So I’ve hit the reset button. Armed with only the tools listed below, I’m going to start again in my woodworking life. First step is to knock together a decent workbench, then follow it up with a tool storage unit.

Deja Vu all over again!
Let’s talk about the tools, first:
- Handsaw. For this, I’m using the excellent Brooklyn Tool & Craft Hardware Store saw. I love this thing, but any impulse hardened contractor saw from the home center will do. I especially like the Craftsman 20″ saw from the home center, if you’re going that route.
- No. 5 Jack Plane. The body is a Type 11 or 12 Stanley; the rest of it is very much a harlequin baby of scavenged parts from a number of different planes, plus a new Honduran Rosewood knob and tote. I could easily have gone with a No. 4 smoothing plane, such as the very decent Taytools version. I just like the slightly longer sole for quasi-jointing. I’m using two different irons: one for scrubbing and one for smoothing.
- Speed Square. Nothing fancy here; just a plastic Stanley speed square from the home center. I agonized about whether to use my Starrett Combination Square. But, amazingly, this speed square (which I’ve had for a billion years) is pretty square. This will, in fairness, be the first thing I swap out for a high end tool.
- 1/2″ Chisel. If I had to choose just one size chisel to use forever, it would be a 1/2″. And the Lie-Nielsen socket chisels are second to none. Period, full stop. Narex are pretty good too. Buy buy the ones from Lee Valley; the Amazon ones seem to be poorer quality, for whatever reason. That’s a Thorex hammer, which I bought on recommendation from Paul Sellers (and I can’t live without it now).
- Folding Utility Knife. As noted above, I fully consider myself a disciple of Paul Sellers, and this knife is absolutely all the marking knife you need. Cheap and effective: the apartment woodworker’s dream.
- Tape measure, mechanical pencil, wood glue. Stanley, PenTech, Titebond 1. ‘Nuff said.
- Cordless drill driver. Whatever you’ve got. Mine is a DeWalt 20V. A two or three jaw brace would work just as well.
- Sharpening Stones (not pictured). I use Atoma diamond plates. You could honestly get away with just the 1200 grit version, which after a little use breaks in nicely. But having the 400 grit version makes flattening and regrinding easier. I’m not bold enough to freehand sharpen, so I’m keeping my Lie-Nielsen sharpening jig (but a cheapo Eclipse knockoff will work fine too).
The plan is to make a low workbench. Not a staked version. That would require auger bits for a brace and a spokeshave to make round tenons, not to mention a bevel gauge or comparable jig. This low bench will be patterned roughly off a Schwarz-pattern saw bench. I prepared the slab off camera.
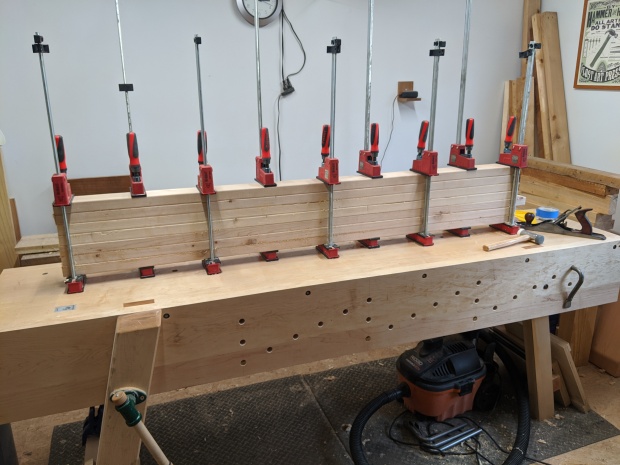
Yes, I have lots of parallel jaw clamps. That doesn’t count.
Douglas Fir 2×4’s at my local home center are about 102″ long. That’s eight and a half feet, in the vernacular. Which means the off-cuts from a 72″ workbench are long enough for legs and gussets on a low workbench. That said, there are not four clear off-cuts from the seven boards I had. And I would never lie to my readers. I’ll use some 2×8 offcuts I have left over from a Naked Woodworker workbench I made for my brother for the legs. Or just buy a couple more 2×4’s from the home center.
Speaking of not lying to you guys, I’d like to be clear about something. I surfaced two of the seven boards for the glue up using buckets as saw benches, to prove I still can. But for the sake of my lower back and sanity I did the rest on my 60″ roman workbench. I’m not a masochist, after all. At least not in my woodworking.
I’m going to leave it there for now. Next post, I’ll work on the legs and change up the rules a little bit.
JPG

Is it your intention to remain with this minimal complement of tools?
LikeLiked by 1 person
No. But I am taking the opportunity to explore what tools I really need so that I can do the definitive “here are the tools you need to start woodworking” list.
LikeLiked by 1 person
Great idea! When you nail down your compare it to my list by searching my blog for Essential Tools.
LikeLiked by 1 person
Is a router plane and/or shoulder plane on your list? I have found I can’t live without them.
LikeLiked by 2 people
As far an essential, no. I guess I would consider that a luxury.
LikeLiked by 1 person
I think those of us that grew up learning from Paul Sellers would disagree.
LikeLiked by 1 person
I will agree that there is more than one way to skin a cat! It’s all in what you get used to.
LikeLike