I’ve come very late to the Japanese tool box party. I already have a traveling tool chest, so up until recently, making this tool box would have been a purely intellectual exercise. But a dear friend of mine is starting the house hunt, and every good home needs a good tool box. Plus, it was his birthday recently.
I dug into my pile of reclaimed mahogany for the case. Although nominally 3/4, the stock gets to about 5/8 when tried and trued. This should make the case light enough overall. While the recipient is not likely to use the tool box for woodworking tools, I roughed out the dimensions based on my traveling kit of tools (seen below). The interior dimensions of 8″ x 17″ are enough to fit a No. 5 plane, a couple of medium backsaws, brace and bit, and eggbeater drill. 8″ tall may seem a bit excessive, but after piling in a tool roll, mallet, hammer, nails and other miscellany, the tool box would be quite full for my purposes. And don’t forget, it loses 5/8″ or so of height due to the lid being inset.

That’s my “new” No. 5. It has quickly become my favorite plane.
Cards on the table, I’m pretty sick of dovetails and their finger joint cousins. The design calls for recesses at the ends will house the wooden handles. So this was a perfect application for dadoes and nails. A tightly-fitting housing joint can be just as satisfying as their interlocking counterparts. And the tactile feeling of cross-grain shavings from a freshly-sharpened router plane is divine.
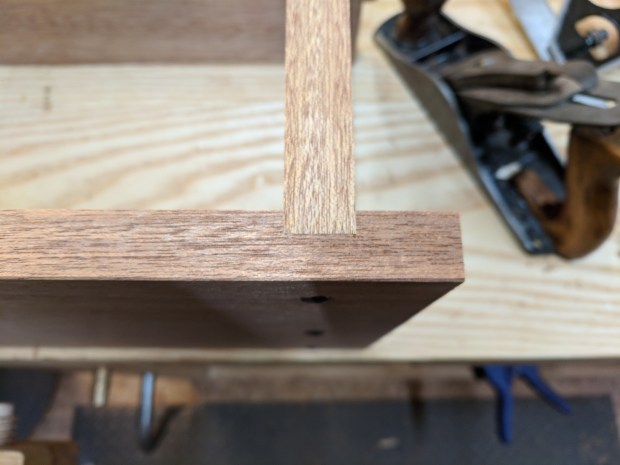
Glamour shot of the joint after glue and nails.
Each joint, which was fit to require hammer persuasion, gets glued and secured with die forged nails from Rivierre. I took great care to properly size the end grain during the glue up. Taken together, the tight joint, the careful glue-up and the reinforcing nails form a very strong joint that will hold up to any wear and tear this box will likely see. And it’s pretty from the outside.

I keep track of french marks to steam out before finishing.
I don’t have any 1″ mahogany scraps and didn’t feel like laminating any, so I instead used Eastern White Pine for the wooden handles. There is a slight bevel on the underside of each, which helps get a firm grip.

Just a couple of degrees, for comfort.
The case ends were somehow slightly proud of the handles, so I shot them down to flush. It was awkward on the shooting board and uncomfortable to hold the plane. I still have the bruise on my palm from the wing of the plane sole. Never again.

The crochet is perfect for final fettling.
More on it next week, but I have since attached the case battens and prepared the lid and lid battens. It’s unclear to me what to use for the bottom boards. I can certainly resaw some 1/4″ mahogany.
But that starts to feel like actual work.
JPG

Cool. About a year ago I came across a YouTube channel by treebangham. He has a nice three part series on making japanese tool boxes if you’re looking for something to watch. The last video in the series is really neat as he shows all the sizes he has made.
LikeLiked by 1 person