When I first built my wall-hanging tool chest, I had only a handful of moulding planes. Basically a quarter set of hollows and rounds, plus a wooden fillister (rabbeting) plane. So the little cubbies at the bottom were more than sufficient for both those and my couple of joinery planes.
Being a 3/4 metal tongue and groove plane, large router plane, and combination plane.
But since then, I’ve accumulated more worker moulding planes, including a few beading planes, two more tongue and groove double planes (for 9/16 and 7/8), some rabbet/shoulder planes, and so on. So on a snowy weekend in Southern New England, I made a new moulding plane cubby.
When your dovetails fit nicely, the clamp on the dado is all your need.
The dimensions are exactly the same as the lower cubbies, other than a little extra depth (since I don’t have to account for the French cleats. Once the glue dries, I’ll run a few screws into the dado board (more for peace of mind than actual fastening) and screw this new cubby down to the top of the current wall cabinet. The joinery is very much overkill (pocket screws or even rabbet and nails would have been more than sufficient for this, as it will experience no significant forces). But I needed the dovetail practice for another project.
I prefer larger pins. Larger than English style, anyway. Not quite Central European.
The wood for this little cubby is pretty scruffy. It’s just a home center white pine 1×12, planed flat and thicknessed to about 11/16. Even home center white pine isn’t usually this brittle and stringy, though. It’s basically the definition of “deal”. And deal is useful for many things, including shop projects.
If I ever get around to remaking my wall mounted tool chest in nicer wood (this was, after all, just a prototype), I will probably add this cubby into the main carcass. I have some old genuine mahogany that I’ve been saving for that in particular. But that’s a long way off.
In any event, I hope everyone is staying warm and dry.
I was up at the Vermont house the other day and made my periodic pilgrimage to The Red Carrot in Rutland. The store is great for things like rustic boxes (more on that some day), but as a woodworker and general DIYer, I prefer the related warehouse down the street. They have most of the interesting tools (at least for me, not needing any more planes or saws). I usually pick up a few odds and ends (like screw taps or T augers). Once in a while, though, the warehouse will hide a real gem.
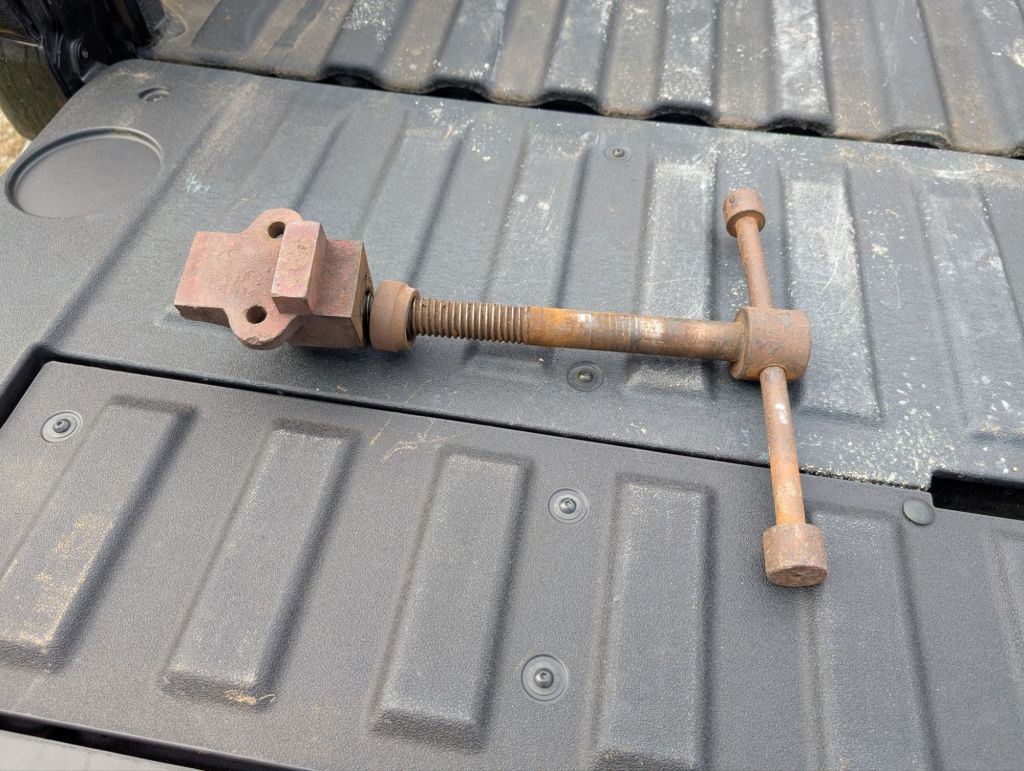
It will clean up nicely.
The metal screw above came from what I think was a portable leg vise. It had two white oak jaws: insect riddled and good for nothing but throwing in the woods to rot. But the screw is in great shape and the nut is rather beefy. It just needs a de-rusting and to straighten the handle.
Unlike typical woodworking leg vise screws, which mount horizontally (in line with the screw itself), the nut had vertical mounting holes and a flange. This means it’s screwed into the underside of the work surface (like a modern bench vise). It could also be for blacksmithing too.
I don’t have a place for this right now. But for $20, how can you go wrong?
For those who know me personally (or who have followed me for long enough), you’re aware that I am atheist. I grew up very Catholic. And like all good Catholic boys, the only vestige of my Catholicism now is periodically invoking the name of the Father, the Son, the Blessed Mother, or whatever Saint fits the bill in the most violently profane torrent needed at the time. Never the Holy Spirit, though. Fuck that guy.
And as a vehement atheist, I have come to appreciate actual biblical scholarship. I feel like I know the Bible way better now than I did earlier (even as one of the few people who have actually read the motherfucker all the way through). For the record, “Then came Shamgar, son of Anath, who killed 600 Philistines with an oxgoad. He too saved Israel.” Shamgar: absolute fucking legend.
So as I was listening to the Data Over Dogma podcast the other day, Dan McClellan (a scholar of the Bible and Religion) said something that surprised me. He said that how he writes and how he speaks are very different. To the point where narrating an audiobook of his own work was a chore.
This is very strange to me. Except for drafting actual legal documents (I am an M&A attorney, after all), I write and speak in exactly the same way. Work emails, personal emails, this blog. National CLE’s where I teach the economics of Mergers and Acquisitions transactions. It’s all the same voice.
Perhaps it’s a luxury of being the kind of lawyer who never has to go to court, know any actual laws, or be particularly formal. Perhaps it’s just taking intellectual honesty to its logical conclusion.
But when you read these words, know that you’re getting the unvarnished and truthful James. That is my promise to you.
Editor’s Note: Buckle up. This will be a long one and will at times feel like James is just ranting. In an effort to pander to his international audience, James is also adding metric parentheticals. Even if using anything other than Freedom Units is anathema to him.
I’ve a number of small trips on my calendar for Fiscal Year 2025. Between concerts throughout the Northeast of the United States, a beach vacation in the Cape of Cod, and, of course, my spring pilgrimage to the house in Central Vermont, I will be away from my home shop quite a bit over the next 6 months. And I’d like to be able to do some vacation woodworking.
Vermont is not an issue. I have, over time, migrated a full size workbench and entire complement of essential woodworking handtools up to permanently live in the utility shed on the property. As a result, though, I don’t really have a travel tool kit anymore. I’ve never been much of a tool hoarder and I foolishly gave away my travel tool box once it did its job and moved everything up to the aforementioned utility shed.
So I’ve been forced to start at essentially square one in putting a new travel tool kit together.
Over the years of making many, many, many travel tool chests, and in refining my thinking on what specific tools one actually needs for casual, on-site, vacation woodworking, I’ve learned a couple lessons. Many the hard way.
First and foremost, vacation woodworking (for me) is not fine furnituremaking. I know of very talented folks who vacation carve beautiful and intricate panels. And I envy them. But that’s just not me. If I’m making furniture outside the home shop, it’s utilitarian: an extra table or a bench or stool. Or if you can’t sit on it, it’s probably a shelf or a rack or a quick shadow box to display some quirky knick-knack picked up at a local antique shop.
That is the long way of saying that my vacation tool kit can an should be small. And I mean small. One saw that crosscuts well and can rip decently (if not efficiently). One bench plane. Two chisels and a mallet. A knife, a square, a bevel gauge, an awl, and a way to bore small holes. Something to keep all of the above sharp. A small hammer and nail set, some pliers, and a measuring tape (although everyone should have one of these in their car anyway). That’s about it. And I’ll probably be tossing in a bag of nails, a bottle of glue, and other miscellany as well (because I just can’t help myself).
All told, that’s 30 lbs. or so of tools (or 14 kg for you metric cretins), before you add the container to store it all in. About that…
I grew up (and still live) by the coast in Southern New England. Between sailing and swimming and other salt-water related activities, canvas tote bags are second nature to me. I have many, and I love them for a broad range of holding and storage tasks. But you cannot just throw a bench plane into a canvas bag, even in a plane sock. No matter how careful, you’ll eventually break the tote or ding another tool. I have in the past made a plane box to keep the bench plane safe, but even that’s not ideal since it still rattles around and can crash into other tools.
And what about your hand saw? Even if you sheath it in a proper carpenter’s saw bag, you could still bend the plate if it bangs around too much in the bag (for instance, against the heavy bench plane). Folding saws are great, but they tend to cut on the pull stroke and I work in the English style (being a steadfast disciple of Paul Sellers).
You can spend money on a nice tool bag with storage pockets to segregate the edge tools and other small tools into pockets. I especially like CLC bags, and any of the Husky bags from the purse aisle at the Homeless Despot will work. But the big stuff is still rattling around inside, if they will even fit. And don’t get me started on metal toolboxes, which can hold a small arsenal in perfect organization but will undoubtedly snag and tear the upholstery in your back seat if you’re not careful.
So where does this leave you? Well, we are woodworkers after all. So I would suggest making a pine box that you can french fit to keep your tools safe.
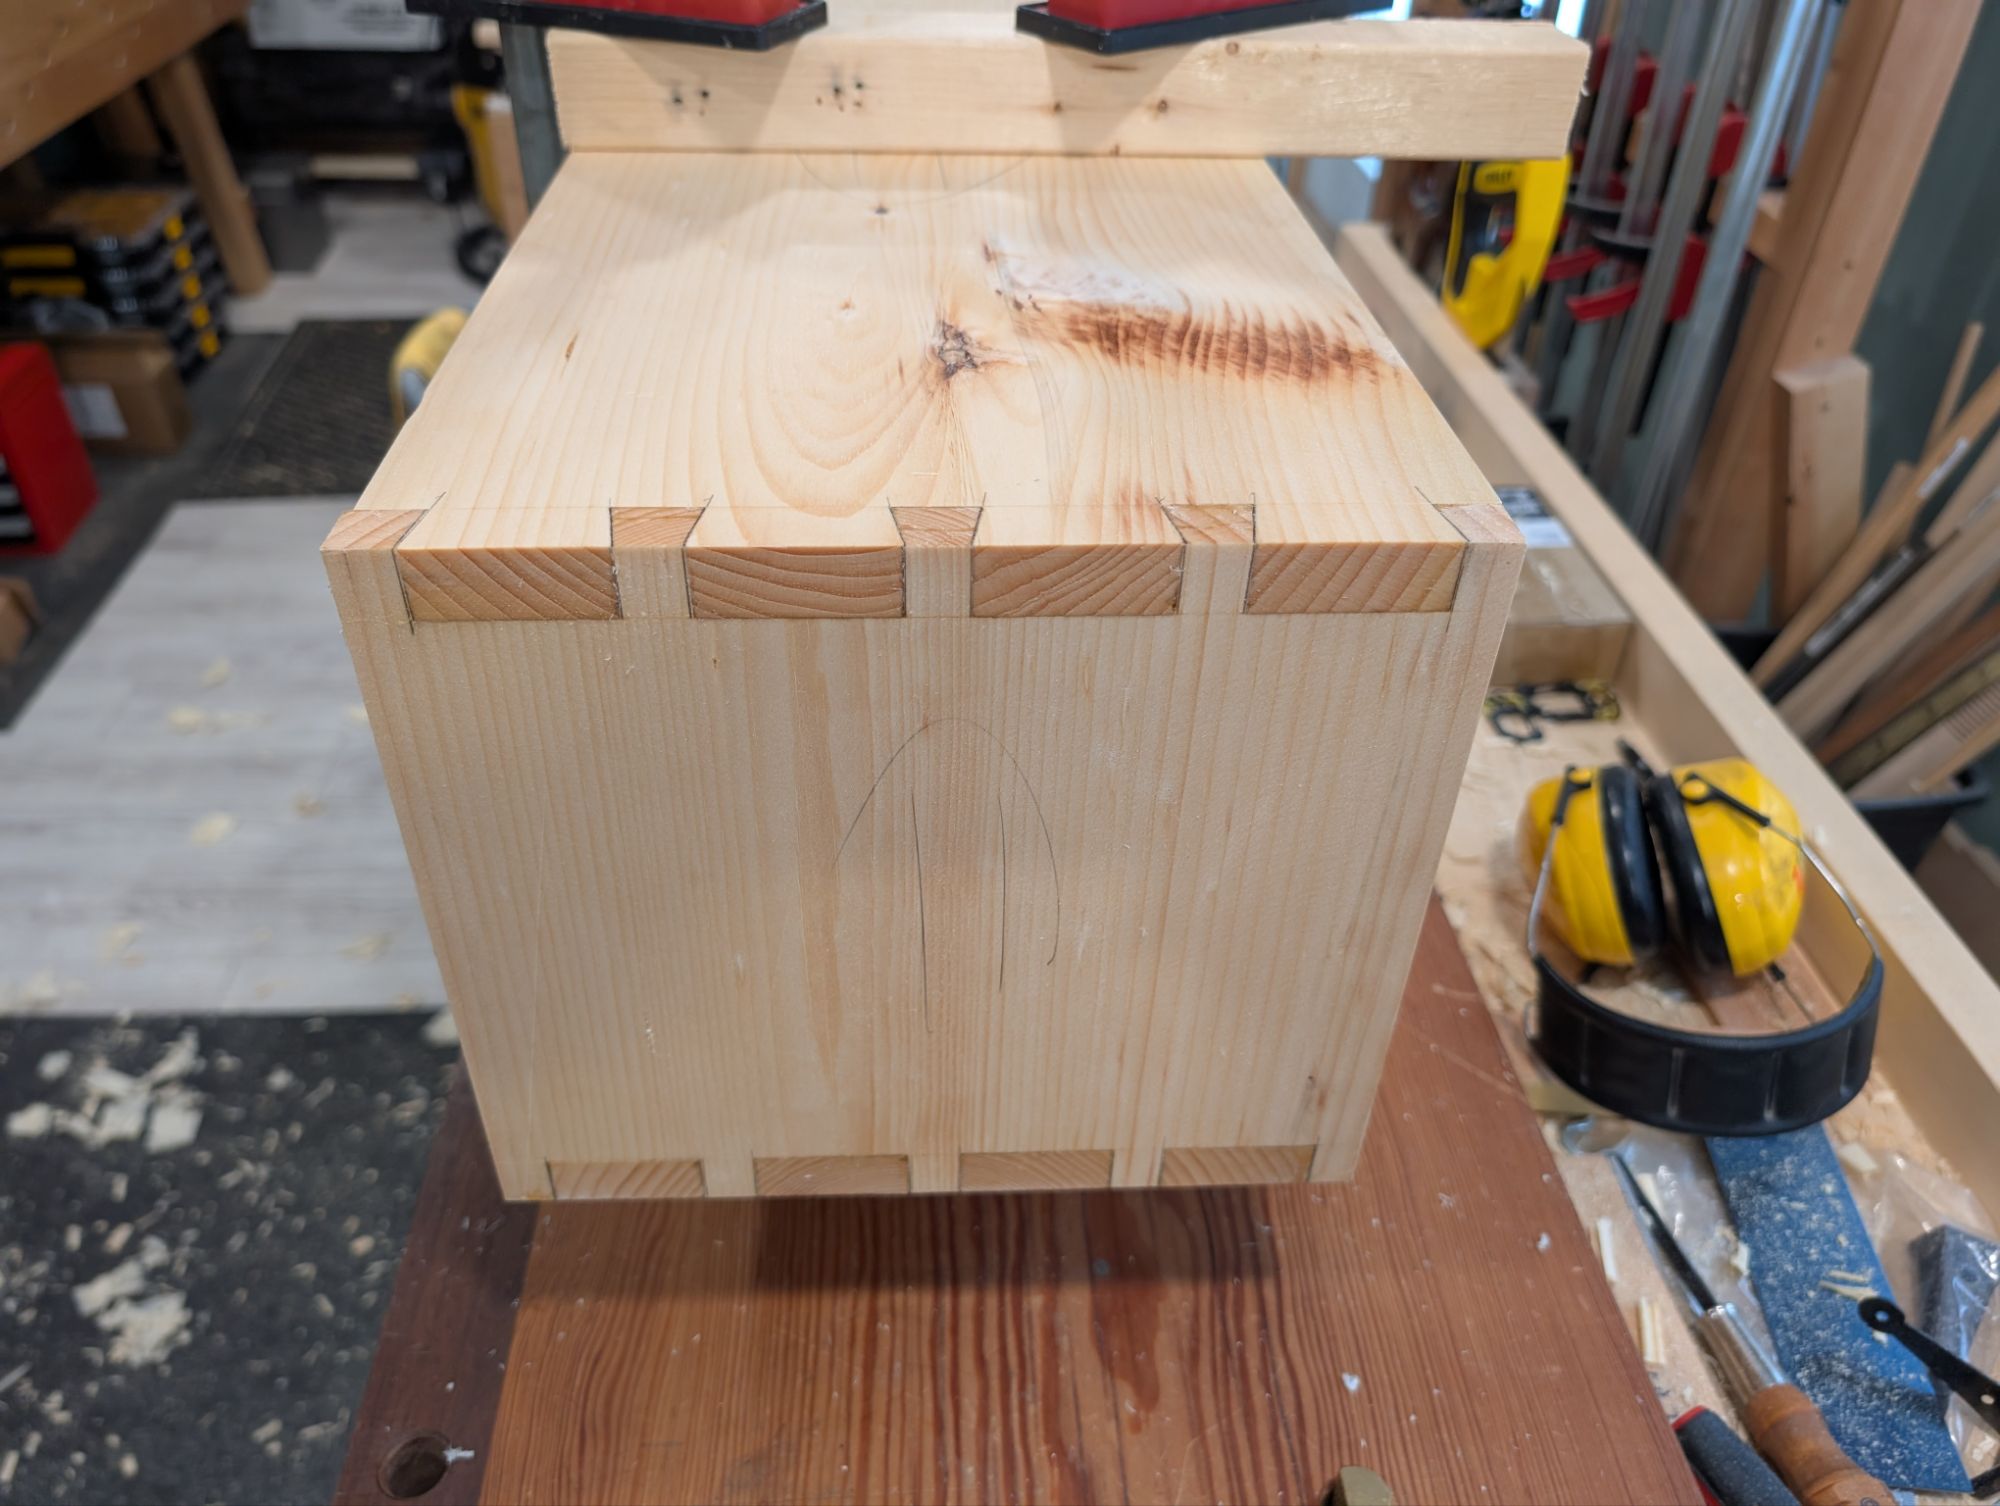
It’s a travel tool chest, though, and will need to haul at most 50 lbs. (again, 23 kg for you metric types), inclusive of the box itself. The 3/4″ or even 7/8″ stock you might see in a proper English floor chest is way overkill here. For a travel tool chest, I typically take the thickness down to 9/16″ or even 1/2″ (13mm or so), with the actual thickness depending on wherever ends up actually flat across the width.
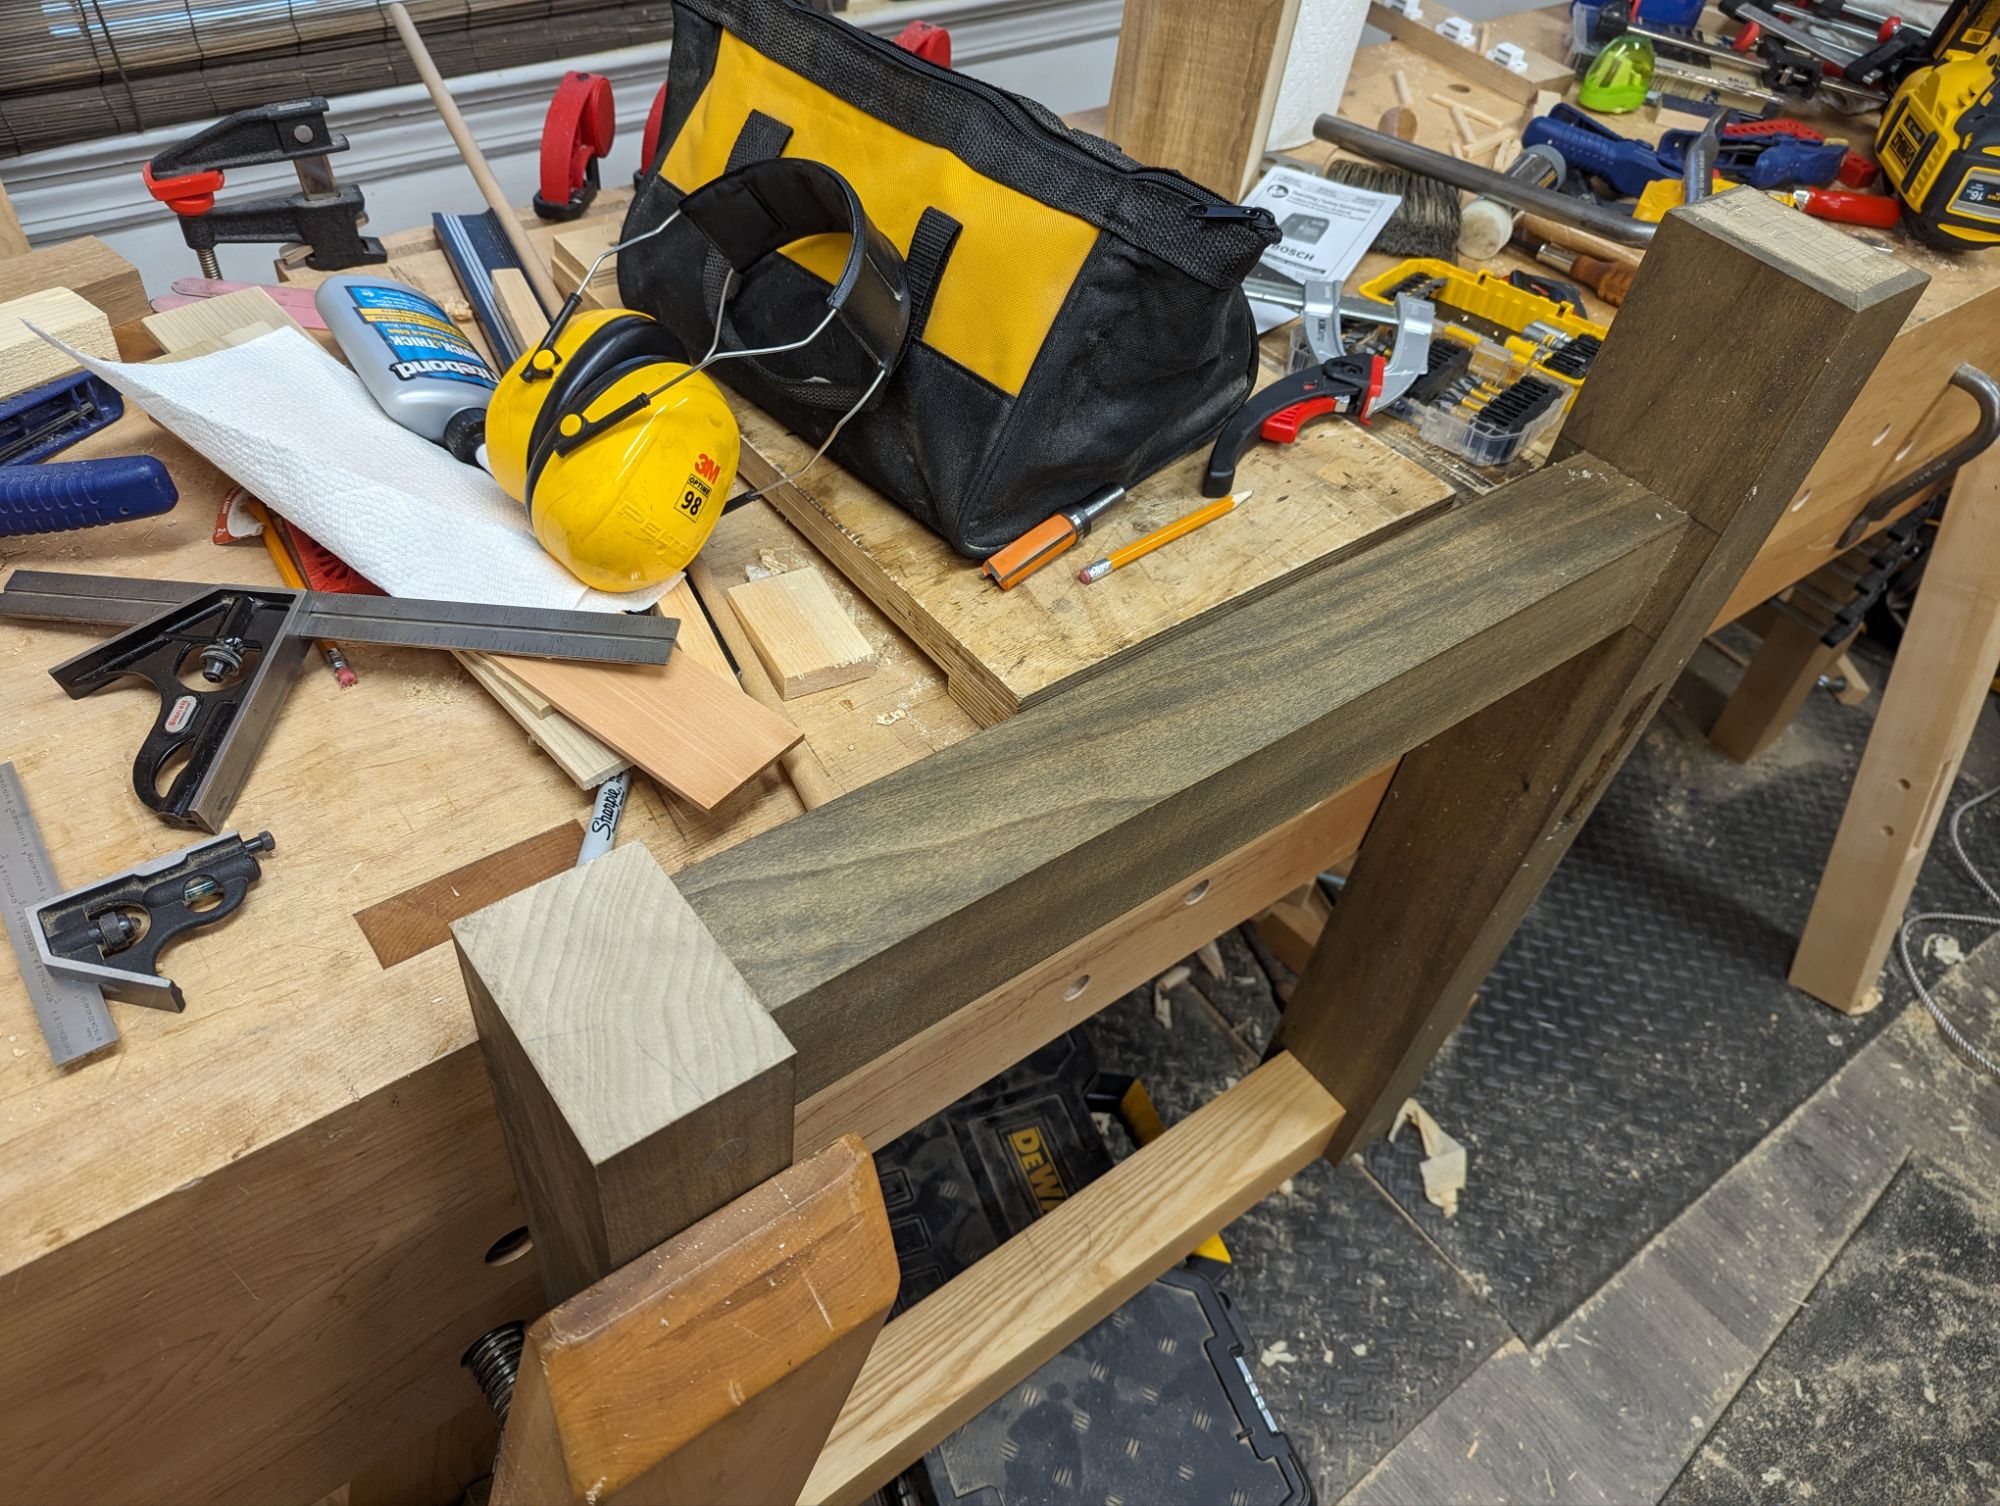
Funny thing is: when working in stock of that thickness and this application (where strength really matters), you really can’t do posh Western European dovetail patterns with super narrow pins. I like wider pins anyway and these travel tool chests are a good excuse to make the pins noticeably beefier. Like so:
Those heavy chamfers on the corners are prep for the iron angle reinforcement.
So how big should a travel tool chest be for the type of rustic vacation woodworking I tend to do? Well, your saw is always going to be your longest tool in the kit. Frankly, if you’re intent on hauling around one or more 20″ panel saws, you might as well just make a full size Dutch Tool Chest and bring an entire workshop with you. But I have found you only really need about 15 inches (380mm or so) of tooth line for most woodworking sawing tasks. It’s less efficient than a longer saw because of the shorter stroke, sure. But it still works fine.
A saw like that will fit into a tool box that’s got 19-20 inches (480-510mm) of internal length. You could buy a small home center hard point saw, and they work well. But they sure don’t look very nice and aren’t terribly comfortable to use for long periods, especially when ripping. So what are the other options?
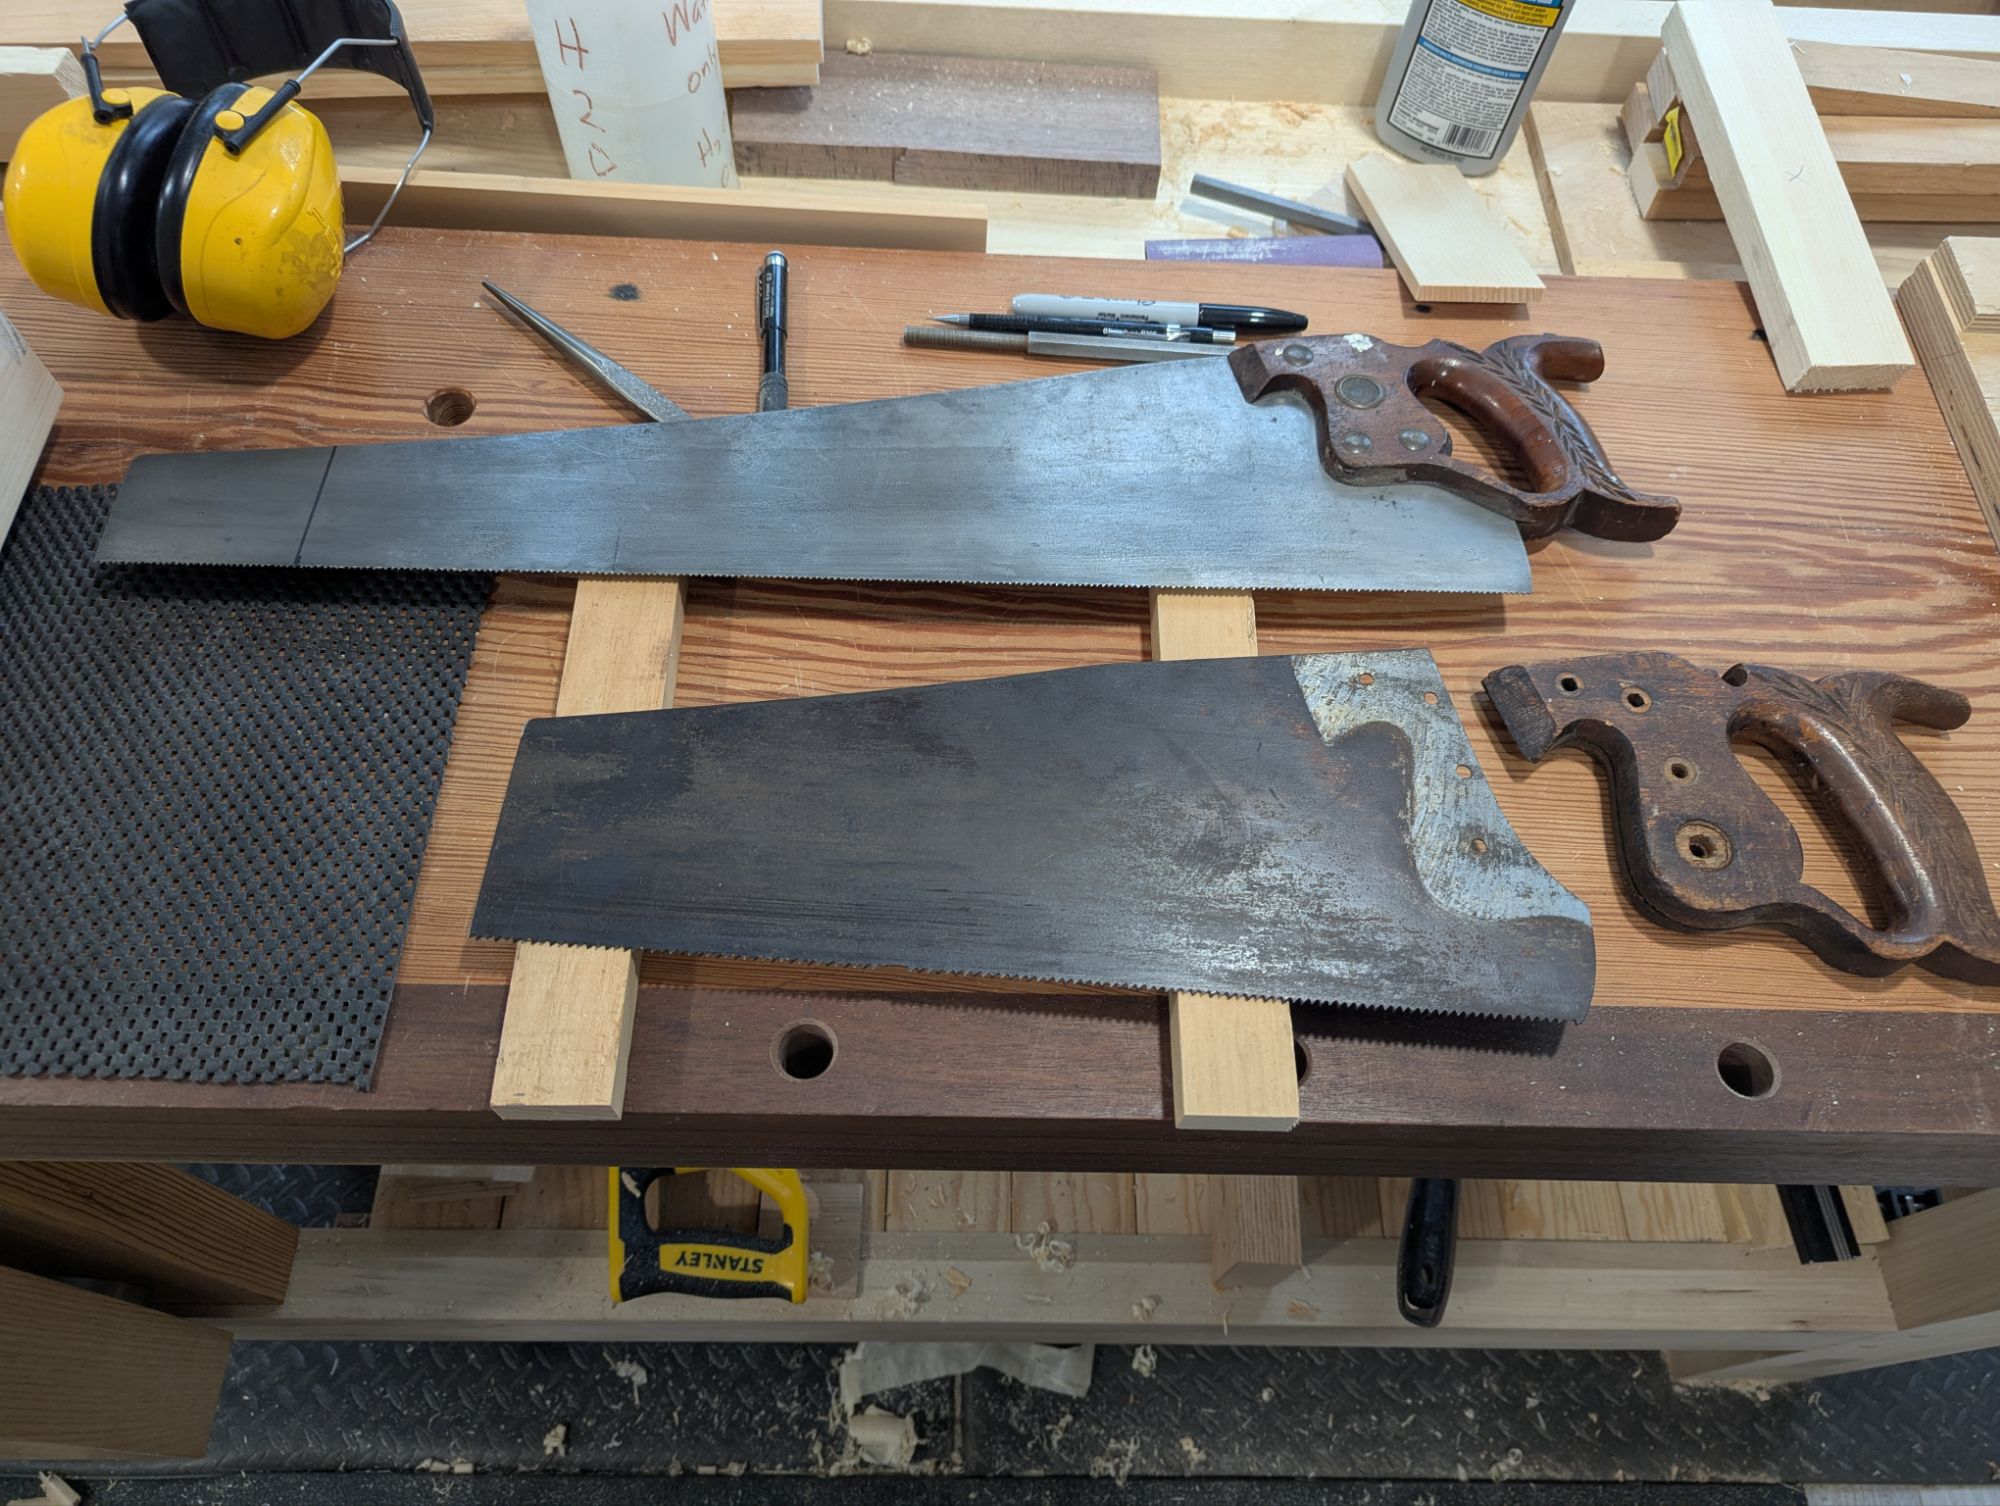
Well, vintage hand saws are abundant and cheap. If the tote is in decent shape, and the plate itself still has some life, odds are it’s got a kink in the tooth line. And that kink is probably around 1/4 or 1/3 of the way back from the toe. You’ll never get that kink out (and even if you do, you probably just work hardened the area around the kink so it will just kink again, or shear). But what if you could just angle grind off everything past the kink and make a shorter saw? Suddenly, that saw would fit into a travel tool box of manageable size.
Something like this, perhaps?
A 20 inch panel saw shown above for length comparison.
I find with shorter saw plates (physics for the win) that they are more rigid and more controllable. After making several travel saws of various tooth pitch this way, I’m starting to think that backsaws (and especially half back saws) are somewhat superfluous. You can do fine joinery tasks with a backless hand saw that’s short enough. The lost stroke length is meaningless when you’re aiming for precision. And 15 inches feels like the sweet spot for rigidity and control.
So when you allow for the saw and other tool kit described above, plus the french fitting, I find a tool chest that is about 20″ long (510mm) x 8″ wide (200mm) x 7″ high in the well (175mm) will hold everything I need, even if it’s a bit cramped. If you can get away with some more width, go for it. But remember to subtract about 1 inch (25mm) to determine the inside dimensions when planning out your tool storage.
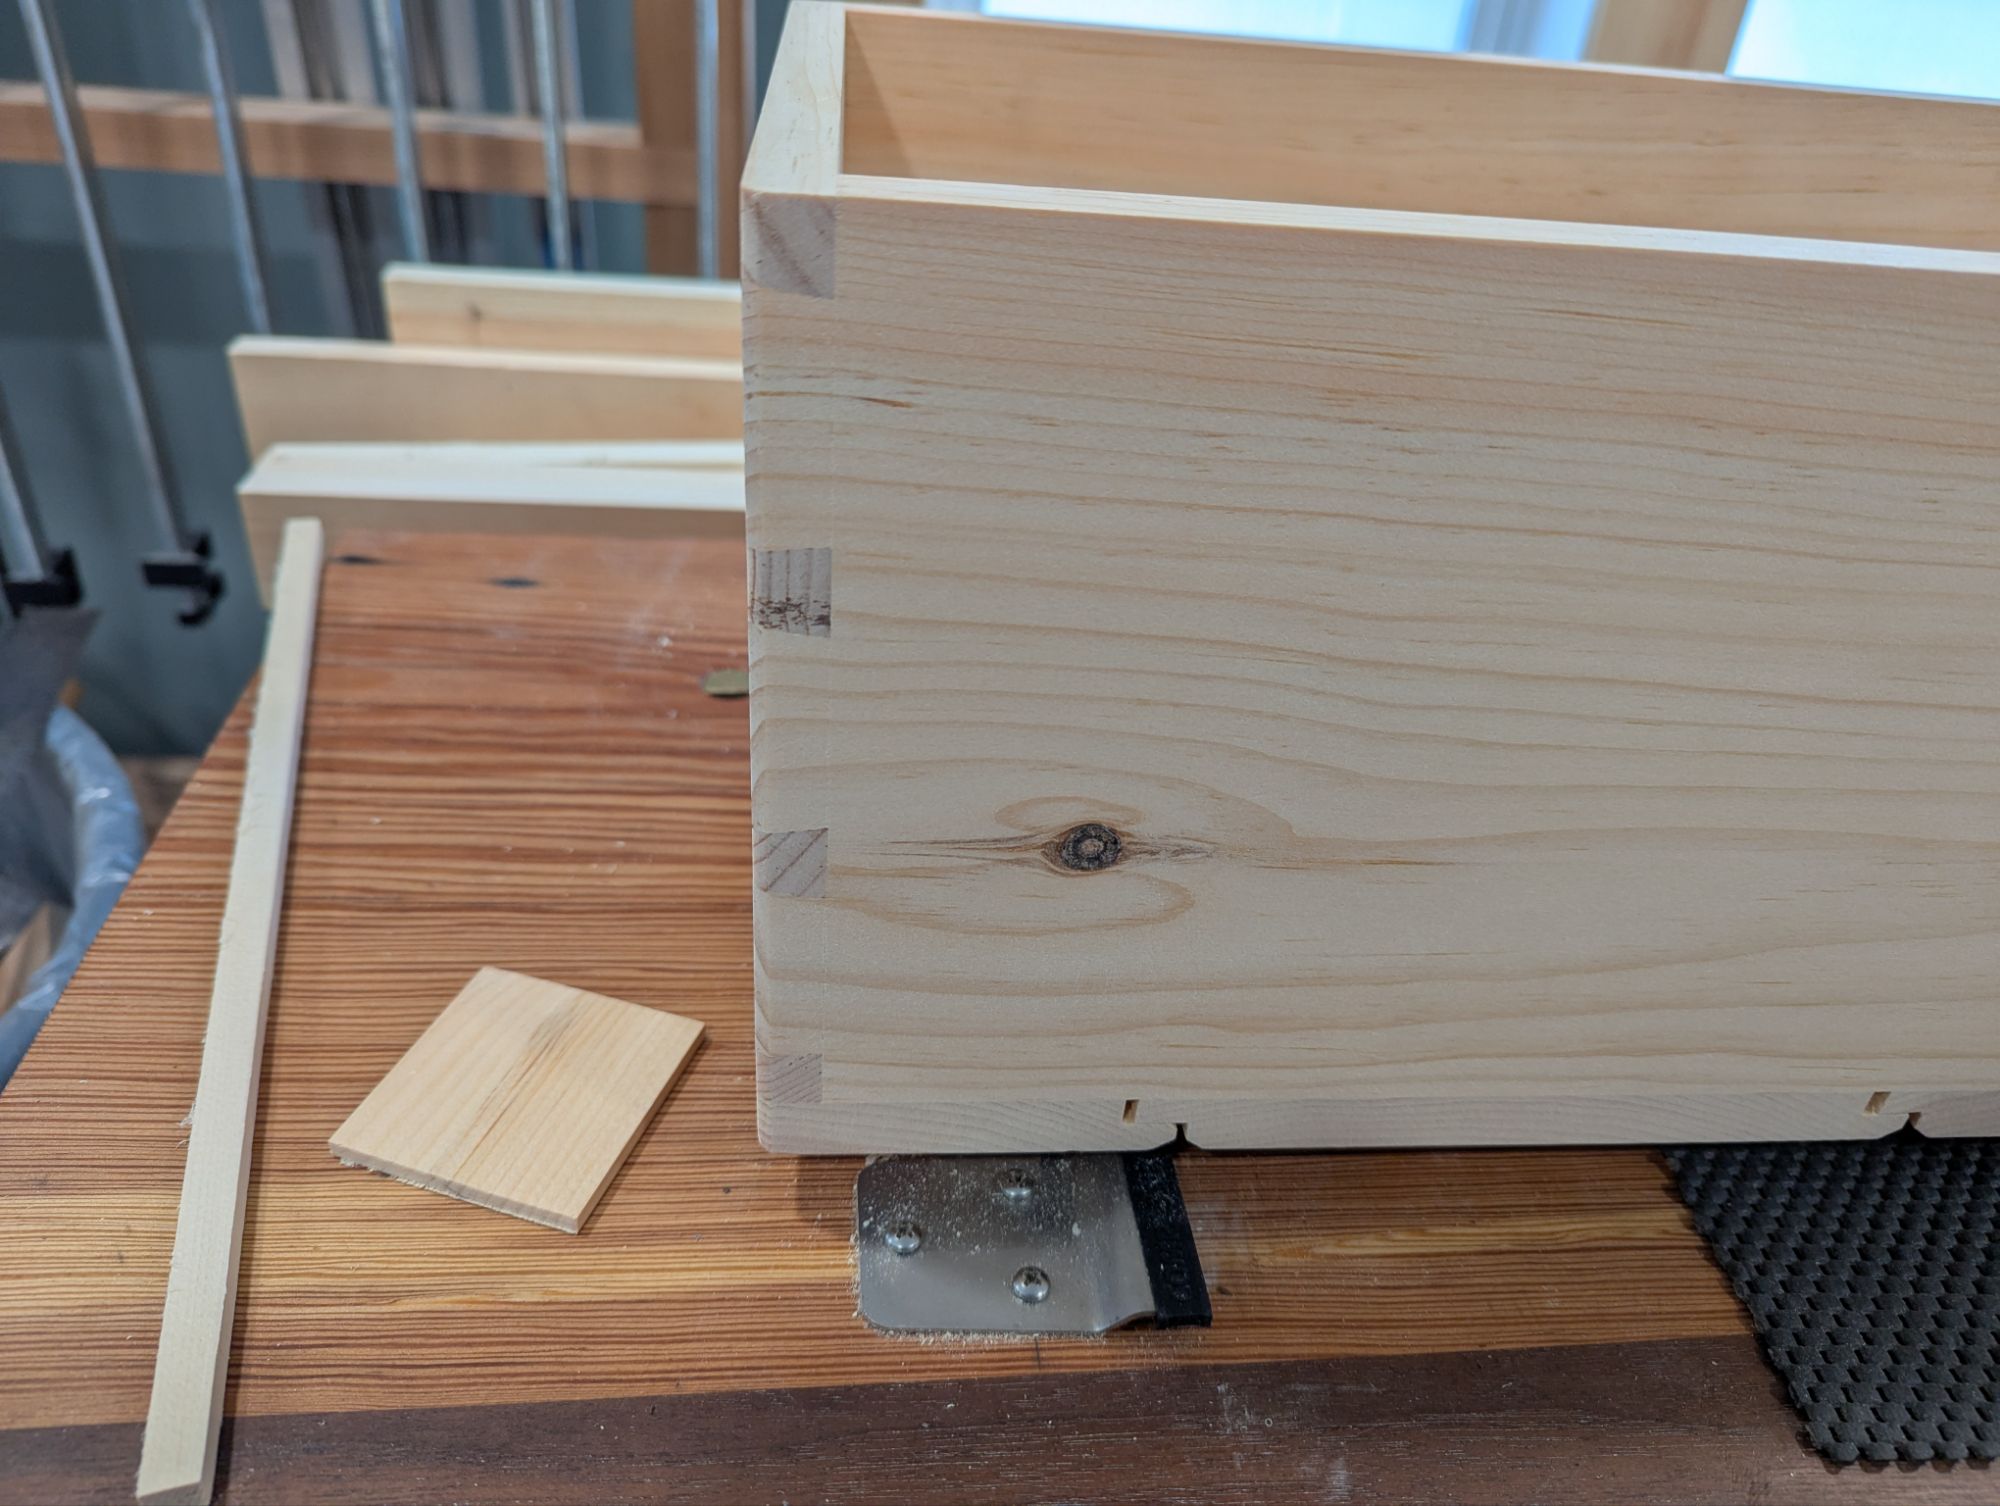
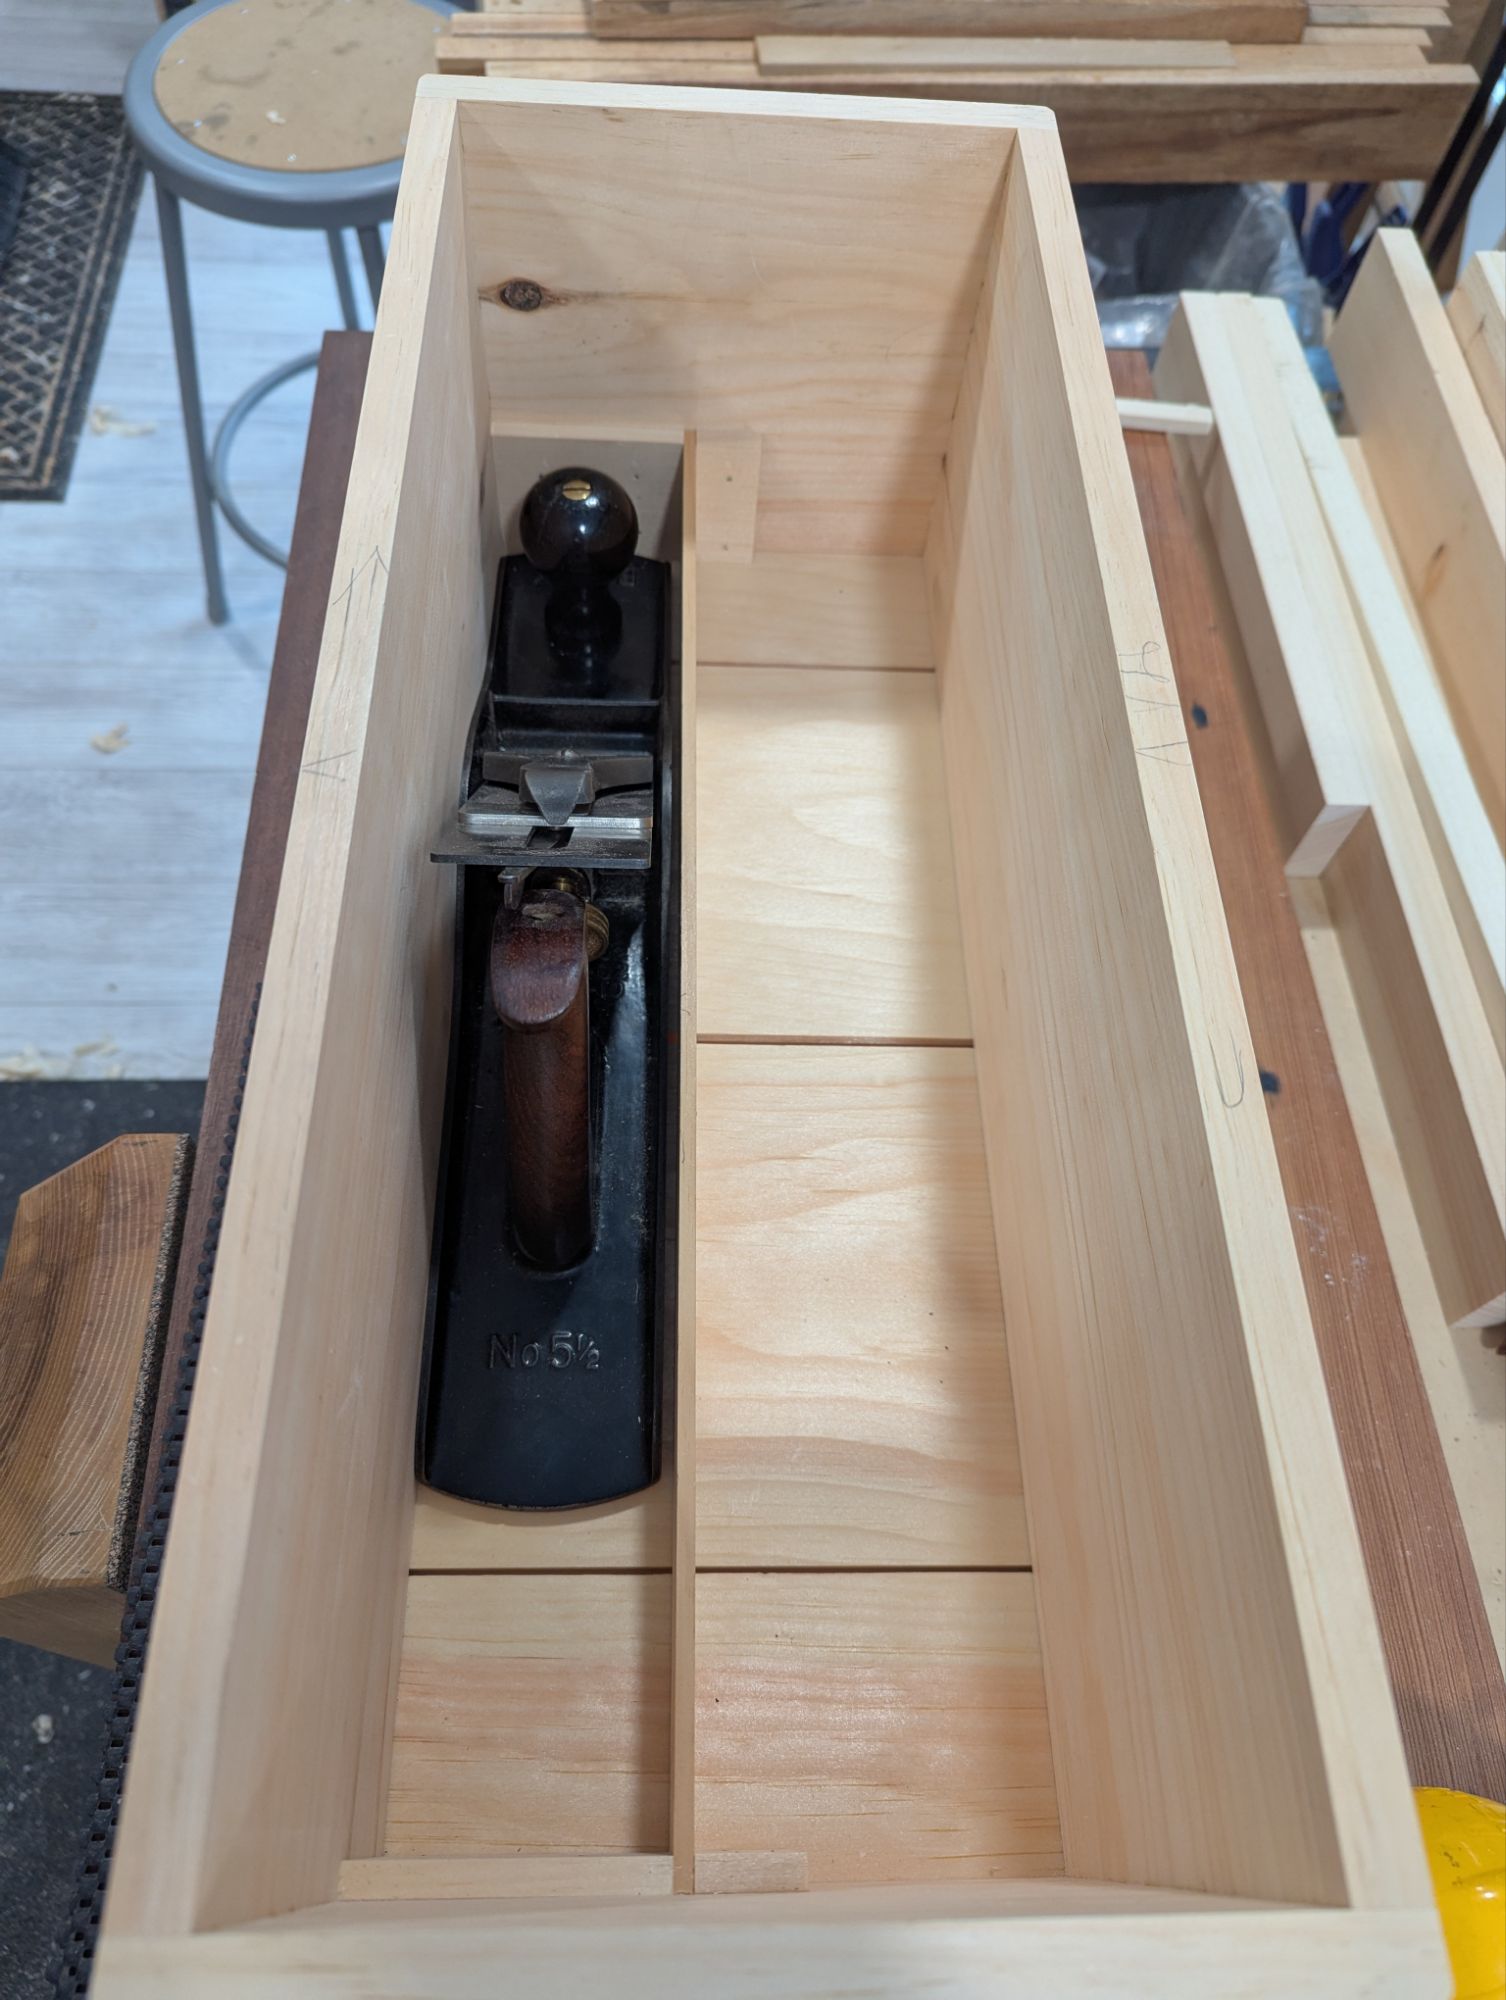
The second lesson on travel tool kits, and probably even more important, is that you can’t bring a thickness planer with you to the beach. I mean, you can. But then you’re a psychopath. So you’re probably working with dimensional stock (home center pine or construction lumber) that needs to be flattened and/or trued on site. And unless you are a different type of psychopath, this rules out anything smaller than a No. 5. I typically use a No. 6 fore plane for everything in home shop (other than the absolute final smoothing before finish). However, I prefer a No. 5 1/2 jack plane for travel work. It’s the right combination of length and width (and heft) for being on the go. And this is where a corrugated sole really shines, in fairness.
That extra room is for a little box that will hold a measuring tape and some other bits and bobs.
In a 20 x 8 toolbox, your jack plane will take up less than half of the total width, and not all of the length either. A hand saw till is about 1 1/2″ (38mm) wide and you can cram a few smaller tools around the saw itself. So you have around 4″ of width for everything else, which I typically fit out with a rack (for the edge tools and pokey bits) and another well for sharpening gear). You can make a lid with some depth to it that will add a new dimension (pun intended) to your storage space.
But I’m going to stop there, before this becomes a veritable novella.
In the meantime, that cut off saw plate needs to sit in some Evapo-Rust for a day to get cleaned up. Pretty sure that saw was a Disston, but it could be an Atkins. It’s definitely not a Simmonds (my preferred brand of vintage saw).
We’ll see. In any event, Happy President’s Day, all!
When last we spoke, I was walking through my process for laying out and cutting angled, rectilinear mortises through a slab top to make low benches and other staked leg furniture without the need for large boring bits and round tenon cutters.
At the end, I promised to discuss my process for cutting the tenons, so here we go.
For most applications, a bare faced tenon (i.e., with one shoulder) is more than sufficient for these types of compound angled joints. The legs splay outward (sometimes as much as 10-15 degrees), so gravity is trying to spread the legs apart, especially where splay (outward angle) is greater than rake (front to back angle. This spreading puts most of the force is on a single shoulder oriented to the outside of the slab in the direction of the play. And tight fitting joint (wedged to fill any gaps lengthwise will more than carry any load in the rake direction). No need for a second shoulder.
I have one more mortise to cut.
For compound angle legs, I start by measuring the overall length of the tenon I’ll need. I like to measure from the back inside corner to the front outside corner (ie, diagonally across the joint), then add 1/4 inch or so per 1 inch of tenon thickness. This leaves enough tenon proud of the top of the slab to trim it fully flush after glue up. When in doubt, add another 1/4 inch. Mark the tenon width like you would any other tenon.
Now mark the splay angle on one side of the leg using a marking knife. This is really important: the splay angle should slope downward and away from the flat of the tenon. As shown below.
Ignore that second mark on the top. After initial marking, I noticed a defect to cut around and had to invert the board.
Now it’s time to mark the rake angle (if you have one). This is where having two bevel gauges really helps. The rake angle slopes downward from the side of the leg that faces the midpoint of the slab lengthwise (or, it slopes upward from the side of the leg that faces the end of the slab). If you’re having trouble visualizing it, it will be painfully clear the first time you mess it up and the corner of tenon shoulder digs into the underside of the slab top.
I’m only using a 1 degree angle on this, but I think you can still see it slope right to left here.
Then carry the splay angle line around the other side of the leg, being careful to orient your bevel gauge so the splay angles are parallel (even if one is lower on the leg than the other). Now it’s time to cut the mortise.
I like to start with the shoulder cut, using a small crosscut saw. If all goes well, it should come off the saw at the correct angle. If not, more on that later. Then rip down the tenon length (although you could split it too, like any other tenon). Because ever one of these mortises will be different, be sure to leave the line so you can pare down later.
Both of these were good right off the saw.
As someone who started woodworking in the golden age of Paul Sellers, I refine all of my tenons with a router plane. For these, though, be careful and take very small bites (i) to ensure the tenon isn’t too thin (there really isn’t a good way to wedge that) and (ii) to avoid tearing the grain (especially in open pore woods like ash and red oak). Any undulation in the tenon face will show when you flush the tenon to the slab top.
After a quick test fit, it’s likely one of your shoulders won’t seat perfectly. I sawed at the wrong angle on one of the legs and ended up with the gap below. Now, this would probably be fine (the other side of the tenon actually seated quite well and the rake angle was spot on. But for a low workbench or a footstool that will see heavy loads, or if you need to fix a wonky rake angle, here is my process.
This is actually going to be a coffee table, so I could have left it alone.
If you have a good flush cut saw (most likely a low set Japanese pull saw or dedicated flush trim saw), you can very gently and carefully saw away flush with the slab top and you’ll be done. If, like me, your flush trim saw plate is thinner than the gap you’re trying to overcome, it may just be worth remarking the splay and rake angles and paring down with a chisel. As long as you left your leg stock overlong, either approach will work. Even if you screw it up a few times.
Now repeat three more times (or as many times as legs you have). You’ll quickly notice that the diagonal legs are identical (other than tenon thickness, probably, since that depends on the mortise). So if you screw up a leg by cutting the angled shoulder wrong, don’t necessarily throw it out or recut it. It will be useful for the opposite set of diagonal legs you haven’t done yet.
I’ve got one mortise and one leg left to go on this new project (an entirely too beefy coffee table made of 8/4 white ash that will also be a large stepstool in a pinch), and will post pictures when it’s done.
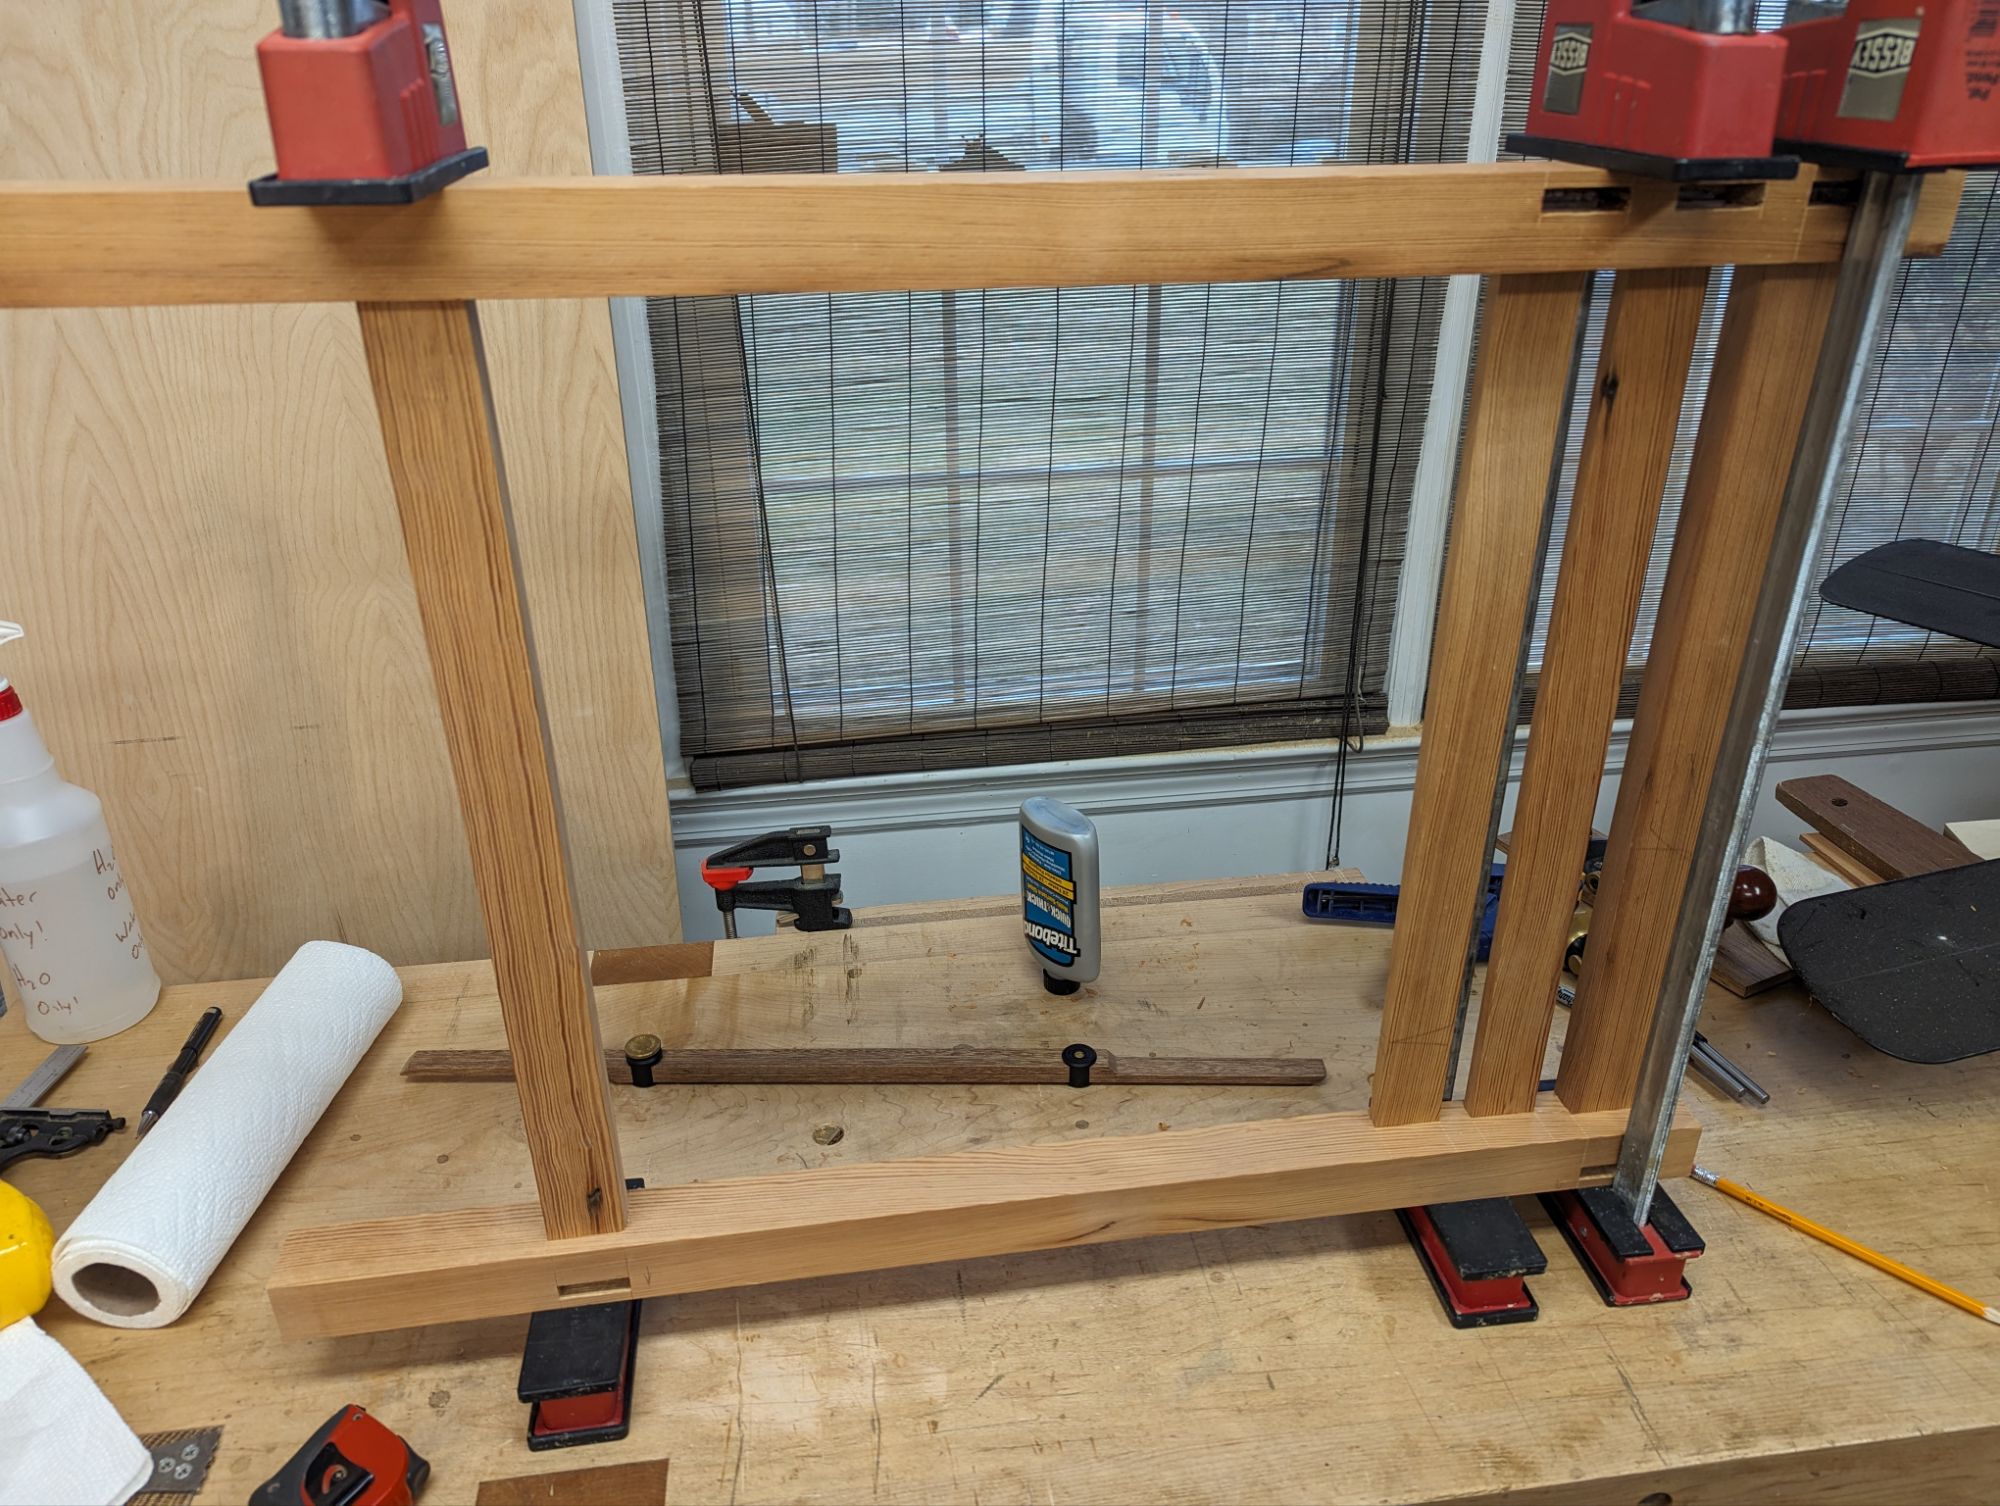
I’ve glued up the frame for the bathroom vanity, and I think it came out great. The entire frame came out of a single chunk of reclaimed Southern Yellow Pine barn beam, so the color match is pretty good. I’m quite pleased. An exterior oil finish will darken the wood a bit, but won’t detract from the character of the reclaimed wood. And die forged nails will reinforce each of the stretchers and slats (mostly because it will look nice).
Ignore the white pine spacer in the bottom front; that was just for alignment during glue up.
The table top will also be SYP, but from a different board. I just didn’t have enough after cutting around the worst nails and checks and defects to get the wood for the frame, even taking into account the massive cutout for the vessel sink. The color match isn’t perfect, but I’m arranging the boards to make it work.
The small remaining chunk of the beam that went into the frame would have been enough for a lower shelf (slatted and nailed onto the lower stretchers). But upon further reflection, I think having the shelf boards match the tabletop boards will balance things aesthetically.
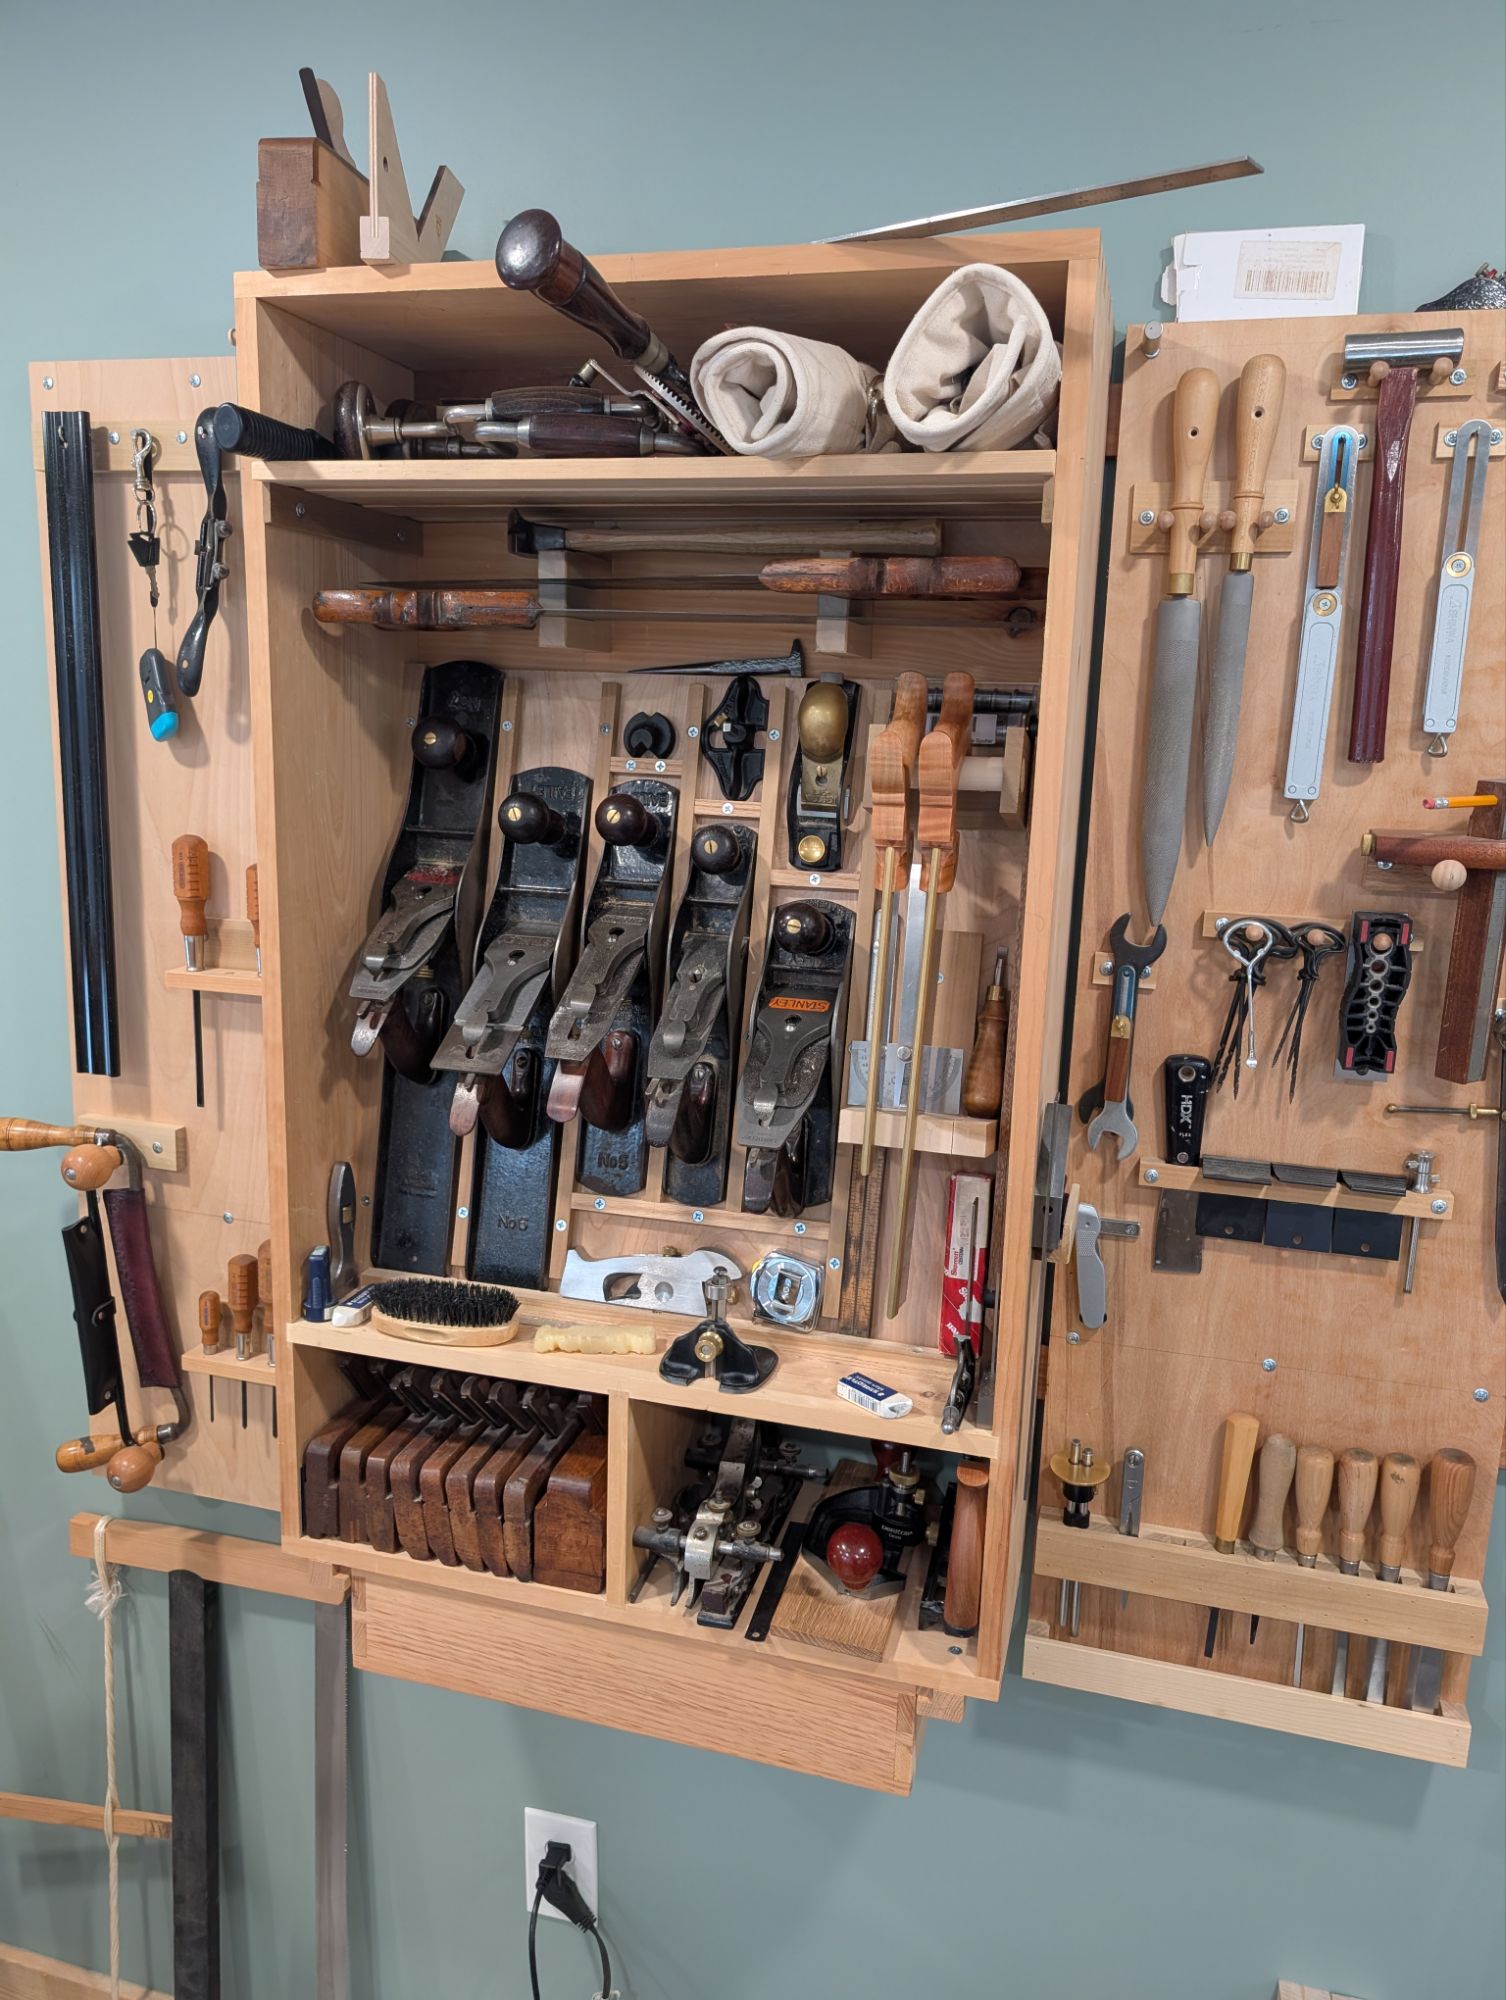
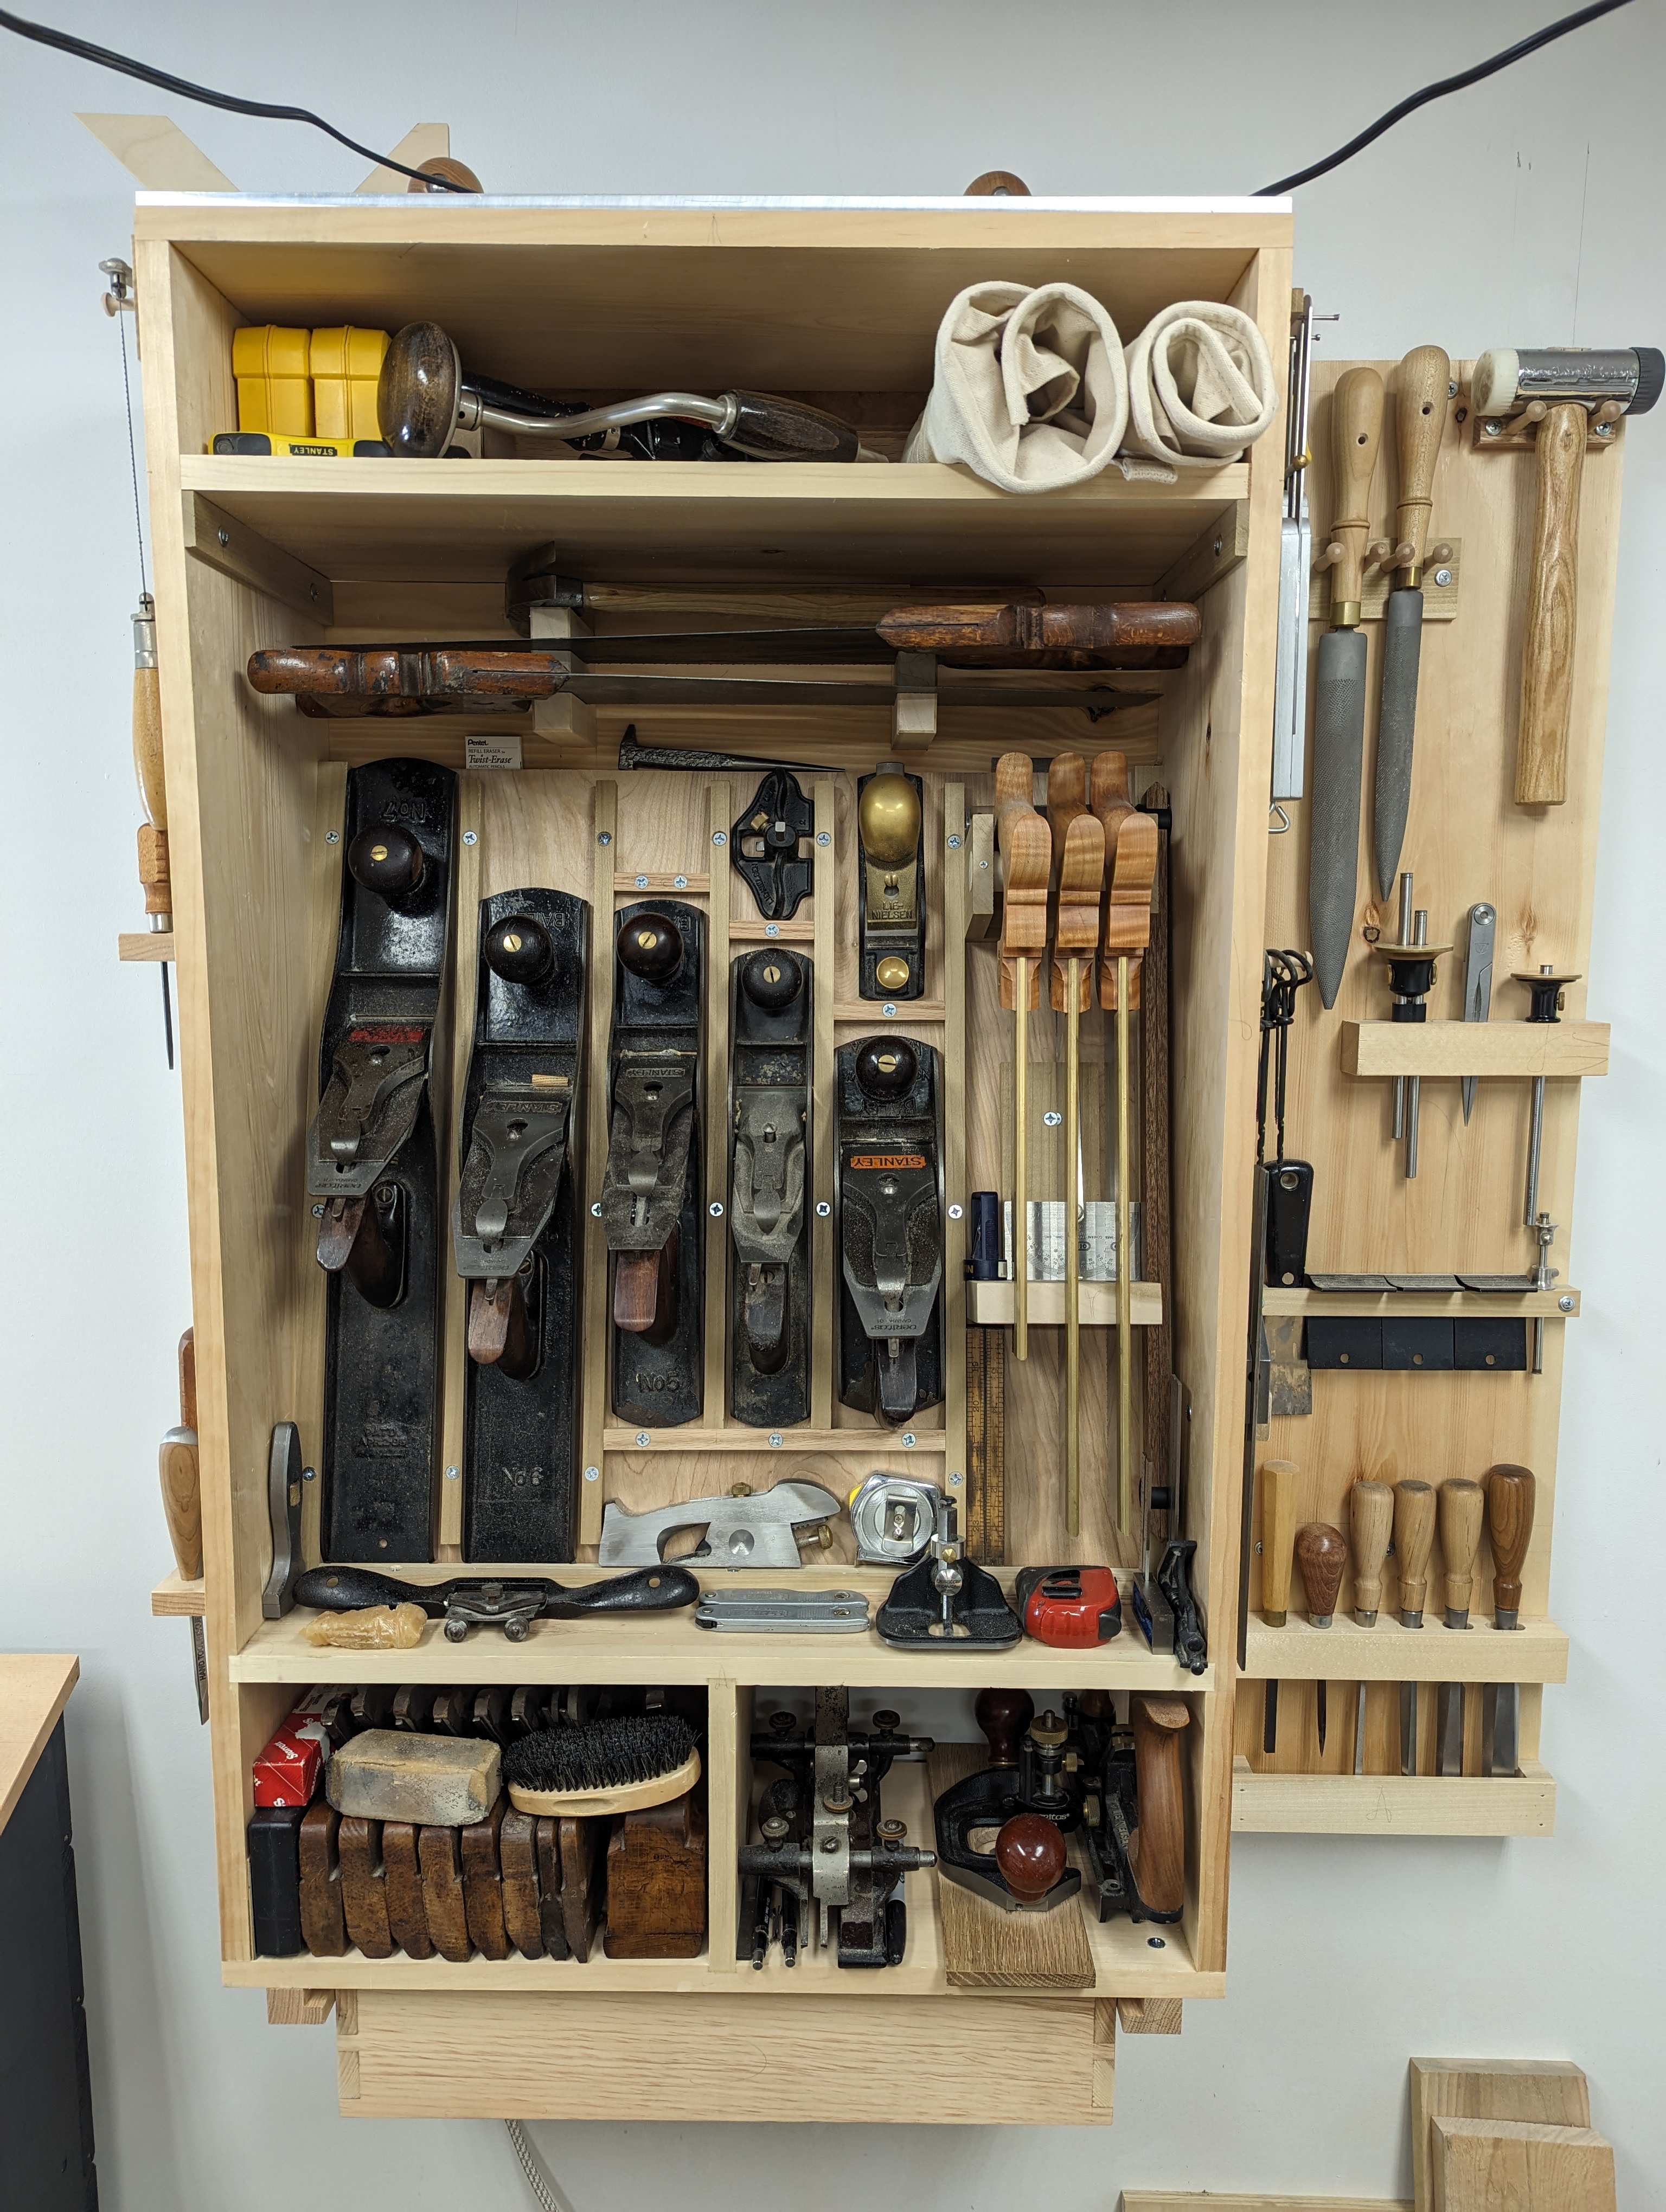
It’s been tough to find enjoyable workshop time of late. There is some work being done on the house and as cramped as my 12′ x 13′ (3.5m x 4m) workshop is at the best of times, it’s even worse when more than half of it is filled with furniture from other rooms. I’ve got about 5 feet of workbench (at the vise end) and 2 feet of space along the front to move around. I can reach all the tools in my wall cabinet, but it takes a bit of leaning on my tiptoes to get the coping saw. Even so, I’ve a project I need to complete, so I push onward.
Not sure if I’ve ever posted this image of the finished wall cabinet.
The vanity in the downstairs bathroom has always been subpar. It’s internet furniture pressboard bullshit that I bought when I first got the house just needed to make a gross washroom usable on a DIY basis. Now that the whole bathroom is being updated by professionals, I figured I’d tackle making a new vanity that is up to my own specs.
The last few chunks of reclaimed old growth Southern Yellow Pine barn beam would be just enough for the frame and a top. My little bandsaw was instrumental in this; I don’t think hand ripping would have left enough stock. I have officially hit “can’t live without it” status on that tool, for what it’s worth.
In terms of style, I’ve always been fascinated with the “slatted” style of furniture. I think the first time I saw it was a Restoration Hardware media cabinet. But it seems a dreadful waste of material because the slats tend to be decorative (and not structural). But what if they were structural? They’d essentially make a wide board out of a few small sticks (id est, offcuts from the bandsaw): maximum strength with minimum material.
While also hiding the plumbing below.
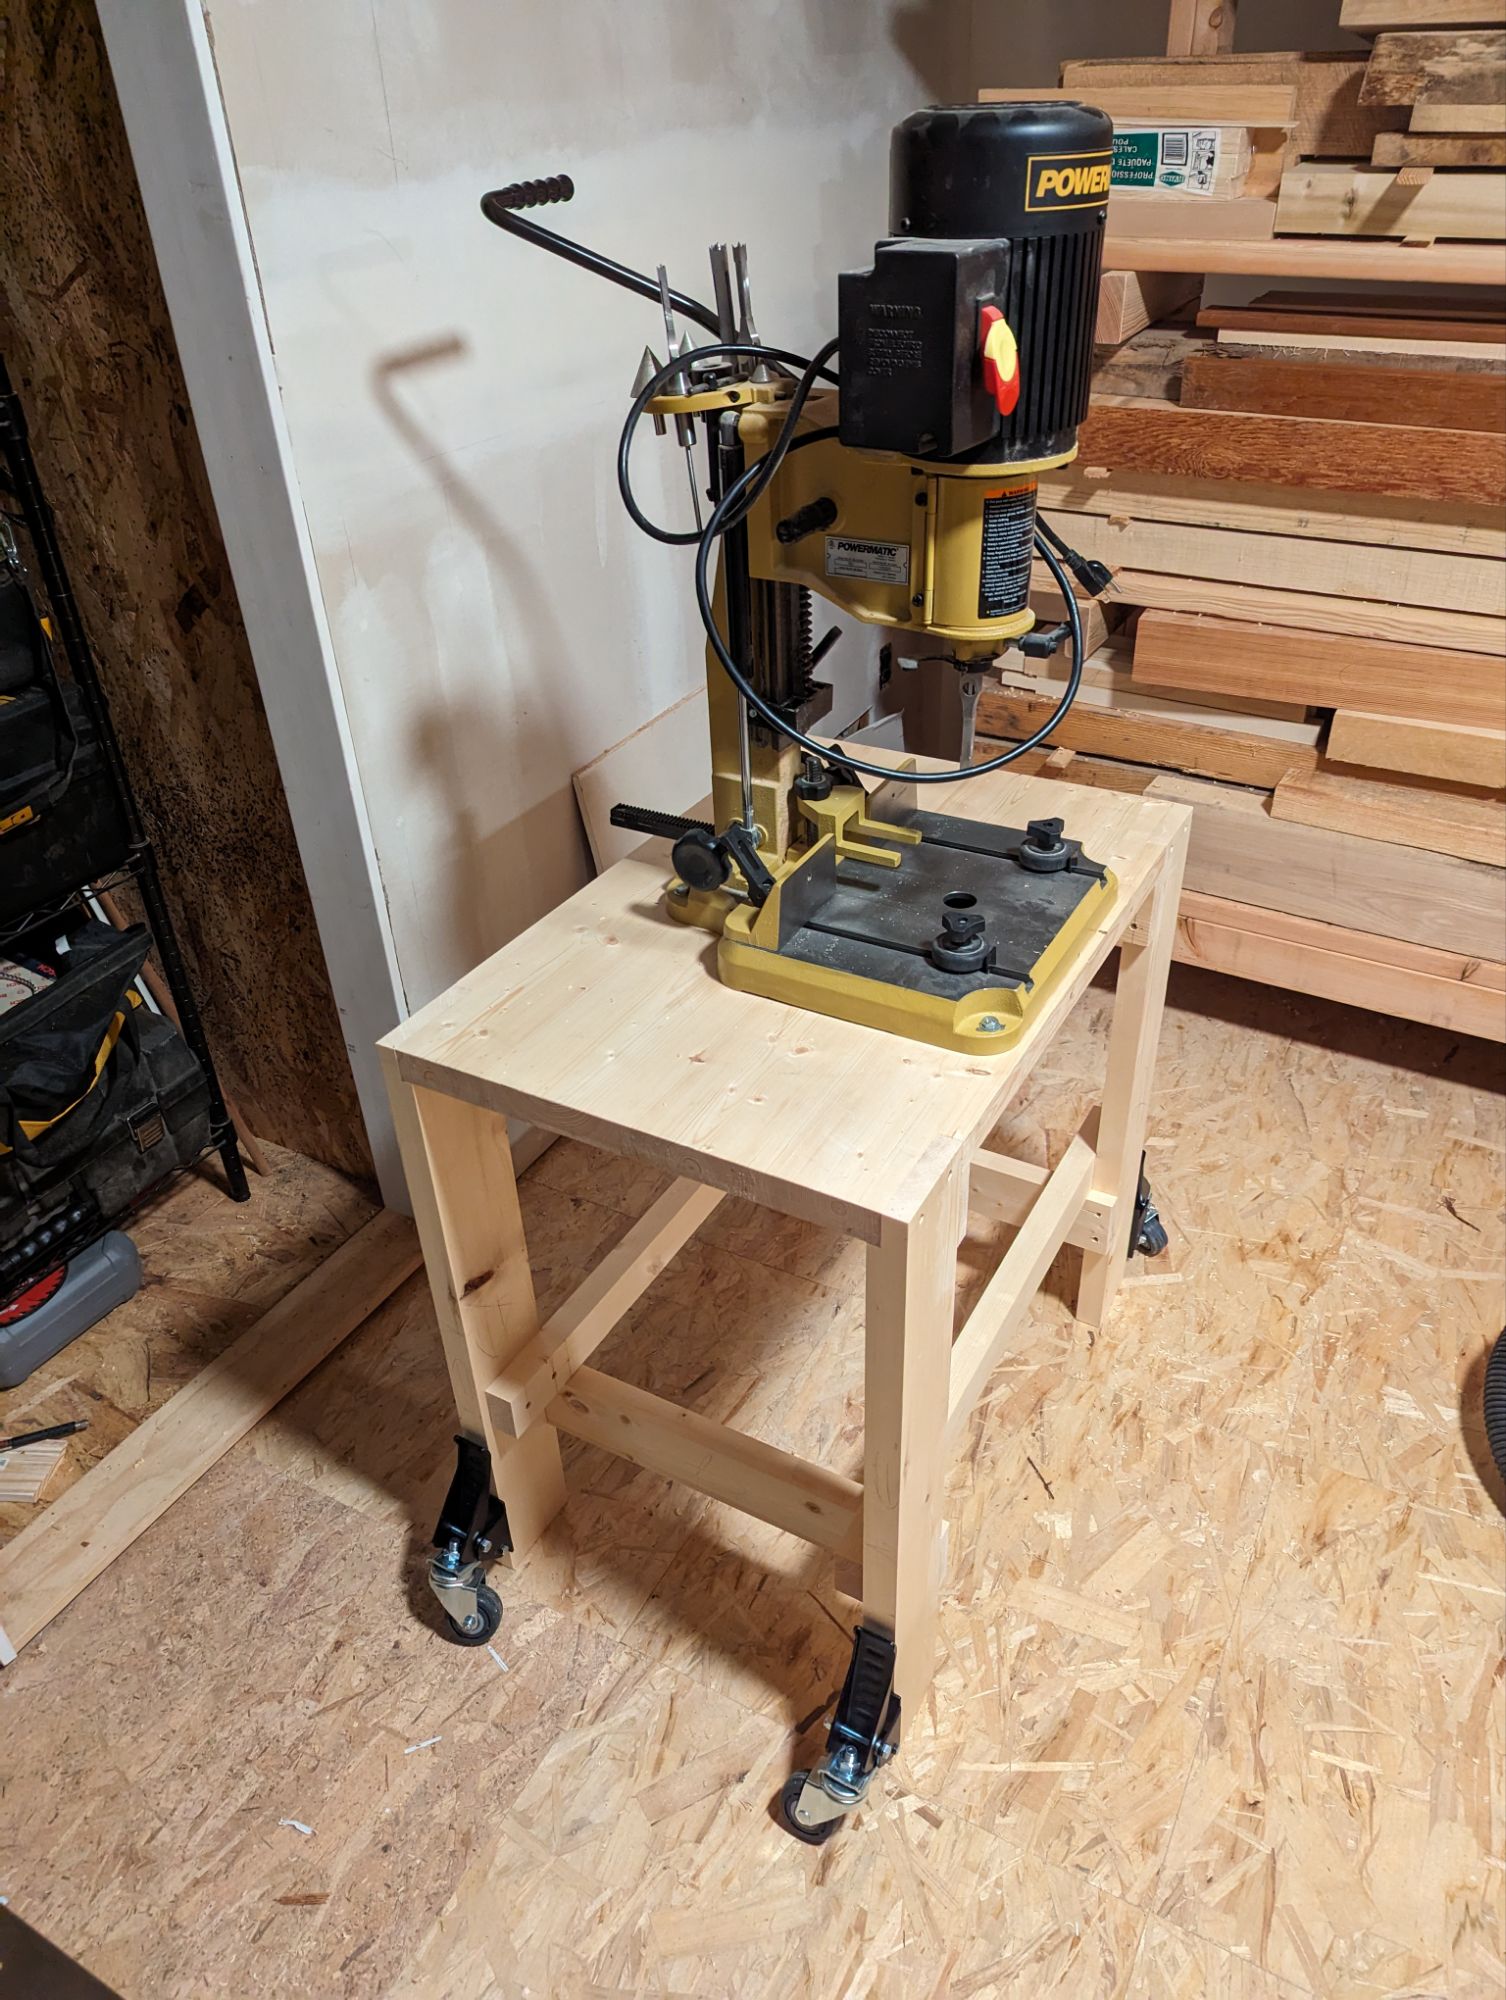
As an aside (as if my entire collected works weren’t just one massive, frenetic soliloquy), this is the kind of project where a hollow chisel mortiser really expedites things. I couldn’t centralize the mortises for the top the rails or the slats and have mortises of any great substance, so the outer walls of the mortises ended up less than 1/4″ (6mm). So not something where brace and bit boring or chisel chopping is without significant risk of blowing out the whole thing. And when you don’t have material to spare (and can’t afford to scrap the work), a hollow chisel mortiser really shines.
The second of the power tool triumvirate for a small space, hand tool woodworker.
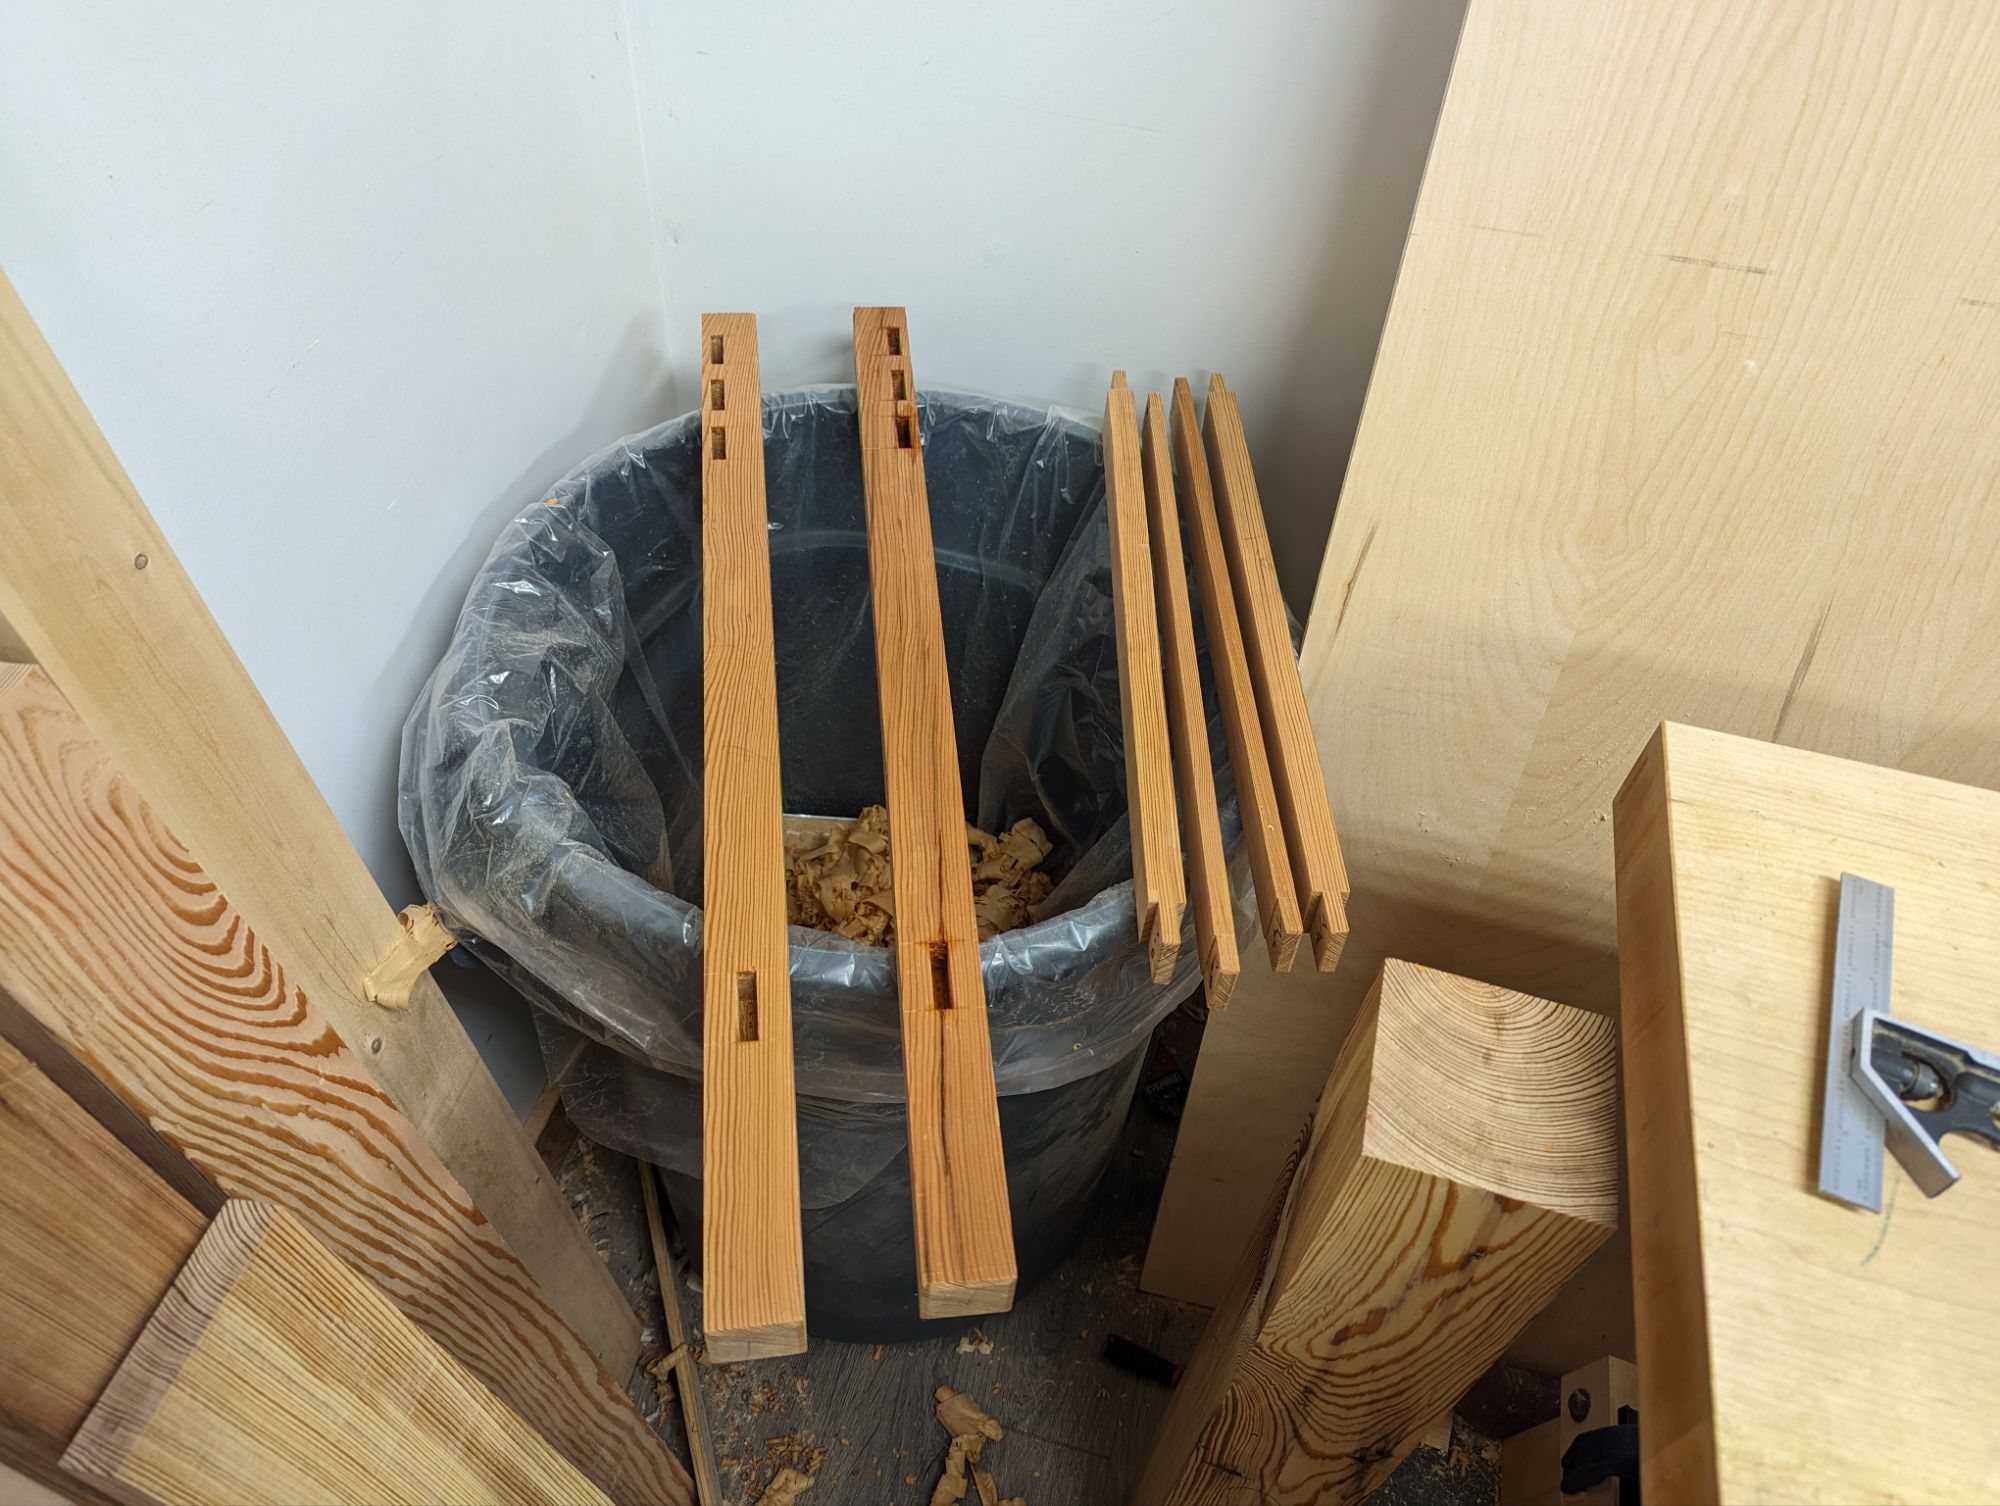
It occurs to me that, even with multiple slats, a piece like this still needs substantial, double shouldered tenons for the top rails and the lower rail. This will increase the bearing surface of the main joints in the structure and should encourage squareness in the overall assembly and a strong frame. The slats themselves can be single shouldered, I think (again, just to use all of the available material). On the lower rails, a tight fit becomes a necessary. So everything gets fettled with a router plane.
Do others use the “over the garbage can” method for storing ready-for-glue up pieces?
I would typically drawbore each joint on something like this, but there really isn’t room for a size of peg that would give any real strength. I think, instead, I’ll use die forged nails (after finish) to lock everything in place. I’m not worried about the glue failing, I don’t think. But some extra reinforcement can’t hurt in a bathroom with wildly-varying humidity.
But I’ll tackle that after I finish the frame. I’ll also talk more about making the top where the sink will sit (this is for a vessel sink).
Happy New Year, everyone! I realized I missed my usual “6am Eastern on New Years Day” post. I think that’s because I went to an actual party and didn’t get to bed right at 730pm like I have for as long as this blog existed. But anyway…
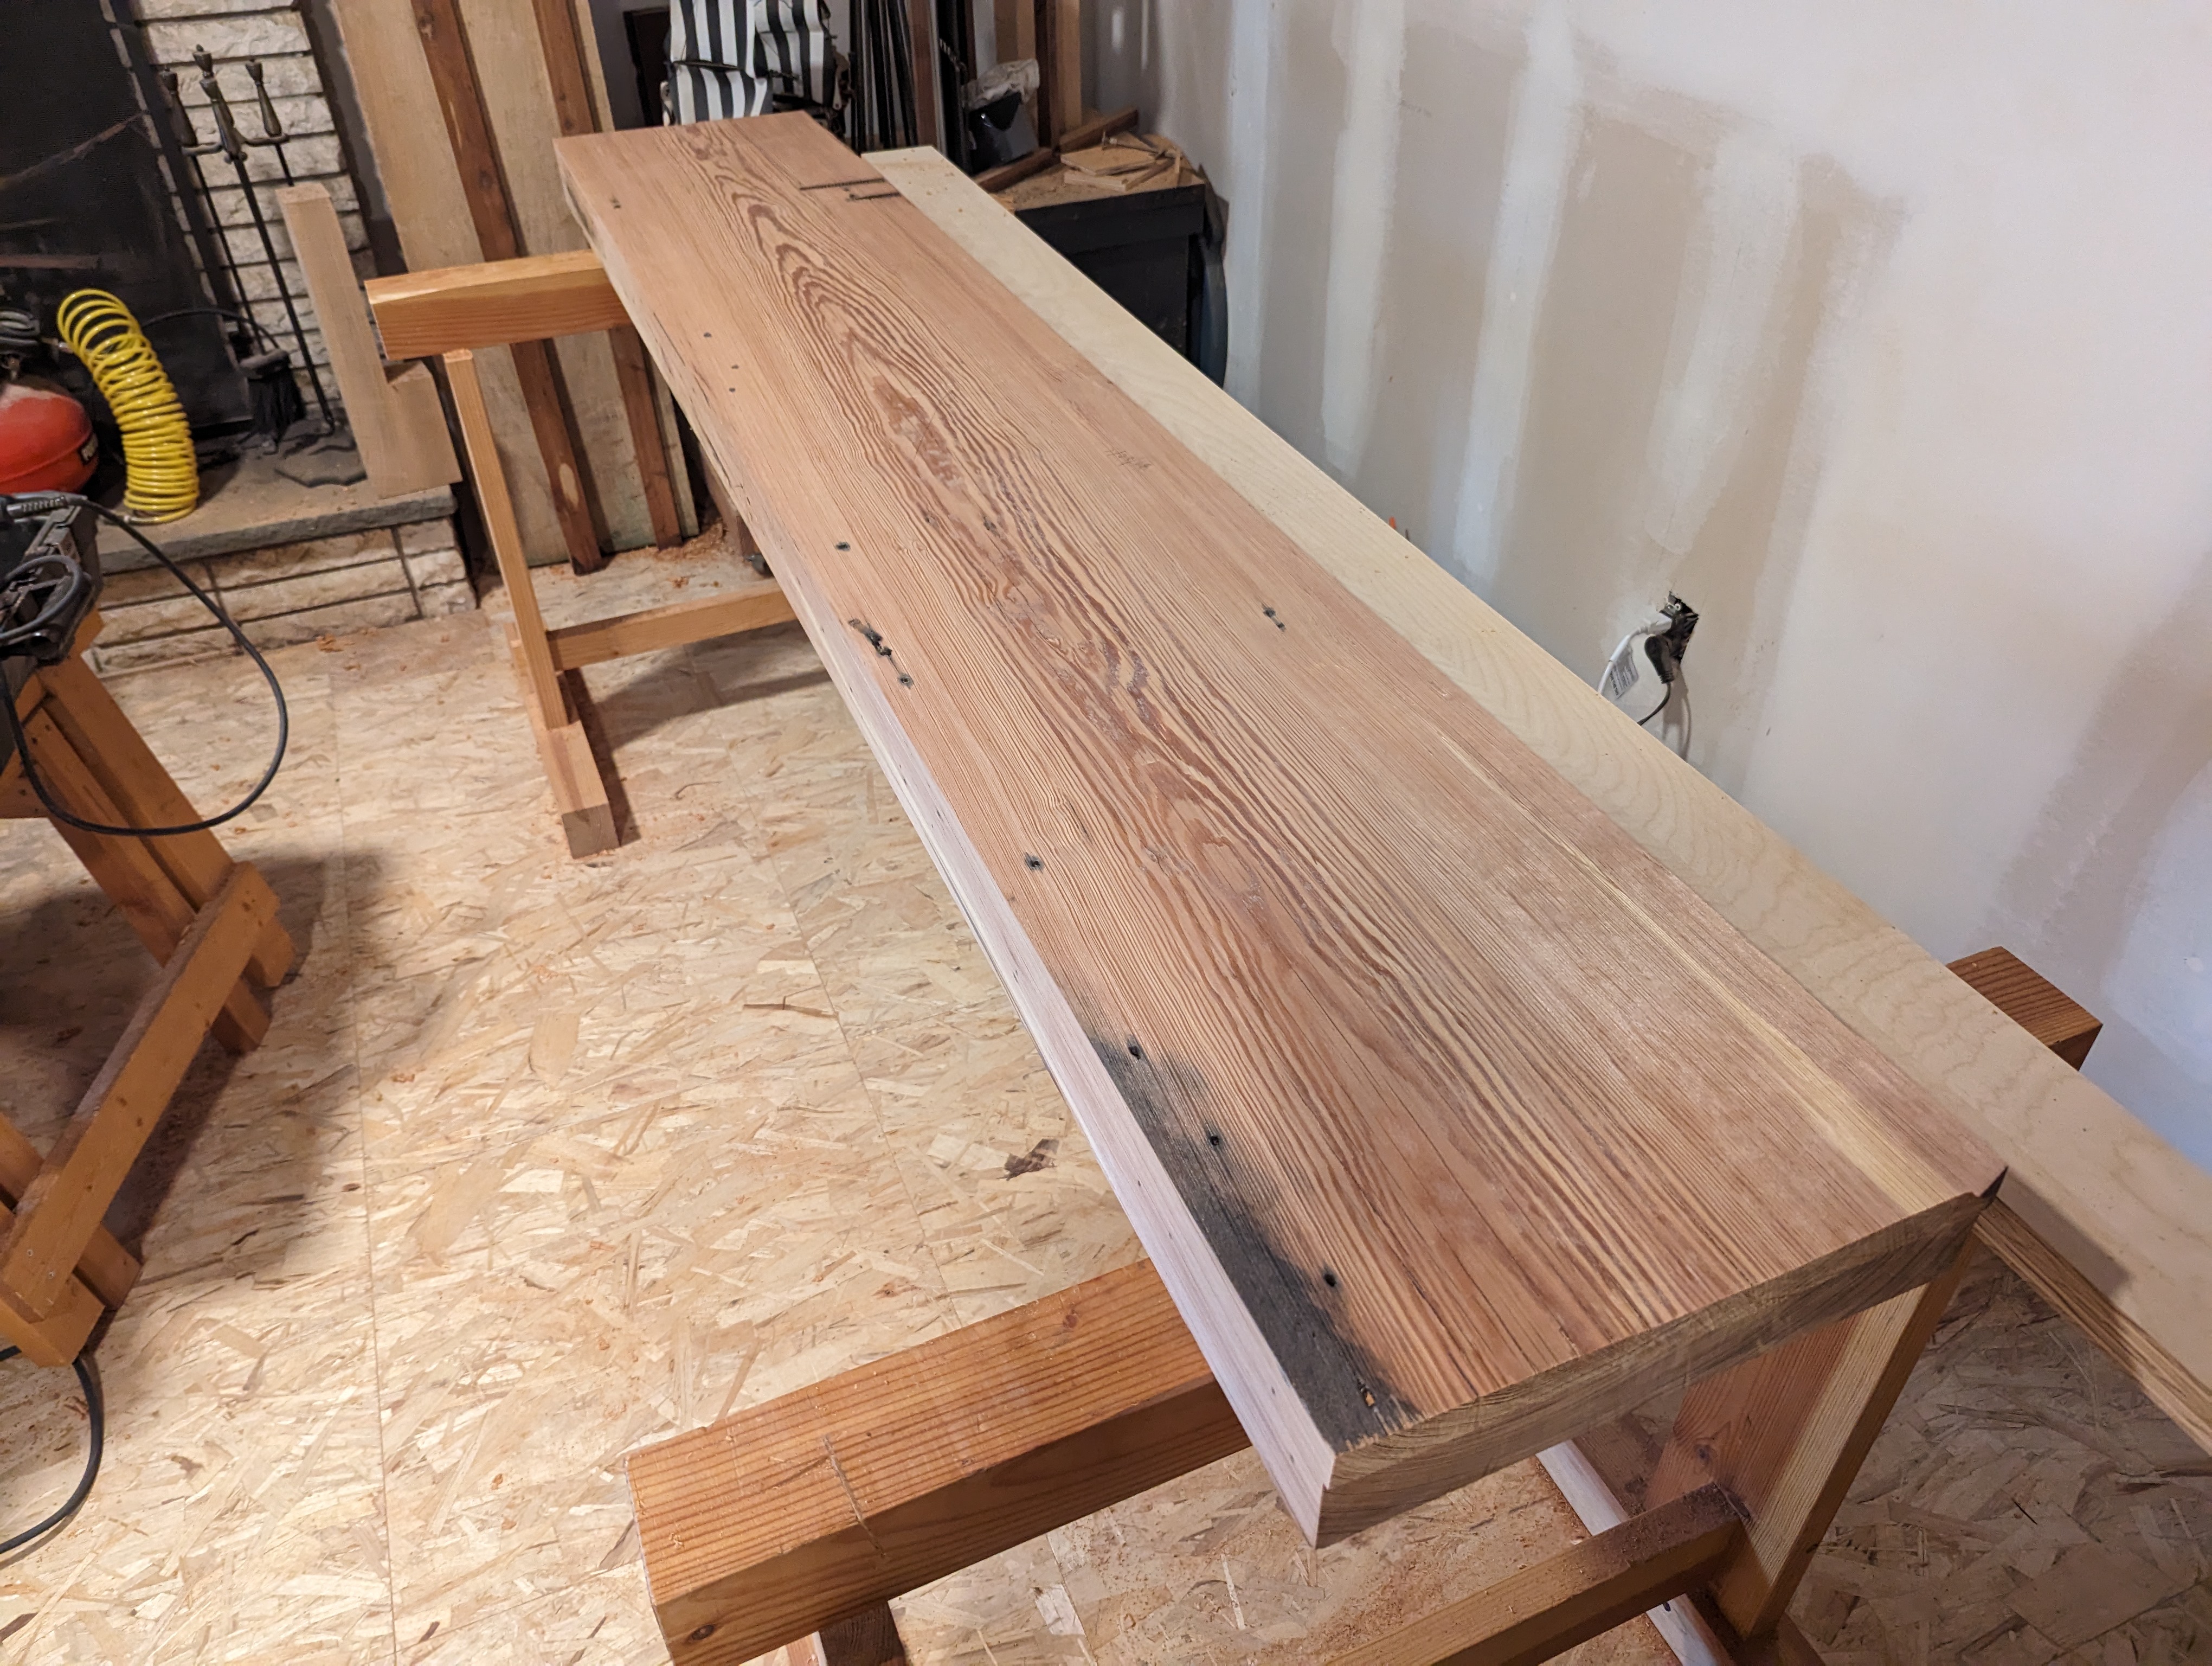
A while ago, I obtained an old growth slab of what I believe is Slash Pine (one of the species of Southern Yellow Pine) from a reclamation sawmill. It’s about 16 inches wide, 90 inches long, and after flattening is still a solid 3 1/2″ thick. It’s mostly flat at this point, anyway. I actually made an impromptu router sled because it’s so damned hard (the resin long ago crystallized and, between that and the barn grit in the checks, it was eating O1 steel for breakfast). This slab will make a wonderful workbench top once I laminate a fascia board along the front edge and square the ends, though.
And after I fill all the nail holes and bolt holes with tinted epoxy offscreen.
Another workbench, you say? Well yes, of course. I’ve been working on my 8 foot maple Nicholson which I made in the thick of the pandemic. It’s got the nicest leg vise I’ve made (it’s angled, uses a cog and screw instead of a pin board, and opens and closes very smoothly). But I’m kind of over front aprons again; it makes using bench dogs in the top too difficult, even if the apron is great for edge planing long, wide boards. And I have just the one workbench at home after giving all the others away. A second wouldn’t hurt.
This new bench will be in the Shaker style, like at Hancock Shaker Village. Leg vise, tail vise, sliding deadman, some drawers underneath. In fact, I’ve already made the leg assemblies. But unlike the Shakers, this bench will knock down (like a Moravian workbench). And I have a linear bearing and a 1 1/2″ hardened steel shaft to use as a parallel guide for the leg vise instead of a pin board (or even a cog and screw or crisscross). McMaster-Carr is the best.
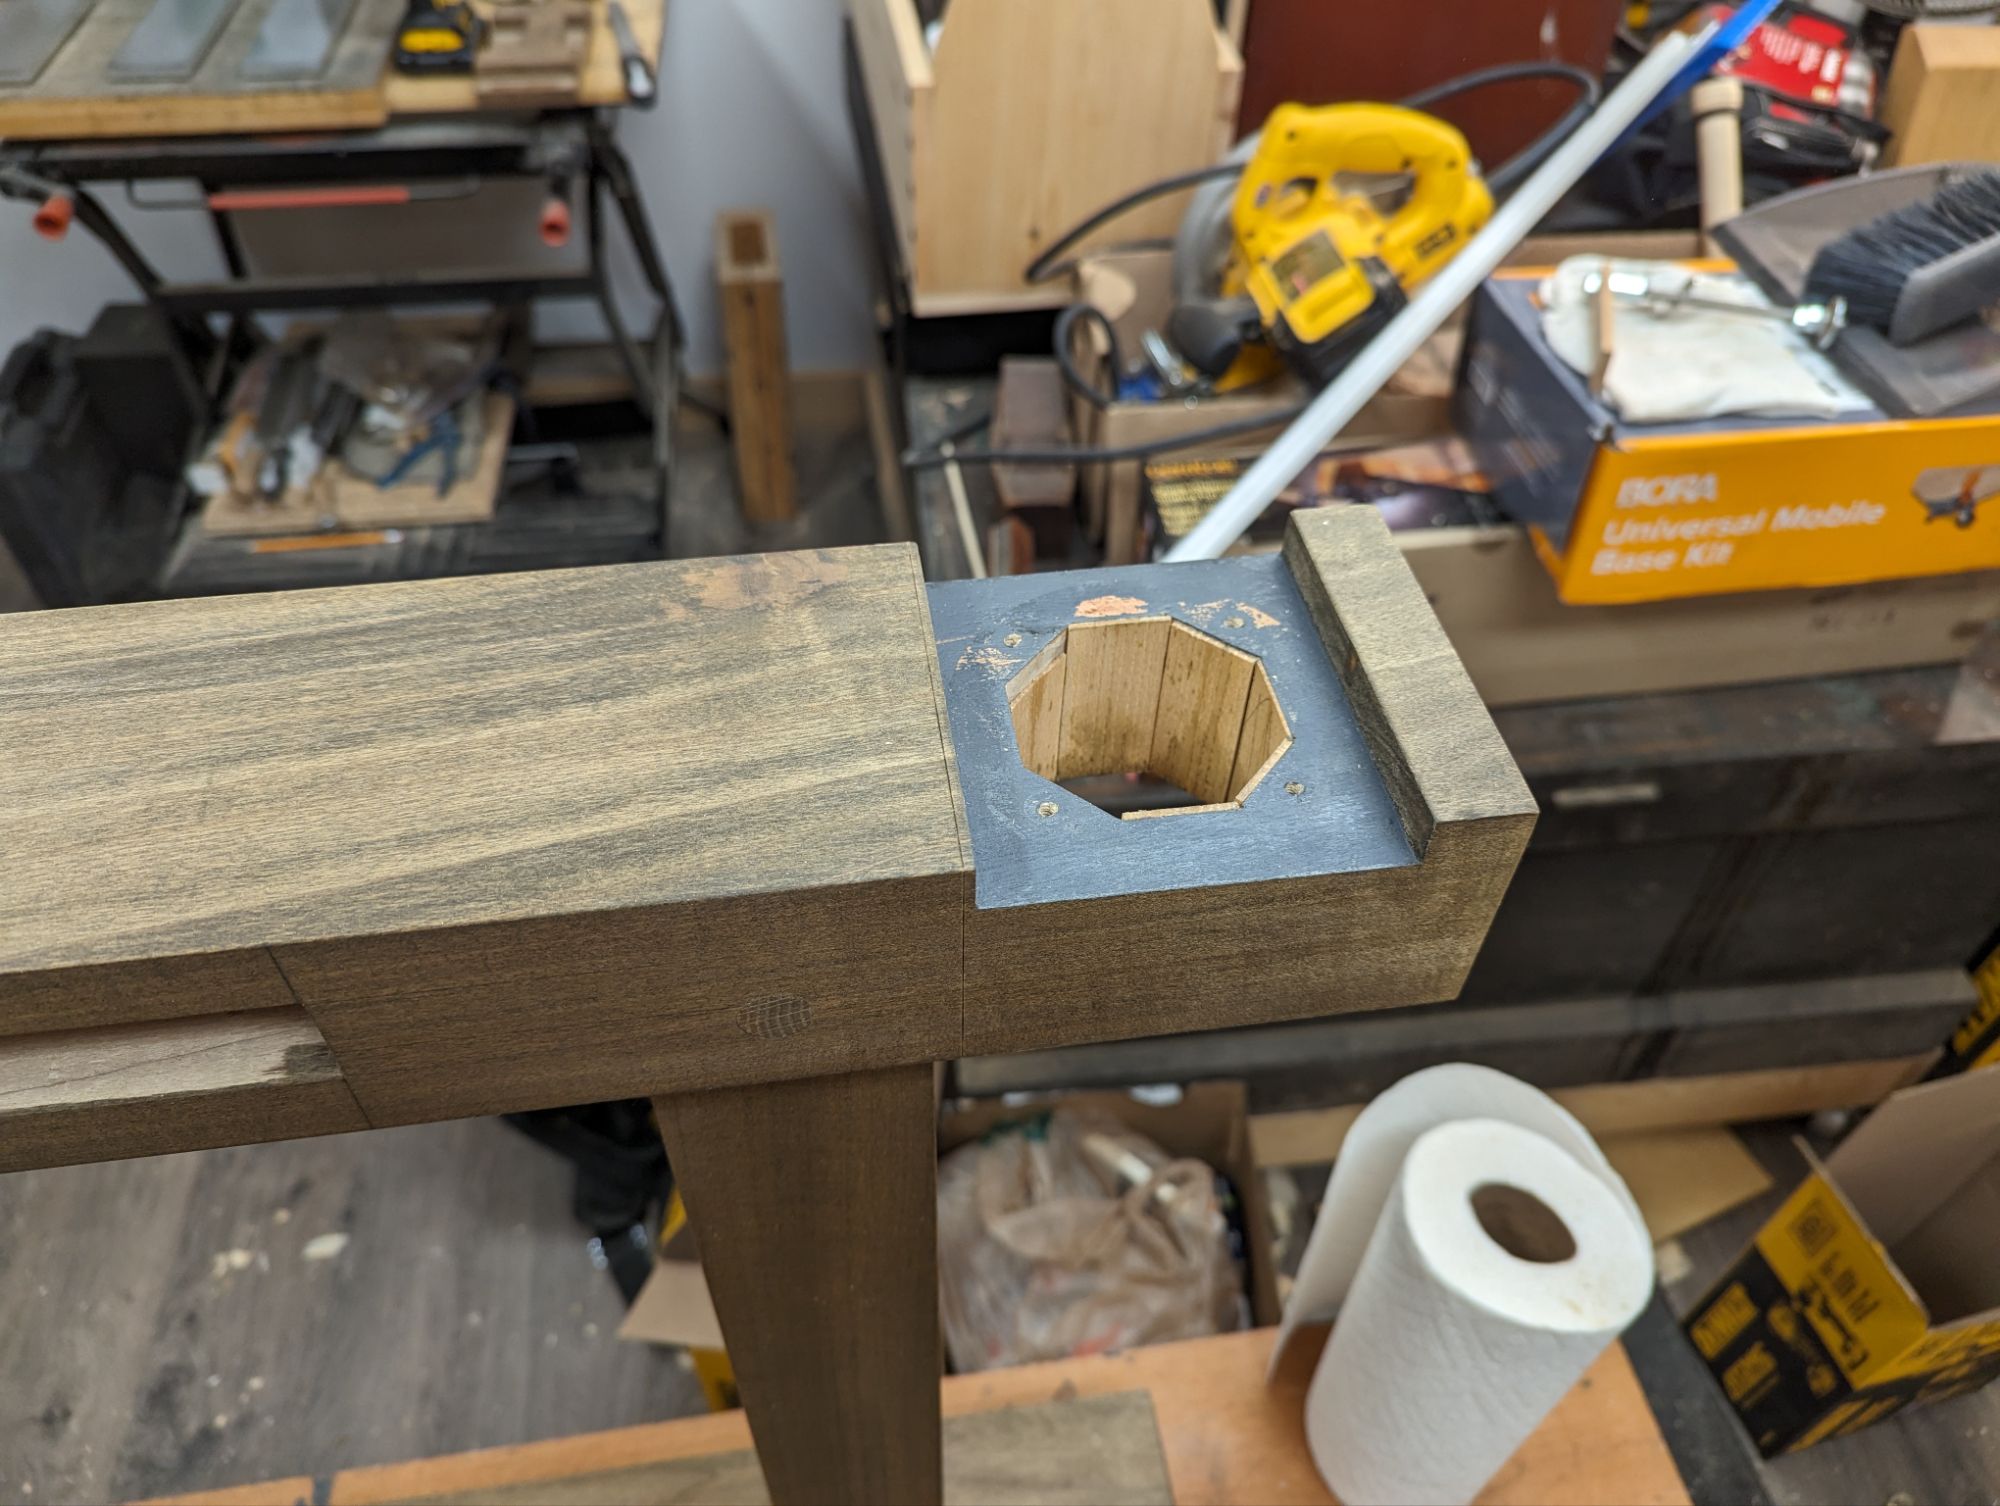
When making the recess for the linear bearing, though, I didn’t have a good way to make a 2 3/8″ hole. So I chopped it out octagonally. And it was scruffy and didn’t fit well and I had to shim it. All of which ate at my brain and caused me to set the whole project aside for a while.
I’ve finally come back to it. And it still eats my brain.
This is just not the quality I’m used to producing.
And what is a fellow to do when a bad bench installation is ruining a good time? Cut the offending portion of the leg off and add some wood back on, of course. About that…
First step was to saw off the offending area and square up the end grain. And also dig out and prepare an offcut of the same species that has a decent grain match. If I had access to a Festool Domino, this would essentially be the end of the process. Four dominos and some glue: Bob’s your uncle.
My workbench is an absolute mess as I do a few renovations.
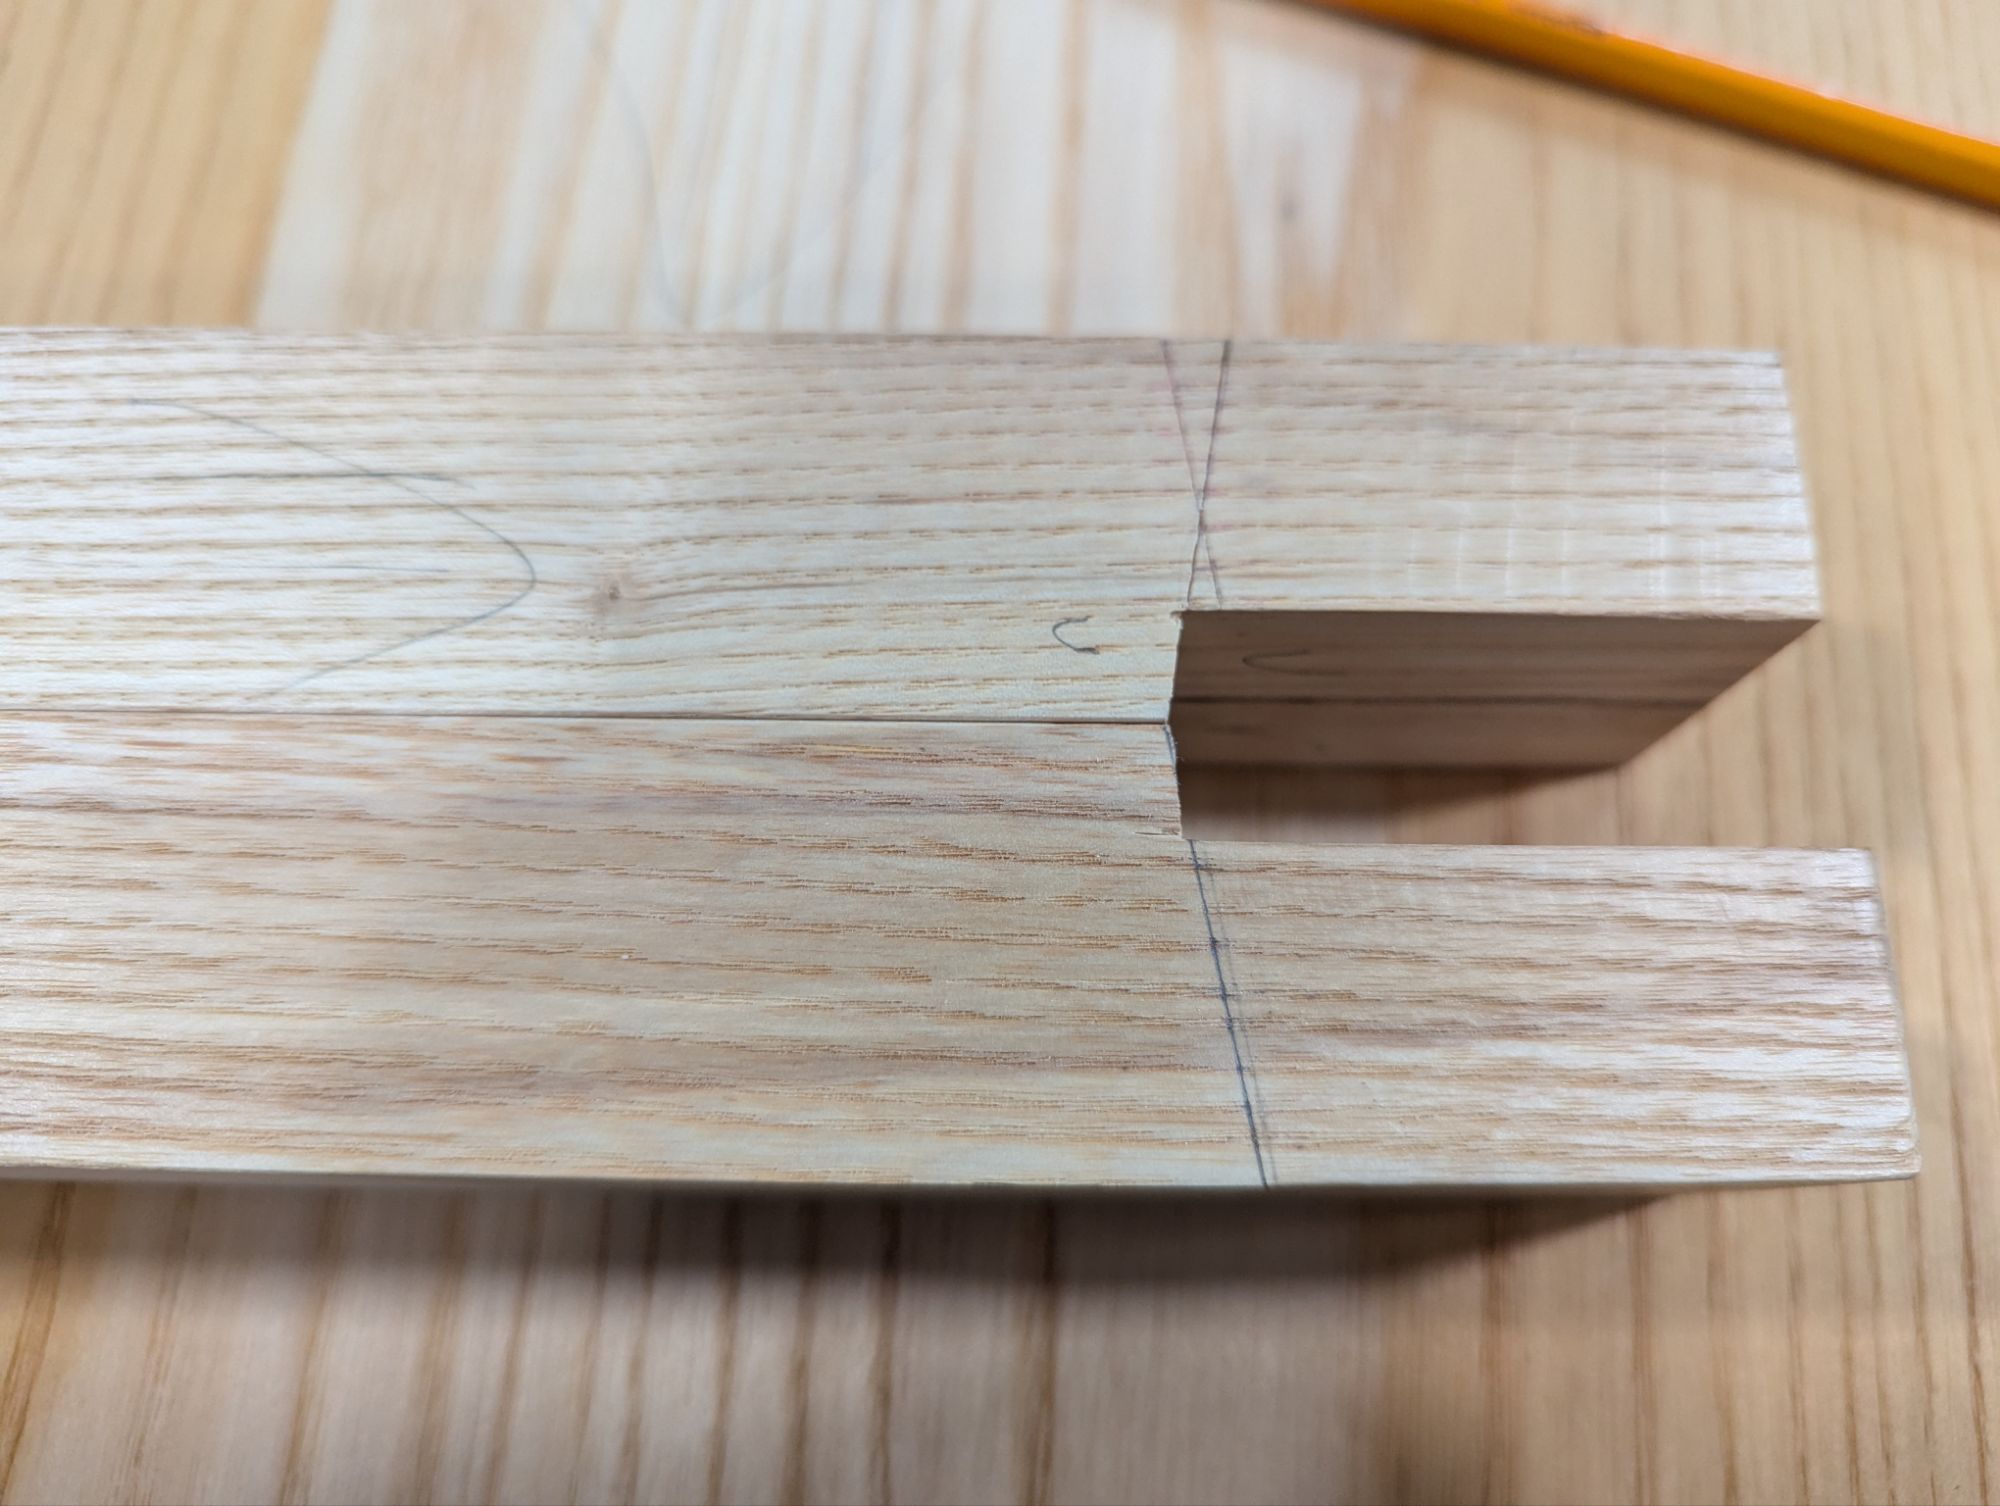
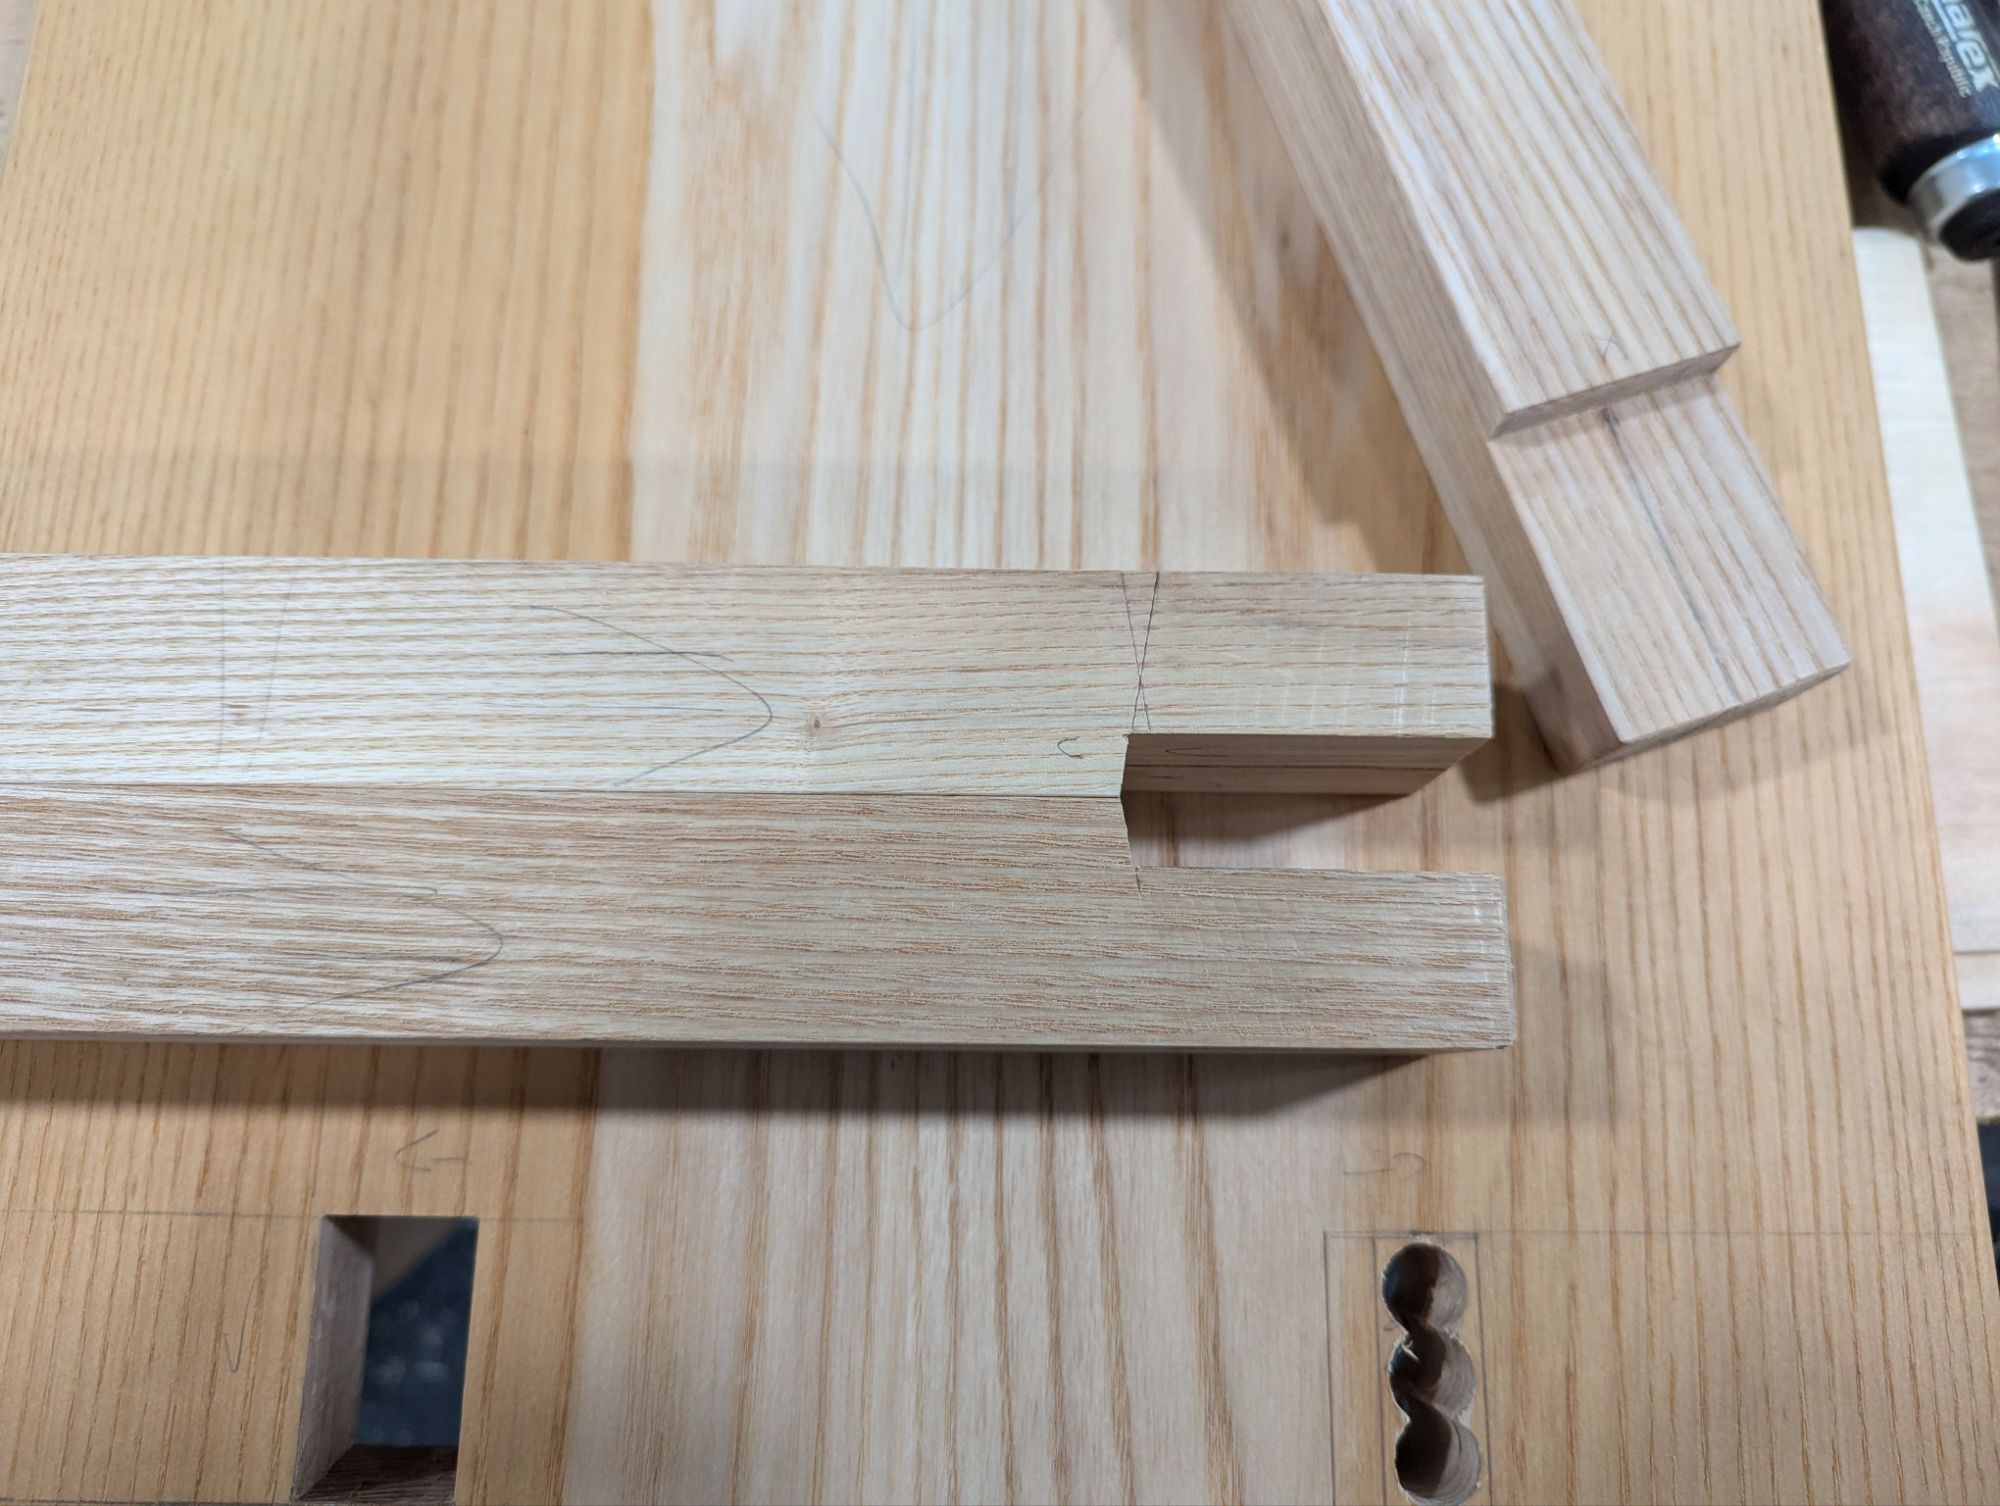
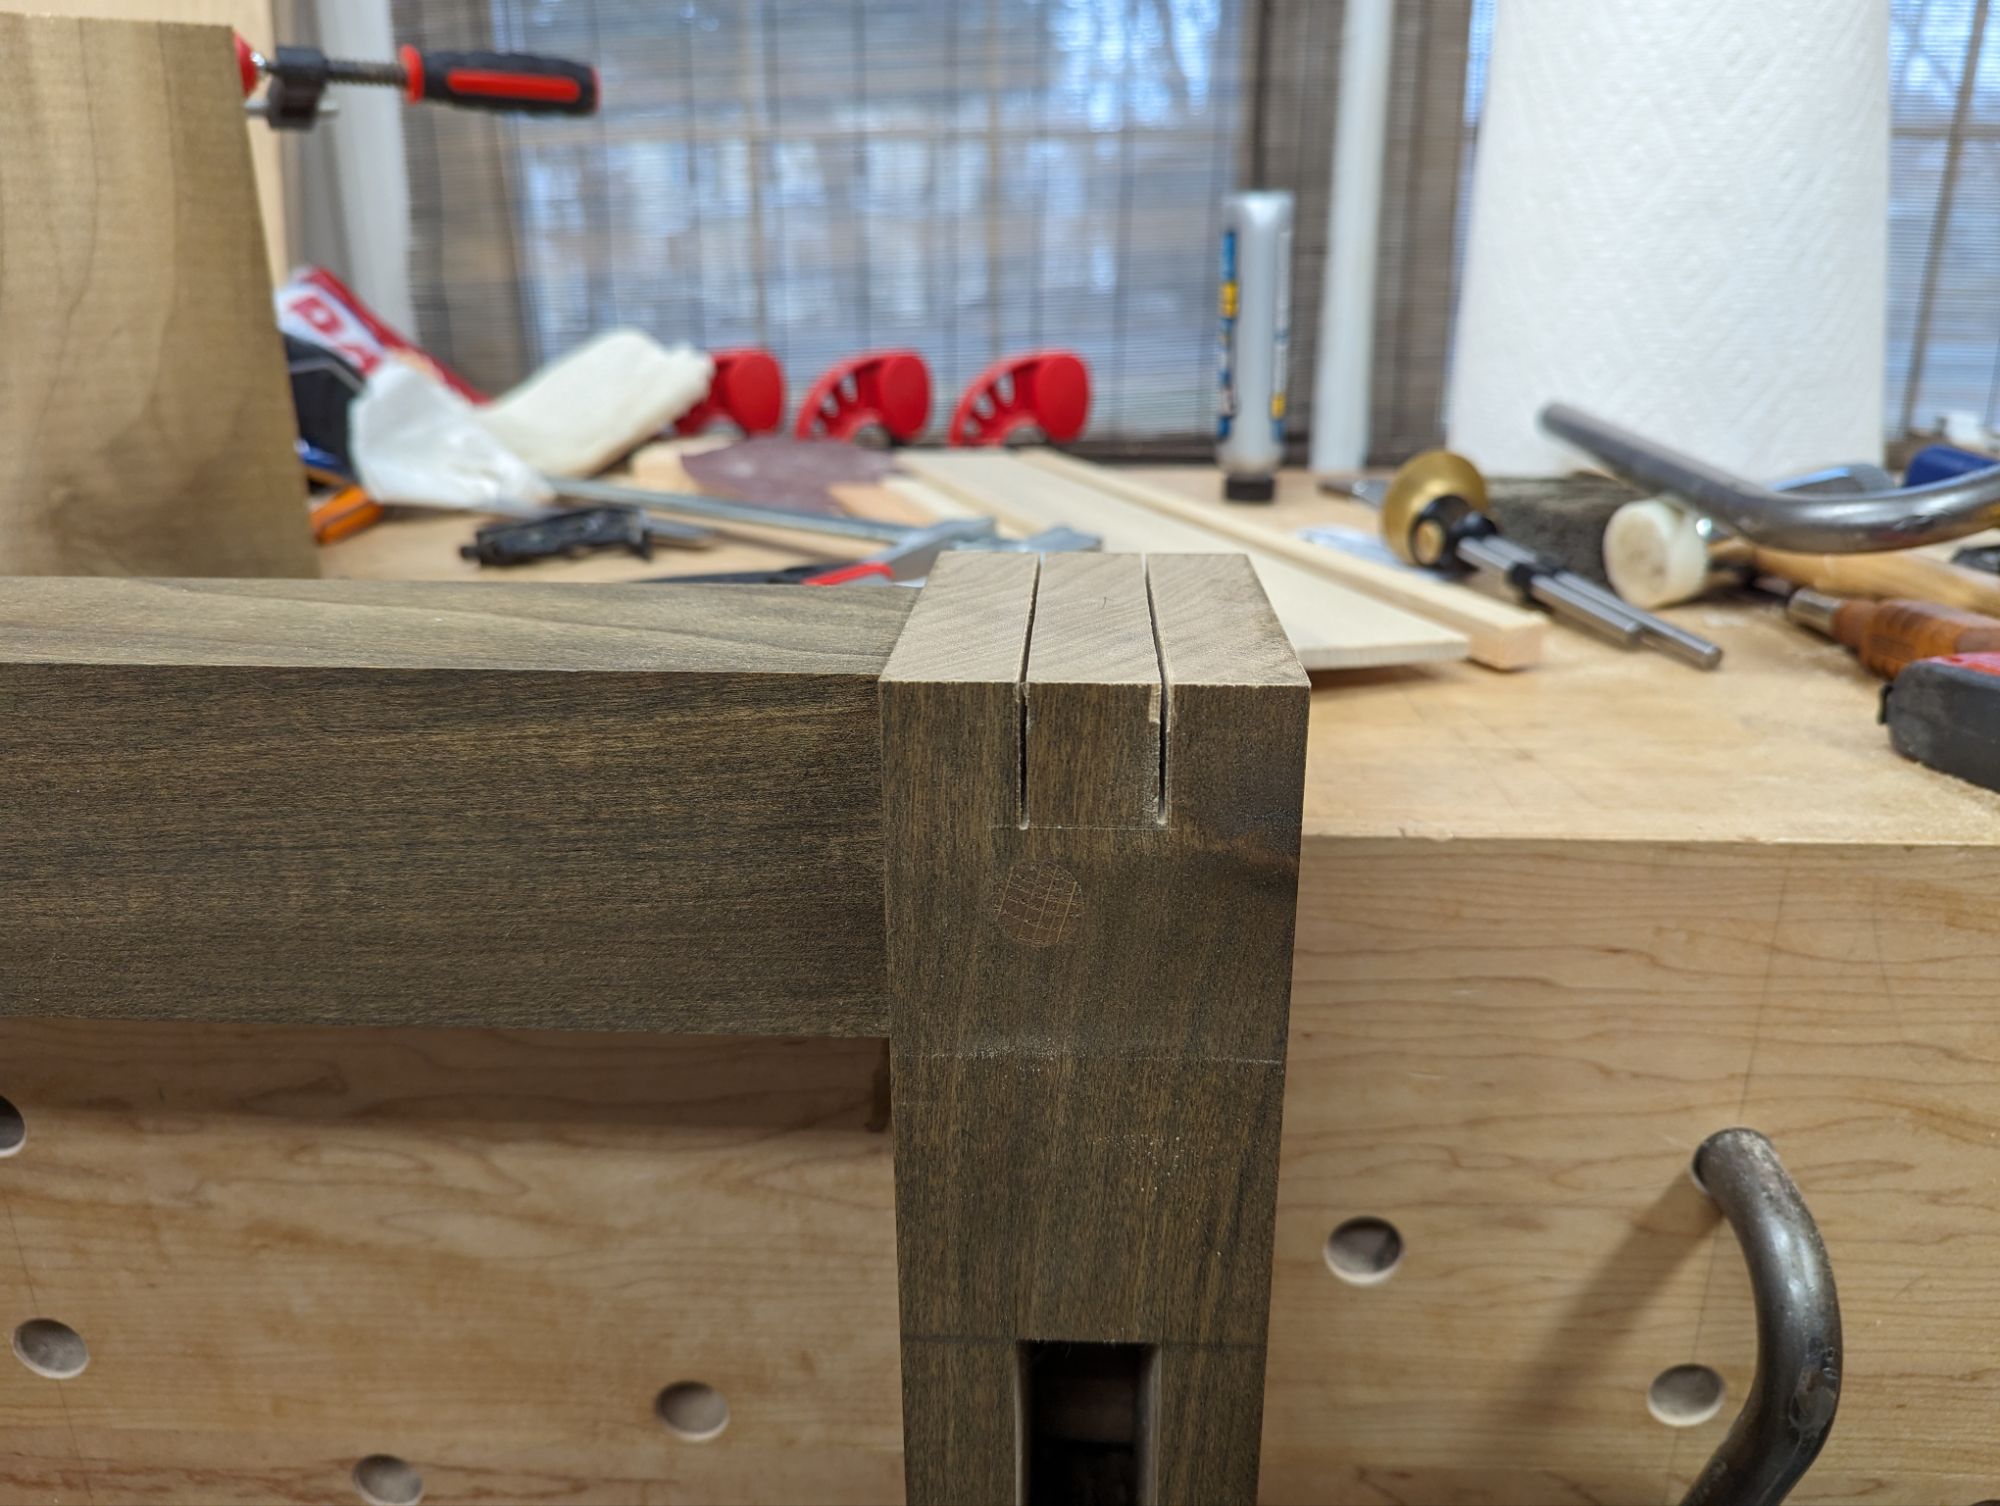
But absent a Festool Domino, how does one join two boards, end grain to end grain? Finger joints are probably the best option, because of the large amount of long grain gluing surface. For a hand tool guy like me, that’s essentially a bridle joint. I think in this application, it would be strongest if the mortise was in the remaining leg and the tenon on the added piece. I almost made bridle guides, but that probably would have taken longer than just sawing and paring.
Now to saw down the sides of the mortise.
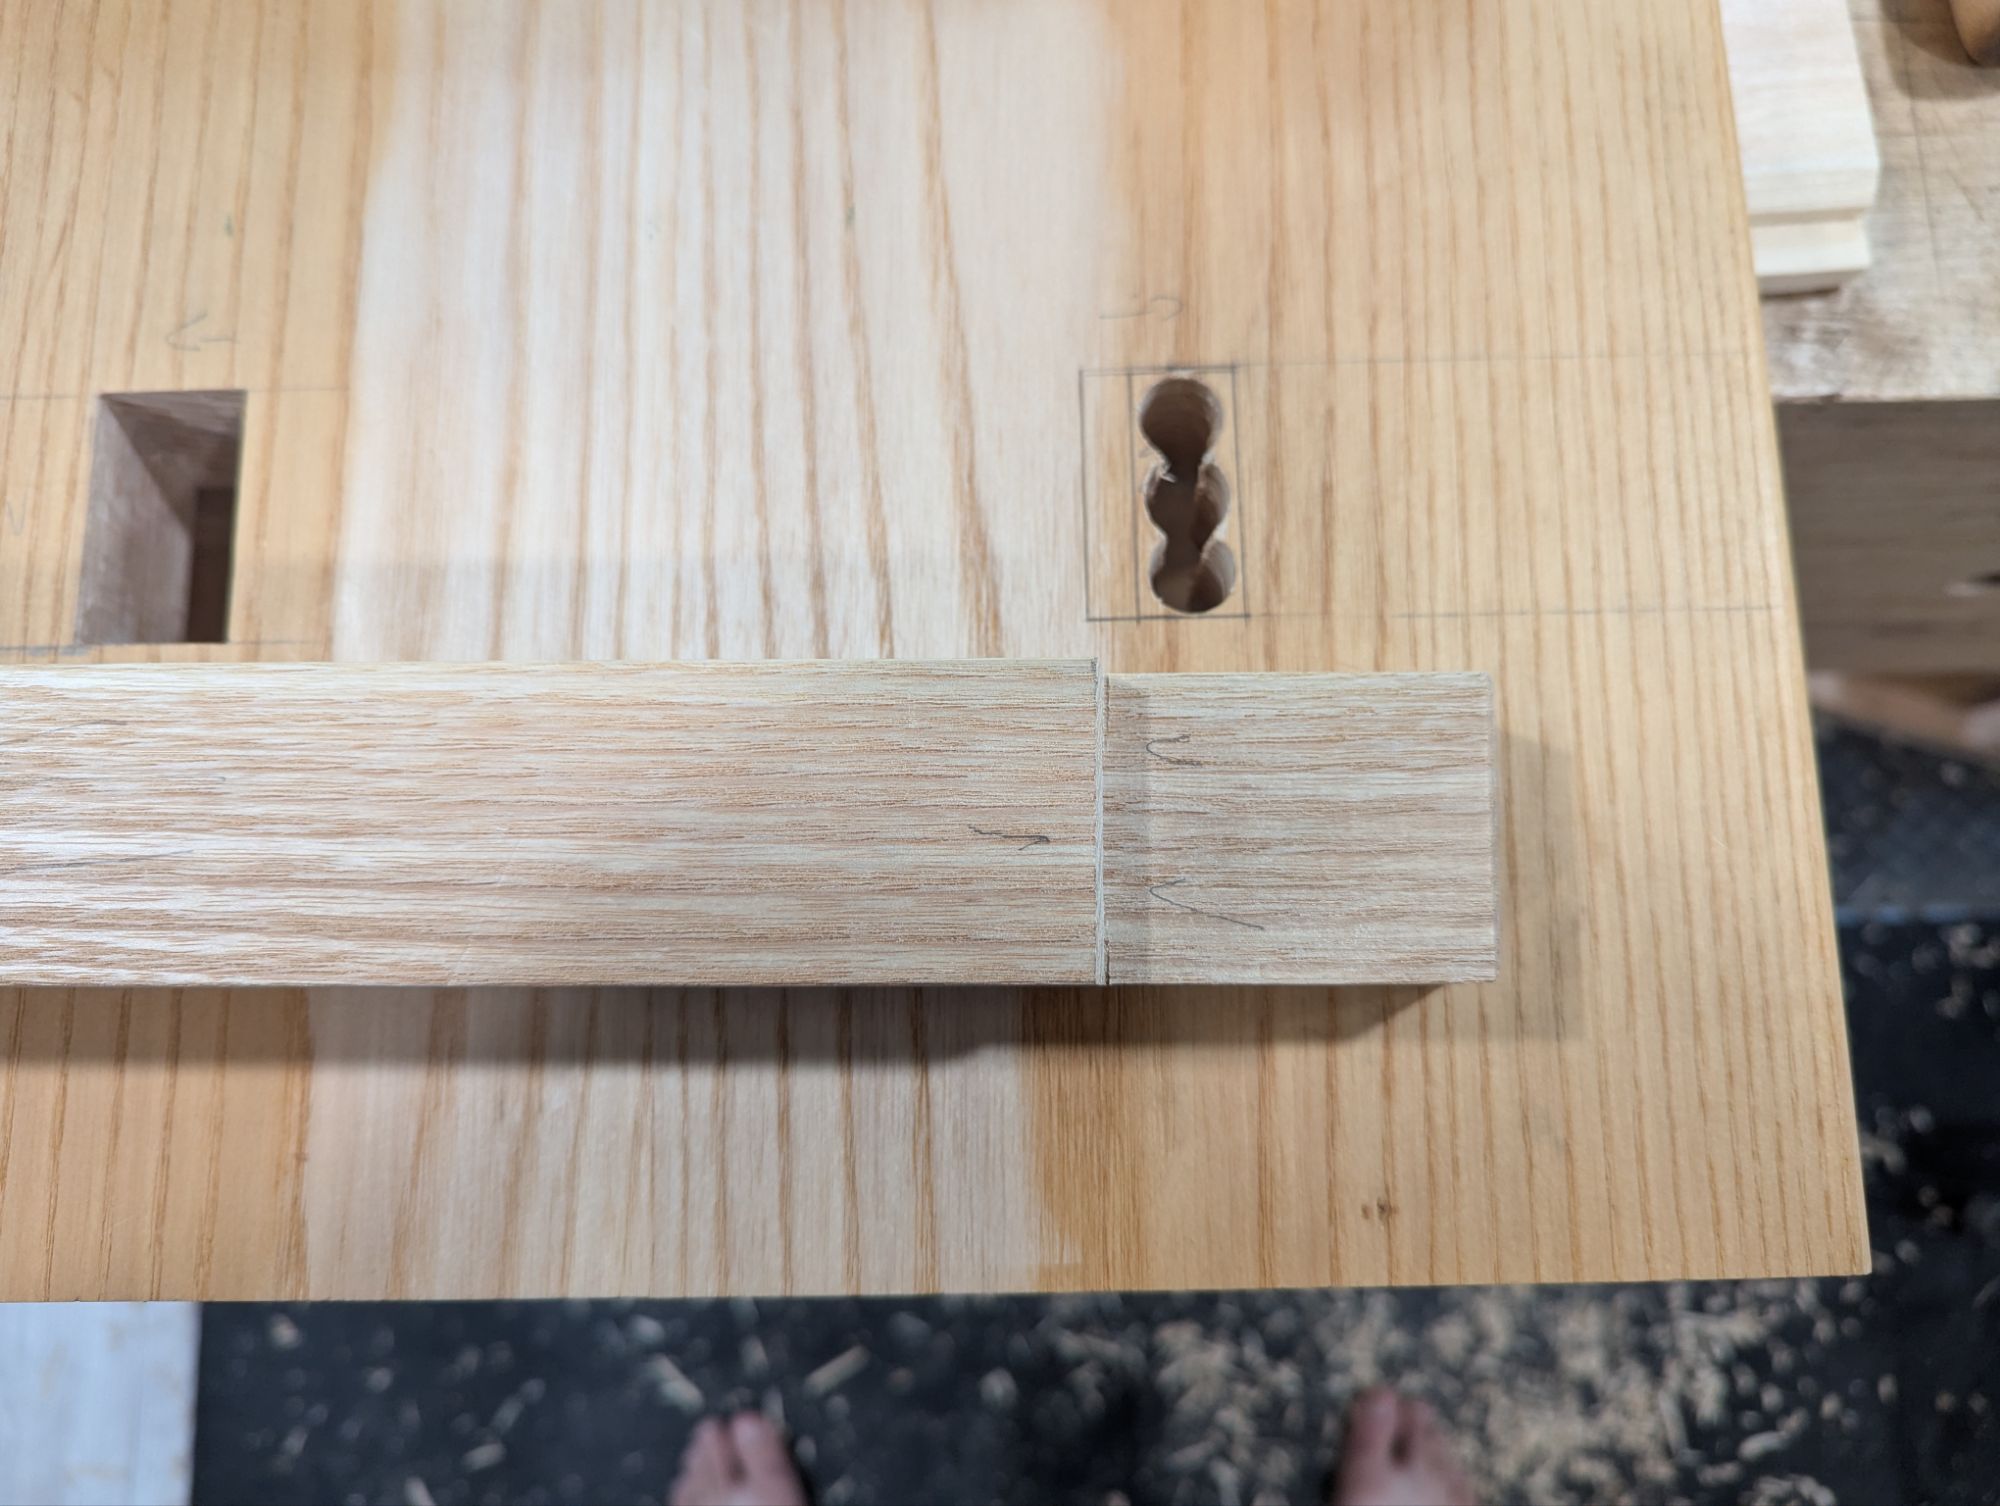
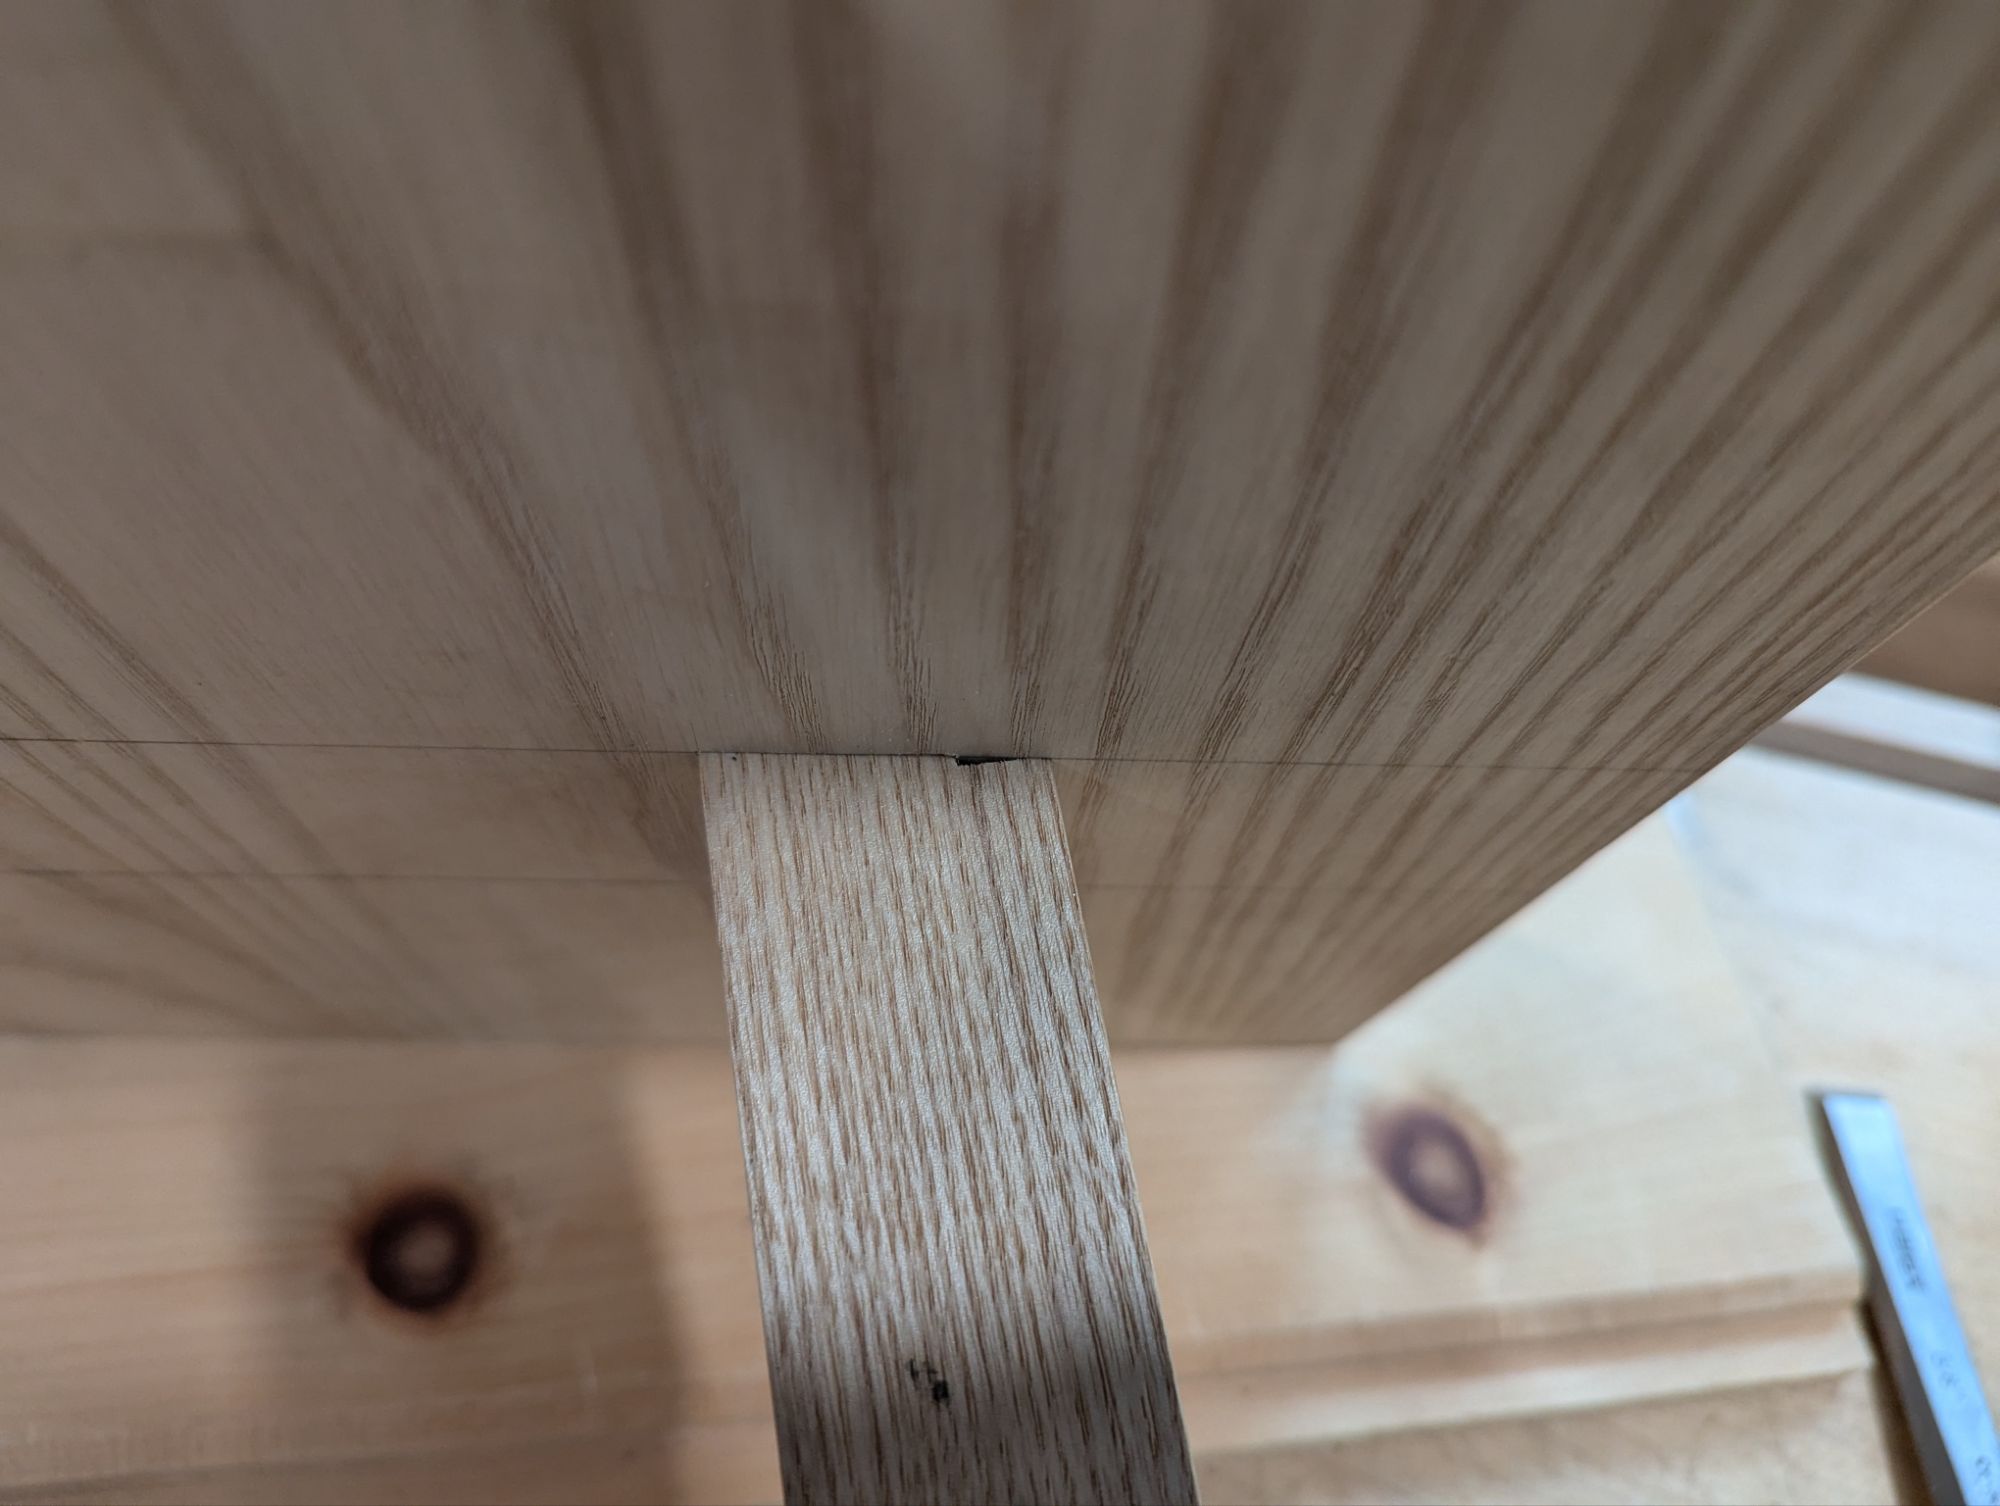
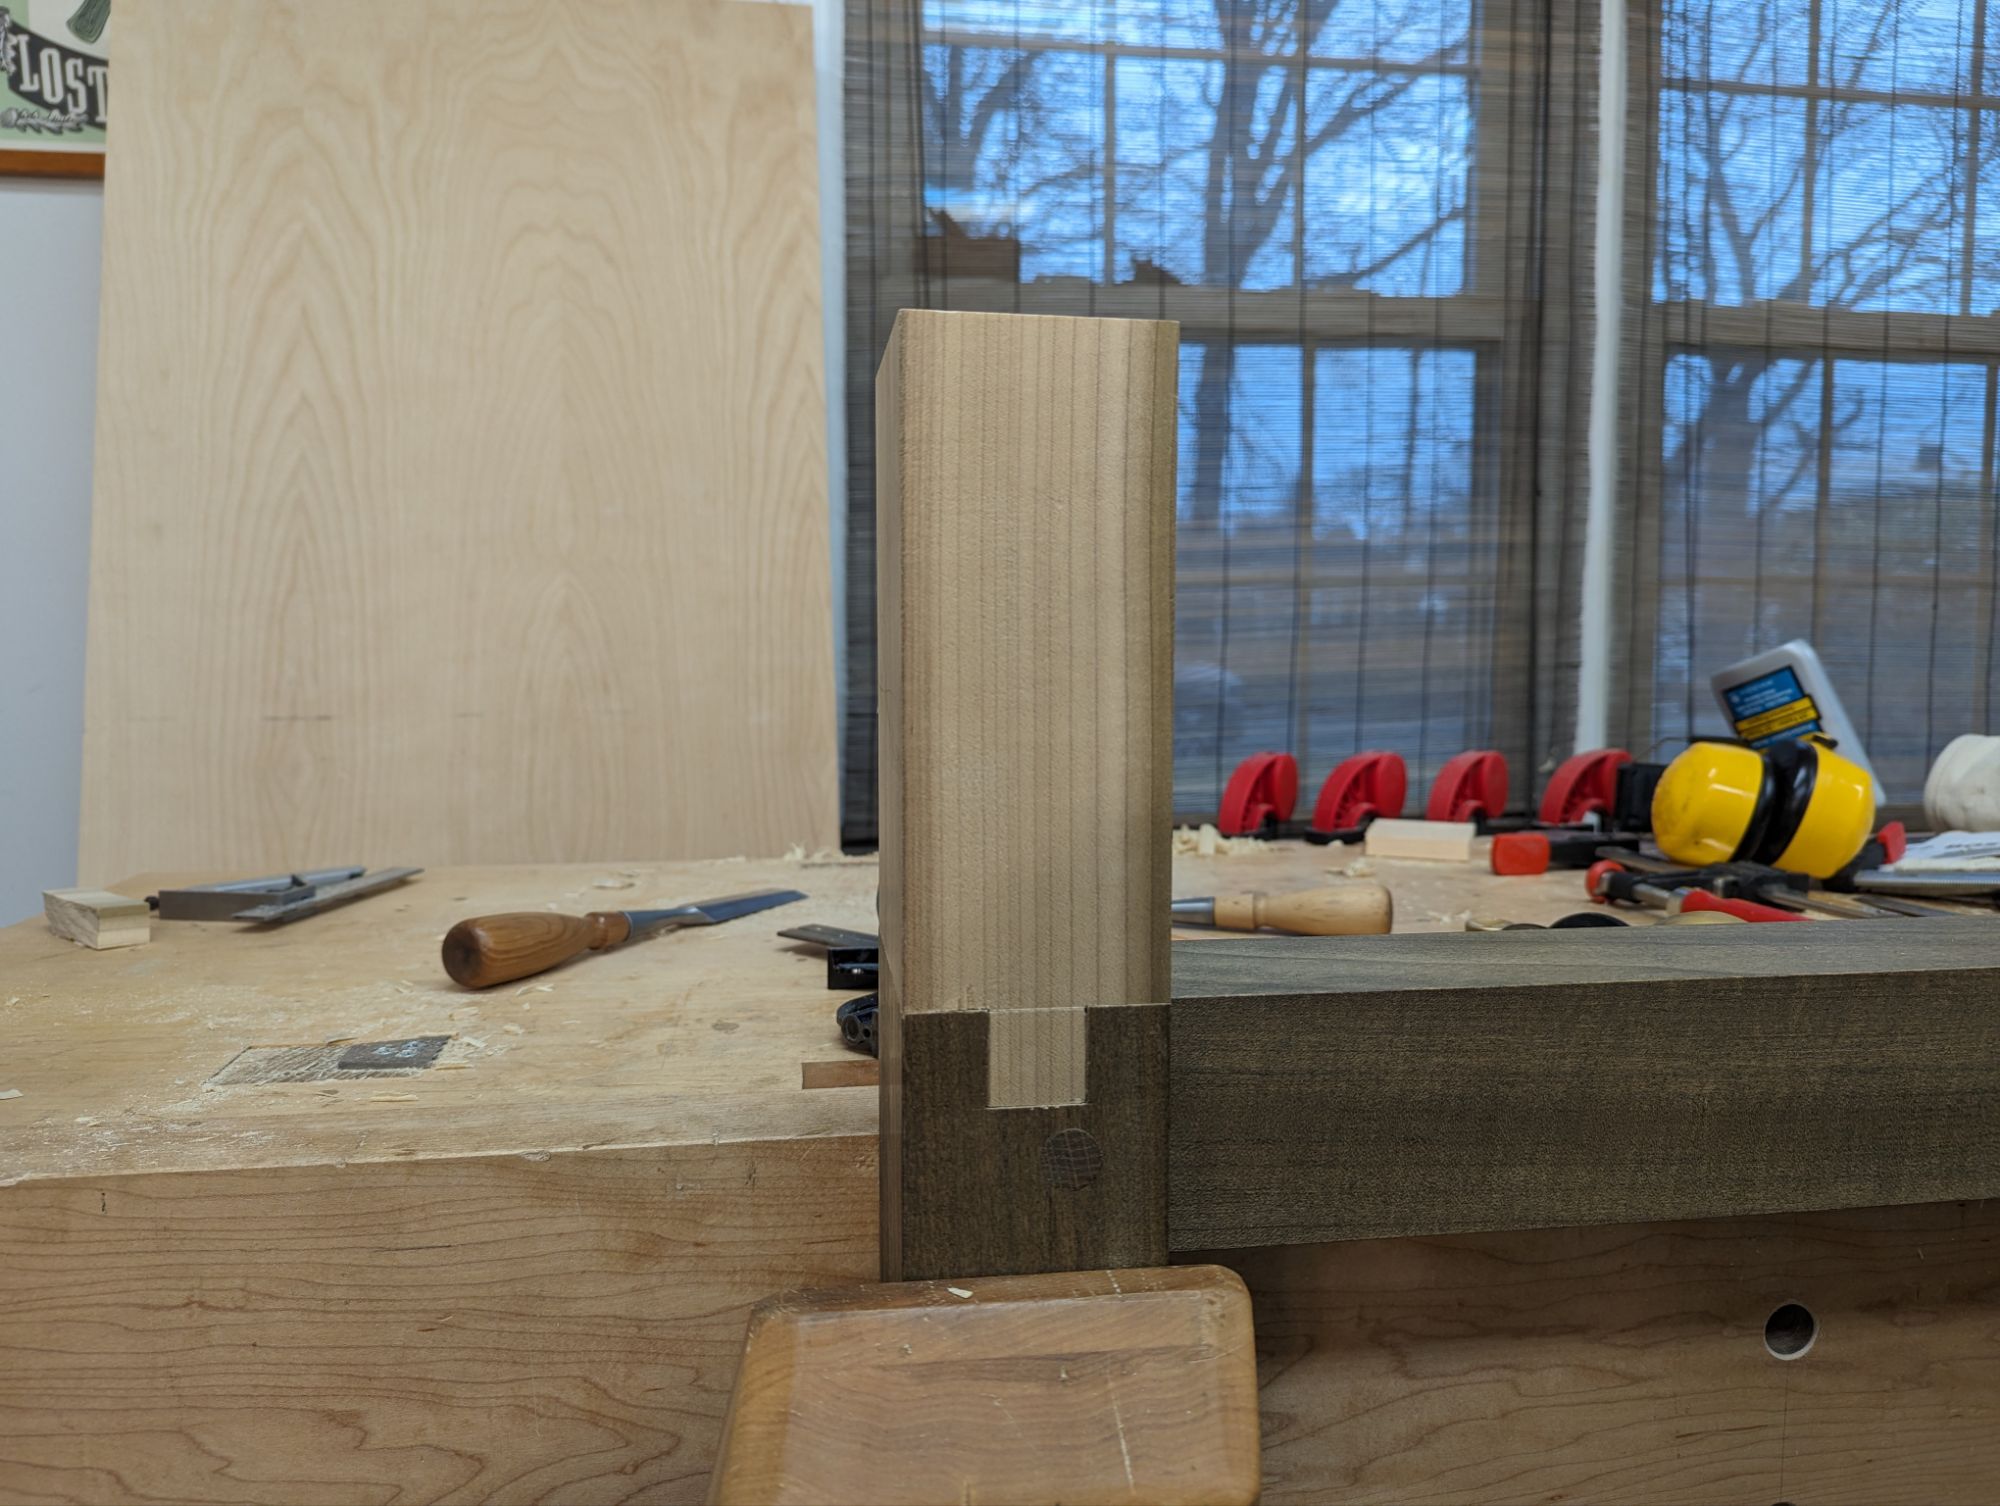
Once the mortise was nicely pared to the lines, I roughed out a tenon and finessed it to a friction fit with a router plane. Remember to ease the inner parts of the mortise to leave room for glue on the mating surfaces. A dry fit looked like so:
It was at this point when I realized the offcut was actually from the same board as rest of the leg. Fortuity!
Will a 1″x1″ tenon (with 7/8″ mortise walls) be strong enough for a front leg of a workbench, even with TiteBond Thick & Quick PVA? Fuck if I know. But this is poplar, which doesn’t split easily, so I think I’ll be okay. I plan to add a trio of 3/8 oak pegs as reinforcement along the length of the tenon, which should help. Maybe a couple of metal mending plates too just for luck. But I think it will be strong enough, even without pegs, as long as whatever parallel guide I use for the leg vise doesn’t bear just on the new wood.
Hopefully I can find the stain I used for the rest of the leg too.
To be clear, I almost bought a Festool Domino today. But I’m glad I stayed strong and didn’t. Not that having a Festool Domino is bad; I just kind of enjoy doing things the hard way. And I do think this fix is a good solution and should stand the test of time.
I went up north for a quick summer weekend and did something I don’t usually do: peruse the antique shops. This was pretty fruitful, honestly. I found a boarded chest made from 12″ x 7/8″ clear pine which will clean up very nicely. It’s about 24x14x14. It was last used as a toy chest (I know from the several Battleship peg pieces inside it) but it has some signs of old tills. More on that another time.
I also found a nice Disston D7 (I think) hand saw, crosscut. The plate is arrow straight with no kinks that I can see. Even the nib is intact. The only defect (aside from a heavy black patina on the blade that comes from being stored in barn-like conditions) is a small chip off the top horn of the tote. Easily fixed (or, honestly, just sanded smooth and left alone). I’ll do a quick restoration post on that one too in the future.
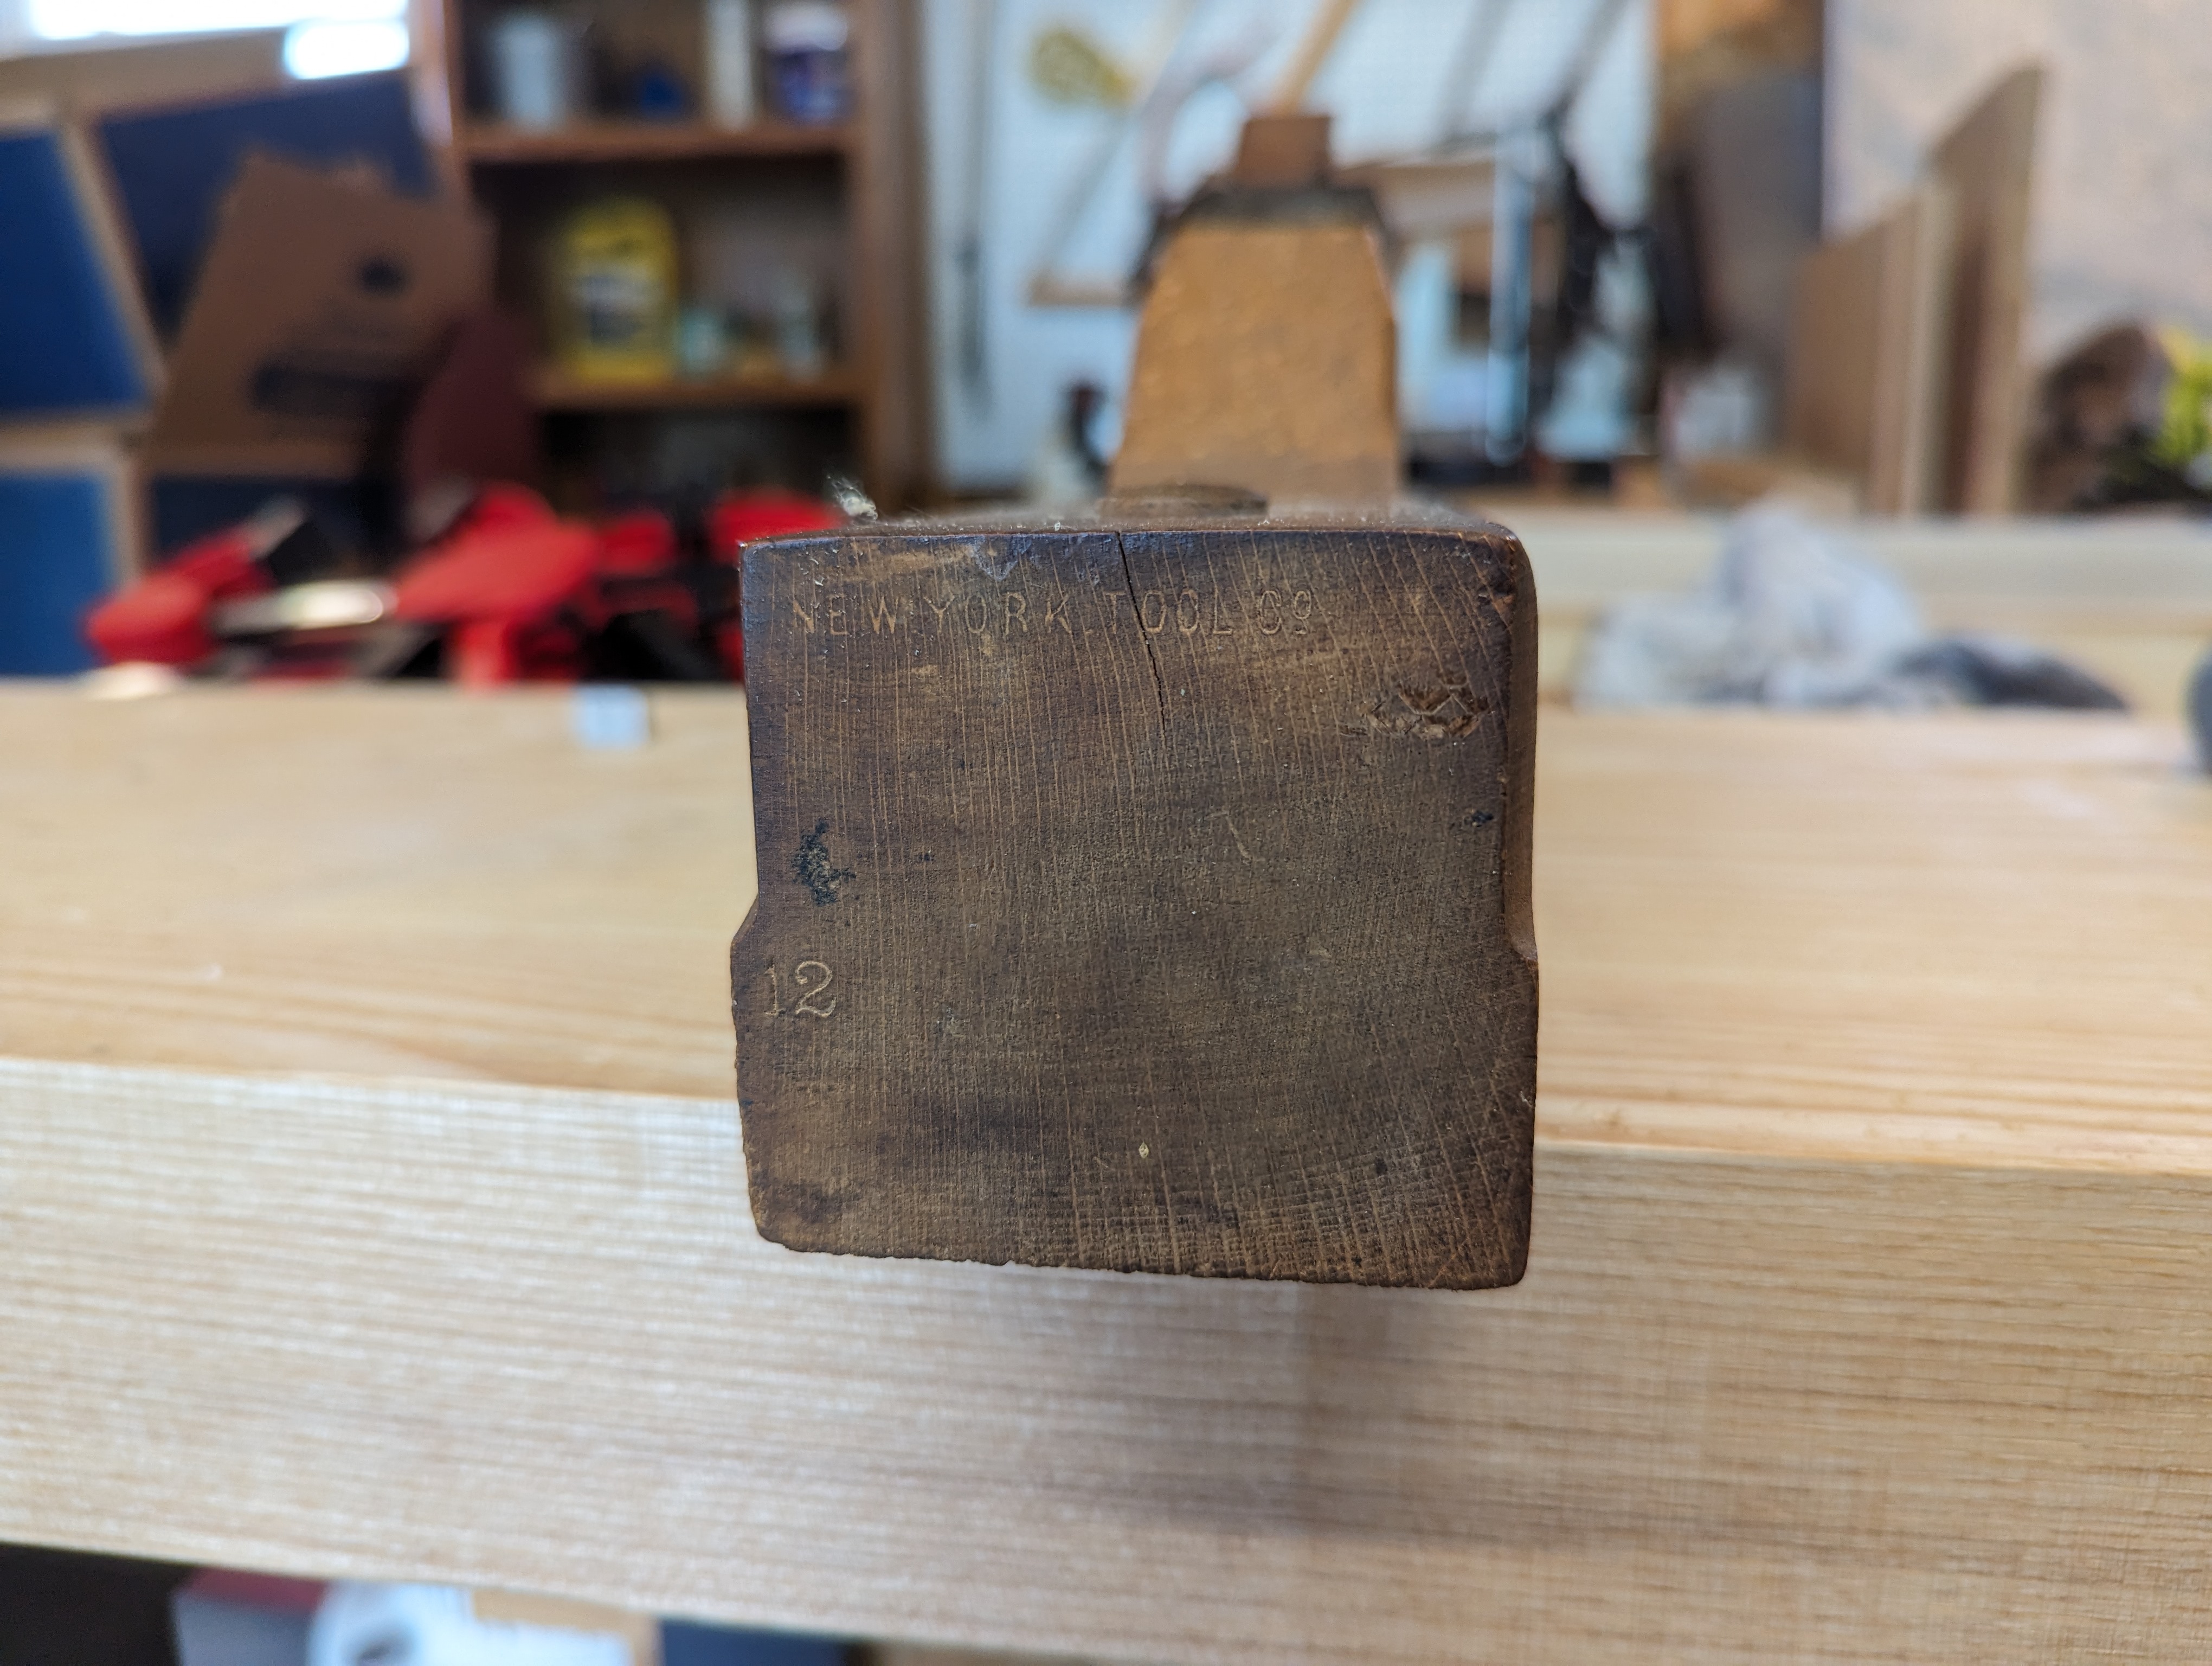
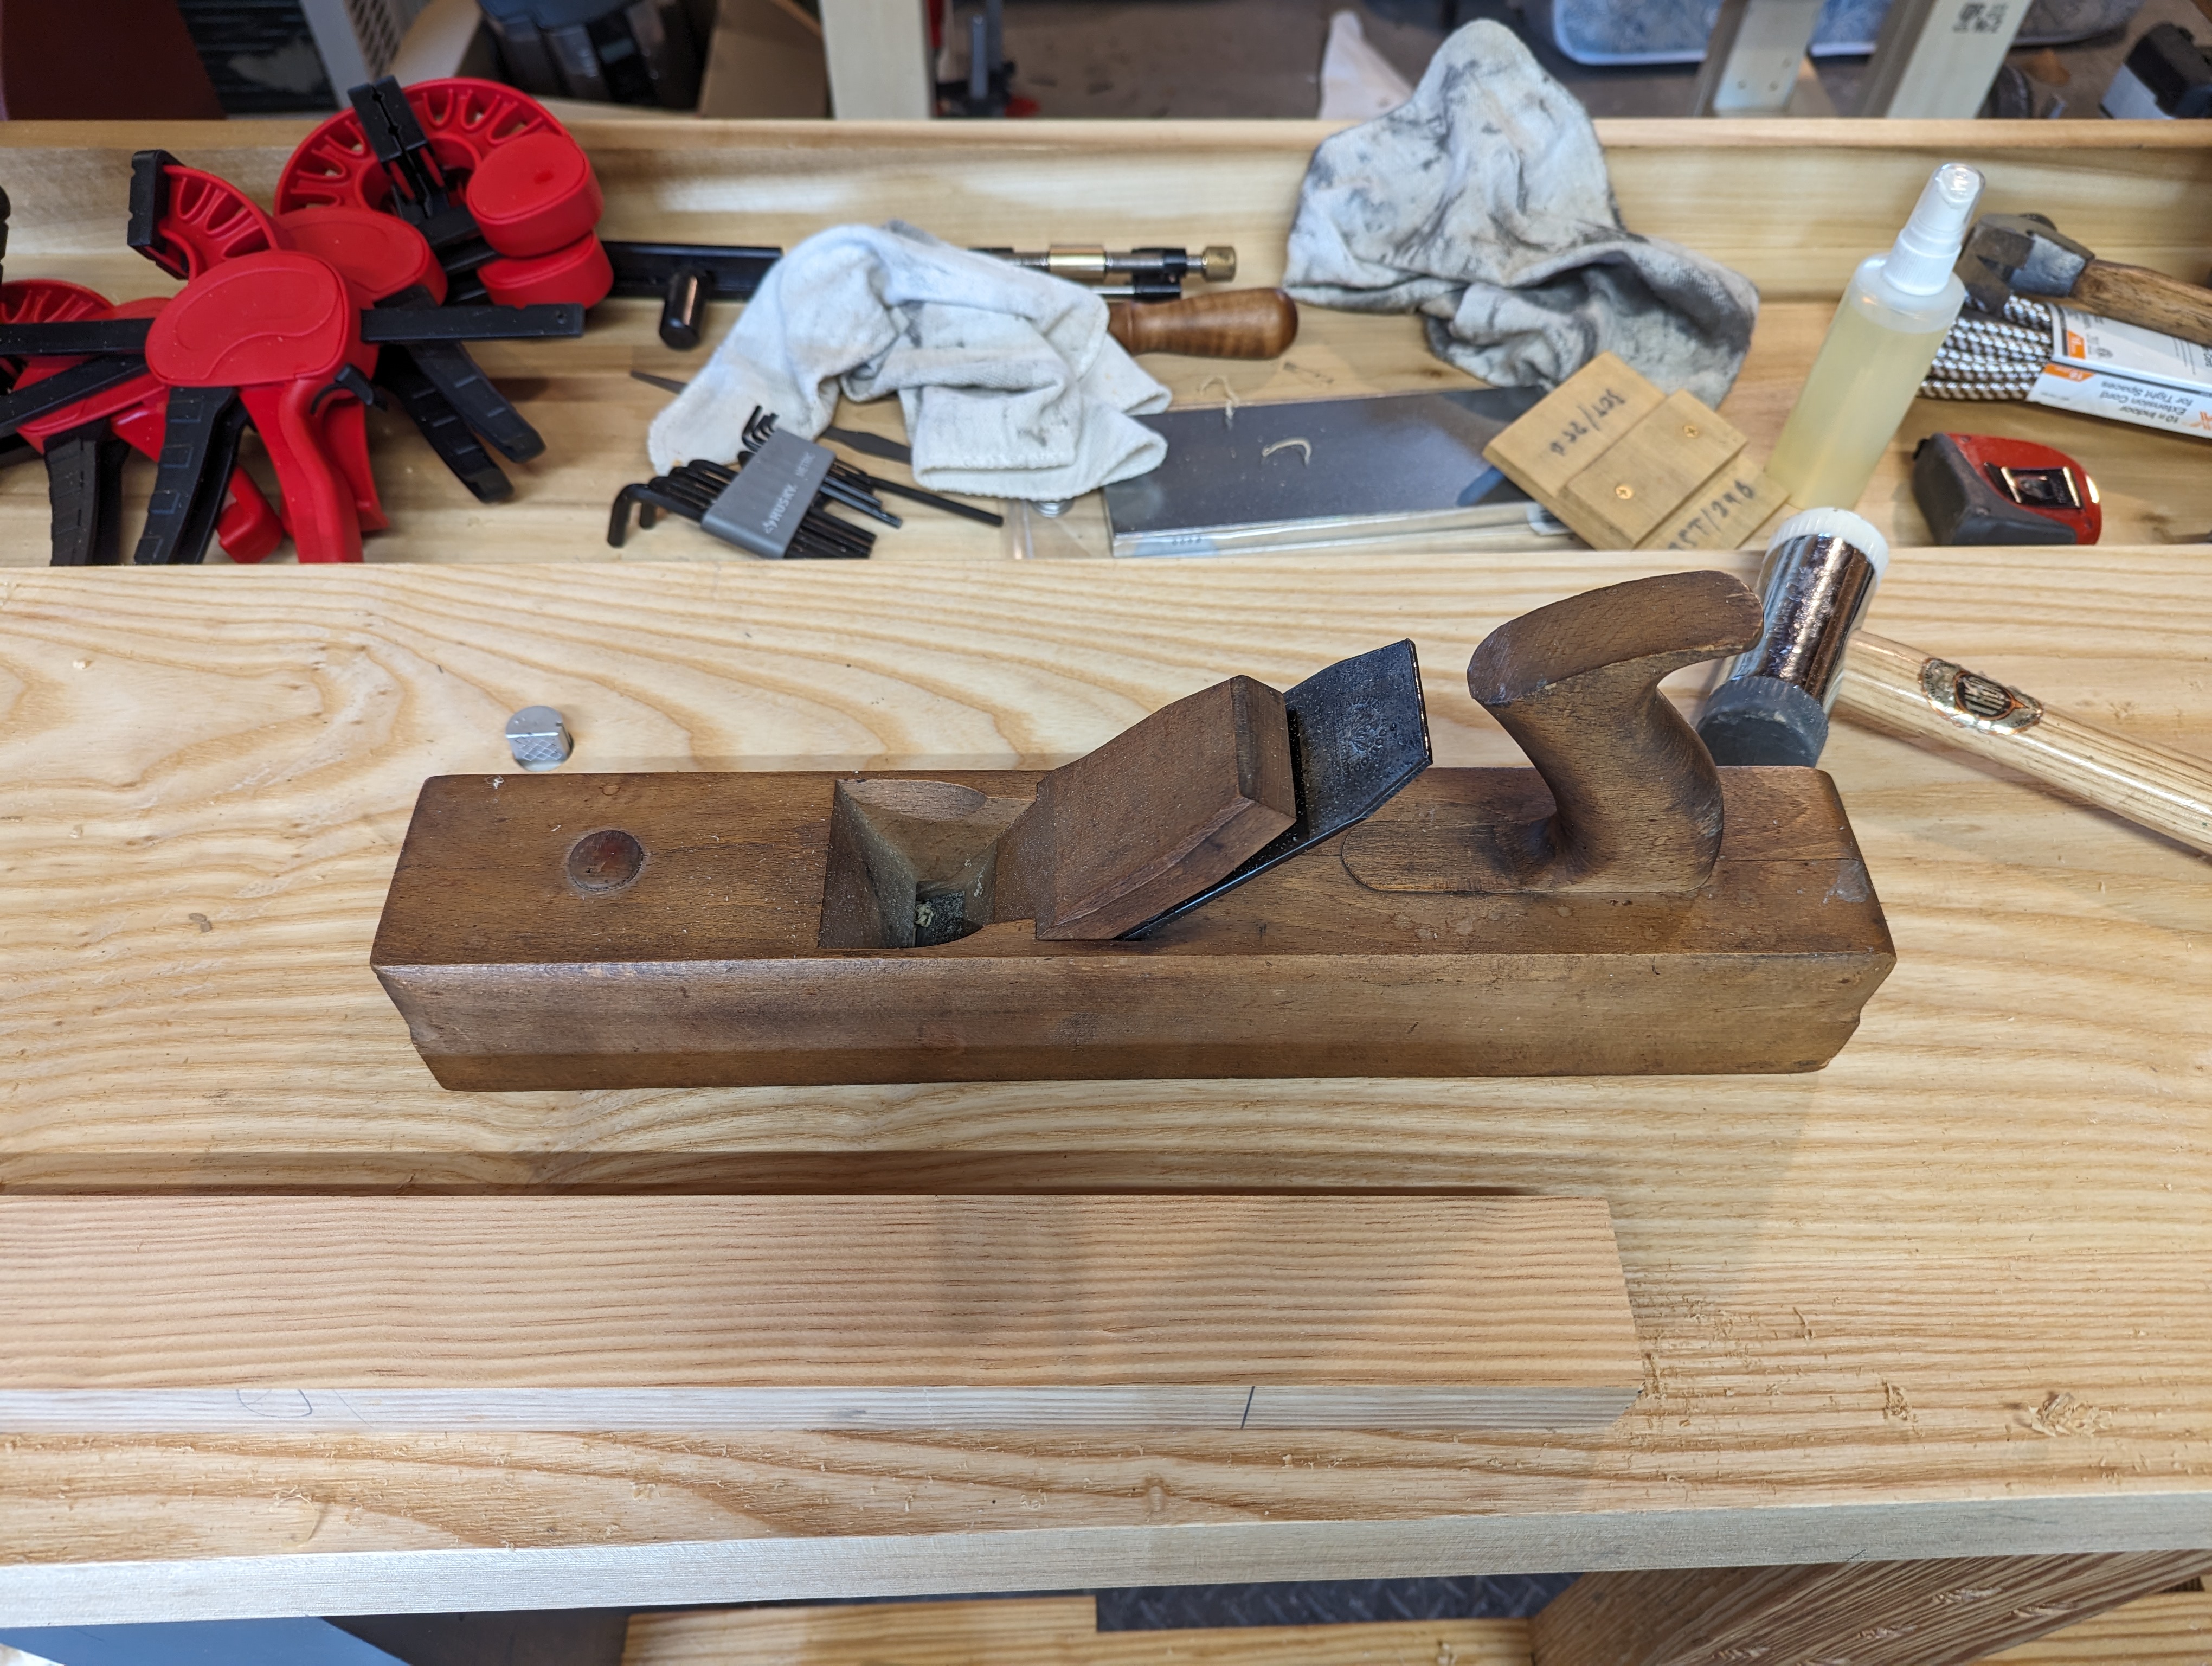
But the best find (in my opinion) was a wooden jack plane in remarkable condition. It’s stamped with “New York Tool Co.” (which my cursory research showed was a brand used by the Auburn Tool Co in the late second half of the 19th century). It’s 16 inches long and seems to be a No. 12. I didn’t even argue with the sticker price at the antique shop (which was $25).
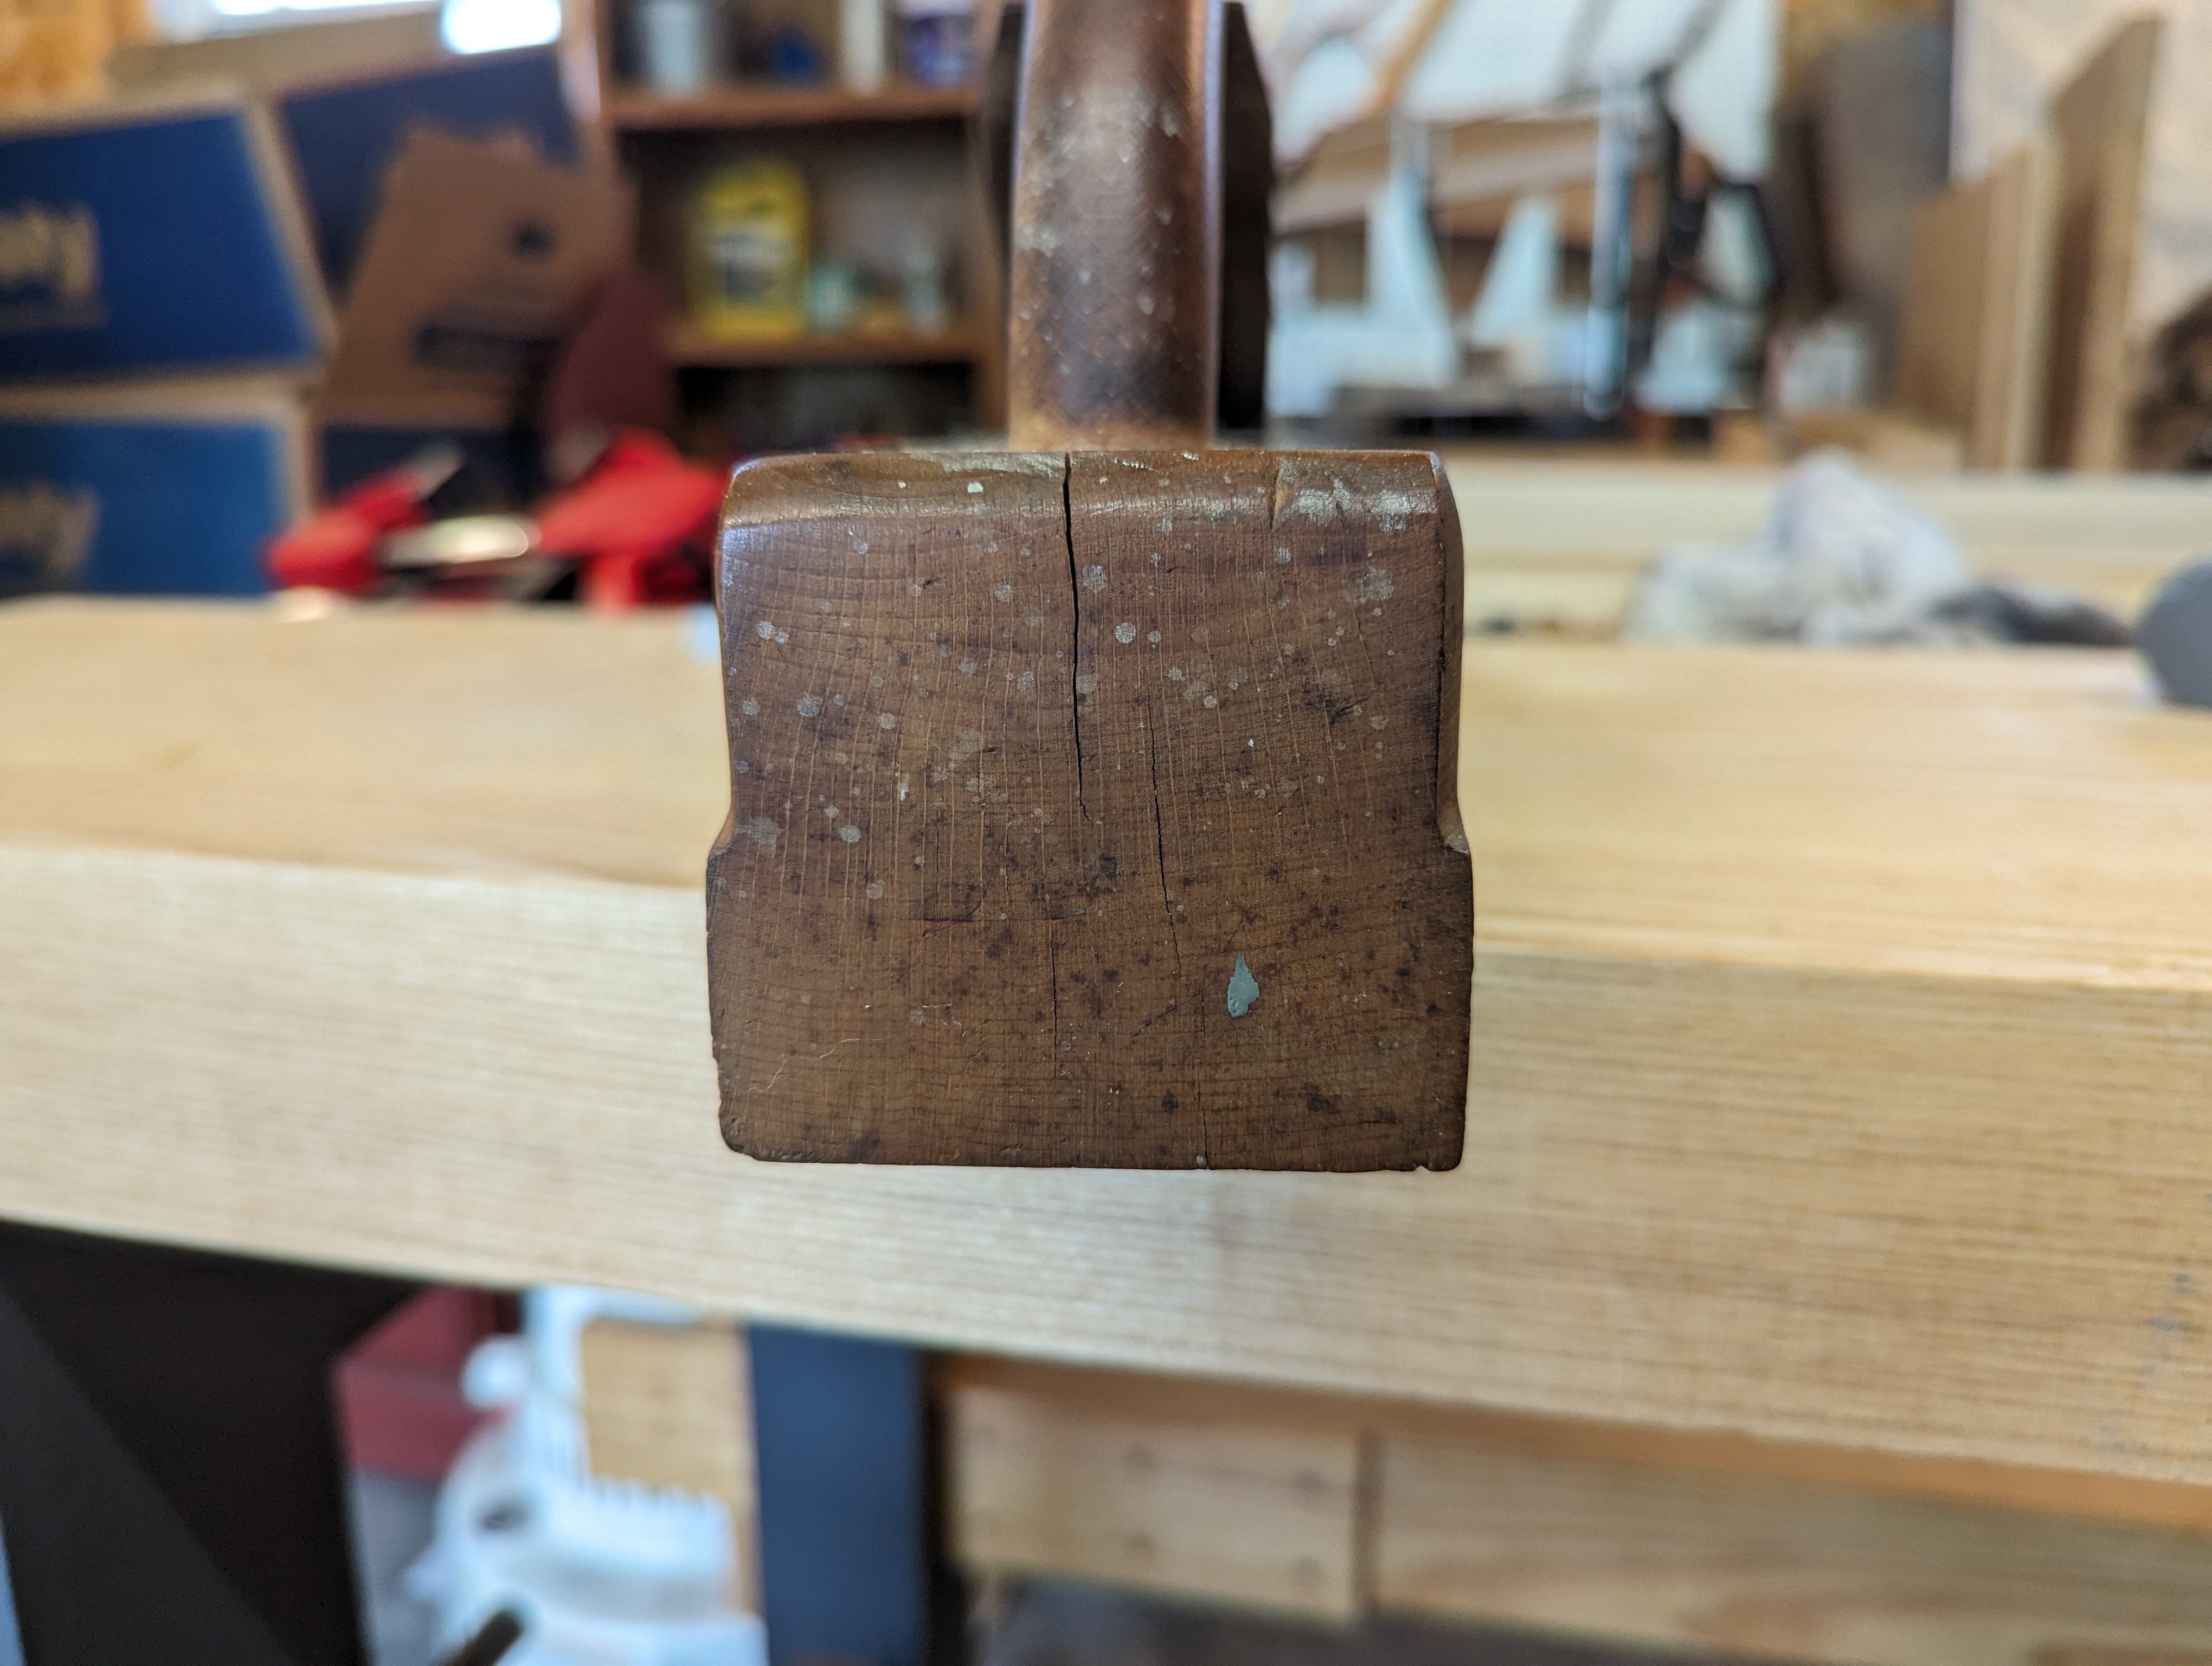
One tiny check on the toe of the plane.
The strike button on the front of the plane is pristine and there is no mushrooming to speak of on the iron (mushrooming happens from consistent use of a metal hammer or mallet to adjust the depth and lateral adjustment of the iron). There are also no mallet dents on the heel of the plane; just a few shallow checks away from the sole.
It’s honestly a bit silly how nice this thing is.
The tote is fully in tact, with just a couple of knicks showing lighter wood below which are probably just from being in a box bumping into other antique store fare (and not from use). The tote itself is a bit wobbly and just need regluing after 130 years. In fact, the only meaningful patina on the entire plane is on the back of the tote (where the palm of the user would be). If I had mineral spirits and denatured alcohol with me on the trip, I probably could have freshened it up to like new.
That could easily just be grime sticking to the exposed end grain and not patina from use.
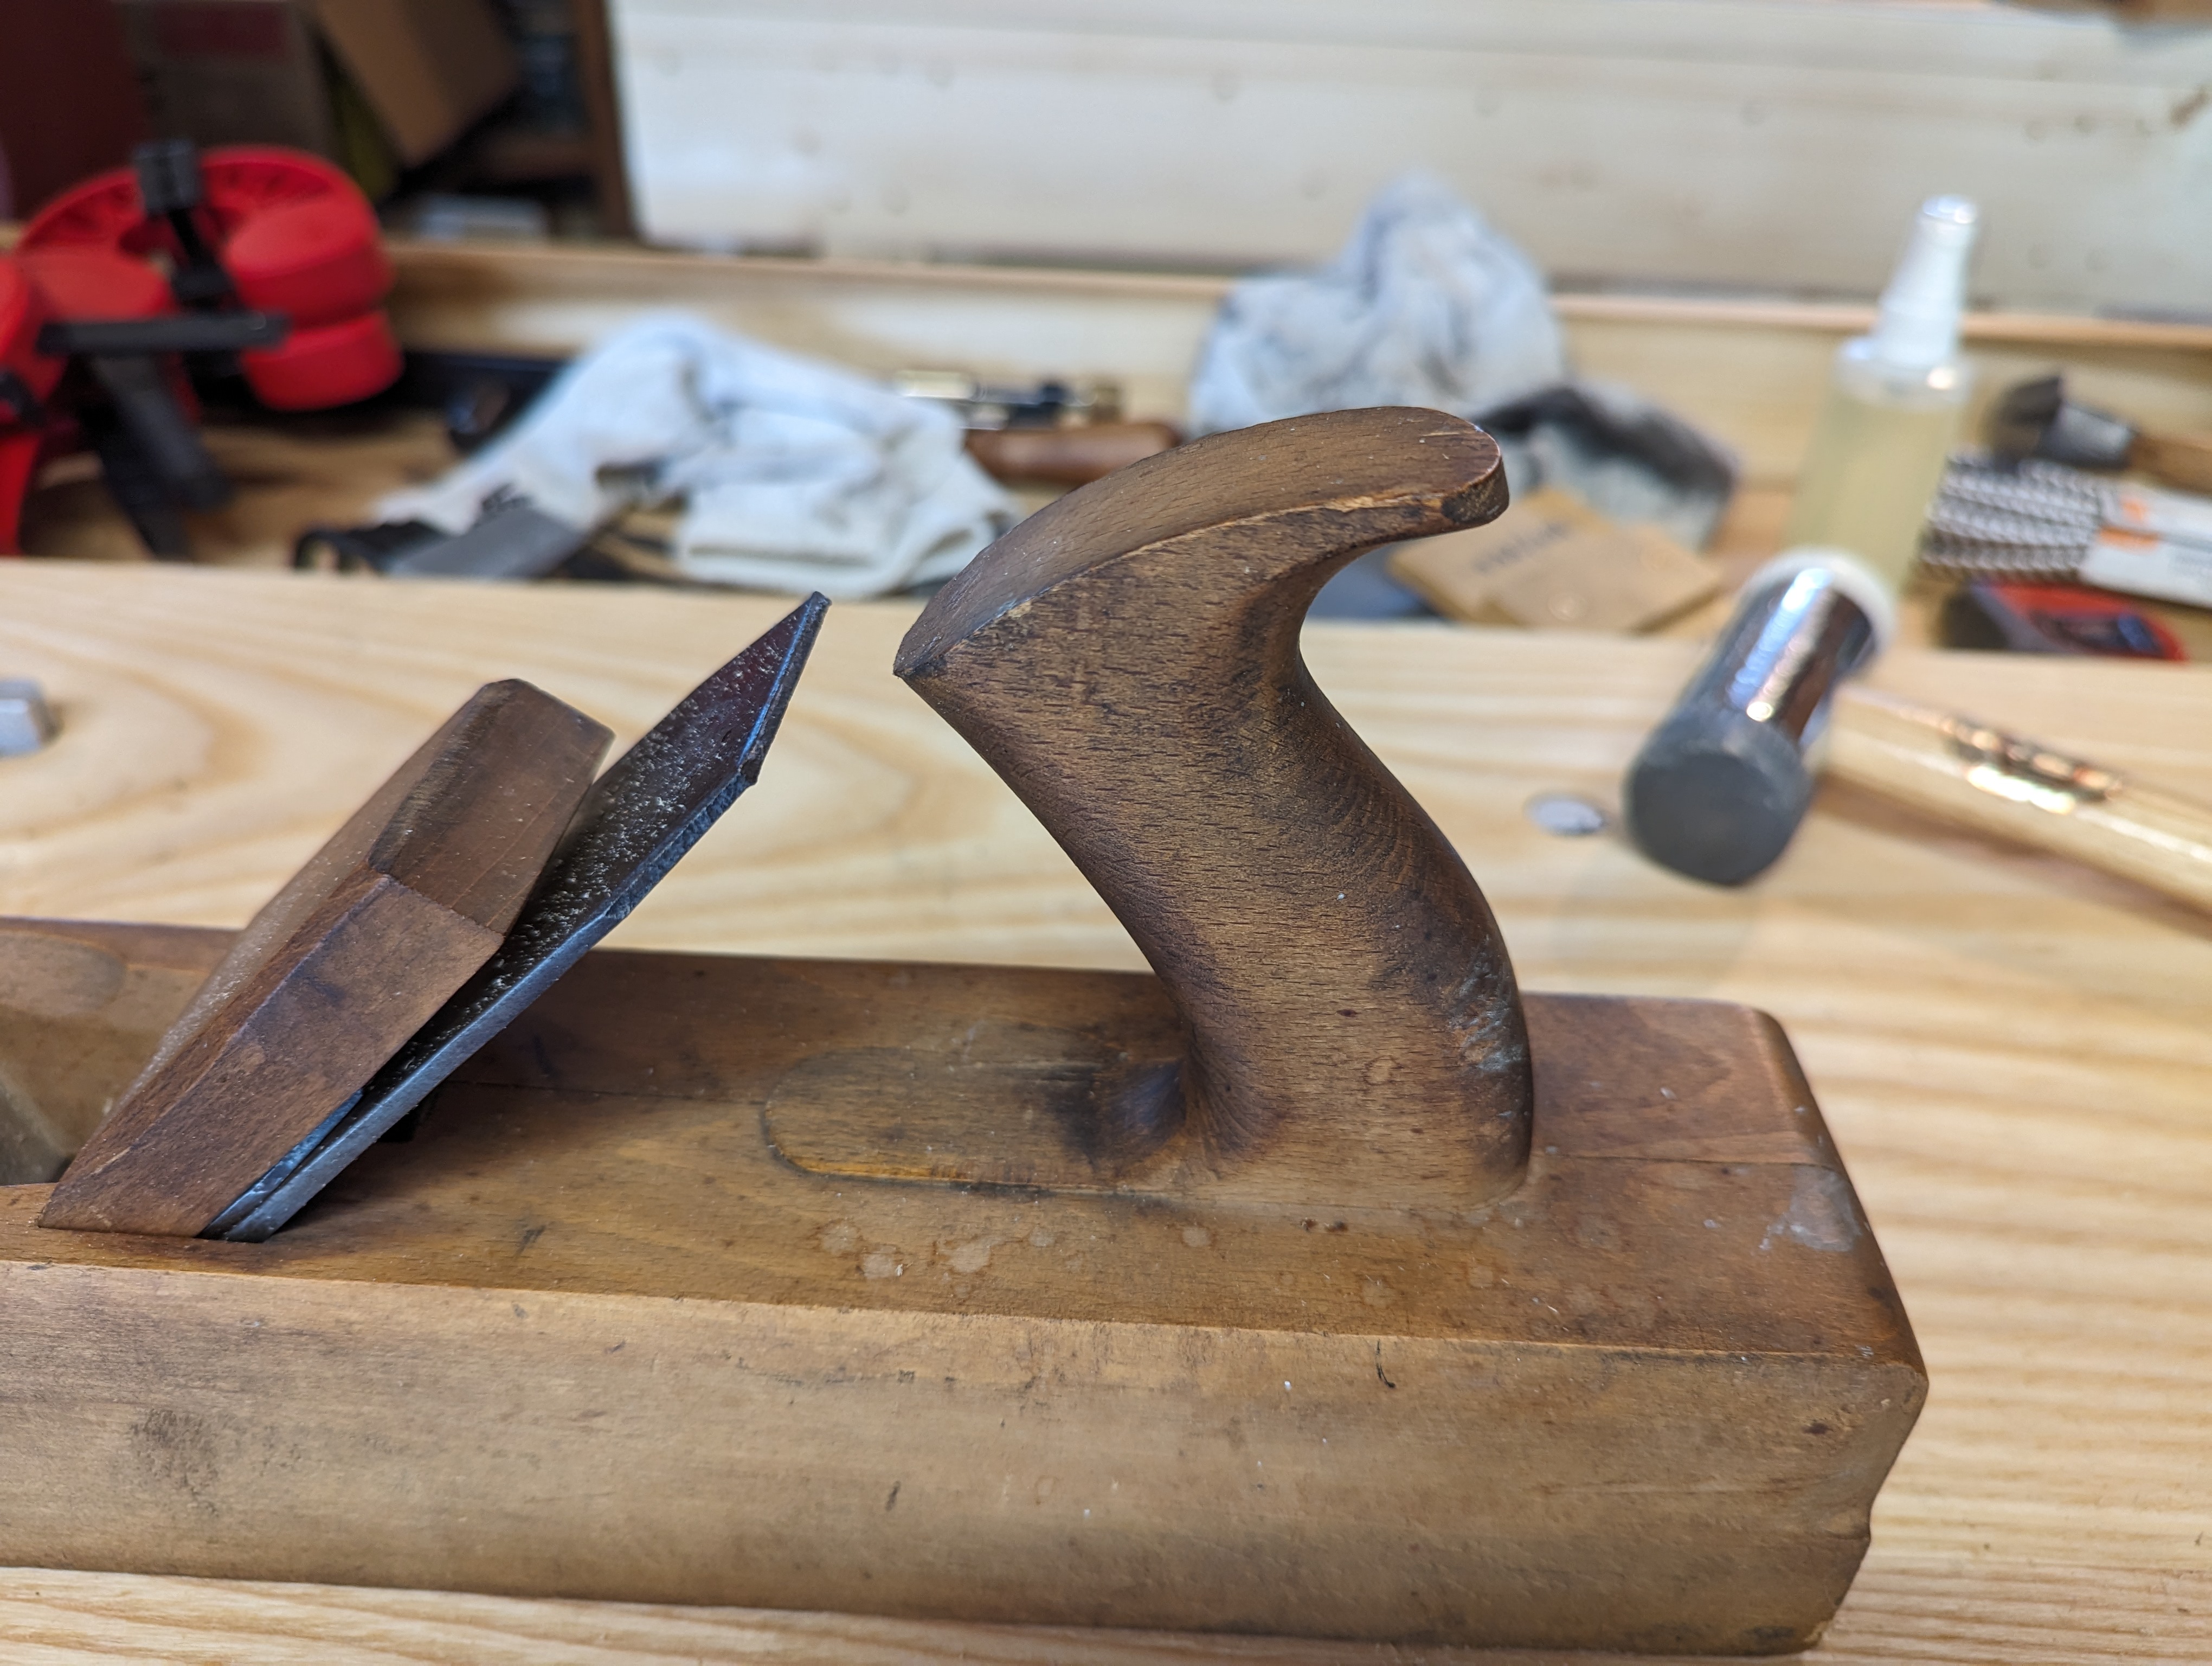
The mouth is still tight. Not tight for a jack plane, mind you; tight for any wooden plane. The front of the mouth is crisp and 90 degrees to the sides of the sole. The back of the mouth (behind the iron) is a little chipped but that seems pretty common on wooden soled planes where the bed comes to such a fragile point. A couple swipes with a fine cut file will clean it right up. I’m not even sure the sole has ever been flattened, but it didn’t take much to true it with a fore plane. And there are no splits on the cheeks around the wedge.
Seriously. Look at that crisp mouth on a 130 year old wooden jack plane.
The iron looks pretty much fresh to me; I don’t think it’s ever been reground. There were no shavings caught between the iron and the chip breaker when I pulled the two apart; just a little flaky orange rust. Other than being sharpened a bit out of square, and some camming on the cap iron screw, you’d be hard pressed to prove this thing ever actually saw any real use. There aren’t even any of the usual paint splatters or other stains from being near a workbench.
Those Victorian era prisoners sure knew how to make ’em!
All in all, I have a hard time believing that someone made even a part time living with this tool. It’s just too pristine. It’s possible there was a hobbyist in the late 19th century, perhaps an attorney or accountant, who took pride in the upkeep of his tools, even though he rarely put them to heavy use. But that seems a bit too romantic and hits a bit too close to home.
In any event, it will have a good home with me. Even with occasional use (I’m not giving up my metal planes any time soon), this beauty will probably see more action with me that it did in its youth.