A great joy of life is reclaiming wood. Both economically- and environmentally-efficient (most of the time), recycling my or someone else’s prior project into something equally (or more) beautiful and functional is about the only resurrection I still believe in.
A while back, a coworker gifted to me a solid cherry table that had been neglected. Across a 3 foot width, the table top had cupped almost a full inch. There was no flattening this through ordinary means. It had to be ripped down and re-laminated if it could be saved. But that seemed like a lot of work and I already have a dining room table. So, instead, I took careful stock of how board feet there were and set to work re-purposing the table.

The first of many glue-ups.
I’ve been fascinated by the Nicholson Workbench form for a long time, but never actually built one. And in need of a grinding station for my new bench grinder, I set out to turn that cherry monstrosity into a light duty workbench. It would be 48″ long, 13″ deep and about 36″ high. Small enough to move around but big enough to stay put when pushed up against a wall.

Light duty because of the depth of dadoes in order to make the aprons flush to the legs.
I drew on a number of influences, including Paul Sellers’ ubiquitous workbench and Mike Siemsen’s Naked Woodworker bench. And then pretty much winged it. And as the piece took shape, it became clear that this was not destined to be shop furniture. The wood is too beautiful and the effort too great. This one would live in the civilized world.

I’ll scrape away the little bit of french polish left in spots where flatness is not critical.
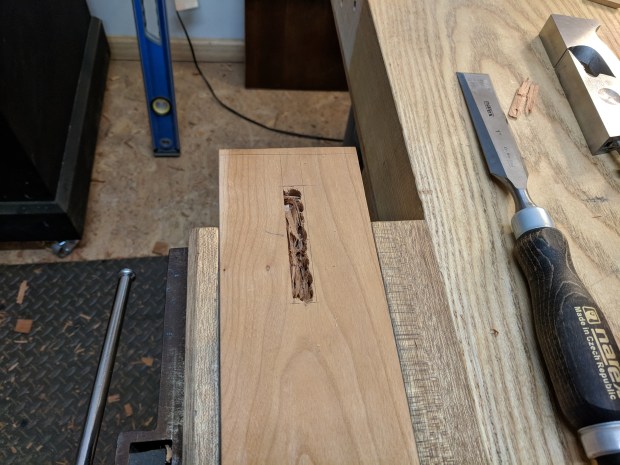
It’s no secret that I don’t chop a ton of mortises. Most of my woodworking involves dovetails and dadoes. So when I need to cut eight blind mortises for the leg assembles, I fall back on the most boring method of all.
See what I did there?
I find that when chopping mortises by drill bit and paring chisel, the most important thing is to cut the mortise first. And it begins at establishing a reference wall (see the check mark above) that is consistent across the piece. If all of the reference walls correspond to the outside face of the assembly, and the corresponding tenon cheek on each rail is perfectly in line, then it doesn’t really matter what the opposite wall and opposite tenon cheek are. They can be adjusted to fit the individual mortise (which I do with a router plane on smaller work).
The end result is a consistent reveal on the show side of the assembly (and, by extension, an assembly that has no twist or wind).
And a base that is square and true will be the first step toward a table that is square and true.
JPG

Nice work. Kudos!
LikeLiked by 1 person
I am also an apartment woodworker, one of my most significant problems is the noise the power tools make. I already got a neighbor complaining. I try to organize my work, so all cuts are made at the end of the morning or period of an afternoon, but this makes my productivity to be small. Thanks for making this blog.
LikeLiked by 1 person
Glad you’re finding it helpful. That’s why I made the switch to hand tools!
LikeLike