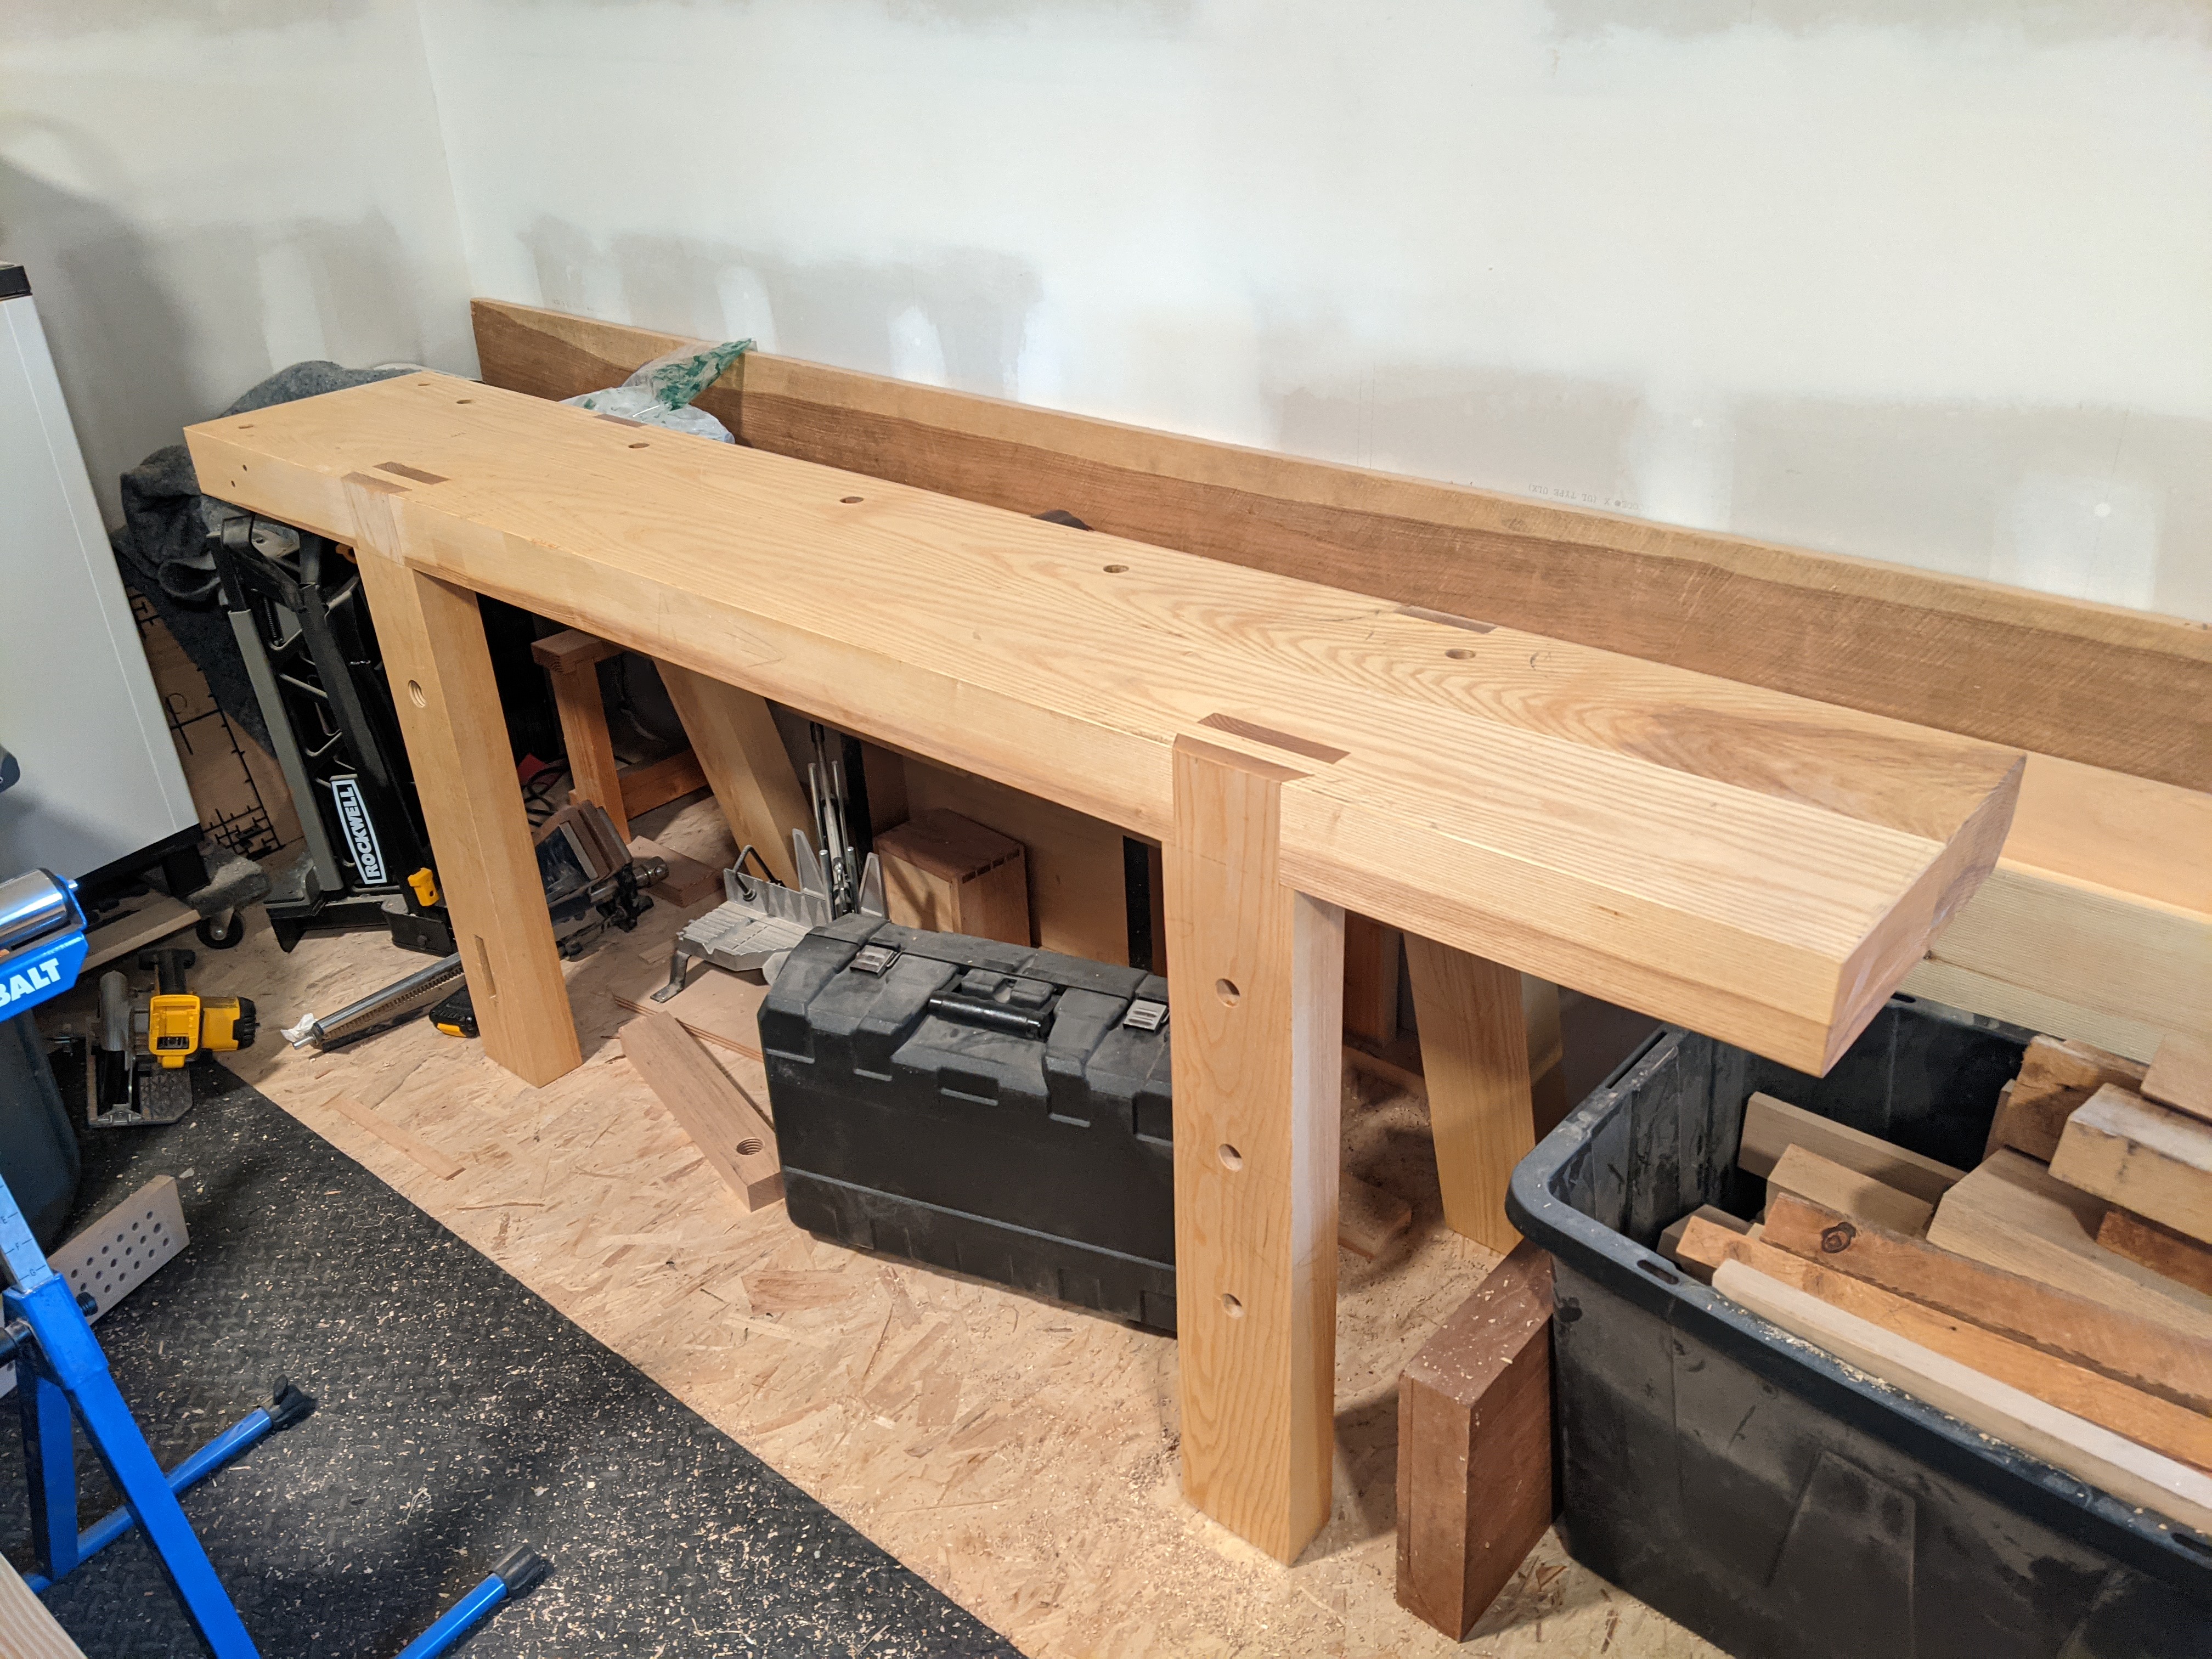
If you follow the blog at all (or my new BlueSky handle: @aptwoodworker.bsky.social), you know I build a fair amount of workbenches. In fairness, it’s been a while since I’ve built one for myself. But I have some exciting news: I am making one more workbench, before hanging up my cleats forever.
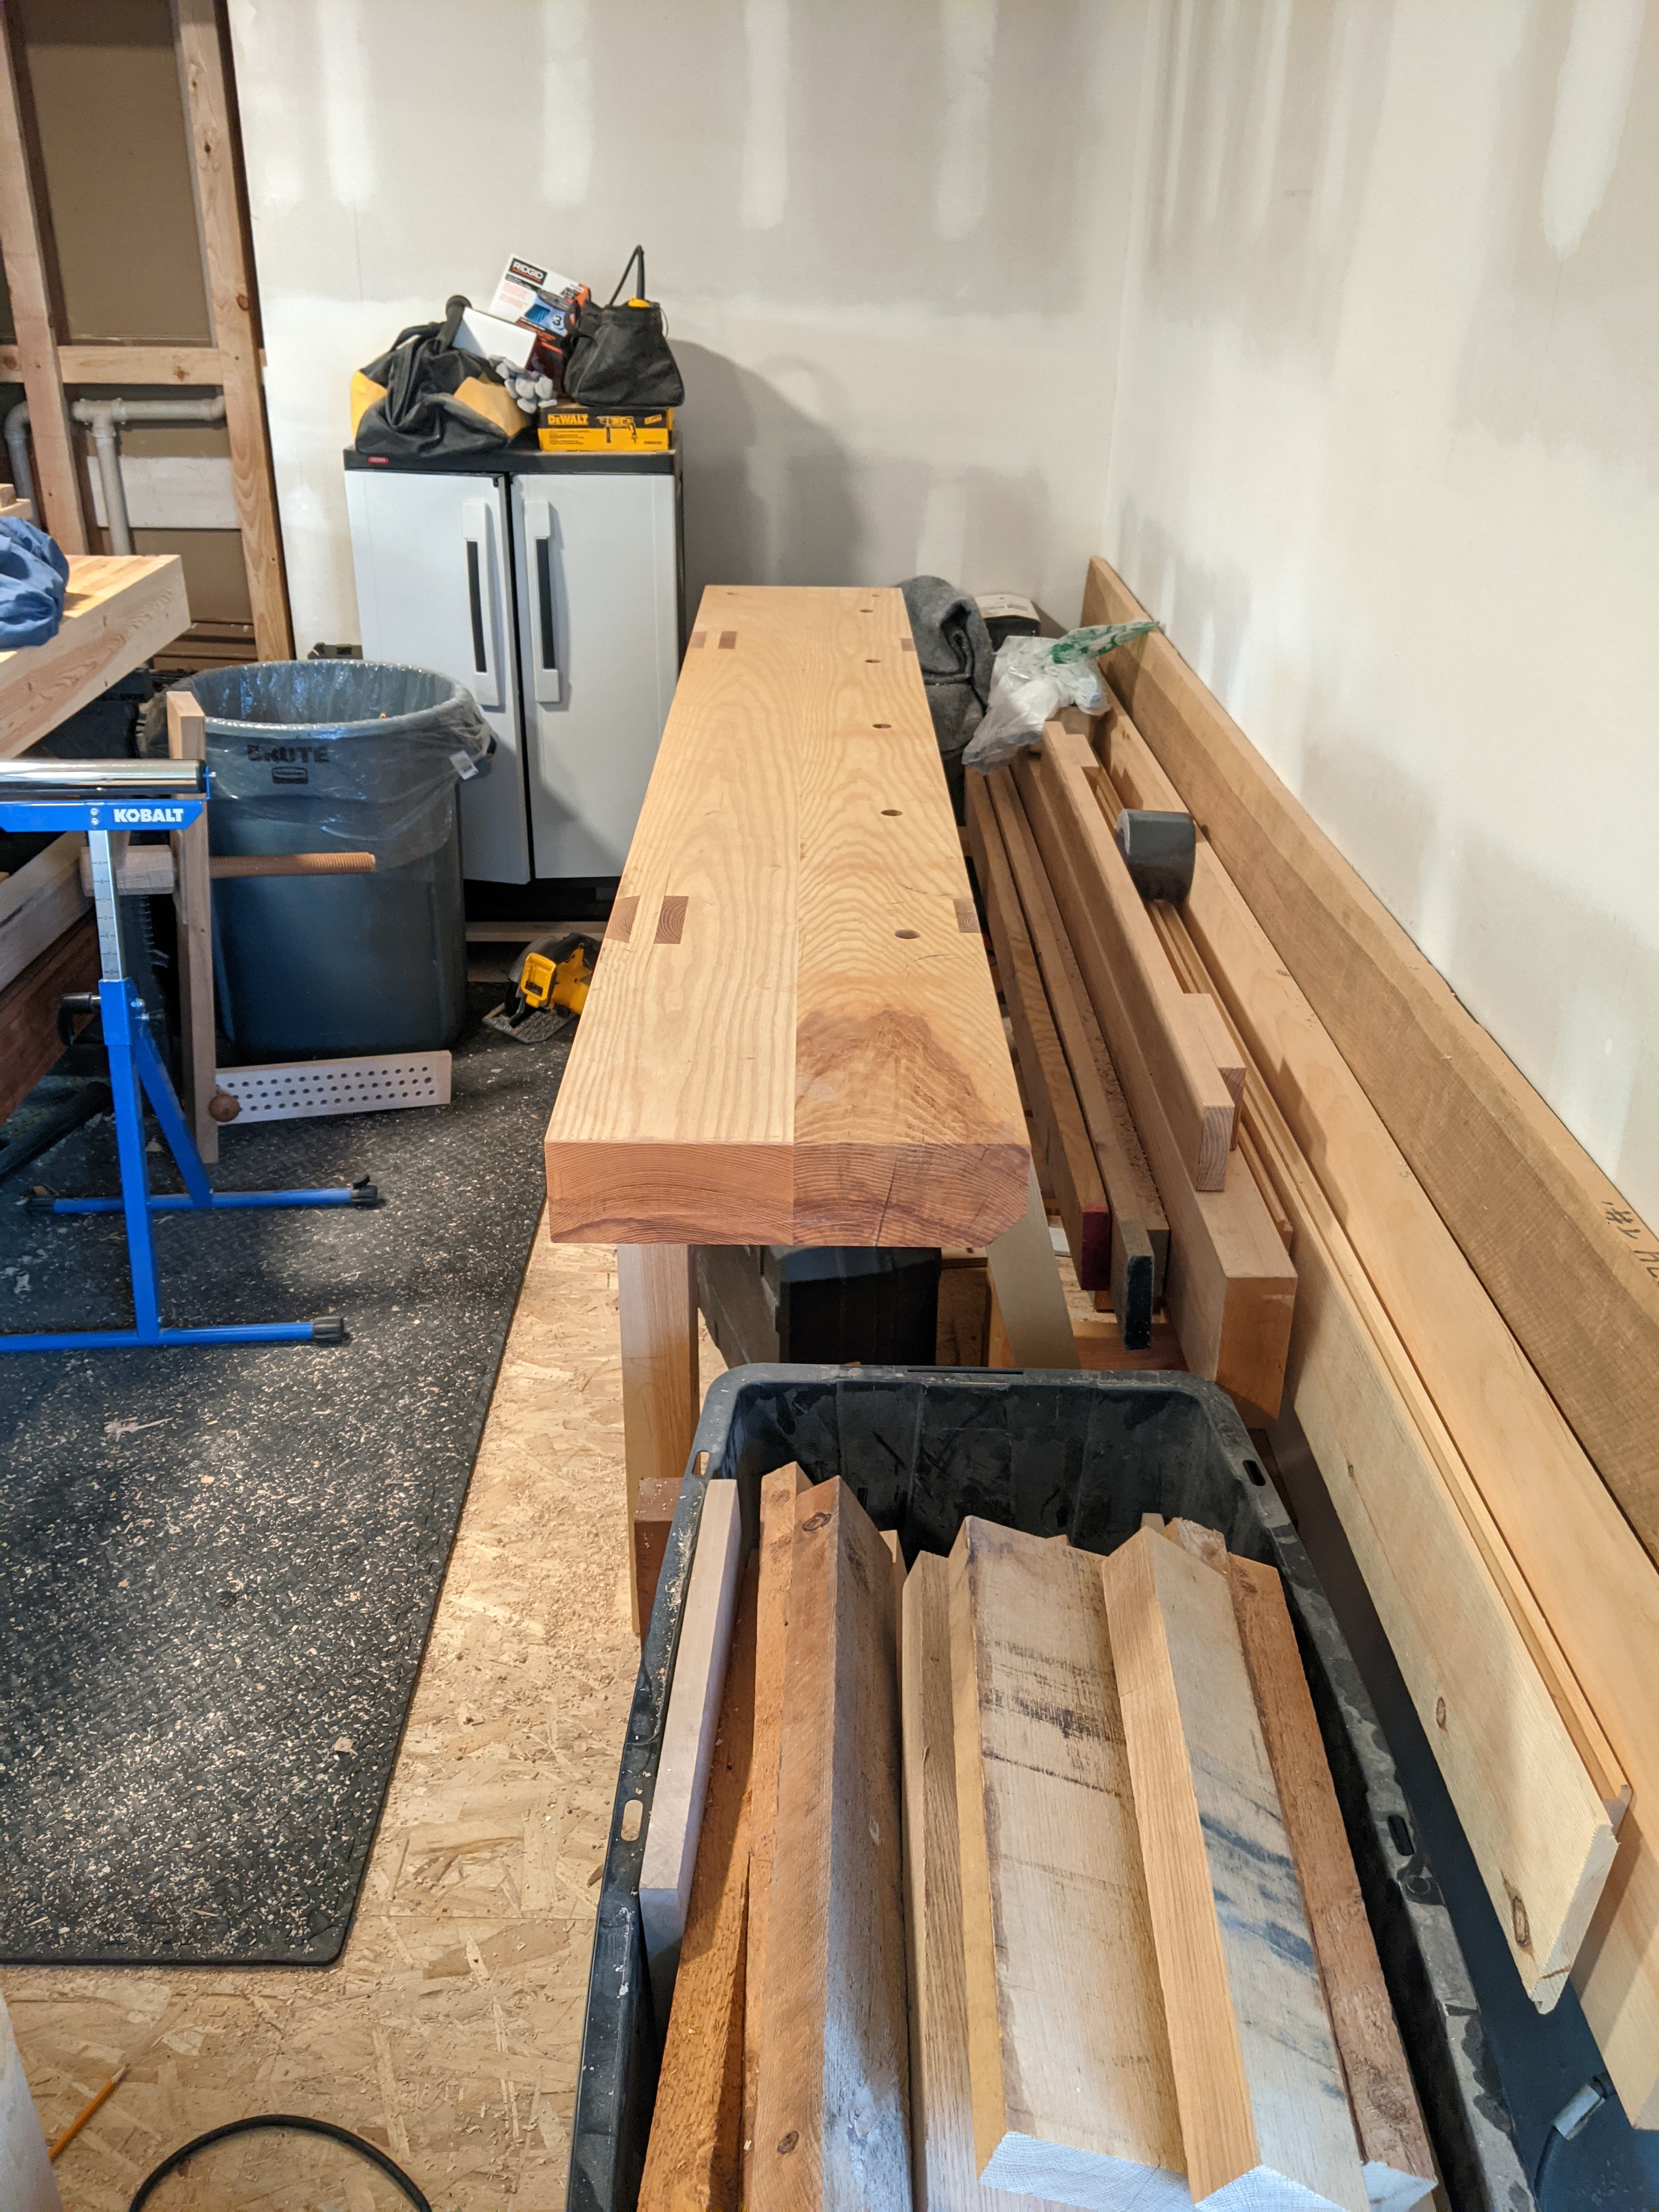
This new bench is a mishmash of poplar, ash, walnut and southern yellow pine. And the centerpiece is a slab of old growth Slash Pine that I bought from a reclamation yard for the main part of the workbench top.
Look at all them growth rings!
This is by no means a “dream workbench”. I don’t really have dreams (literally: it’s just not a thing I do very much). And I certainly don’t go in for the sappy sentiment. But I have poured all of my knowledge and skill into this thing, and I’m pretty happy with it.
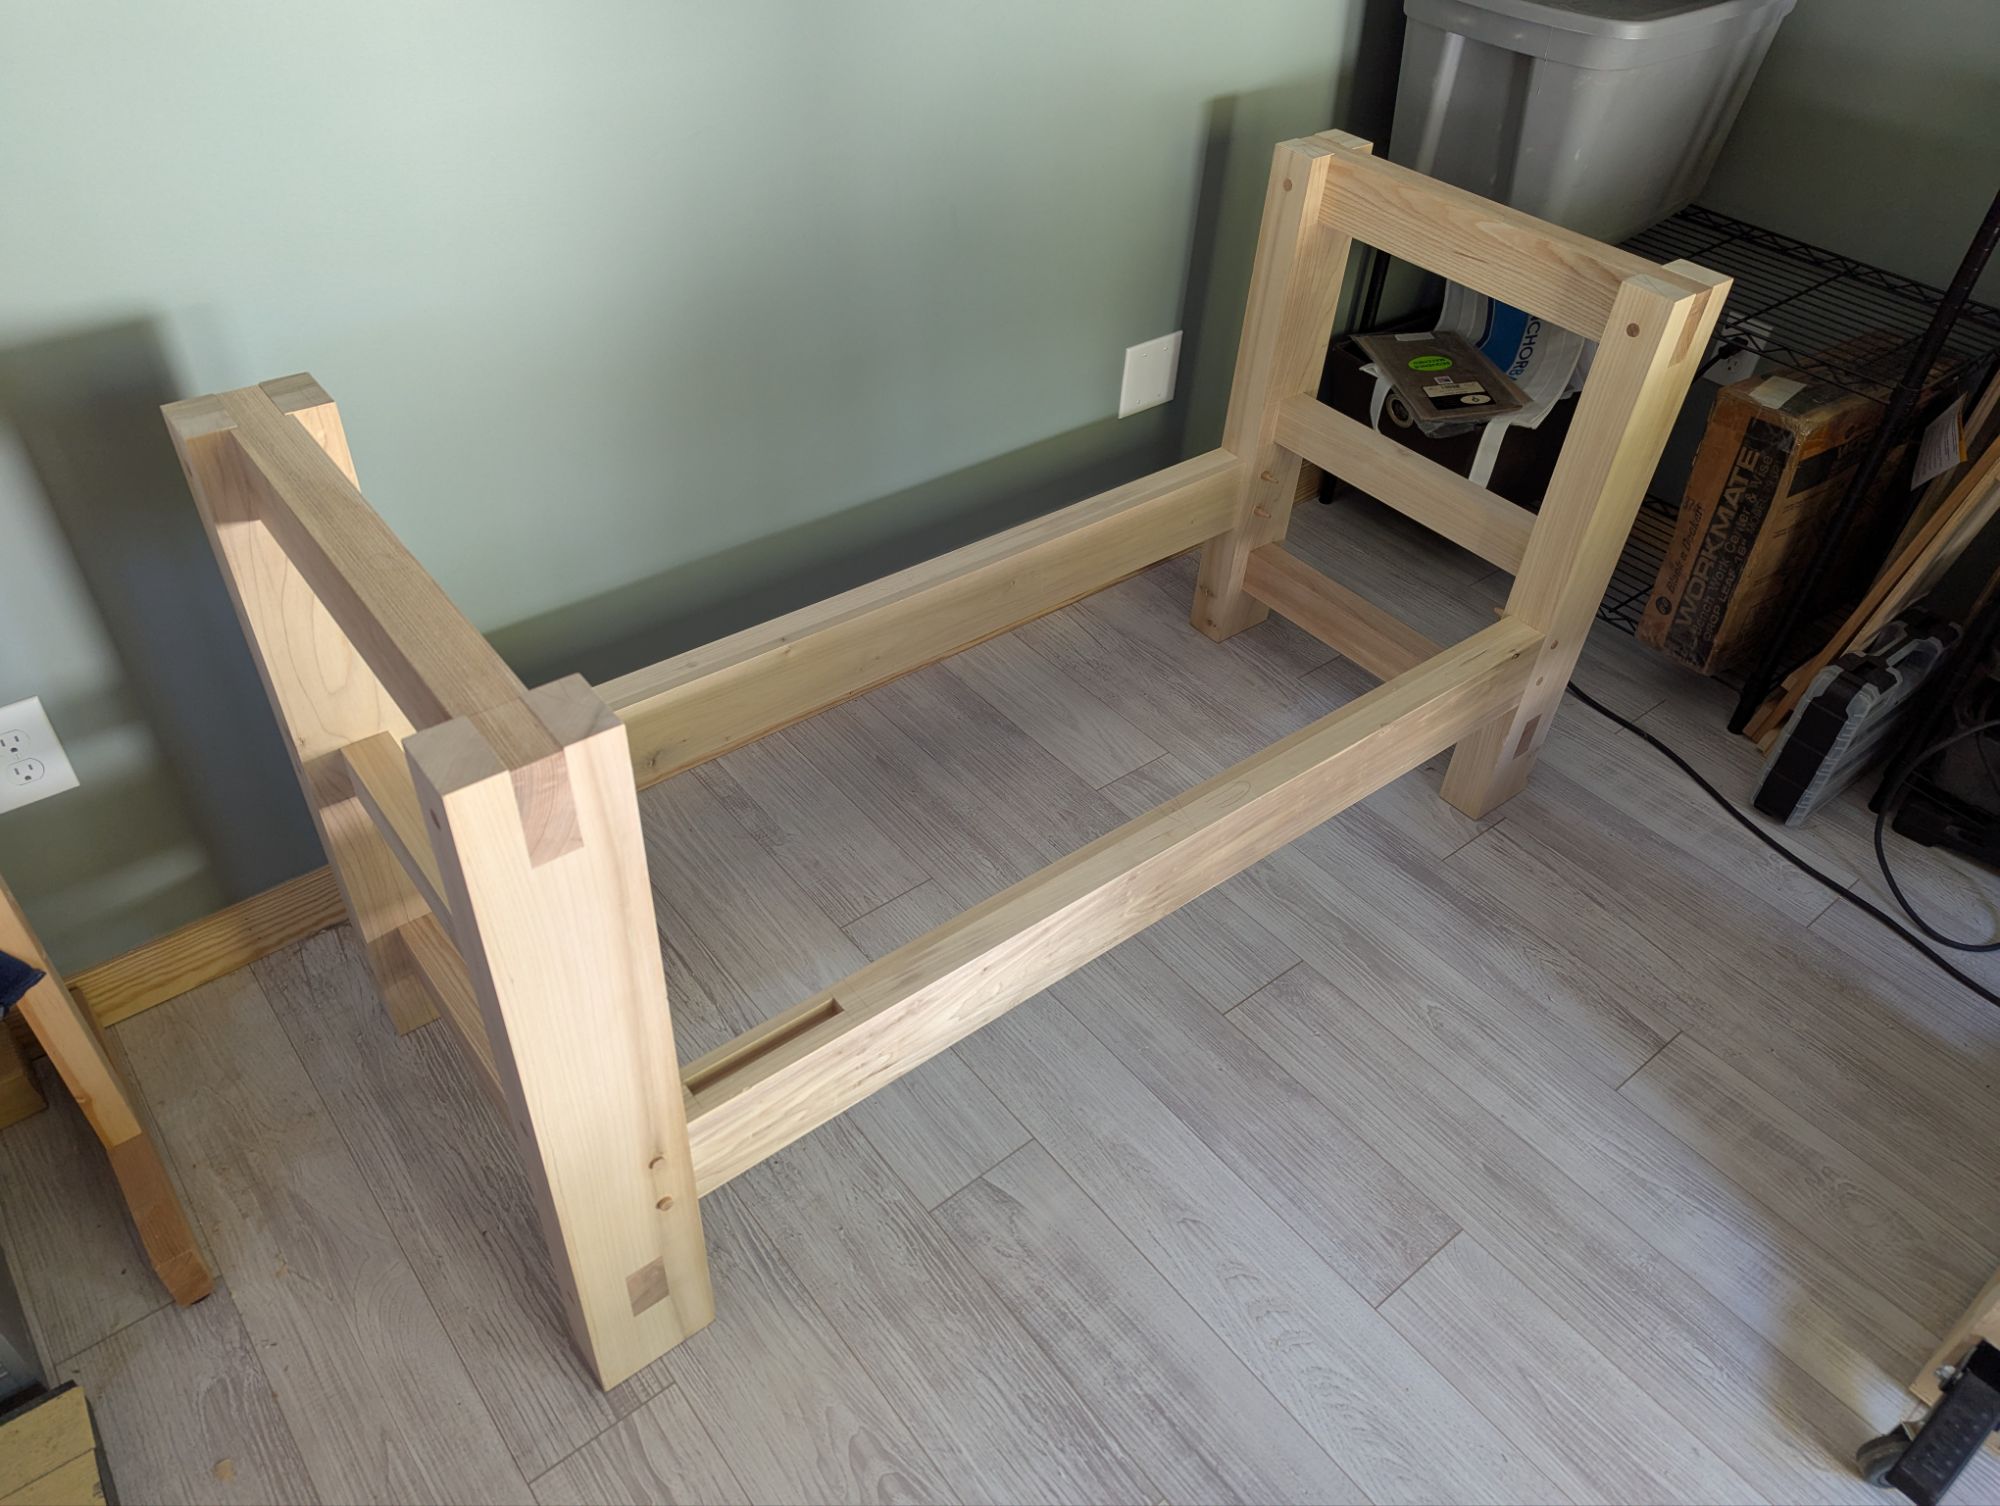
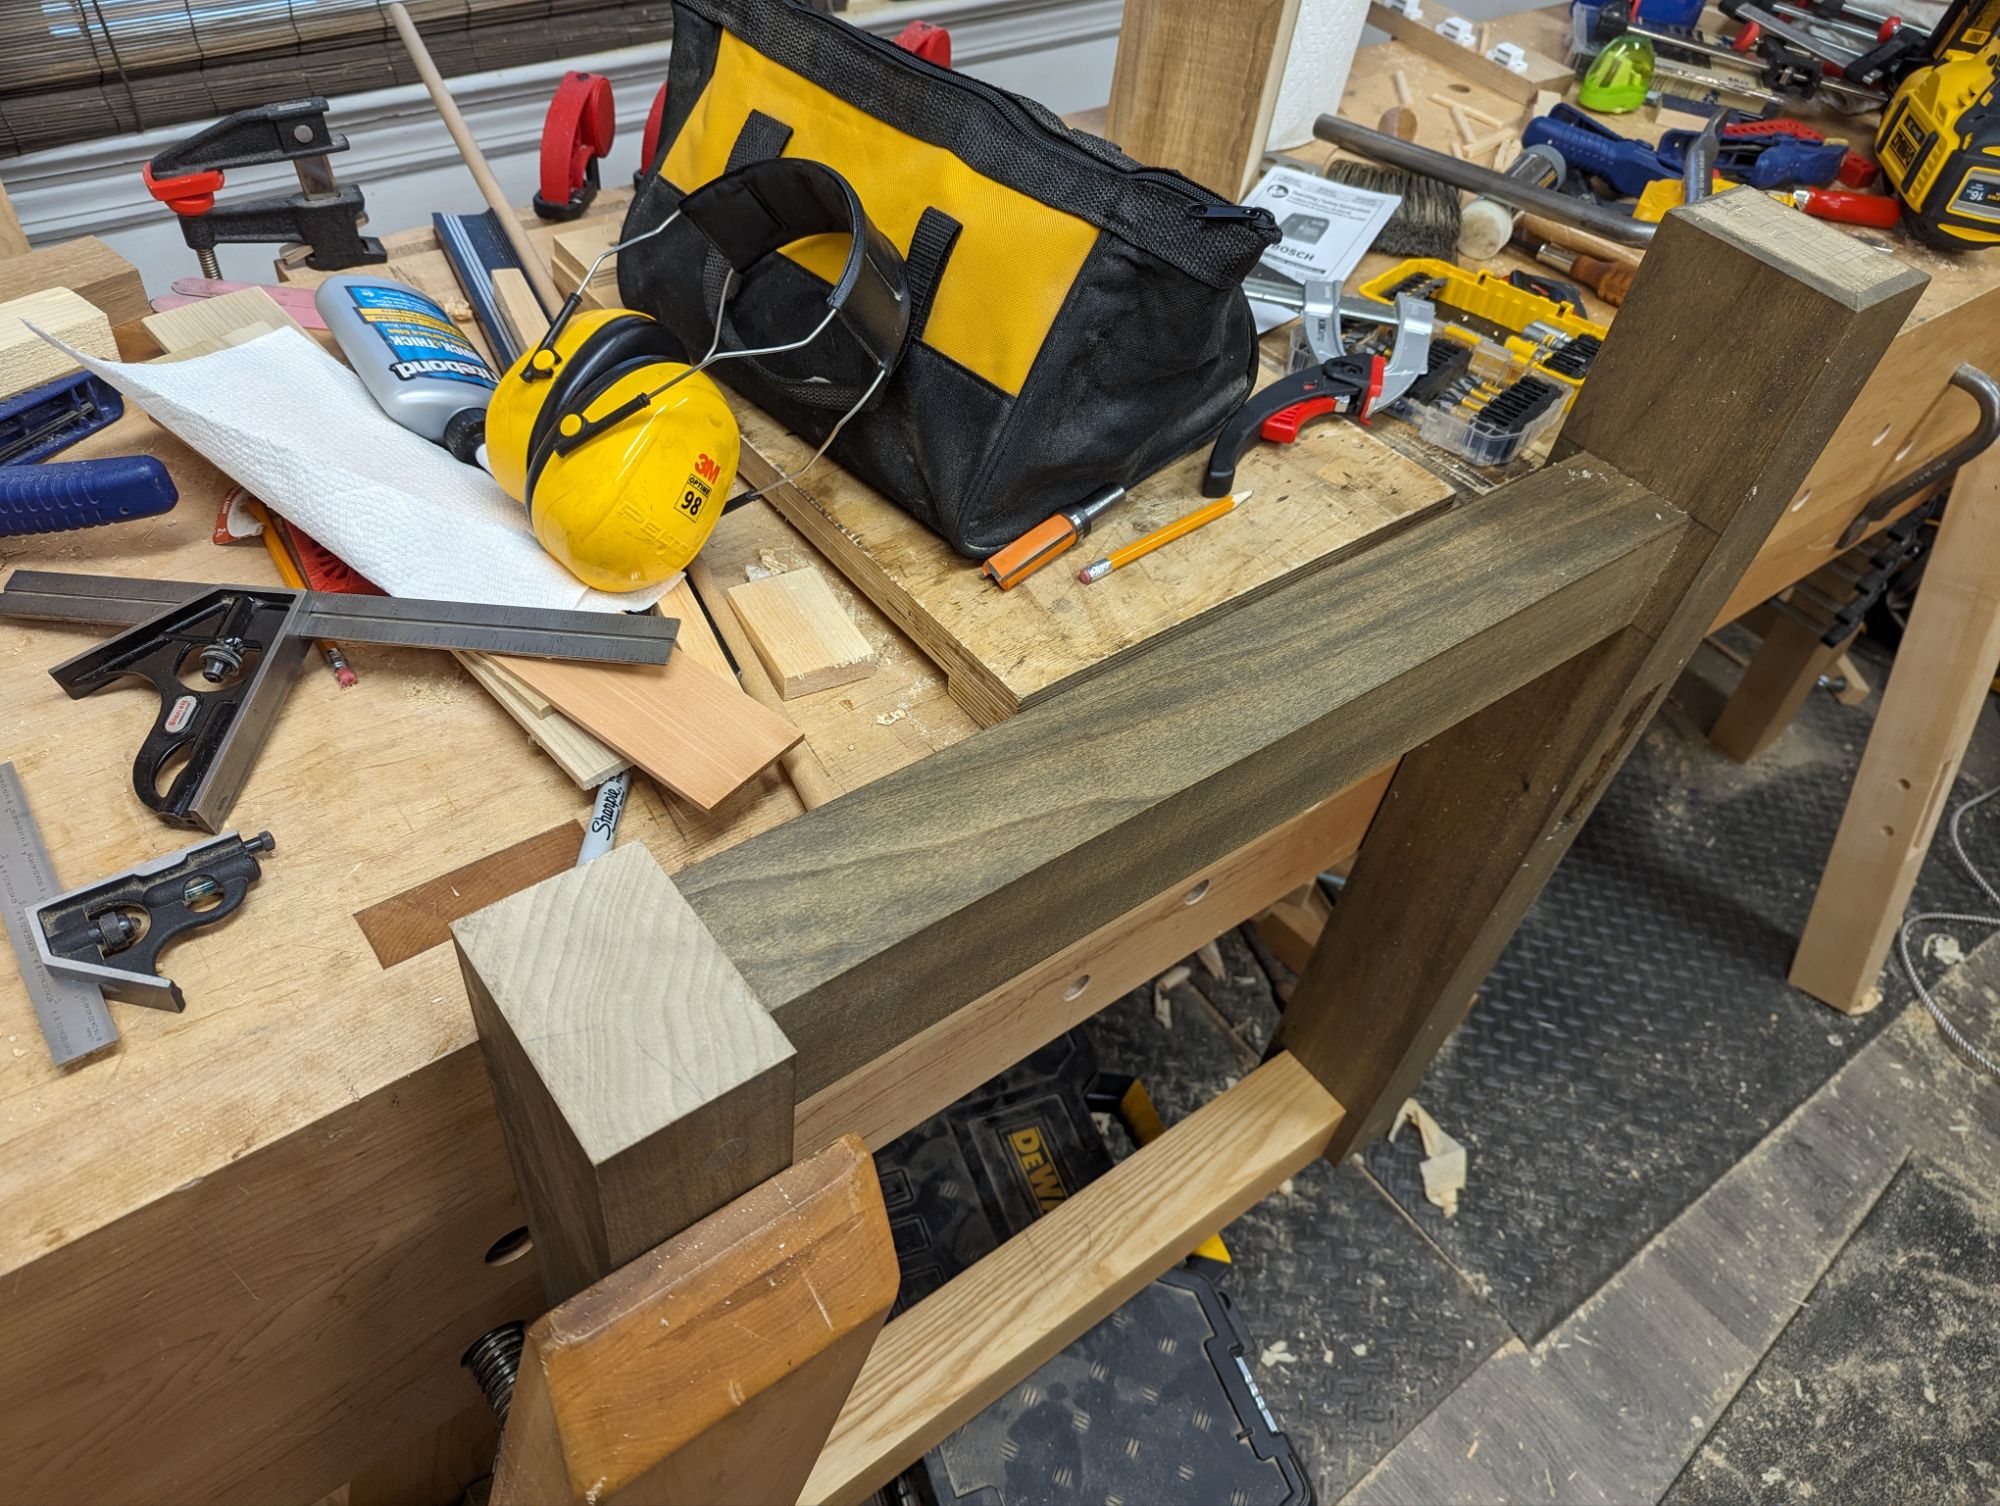
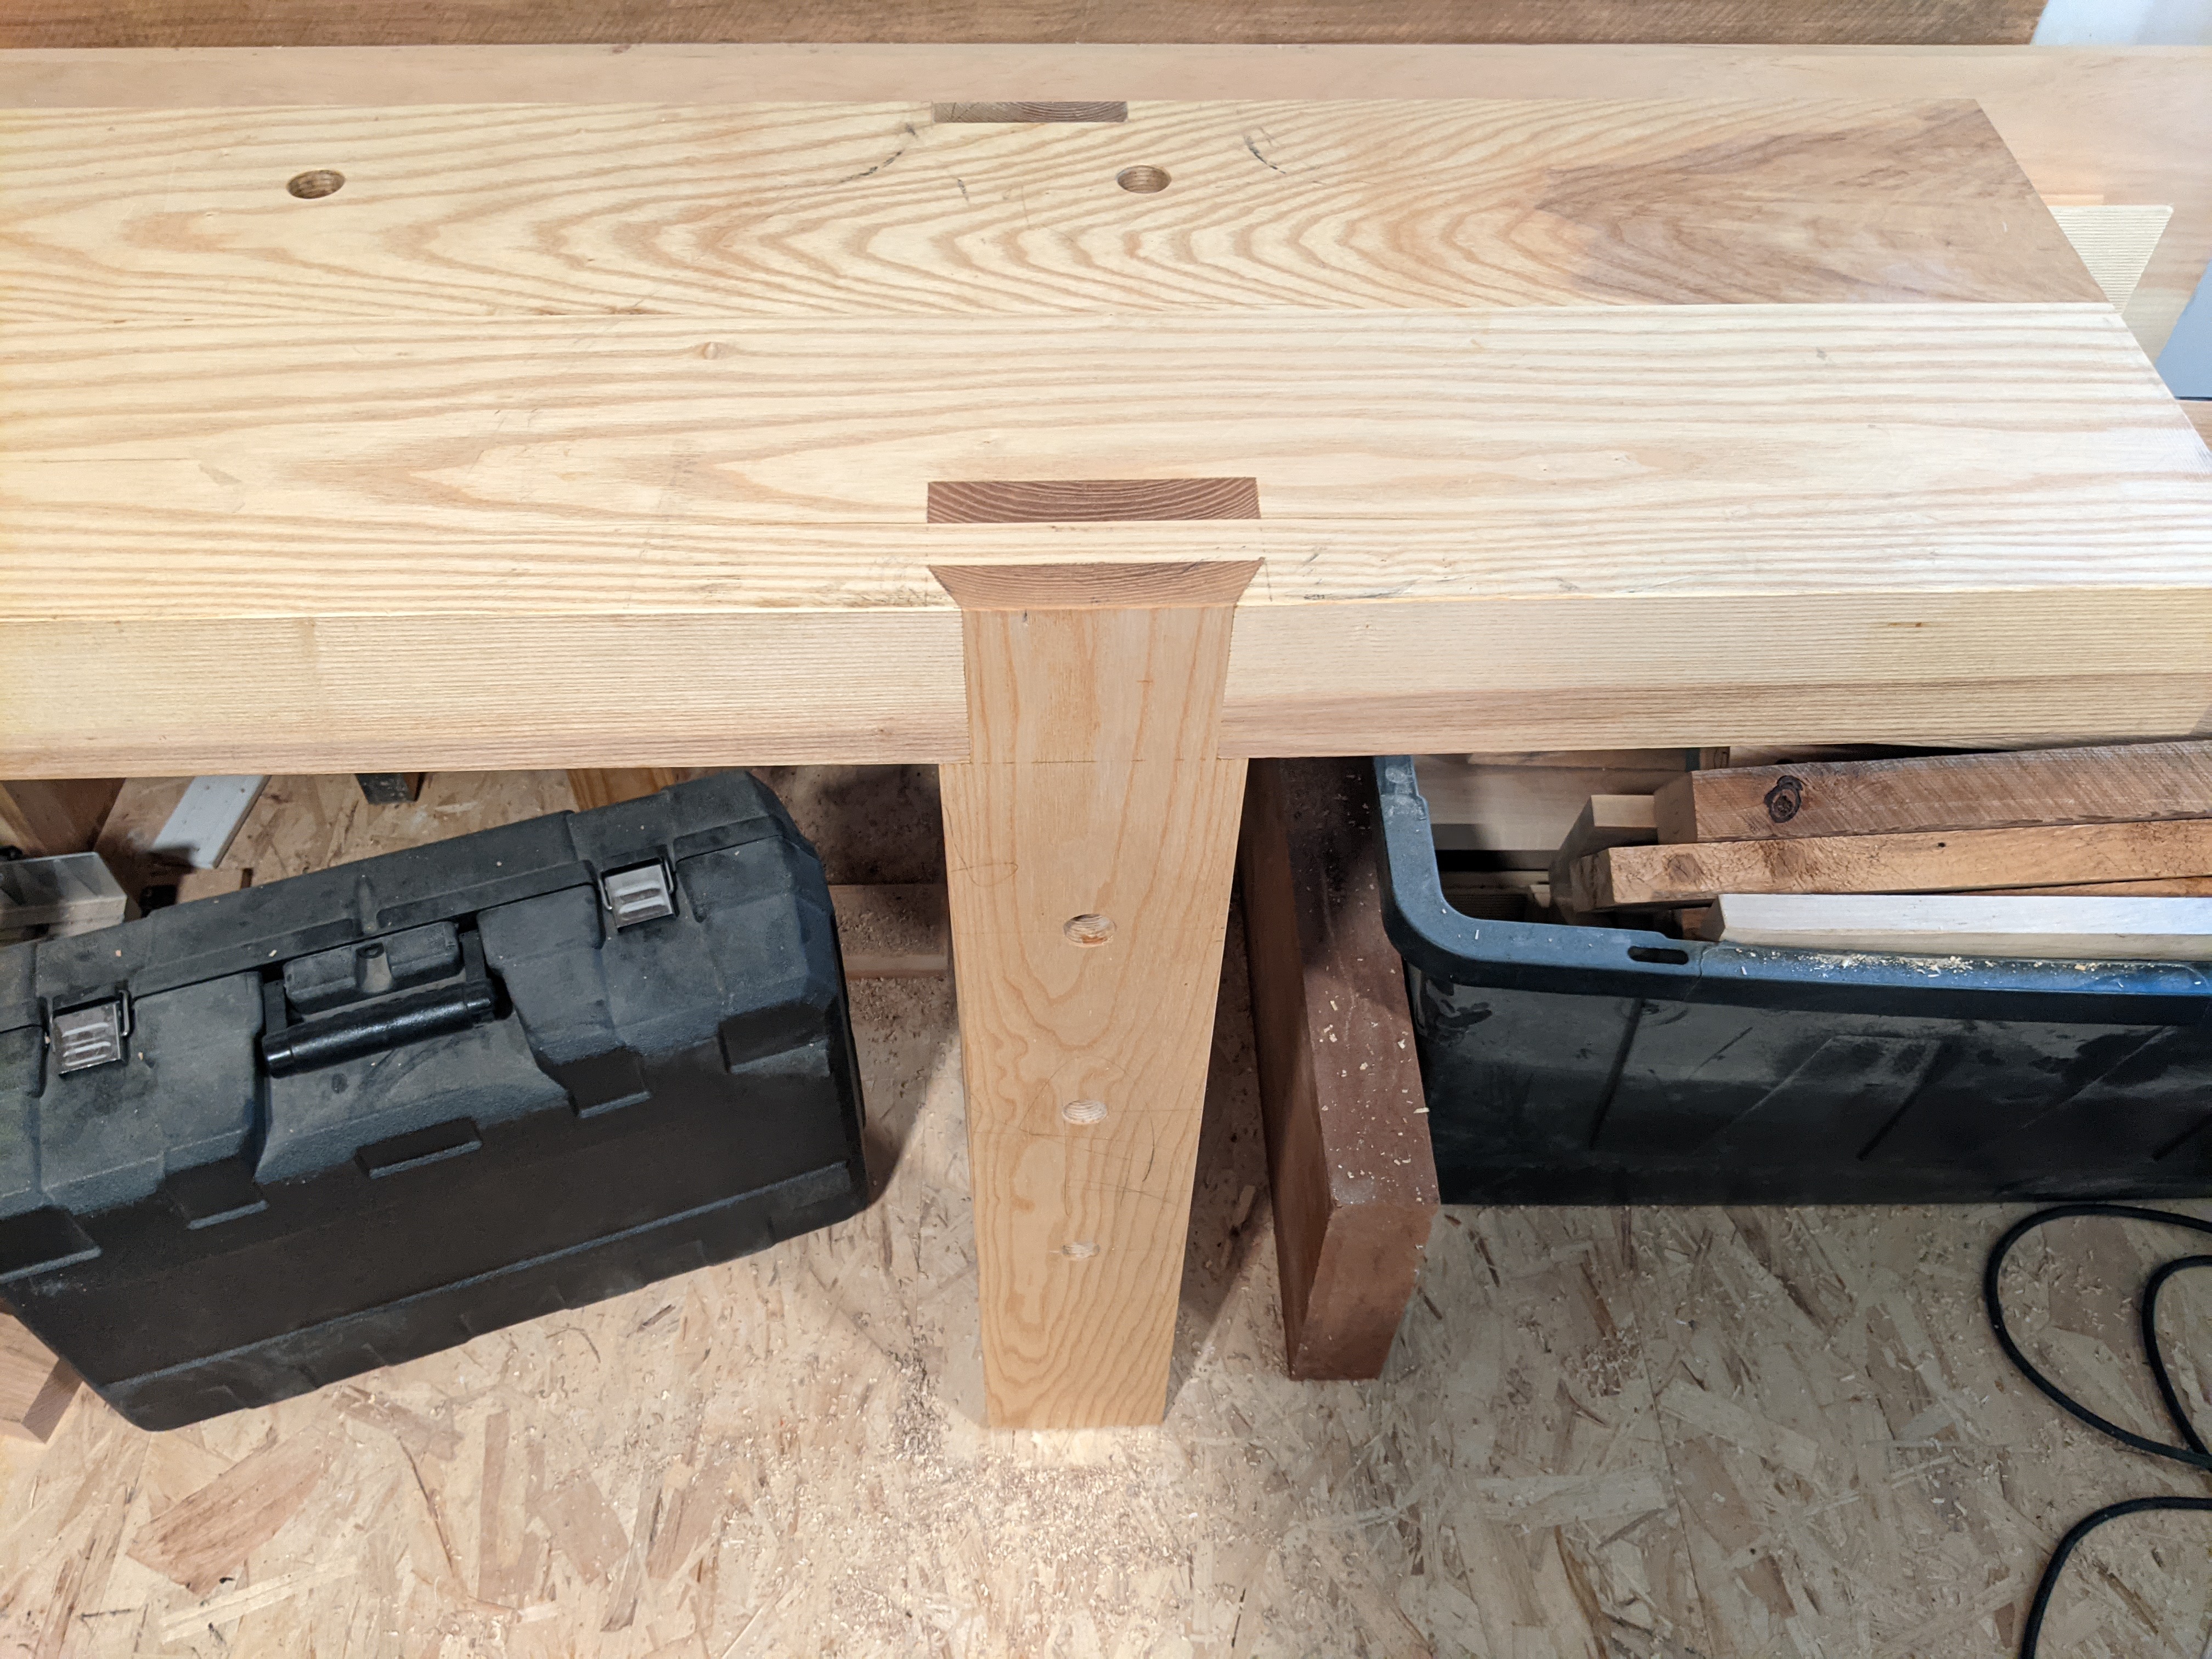
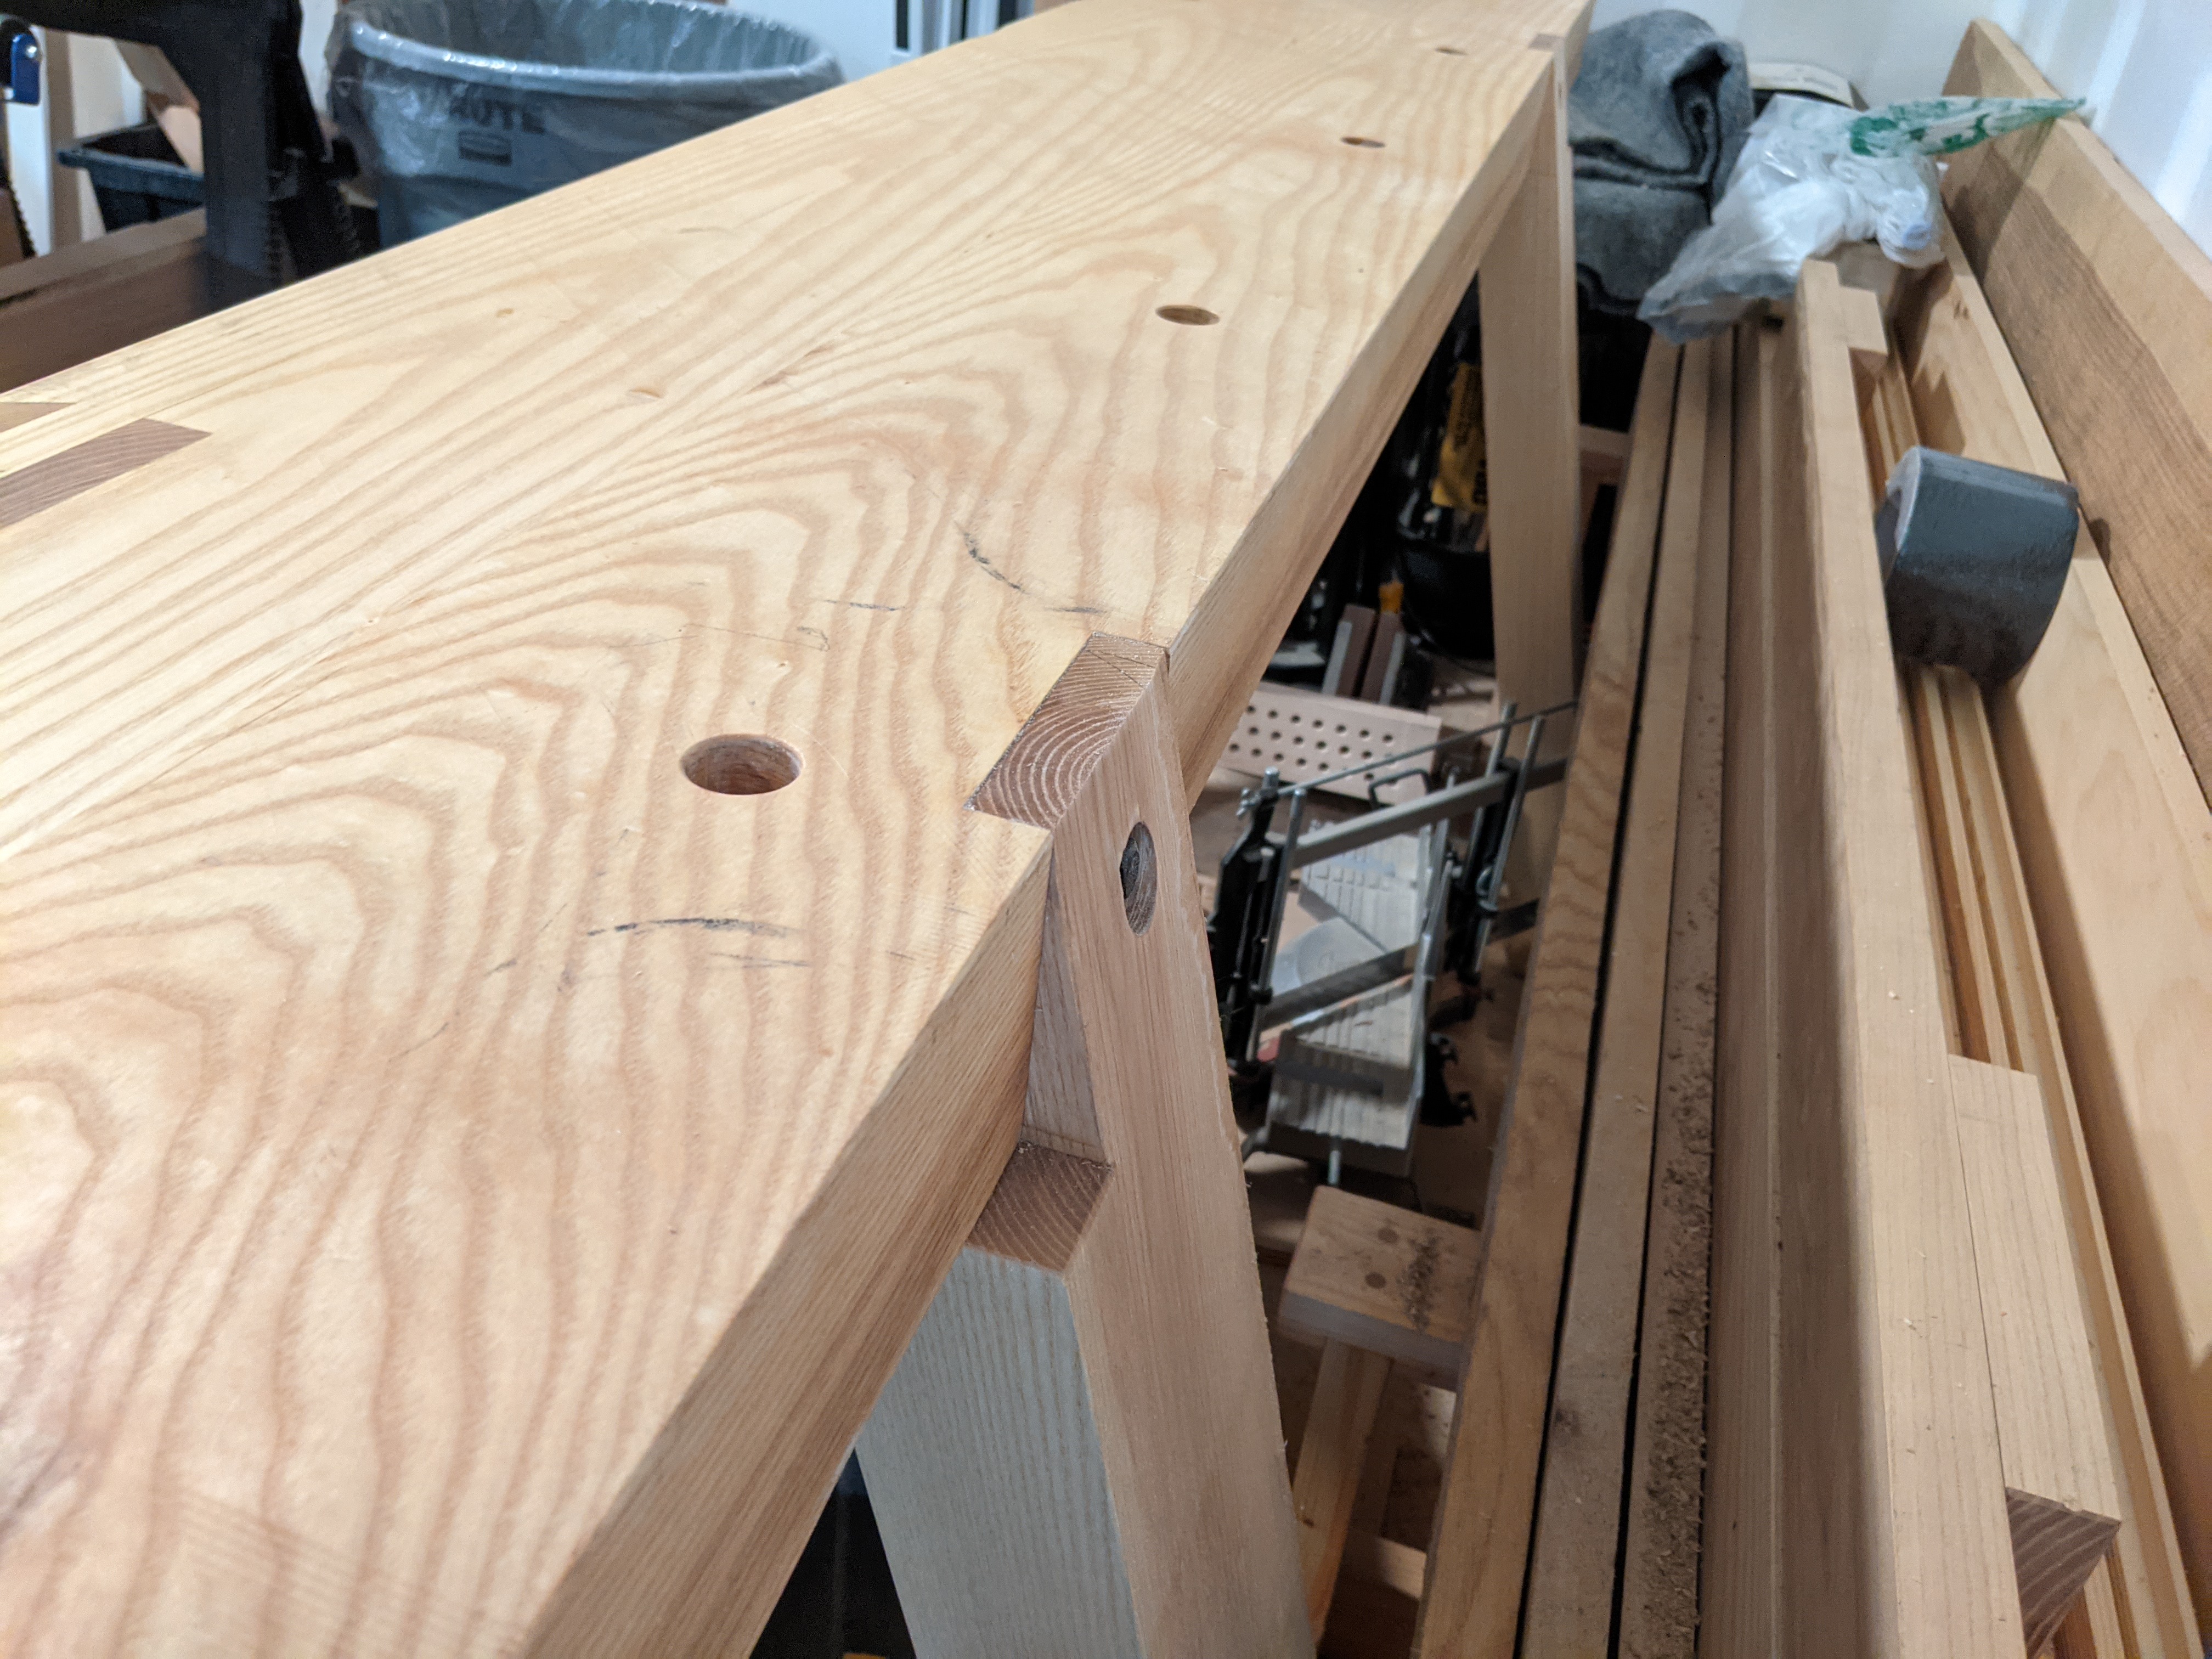
To date, I’ve finished the base, which is super beefy. I resolved not to buy any more lumber for this workbench, which has required being creative in using materials (including resawing and laminating materials as needed). Between the leg vise (Moravian workbench style) and sliding deadman (TBD), I’m still cobbling together all the necessary pieces.
I may still paint the base in the future.
Now I just have to get rid of an 8 foot hard maple Nicholson workbench that I’m realizing I never really took any good photos of over than here. Anyone in Southern New England (USA) interested?
Happy New Year, everyone! I realized I missed my usual “6am Eastern on New Years Day” post. I think that’s because I went to an actual party and didn’t get to bed right at 730pm like I have for as long as this blog existed. But anyway…
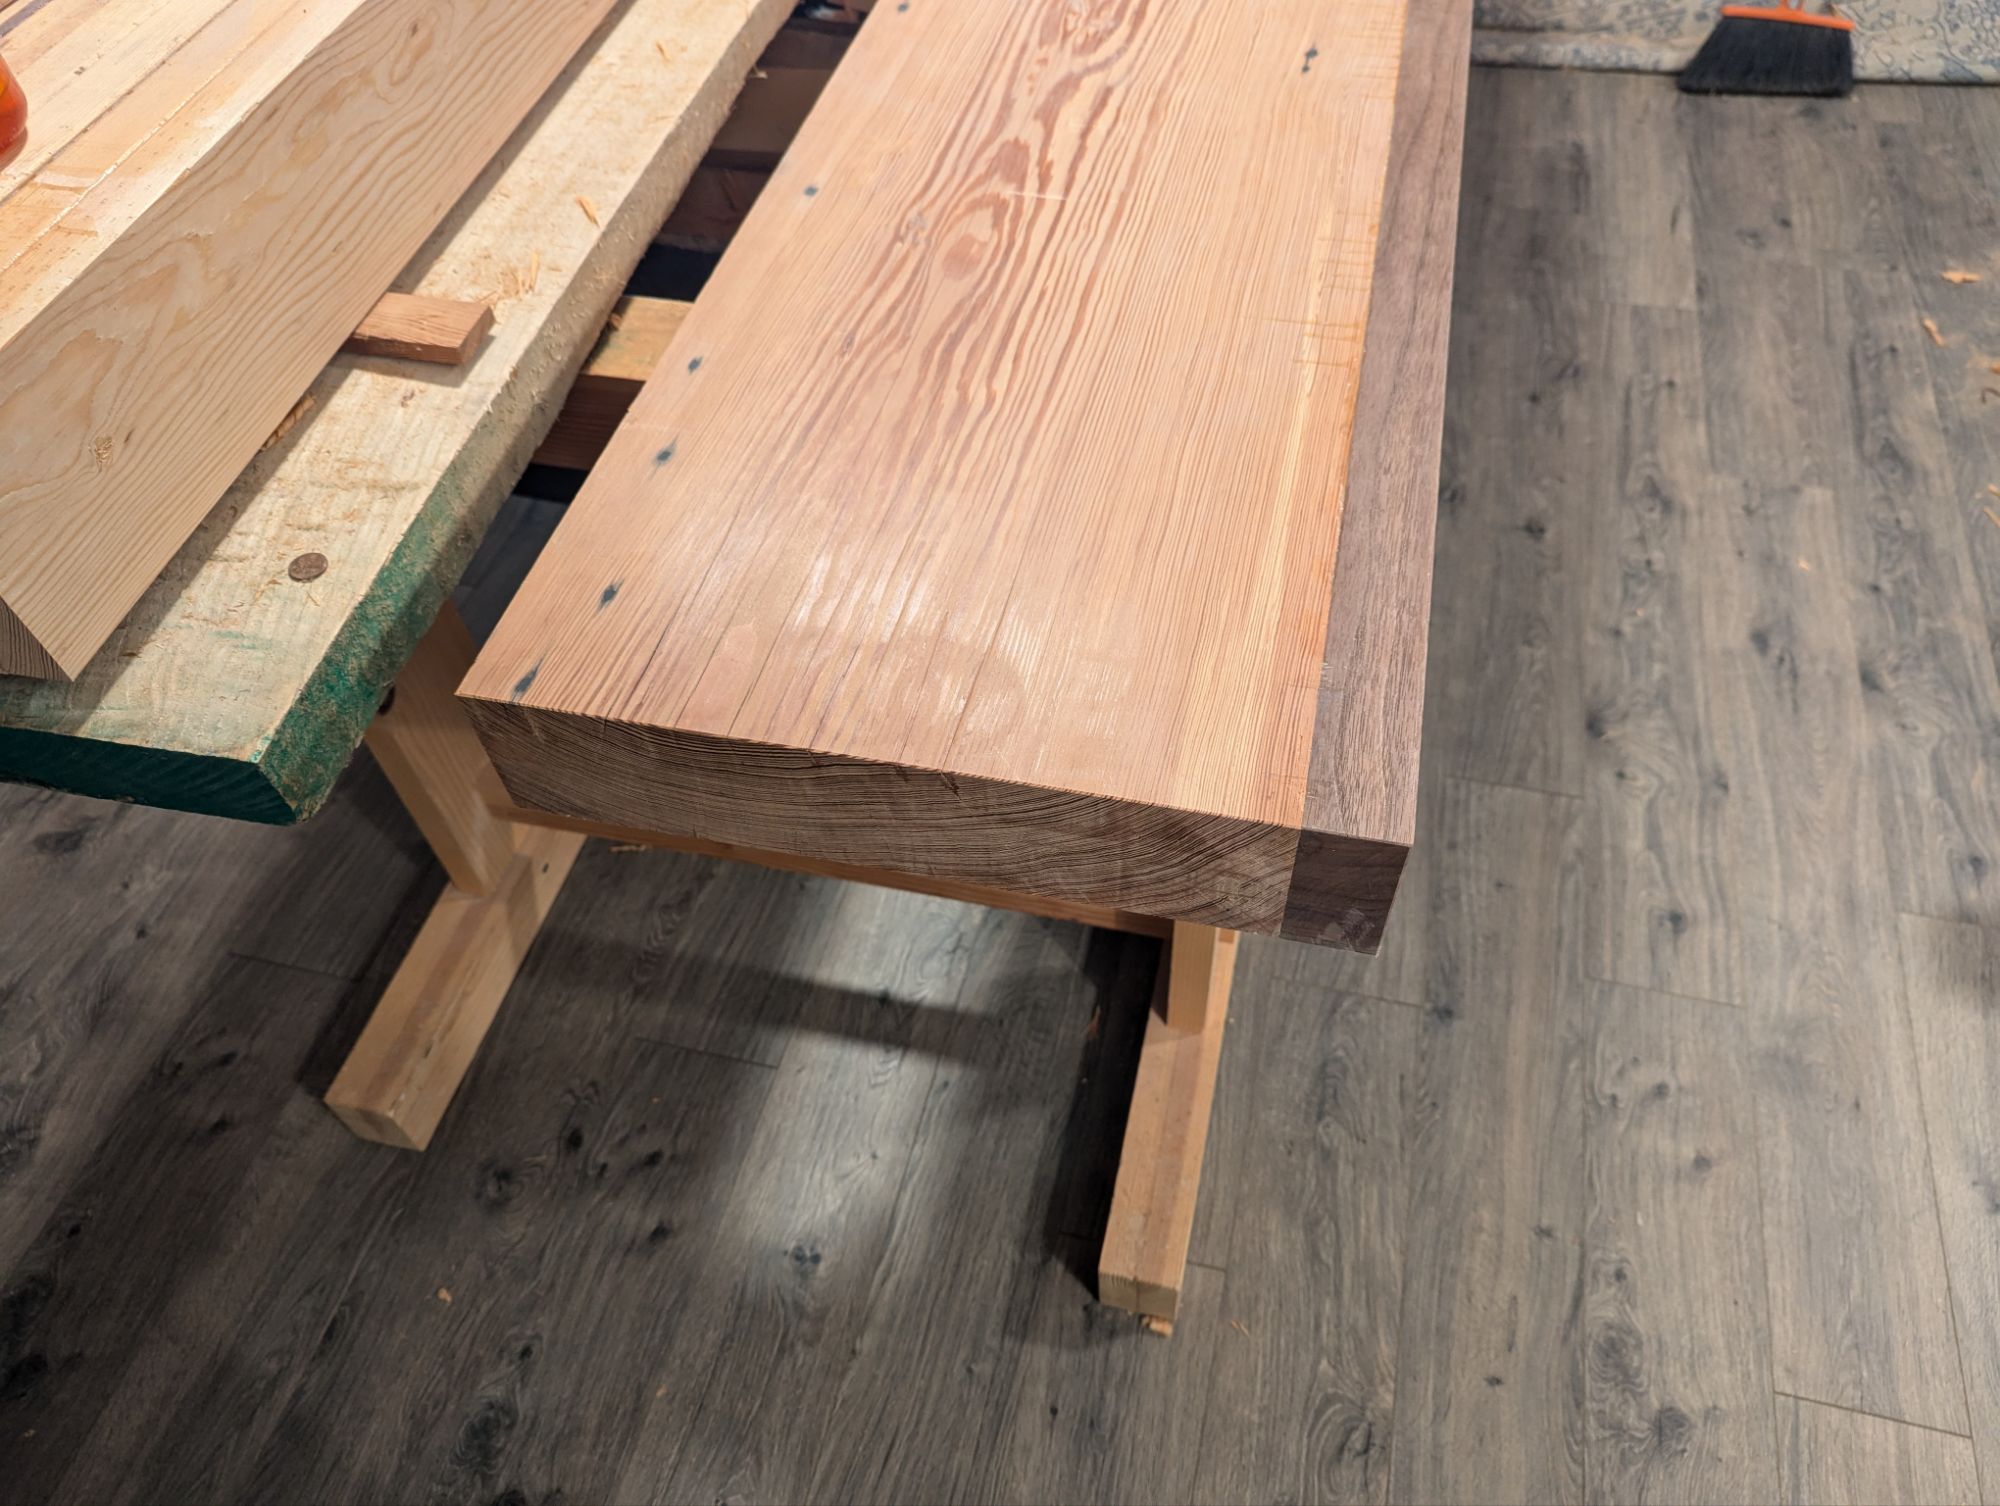
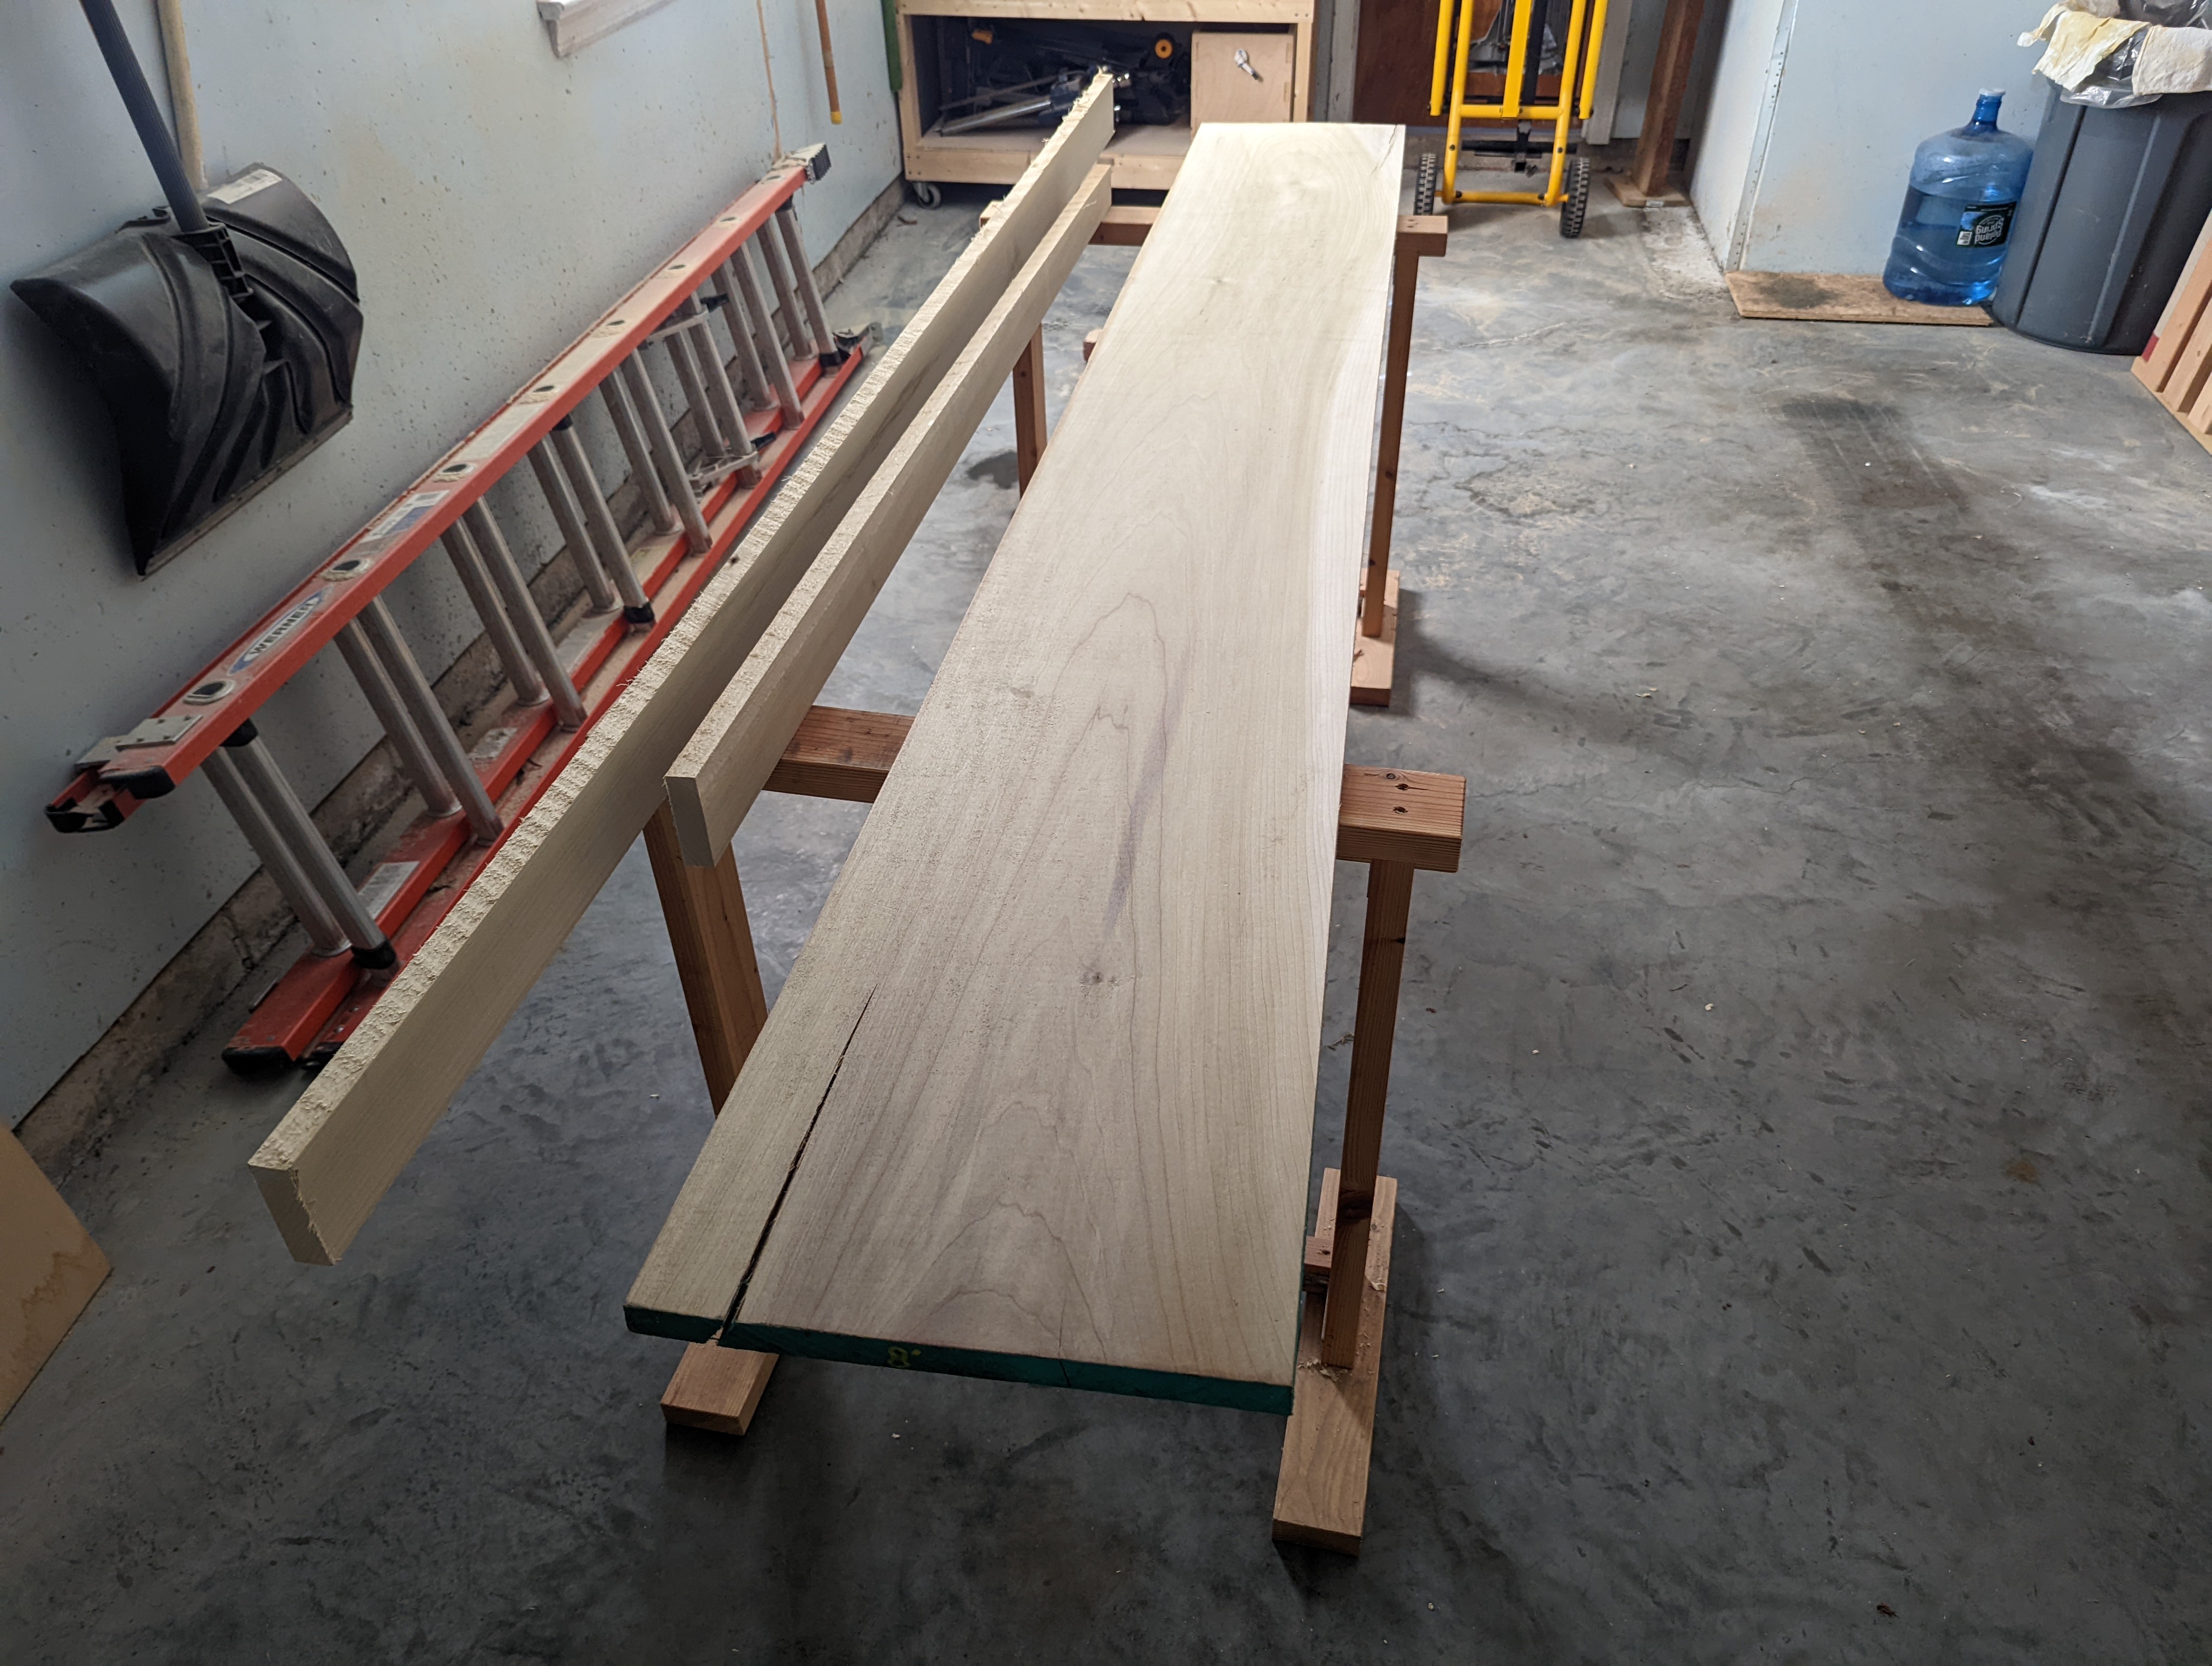
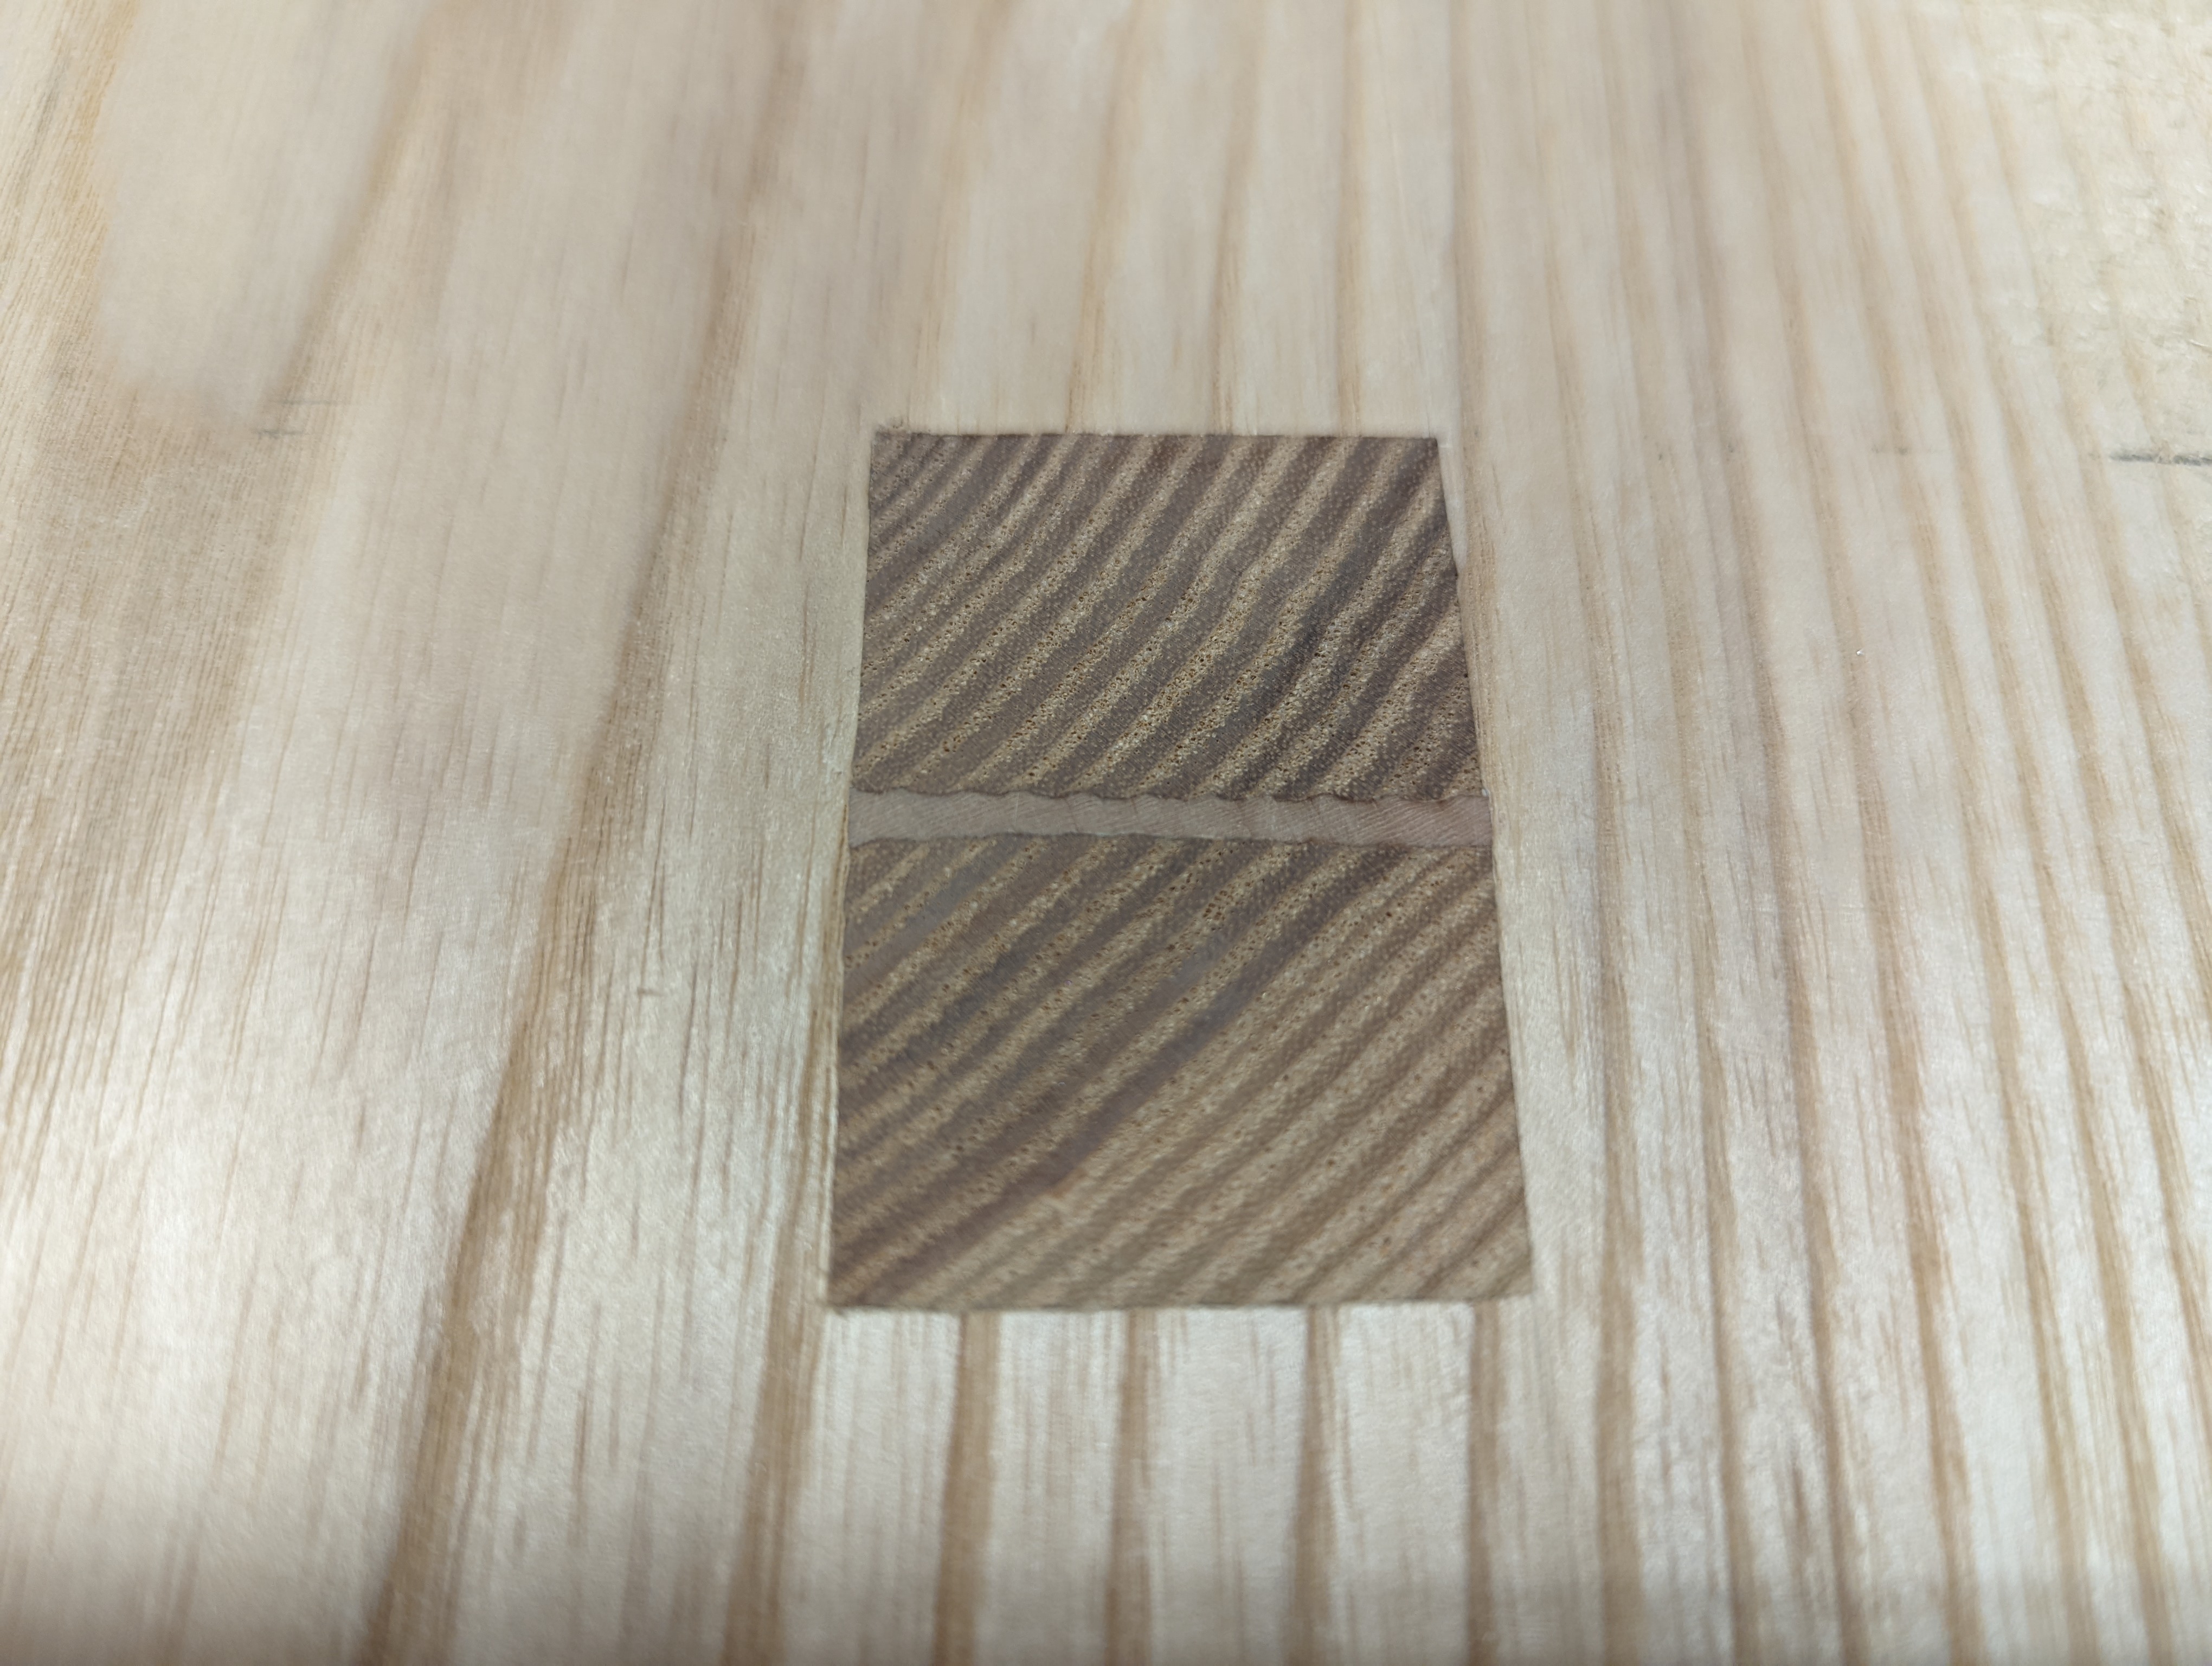
A while ago, I obtained an old growth slab of what I believe is Slash Pine (one of the species of Southern Yellow Pine) from a reclamation sawmill. It’s about 16 inches wide, 90 inches long, and after flattening is still a solid 3 1/2″ thick. It’s mostly flat at this point, anyway. I actually made an impromptu router sled because it’s so damned hard (the resin long ago crystallized and, between that and the barn grit in the checks, it was eating O1 steel for breakfast). This slab will make a wonderful workbench top once I laminate a fascia board along the front edge and square the ends, though.
And after I fill all the nail holes and bolt holes with tinted epoxy offscreen.
Another workbench, you say? Well yes, of course. I’ve been working on my 8 foot maple Nicholson which I made in the thick of the pandemic. It’s got the nicest leg vise I’ve made (it’s angled, uses a cog and screw instead of a pin board, and opens and closes very smoothly). But I’m kind of over front aprons again; it makes using bench dogs in the top too difficult, even if the apron is great for edge planing long, wide boards. And I have just the one workbench at home after giving all the others away. A second wouldn’t hurt.
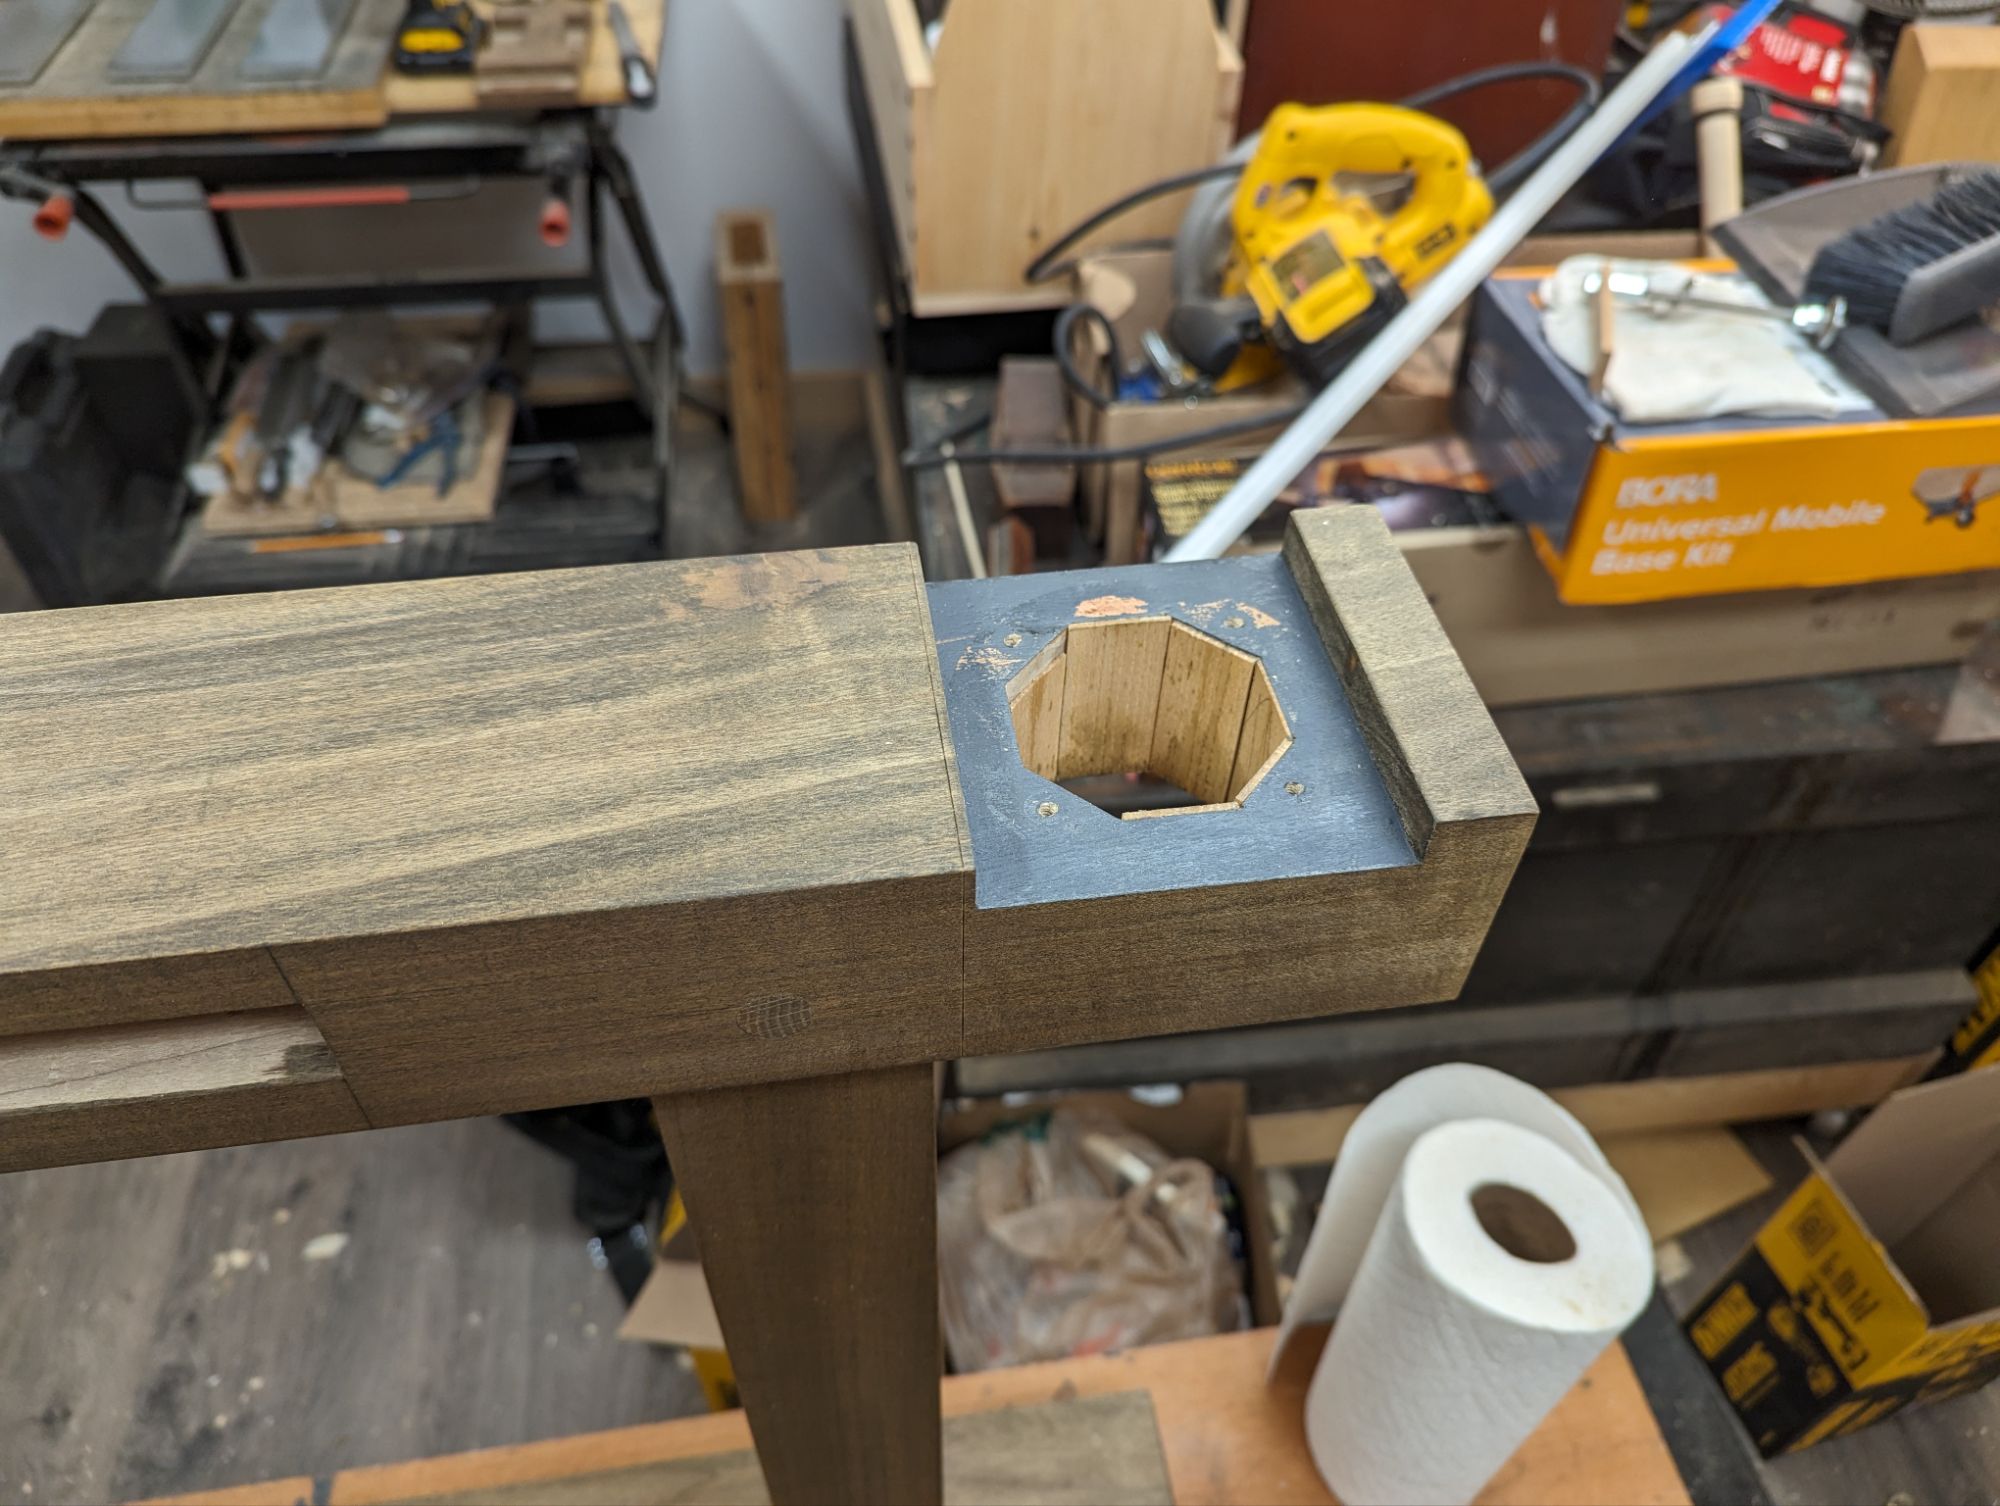
This new bench will be in the Shaker style, like at Hancock Shaker Village. Leg vise, tail vise, sliding deadman, some drawers underneath. In fact, I’ve already made the leg assemblies. But unlike the Shakers, this bench will knock down (like a Moravian workbench). And I have a linear bearing and a 1 1/2″ hardened steel shaft to use as a parallel guide for the leg vise instead of a pin board (or even a cog and screw or crisscross). McMaster-Carr is the best.
When making the recess for the linear bearing, though, I didn’t have a good way to make a 2 3/8″ hole. So I chopped it out octagonally. And it was scruffy and didn’t fit well and I had to shim it. All of which ate at my brain and caused me to set the whole project aside for a while.
I’ve finally come back to it. And it still eats my brain.
This is just not the quality I’m used to producing.
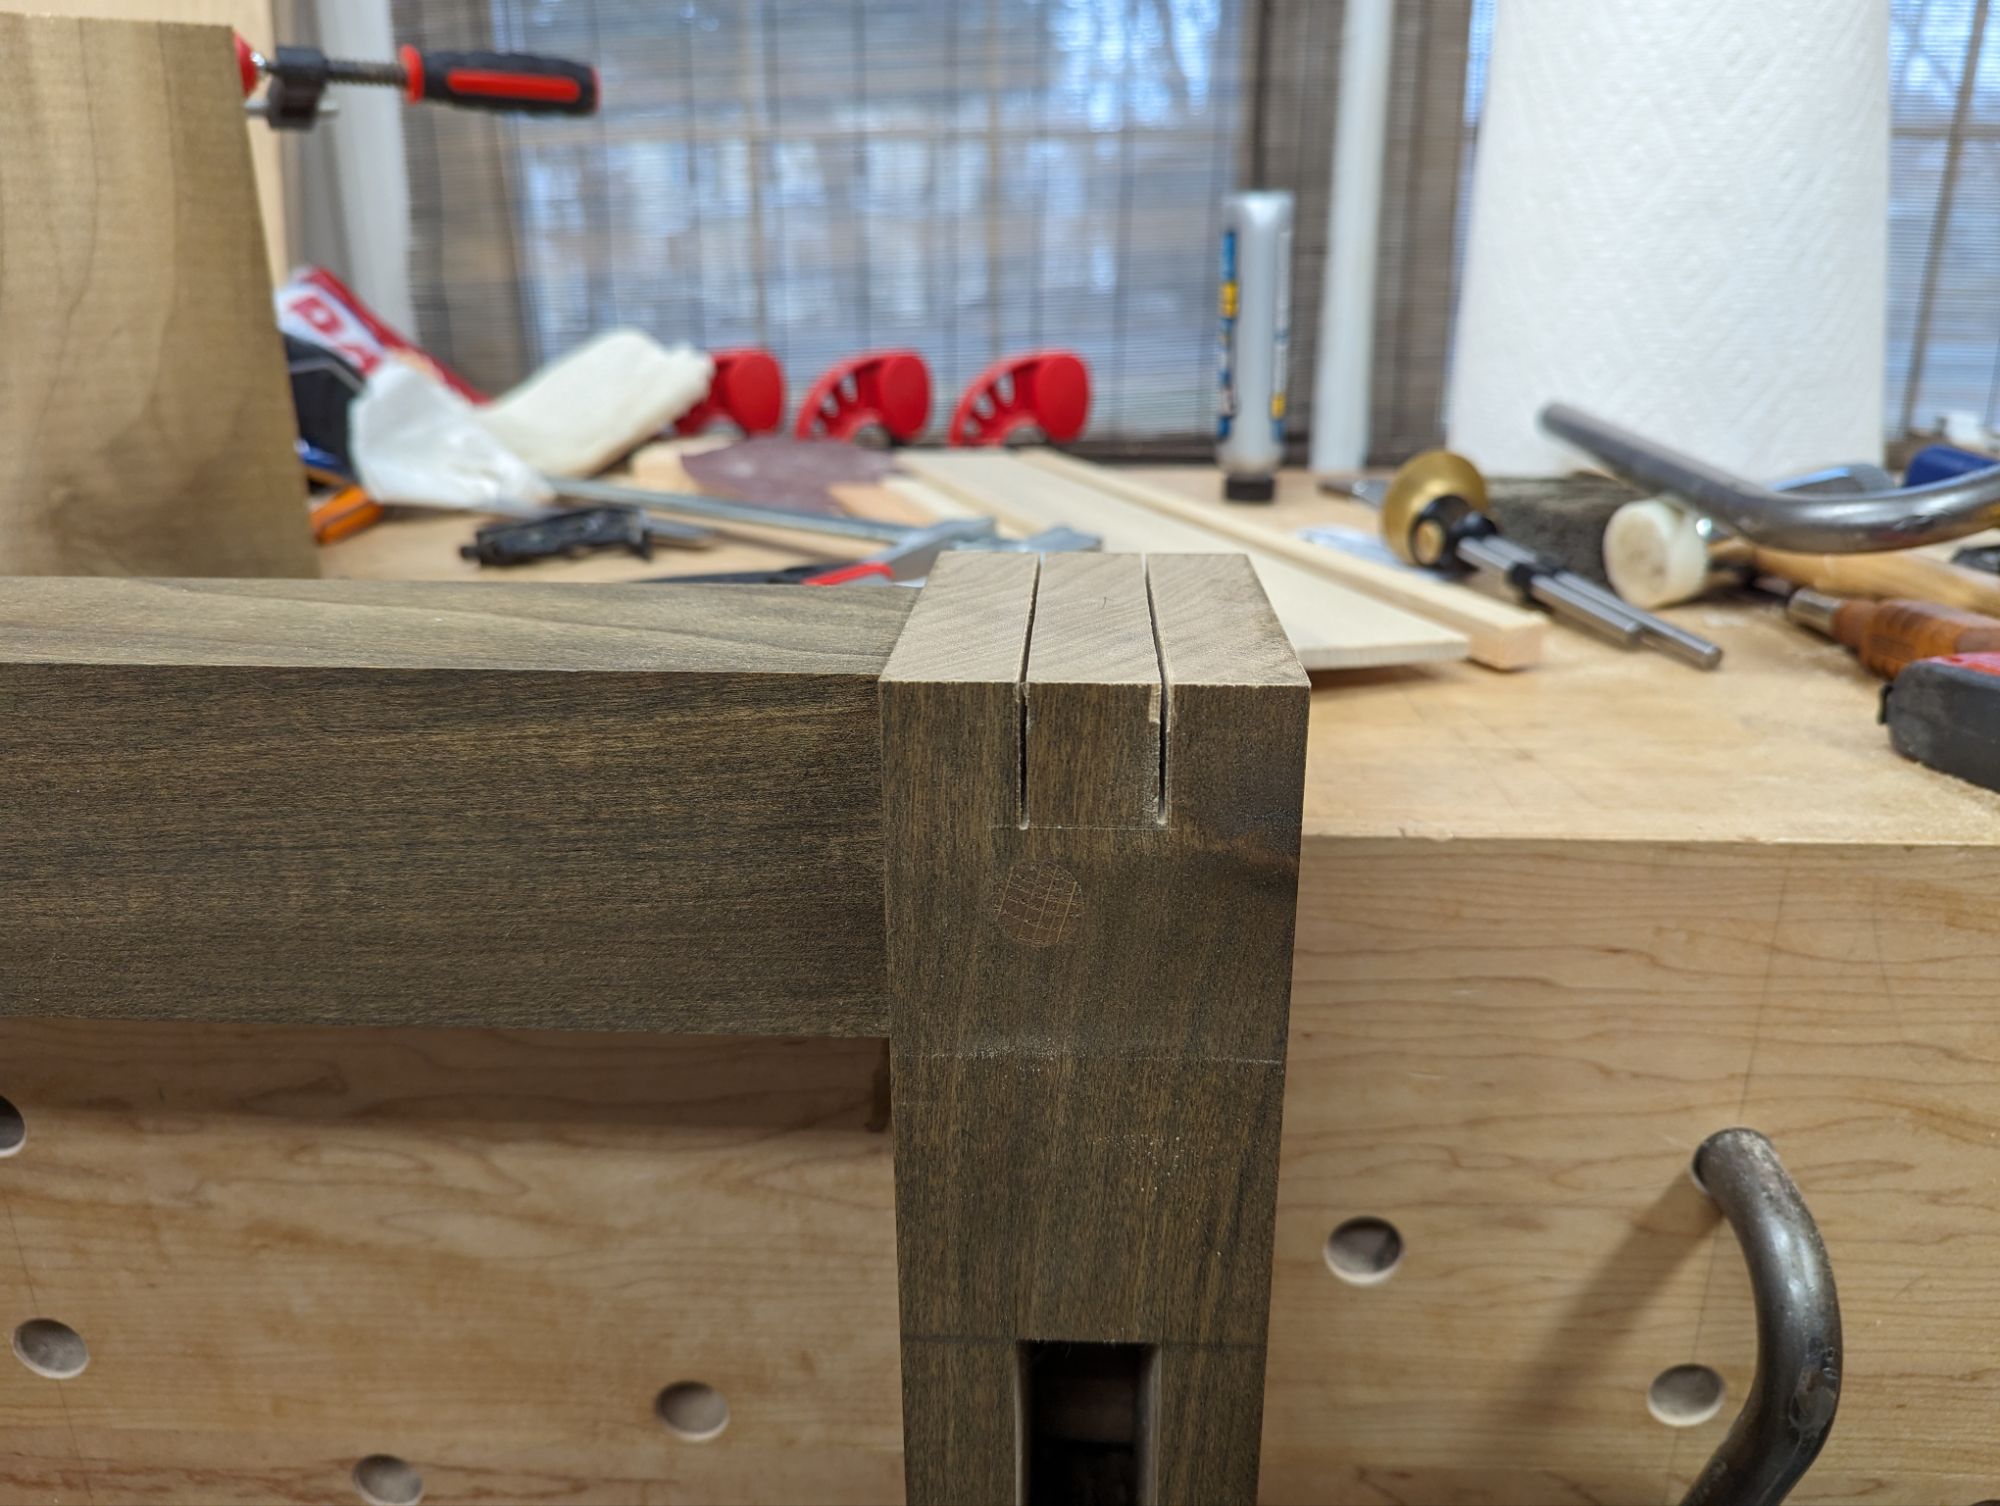
And what is a fellow to do when a bad bench installation is ruining a good time? Cut the offending portion of the leg off and add some wood back on, of course. About that…
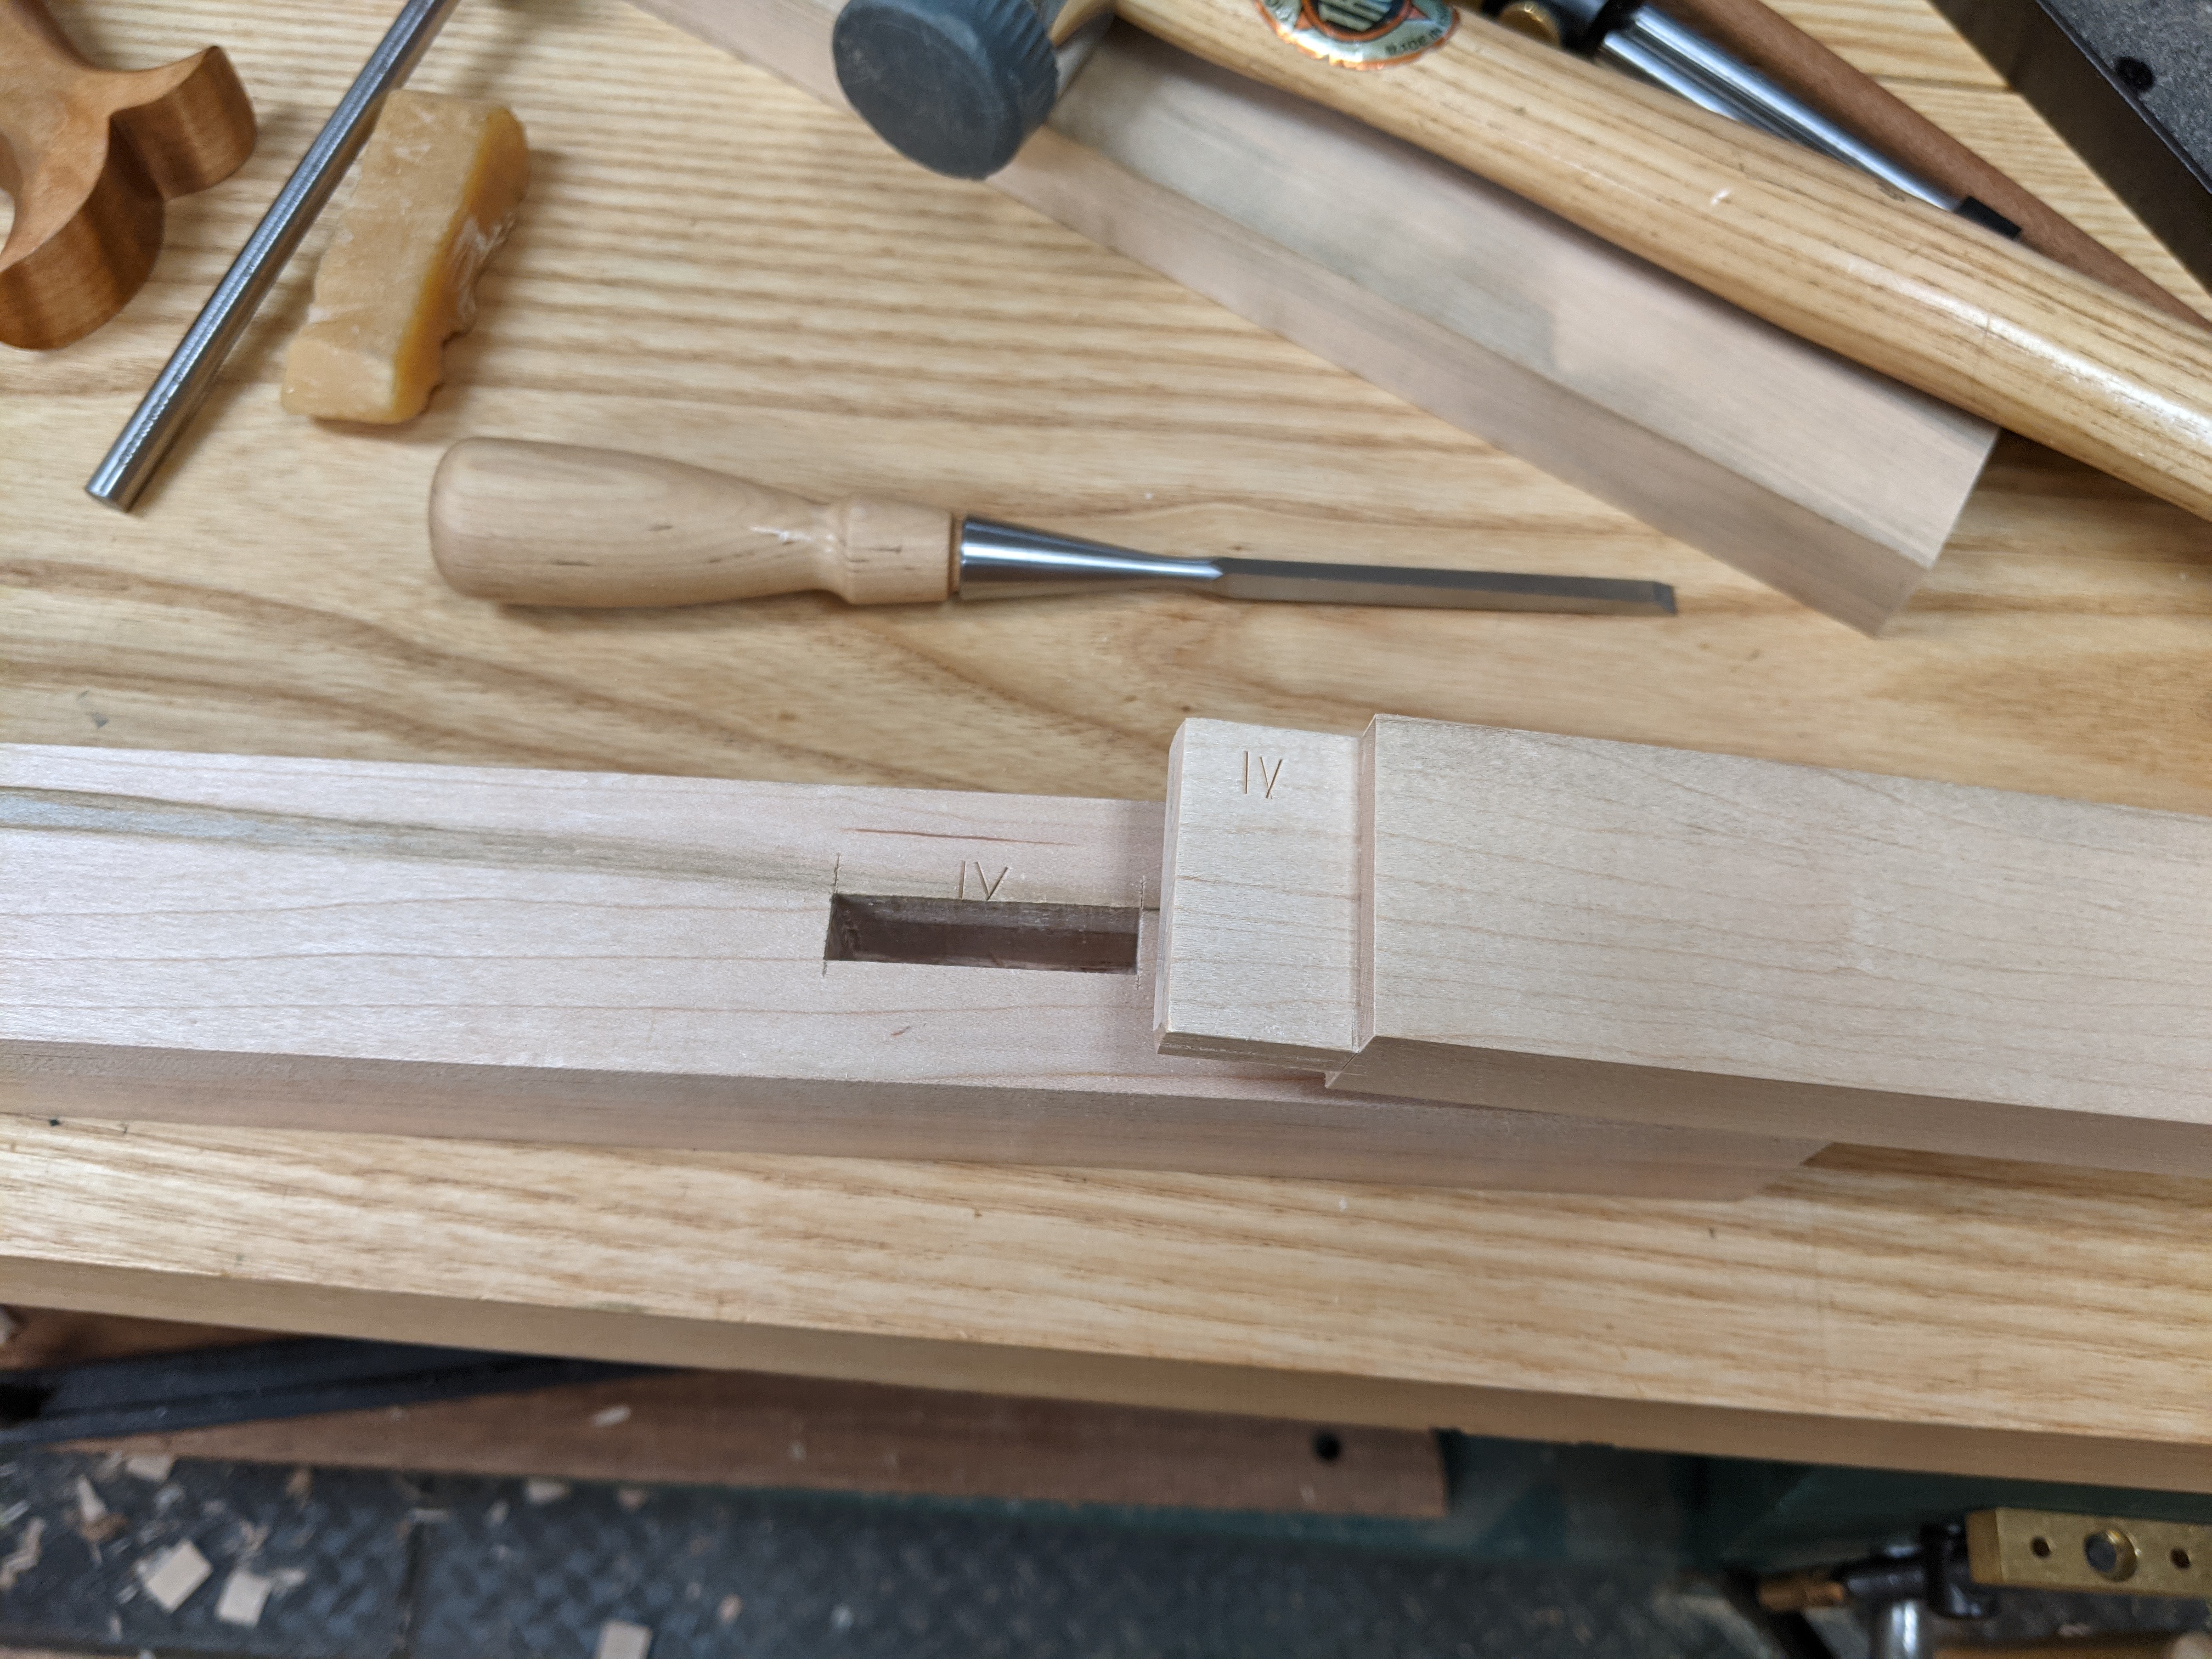
First step was to saw off the offending area and square up the end grain. And also dig out and prepare an offcut of the same species that has a decent grain match. If I had access to a Festool Domino, this would essentially be the end of the process. Four dominos and some glue: Bob’s your uncle.
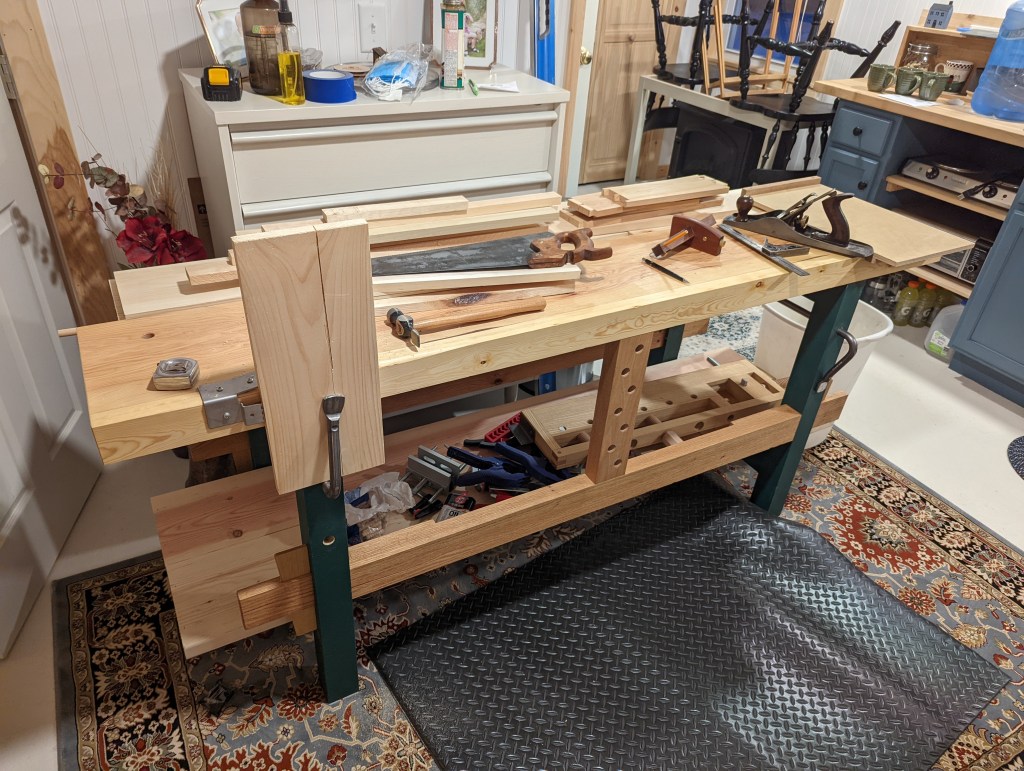
My workbench is an absolute mess as I do a few renovations.
But absent a Festool Domino, how does one join two boards, end grain to end grain? Finger joints are probably the best option, because of the large amount of long grain gluing surface. For a hand tool guy like me, that’s essentially a bridle joint. I think in this application, it would be strongest if the mortise was in the remaining leg and the tenon on the added piece. I almost made bridle guides, but that probably would have taken longer than just sawing and paring.
Now to saw down the sides of the mortise.
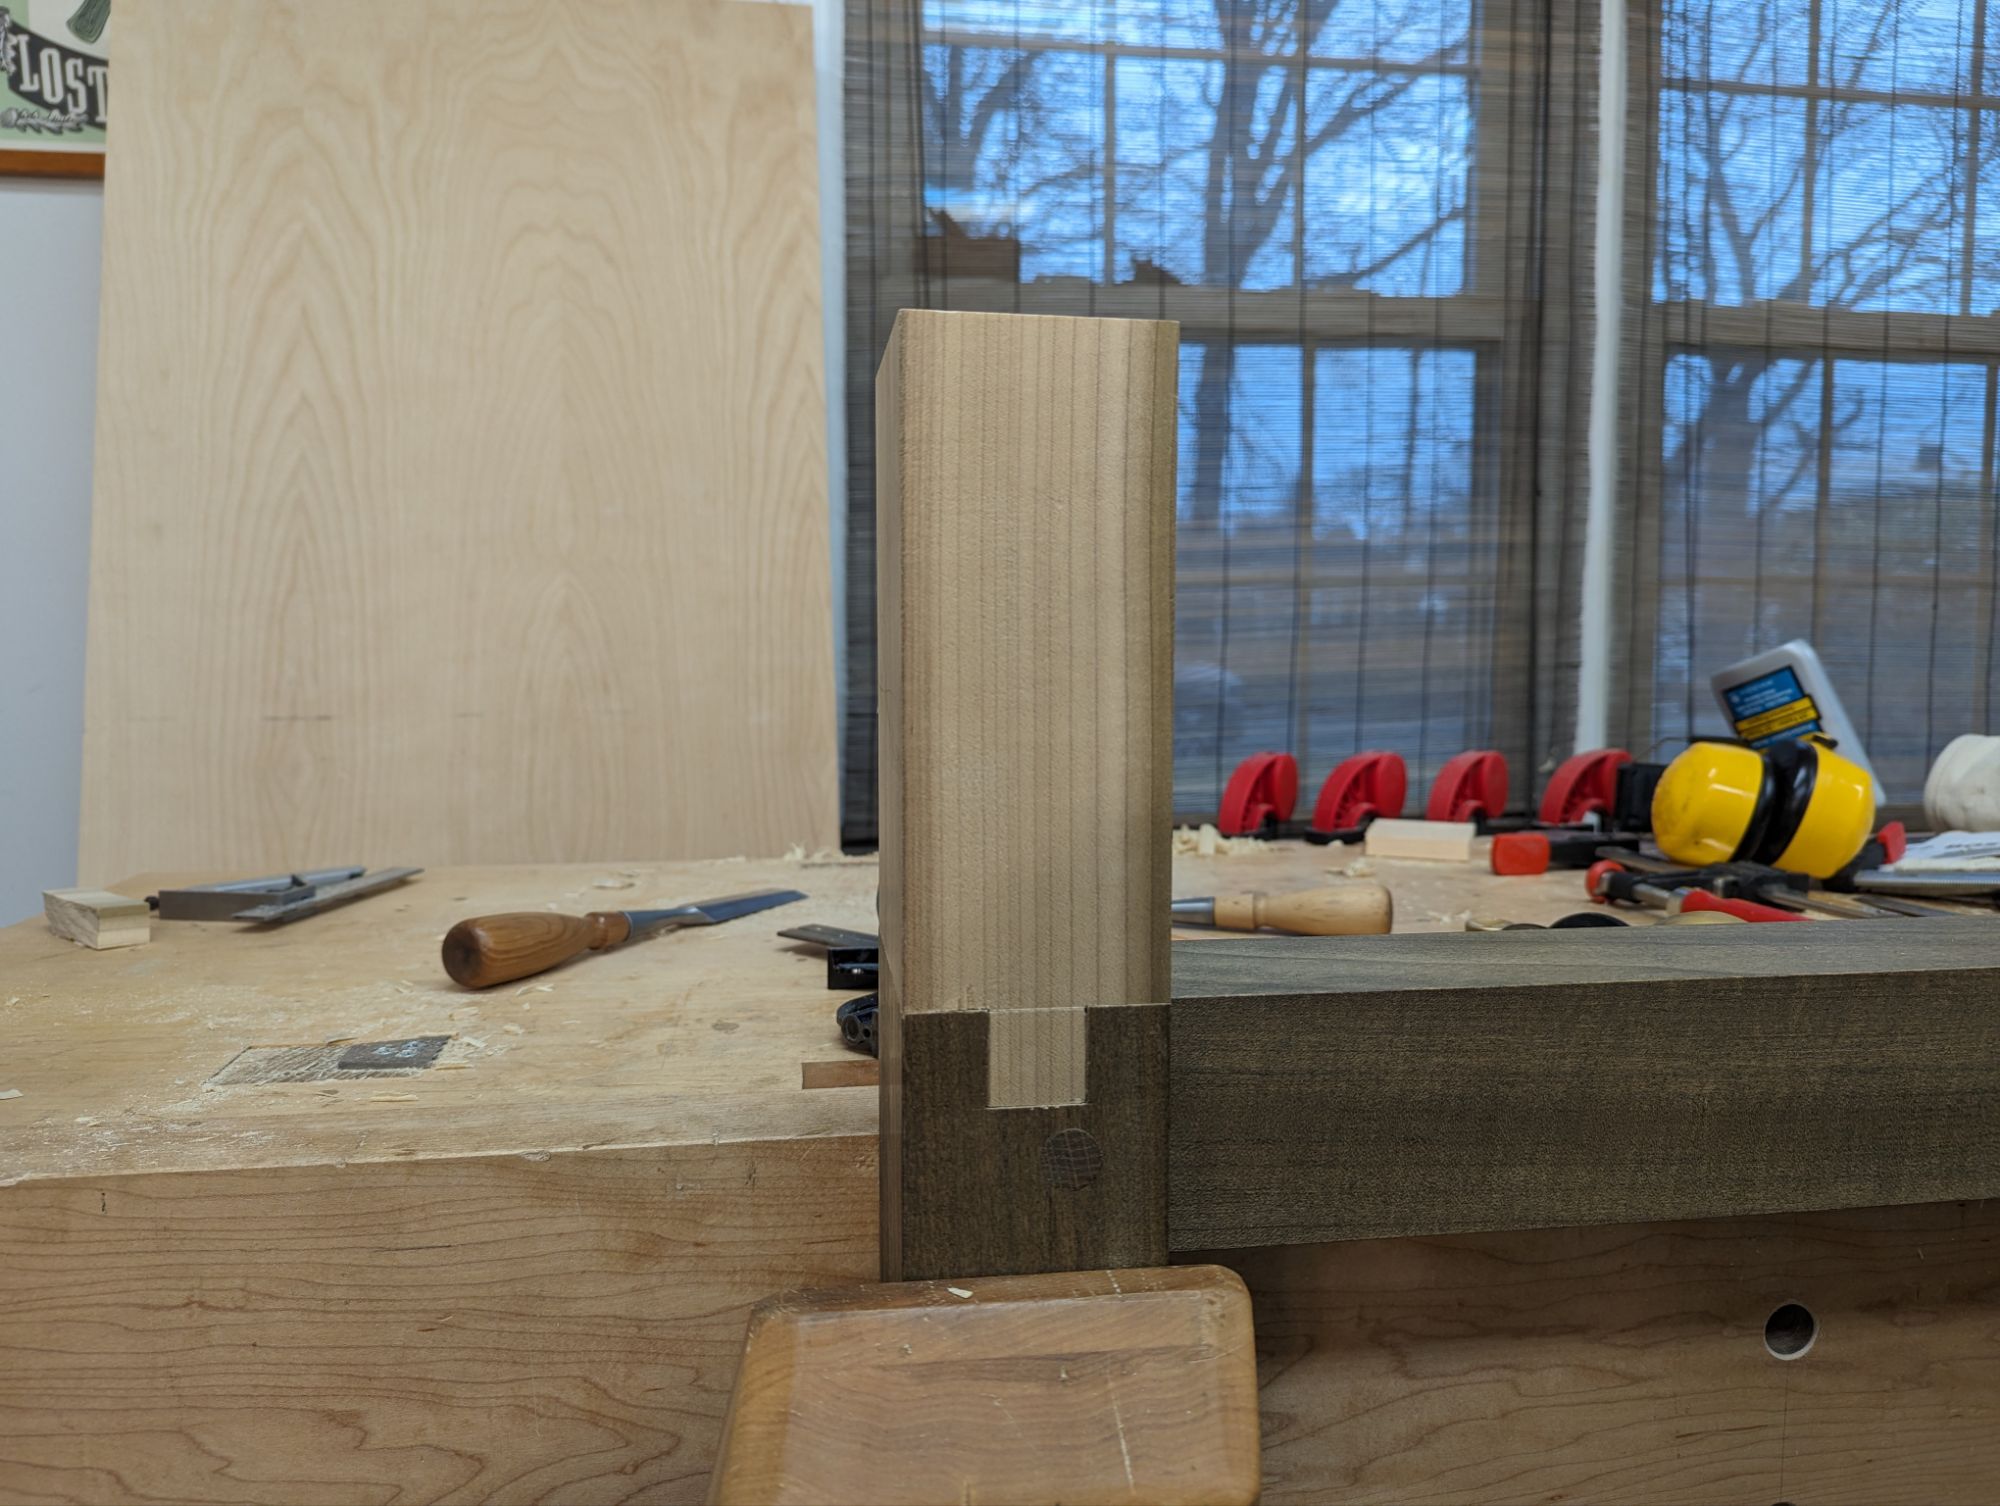
Once the mortise was nicely pared to the lines, I roughed out a tenon and finessed it to a friction fit with a router plane. Remember to ease the inner parts of the mortise to leave room for glue on the mating surfaces. A dry fit looked like so:
It was at this point when I realized the offcut was actually from the same board as rest of the leg. Fortuity!
Will a 1″x1″ tenon (with 7/8″ mortise walls) be strong enough for a front leg of a workbench, even with TiteBond Thick & Quick PVA? Fuck if I know. But this is poplar, which doesn’t split easily, so I think I’ll be okay. I plan to add a trio of 3/8 oak pegs as reinforcement along the length of the tenon, which should help. Maybe a couple of metal mending plates too just for luck. But I think it will be strong enough, even without pegs, as long as whatever parallel guide I use for the leg vise doesn’t bear just on the new wood.
Hopefully I can find the stain I used for the rest of the leg too.
To be clear, I almost bought a Festool Domino today. But I’m glad I stayed strong and didn’t. Not that having a Festool Domino is bad; I just kind of enjoy doing things the hard way. And I do think this fix is a good solution and should stand the test of time.
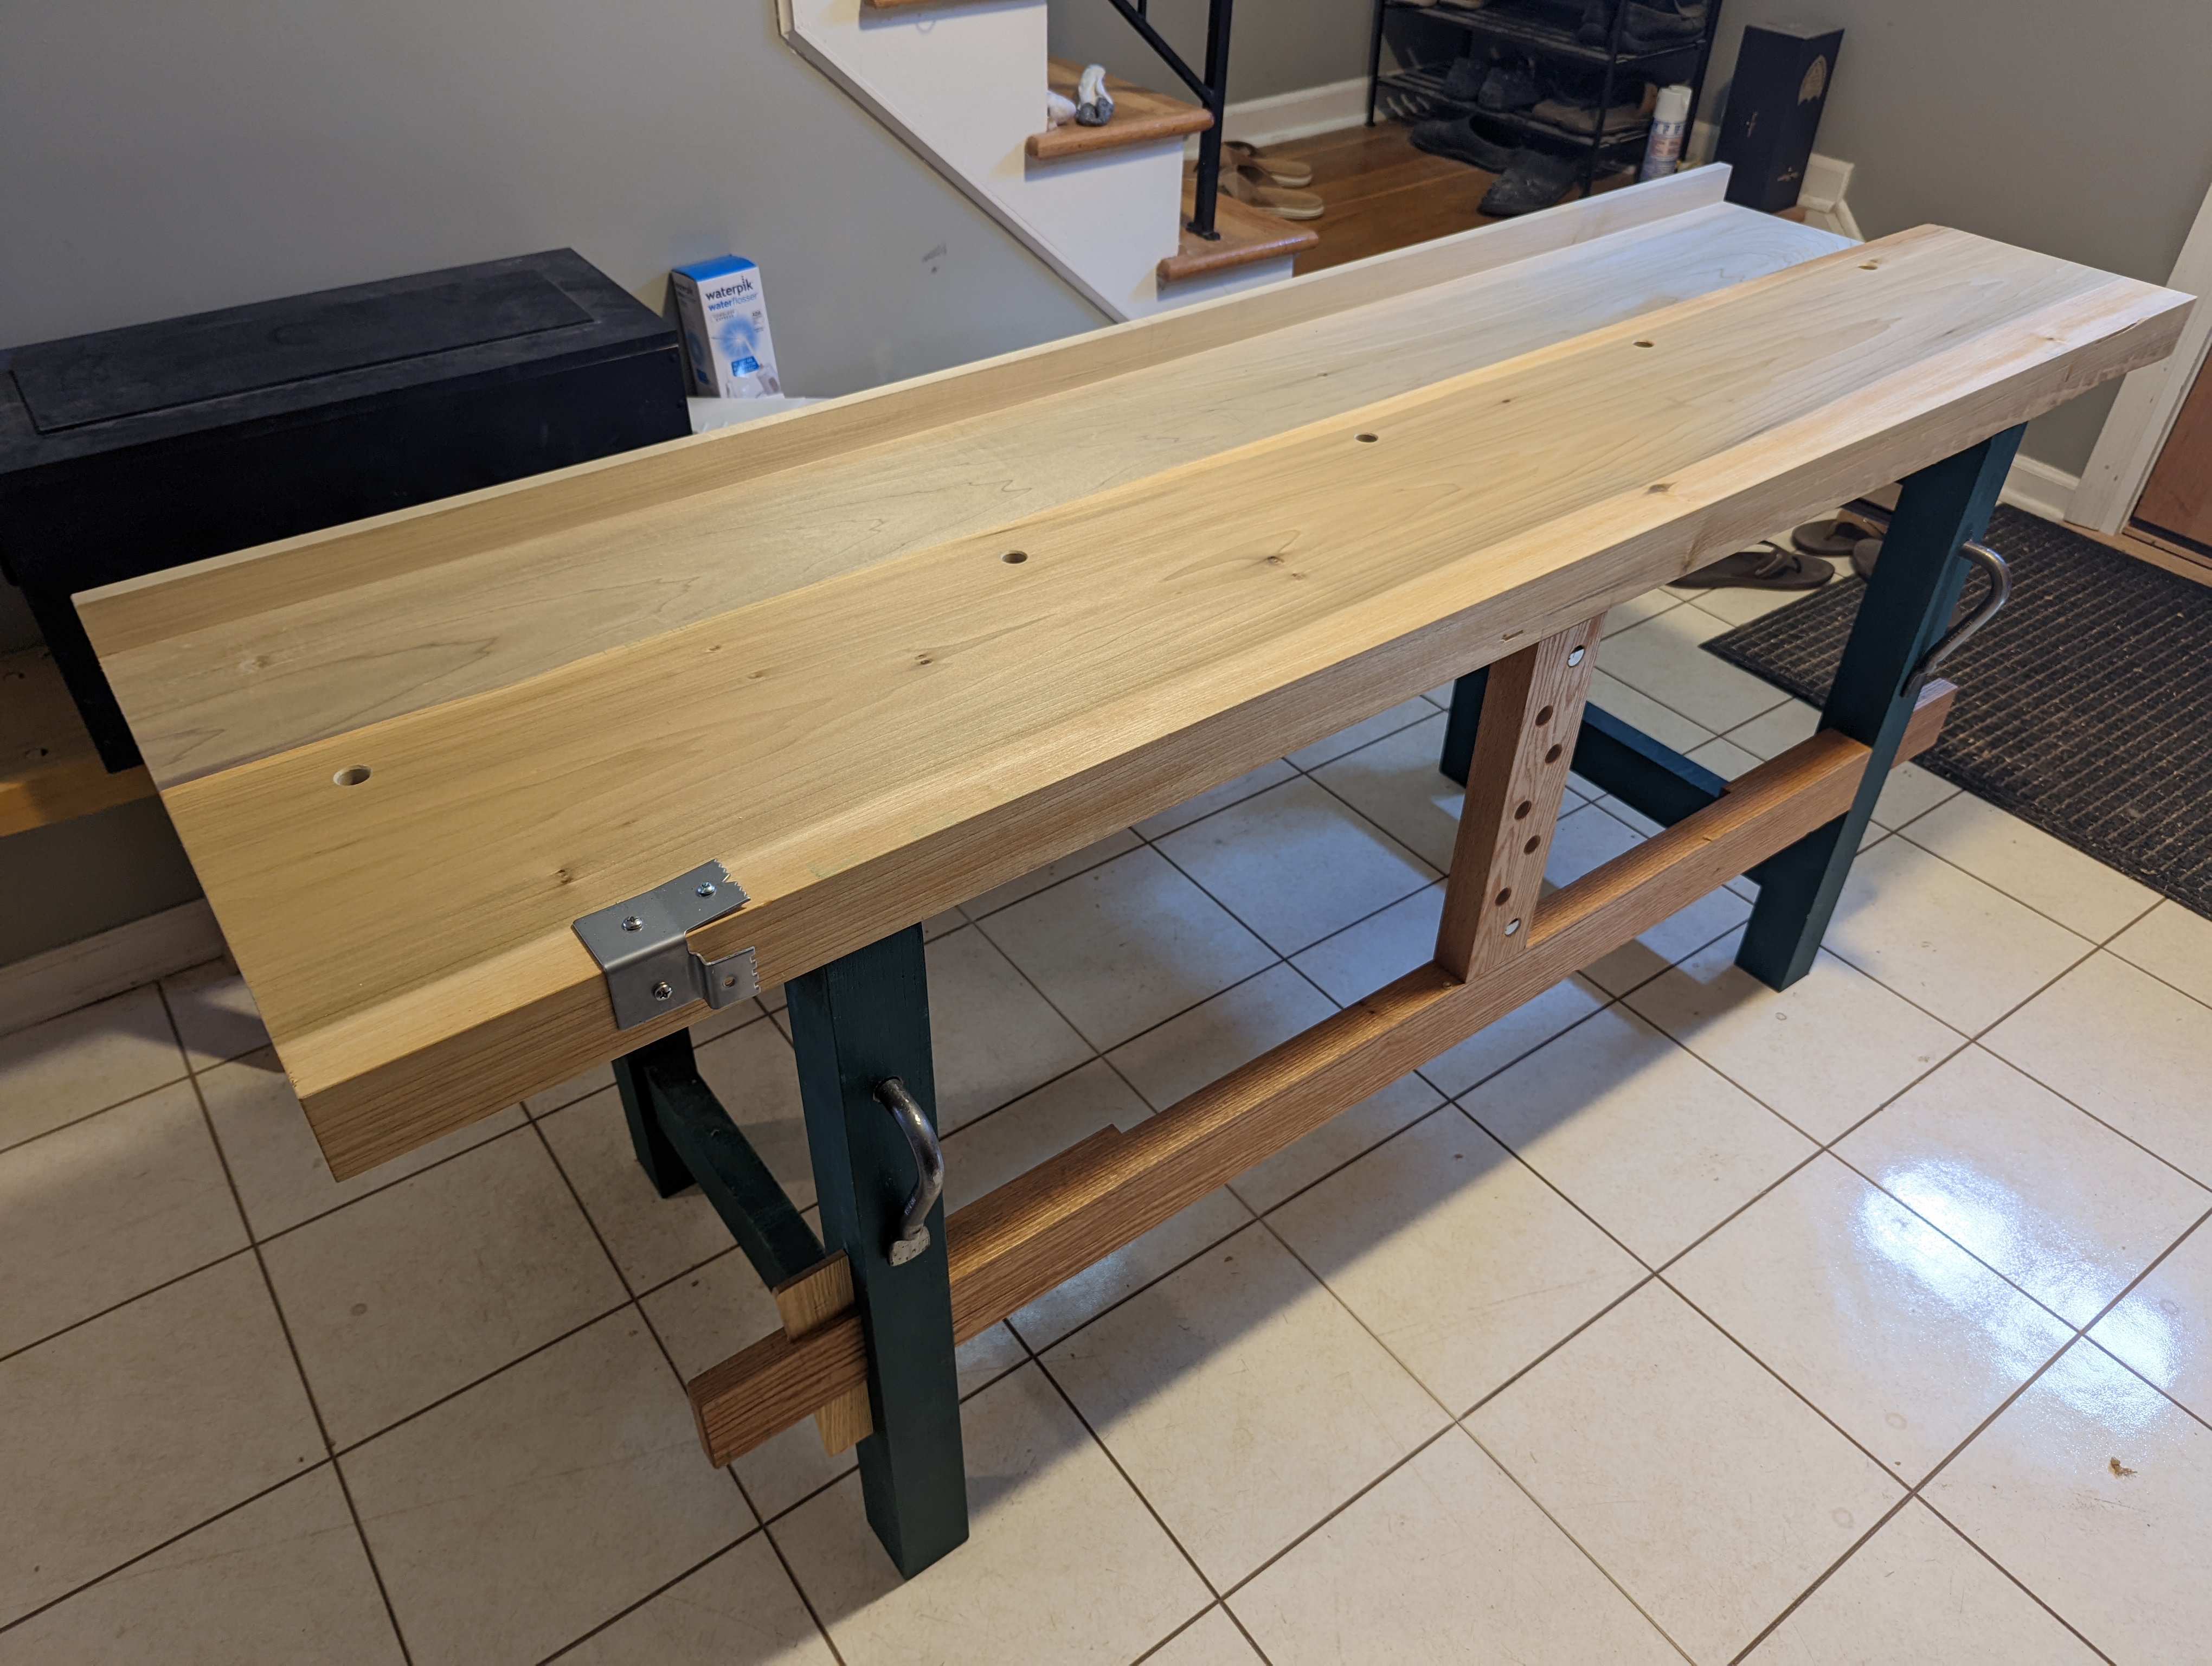
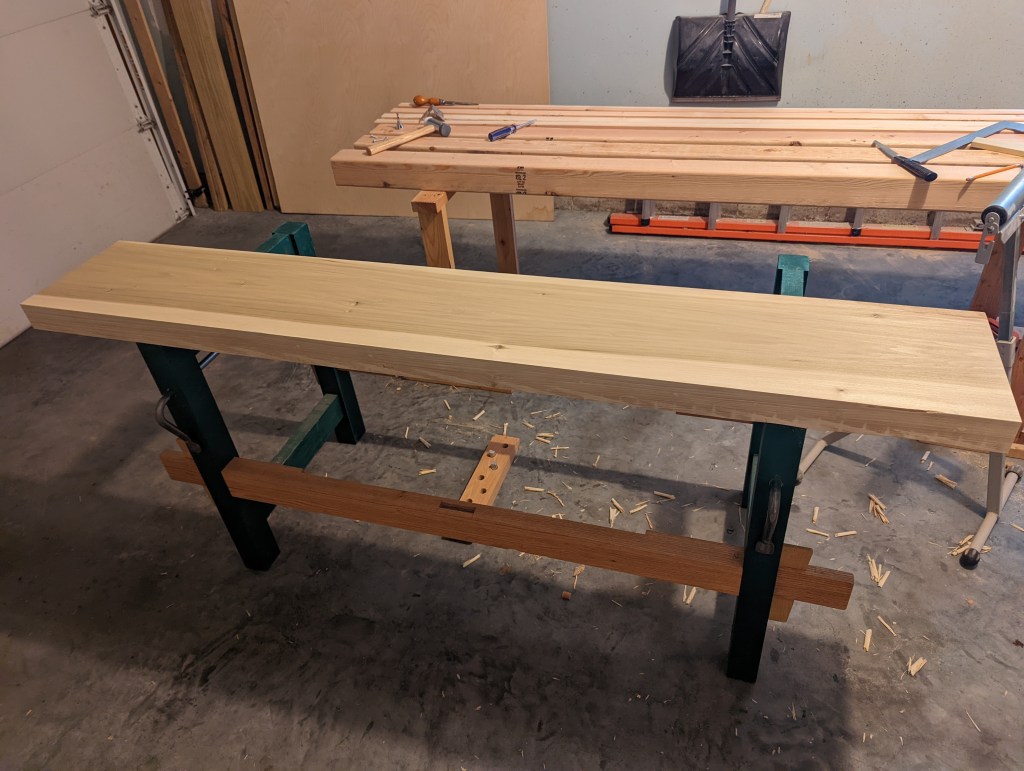
After very little deliberation and just a few moments of thought, I’ve made a tray to complete the refitted knockdown outdoor workbench. It is also of poplar (to match the new slab) and about as simple as a workbench tray can be. Just a wide plank with a back lip glued and screwed on.
And when it’s sealed with some oil, it might even match!
It’s important not to overcomplicate things, especially not an outdoor workbench. So when I came across a thin-ish poplar board at the lumber yard that was wide enough (more than 14″!) to get both the tray bottom and the back edge, I jumped at it. Sure, it’s only 7/8 after flattening. But that actually maximizes the available depth (the slab is only 2 3/4″ or so).
I ended up not even needing the extra board I bought for the back edge of the tray.
To keep the tray aligned and stationary, I added some long battens with elongated holes and truss screws to the underside. These lock in place with a satisfying snap to the inside of the back legs and the top rails. Is it elegant or beautiful? No. Is it perfectly functional? Yes, of course. And it has the added function of keeping things relatively flat throughout seasonal movement.
Let’s hope the oil fixes that color match problem.
With the weather getting nicer, I’m glad to have this bench back up and running. Poplar gets a bad rap sometimes, which is undeserved in my view. Not only does it paint and stain well (especially very dark gel stains which cover up the streaking and varying hues (from white to purple), but it’s stable and cheap. The rough sawn boards shown on the saw horses above cost $45 in total at a lumber yard just outside New York City.
I am not super great at interpersonal stuff. With the exception of a few traumas from my youth, I get past things pretty quickly and don’t dwell on stuff. And by extension, I don’t get attached to much (people or things).
I learned about the Sunk Cost Fallacy early in my life and I embraced the hell out of it and never let go. Which seems a tad ironic as I write it: I don’t easily form attachments because of my religious-like devotion to a core tenet of rational economic action. But I think my low-grade sociopathy makes me a better woodworker. I just don’t get attached to materials or projects because I will never let myself succumb to the sunk cost fallacy.
This is going somewhere, I promise.
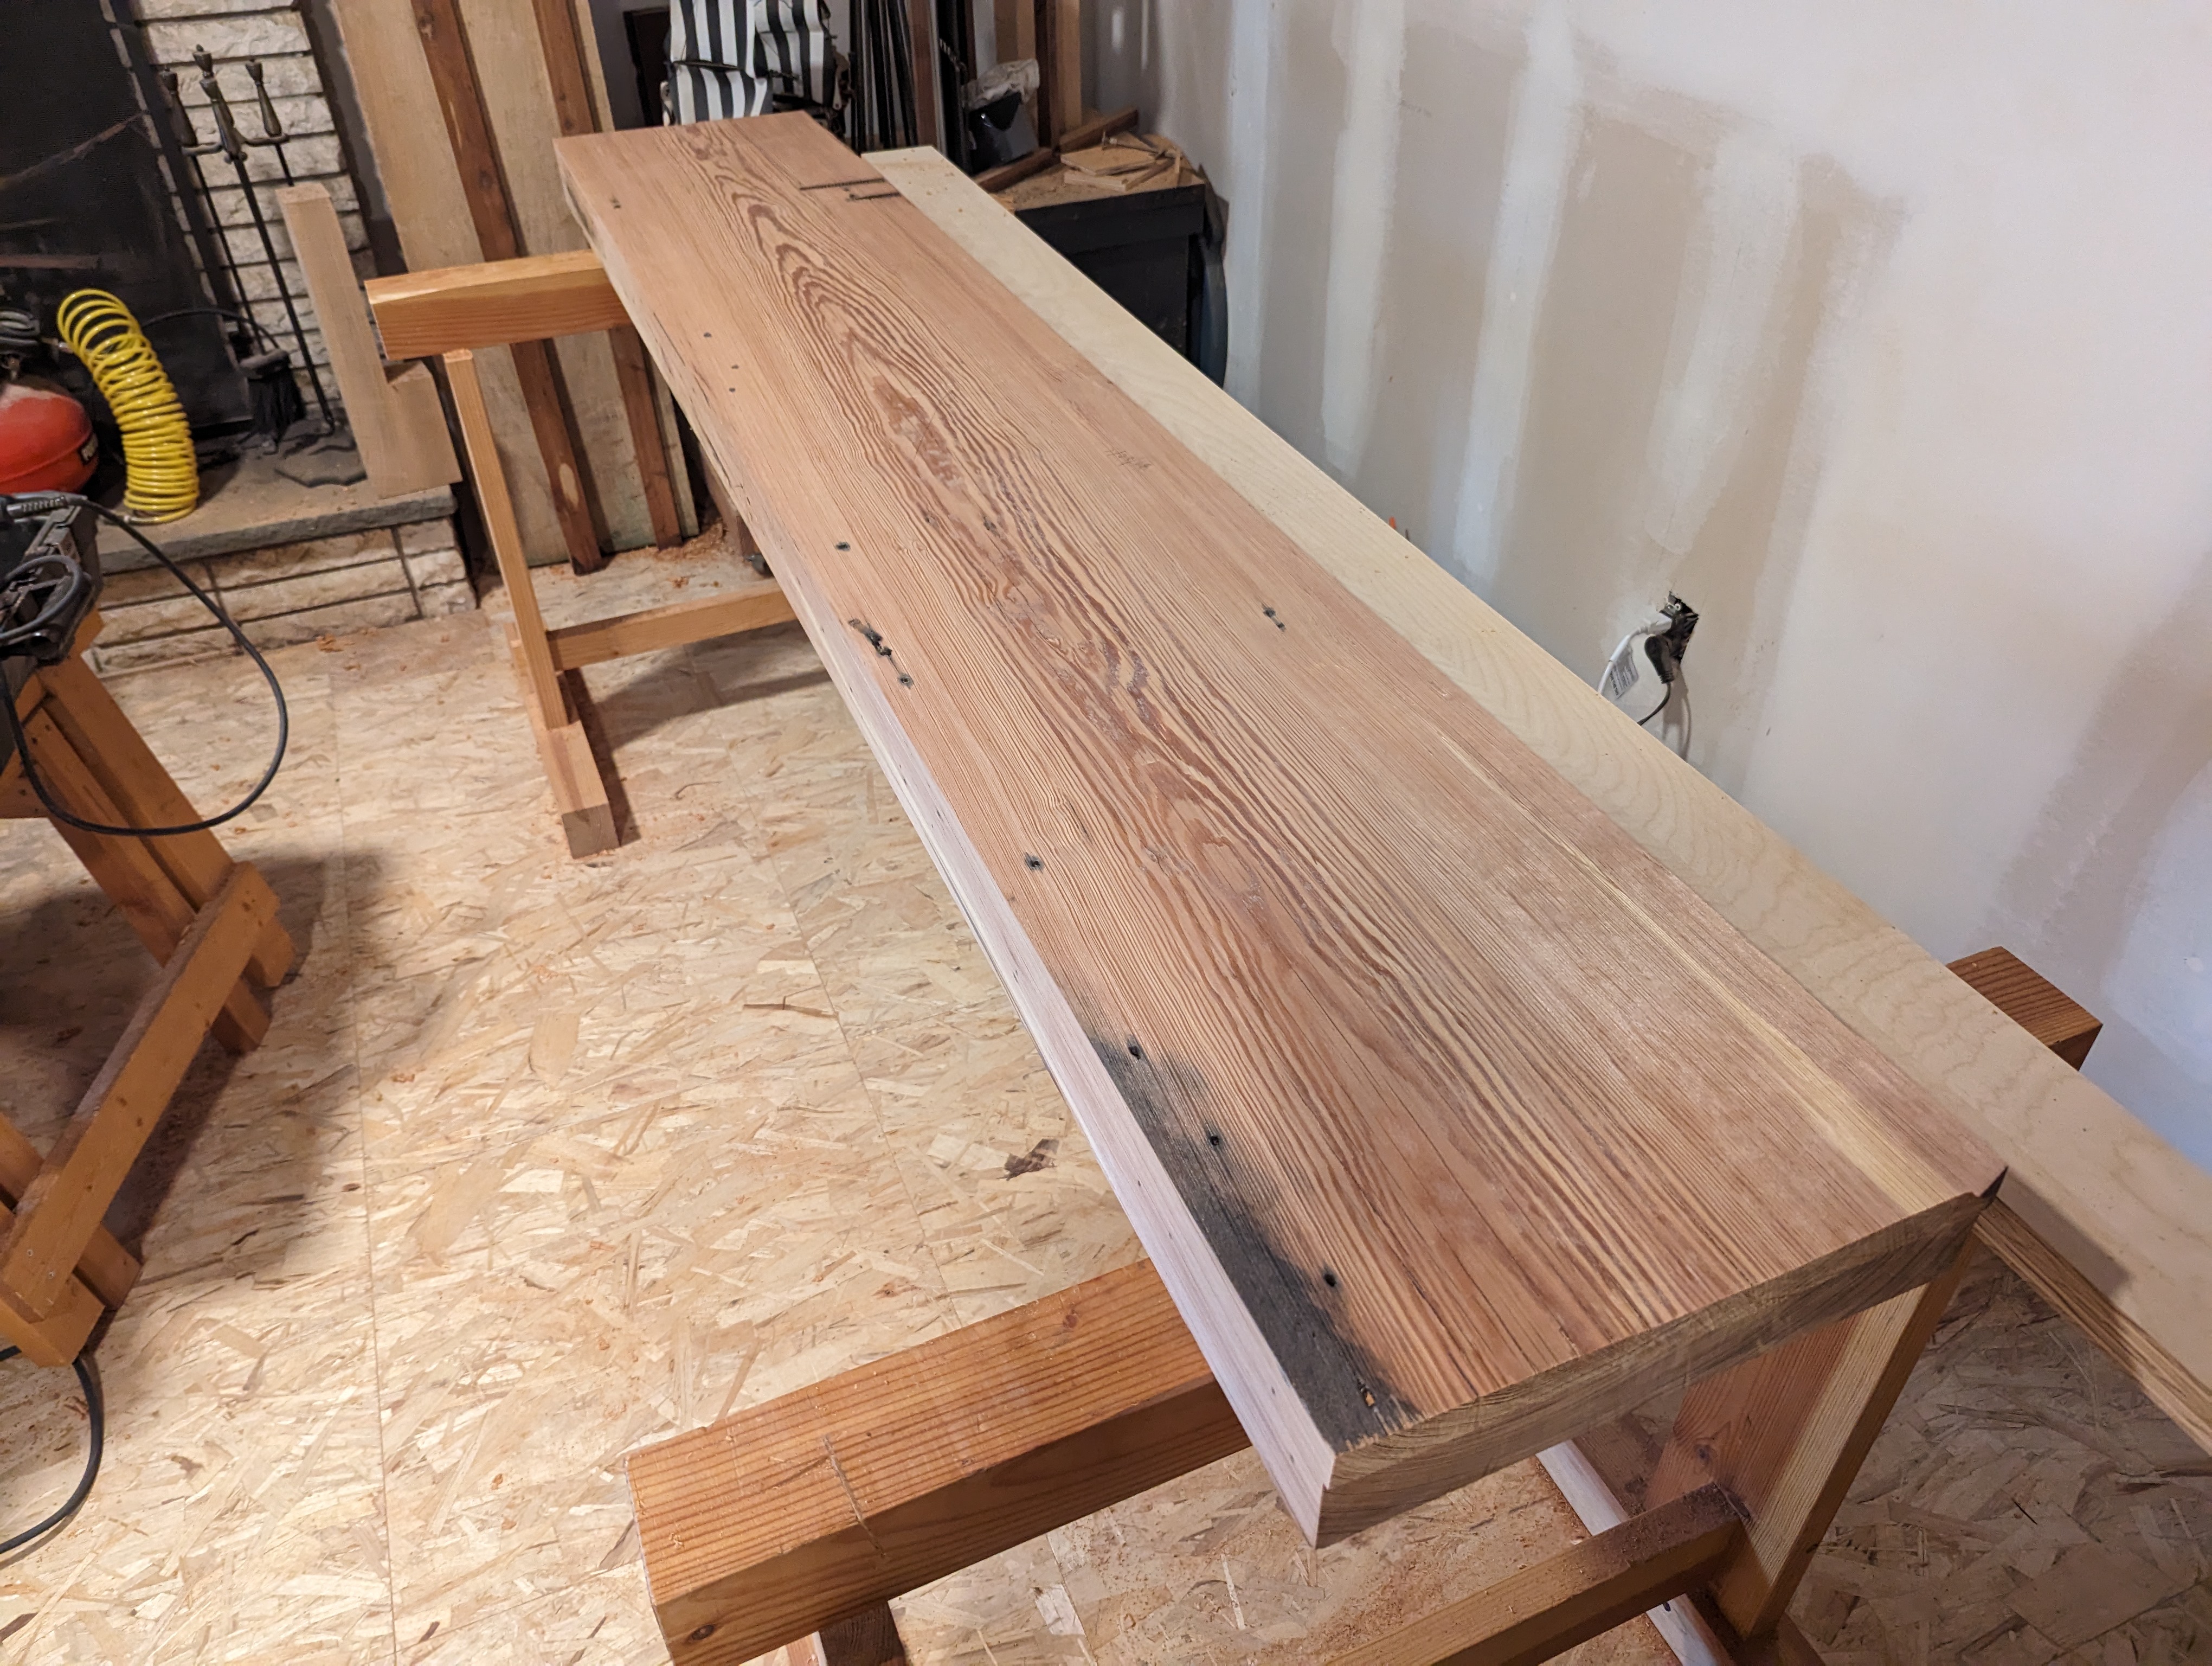
Late last year, I used a bunch of scraps to make a knock down workbench for woodworking away from my shop. Whether on the lawn or at my parents’ house in Vermont (which, I just realized, this morning, is a French portmanteau of “Green Mountain”), this bench has served me well. Except the slab top (face laminated Douglas Fir), which got wet in the back of the truck and cupped horribly.
So, embracing the sunk cost fallacy, rather than spending hours reflattening and whatnot, I scrapped the slab entirely (I’ll cut it up for firewood later). I had a lovely Poplar slab that is a perfect replacement and that only needed some minor attention before it was ready for the thickness planer. Sure, that poplar slab was technically for another project in the queue, but I need a workbench for outside now.
The most important tool for hand tool woodworking is a decent thickness planer.
Also, I think it’s worth mentioning that the last slab was 78″ long. But making the poplar slab 76″ would leave an offcut large enough to get four table legs out of. So the new slab is 76″. That only leaves 11″ overhang on each end of the undercarriage. Oh well. Sunk Costs.
I am well aware that is not the correct use of the term.
In the end, I think we could all be better at avoiding attachments. For instance, it would have been easy enough to try and blind peg the top to the existing 5/8 dowels in the undercarriage. But I took the time to saw off and plane down the old dowels and re-blind peg the top with larger dowels (3/4) that completely subsume the old dowel holes.
Let the past die. Kill it if you have to.
This post has gone a bit off the rails, admittedly. But I still need to mortise in the fixed deadman (seen on the floor above) and bore holdfast holes in the slab. And attach the Whipple Hook (which works great and is not being abandoned).
Because not all prior effort is actually a sunk cost.
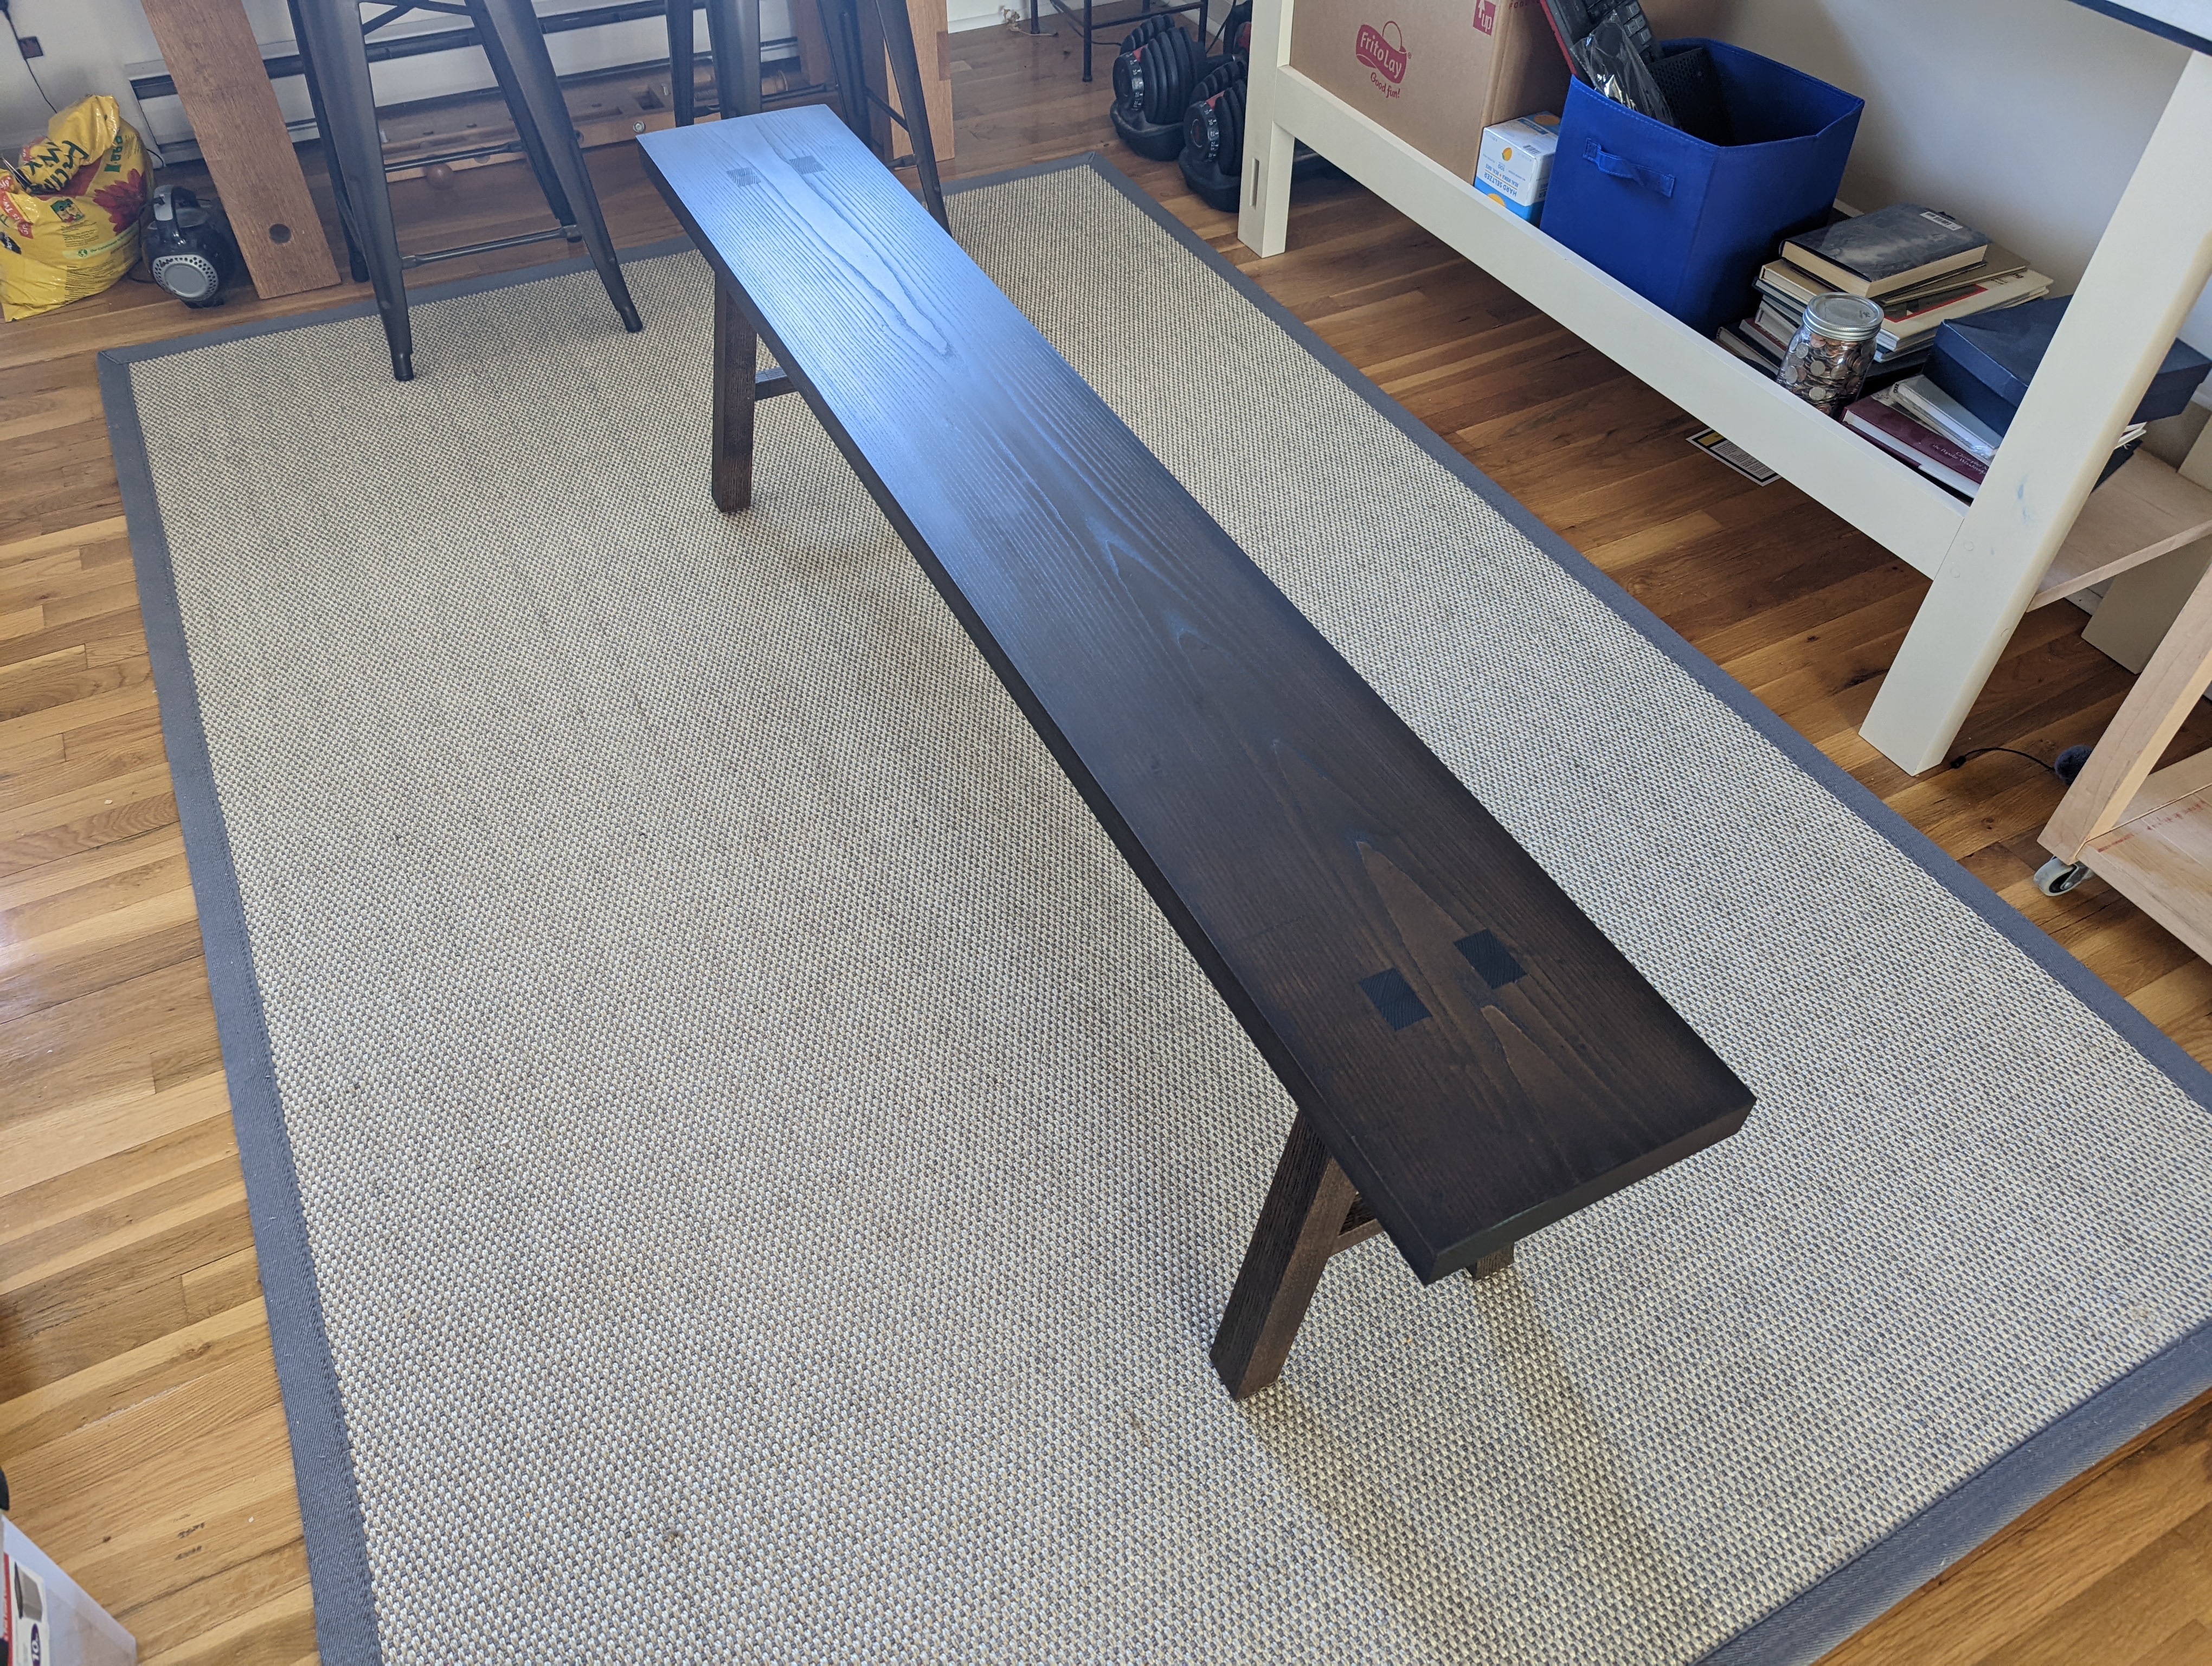
Just a quick update before the weekend. I finished (literally and figuratively) the joined low bench (which is what I’m calling it now). Two coats of Jacobean stain and some dark paste wax. No film finish.
I think it looks great.
It still stinks (both the stain and the wax smell the same to me) but it’s getting better and feels dry to the touch. I’ll give it a few days to cure before I sit on the thing, just in case.
All in all, I remember why I stopped staining projects. Natural wood color is nice and a wipe of Boiled Linseed Oil or Tung Oil is just so much more convenient (and less messy) than staining things. But sometimes you don’t have the wood you want on hand and have to make due. Or, sometimes, the wood you want just isn’t going to match the rest of the furniture.
Although it probably needs one more coat of wax in a few weeks.
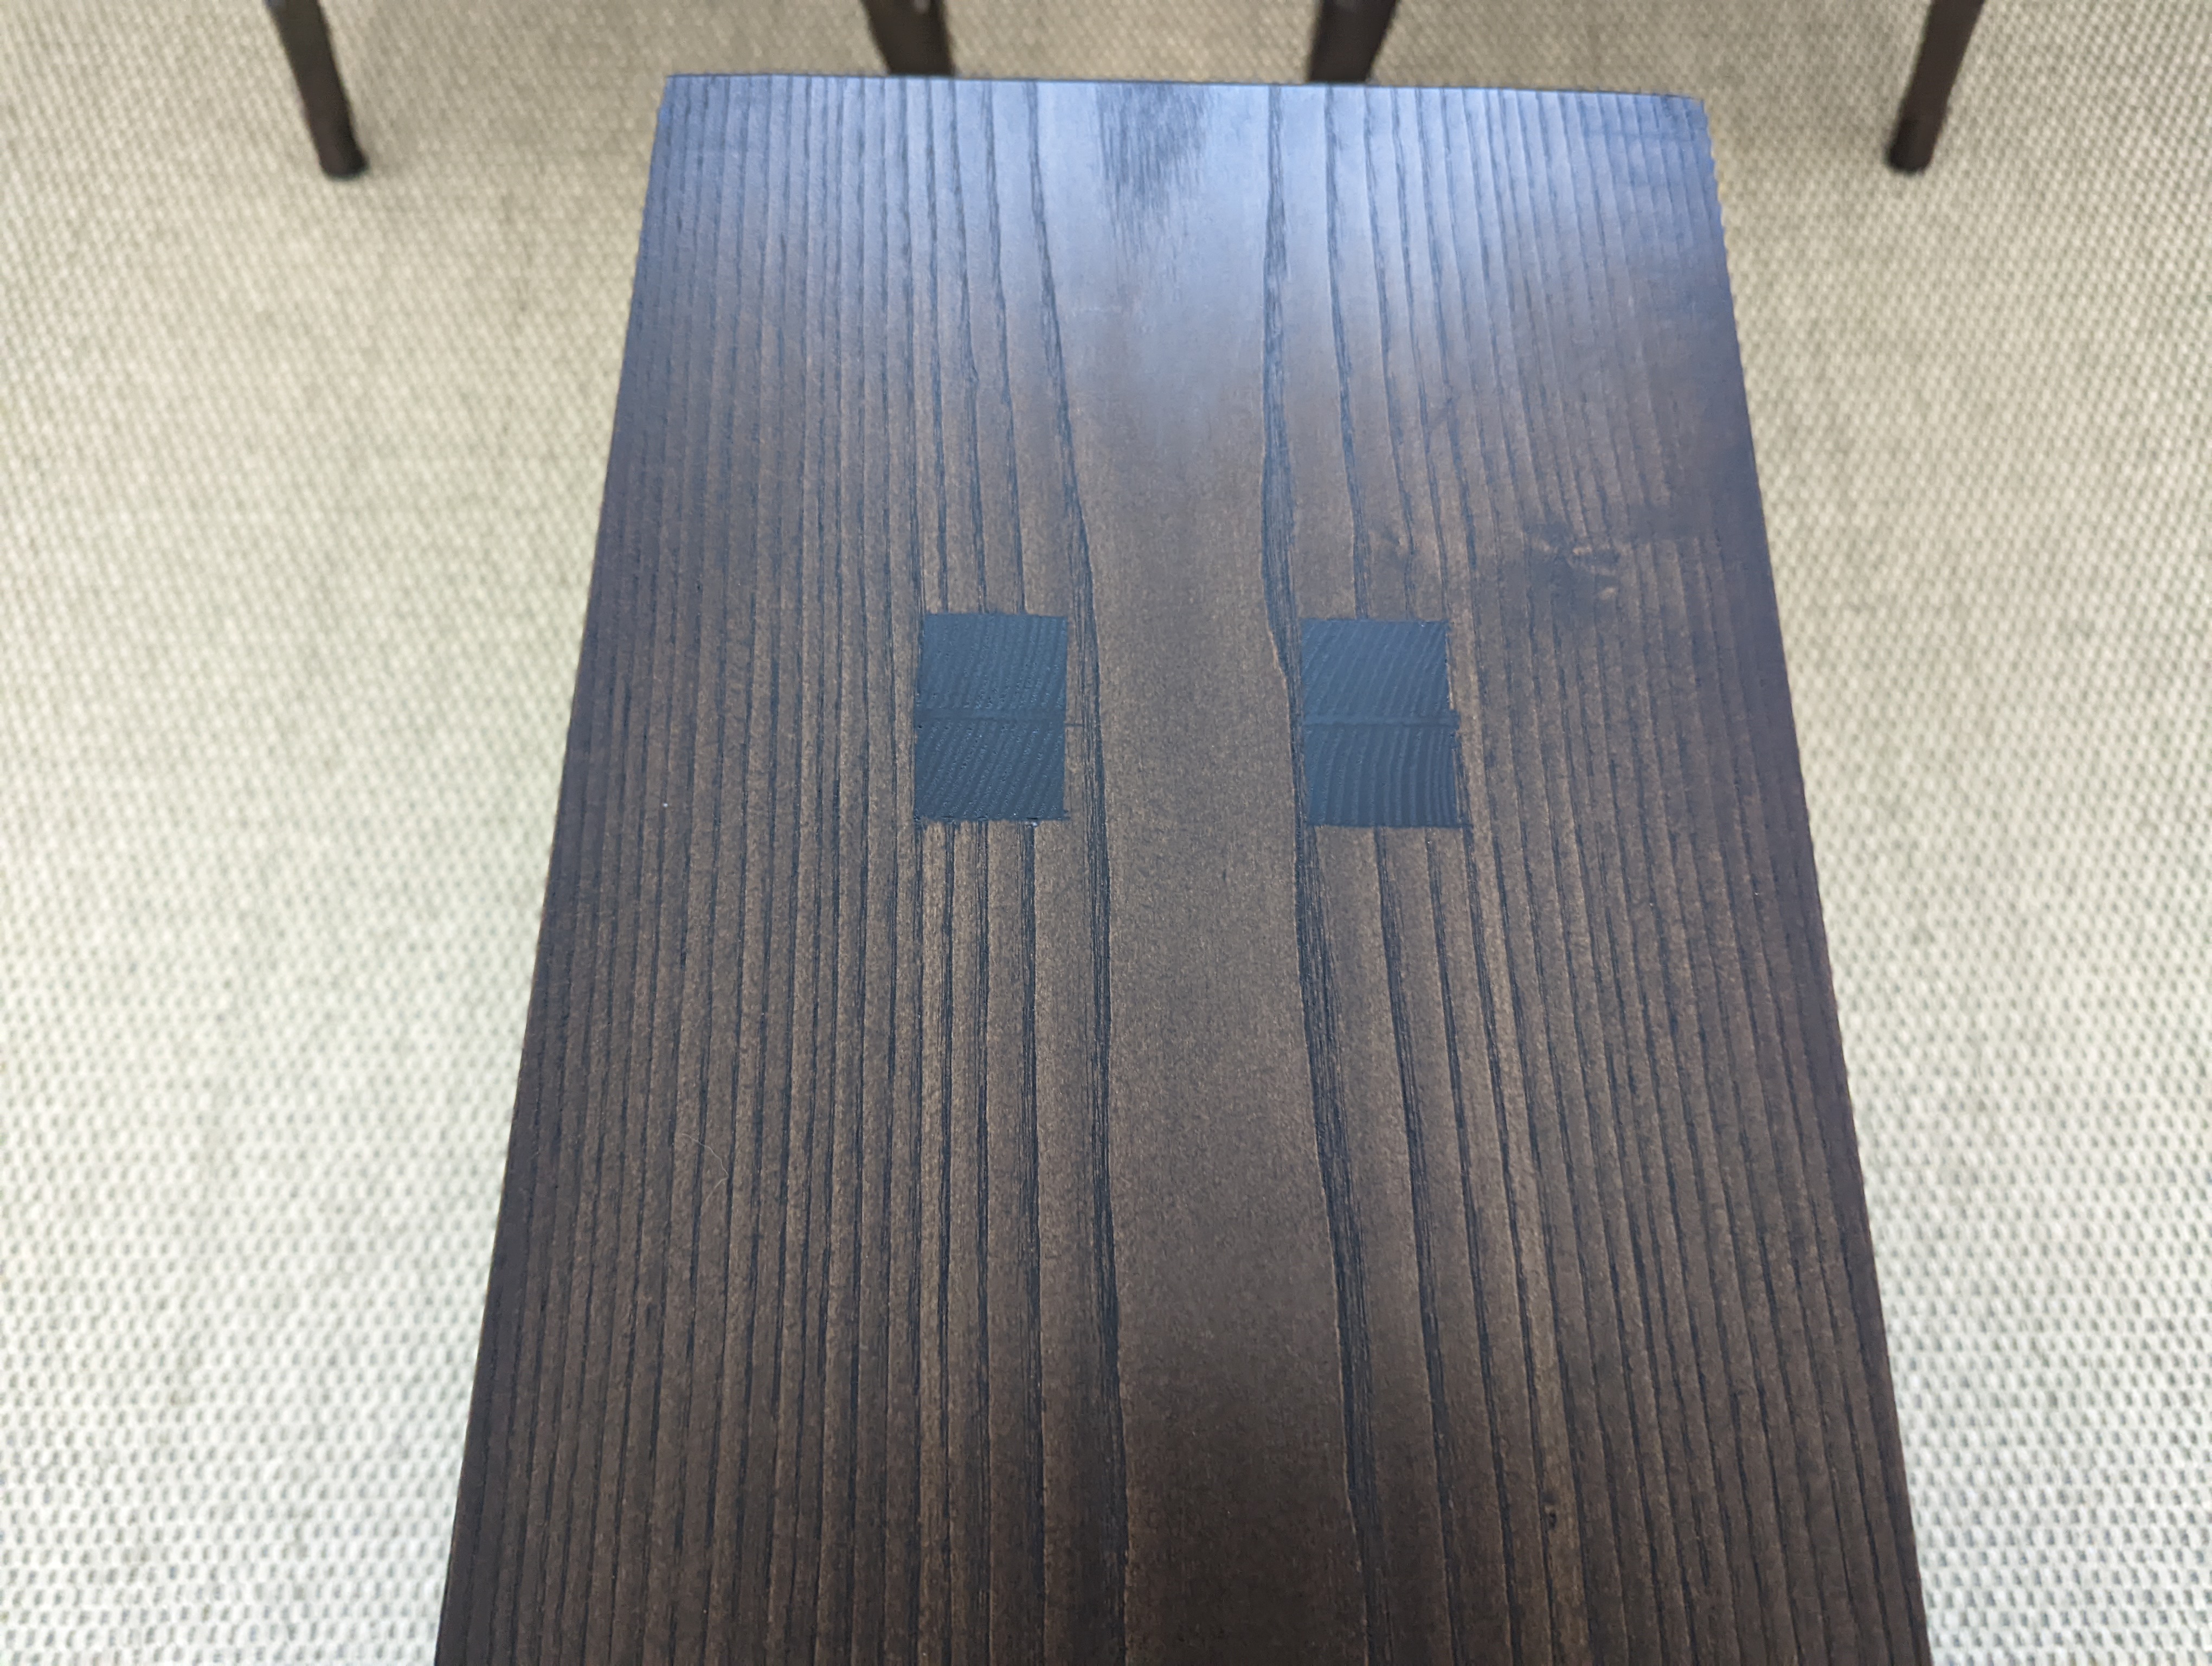
I think I stained the thing so that I wouldn’t just turn this into a low workbench. I now can’t glue any blocking to the underside for holdfast holes or a twin screw vise on the side. And it’s better that way.
If you don’t get it, watch the Jaws 3 and Jaws 4 trailers.
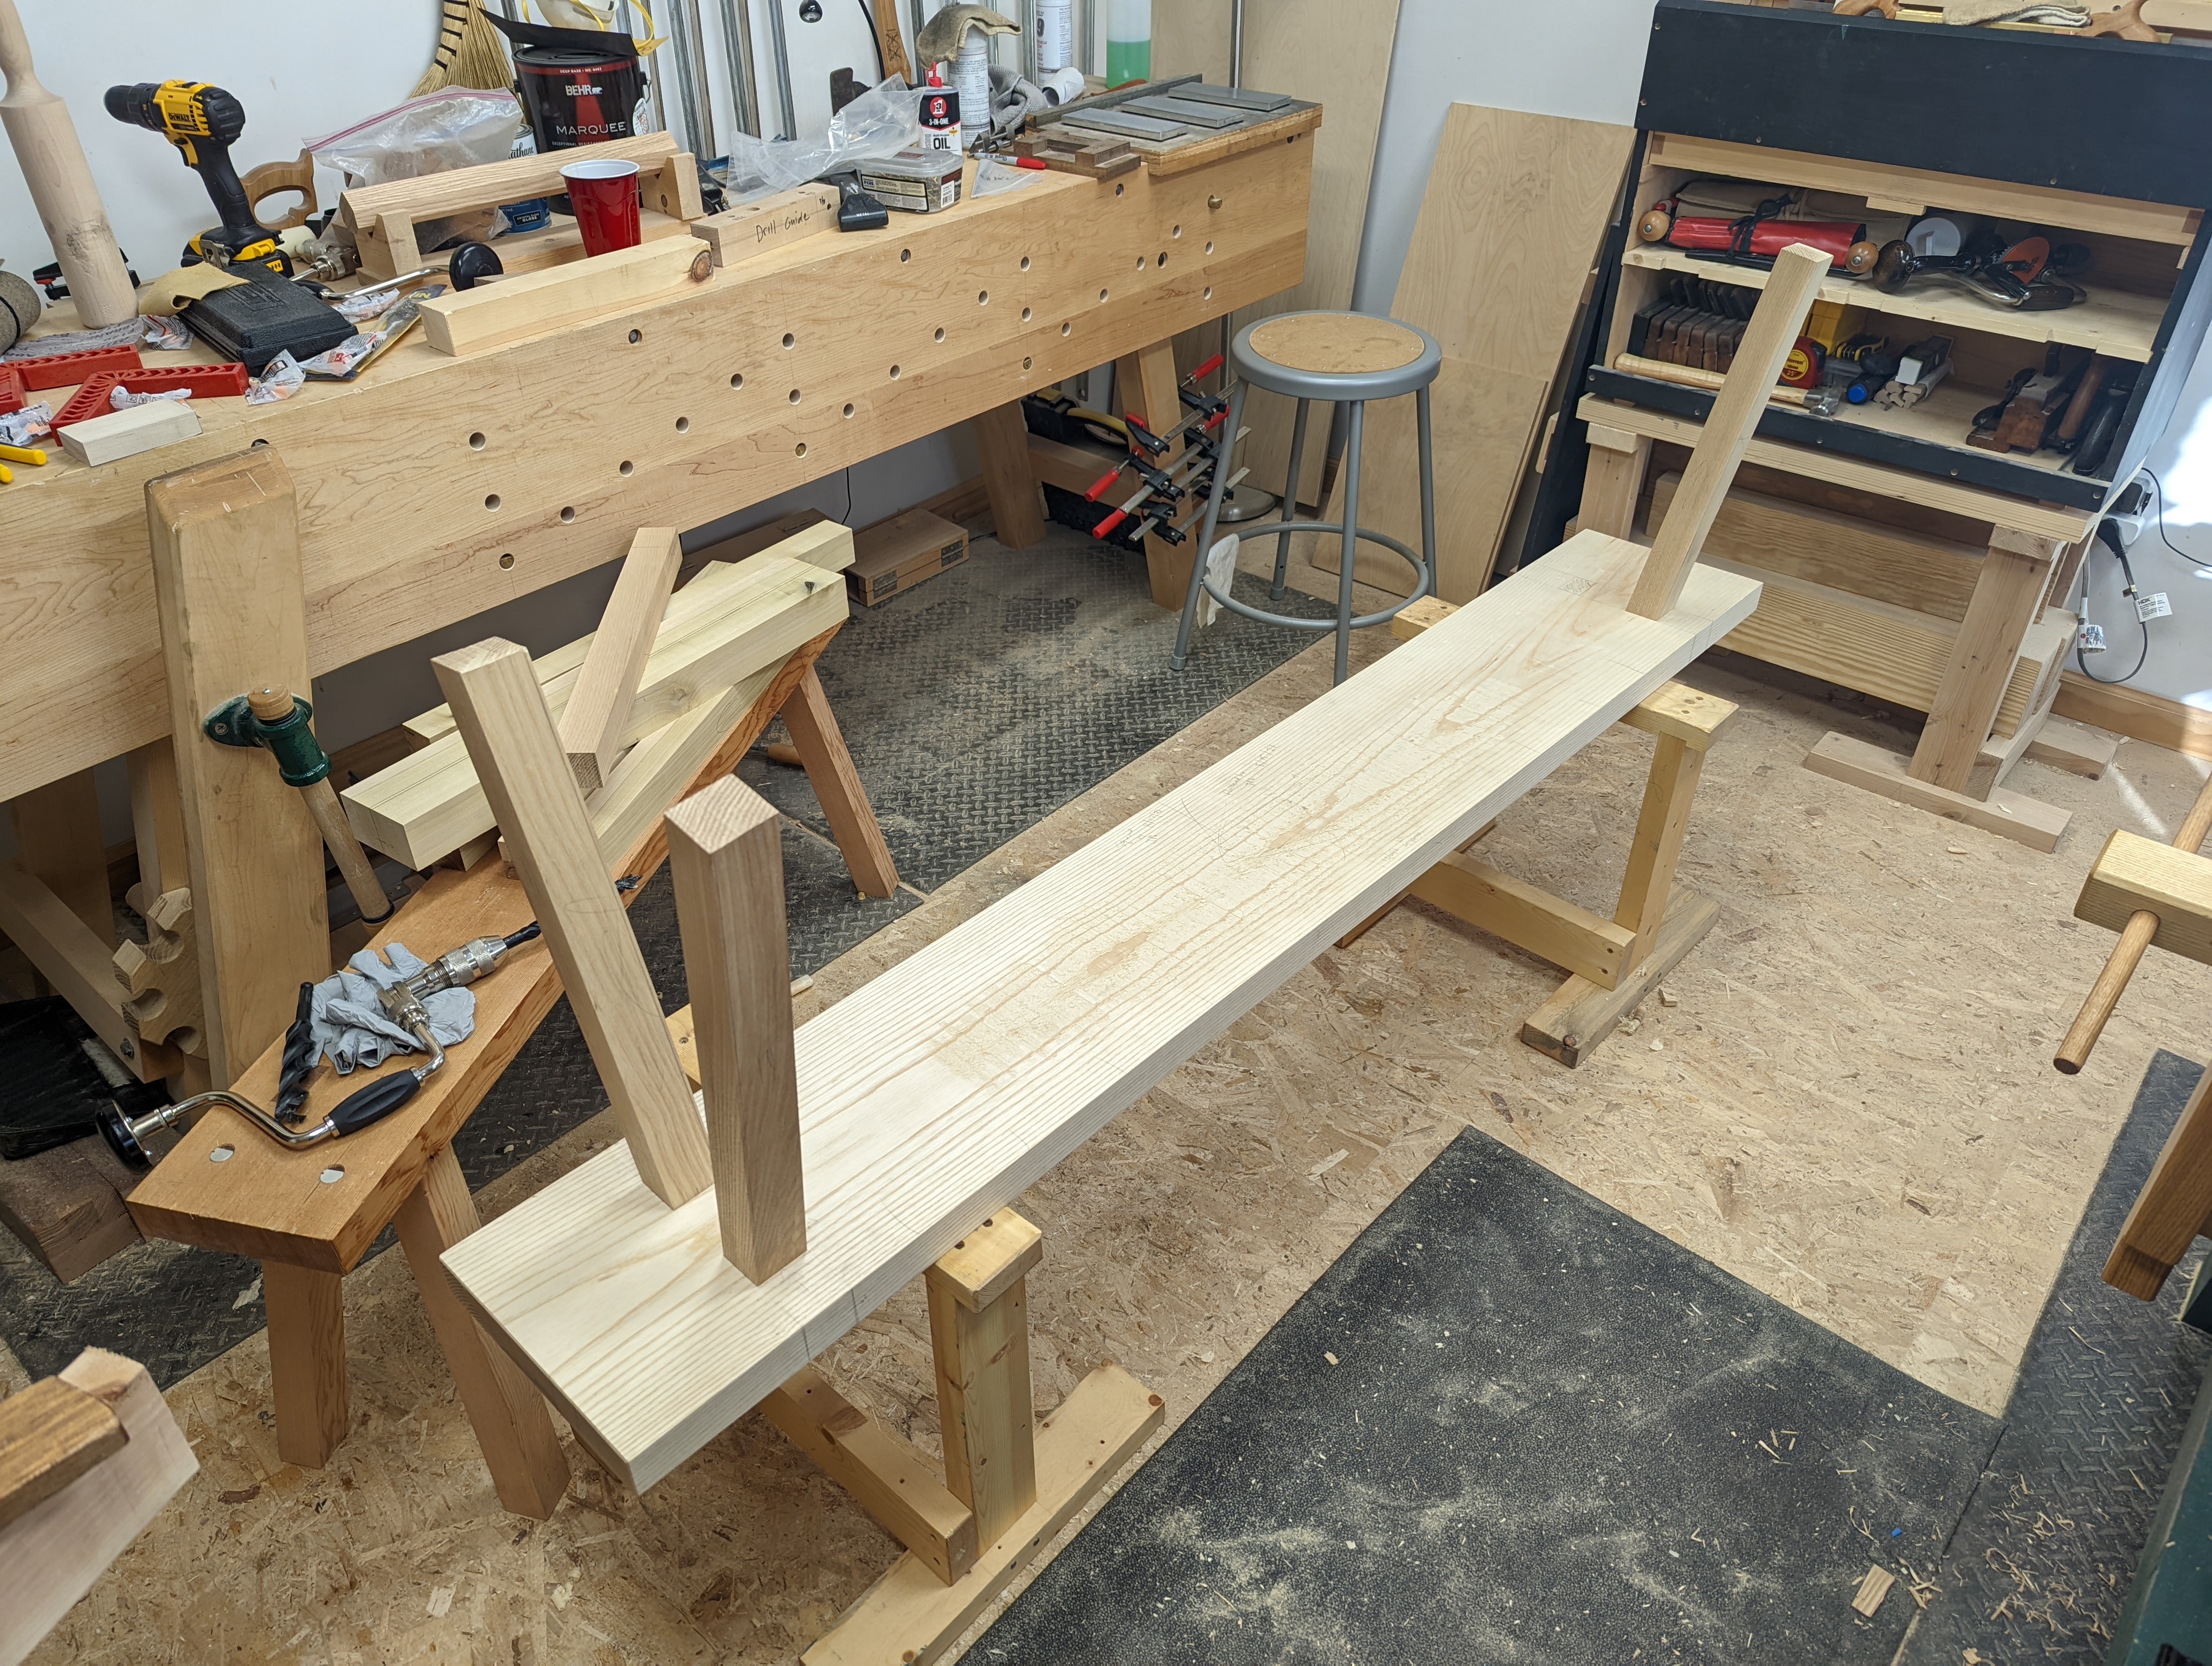
For a while now, I’ve been fascinated with the Chinese-style of “staked” furniture construction. Instead of round tenons, they are square or rectangular and therefore able to be made with very simple cutting tools (just a saw and a chisel, essentially). This also means that the angles can be micro-adjusted in a way that outshines even reaming tapered round tenons. So getting the fits and angles perfect is within reach of anyone, especially with some basic angled guide blocks.
If you click the links above, you’ll see I have gradually increased the complexity of the build project by project. And it is now culminating in what will be a sitting bench for the bottom of the bed. No palm or holdfast holes on this beauty. And no softwoods for margin of error.
A mid-build shot.
I was tempted to go stretcherless on this piece. The entire project is 8/4 ash (the legs are actually a bit thicker than the finished top) and there would have been plenty of strength in the beefy, wedged mortises. I even considered lapping the stretchers on with some die forged nails or square head bolts for accent, but it just didn’t match the aesthetic for which I was aiming. After checking all the information available in a single internet image search for “chinese workbench” (which actually turned up two great articles, including one by The Schwarz himself), I decided to mortise in the short stretchers.
Had I done single shouldered tenons like with the original saw bench, I’d be done already. But I had to get all fancy and do double shouldered tenons. Because I’m a masochist.
With this bench, there is 10 degrees of splay but only 2 degrees of rake (remember: splay sideways, rake foRwaRds). So I assumed the tiny bit of rake wouldn’t mess with the geometry of the angled shoulders enough to matter (and that perfectly parallel shoulders would work without fettling). I was wrong and there is one decent gap among the four total shoulders. I keep the shades drawn in the bedroom most of the time, so I doubt the gap will ever be seen, even by me. I did fill it with some matching putty, though.
Close up of the rectangular tenons with hard maple wedge.
I am still tweaking the fit on the second short stretcher and will post some pictures of the finished bench once it’s complete (I also have to level the legs once everything is fitted). But, for now, I will think on whether to paint the base to match the walls in my bedroom or just tung oil and be done with it. Or maybe stain the base in dark mahogany to match the bedroom furniture (which is storebought, btw).
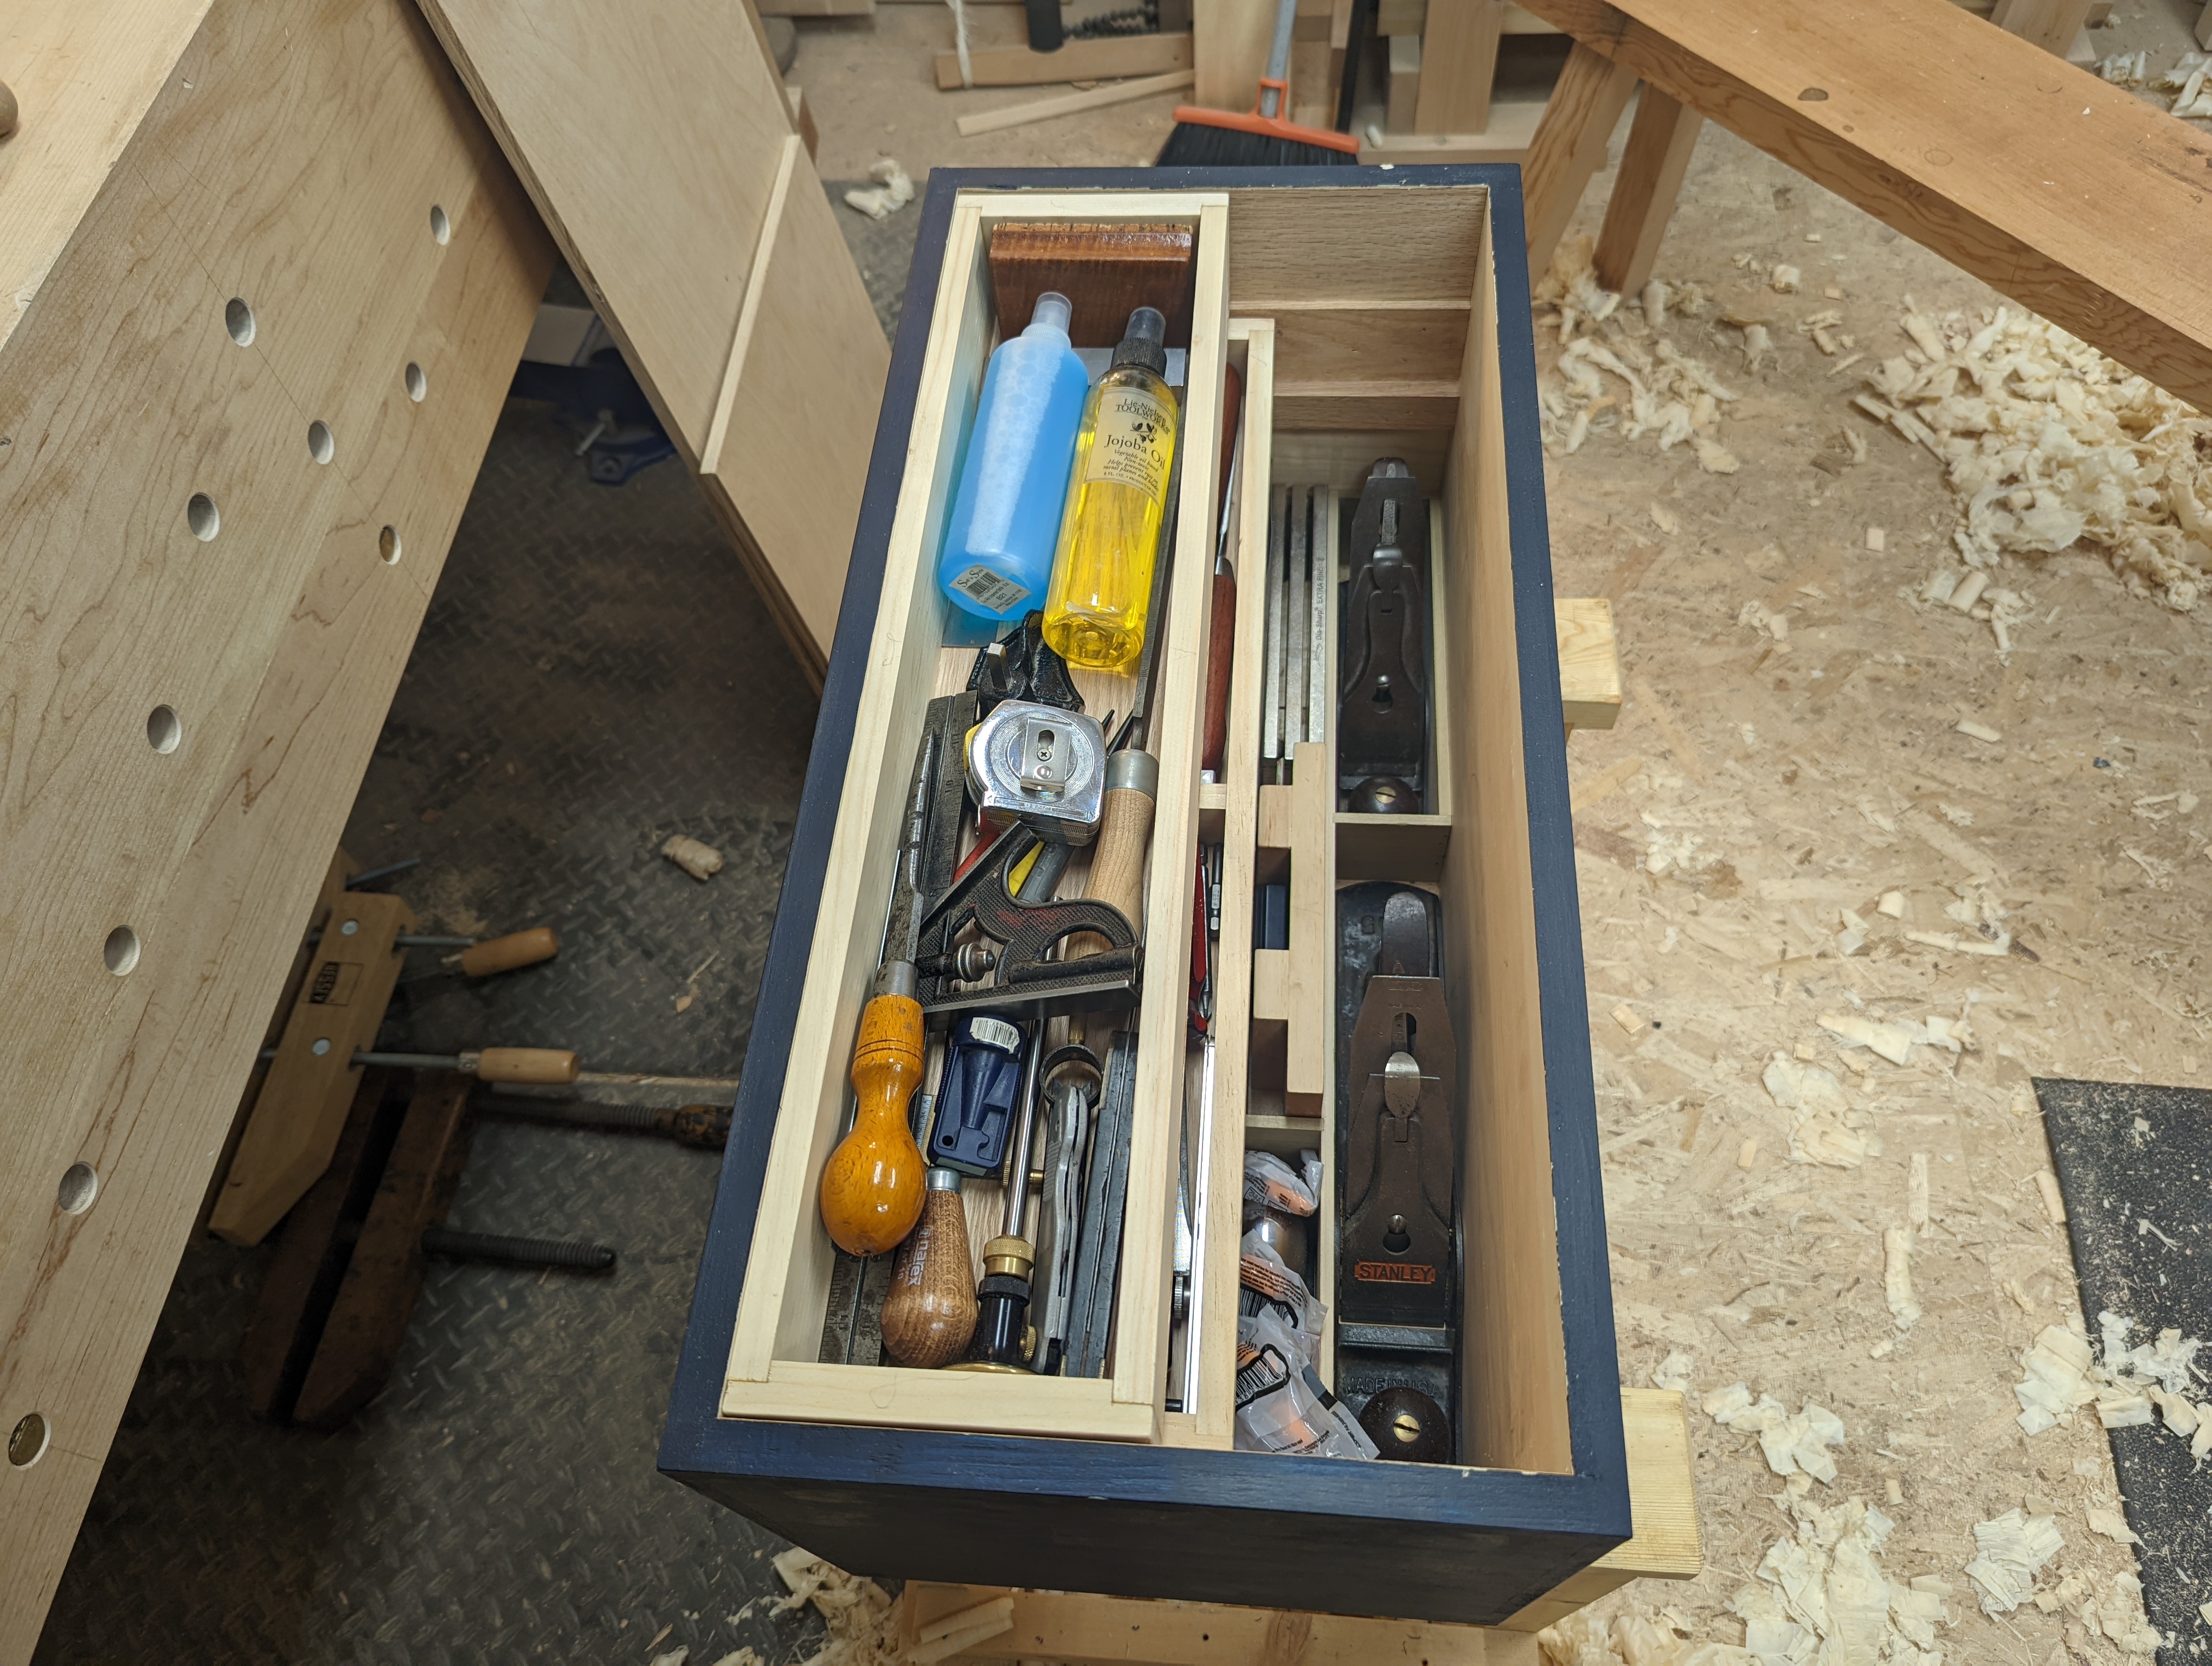
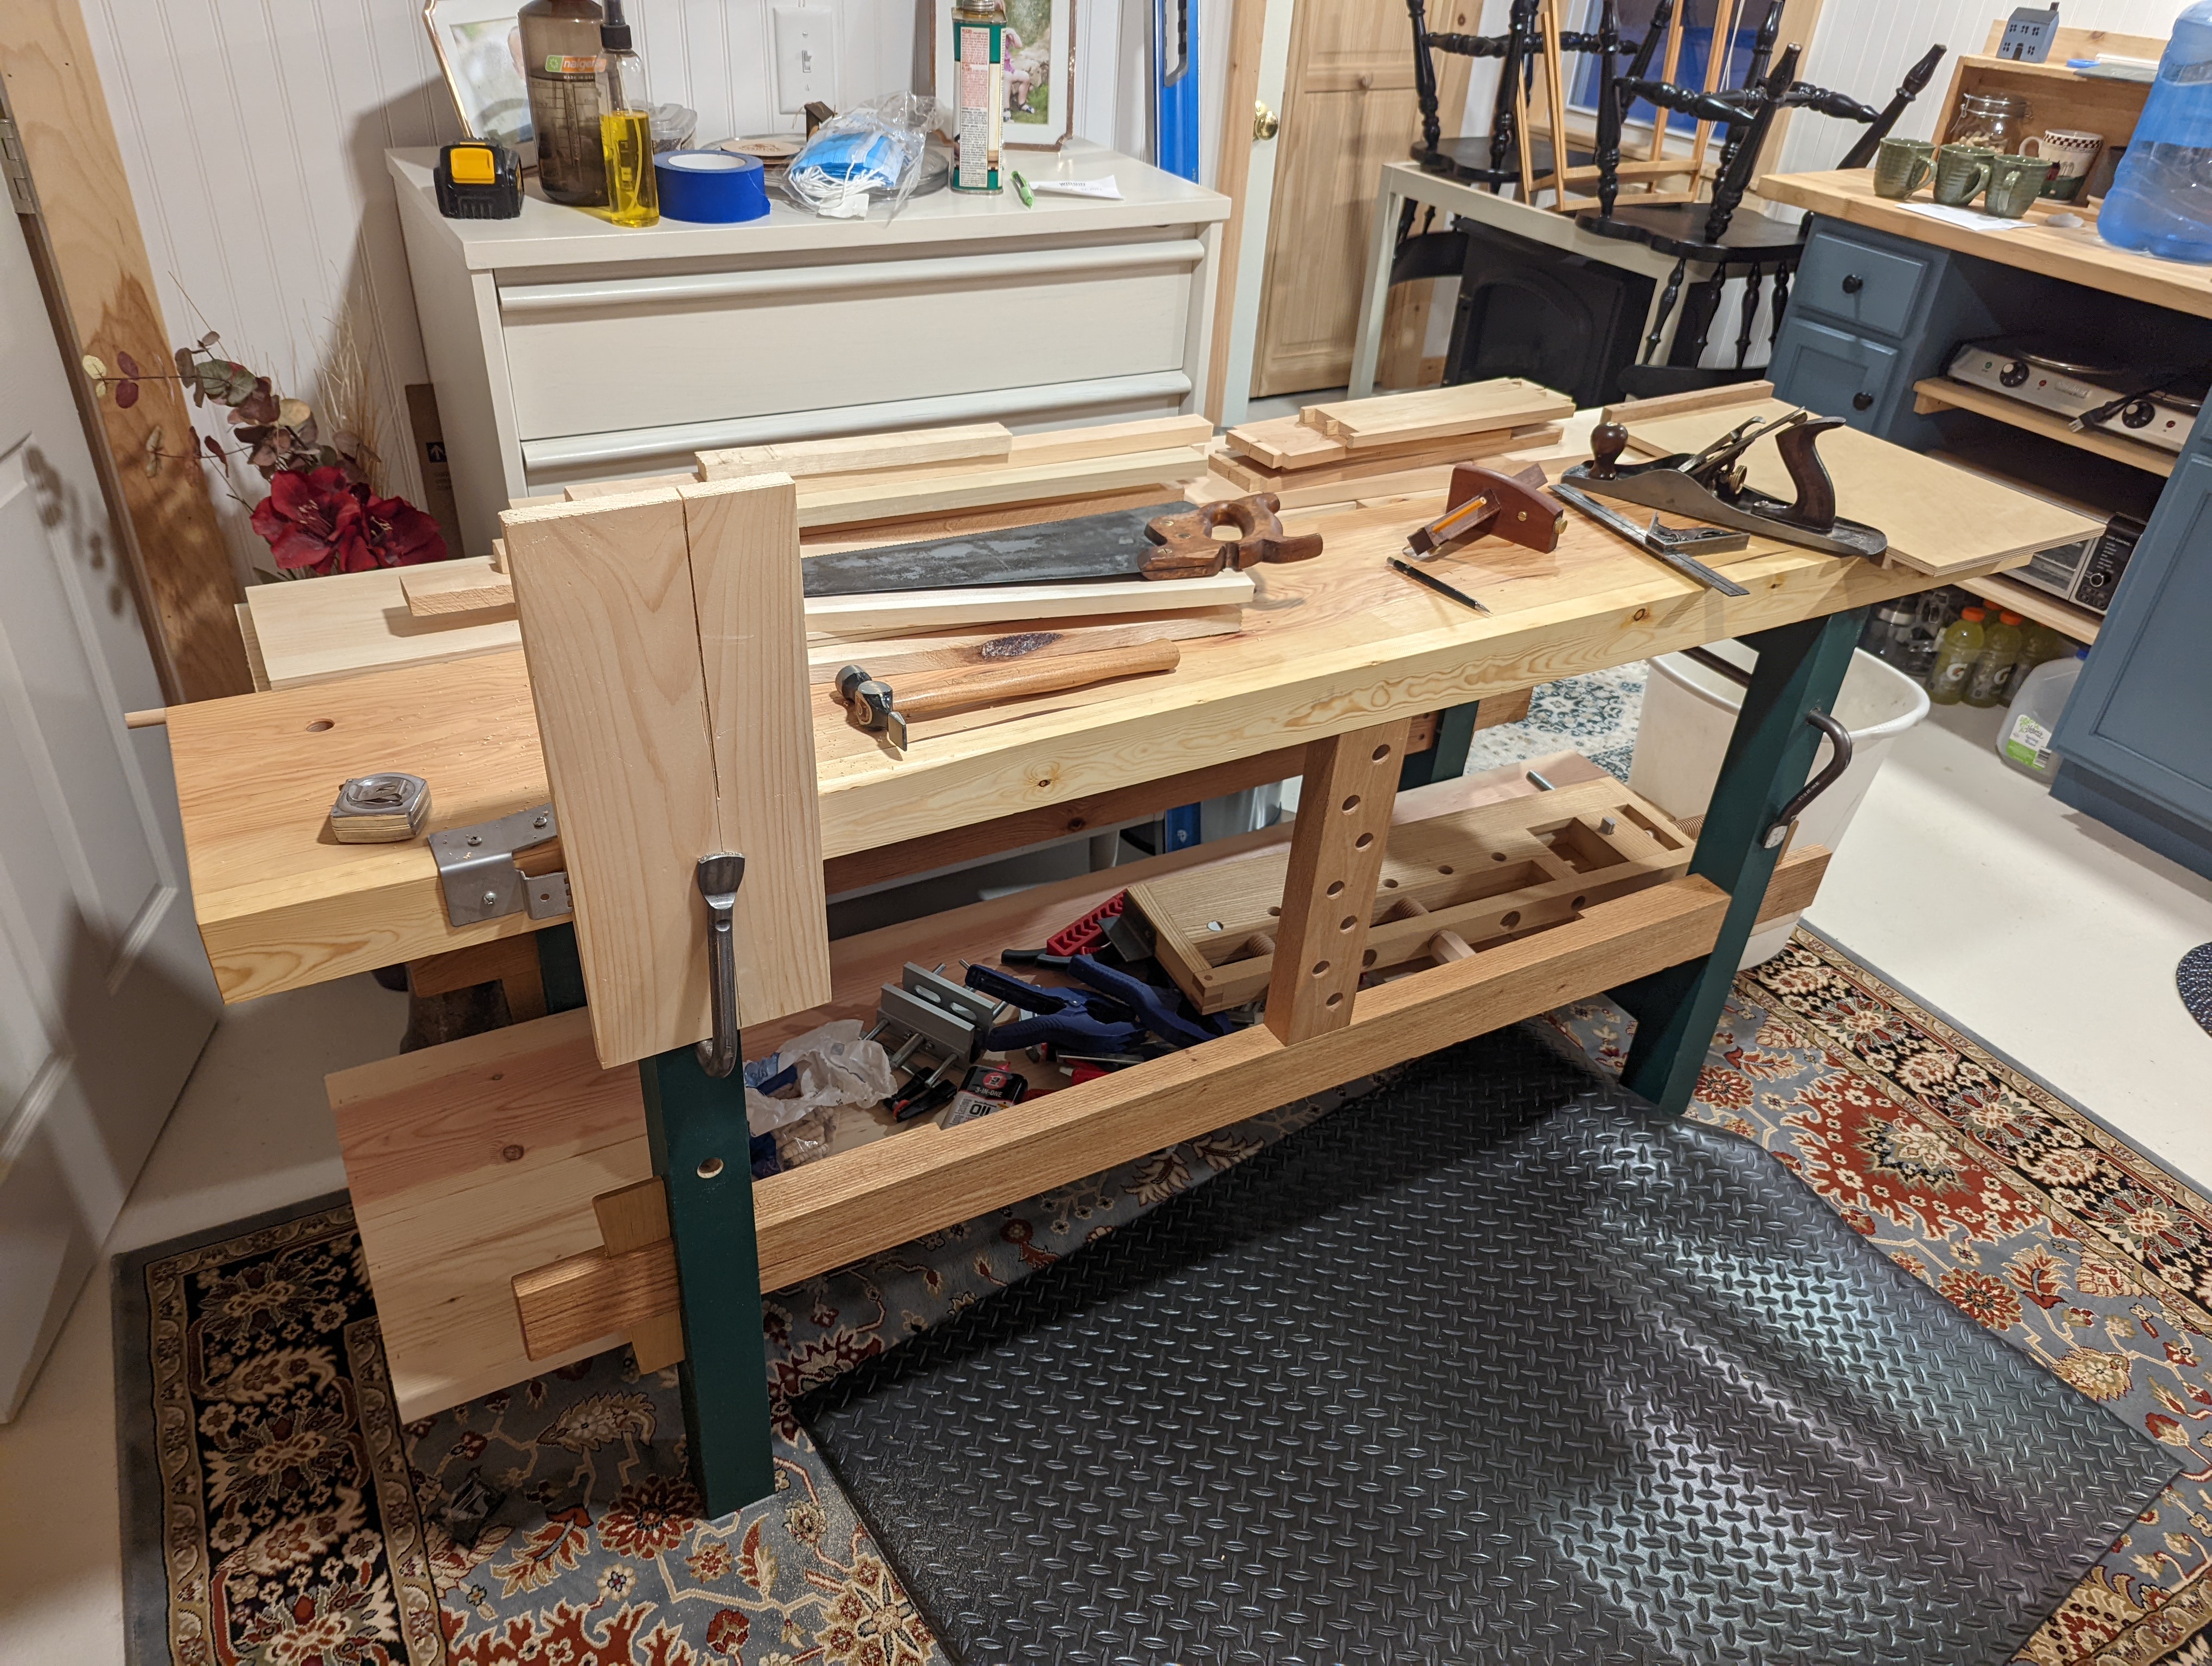
The year has started off somewhat weirdly. I was able to take a bit of time off; I even made a new traveling tool chest for my vacation. Which I am quite pleased with, although I wish it had been about 1″ deeper than it is. The upper tray, even at a full half of the total depth of the chest, is still a bit tight for a 12″ combination square. But I make due.
Everything fits, and that’s what’s most important.
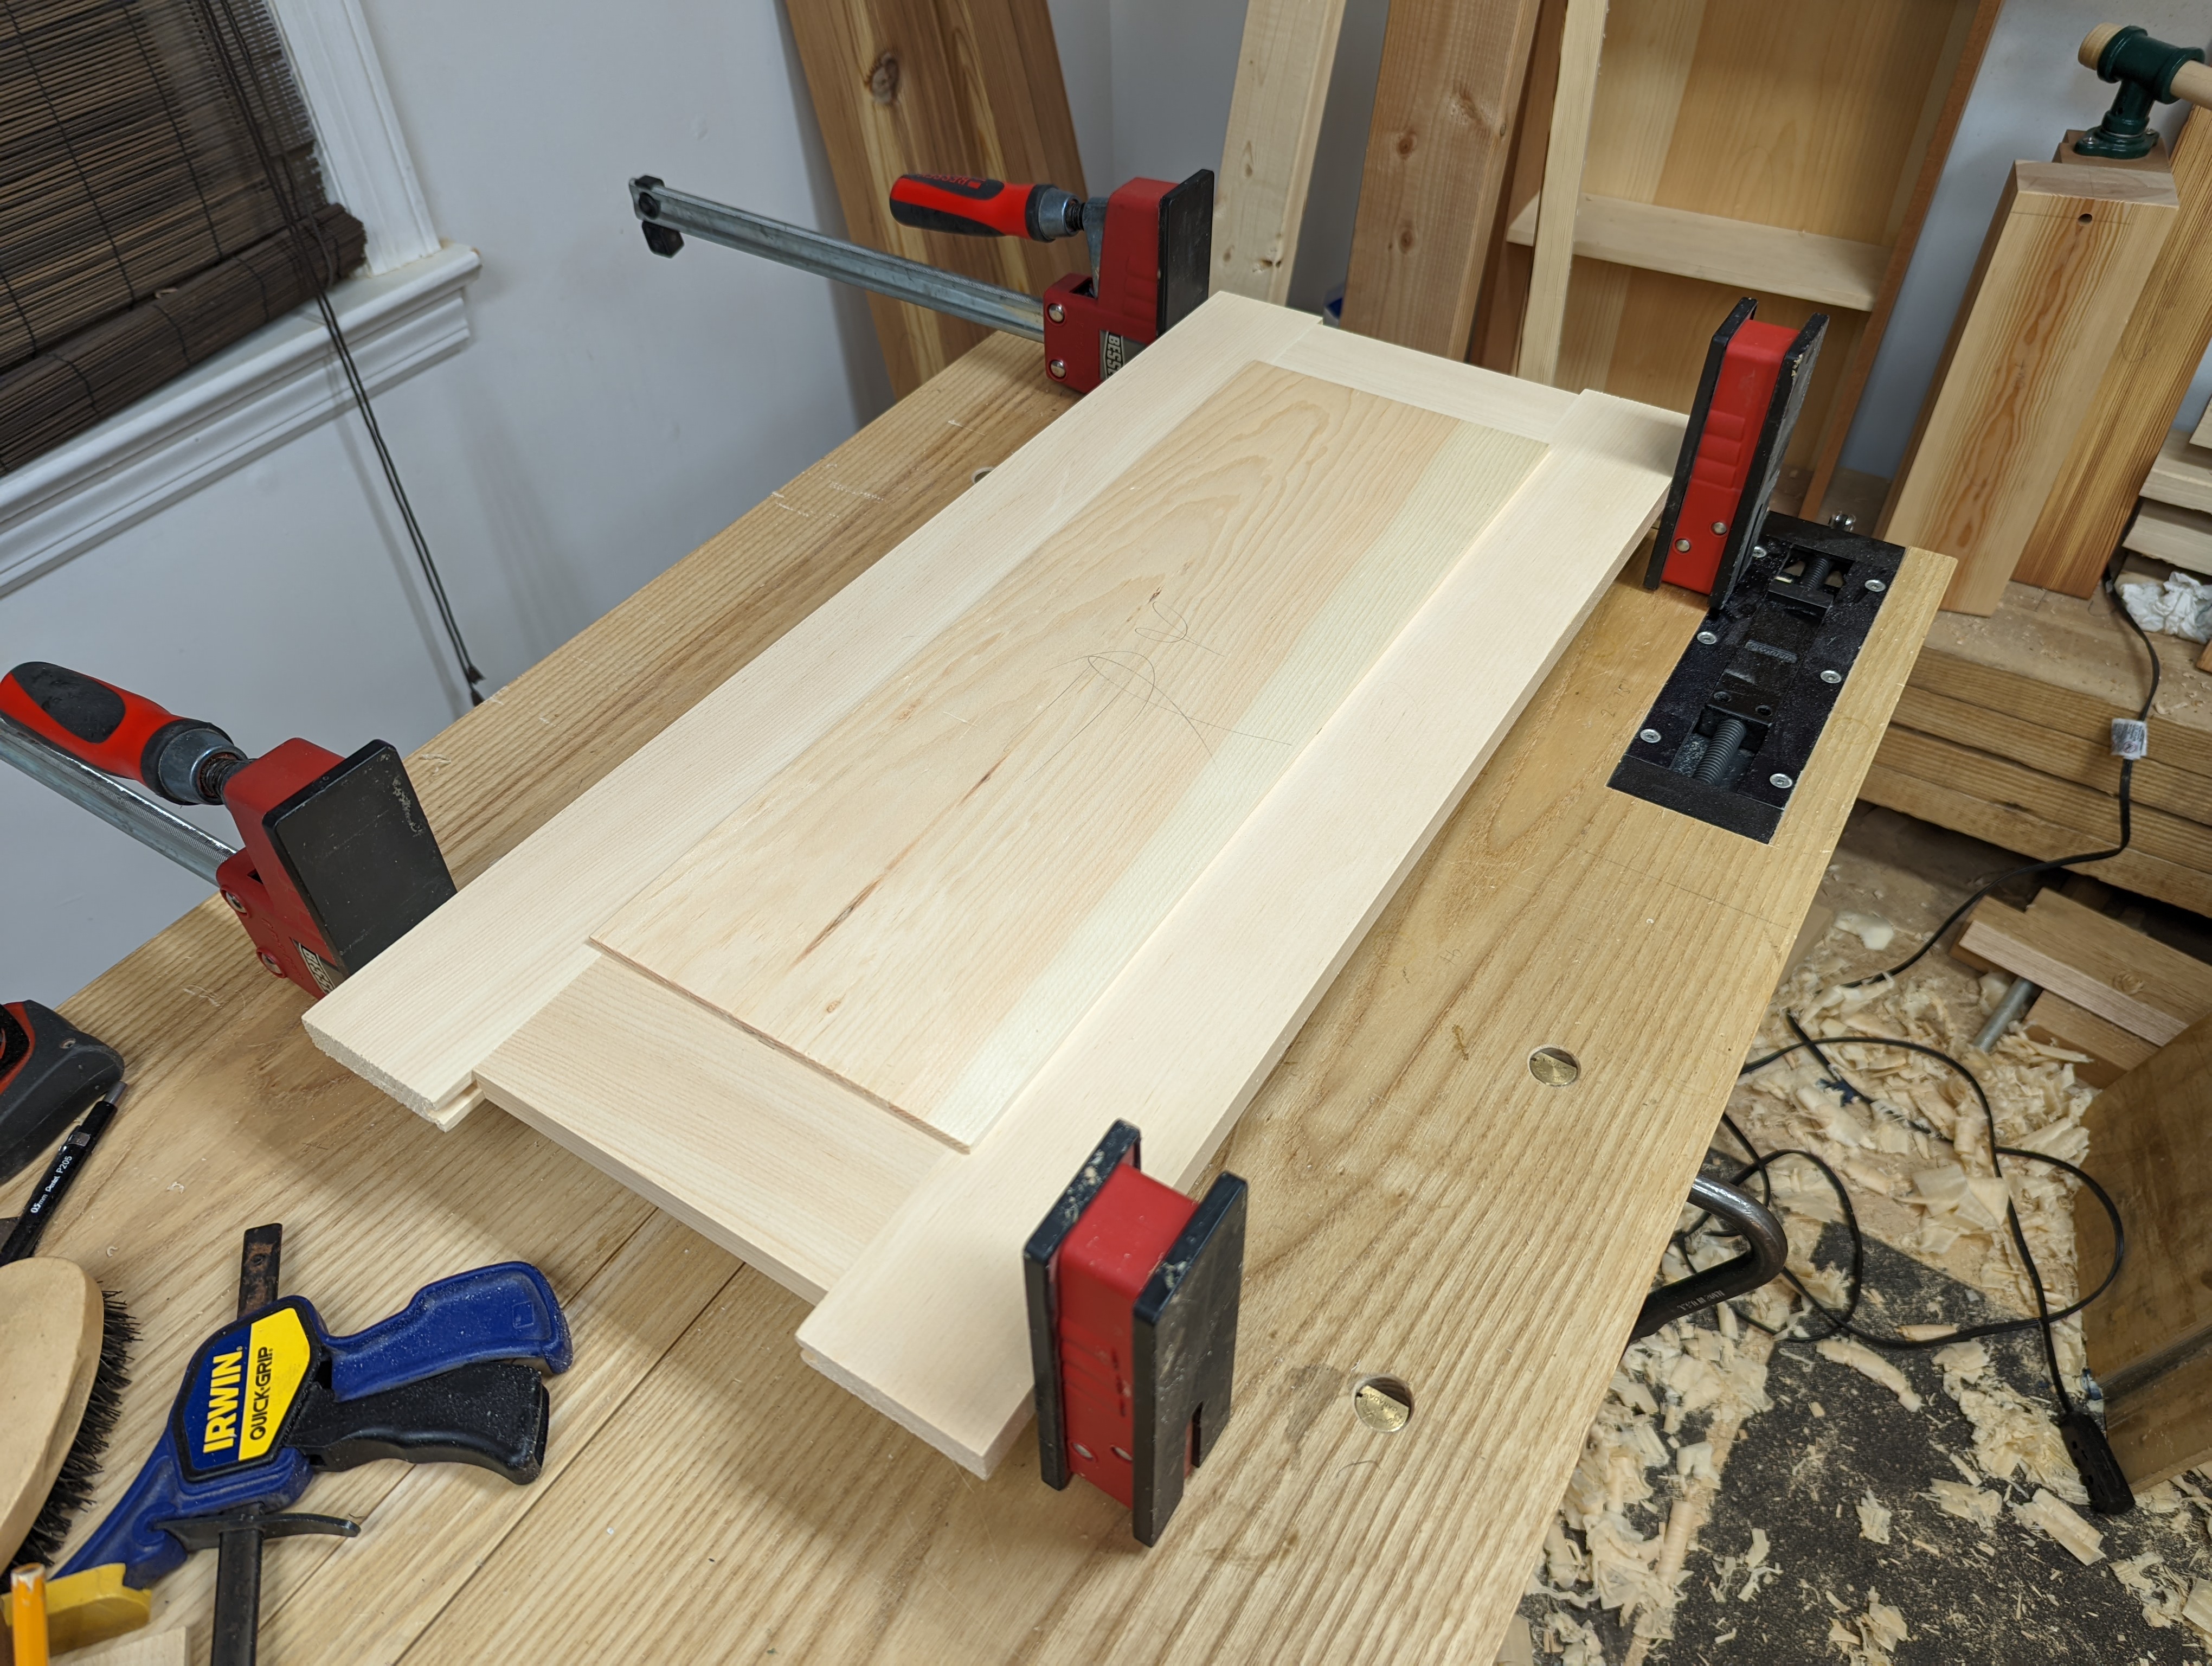
The case itself is pretty utilitarian; as are the tills. But the lid is definitely not. I went full groove-in-groove frame and panel with this one. I had never made a lid like this before. All my panels were in the past raised, and I made the choice to glue one long edge of the panel in place in the frame. I somehow mis-sized the piece and there was a bit too much side-to-side float for my taste.
Flat, square and stable.
When it came to picking tools for the actual vacation, I ended up stuffing it a bit to the gills. Glue, blue tape, a few clamps, an egg beater drill. None of these things fit naturally in the design so just get piled in. It does, however, stabilize the tills so nothing bangs around while driving. The chest itself took some heavy dings when I piled it and the travel workbench into the back of the truck (with the stock for other projects). But it held up well so far.
Does look a bit like a baby coffin.
Speaking of the travel workbench, I need to make a new top for that. The slab cupped again (not sure why; it’s been through two flattenings). The front edge sits about 1/8 off the legs. It doesn’t rock and I may just level where the slab sits on the frame, but it changed the peg hole geometry and it’s tough to get the slab off again once it’s in place. But the bench worked great. Not sure I prefer viseless woodworking, but it can be done.
But I really liked the 32″ height for rough work.
I’ll talk more about the vacation projects in a future post. Monster Hunter: Rise came out while I was gone so I got less done than I wanted, but still more than I expected.
I’m out of room in my workshop. Between my Moravian and my Nicholson, my workshop proper is full. And my overflow room (where my thickness planer and hollow chisel mortiser are) is full too (mostly of lumber). So that leaves me with a superfluous workbench which I’d like to find a good home.
Yes, that is the repurposed top from the last time I tried to sell this giant hunk of ash.
The workbench is a modified Roubo style. It’s stretcherless; the way I like it, although you could easily nail on a couple of short stretchers (a la the Vasa workbench) if you wanted to add storage to the bottom.
The front legs have the traditional Roubo joint (tenon with sliding dovetail), but the back legs are angled out around 14 degrees and glued and bolted on kind of like the legs on a Schwarz-style saw bench.
Overall dimensions are as follows (everything is solid ash, except for the vise chop, which is white oak):
Top: 90.5 inches long x 14.875″ deep by 3.75″ thick
Base: 58 inches long x 24″ deep (legs are 6″ x 3″)
Accessories: DIY Leg vise (1.5″ screw, pin board style) and 2x DIY bench dogs (1″ holdfast and dog holes)
With leg vise
$500 firm (just recouping the cost of the slab top material; I enjoyed making it and want someone to enjoy using it). And you’ve got to pick it up in lower Fairfield County, Connecticut. No shipments; no exceptions. I will help you load it in the truck, though.
Email: theapartmentwoodworker@gmail.com if you’re interested.
More pictures:
Leg detail (three dog/holdfast holes at 1″)Back leg joint detail. Lots of face grain glue surface here, plus the bolt.Slab detail. Perfect for adding a tool stray or a wing to extend the benchtop.
One of the first proper pieces of furniture I made when I switched to primarily handtool woodworking was a dining table. Or, at least, that’s what it was supposed to look like, because it really was more of a workbench. Made of solid ash, it had roughly 3″ square legs, 8/4 rails and a 5/4 top. Everything was drawbored together with 1/2 pegs.
For several years, I clamped my Milkman’s Workbench to it and that was my primary work area. In fact, you can see it in the banner of the website and I detailed the construction in my second ever post.
So many memories.
But many years have passed since then and my shop is now a 12×13 bedroom (instead of a dining nook). My mother claimed the old dining table for her house and my dining room has been empty (other than a console table that functions as a bar) for some time. But that’s about to change.
Dry assembly.
I’ve had a stack of paint grade soft maple for a while. Mostly 4/4 boards, but a little bit of 8/4 stock too (enough for some leg frames, at least). So I’m making a new dining table out of it, although much more delicate than the last. The legs are 1.75″ square and the top rails are barely 1′ x 3″ (and the bottom rails under 1″ x 2″). It will be solid, but far too spindly for woodworking on. There’s a number of mortises in this piece, so in addition to the usual cabinetmaker’s triangles, I’m also employing a timber framer’s marking system as backup.
I’ve never cut roman numerals with a chisel before.
As always, I tend to latch onto specific design elements that I find online (don’t @ me). For this, I’m going with the same stopped chamfers shown in this Restoration Hardware piece.
I don’t plan to permanently affix the top (not even a line of glue along one edge). Instead, the entire top will be affixed with wooden turnbuttons. Further contributing to the future of this piece merely as a dining table.
I mentioned this is paint grade soft maple and I mean it. It’s blotchy, streaked and, although curly in a few places, generally the grain is unruly throughout. I expect to paint the entire piece (probably in the same linen/coastal blue two tone as the console table bar). But as an initial matter, a couple coats of boiled linseed oil to see how the grain looks unpainted will do the trick.
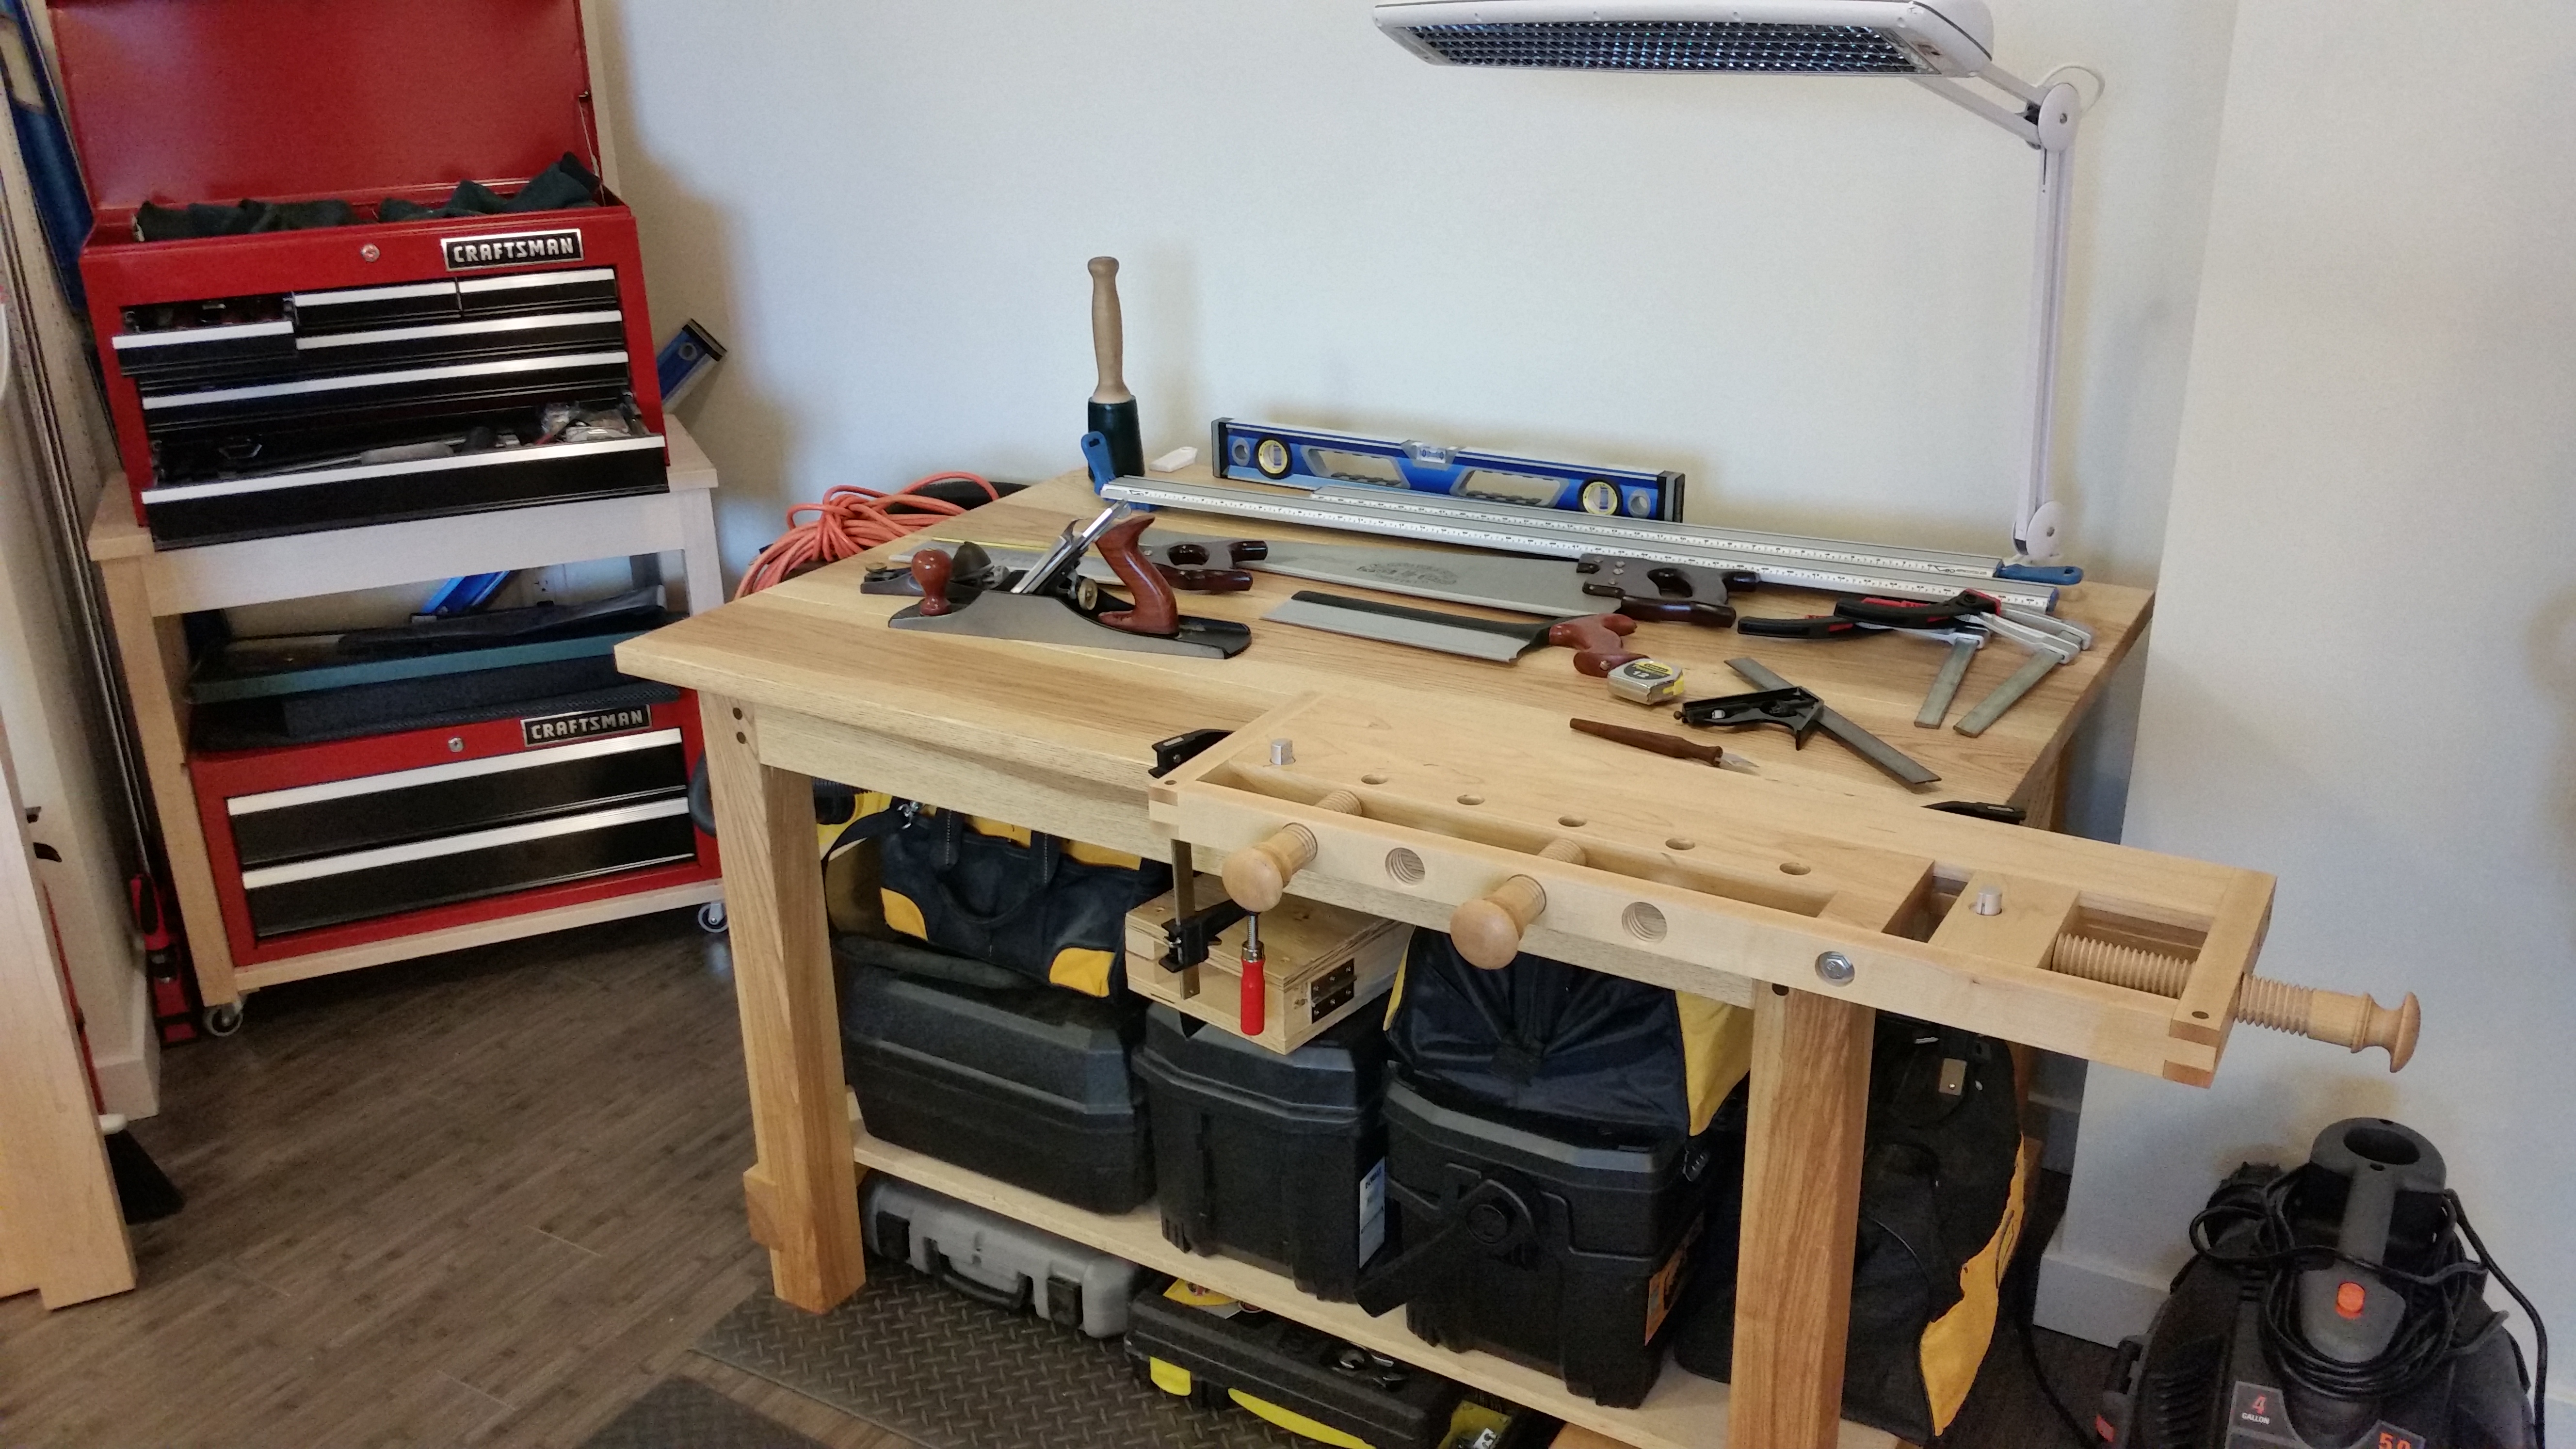
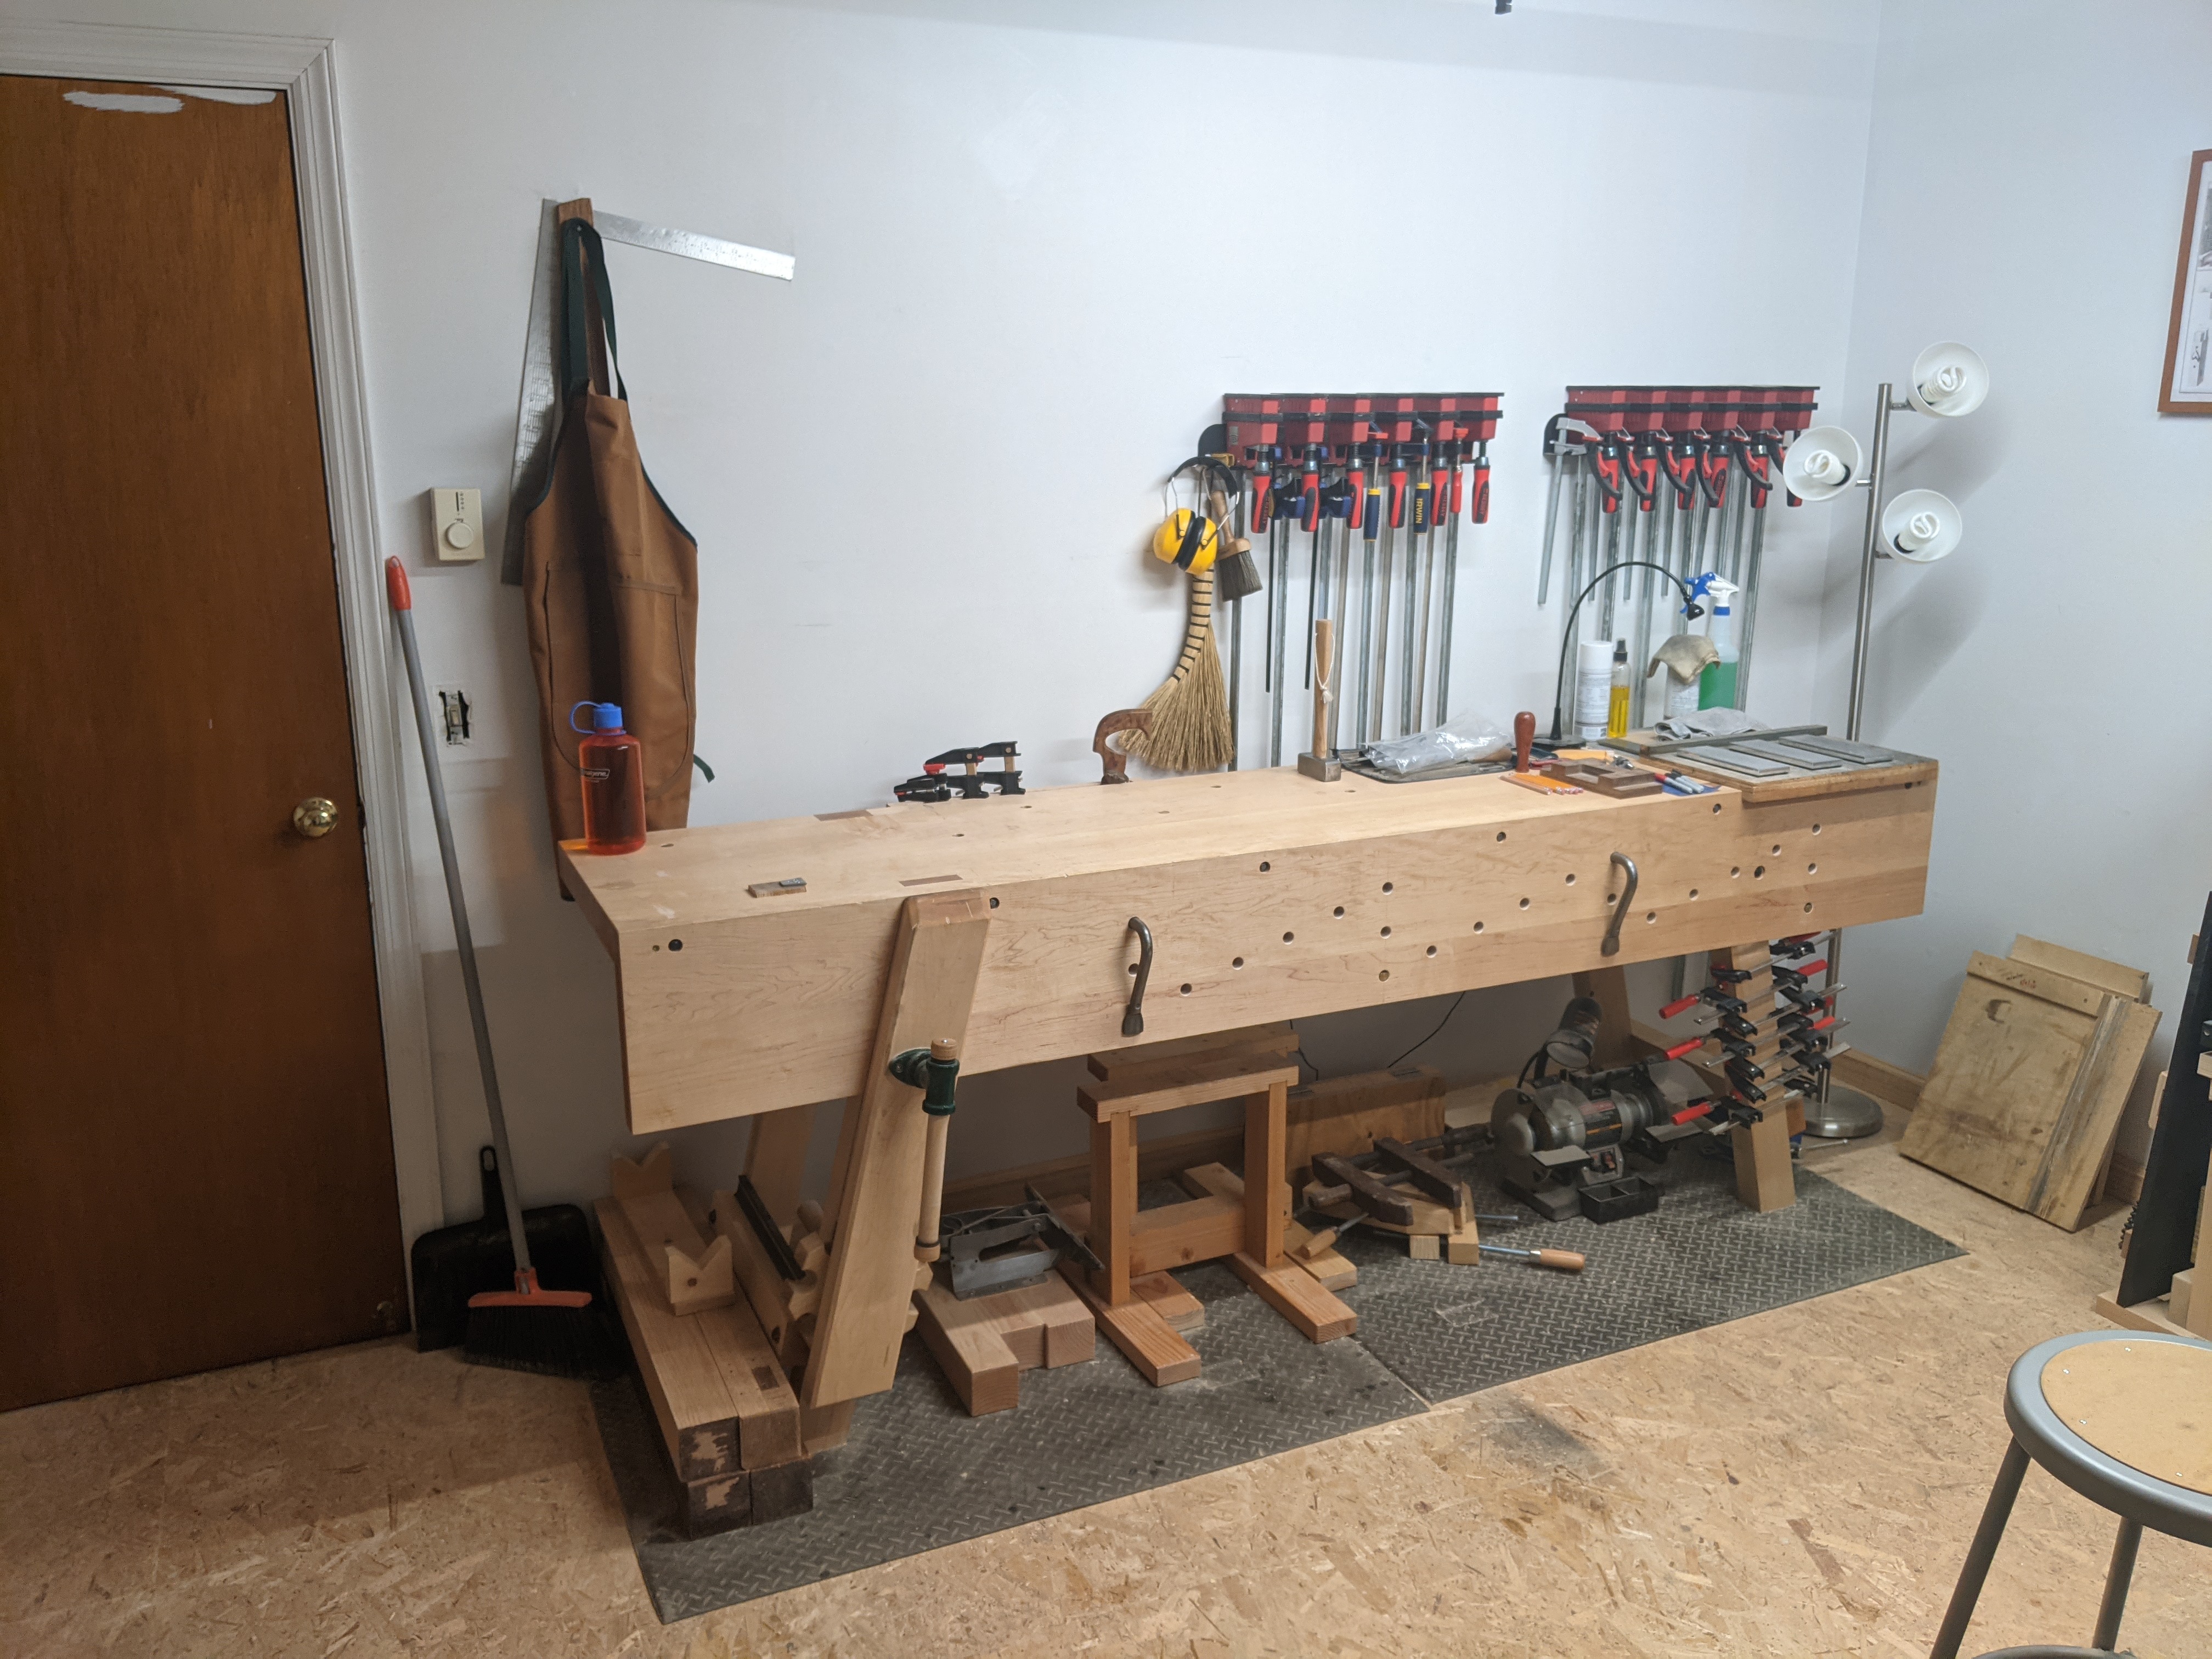
Those of you who follow me on the twitterbook know that I recently rearranged my workshop. I think it’s really great, especially now that my main workbench is under a window (south facing as it may be). And you may notice something about the main workbench itself: it’s a forest green Moravian knock down! Albeit a split-top variety.
I also upgraded the overhead lighting, as if natural light wasn’t good enough!
With the new workbench rotating in, my eight foot Nicholson shifted against the wall where my tool chest used to live and my clamp racks still do. And my sharpening station is not on the right end of that bench, with the old sharpening station (a 4-foot Paul Seller’s workbench clone) having moved to another home. I still use the leg vise from time to time, because I love the foot-operated cog and screw parallel guide just so much. The Moravian workbench has a pinboard, which is fine but much less convenient (more on that in the future).
I still like this workbench, it’s just very large and was taking up too much room in the middle of the space.
All in all, the new arrangement improves the flow of the workshop and the room actually feels bigger despite having another 4 square feet of overall workbench footprint (it’s a 13.5′ x 12.5′ bedroom, btw).
I need to work with the Moravian workbench for a few more months to get a better sense of how it fits my workflow.