A few years ago, I bought a Veritas Bevel Up Jointer Plane. I also got the jointing fence, which I have more than once used to make a hand jointer for small parts. It’s also still very useful for edge-squaring, especially on long, narrow stock.
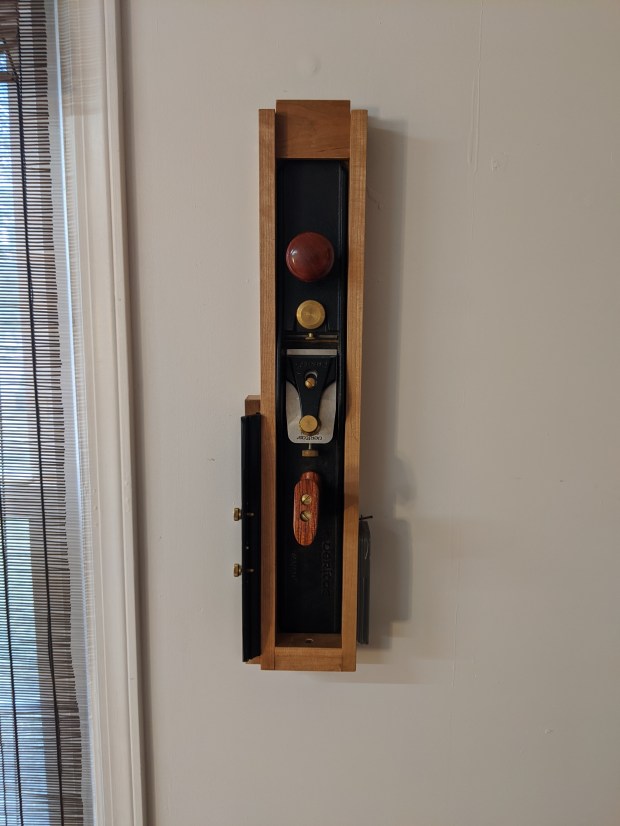
But ever since I inherited a first gen Stanley Bedrock Jointer Plane, I haven’t had room in the tool chest for it. It therefore lives in storage and, without it closely at hand, it’s been rather neglected in its use. So I’ve devised a way to keep it closer at hand: a saw till to hang on the wall.
Ignore the bad paint job on the wall!
I have a fair pile of reclaimed mahogany that one day will become a full wall cabinet (maybe not Studley-level, but something like it). One part of any good wall cabinet is a plane till. From what I can tell, there are two basic ways to capture the planes in a plane till. First, angle the till with a single catch at the bottom so gravity does all the work. Or have both top and bottom catches so the planes can sit vertical. I’ve chosen the latter.
There’s three parts to store in the till: (x) the plane itself, (y) the jointing fence, and (z) a toothed blade that’s great for coarse work and also roughing up smooth bench tops. Let’s start with the box to store the plane.

Because of the ridge to which the fence attaches, it’s unfortunately not possible to shoot with this plane.
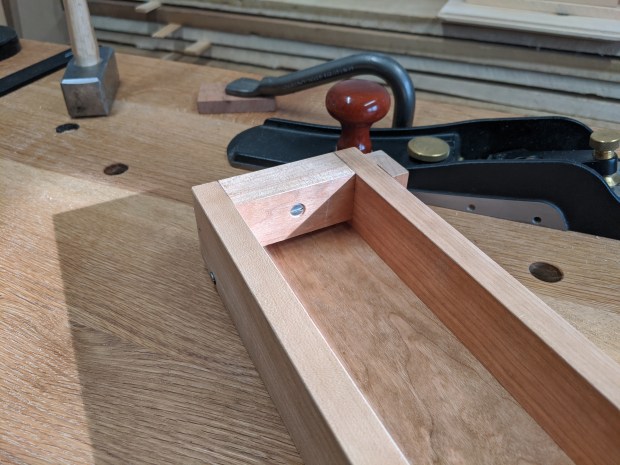
The box is pretty simple: just three narrow pieces of cherry, glued together in a long U shape and nailed after-the-fact for extra strength. The recess should be about 1/8″ wider than the plane sole and at least 4″ longer than the plane sole. Then friction fit and glue and nail on ends to enclose the box. Once the glue dries, glue and screw on the first cleat to capture the heel of the plane sole. The exact thickness of the cleat and the height and depth of the recess will depend on the plane.
Like so.
If this were an angled till, that would be the end of it. But a vertical till needs another cleat at the top to capture the toe of the plane. The till works by inserting the plane toe at an angle into the top cleat, then straightening the plane to vertical and dropping the heel into the bottom cleat seen above. And when it’s dropped into the recess made by the bottom cleat, the toe should still be retained by the top cleat. Otherwise the plane would crash to the floor.
Unfortunately, locating the top cleat is a bit of trial and error. It’s L-shaped, much like the cleats that retain the fence as seen below. You can make this cleat in a single piece (like I did) or laminate it from one narrower piece and one wider piece. There will be a sweet spot where the depth and height of the rabbet forming the L allows easy access in and out without too much slop.
Once you figure out the spacing, screw the top cleat in place from the back of the till. No glue with this one, just in case something needs to be adjusted, either because the angle is off or you get a different plane and want to reuse the till.
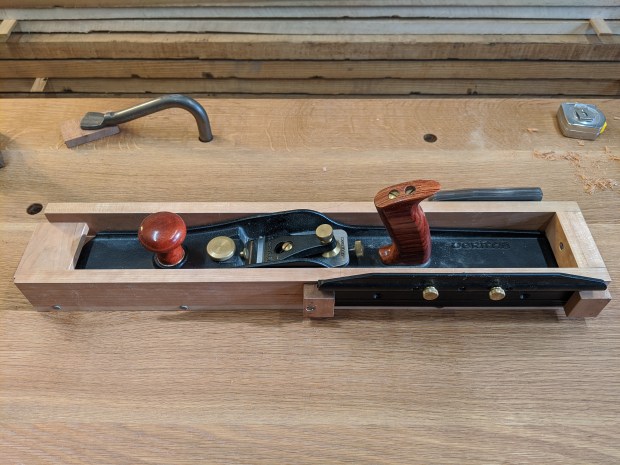
The nearly-finished till.
A couple of wooden hooks retain the jointing fence and the replacement blade hangs in its plastic case from a cut nail. I declined to finish the till and just screwed it into a stud on the wall.
Funny thing is, since making the till, I still haven’t used the plane. Perhaps I just don’t need it.
JPG
