It’s been a very long time since I did a Basic Project. But on this snowy day in February, I think it’s a good time to pick them up again. This time, it’s a wooden straight edge that is a long overdue project for me. I admit I only got inspired to make this because I saw it on the blog of the By Hand and Eye guys.
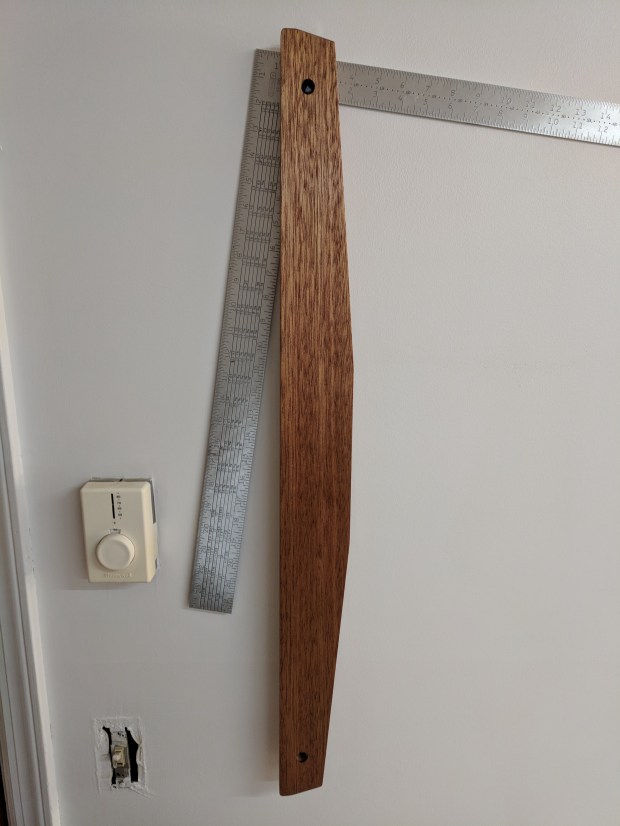
Hanging holes for convenient drying.
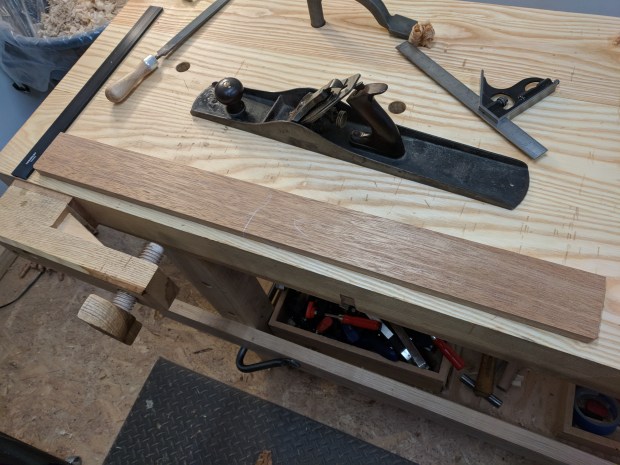
This one is pretty straightforward (teehee). It’s a single piece of wood, approximately 33″ long, 3″ wide and 5/8″ thick. I used a piece of mahogany with particularly straight grain, but any piece of reasonably stable, straight-grained wood of approximately the same size will do.
There is also a very short tool list:
- Hand plane, the longer the better
- Combination square, any size
- Rip cut saw, preferably panel
- Pencil and a ruler
Start by planing one side of the board straight and out of twist. This reference face is very important to the overall project. Clearly mark it with a face mark and a direction arrow, so you can keep track of it in the future. Then bring the opposite face reasonably into parallel with that reference face. Exact precision is not essential on the opposite face, however.
Flattening a board with a try plane is easy mode.
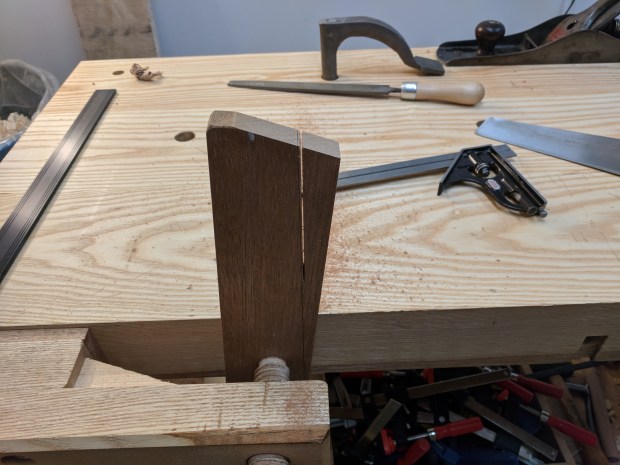
Then bring one edge into square with the reference face, as straight as you can (but we’ll fix it to be perfectly straight later). It’s not essential for the ends to be squared. Just measure up 1″ from the straight edge and then cut an angle on each end. I used 15°. You could leave it at that, but remember that wood exchanges moisture with the air through its end grain. That means the more end grain that’s exposed, the more stable the straightedge will be. So let’s now taper the whole straightedge along its length.
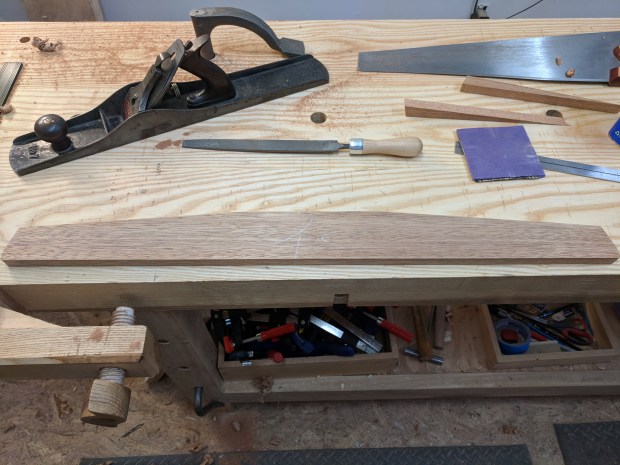
Measure 2″ up from the reference edge on each end and mark it with a pencil. Find the center point along the length, measure a few inches out from either side, and draw a line between each of those points and the marks on the end. Saw down each line and clean up the tapers up with a plane. It is not essential for these tapers to be perfectly square, but do your best.
This cut exposes additional end grain.
And that’s it for the main shaping. Break the arrises all around and bore a couple of hanging holes, about 2″ in from each end and 1″ up from the reference edge. These hanging holes are more my preference than anything. They make the straightedge easier to grab. An alternative would be to use a gouge to cut a couple of fingertip grooves.
So all that’s left to do true the bottom edge. If you’ve got a known straight edge (like a metal straight edge), just use that. But if you don’t have a straight edge, you can use a trick that I saw on Lee Valley (which is apparently a Christopher Schwarz article). Lay the square down and trace the edge, then flip it over and see how well you did. Any undulations will be apparent. Plane them down and do your best to keep it square to the reference face.
Without the hanging holes.
That’s it. Slap on a coat of boiled linseed oil and you’re ready to go. A 36″-ish square is pretty easy if you have a No. 5 or No. 7. But if you only have a block plane or a No. 4, perhaps start with an 18″ square.
In any event, check it now and again to see if it’s gone out of square.
JPG

Hi, I made one as well out of sapele but went a little crazy compared to yours. Definitely a good started project that focuses you on your hand tools skills.
LikeLiked by 1 person