Over the last year and change, I’ve been experimenting with the Moravian Workbench form popularized by Will Myers. I’ve watched the first three and a half hours of the instructional video probably 15 times. Every time, right up to when the top gets attached via blind-pegged dowels.
But up until now, I haven’t paid much attention to the leg vise assembly, because the previous benches I’ve made for others haven’t included leg vises. For the final version, though (the one I will keep), I’ve got to push through the rest of the video and figure out exactly how that part of the bench is made and works.
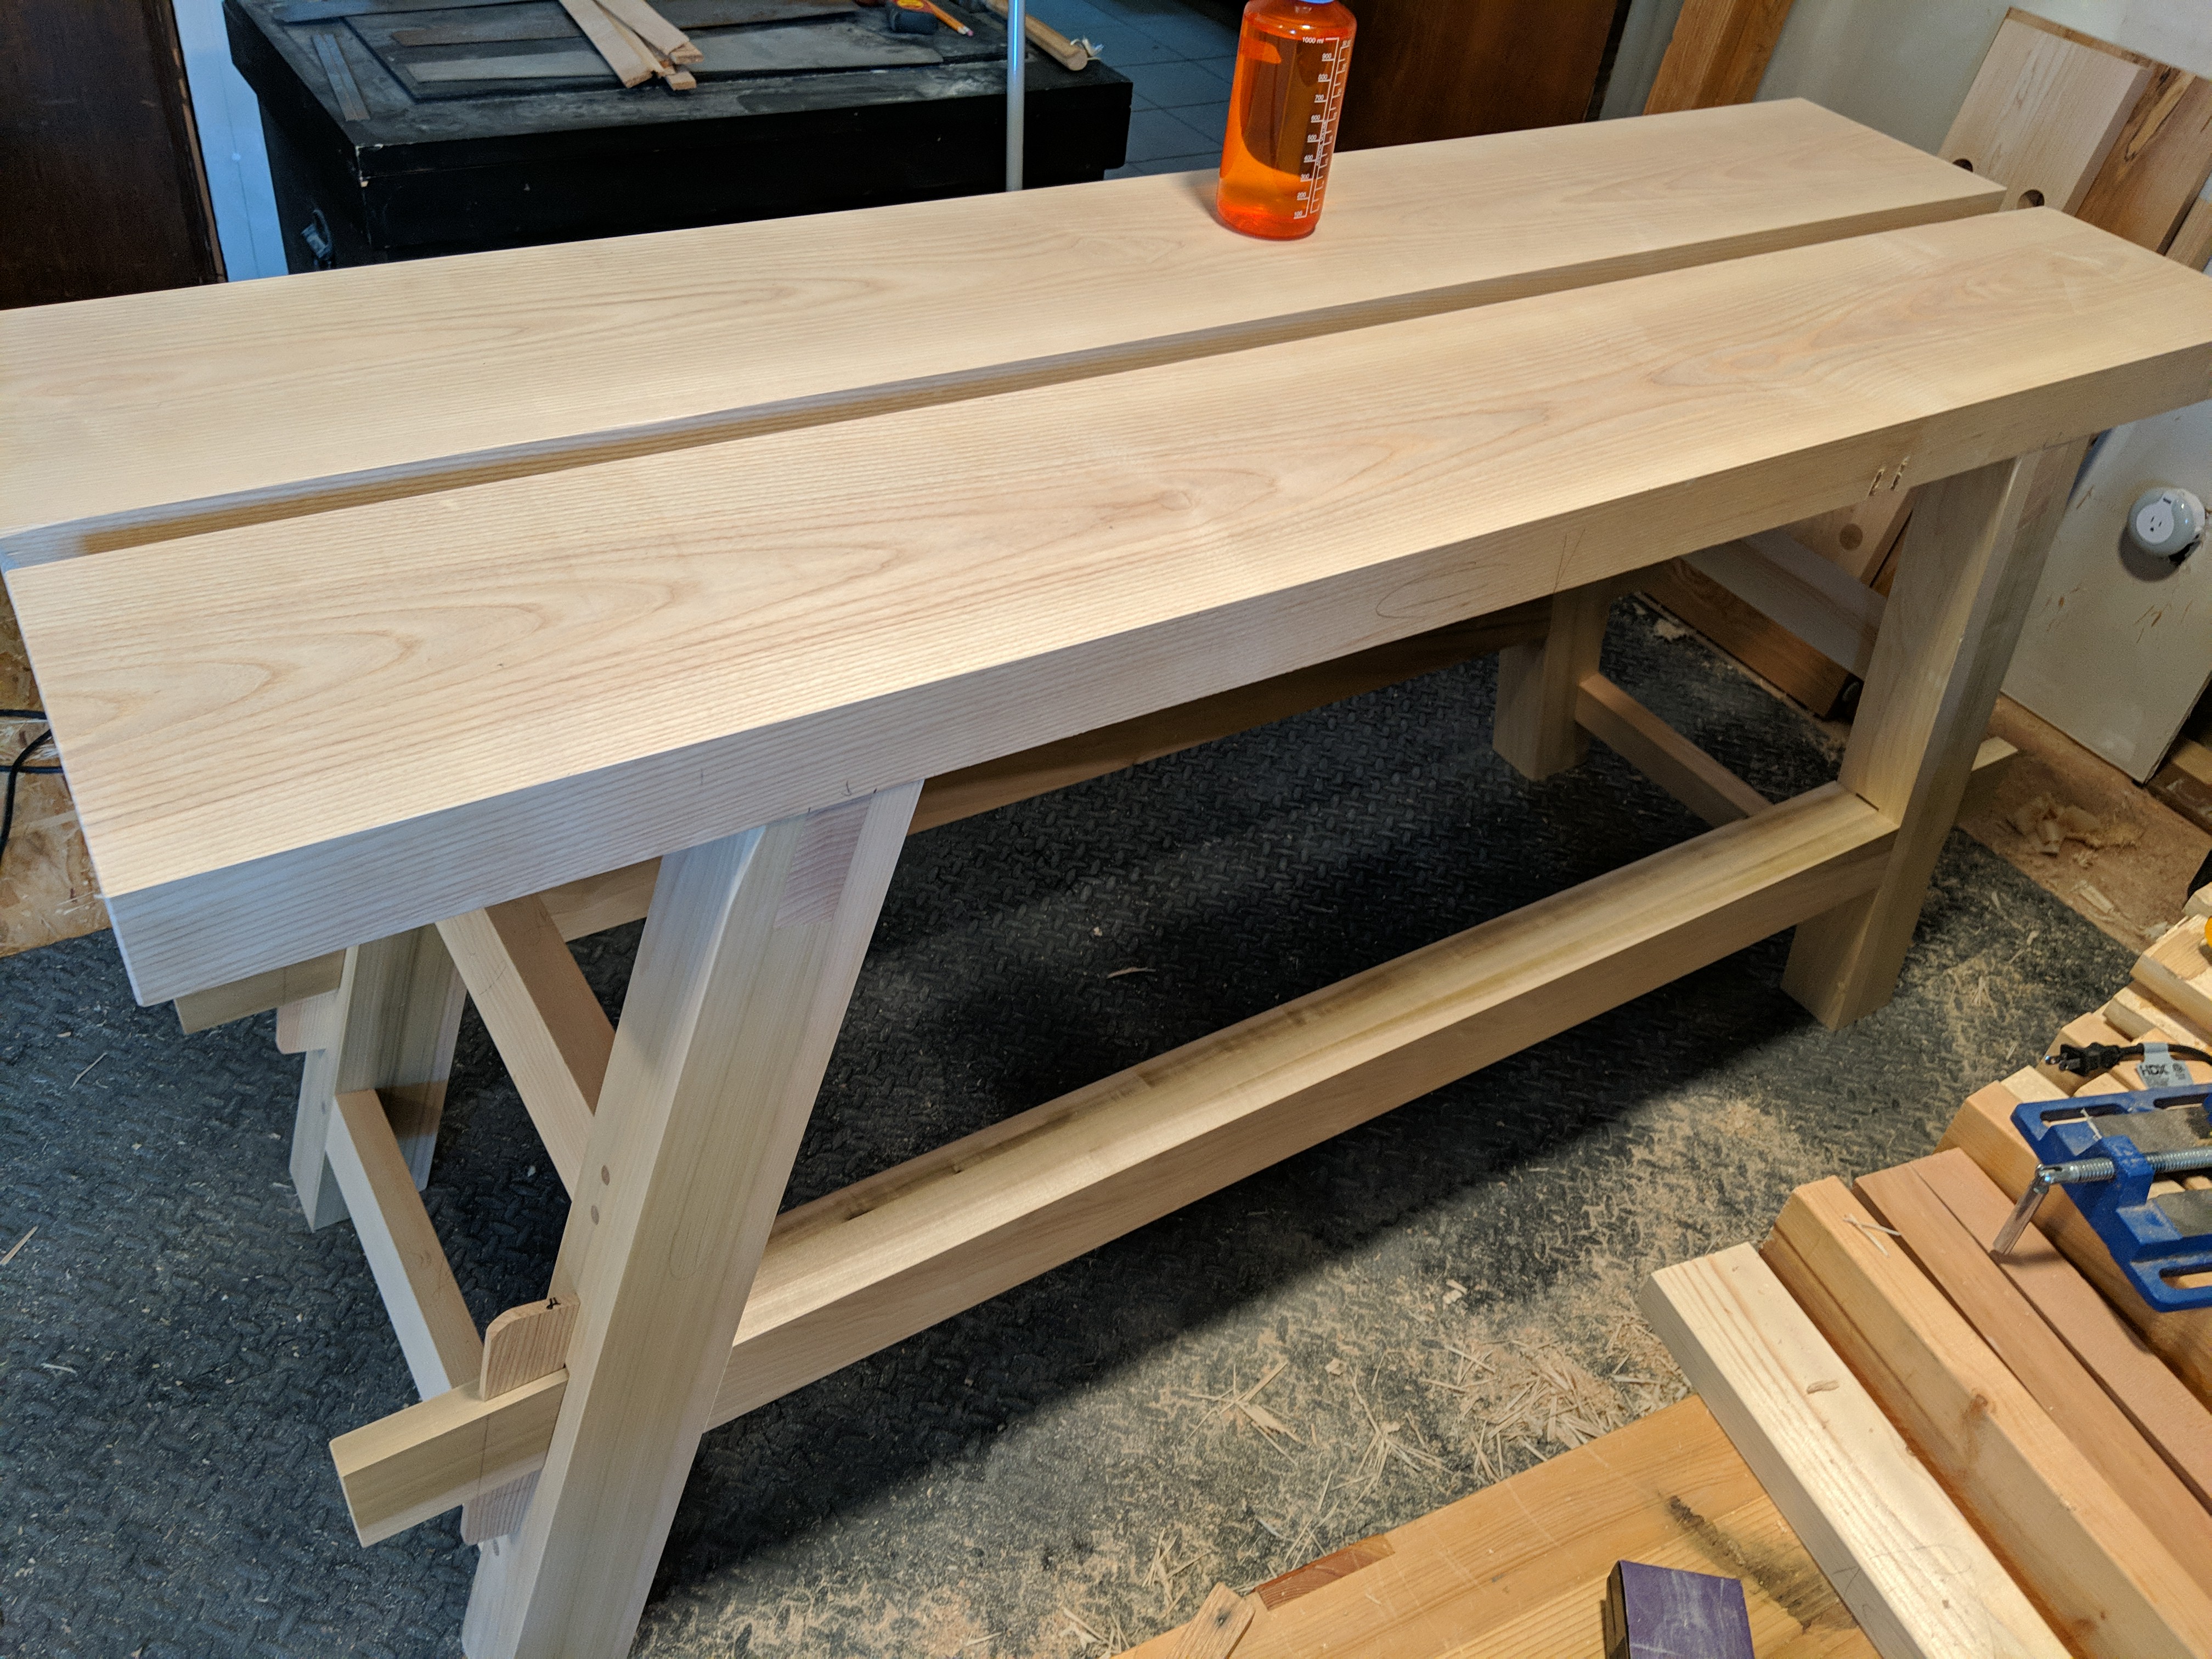
This particular version is 73″ long (i.e., 3″ shorter than the source material) and 24″ deep. But instead of a single slab and a tool tray, mine has two 12/4 ash slabs at 11.25″ wide each. The gap in the middle will eventually be bridged with a tool removable tool rack.
The legs and long stretchers are poplar. Along with the slabs, the short stretchers and the wedges are ash. Ash is my favorite wood, with poplar close behind. Both are cheap and readily available, making them perfect for workbenches. And, other than the slabs (which came from a single board) were already in my lumber pile.
Having made three of them now, I have some thoughts on the form and process of the main bench.
While the legs themselves are sawn from solid 16/4 poplar stock, the long stretchers are laminated from three 5/4 poplar boards. I did it this way in the douglas fir experimental version and found this easier than sawing and paring the tenons (like I did for the more accurate version I made recently).

Also, I nixed dovetailing the lower stretcher and just mortised it in with drawbored pegs. I’ve always thought the dovetailed lower stretcher on the source version must have been added later, when it became clear the leg assemblies weren’t rigid enough without them. I may be biased, but why use a lapped dovetail for only this joint when you’re otherwise using square mortises? Because you done F’d up and needed to fix a design flaw. That, or the maker just got sick of mortises and changed it up. Which I also understand.
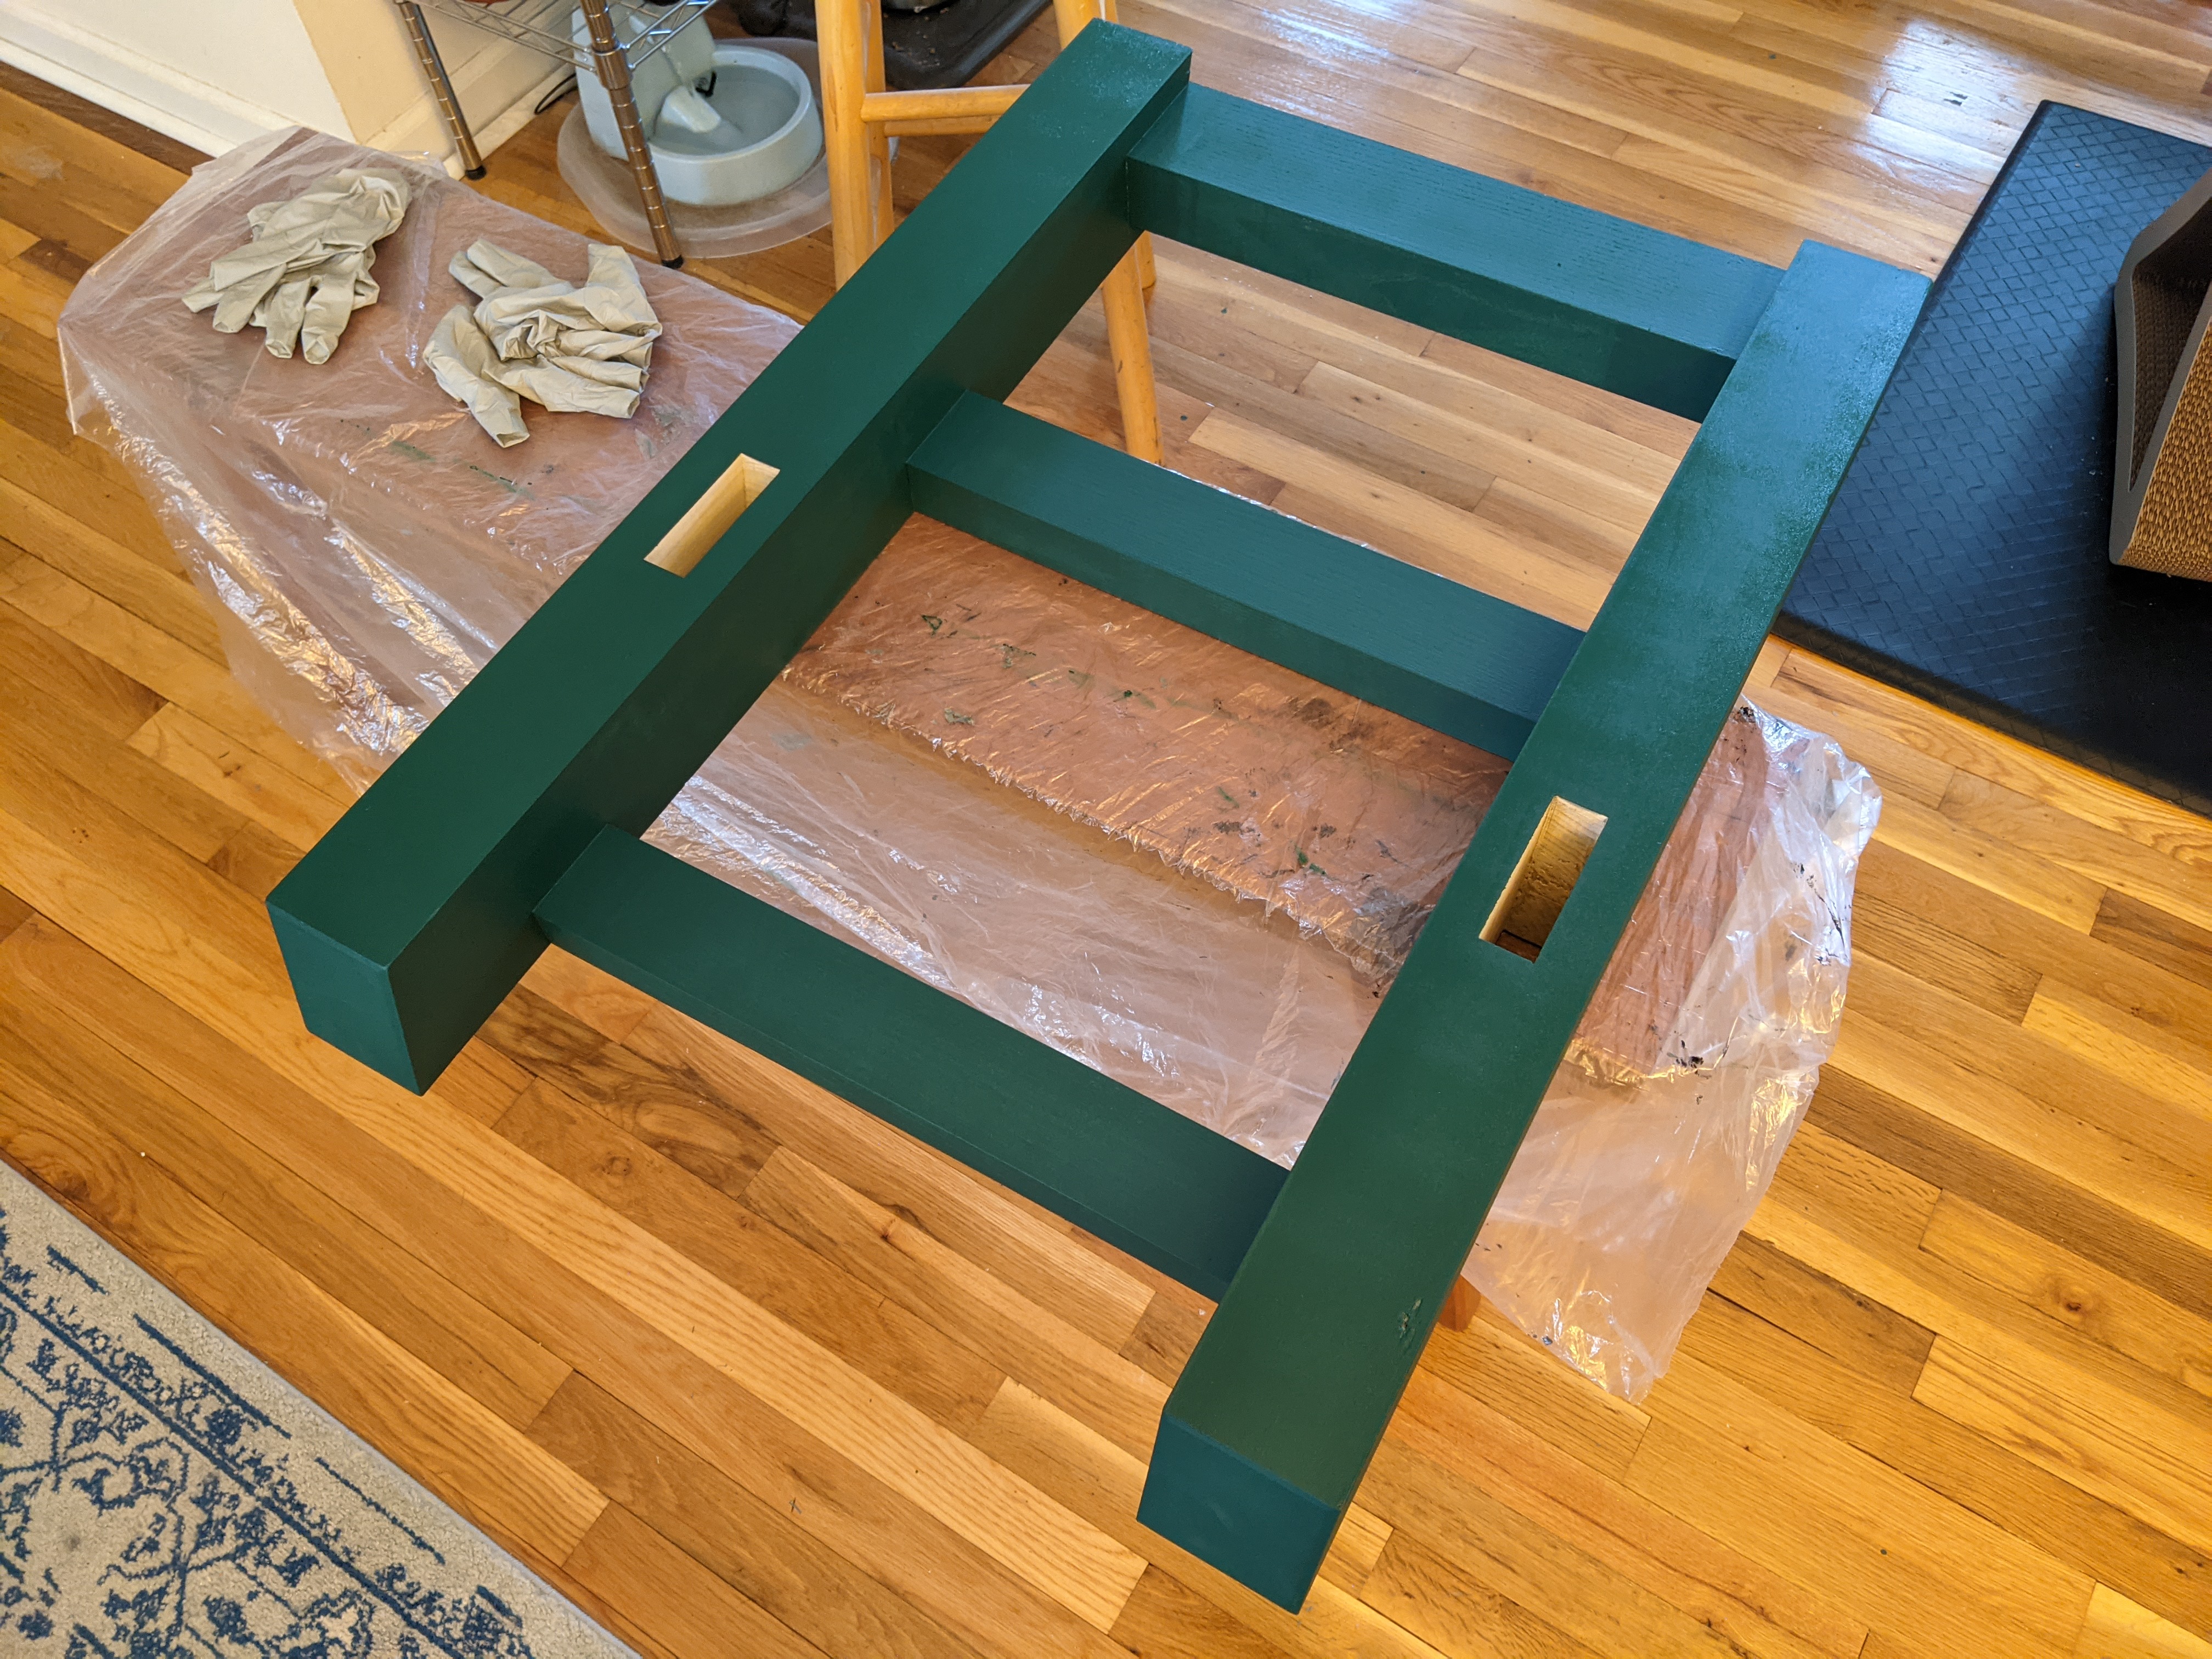
Oh, and I painted the undercarriage forest green. Which then made the tenons too thick and I had to widen the mortises. Sweet, sweet irony.
And, with that, it’s back to making the vise assembly. I’ve procrastinated long enough. And I have just the board for both the backer board and the chop. An 8/4 ash board that’s been acclimating to my shop for almost 4 years. It’s almost too perfect.
But every board, in the end, gets sawn up. No matter how perfect the board is.
JPG

Nice color and I like the comment about M&T’ng the lower stretcher vs dovetail (though the dt does add a nice visual compliment.
LikeLiked by 1 person
Beautiful!
LikeLiked by 1 person
I am in the process of building such a workbench for the son from recycled wood (most of it from an old picnic bench). I have decided also to use through tenons for the lower rails and even to eliminate the intermediate one for which I don’t see any justification now.
In my view there are two clues about a retrofit on the original bench:
– The use of lapped dovetails, for the addition of which, one doesn’t have to disassemble the leg-frame (addition in my view to resist to forces when dragging the bench around);
– The fact that on the original bench it has been added only to the left leg-frame and not to the two of them as Will Myers has decided to do. (Read: https://eclecticmechanicals.files.wordpress.com/2018/08/themoravianworkbenchbywillmyers.pdf )
While Scandinavian workbenches usually have a long stretcher at mid height, it seems awkward here, especially as it is not wide enough (vertically) [and not kept in tension by wedges or bed-bolts] to ensure anti raking.
If I were doing another one, I would do leg-frames like on a Paul Sellers workbench, with through tenons for the upper rail also; and adding a bearer with the 16° angle on top of it.
LikeLiked by 1 person
I would not skip the middle stretcher. If nothing else it adds weight to the bench but it also adds rigidity
LikeLike
One suggestion for anyone wishing to build a Moravian workbench is to build close to what Myers and the original builder built. After building several I realized each of the joints was chosen carefully to be the easiest to make for the job required. The bottom lapped dovetail is a good example, its job is to keep the legs from spreading. A lapped dovetail does that job very well and is easier and quicker to make than a pinned through M/T. Same story with the top bridle joint, easier than a M/T and just as strong in the application.
Bottom line, the original builder knew what he/she was doing and Myers was smart/lucky to copy the build. It took several builds and some time working on them to fully appreciate how well thought out the original bench was.
ken
LikeLiked by 3 people
Maybe, but lapped dovetails are also ugly to me. So that sealed it.
LikeLike
Perhaps the lapped dovetail precludes the need for a mortise so close to the bottom end of the leg.
With modern glue in a well-fitted M/T joint and indoor shop use, this would not be a weak spot; but for outdoor and site use in past times, maybe enough legs split that the lapped dovetail came into the design.
LikeLiked by 1 person
Sylvain mentioned he saw the original to have the lap dovetail stretcher fitted only on the left end…makes me think that it was added to keep the leg below the middle stretcher from bending under while the leg vise was being torqued up; the stretcher (in compression) would make both left end lower leg sections work together to resist the lateral force along the parallel guide..
Also, vise lateral forces (at the workpiece contact, the screw nut and the parallel guide pin) are a good reason NOT to eliminate that middle short stretcher.
LikeLiked by 1 person
James, I just stumbled upon your “Perfection, In Potentia” post on Moravian workbenches. Nice post and great pics.
I know this is old, but I’m hoping you might entertain sharing more updates/comments/insight. Have you made more of these and did you settle on a final design & feature set you like best or that works best for this style bench?
As someone working out my own obsession and loose idea for a modified Moravian workbench, I have a bunch of questions. I’ll try to focus on the most important here.
I had a similar online journey into obsession over this bench style and came to a similar design conclusion – that it should be a Roubo style split top (no tool tray). I’m not sure I want a leg vise and have been contemplating how to do a full width tail vise on a split top while maintaining the knock-down storage capabilities.
Also, I THINK I want this bench to carry me into a transitional phase of hybrid woodworking (power tools to hand tools mostly/only). So, I’m thinking it would be cool keep the ability to have a track saw cutting station built in. Imagine 20mm dog holes along the back section of the top where a Benchdogs fence can we set. The, use a tail vise to extend the length of the top by holding a sacrificial board (maybe MDF) under the track – where the track would go from front to back.
Anyway, I guess the primary questions are what type of vise setup have you settled on as “best” for this type of bench and have you ever considered how to have a full width tail vise on a split top?
Many thanks for any insight you can share.
Mark
LikeLike
My honest recommendation is to build the Moravian Bench exactly as Wil Myers shows you how to do it, but skip the tail vise/wagon vise. It works great. But if want it to be a bit lighter, do what I do with my traveling bench and use the offcut from the tenon cheek cut to laminate on a shoulder. Also, re: the tail vise, just get a wonder dog/pup from Veritas and some Grammercy Tools holdfasts.
LikeLiked by 1 person