I have an office job (M&A attorney) and my principal place of employment is in town. I like being at the office; I go 4-5 times a week. But I do work from home from time to time (especially evenings and on weekends), so it’s important that my home office is both functional and cozy. My home office also doubles as my gaming room (what cretins would call a “man cave”). It’s a 12×13 ground floor bedroom.
Oh, and it was my hand tool woodworking shop for almost a decade.
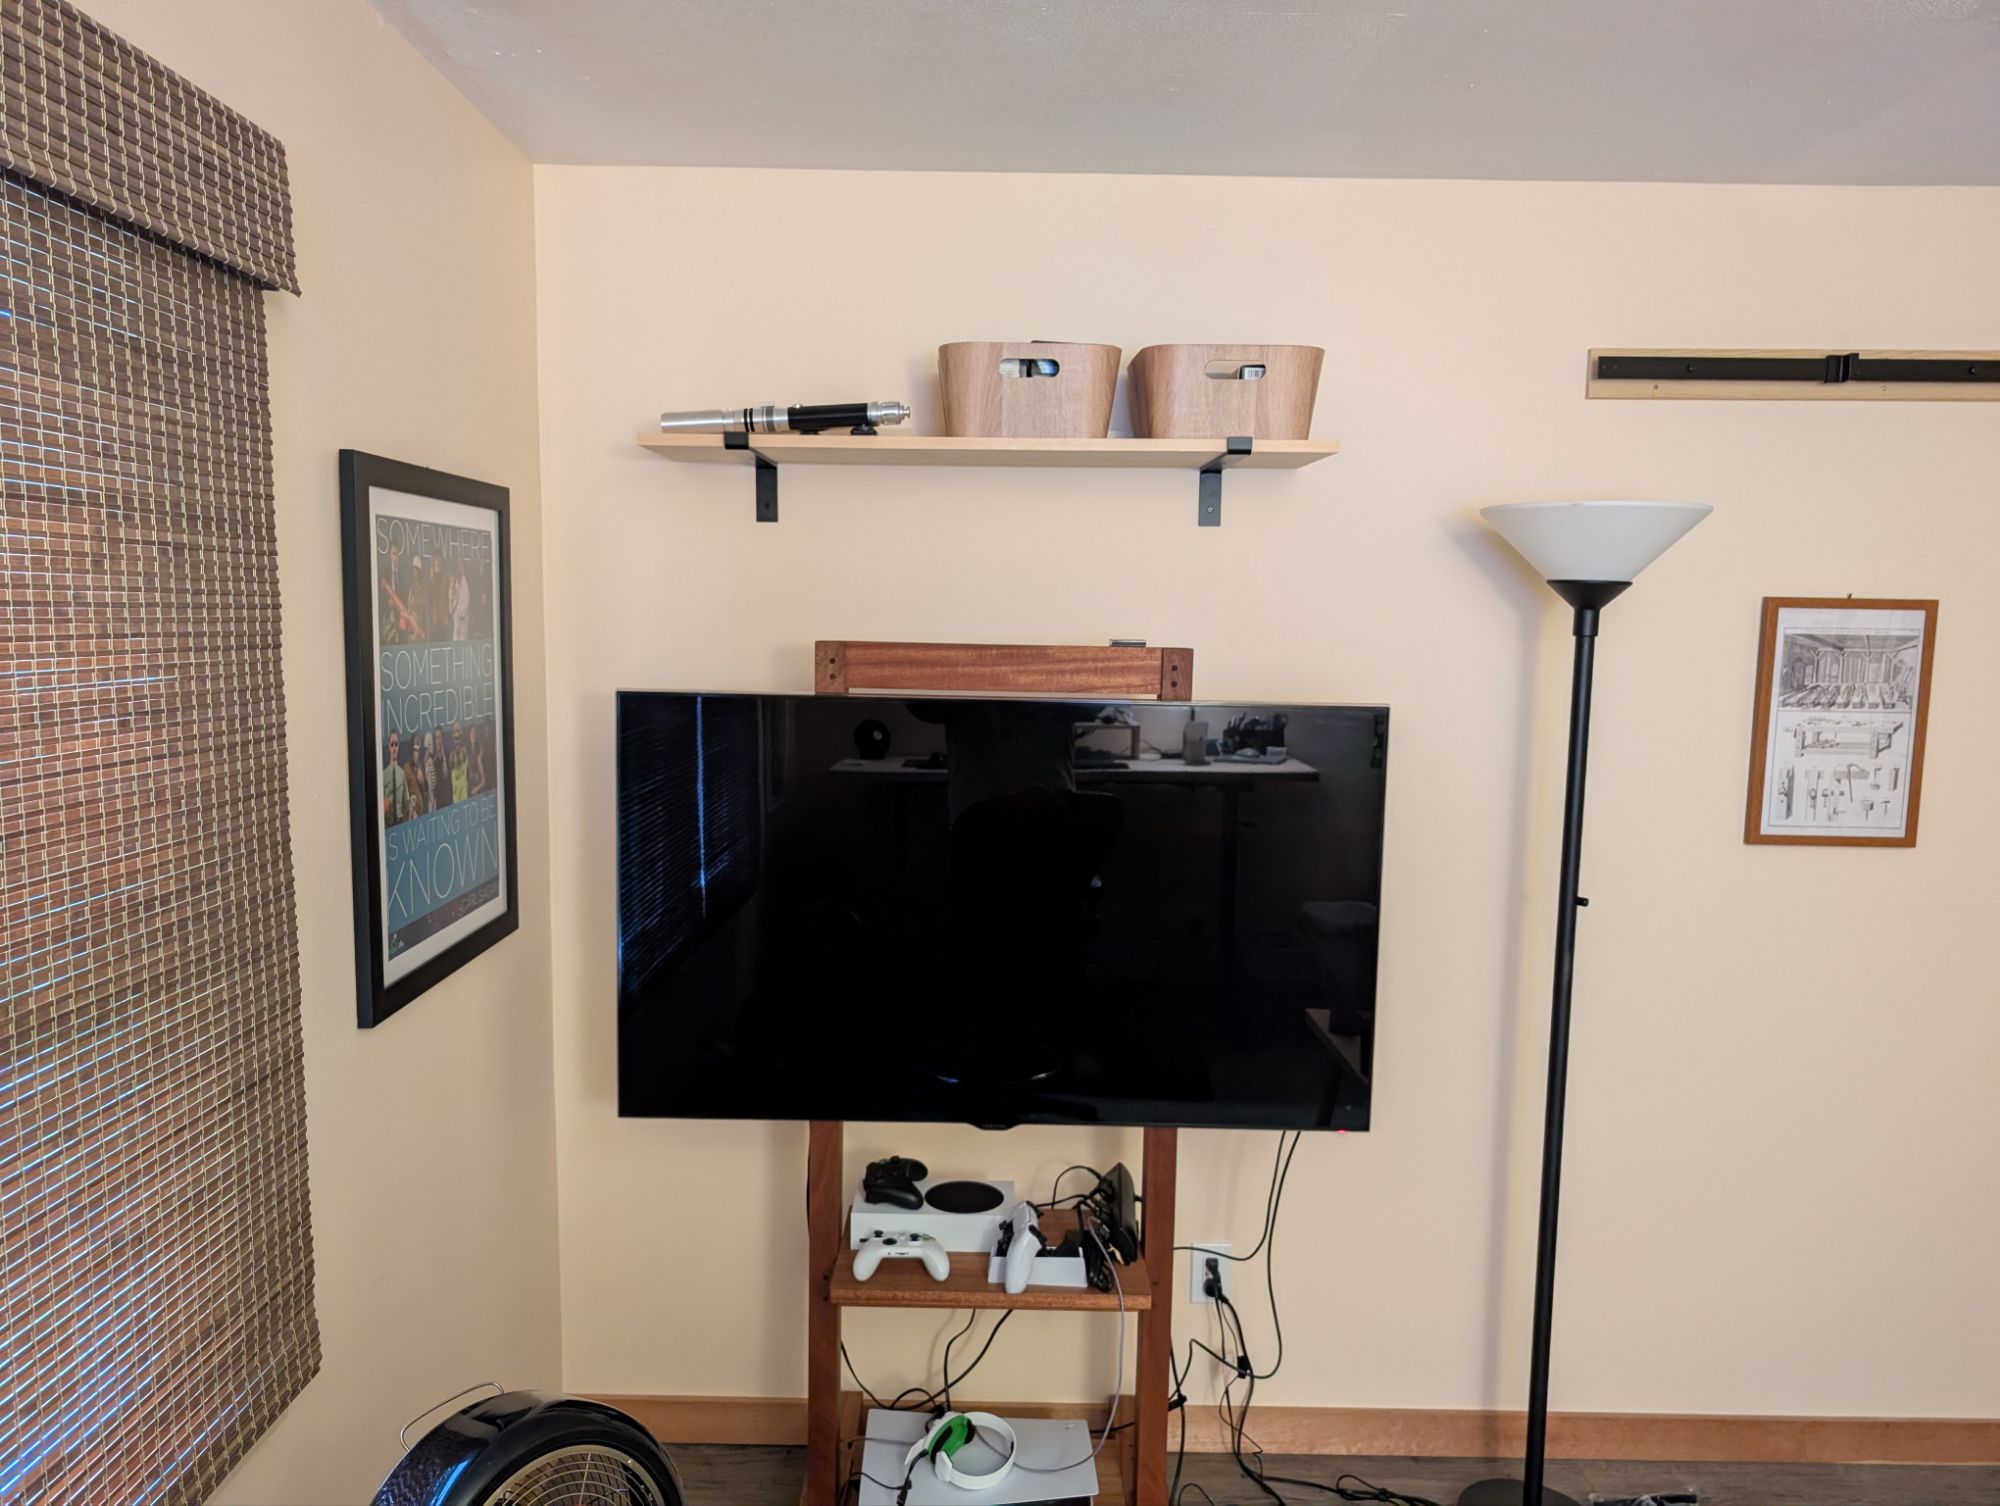
When I had a workbench in here, I was always frustrated that it wasn’t level front to back. Depending on where which bench, the front was anywhere between 1/8″ and 1/4″ lower than the back. Meaning tools would always roll forward and off the bench (terrifying if it was an awl or chisel and I was barefoot, which I tend to be in my shop). Convinced I was a bad craftsman, I banished the thought from my mind (putting aside that when I moved the same workbench into the new workshop, it was basically level).
But then, the other day, I decided to hang a wall shelf and what do I notice? There is actually a 1/4″ downward slope in the floor across just 24 inches. I know for a fact the TV easel is square to the base; I built it myself. But you can clearly see the TV leans to the right compared to the wall hung shelf. Just look at it, face on. And the right side of the easel is exactly where the front of my workbench was when this was my shop.
That’s Benjamin Moore: Winter Melon for all paint.
So all this time, I thought maybe I over-flattened the front edge of the benchtop. Or perhaps I just measured the shoulder on the back legs badly when cutting the joinery. But, in fact, it was some mason in the 70’s fault. Not mine.
Hope everyone’s 2025 is off to a great start! I am actively ignoring the shitshow that is the United States federal government for the next 2-4 years, so that means more woodworking!
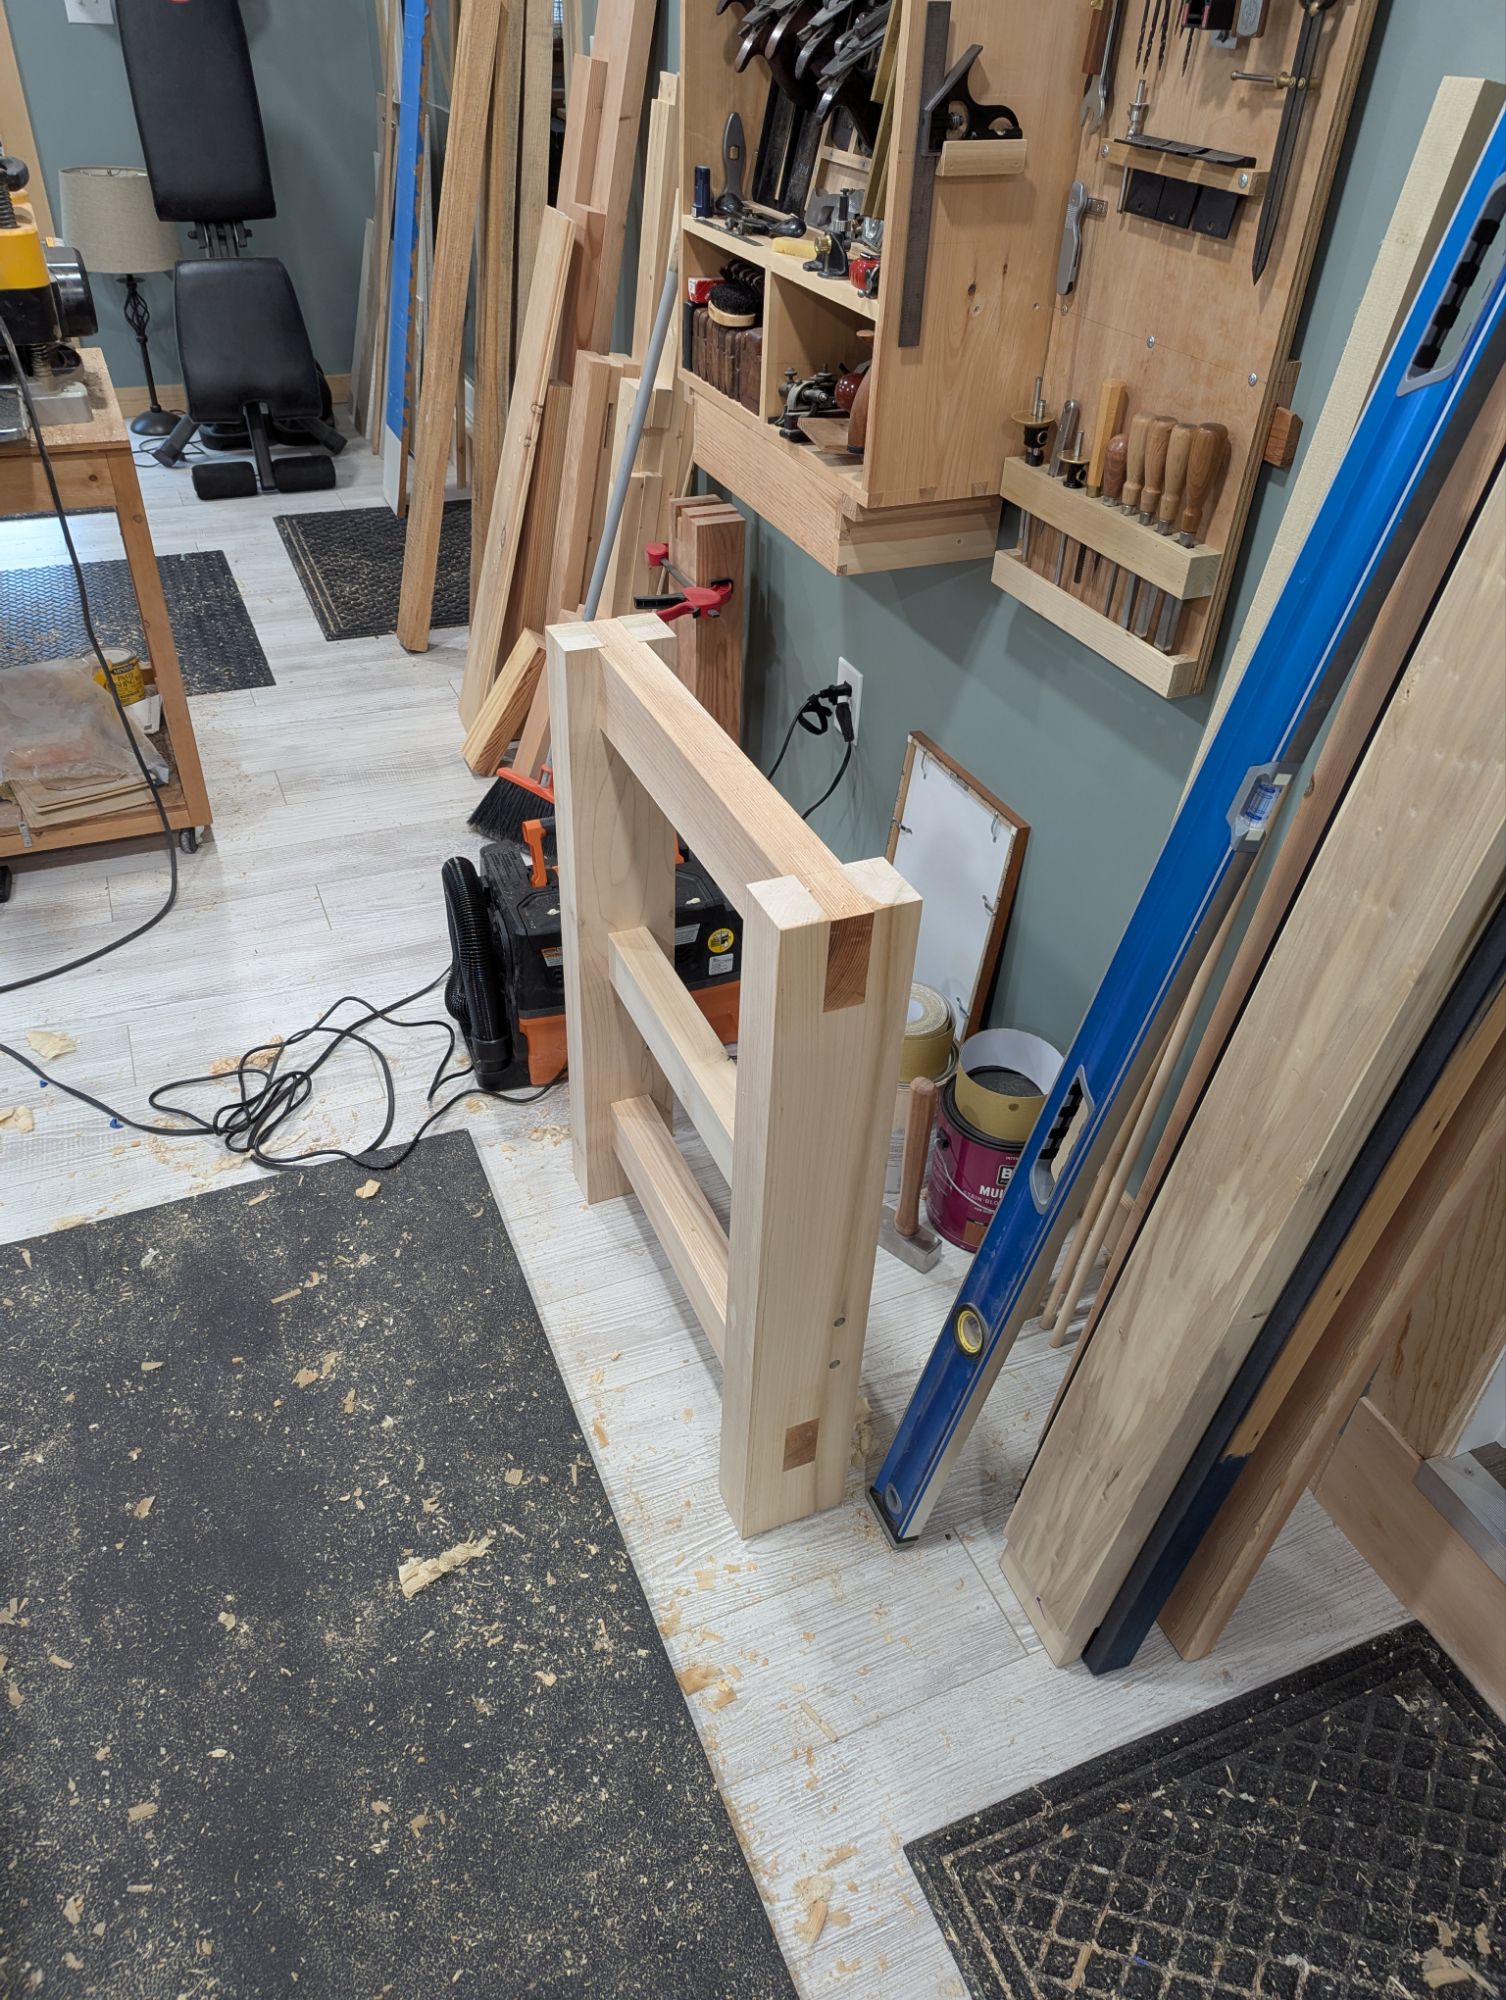
I was recently up north where I have a basic set of hand tools and a pretty good workbench in a shed. My tool kit consists of a few bench planes (No. 5 1/2, No. 4, and scrub plane), saws (a 20 inch hardpoint and a 12″ hardpoint, plus a 12TPI crosscut carcase saw), chisels (1″, 3/4″, and 1/2″), plus a small router plane, a small shoulder plane, a brace and bit, and all the basic marking and measuring tools. This is, in my view, an essential hand tool woodworking kit and I can do most home improvement and general construction tasks that cross the bench. Speaking of which, the workbench is 62″ long and the main benchtop slab is 15″ deep, which is plenty.
I have a dedicated Milkman’s Workbench for when I need vises.
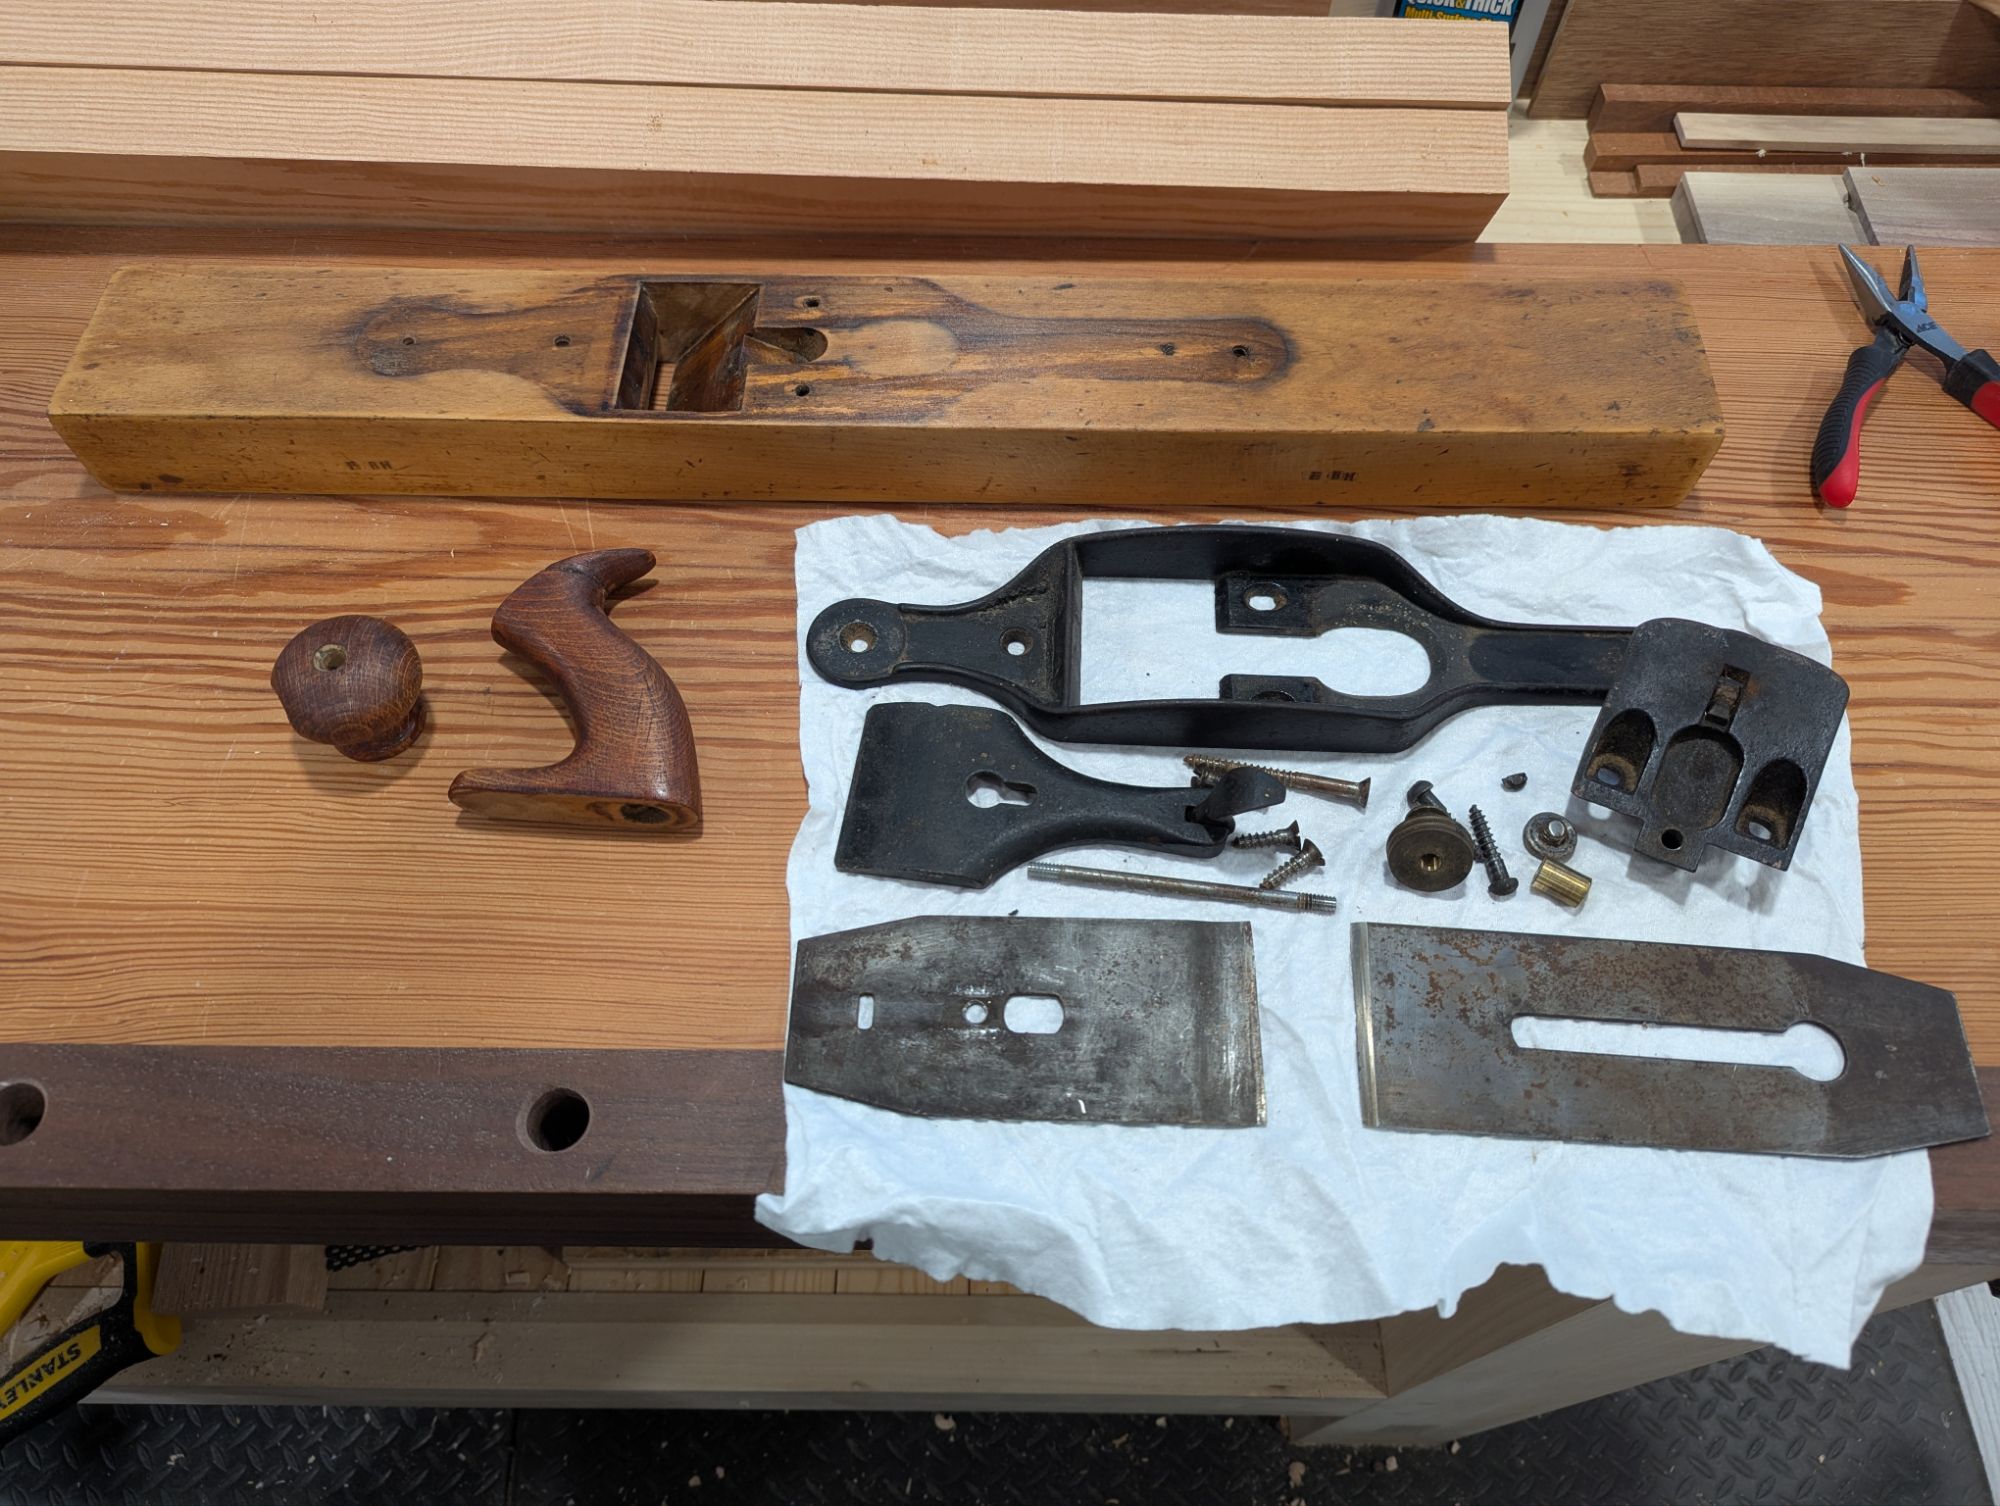
But when I’m up north, when I’m not making spice racks and rebuilding exterior stairs, I like to scour the antique stores for two things: gate leg tables and vintage handtools. Most recently, I found a nice double gateleg table that now sits under a window in my living room. For furniture, I highly recommend The Red Carrot in Rutland, Vermont. Especially when the warehouse down the road is open. They also have a great selection of rustic boxes, most of which seem to have been joiner’s chests at some point. I don’t buy them to use them, but rather to study the techniques.
For tools, though, I find the foofier antique stores and thrift shops tend to be goldmines. While everyone else is looking at the jewelry and lamps and sewing machines up front, I’m digging through the back corner to find Disston and Simmonds hand saws and Stanley bench planes. On this trip, in addition to a nice 9 PPI Simmonds crosscut hand saw (26″ plate length) I extricated from a pile of painted kitsch, I finally bought a transitional jointer plane I’d been eyeing for a few years as it migrated around the store.
Not bad for 150 years old.
As far as I can tell, it’s a Stanley No. 31 transitional jointer plane, Type 4 (manufactured between 1871 and 1872). No lateral adjustment, right handed threads on the depth adjustment knob. The japanning on the casing is like 95% intact and aside from the horn of the tote being cracked (I’ll make a new tote), and one of the slotted frog screws having split (you can see the half moon fragment next to the frog, and replacement screws are readily available on electronic bay dot com), it’s in amazing shape. The beech sole, while a bit twisted, seems never to have been seriously flattened. The mouth is still crisp and tight and should remain so after truing the sole. The throat has shrunk a bit (again, 150 year old wood), so I might have to grind 1/16″ off the iron width so it adjusts easier. Or just get a modern replacement blade which is a bit narrower. Even the knob is sound (despite a small flake off the side).
Do I need a transitional jointer plane for my toolkit? Definitively no. I have a Type 1 Stanley Bedrock No. 7, and one of the very last Old Street Tool trying planes ever made. Plus I have a No. 6 fore plane that is just as good as a jointer for most of the work that I do. And is my every day plane, as it were.
But this transitional plane was $45 dollars and a piece of history. So I will clean it up and use it as I see fit.
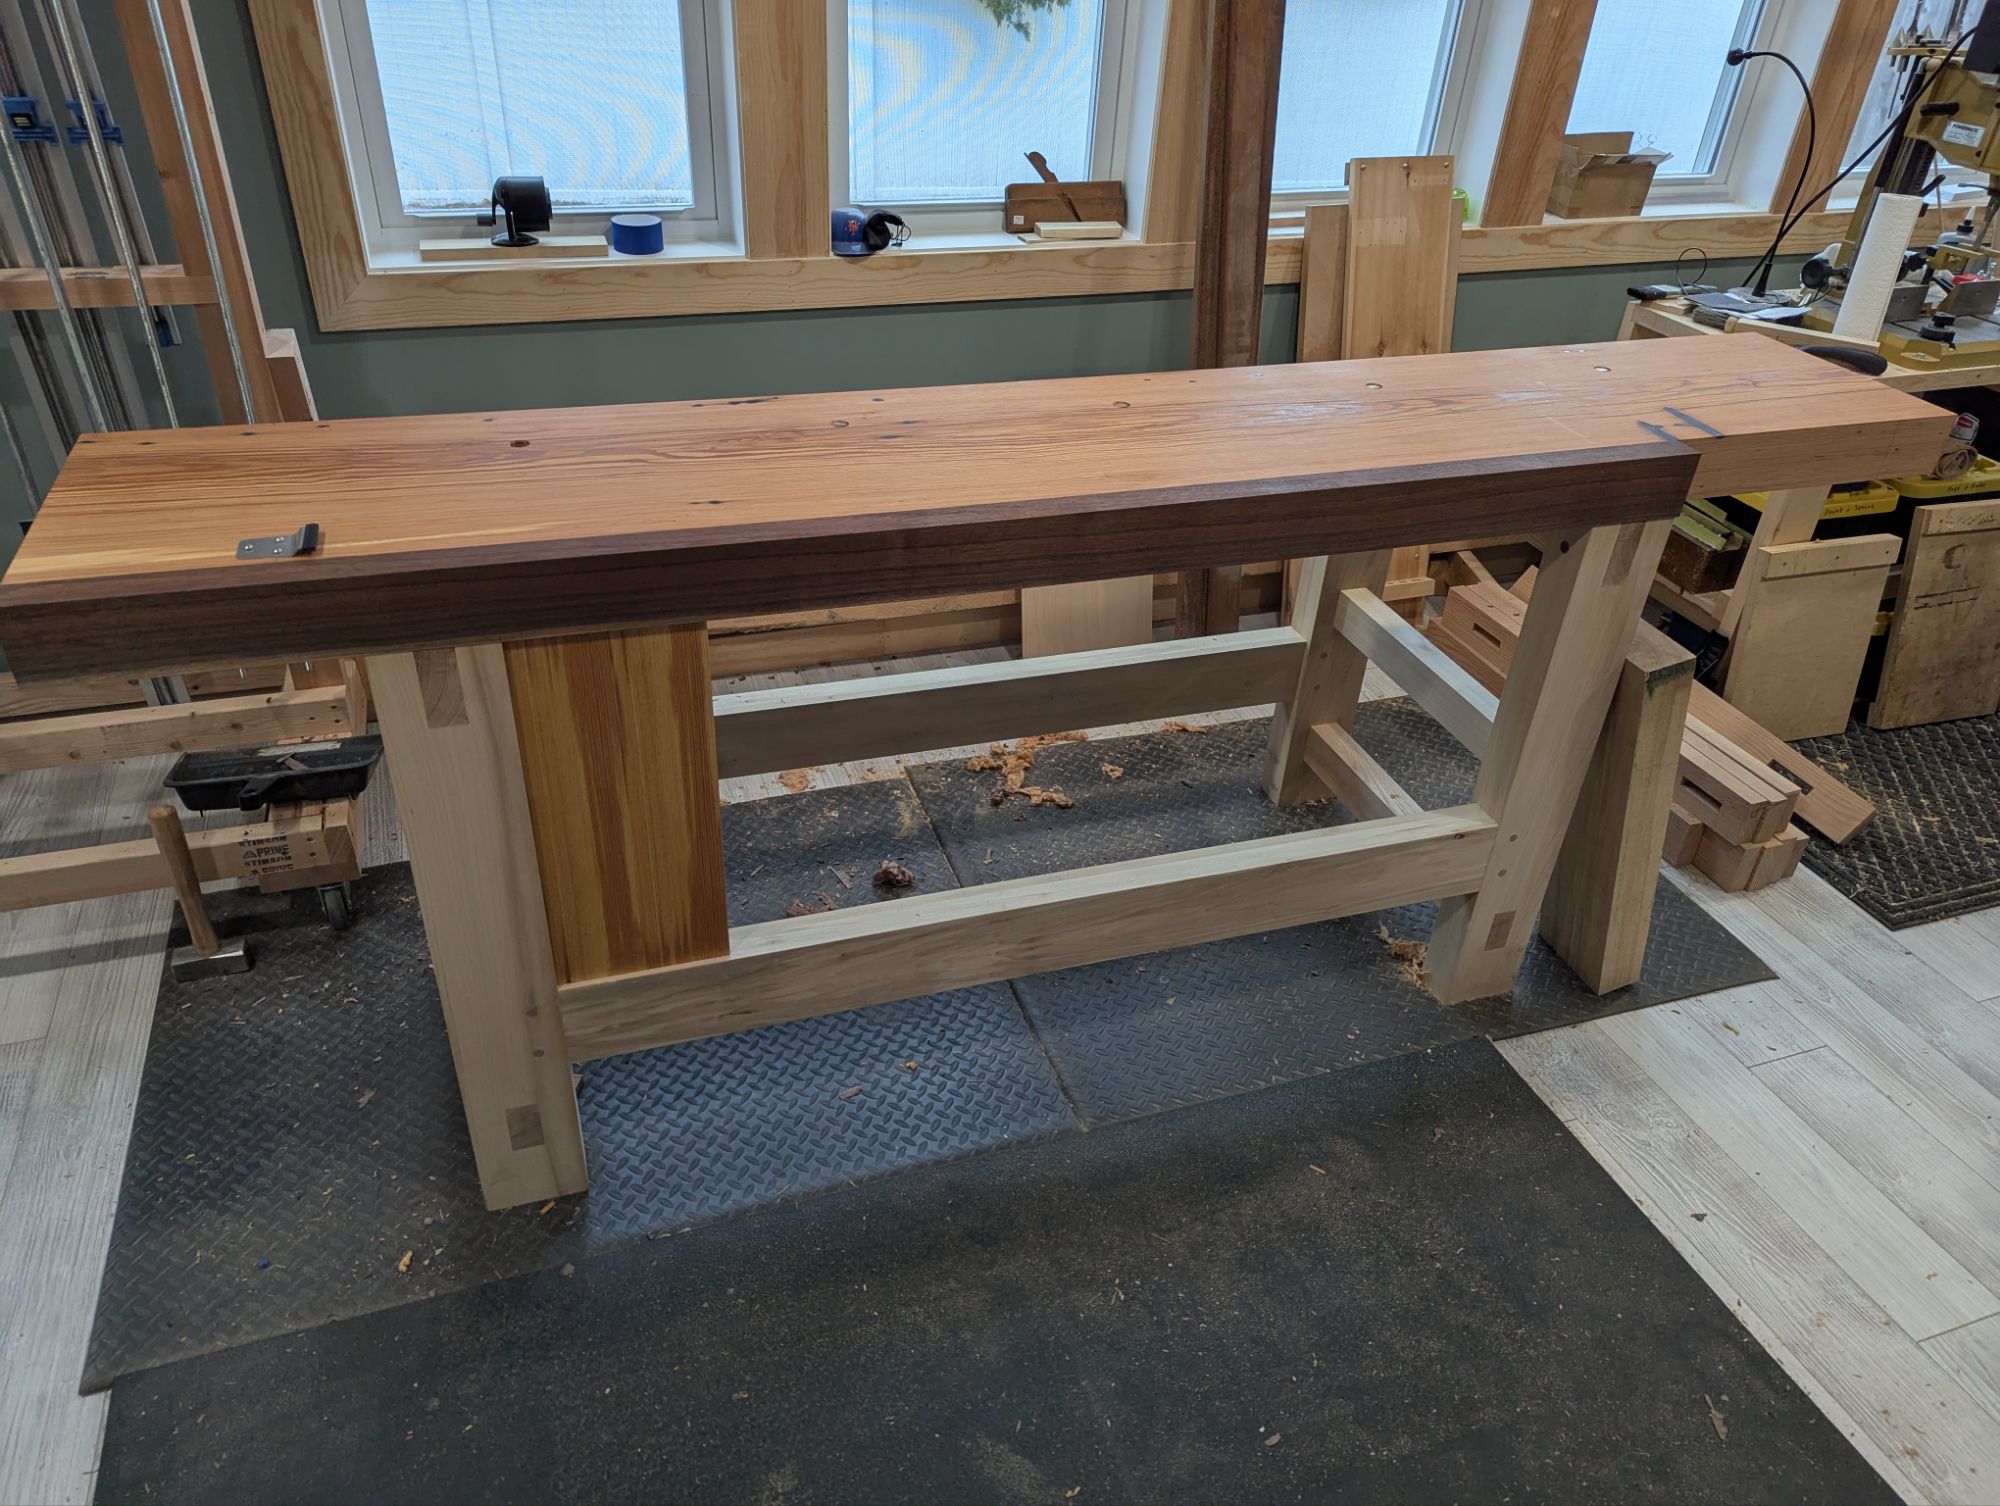
Just a quick update on my new workbench: I have attached the slab top (with pegs like a Moravian workbench) and oiled it a few times (with untinted Danish Oil), which I think looks super neat.
I’ve also bored holdfast holes in the top (12″ back from the front edge of the bench and 14.5″ on center, which I think is the right spacing for Grammercy Holdfasts) and attached a Compass Rose planing stop. Finally, the vise back is mortised into the stretcher and the underside of the top, so I’m ready to work on the vise chop itself.
I’m not one for sentiment, but that top sure looks nice with a couple coats of oil.
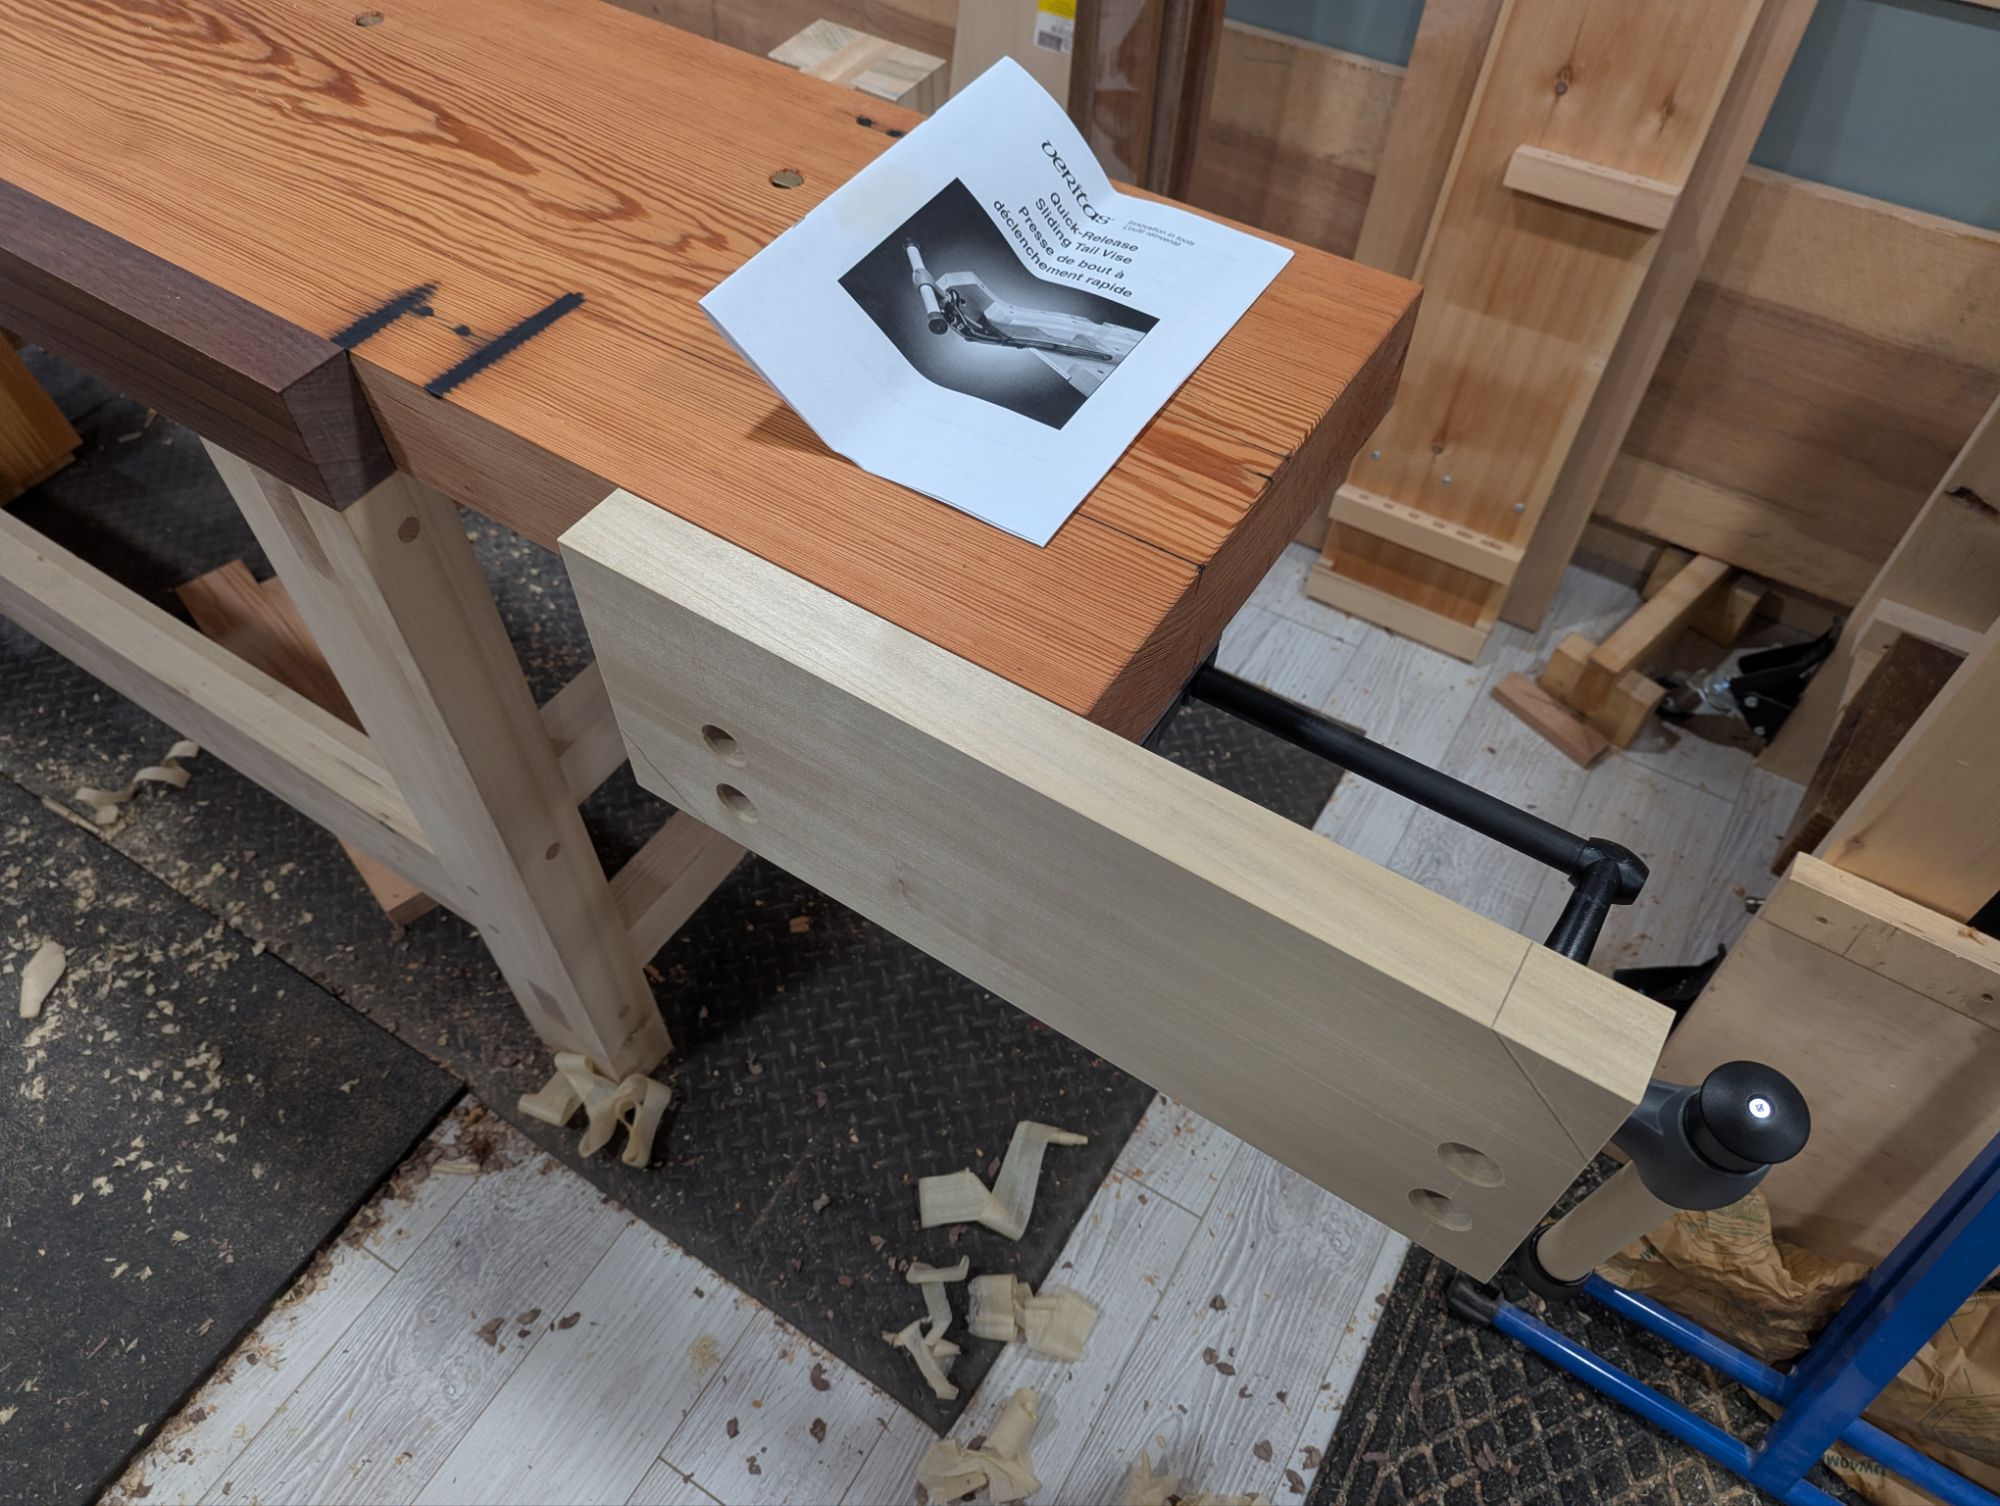
In addition, I finally unboxed my Veritas Quick Release Sliding Tail Vise and attached it to the workbench. I followed the directions exactly but I guess my vise (which I bought for myself in 2021, right in the thick of the pandemic) had some issues with the casting or the machining. The attachment points for the vise chop were not in plane (more than 1/16″ off) and the threaded holes for the bolts to attach the vise chop were not spaced as described in the instructions (exactly 1/8″ off). Perhaps there was a setup issue in the factory?
This meant I had to scrap the continuous grain walnut vise chop and laminate a new one out of poplar (again, trying not to buy new materials for any part of this workbench).
Kind of annoying but ultimately not an issue.
It’s still a very nice piece of hardware and works great (after I was able to sort out the problems with some fender washers as shims and the aforementioned replacement vise chop). Outside of the irregularities the build quality is great. I have no doubt it’s just a bum unit from the dark times when quality control wasn’t ideal. It happens.
I by no means intend to stop shopping at Lee Valley and I don’t want anyone to think I’m disparaging them. The instructions for the vise were detailed and super useful. If the mounting holes hadn’t also been off, I don’t think I’d even be posting this.
This thing is really becoming a Frankenbench, though.
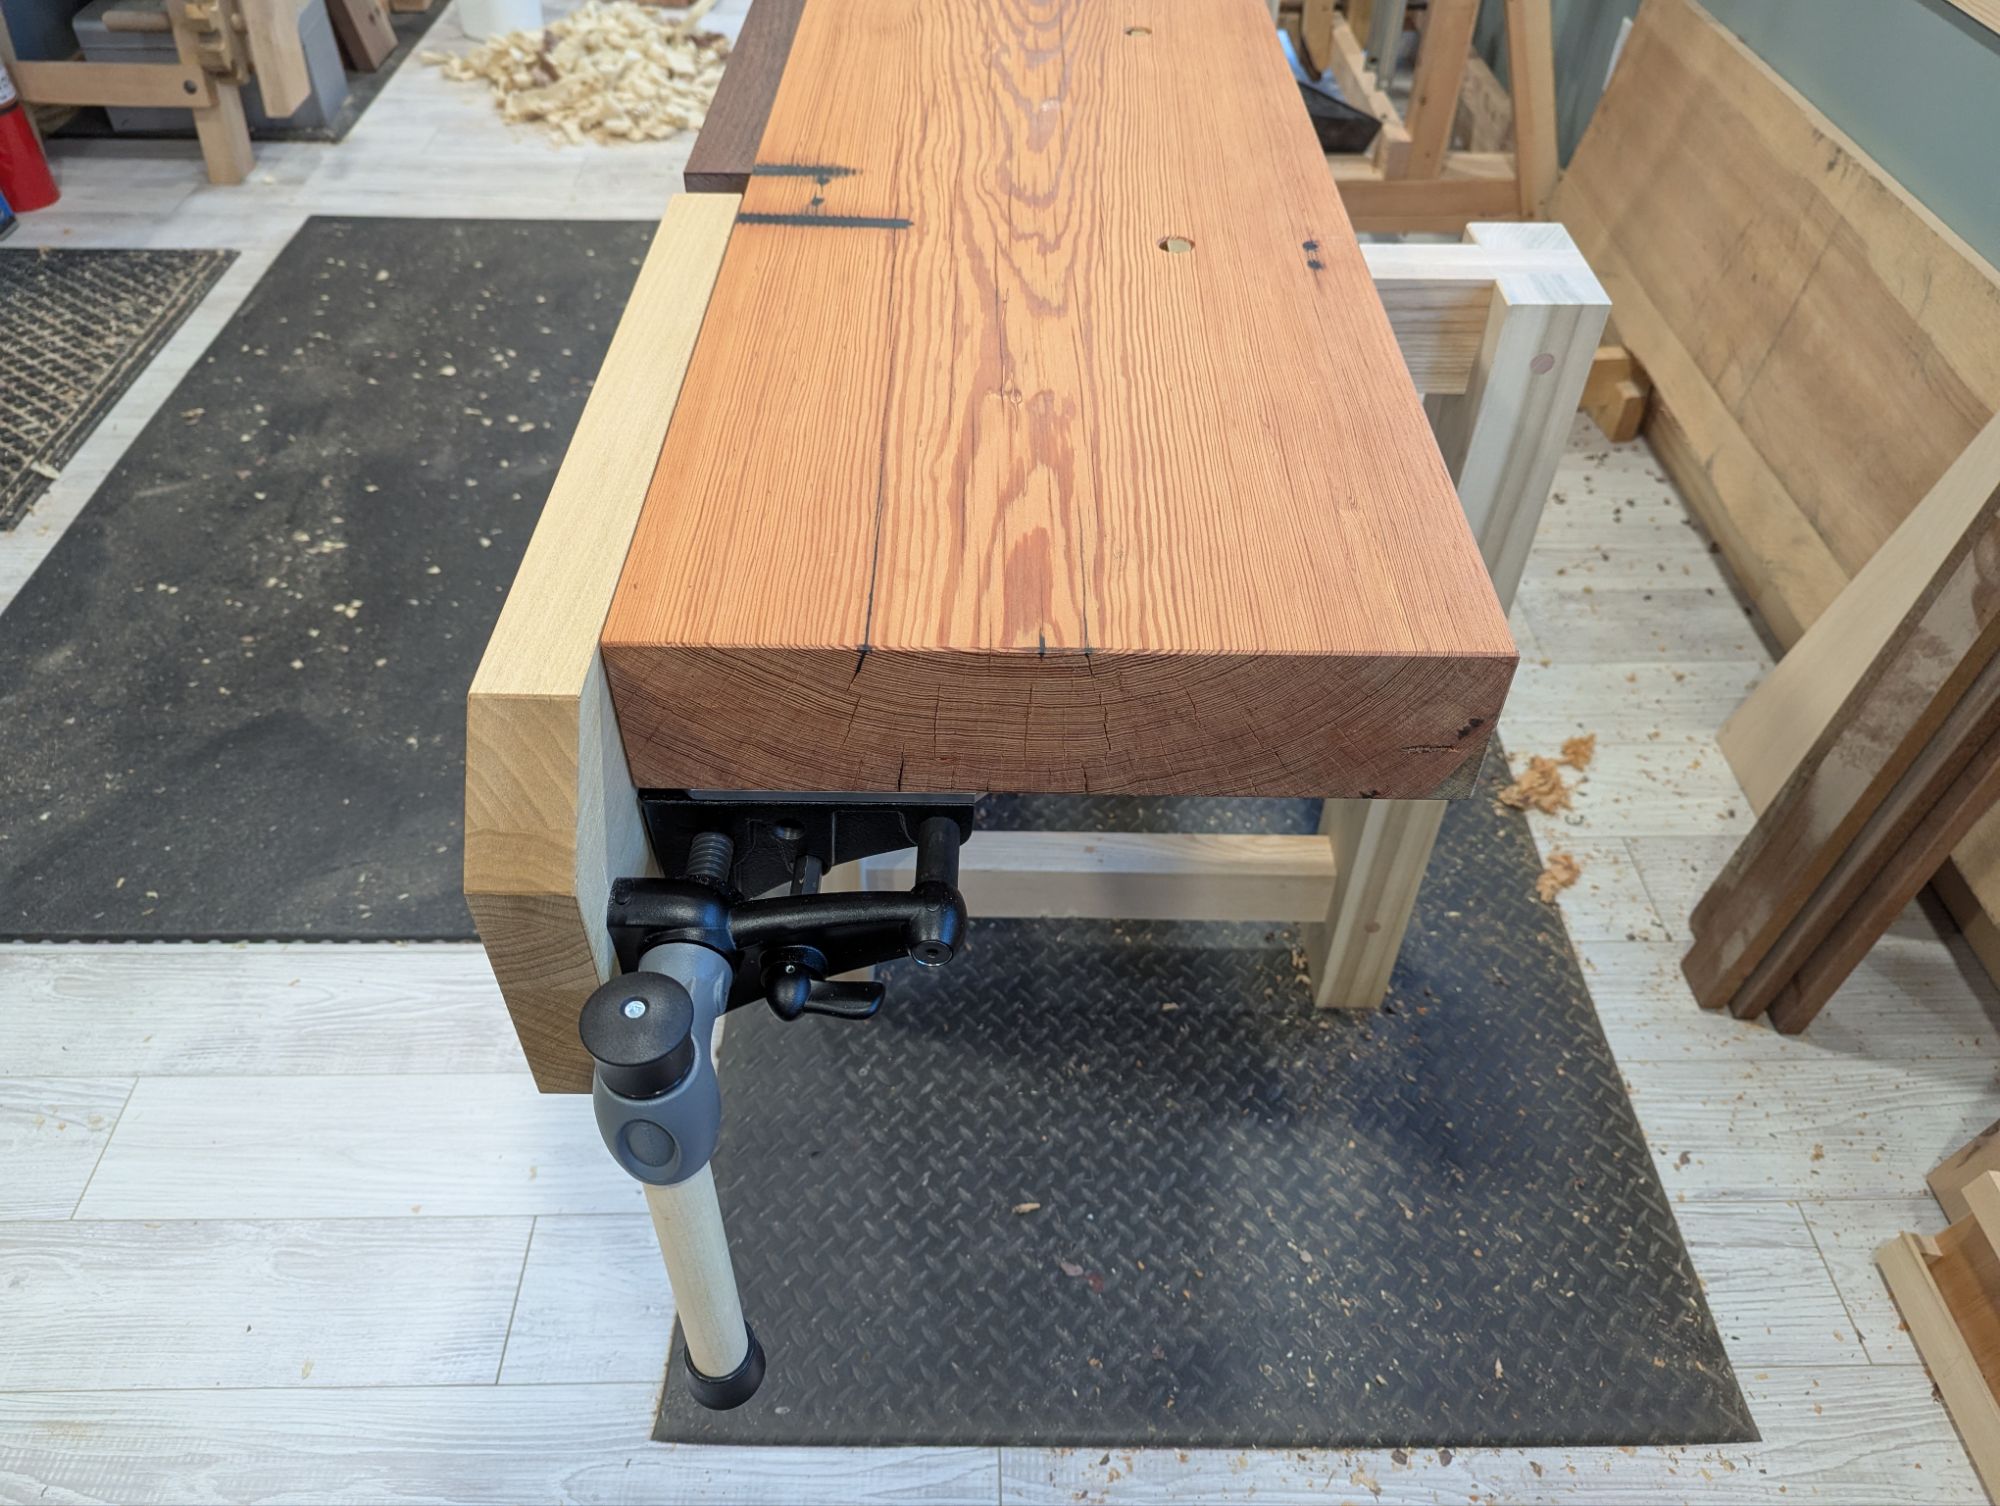
Having used the finished vise for a few days, I’ve noticed a couple things, though. First, the vise is clearly designed for thinner workbench tops. The first attachment point is 5/8″ below the underside of the workbench, so there is a lot of unsupported chop on a 3 1/2″ workbench top. This leads to some vise chop lift. I’m not quite how much clamping pressure would be lost on an even thicker workbench top because of the twisting force on the unsupported part of the vise chop.
Second, everything is attached with screws (No. 14 wood screws for the mounting plate and 3/8″ lag screws for the vise assembly). They are beefy, for sure. But especially for softwood benchtops, I bet carriage bolts would be a better long term option. If it works for metal face vises, it should work for this.
That said, I am not a production woodworker. So I doubt I’ll ever put enough stress on this vise to test either of my theories.
This weekend, I’ll be building the leg vise. This one will be pinless, with a metal screw (also Lee Valley) and a 1 1/2″ linear bearing (and carbon steel shaft), both from McMaster-Carr.
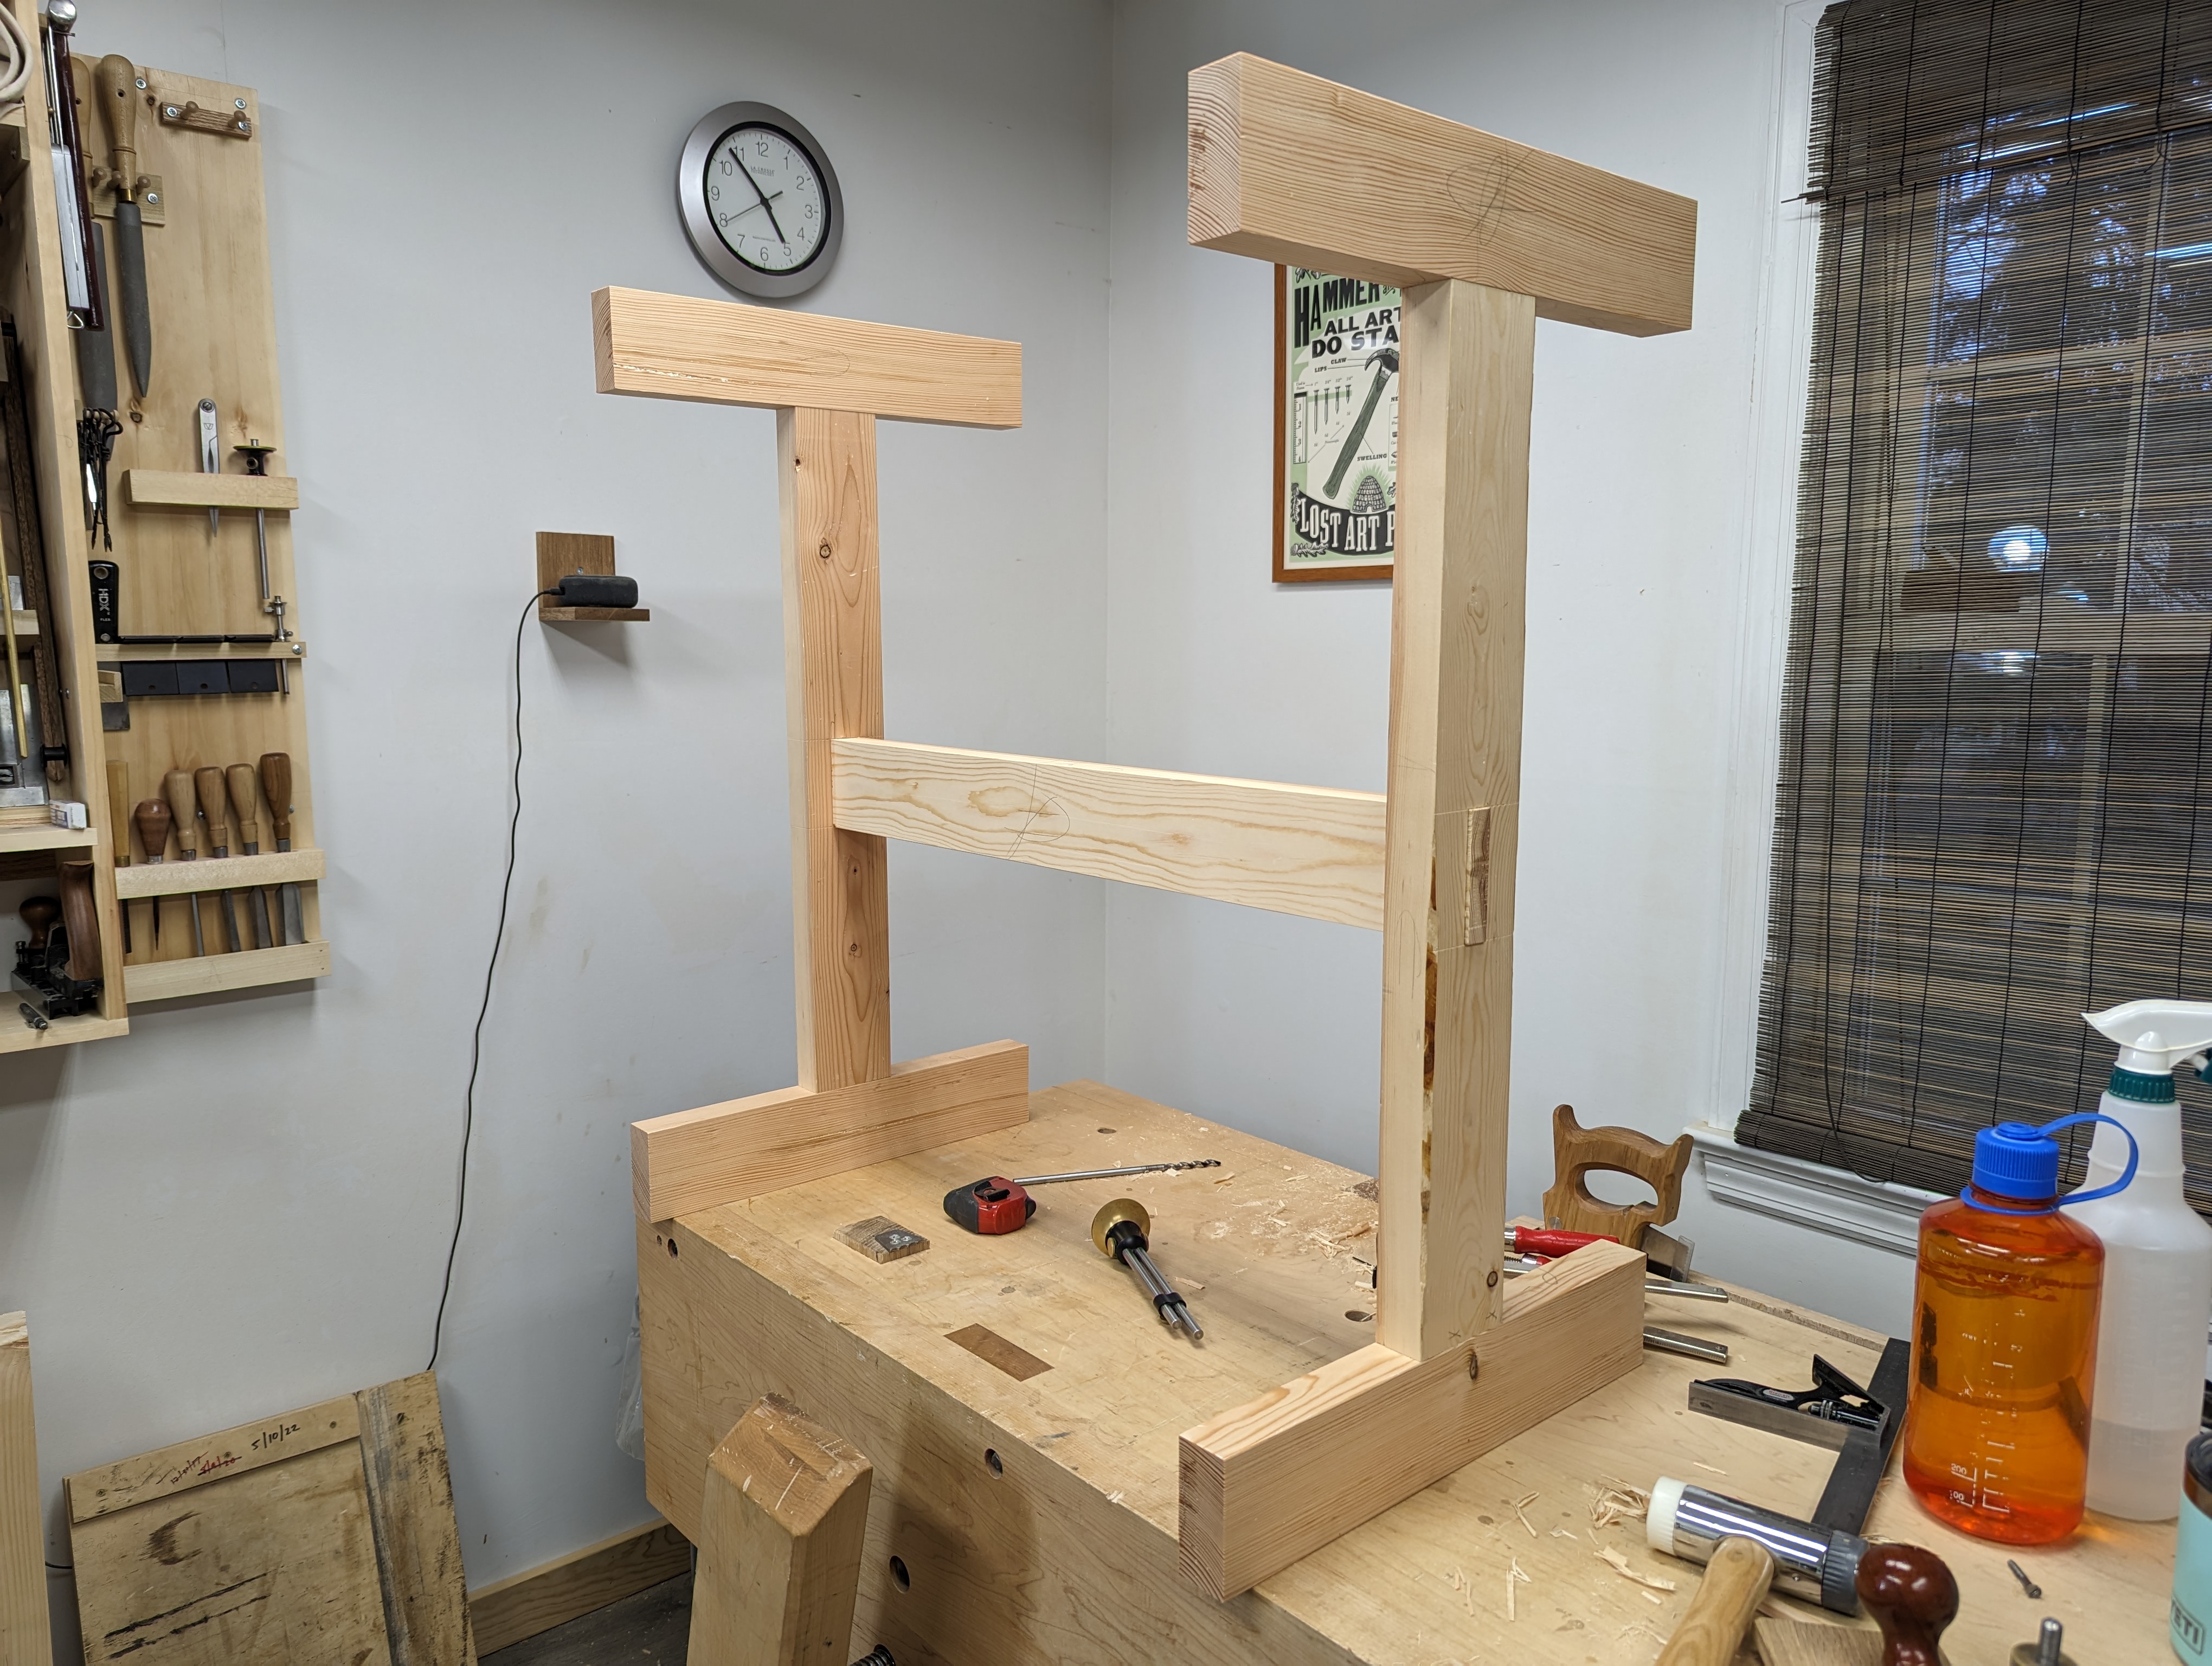
If you follow the blog at all (or my new BlueSky handle: @aptwoodworker.bsky.social), you know I build a fair amount of workbenches. In fairness, it’s been a while since I’ve built one for myself. But I have some exciting news: I am making one more workbench, before hanging up my cleats forever.
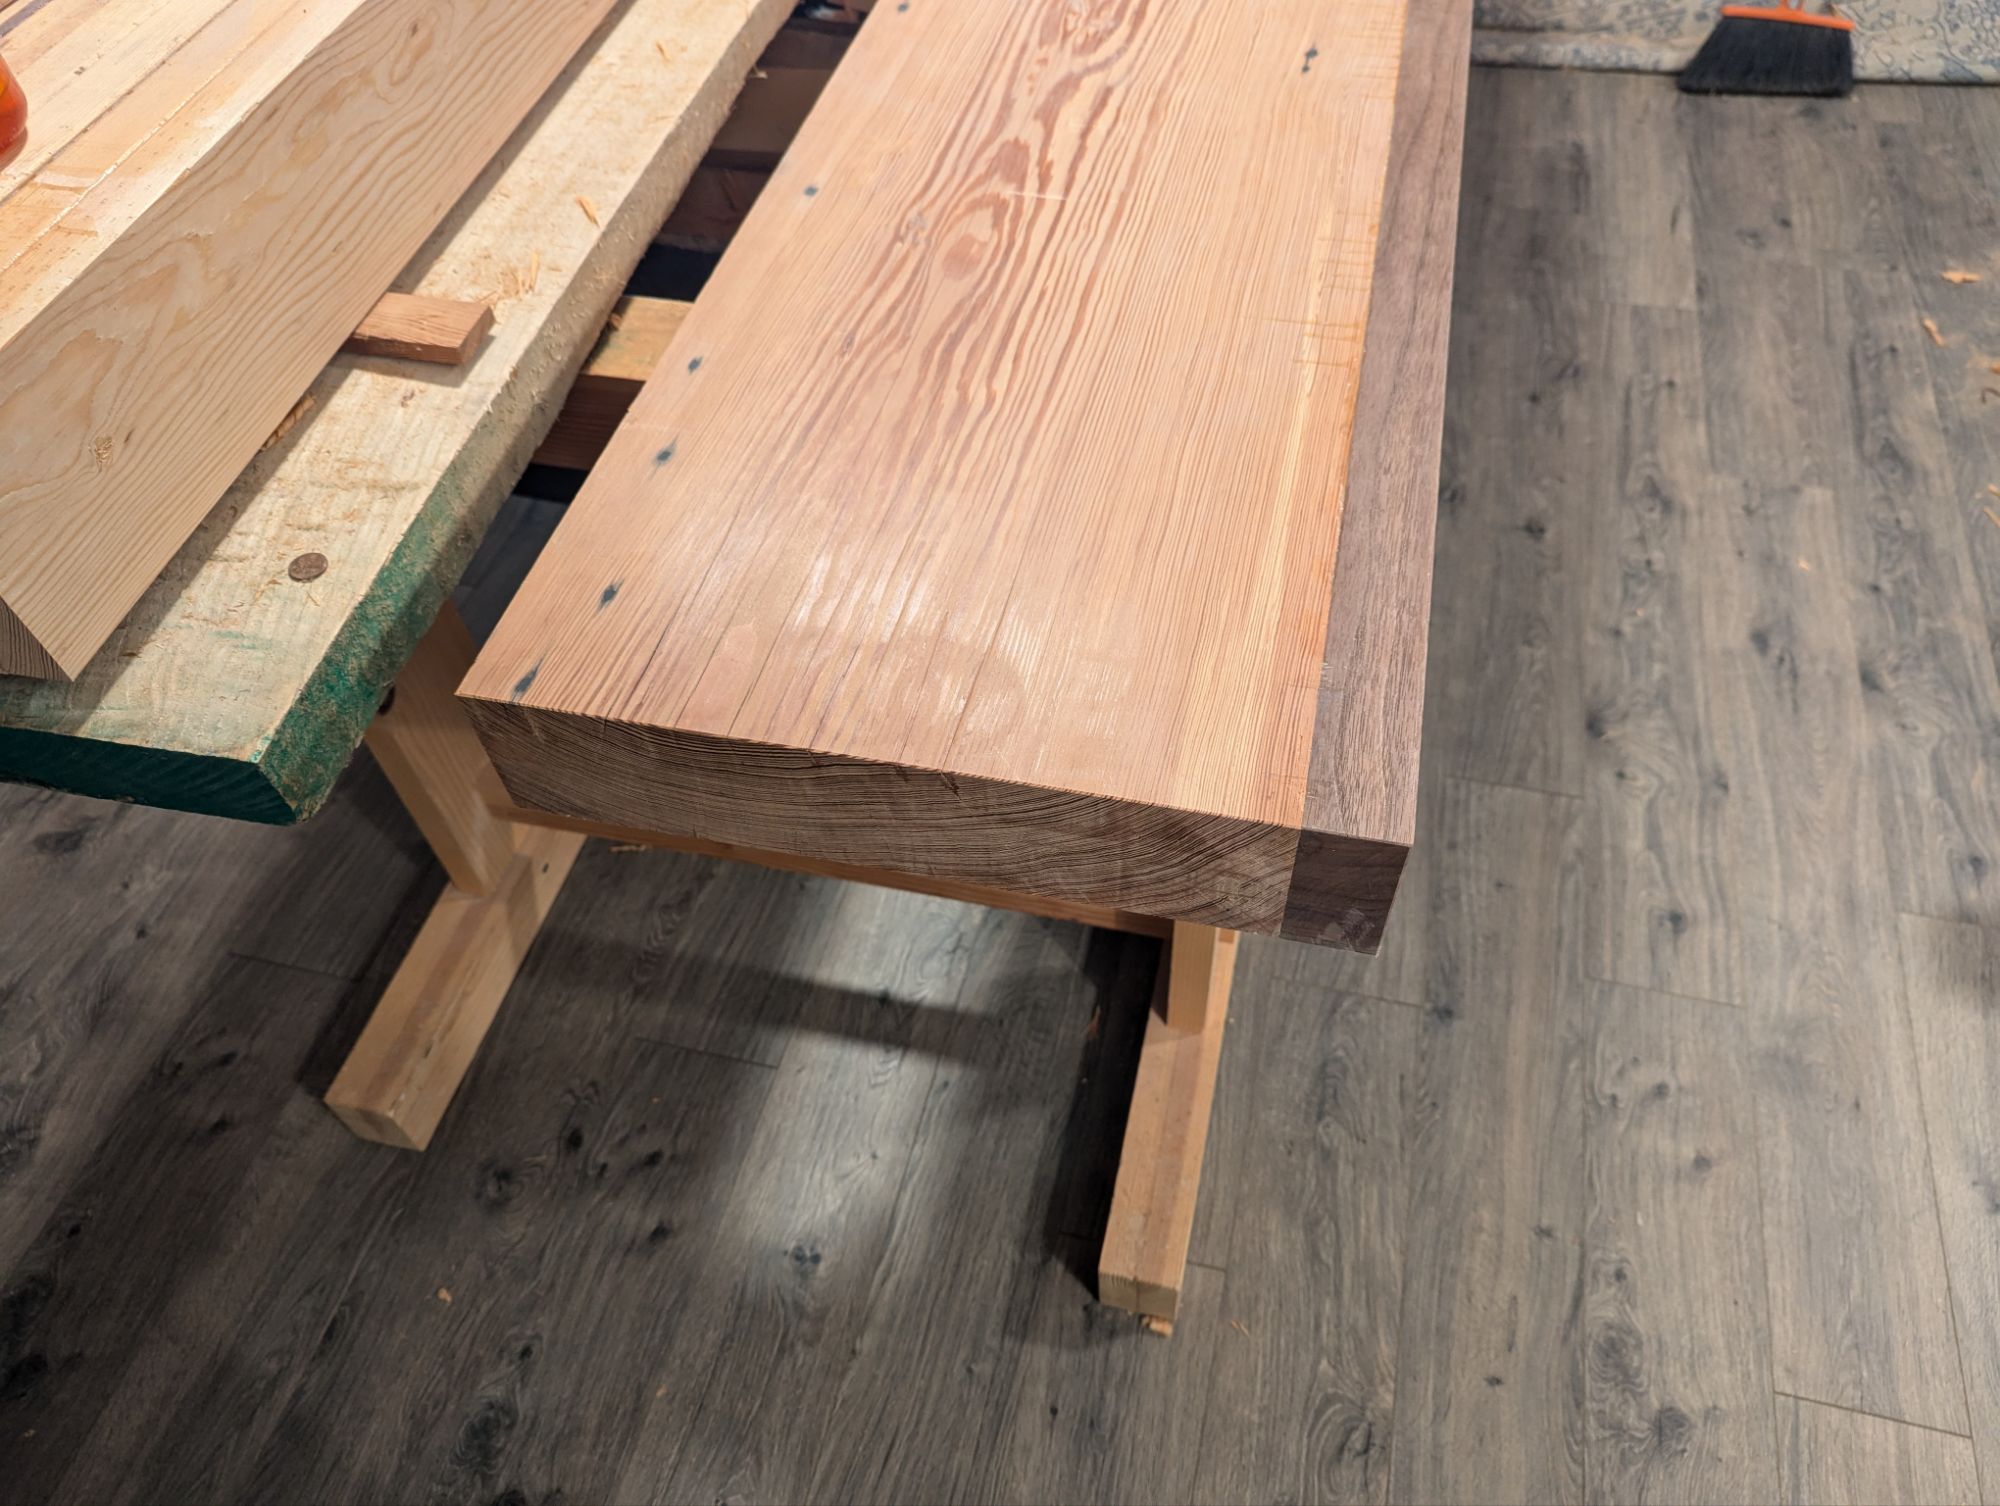
This new bench is a mishmash of poplar, ash, walnut and southern yellow pine. And the centerpiece is a slab of old growth Slash Pine that I bought from a reclamation yard for the main part of the workbench top.
Look at all them growth rings!
This is by no means a “dream workbench”. I don’t really have dreams (literally: it’s just not a thing I do very much). And I certainly don’t go in for the sappy sentiment. But I have poured all of my knowledge and skill into this thing, and I’m pretty happy with it.
To date, I’ve finished the base, which is super beefy. I resolved not to buy any more lumber for this workbench, which has required being creative in using materials (including resawing and laminating materials as needed). Between the leg vise (Moravian workbench style) and sliding deadman (TBD), I’m still cobbling together all the necessary pieces.
I may still paint the base in the future.
Now I just have to get rid of an 8 foot hard maple Nicholson workbench that I’m realizing I never really took any good photos of over than here. Anyone in Southern New England (USA) interested?
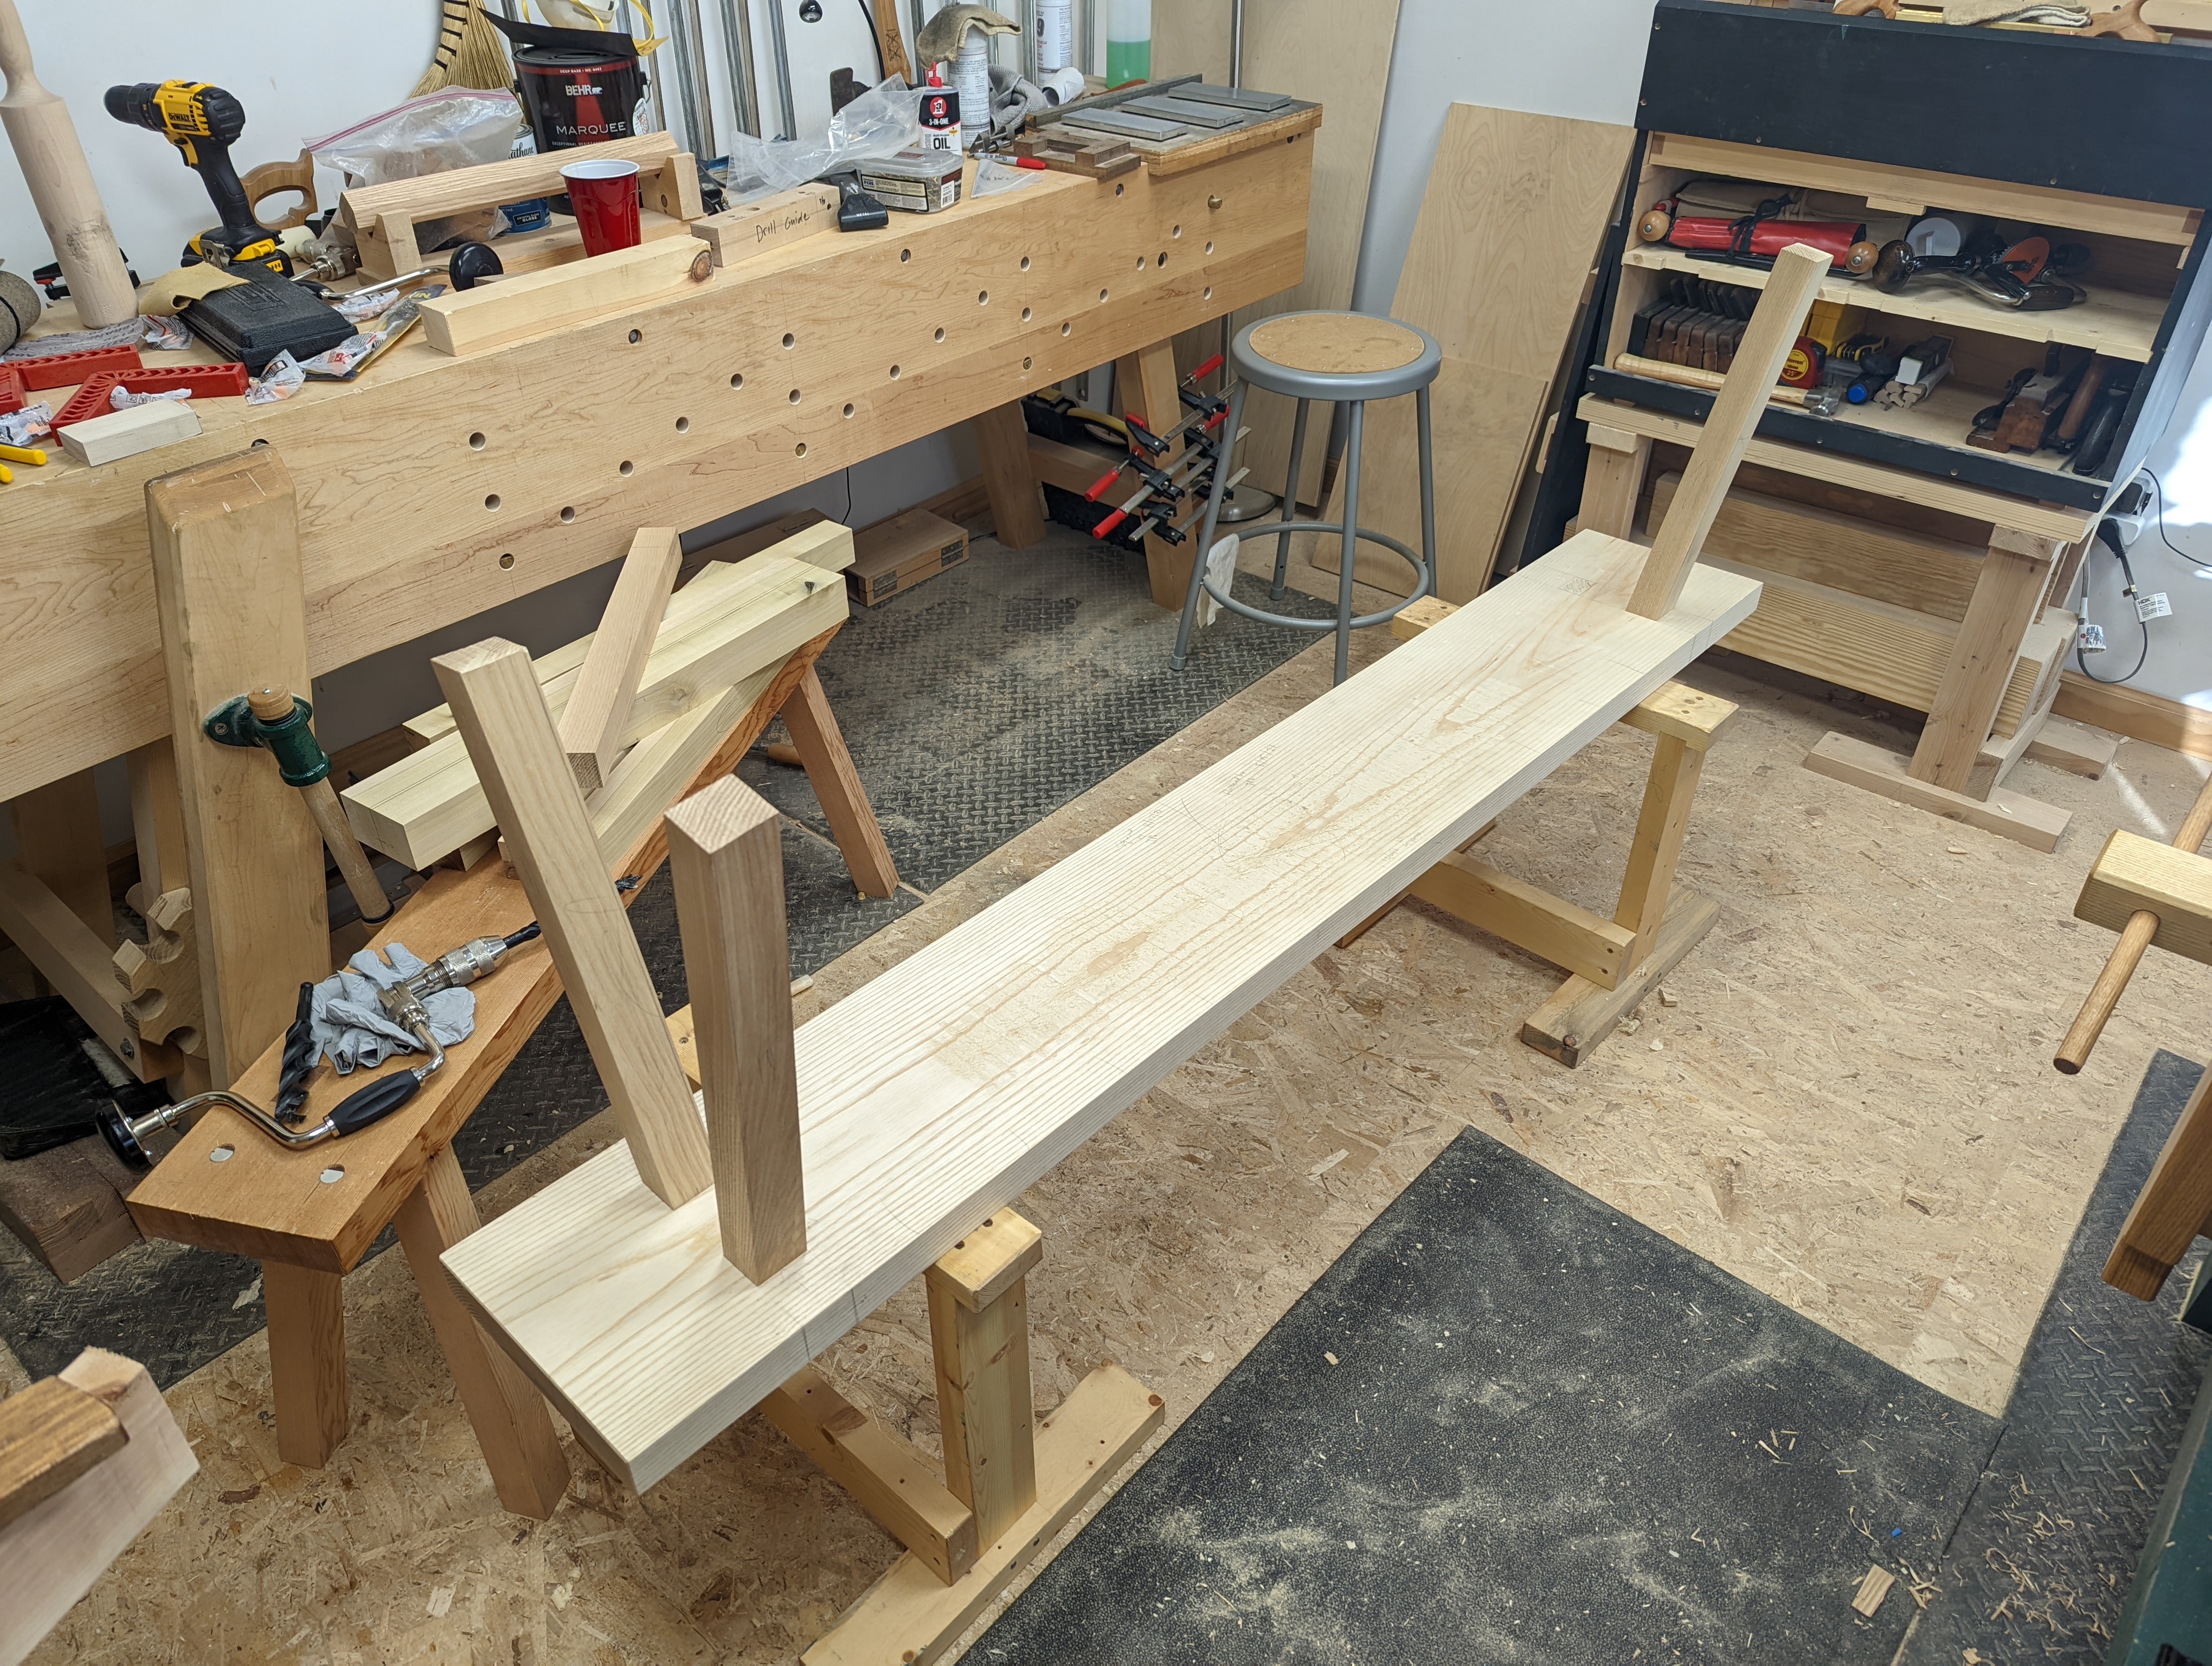
Suffice to say, it’s been a very long year. I lived through some serious renovations on the house, moved my workshop to another room in the house, and generally just had so much going on professionally and socially I did far less woodworking this year than I would have hoped. But even with all that, I still found some time on Thursday to put down the work mobile and pick up the plane, saw, and chisel.
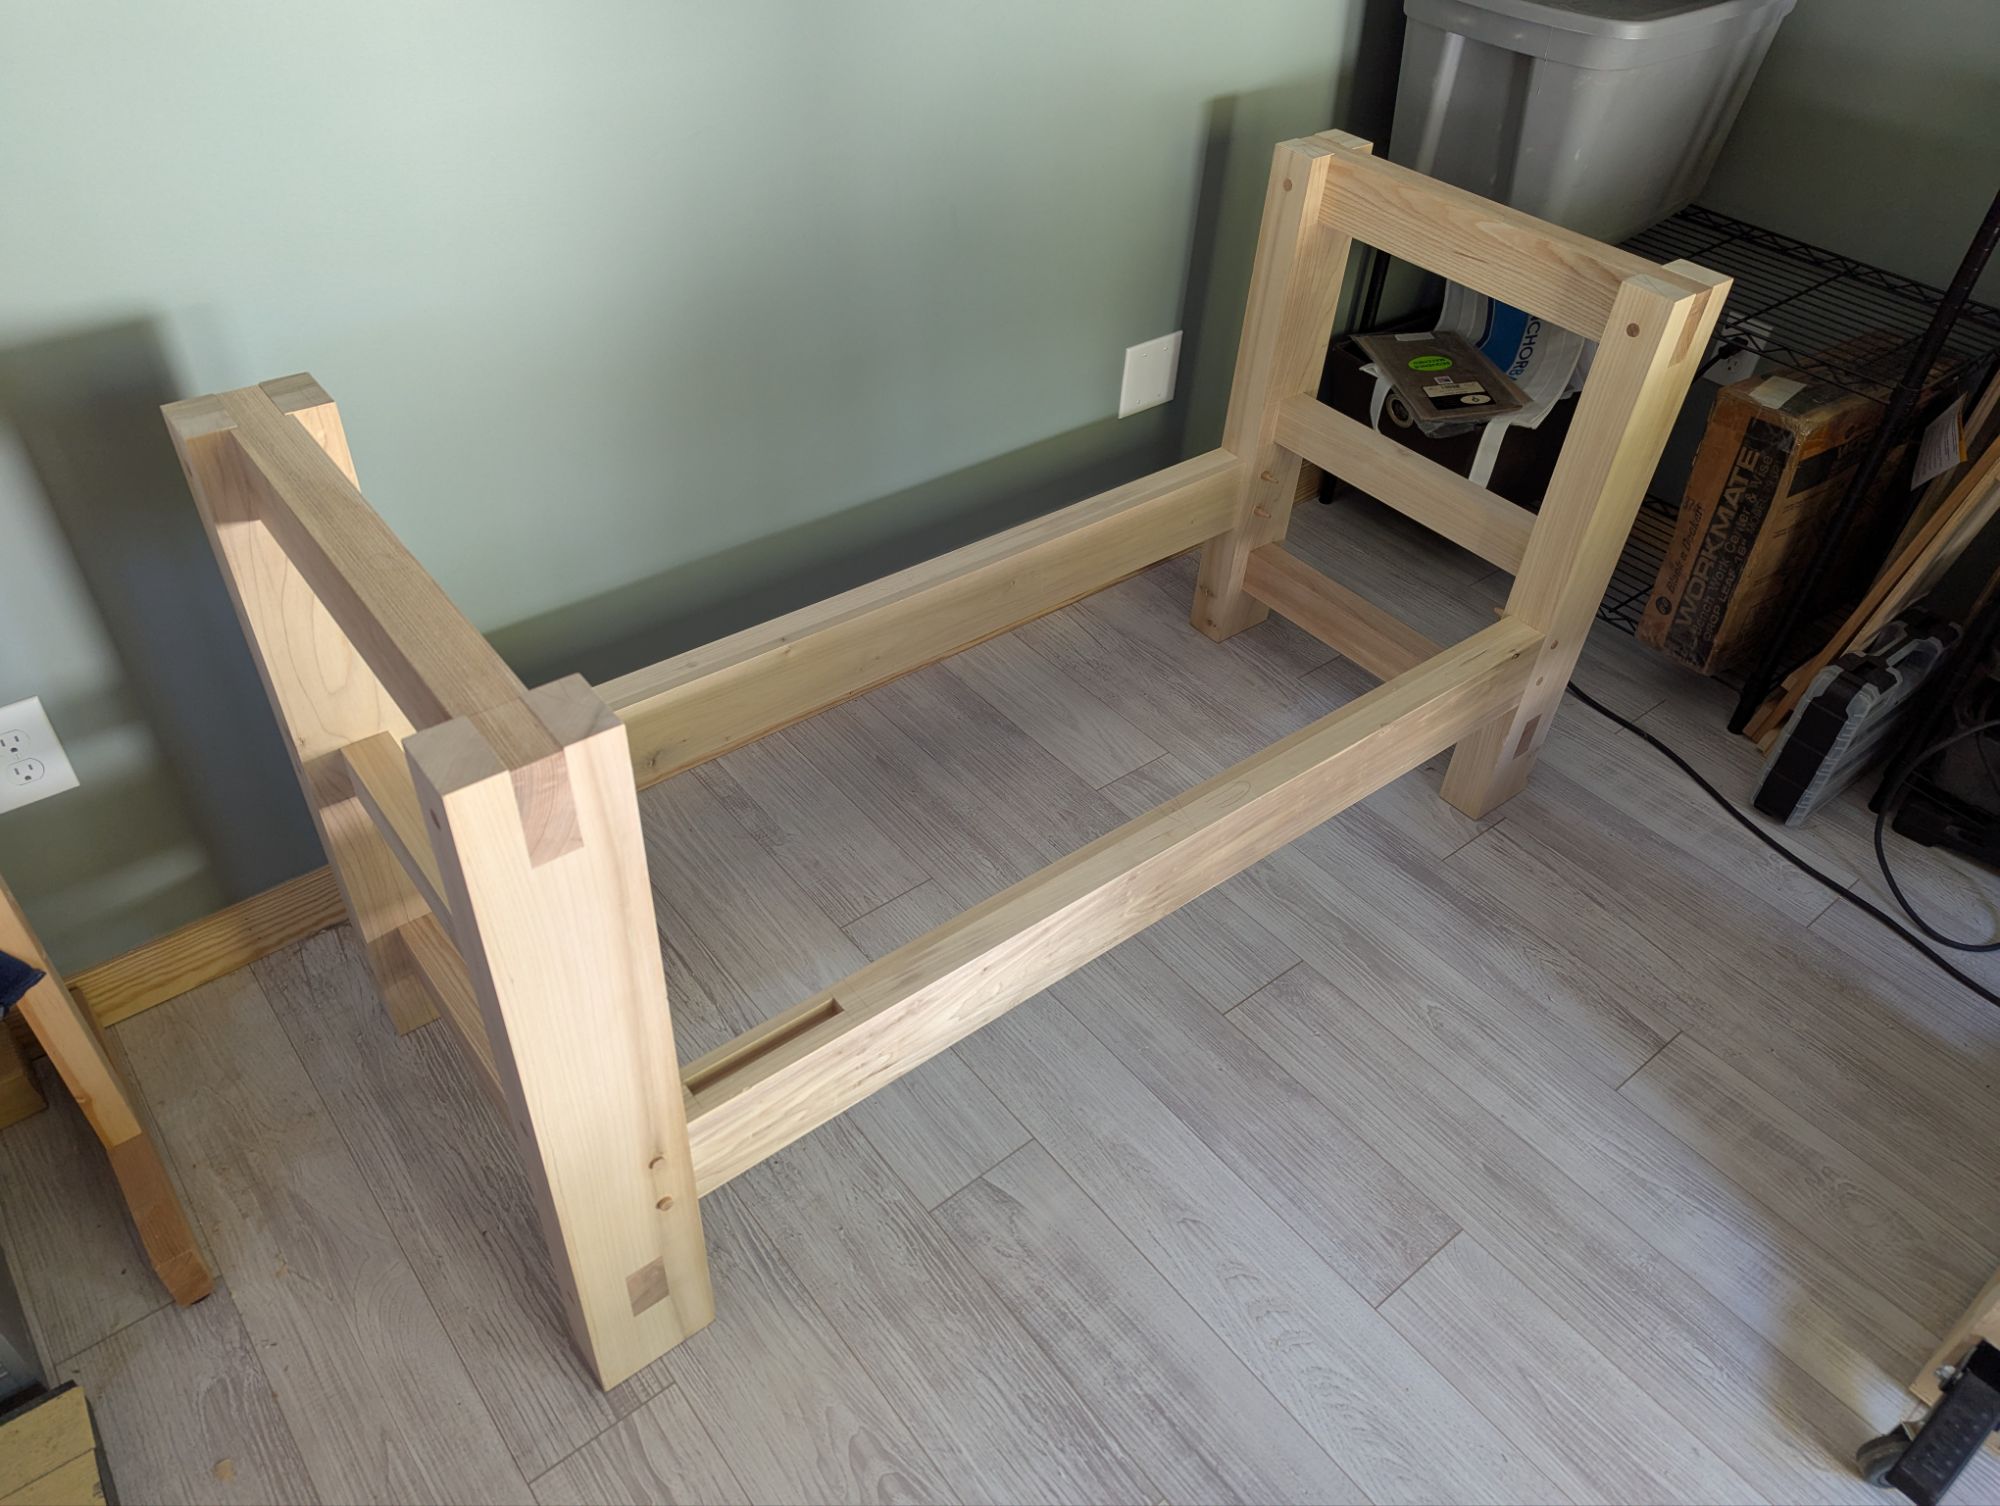
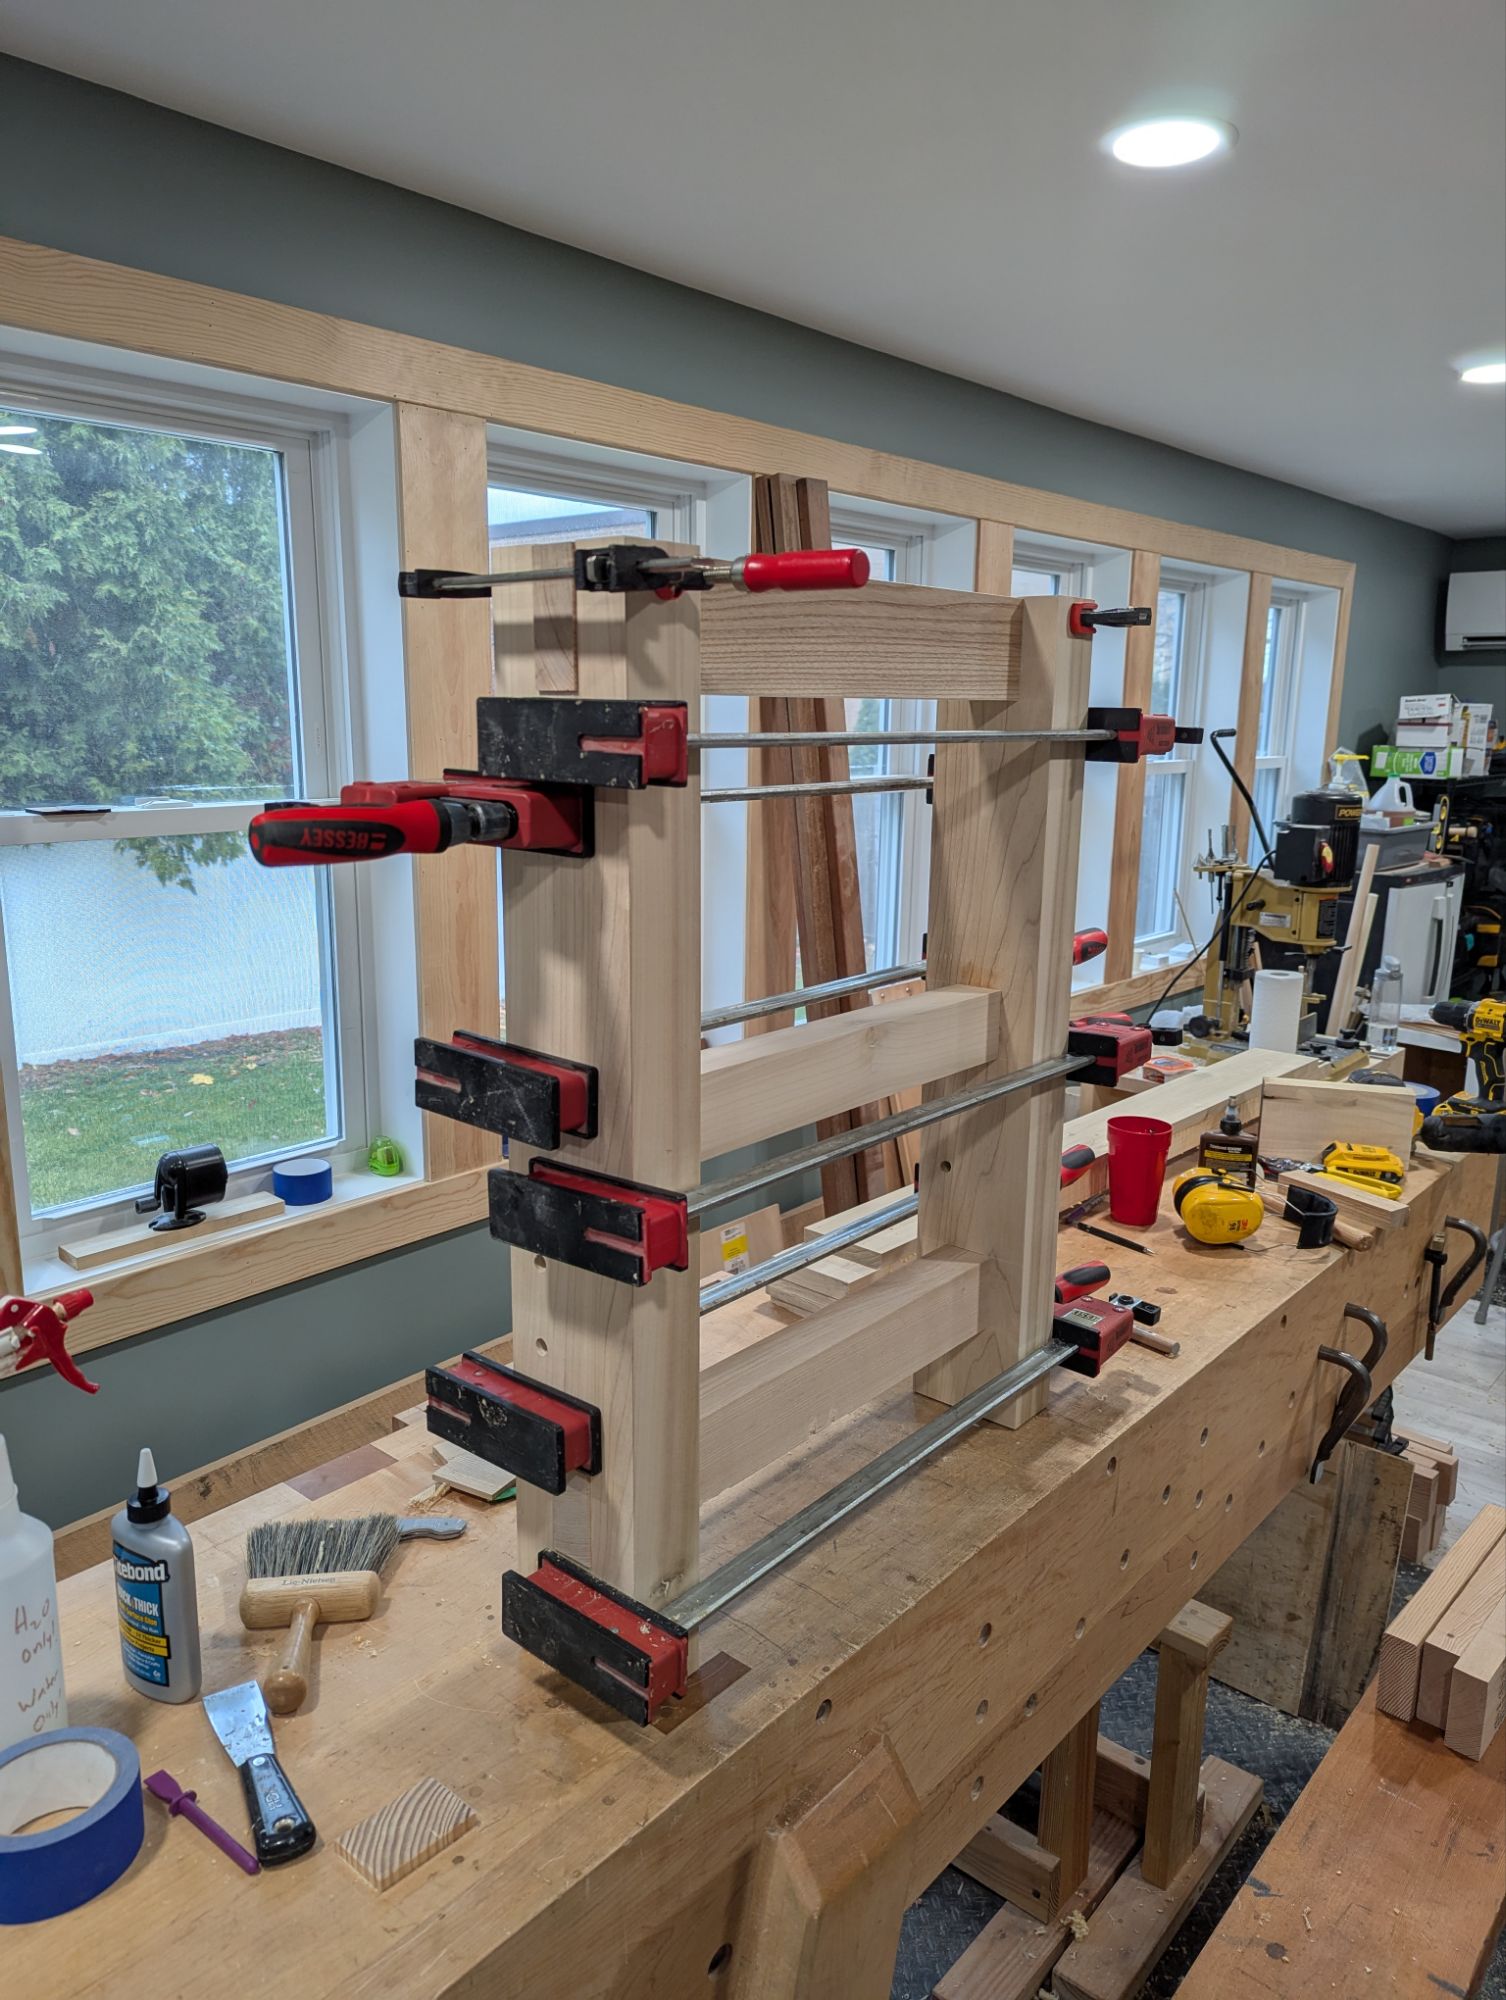
I am in the thick of a new workbench build (it’s been almost four years since I built one for myself, if you can believe it). And I’m at that point where it’s just about to start feeling like an actual workbench, rather than a bunch of beefy sticks.
One of the two leg assemblies.
So even though it’s after the holiday, I hope everyone finds some time in the shop this weekend. Even if it’s just an hour to glue up another leg assemble before your next conference call.
I’ve really learned to love Titebond Thick & Quick for mortise and tenon joinery.
Happy American Thanksgiving from The Apartment Woodworker, to you and yours.
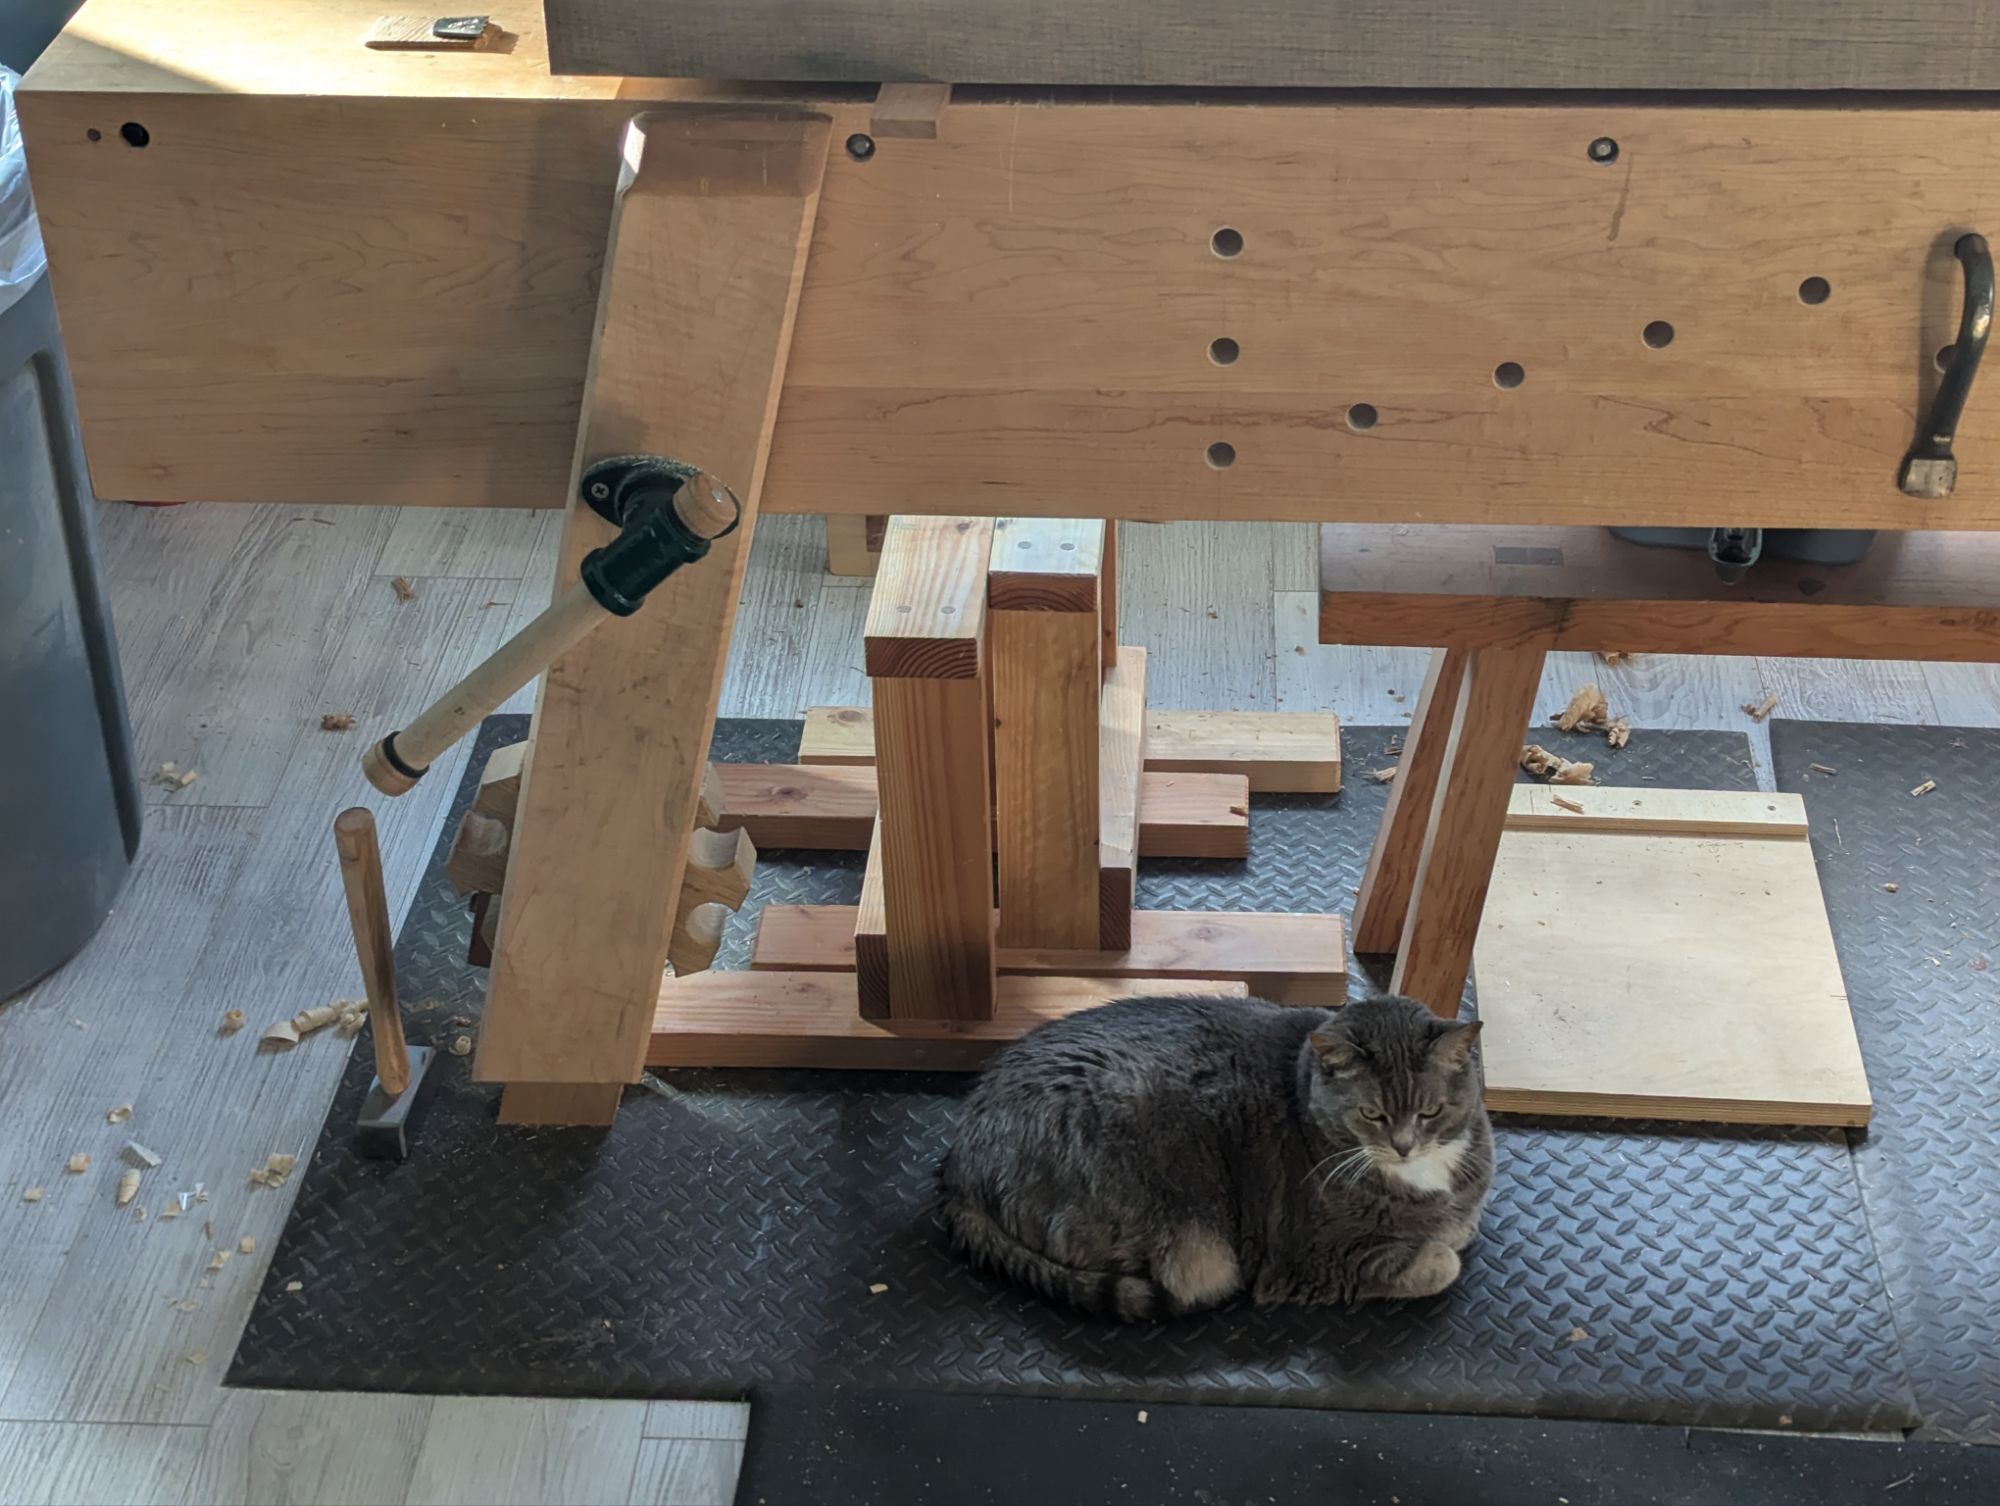
Hello, everyone! It’s July 2024 and things are weird, generally. The Mets, despite being a pretty shaky team, are in the playoff hunt. The world is on literal and figurative fire. And I have a new workshop.
Complete with shop cat!
More on that soon.
But today I’d like to revisit something I’ve talked about previously: rectangular tenons on low benches. It’s no secret that I’m a fan of the traditional Chinese workbench. And in the past I’ve showed off several versions of a sawbench or sitting bench that use angled, rectangular tenons. But today, I’d like to do a deeper dive on how I lay out the angled mortises. Because if you lay them out correctly, it’s tough (but not impossible) to screw things up.
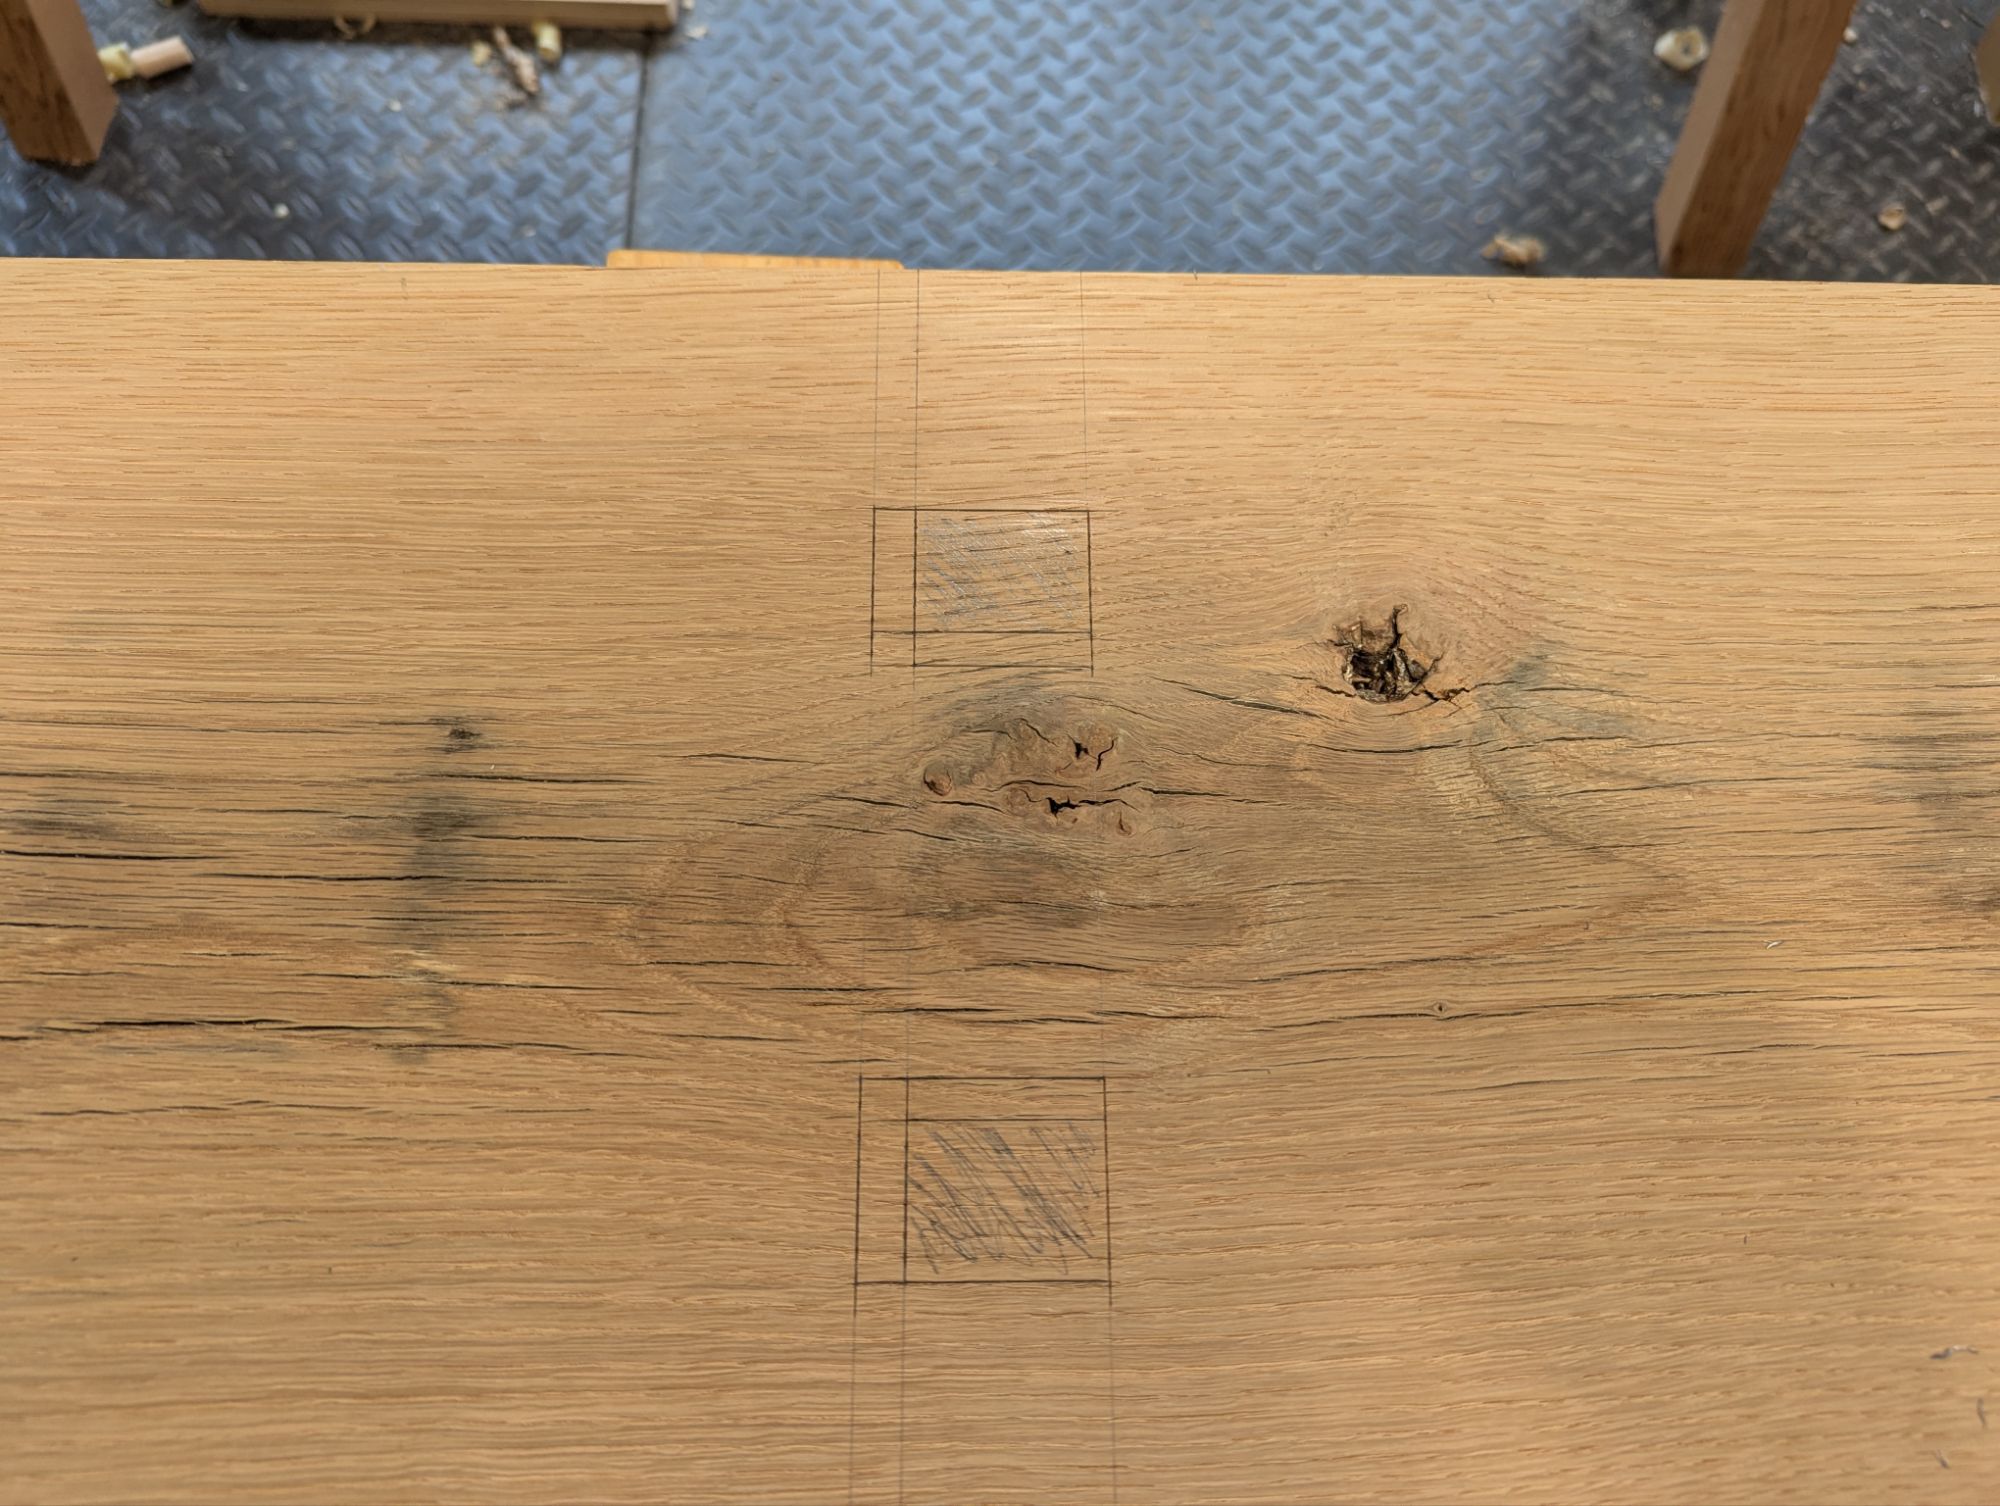
By definition, for any angled mortise, the mortise hole on the top of the slab is in a different position than the mortise hole on the bottom of the slab. Unless you want a super tippy bench, the top of the mortise hole should closer to the center line than the bottom of the mortise hole. And if it’s a compound angle, the mortise hole on the top of the slab will be closer to the midpoint of the slab than the bottom of the mortise hold (which will be closer to the end of the slab). This means that since the mortise (and the corresponding tenon) is a three dimensional object, there will be a portion of the entire mortise is completely vertical. Making angled tenons is, essentially, just strategically relieving the wood around that vertical mortise.
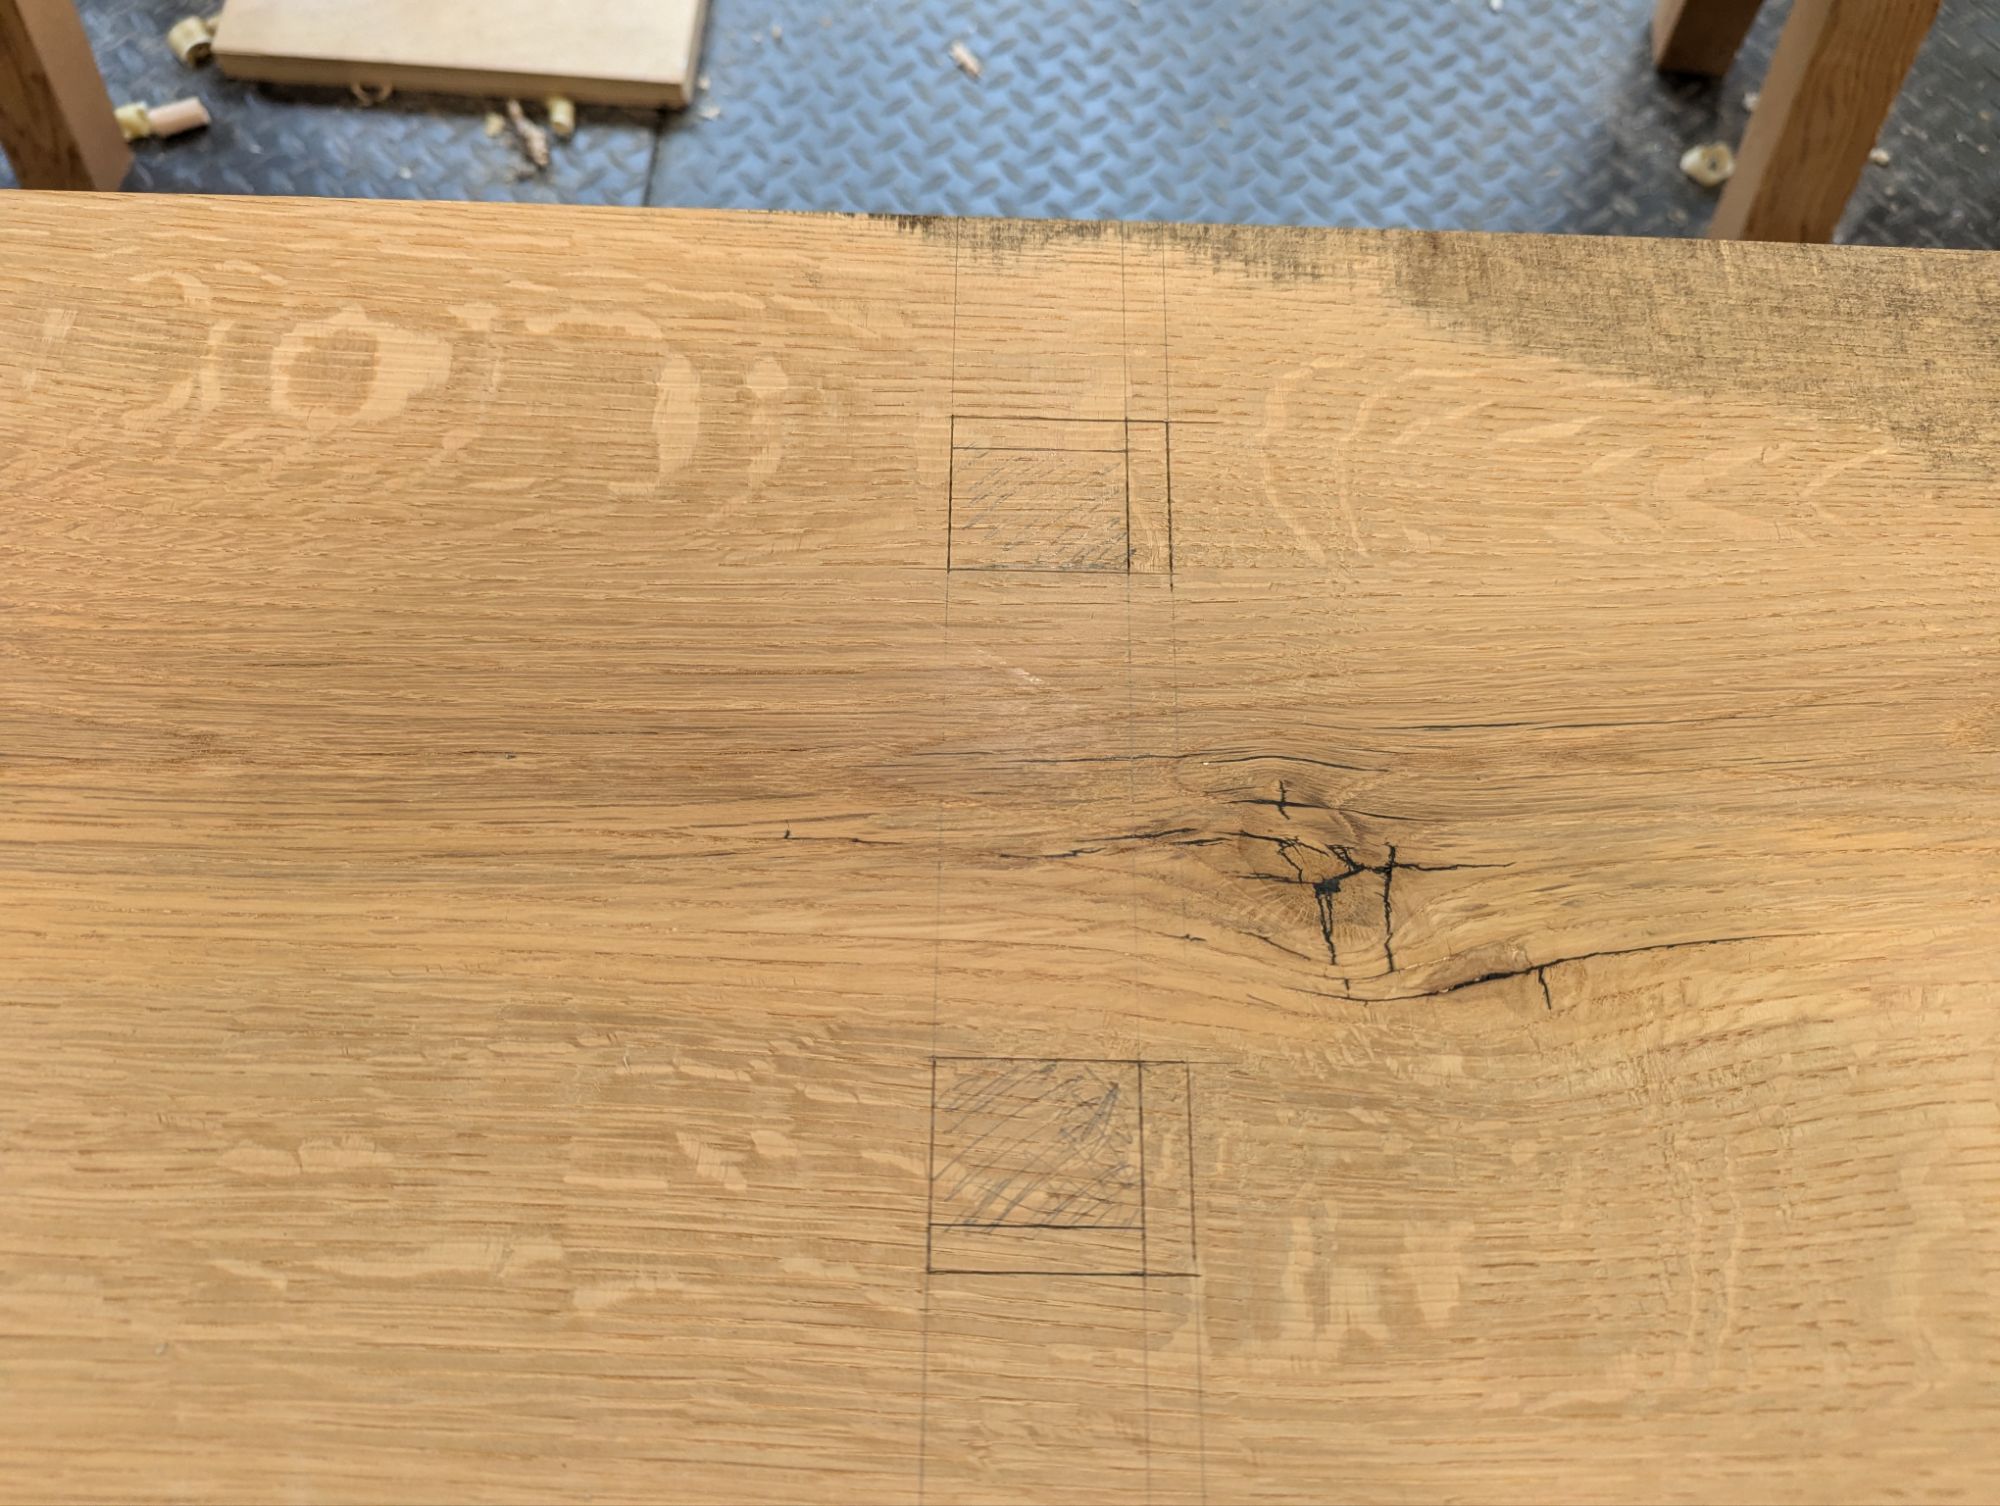
Take a look at the below image, which shows the layout for the mortise on the top of the slab. The greyed out area is the entirely vertical part of the mortise. The unshaded boxes between the other knife lines are the extants of the angled mortise. You’ll see that on the top of the slab, the mortise angles inward. In this case, because of the compound angle, it’s both inward toward the center line and inward toward the mid point of the slab.
The end of the slab is to the right.
Compare that to the underside of the slab (shown below). The vertical part of the mortise is greyed out again. Because the legs are angled both forward and out, the mortise angles outward (both outward from the center line of the slab [and toward the edges of the slab] and outward from the mid point of the slab [toward the end]).
End of the slab also to the right.
One more note: when laying out, I find it helps to carry your lines down the sides of the slab. This also can show the vertical parts of the mortise more clearly and make sure that is accurately carried around the edge.
I also use a trigonometry calculator to figure where to start the mortise on the top of the slab so the legs don’t stick out too much beyond the plan of the slab itself. For most slabs in the 10-12″ range, the mortise on the top side of the slab should be centered around 2.5″ away from the center line.
This just lays out the forward rake.
So what is my preferred method for cutting these angled mortises?
First, I would bore out the vertical part of the mortise with a brace and bit and then pare roughly to the lines. Second, set up a bevel gauge and chop down the angles until I get pretty close. Finally, use a block of wood as a paring guide to refine the mortise until the angle is perfect. Then cut the tenon to fit each mortise, as there will likely be some slight variance in mortise width (and the wedge will take care of any variance in mortise length).
What are some other viable techniques? If you go the chisel only route (i.e., no boring it out first, which is the traditional method), I would still recommend chopping the vertical mortise first. Then you can pare it down to the lines as described above, with or without the guide block. I do not recommend freehanding the angled mortise right off the chisel. At least not for furniture grade pieces. For a workbench, it’s probably fine.
Once you have the vertical mortise, you could use a floats, rasps, or files to shape in the angles. These tools are also helpful to refine the angles and make everything as uniform as possible.
The nice thing about rectangular mortises is that you really don’t need any of the above special tools. You could do the entire thing with a chisel and mallet no problem (and I’ve heard that the lack of boring tools in China is how the form came to be). Although, although a bevel gauge and a rasp or coarse file will definitely help.
Next time, we’ll talk about cutting the tenons. Including how to cope the shoulder so it mates perfectly with the underside of the bench.
Happy New Year, everyone! I realized I missed my usual “6am Eastern on New Years Day” post. I think that’s because I went to an actual party and didn’t get to bed right at 730pm like I have for as long as this blog existed. But anyway…
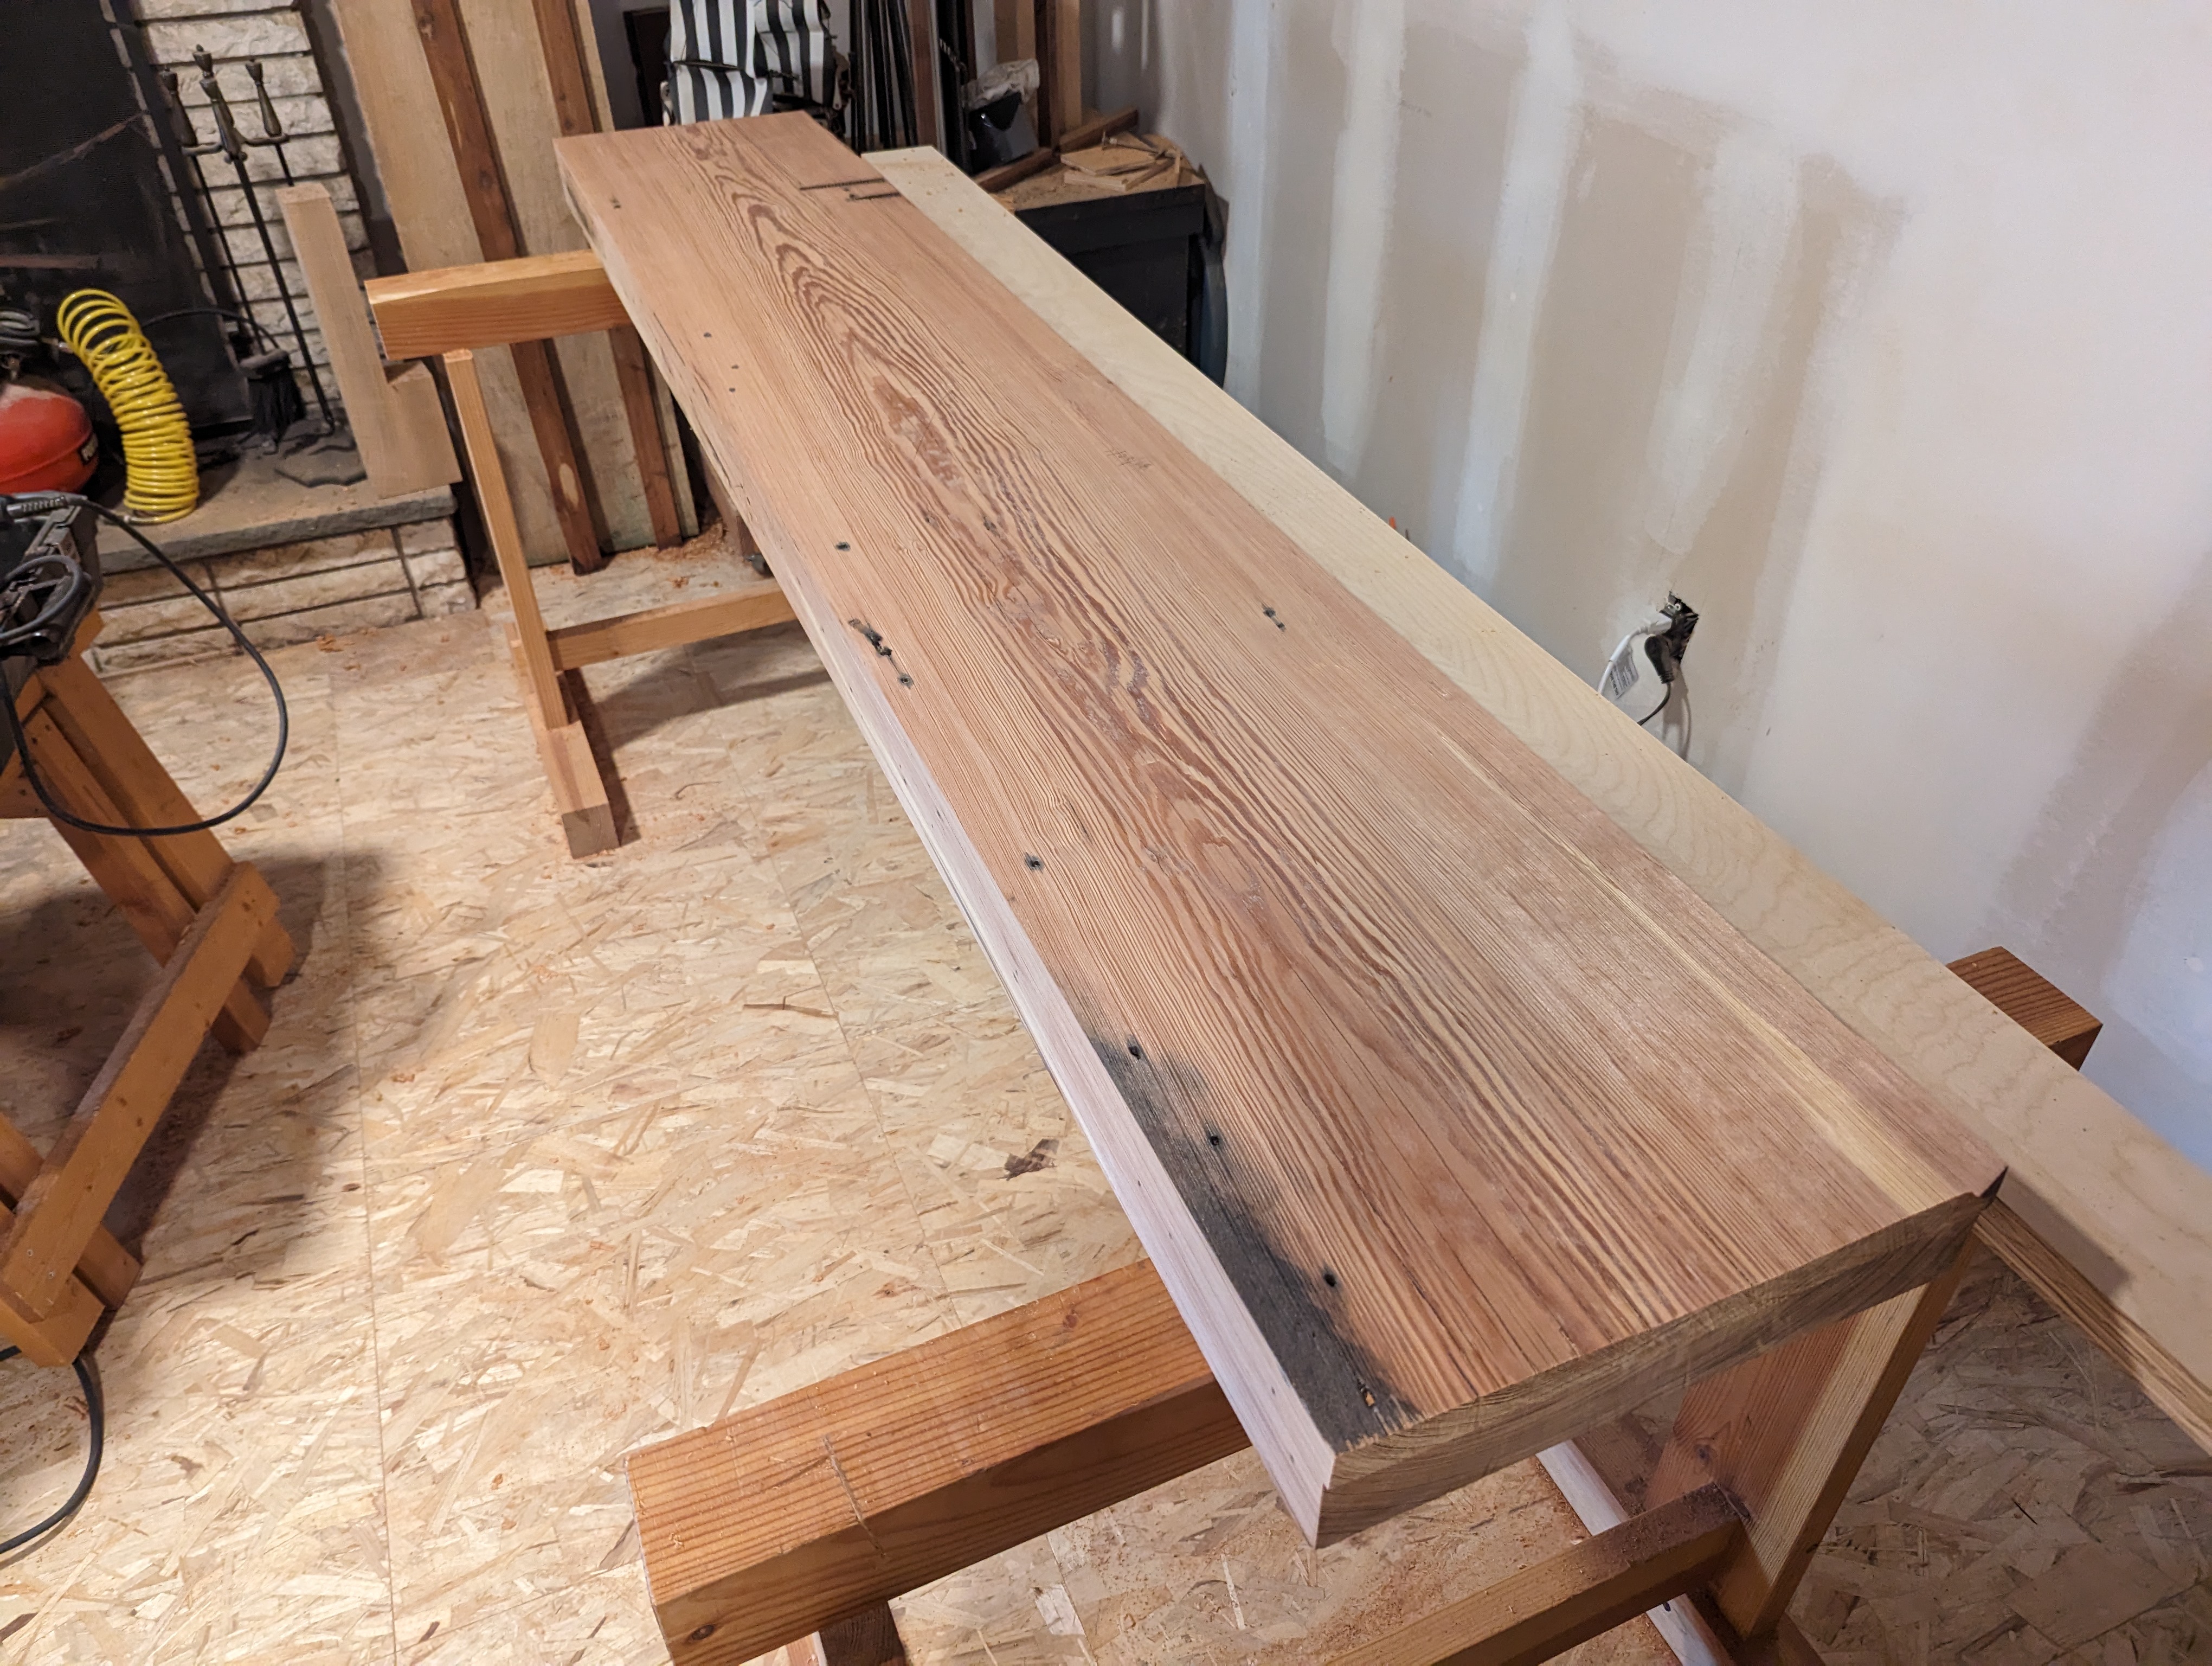
A while ago, I obtained an old growth slab of what I believe is Slash Pine (one of the species of Southern Yellow Pine) from a reclamation sawmill. It’s about 16 inches wide, 90 inches long, and after flattening is still a solid 3 1/2″ thick. It’s mostly flat at this point, anyway. I actually made an impromptu router sled because it’s so damned hard (the resin long ago crystallized and, between that and the barn grit in the checks, it was eating O1 steel for breakfast). This slab will make a wonderful workbench top once I laminate a fascia board along the front edge and square the ends, though.
And after I fill all the nail holes and bolt holes with tinted epoxy offscreen.
Another workbench, you say? Well yes, of course. I’ve been working on my 8 foot maple Nicholson which I made in the thick of the pandemic. It’s got the nicest leg vise I’ve made (it’s angled, uses a cog and screw instead of a pin board, and opens and closes very smoothly). But I’m kind of over front aprons again; it makes using bench dogs in the top too difficult, even if the apron is great for edge planing long, wide boards. And I have just the one workbench at home after giving all the others away. A second wouldn’t hurt.
This new bench will be in the Shaker style, like at Hancock Shaker Village. Leg vise, tail vise, sliding deadman, some drawers underneath. In fact, I’ve already made the leg assemblies. But unlike the Shakers, this bench will knock down (like a Moravian workbench). And I have a linear bearing and a 1 1/2″ hardened steel shaft to use as a parallel guide for the leg vise instead of a pin board (or even a cog and screw or crisscross). McMaster-Carr is the best.
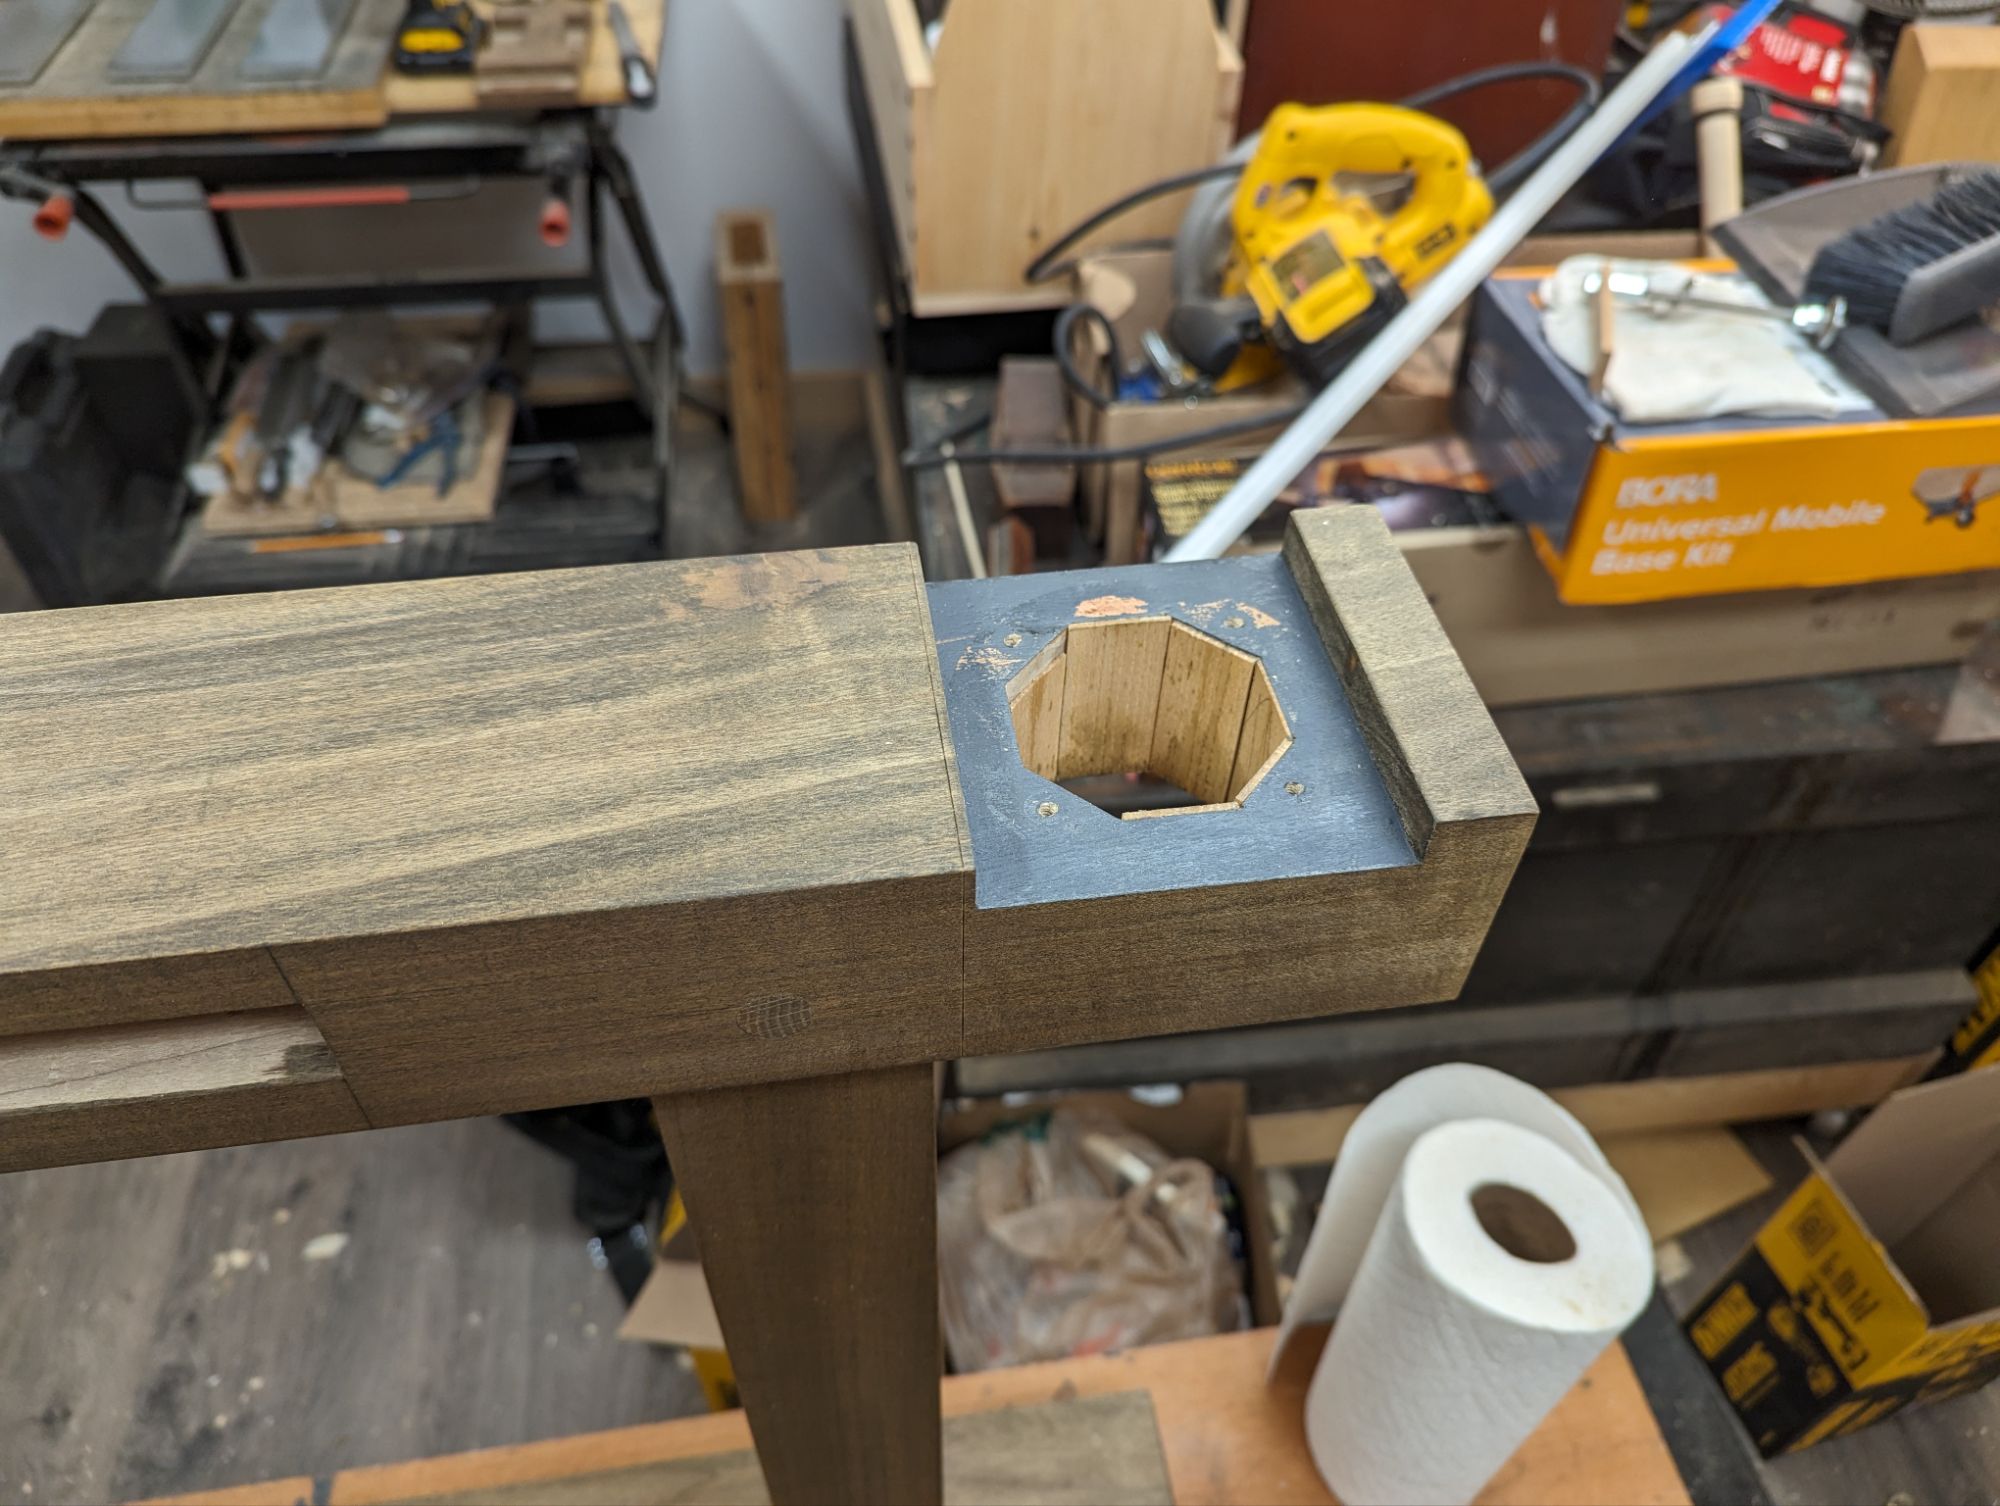
When making the recess for the linear bearing, though, I didn’t have a good way to make a 2 3/8″ hole. So I chopped it out octagonally. And it was scruffy and didn’t fit well and I had to shim it. All of which ate at my brain and caused me to set the whole project aside for a while.
I’ve finally come back to it. And it still eats my brain.
This is just not the quality I’m used to producing.
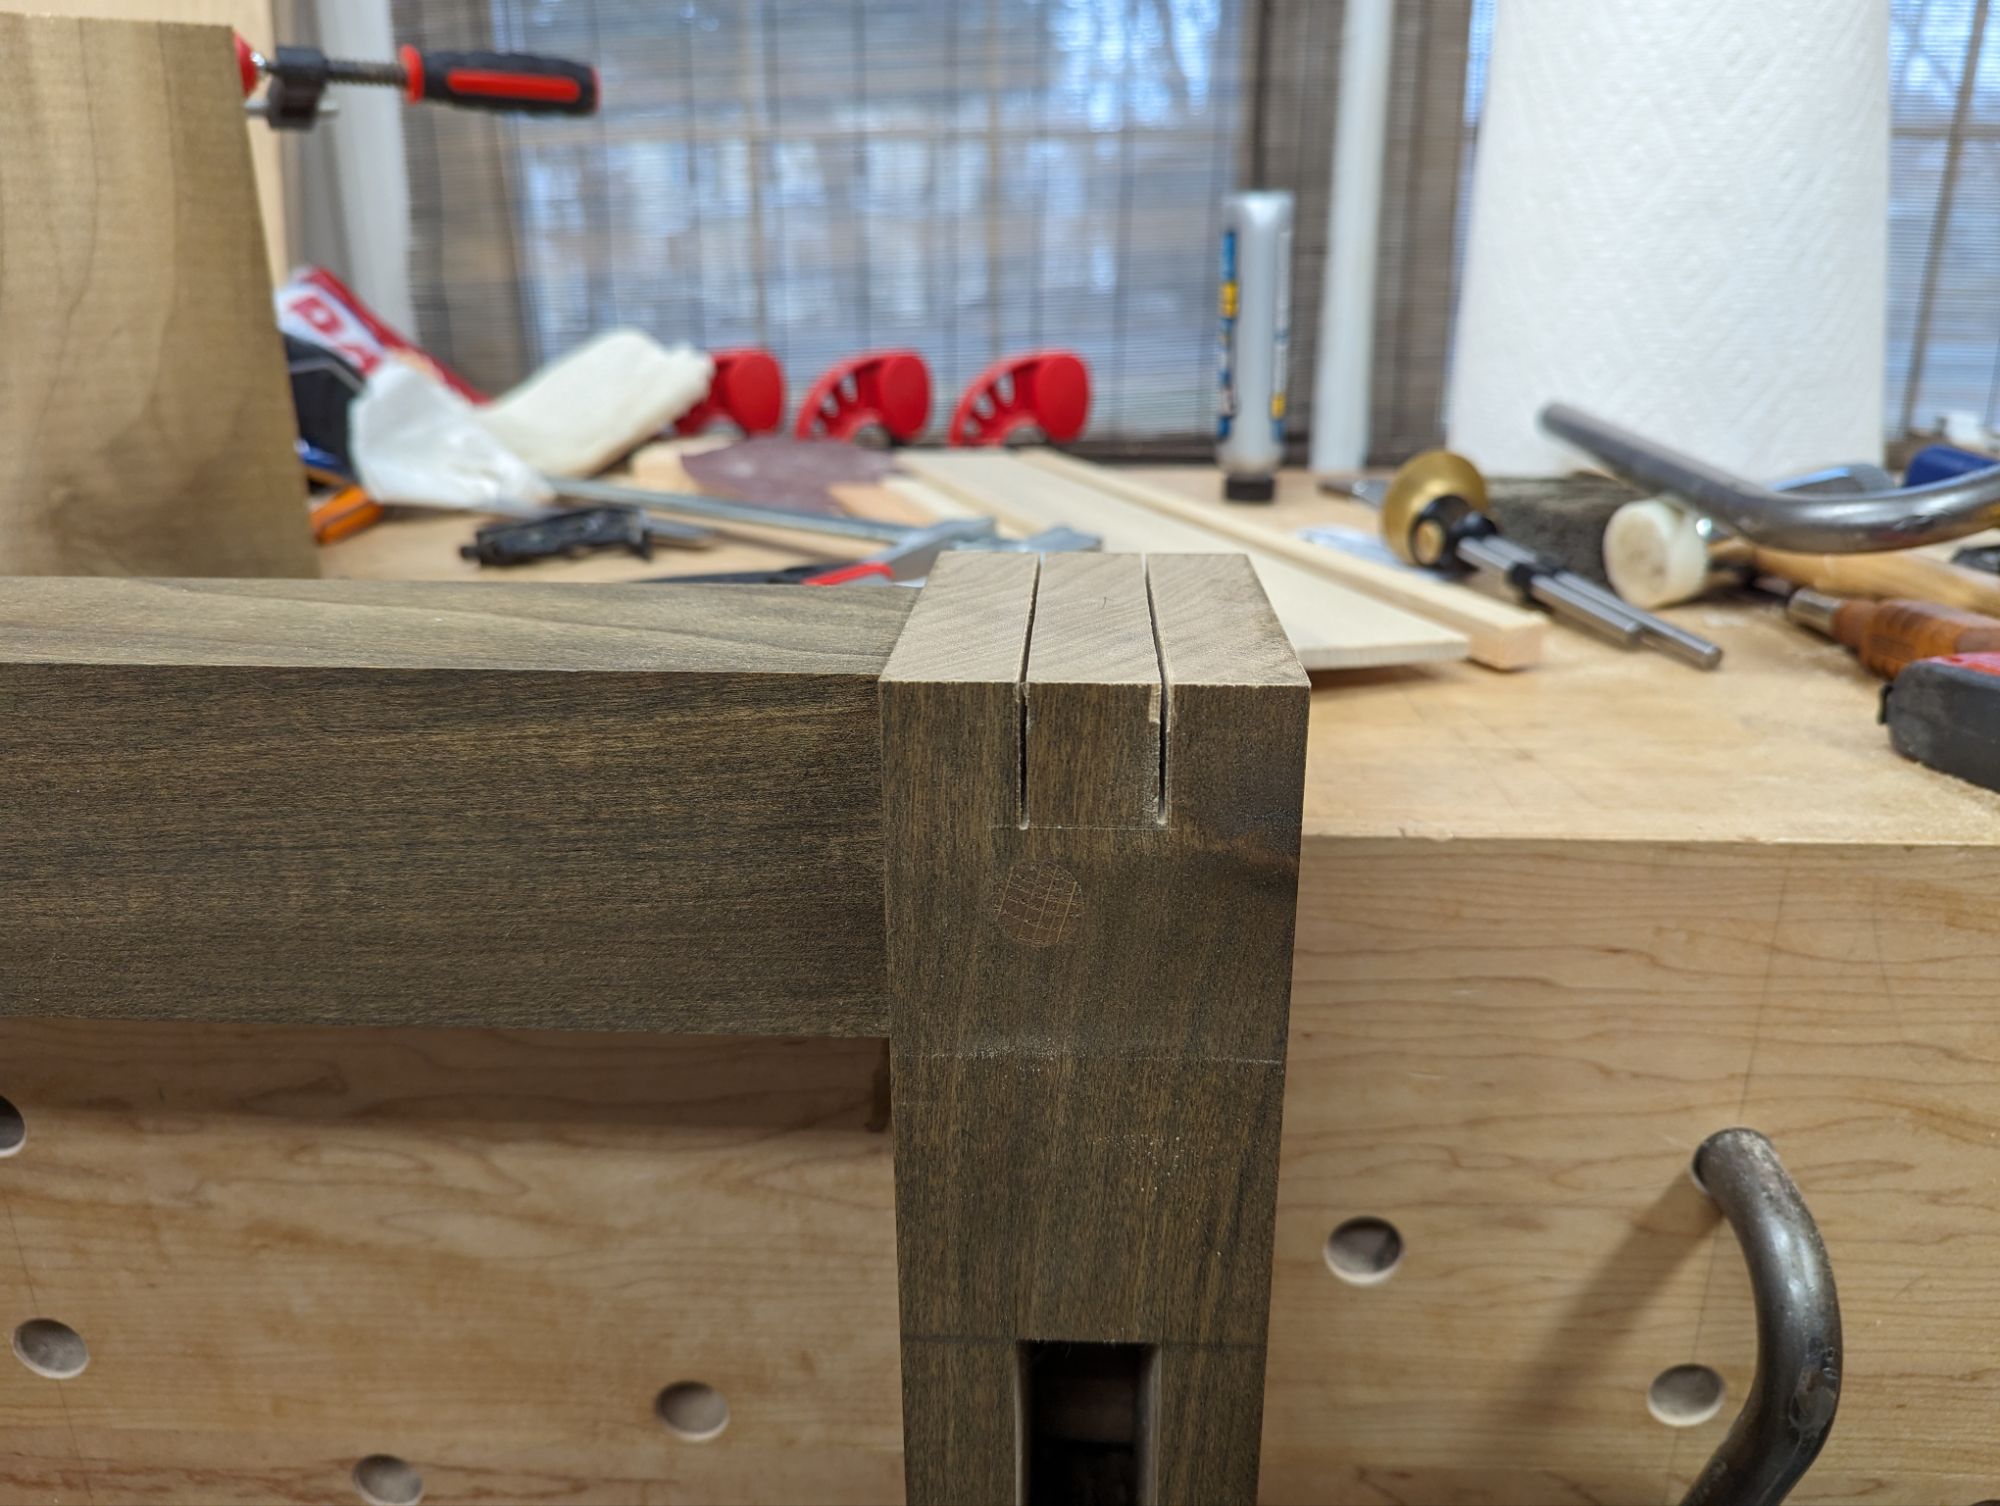
And what is a fellow to do when a bad bench installation is ruining a good time? Cut the offending portion of the leg off and add some wood back on, of course. About that…
First step was to saw off the offending area and square up the end grain. And also dig out and prepare an offcut of the same species that has a decent grain match. If I had access to a Festool Domino, this would essentially be the end of the process. Four dominos and some glue: Bob’s your uncle.
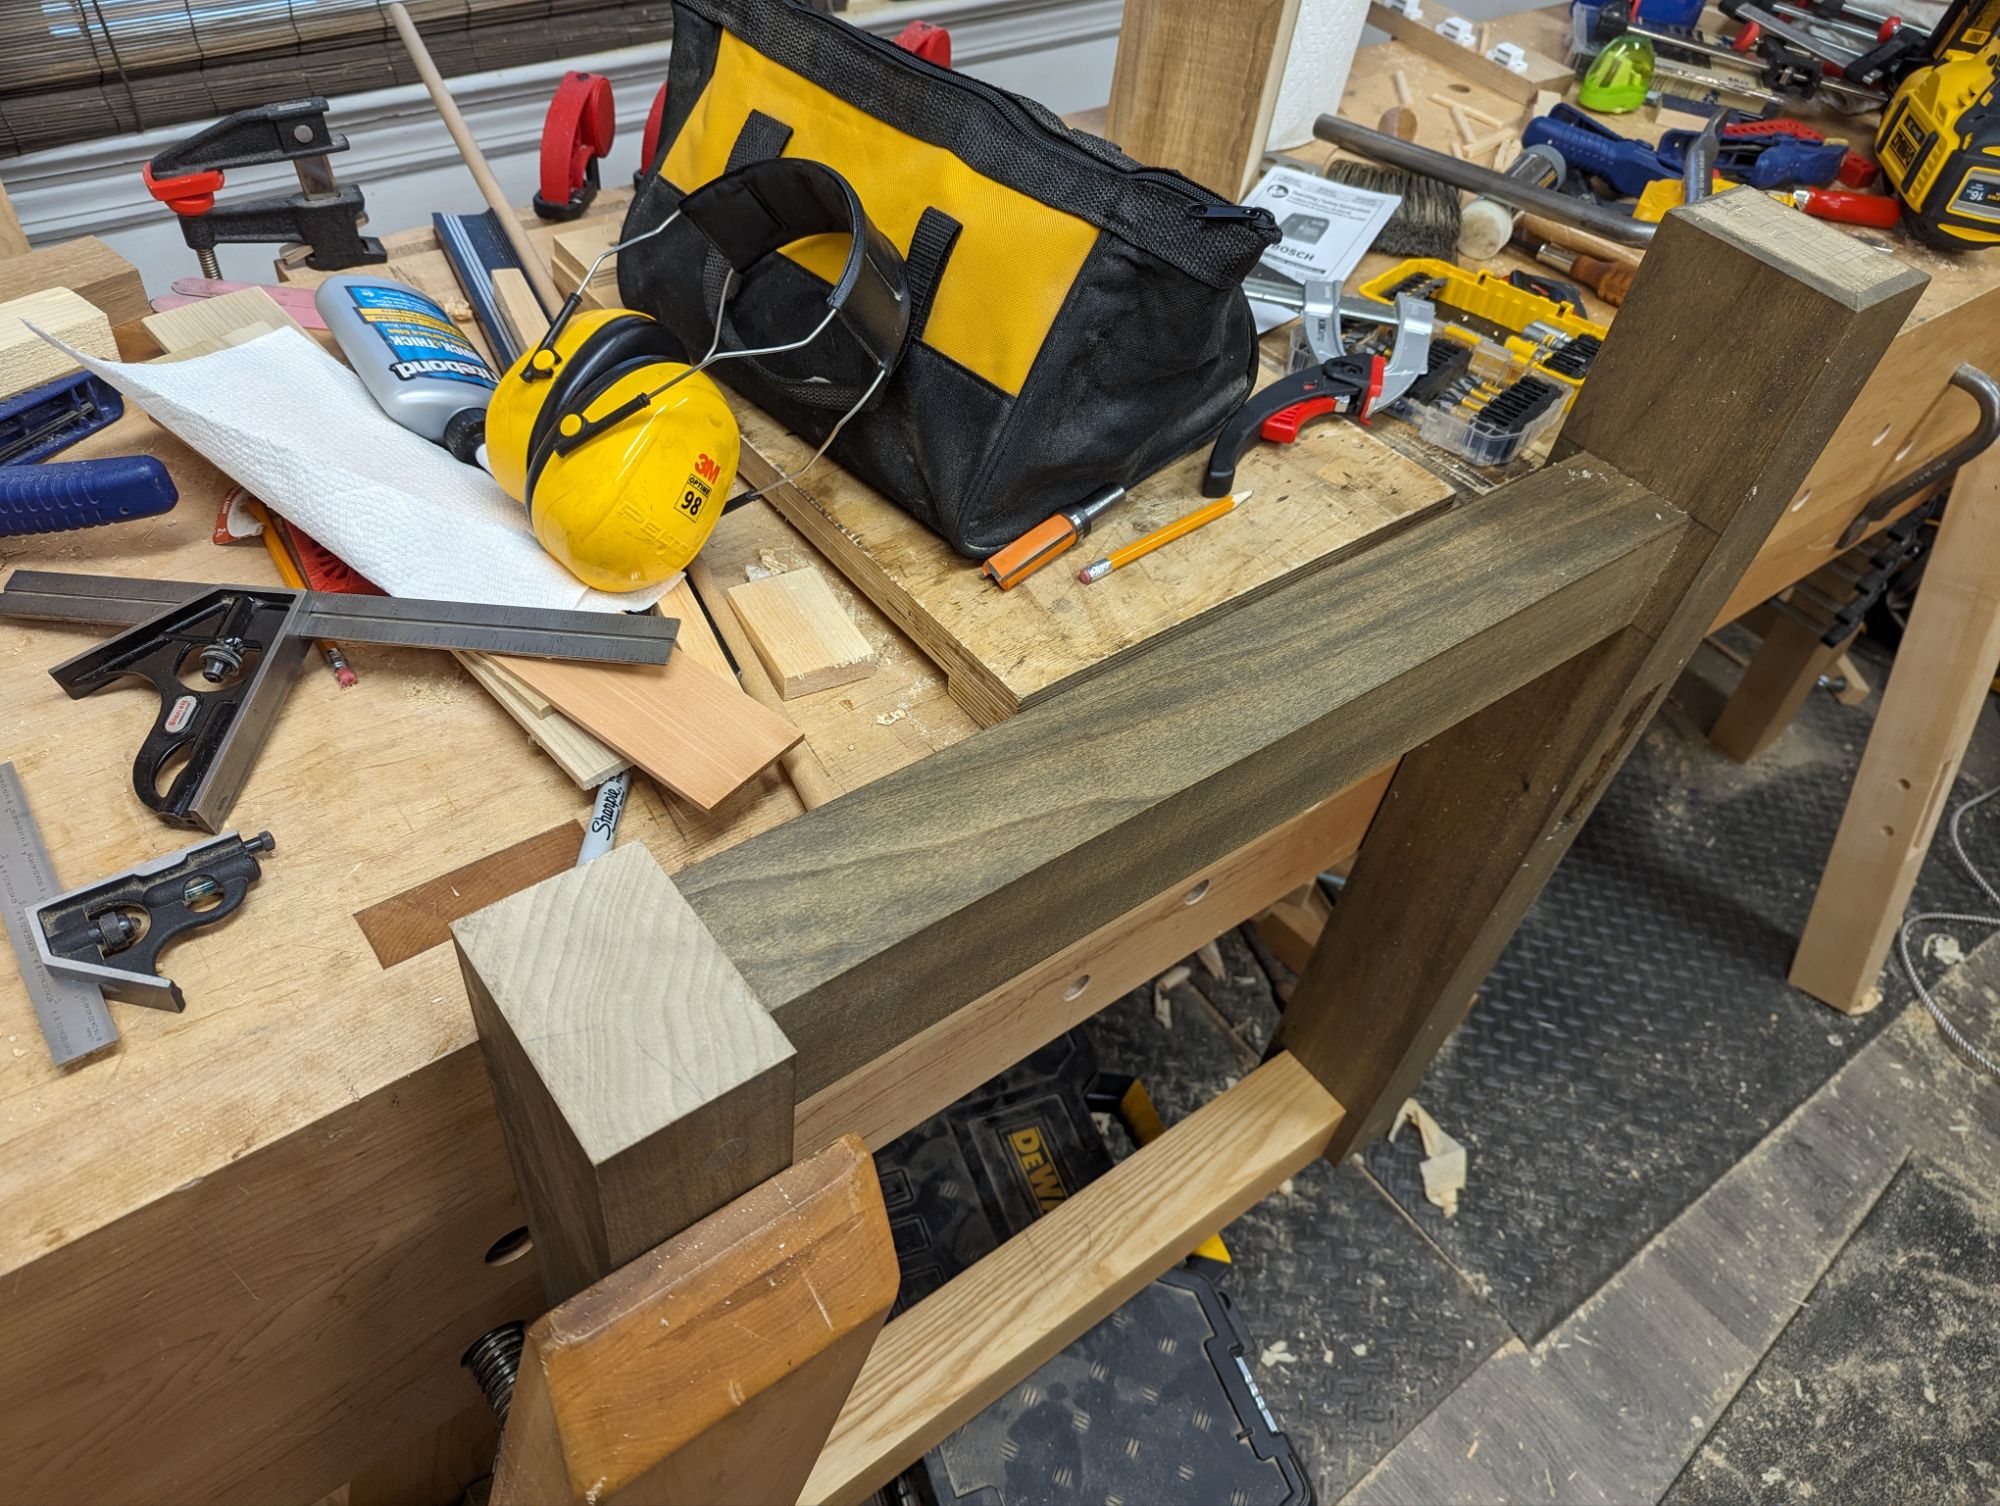
My workbench is an absolute mess as I do a few renovations.
But absent a Festool Domino, how does one join two boards, end grain to end grain? Finger joints are probably the best option, because of the large amount of long grain gluing surface. For a hand tool guy like me, that’s essentially a bridle joint. I think in this application, it would be strongest if the mortise was in the remaining leg and the tenon on the added piece. I almost made bridle guides, but that probably would have taken longer than just sawing and paring.
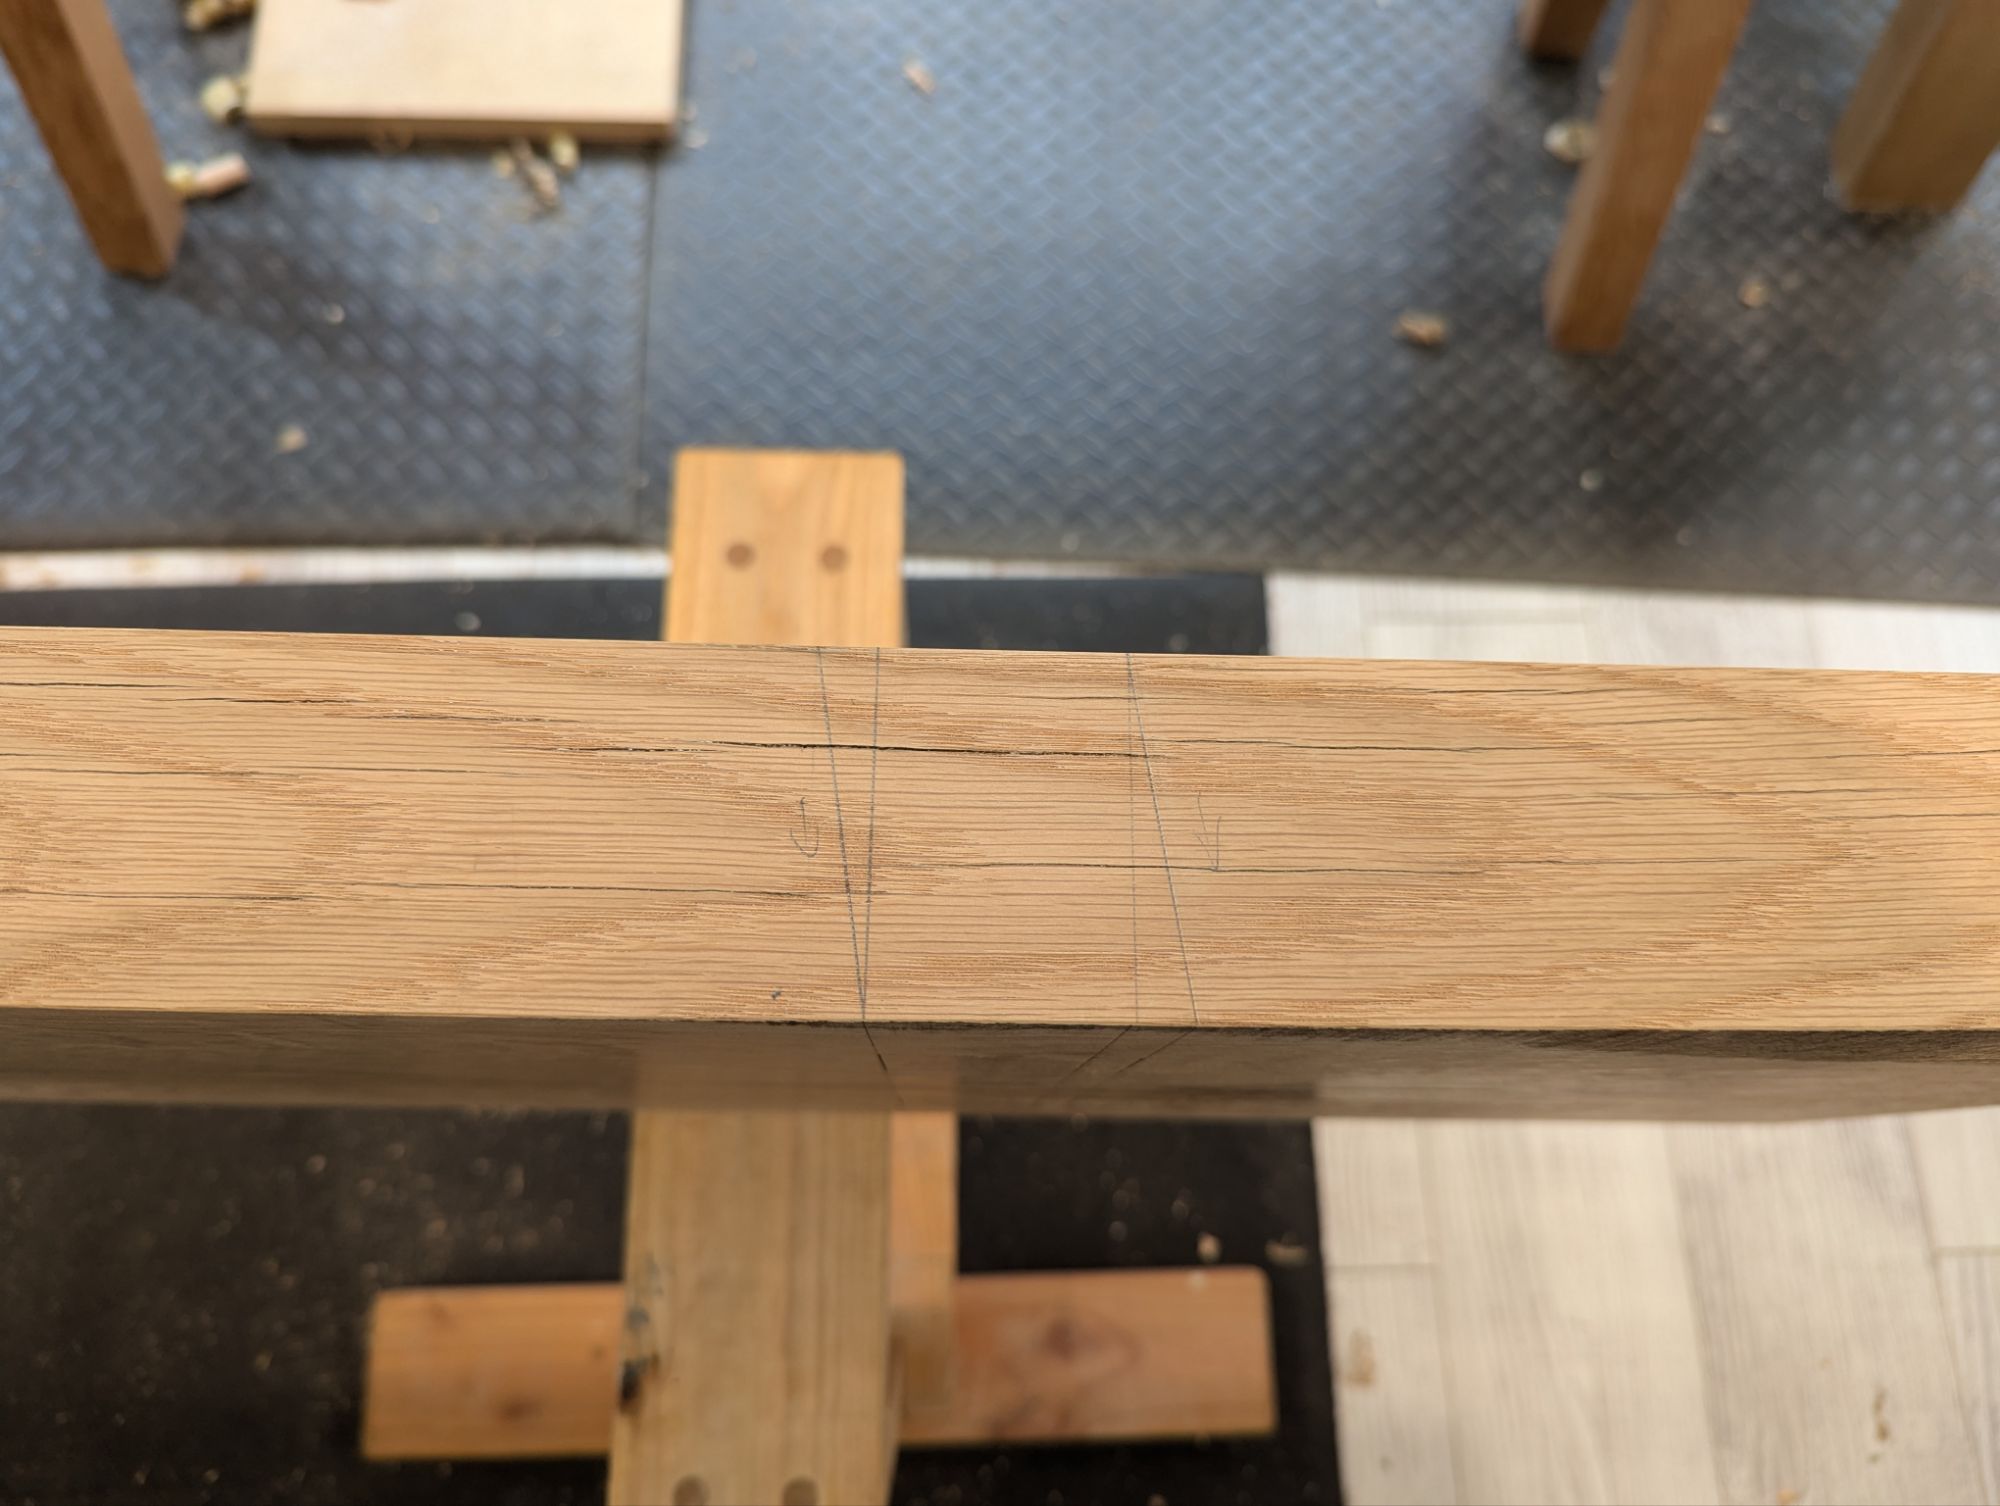
Now to saw down the sides of the mortise.
Once the mortise was nicely pared to the lines, I roughed out a tenon and finessed it to a friction fit with a router plane. Remember to ease the inner parts of the mortise to leave room for glue on the mating surfaces. A dry fit looked like so:
It was at this point when I realized the offcut was actually from the same board as rest of the leg. Fortuity!
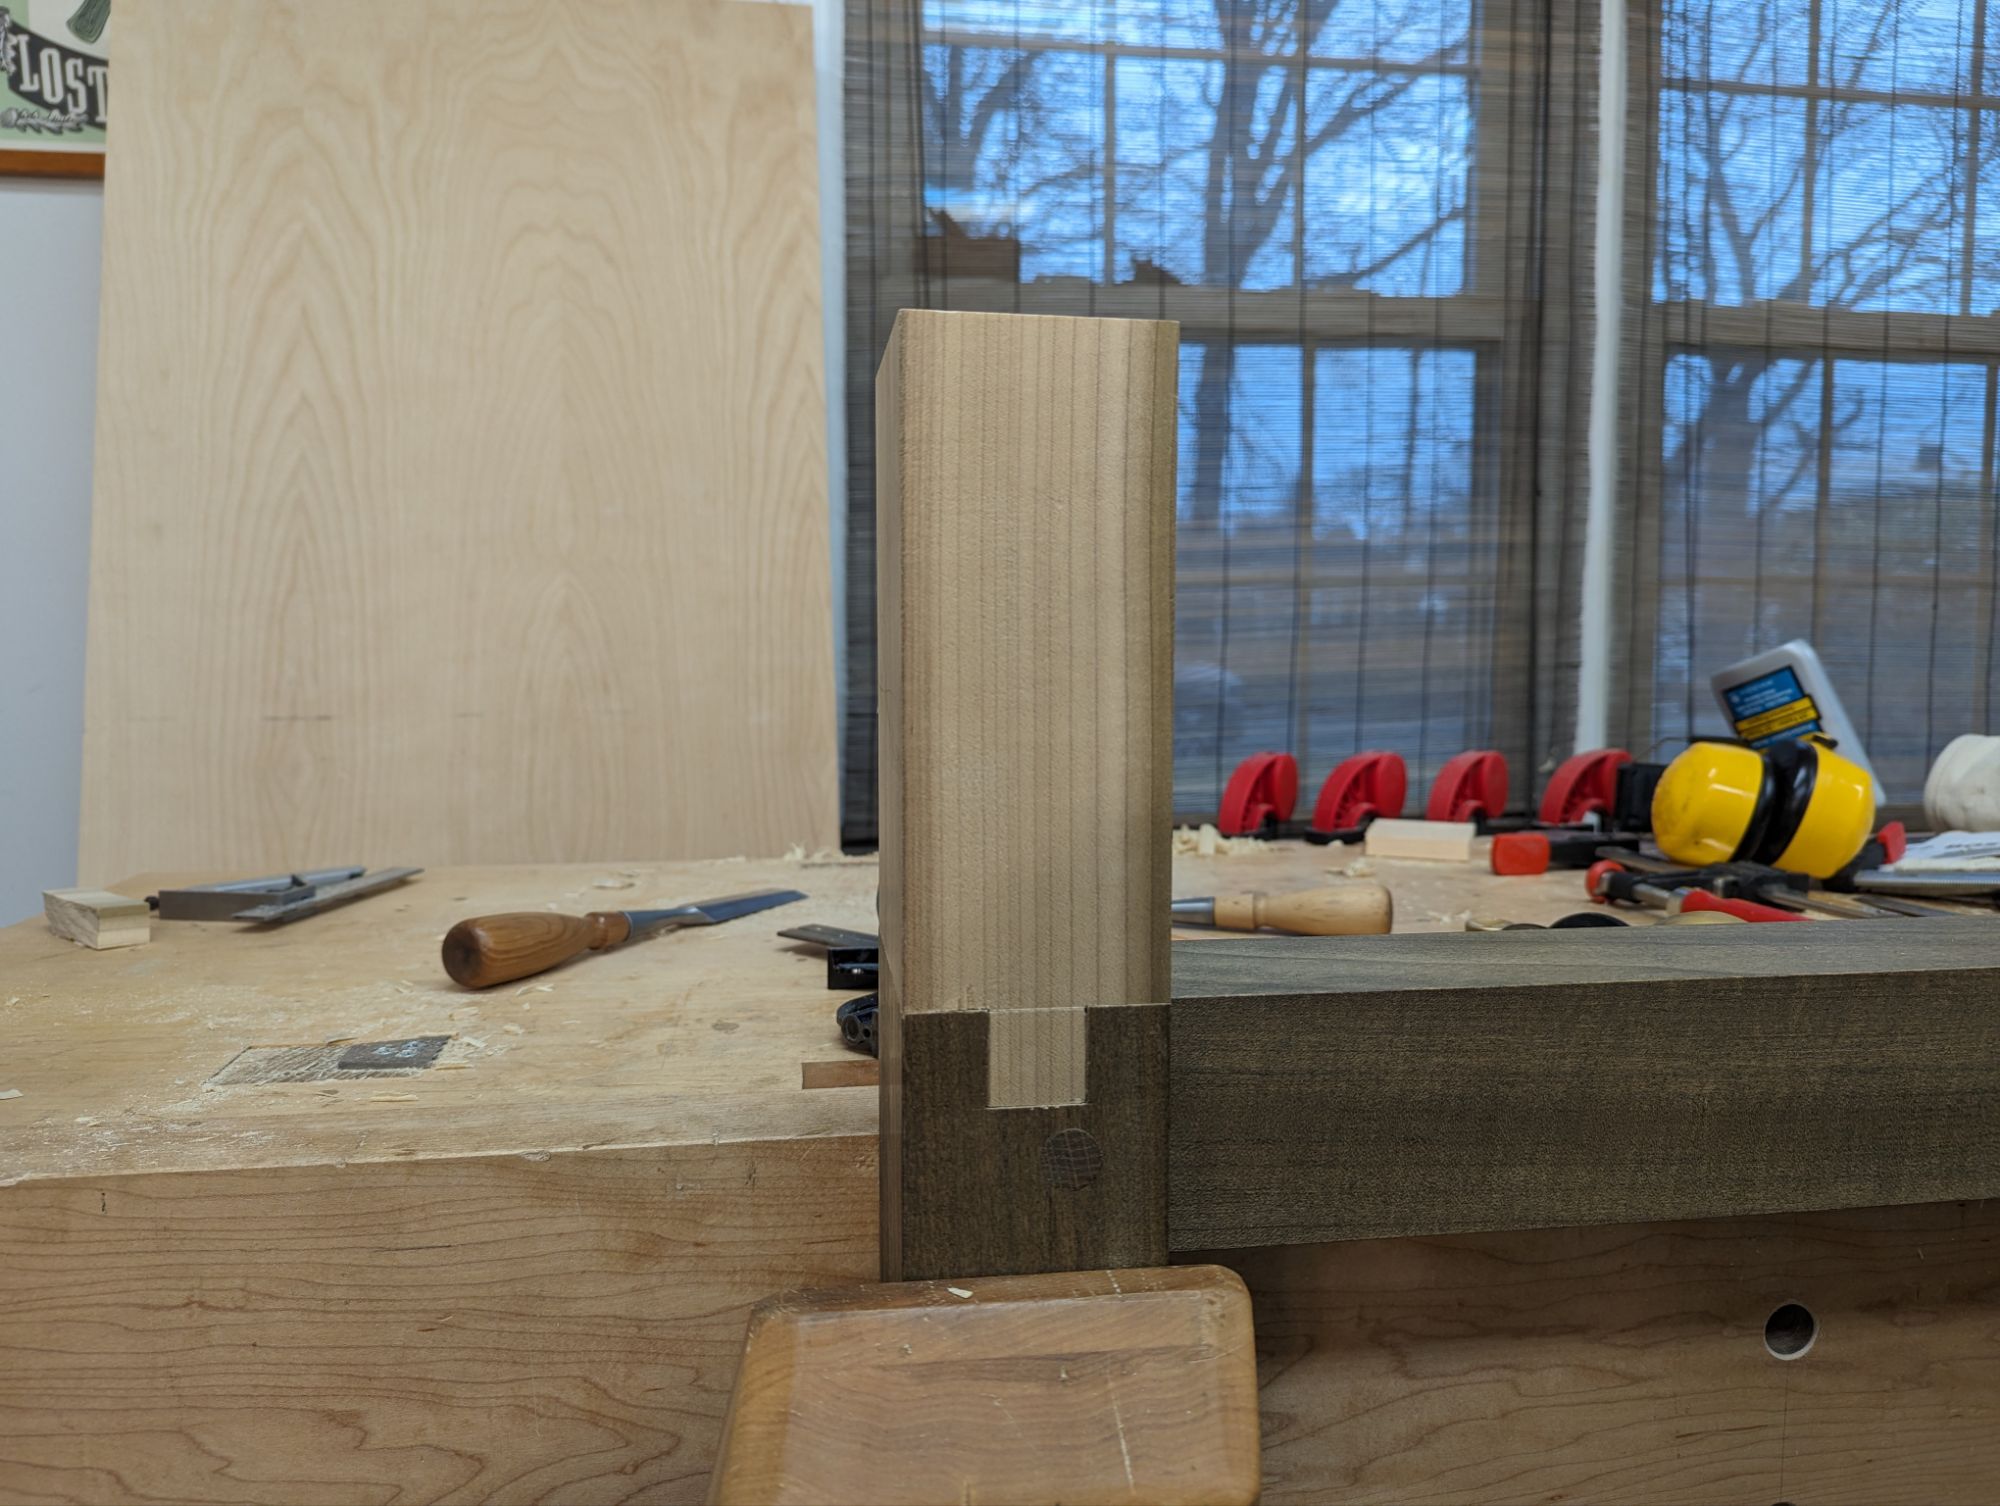
Will a 1″x1″ tenon (with 7/8″ mortise walls) be strong enough for a front leg of a workbench, even with TiteBond Thick & Quick PVA? Fuck if I know. But this is poplar, which doesn’t split easily, so I think I’ll be okay. I plan to add a trio of 3/8 oak pegs as reinforcement along the length of the tenon, which should help. Maybe a couple of metal mending plates too just for luck. But I think it will be strong enough, even without pegs, as long as whatever parallel guide I use for the leg vise doesn’t bear just on the new wood.
Hopefully I can find the stain I used for the rest of the leg too.
To be clear, I almost bought a Festool Domino today. But I’m glad I stayed strong and didn’t. Not that having a Festool Domino is bad; I just kind of enjoy doing things the hard way. And I do think this fix is a good solution and should stand the test of time.
I had in my mind a singular vision. A mini workbench, surrounded by a tray, that sat upon an office desk. Like those perpetual motion clacking ball desk toys. But where one could plane small sticks of wood with a block plane in meditative rhythm. The small curls falling gently into a rimmed collection tray to keep things neat.
I could have sworn such a thing existed. Maybe it was advertised in an old Popular Woodworking issue. It might have been Fine Woodworking or WOOD. But it eluded me.
So I made a prototype. And it turned out great!
As I saw it in my mind.
The bench itself is roughly 1:8 scale. The slab is 12 inches long and 3 inches wide. 1/2 inch thickness would have been to scale, but I bumped it up to 7/8 for stiffness. The wing, which functions as both a tool shelf and a shooting board, is about 1 inch wide and 1/4 inch thick. The planing stop is 1/2 inch square. For those who care, the entire setup is 19 x 7 x 3.
About the footprint of a large gaming keyboard.
Let’s talk materials for a moment. This is just a prototype, so I used some tight grain Spruce framing lumber from up north. In Vermont, where my parents have a house, you can get stuff that has birdseye pattern and blue streaks but still arrow straight grain. It’s beautiful and a joy to work with.
This stock was a bit more plain, but I think still looks good. The only non-Spruce materials in the piece are the planing stop (red oak) and the base of the tray (1/2 inch birch plywood).
Spruce is rather rigid and dimensionally stable, so a good choice for this.
The workbench legs are 1 1/2 inch x 4 inch x 1 inch posts that are rabbeted (cross grain) into the slab top. The oak planing stop is also rabbeted in. The planing stop actually hides some nails reinforcing the joint between the slab and the front legs. The tool shelf is just brad nailed down to the legs.
To attach the bench to the collection tray, the legs are glued and screwed from the underside of the plywood. The tray itself is banded in 1/2 inch spruce just butt jointed around and glued and nailed on. I stuck on some nonskid furniture pads to the underside so it won’t slide around.
Top view with some blanks.
There is admittedly a practical purpose to this piece. There is a step down on the window sill in my office at work. The larger pots overhang the stepdown and it’s unstable without a spacer that’s level with the main sill and fully support the pot. Each spacer needs to be somewhere between 1/2 and 11/16 but the height varies. This will allow me to fine tune some pine 1 x 3/4 spacers on site.
A full size, modern block plane is probably a bit much for this setup. Perhaps I’ll clean up a slightly smaller vintage block plane from the user pile. We’ll see.
When I make a nicer version in mahogany or walnut, I may do a Basic Projects writeup. But for now, the prototype is rather serviceable.
For several years, the floor of my workshop has been the OSB top of DriCore tongue and groove subfloor squares. DriCore is a modern miracle (not a sponsor, just to be clear) and going from working on the bare concrete of the basement to a fully insulated, slightly cushioned wood floor was nothing short of staggering. Not to mention eliminating the risk of a falling chisel needing a full regrind by landing edge down to the concrete. I’ve recently added some tongue and groove laminate on top of the DriCore which, even though it’s darker in color, it has actually brightened the room (I assume because the albedo of the shiner floor is higher than the OSB of the DriCore squares).
That lonely Veritas jointer plane on the back wall.
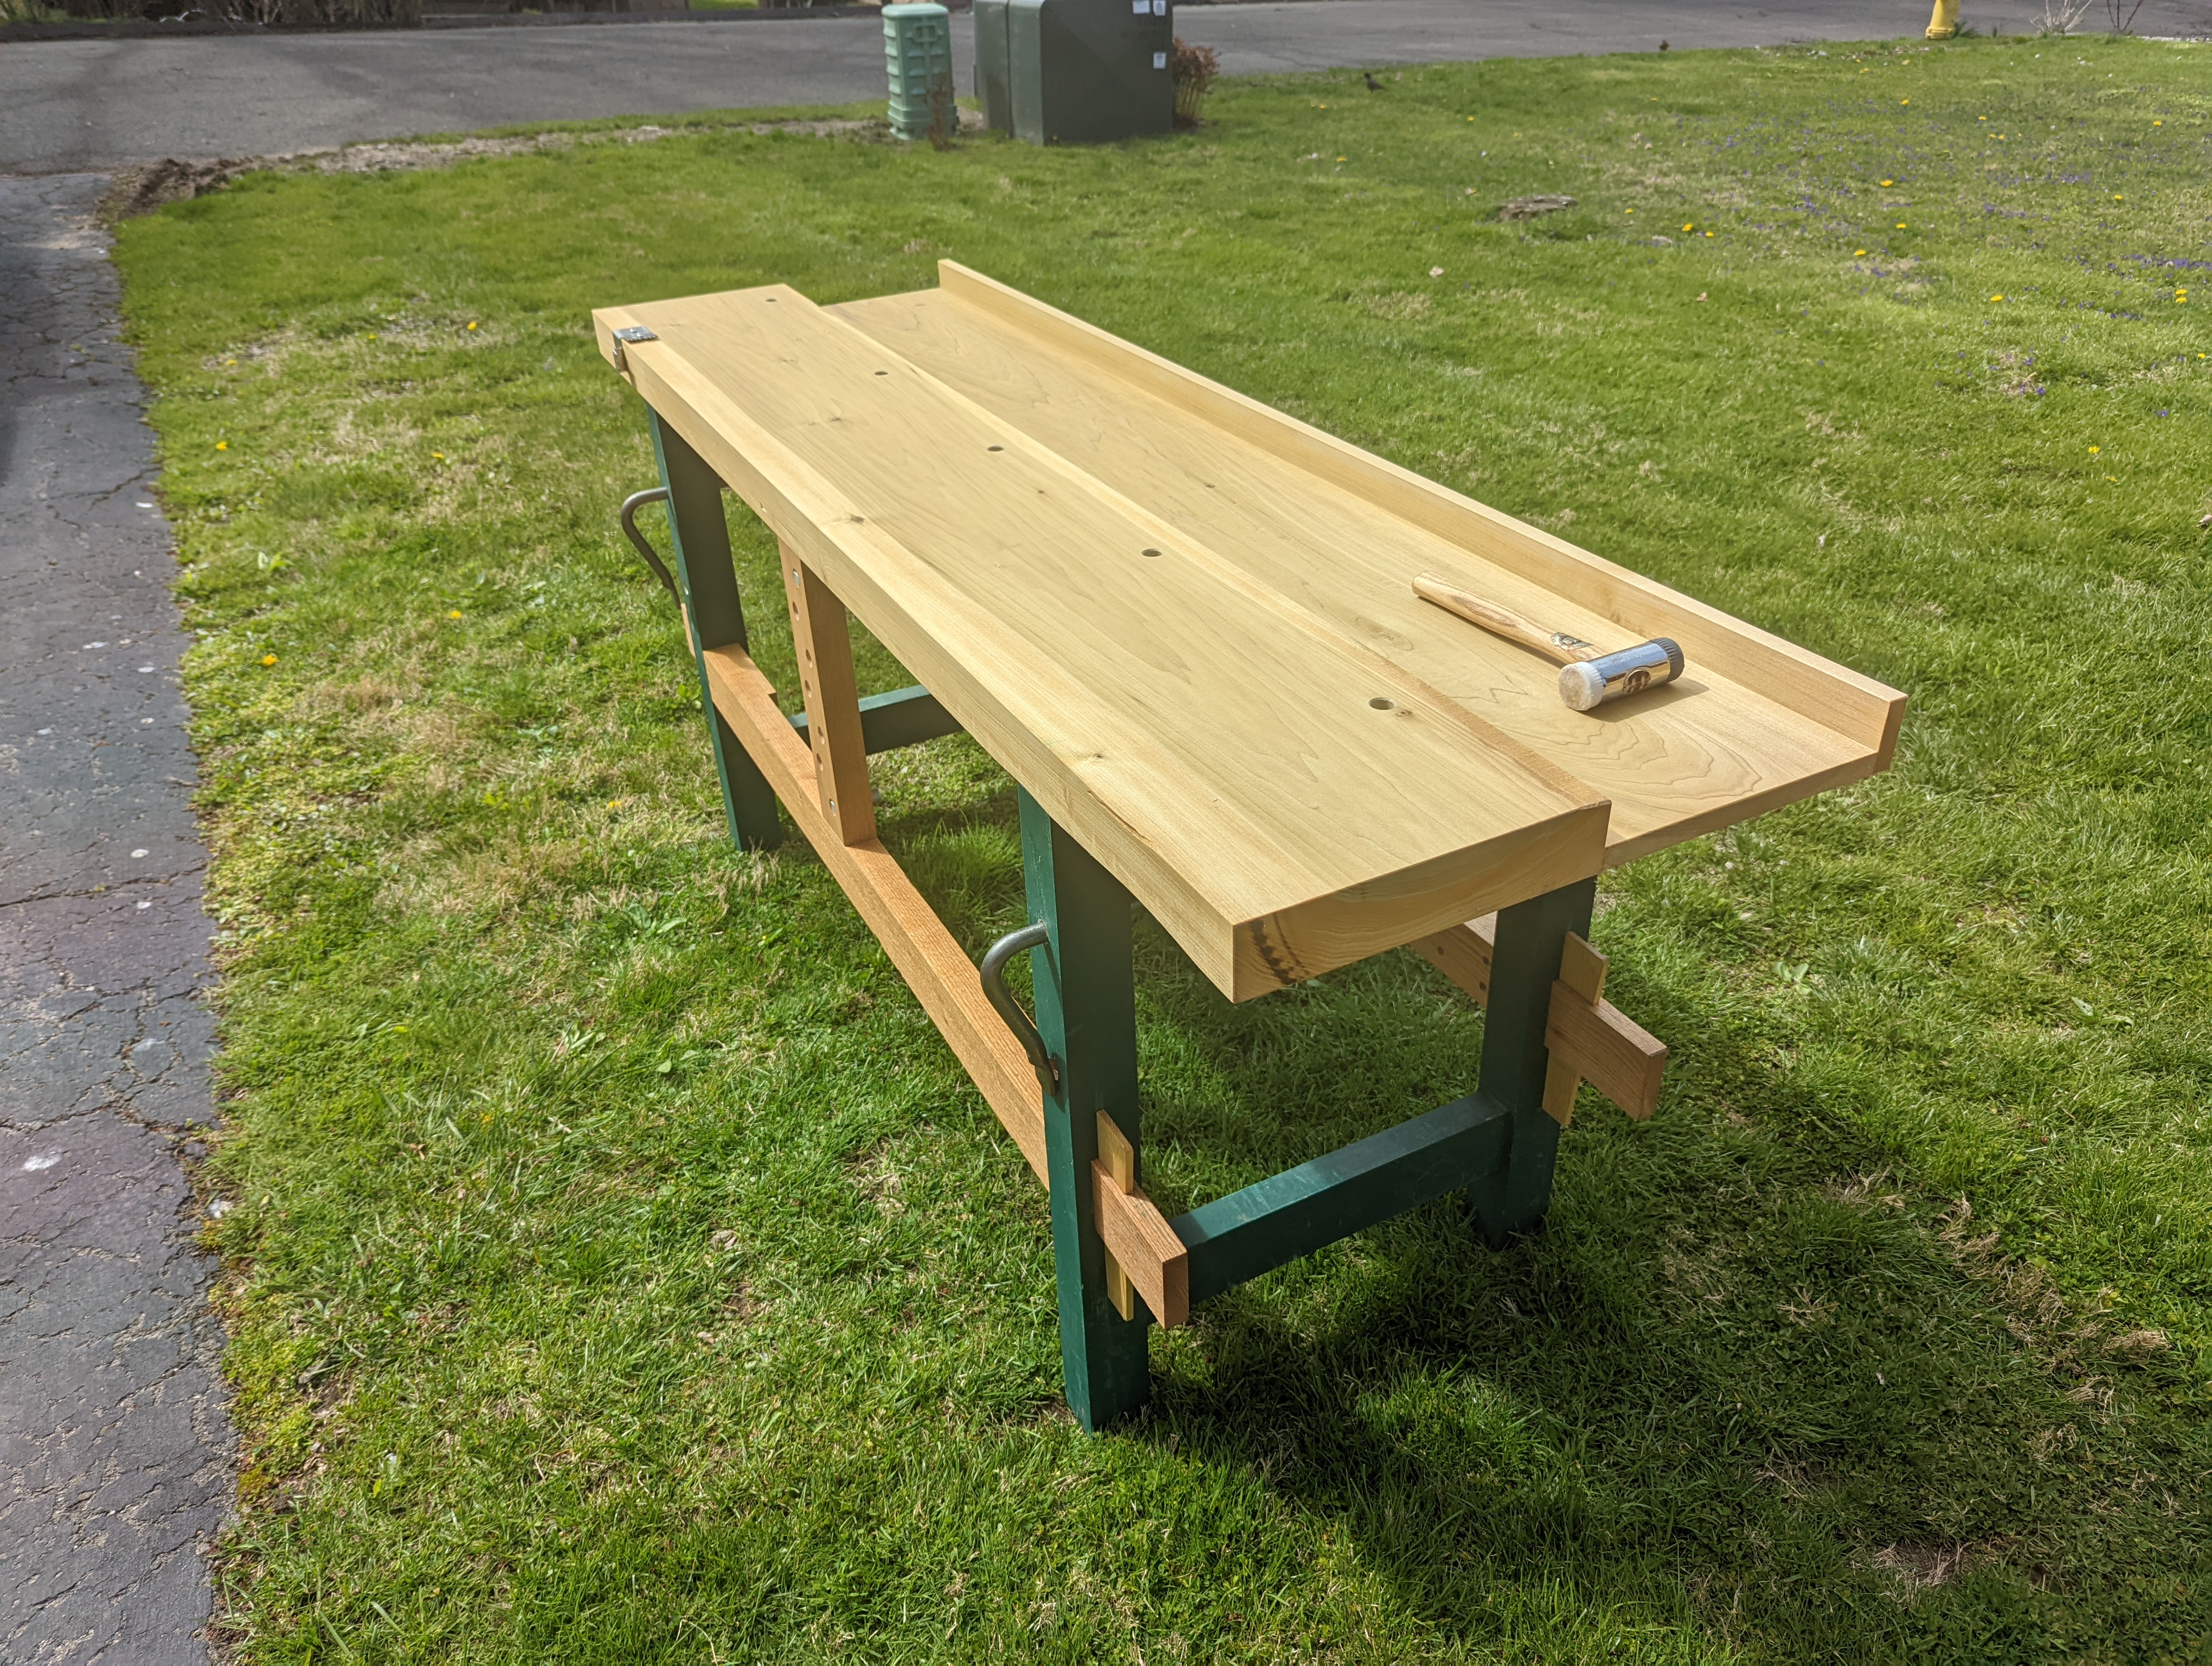
Since adding the laminate floor, I’ve been working off my 98″ Nicholson workbench, made of hard maple. This bench has by far the best leg vise I’ve ever made. It works smoothly, doesn’t bind and the foot operated cog gets real momentum because of the heft (8/4 white oak). It’s still too big for the space, and honestly could use another 2″ of benchtop depth (being a hair under 22″). But it’s the only bench currently in the room. My last buddy to buy a house needs a better workbench than the one I made him pre-pandemic. So I’m giving him my proper Moravian knockdown bench. And with my outdoor workbench neatly stacked in the garage, I’ve got room (and time) to make another full size workbench. But more on that later.
Blue skies and green grass are only a month or two away.
I like the vise on the maple Nicholson when cutting tenons. Unlike a pinboard variety, the cog and screw parallel guide easily adjusts between holding the tenon board widthwise to cut the tenon shoulders and cheeks and holding the mortise board lengthwise to chop and pare out the mortise. Although, in fairness, I’ve been using a hollow chisel mortiser more and more these days to do the mortise chopping.
All those tenons are currently for a new sharpening station. Essentially a trestle table about the size of a sawhorse (and, quite frankly, patterned off a Krenov-style sawhorse). The frame is made of scrap Douglas Fir 2×4 leftover from the lumber rack build and the top will be Spruce offcuts from a planting table built up in Vermont. When it’s done, it will also have a drawer for saw sharpening gear. I might even use full extension, metal drawer glides that can open from either side.
Haven’t decided yet whether to angle the ends of the feet like Krenov did.
I had missed having a dedicated sharpening station that stashes in the corner. When I was working on the green Moravian, the maple Nicholson was pushed up against the wall and the sharpening station was all the way at the end. Besides having to squeeze in between my tool chest and whatever I was working on, the rest if the workbench top got super cluttered all the time. This new station will hold everything it needs to without any extra room to accumulate detritus. It will also be more accessible.
Just look in the background. What a mess. Also, a good shot of the leg vise cog mechanism.
After I finish the sharpening station, the next thing is to take down the lumber rack on the right wall. It barely stores any lumber and just collects clutter (seeing a theme here?). I’ll move whatever lumber (mostly reclaimed red pine) is on it to the new lumber rack (by, unironically, hanging the racks on the back side of the lumber rack posts). That will free up more than a foot of usable floor space (and force me to organize the other crap on the racks currently).
That’s all for now. Will share some pictures when the sharpening station is finished.
I recently celebrated my 10th woodworking anniversary. About this time in 2012, I got sick of paying for furniture that didn’t quite match my sensibilities and took matters into my own hands. I’ve probably covered this before, but growing up, we were a New Yankee Workshop household (not a Woodwright’s Shop) household. So when I decided to get back into woodworking as an adult, I went first for some power tools. A home center run with my father resulted in 12″ chop saw, a plunge router kit, a cordless handheld tool bundle, and a boatload of wood screws (plus one hard point saw and one chisel). Those tools alone got me through a bed (that was reclaimed into the base frame for my bar), a desk (that was reclaimed into the base frame for my regular outdoor workbench), and a console table (reclaimed into god knows what).
But I quickly gravitated toward working primarily without power. Not just because it’s loud and dusty using a plunge router in your foyer, no matter how great your shop vac. But also because it’s meditative to me. Now I am sure there are some folks who Zen out with the random orbit sander. But not I. My happy place is a No. 6 or No. 7 hand plane and a stack of rough sawn lumber to S4S.
My other happy place.
Sure, I still have that same chop saw and cordless circular saw. And I regularly use them, along with a hollow chisel mortiser and a thickness planer. I even bought an impact driver a couple months back and can’t believe how I’ve lived without one for all these years. But the fact is, nowadays my power tools support my hand work; not the other way around.
Although I joke that I am an artist, I will never make anything that ends up in a museum. I’m not a savant at anything woodworking related (although I consider myself well above average at hand cut dovetails). I have a day job, that keeps me very busy. And in these 10 years, I’ve devoted enough time to the craft to have picked up a thing or two. And I’d like to share that collected wisdom with the world.
This will be a multi-part series. I’m not sure how many installments there will be, and I certainly expect I won’t make it straight through without deviating to regular posts. I have literally no sponsors.
Getting Started in Woodworking
If you’re here, it may be because you’ve searched “Woodworking in an Apartment” or “Small Space Woodworking” and took a flyer. If so, welcome. I’m James and I have very strong opinions on literally everything.
If you think you might want to get into hand tool woodworking with a limited tool kit and limited space, there are better resources than me. You should go to YouTube and check out Paul Sellers and Richard Maguire. Paul and Richard are giants to me. Paul’s 10 part workbench video came out a few months before I started woodworking (although I didn’t discover Paul until 2014, after 2 years of fapping about with power tools). Paul is like a combination of Mr. Rogers and Bob Ross.
Richard started posting a year into my woodworking career. Paul’s website, Common Woodworking, didn’t exist when I needed it most. Richard’s site, The English Woodworker, has long form content (both paid an unpaid) that cannot be beat. Richard is at the same time exceedingly practical and esoteric. Trust me; you’ll see.
So check their stuff out and maybe come back here if you want more of those very strong opinions of mine. If you’re open to using more substantial power tools, the Woodworkers’ Guild of America and the Wood Whisperers Guild are both good resources.
Beginner Woodworker Hand Tools
People have written entire books on this question. I have my own thoughts, sure. My only piece of real input is to buy a few tools of good quality, rather than a bunch of tools of crappy quality. But if you want my 10 year retrospective take on the absolute core tool kit, here it is.
Hardpoint panel saw from the home center (Home Depot has DeWalt; Lowes has Craftsman; I have used both)
1/2″ (and maybe 1″ too) Lee Valley bevel edge chisel (the ones with the clear handle; they work both for fine work and mortising)
No. 5 Stanley Bailey pattern Hand Plane (Patrick Leach at http://www.supertool.com/ can get you a good worker that won’t take much to restore; sign up for his monthly tool list so you can build your kit with good vintage stuff if you want to go forward)
Stanley 10-049 folding utility knife (Paul Sellers swears by this knife and so do I; get it from Amazon)
Thorex double face mallet (both Paul Sellers and Richard Maguire use one and so do I; get it from Amazon)
12′ tape measure (the Starrett “exact” one is pretty great, and cheap, from Amazon)
12″ combination square (I use a Starrett, but Lee Valley sells a 12″ in a set with a 6″; they are pretty accurate for the price)
Taytools double sided diamond plate sharpening stone (these are pretty good for the price, Amazon available, but also get a sharpening stone holder from powertec or peachtree and some 3 in 1 oil)
Vise type honing guide for plane and chisel sharpening (I like the eclipse-style one you can get from Lee Valley, but make sure to make a stop block system for repeatable angles)
Cordless drill driver (let’s face it, you probably have one already)
And that’s it. Don’t forget the glue and the mechanical pencil.
You can probably get away with a speed square from the home center instead of a combination square.
But for my money, I would check out either The Naked Woodworker workbench, which can be built with just dimensional framing lumber from the home center and the tool kit described above. Or check out Rex Krueger on YouTube and his “Joiners Workbench“, which is similar but arguably easier to build with the same kit.
I’ve built a few of those Chinese-style low benches, two of which are shown in this one picture.
I’m going to stop it there for now. I could otherwise go on forever.
Btw, I’m not on twitter anymore. I have a strict “no social media owned by delusional man child” policy (I’ve been off facebook for several years for the same reason and never had an instagram).