small space woodworking

Almost Too Deep

With the negligible exceptions of squaring the ends and boring a few more holes (for holdfasts or otherwise), my workbench is officially done.

wp-1489775913627.jpg

Maybe one more pass with the jointer plane as well.  

After the new benchtop extension, the workbench is officially 22.5″ deep (plus 1/8″ or so in places along the still-rough back edge).  I know I will eat these words sooner rather than later, but 22.5″ almost feels too deep.

My last workbench, the Stent Panel (i.e., stretcherless) knockoff, was only 19″ deep.  Before that, I worked primarily off a 10″ deep clamp-on slab with two planing stops and holdfast.  And before even that, there was my Milkman’s Workbench.  See here for a size comparison of the two.  I got all the way back to the middle of 2014 for when I last had a workbench deeper than 19″ (it was 23.75″).  That’s a long time ago.  I’m sure I’ll get used to it again

I promised everyone pictures of pegs going into holes, so here you go.

wp-1489777990392.jpg

This one actually broke off in the hole during the glue up.

wp-1489777995653.jpg

Spacers work well after a bit of finessing.  

Are you sick of phallic double entendre yet?  Me neither.

JPG

Real Bench Extension

After a couple months of acclimating, I surfaced the 12/4 ash board which will form the rest of the benchtop. It had almost no twist, but even with a bit of cup, I still ended up with over 3″ of total thickness. But as you’ve probably observed, that’s still about 1″ thinner than the main benchtop. 

What’s worse than a tool tray? A really shallow tool tray.

I have a solution, though.  Some Douglas Fir spacers will raise the back board up to the same height as the rest of the benchtop. A little higher, actually, so I can plane everything into flatness. I used DF because while it will ding and mildly conform to any irregularities, it’s still tough and rigid. Eastern White Pine would compress too much over time, methinks. 

I will probably leave the back edge rough, until I don’t. 

I plan to glue the back board to the main benchtop, so here is the question: do I glue the spacers to the back board, or just screw them on (so I can replace them later)?  In any event, I want to add some alignment dowels into the short stretchers that will keep everything in order.

I have a process for that, which I’ll detail in the next post. 

JPG

What the Hell am I Doing?

It’s no secret that “Mythbusters” is one of my favorite shows. I’ve probably seen each episode, other than the really gross one with the earwax candle, five times. And I’m very fond of ruining party conversations with “Well, actually, the Mythbusters tested that and…”. Damn me and my science.

One of the recurring themes on the show is the “What the Hell are We Doing?” moment, where one of the hosts realizes how absurd a turn the experiment has taken. I had one of those moments yesterday.  Having just finished the saw till for the new chest, I realized, all at once, that it’s stupid to make this a tool chest.

Seems to work pretty well, though.

It’s not the right size for my tools and I already bought lumber for an anarchist’s tool chest clone. But I glued in the saw till anyway, because I couldn’t help myself.

This is dumb and I’m dumb for doing it.

But I came to my senses after two lower runners and a saw till.  Blanket chest, it is.  At least I can skip the frame and panel lid (or at least the dust seal).

Trust your instincts, folks.

JPG

Small Space Woodworking

When I started TheApartmentWoodworker.com over two years ago, I had one goal in mind: chronicle my foray into handtool woodworking in a confined space with a limited set of tools.  For almost two years, that confined space was my high rise apartment in lower Fairfield County, Connecticut.  There were ups and downs to woodworking in that apartment: the ups being mostly proximity-related, and the downs being primarily noise-related.  I’d like to think I was successful in that respect.

I don’t talk about it much, but I no longer live in a high rise apartment.  But I do still woodwork in a confined space.  Instead of a dining nook facing an inside wall, however, my shop is now a 12′ x 13′ ground floor bedroom with a south facing window.  Once you factor in wood storage, the usable space is more like 12′ x 9′.  Quite comparable to the overall space I had in my old apartment.

wp-1488995206891.jpg

Seen here, with the aforementioned blanket chest.

I would go so far as to say the only real difference from my old setup (aside from all the natural light) is having a full size workbench, rather than a series of clamp-on workholding solutions.  And that is something I was working on anyway when I still had my apartment.  I will also note that instead of driving 45 minutes each way to my parents’ house to use my miter saw or my thickness planer, they’re tucked away nearby.

So, all in all, I’m keeping the name of the website.  I hope you will stay with me on this adventure and all the (hopefully) great things to come.

JPG

What am I Ashamed of?

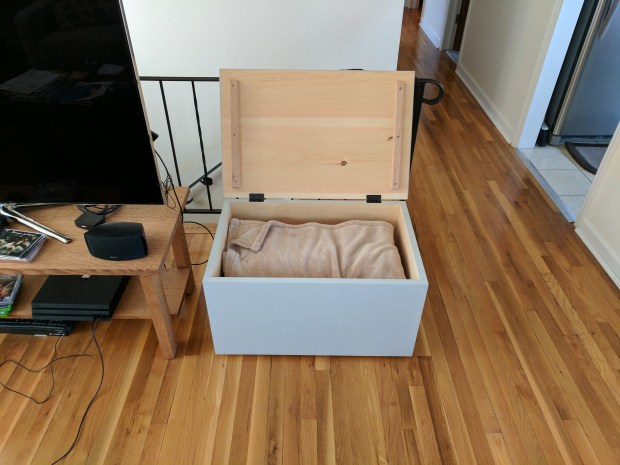
I’ve been building another chest and it’s coming along pretty well.  Overall dimensions are 30.25″ long x 20″ wide x 15.25″ high.  The inside dimensions are 28″ long x 18″ wide x 14.5″ deep.  Sound familiar?

wp-1488766823255.jpg

This one has rabbets and nails, not dovetails.

Several people have asked me what I’ve been building lately and every time I’ve said “a blanket chest”.  But is it?  It could easily be a tool chest.  I’m not sure it’s not a tool chest.

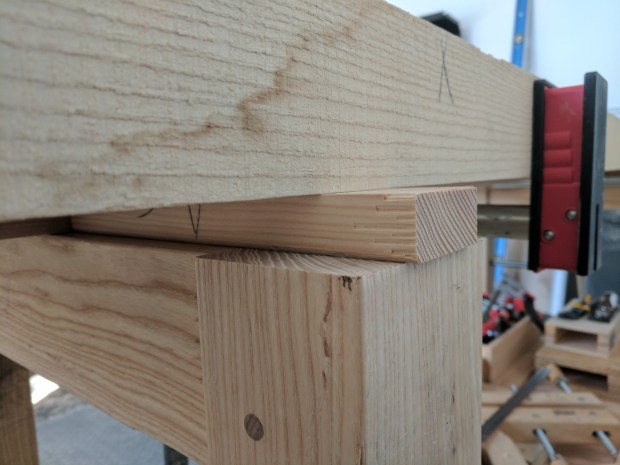
There are rabbets and nails at the corners, and there would be regardless of what the chest will hold.

wp-1488768898794.jpg

Sawn and split by hand, like always.

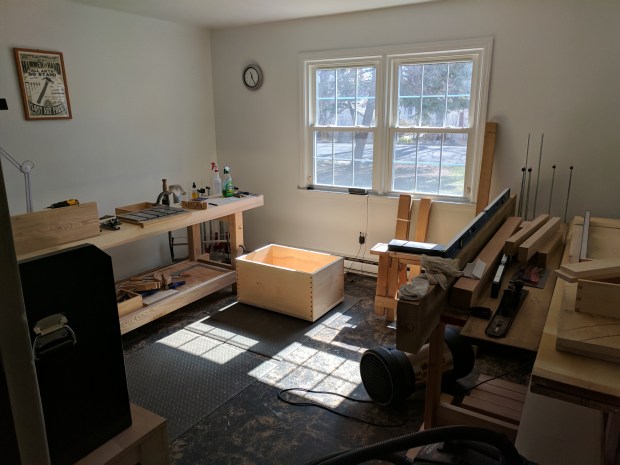
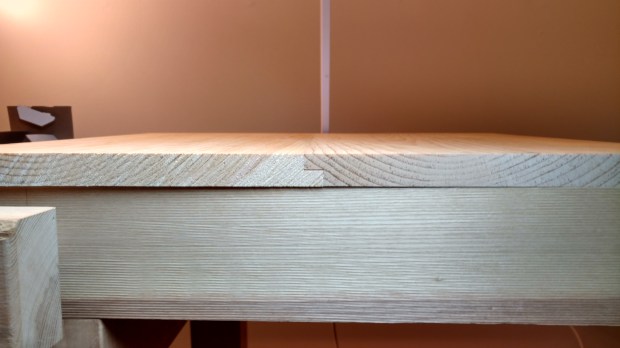
There are shiplaps for the floorboards, cut with my shop-made fillister plane.

wp-1488766830932.jpg

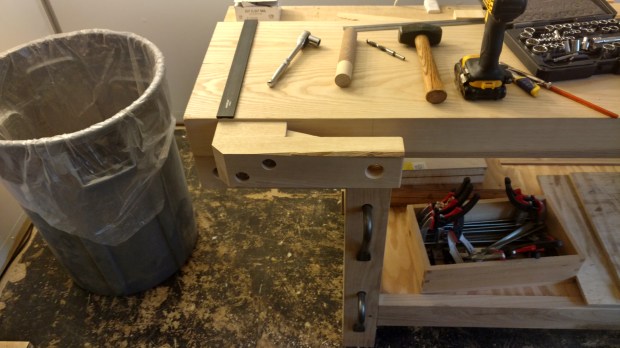
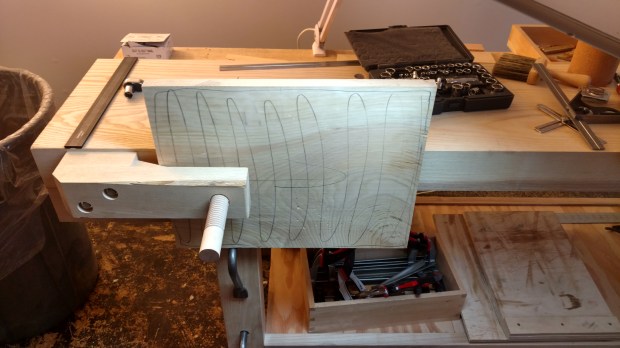
The toothed texture on the edge of the benchstop is very grippy.

And the chest will be painted, whether or not it holds hand planes or doilies.  So what’s the difference?  I think a tool chest has a proper skirt and dust seal, which isn’t necessary on a blanket chest.  The lids may differ a bit as well.

But maybe, just maybe, there isn’t any real difference other than in my mind.  I think I’m just ashamed that rather than build the furniture I need (like some more plant stands or a cat jungle gym for River), I’m building yet another chest.  But I like building chests and I’ve had these boards for over a year.

And who knows, it might really be a blanket chest this time.

JPG

Something Borrowed, Something Blue

If you follow me on Twitter, you’ve probably already seen the finished crochet.  I’m very pleased with how it came out.  The screw holds like crazy and the EWP wedge doesn’t seem redundant.  But if I could do it again, I’d screw the wedge in from the outside.  I’ll have to remove the crochet to replace the wedge.

wp-1487514576999.jpg

Still no screw handle.

I struggled a bit with the placement of the crochet relative to the rest of the bench.  I finally settled on centering the screw over the leg, so the screw functions an awful lot like a shoulder vise.  Holdfasts in the leg, at 9 1/2″, 16″ and 22.5″ below the benchtop, respectively, support the work.

wp-1487514586965.jpg

I used 6″ 3/8 lag screws, and I think I burnt out my cordless drill in the process.

I did not incorporate a sliding deadman into this bench and I’m starting to think I should have.  I could retrofit one or make a moving deadman that locates on dog holes in the lower stretcher.  But I have another, more elegant solution in mind.  I need to do some patent research first.

wp-1487514596980.jpg

As of right now, I’d need a clamp to keep the right side from sagging.

All in all, I’m calling this one a win. It works.  I didn’t waste any materials.  And it didn’t take that long to throw together.

Now to make that screw handle.

JPG

That was Easy!

So it only took about an hour to knock together the bulk of the new crochet.

wp-1487073168749.jpg

Still haven’t made that screw hub.

Before I bolt it to the benchtop, however, I’d like to test a theory.  Crochets without screws work via a wedging action.  Even though mine has a screw, I’d still like to test out a wedge.  So I’m making a softwood insert.

wp-1487160599148.jpg

This is not the actual insert, but you get the idea.

I’ll likely just nail the wedge in place.  If it works, great.  If not, I’ll pry it out.  And when it wears out, I’ll pry it out and replace it.  And wear out, it will, because it’s Eastern White Pine, a species I picked over Douglas Fir because it won’t mar the work.

Does any of this sound crazy?  It’s starting to feel crazy.

JPG

DIY Bench Dogs

The dog holes on my workbench are 1″, to accommodate my Crucible Tool Holdfast, which I love more and more each day.  Well, except the legs, which use 3/4″ dog holes to accommodate my Gramercy Tools Holdfasts.  I love these holdfasts as well, but they have been relegated to deadman duty.  So when it came to time to get 1″ bench dogs, I had two choices: (i) drop $100+ on four metal dogs or (ii) spend $6 on an oak dowel and follow the instructions.  My woodworking budget for the week was already spent on quartersawn 8/4 white oak, so DIY bench dogs won out.  Three only took about half an hour to make, and most of that was sanding to fit.  I’ll add the bullet catches when they arrive this week.

wp-1487514561179.jpg

I used a bevel gauge to ensure the angle is exactly 2 degrees (not really).

Like any good project, I bloodied myself a bit making these.  60 grit sandpaper is basically sharp pebbles glued to a piece of paper, and my left thumb now looks like a miniature Freddy Krueger came after me.

Like I always say, if you don’t bleed for (on?) the project, it’s not real woodworking.

JPG

Getting on with it

Having admitted defeat, it only took me a little while to literally and figuratively pick up the pieces.  After salvaging the wooden peg on the failed face vise for use as another wooden screw, I had a choice: put the jaw aside for a rainy day, or use it right away.  Well, you know what they say: nothing gets the blood flowing like hand-ripping American hard woods of greater than 2″ thickness.

wp-1486953236768.jpg

Or, whatever.

I ended up with a board that is 3.25″ wide, 18.25″ long and 2″ thick.  A single pass through the thicknesser to clean up the saw cut and all that’s left is to cross cut it and glue it up.

wp-1486953240490.jpg

I’ll figure something out for the board with the holes.

What am I making, you ask?  I’m making that crochet, with the wooden screw.  Like I should have the first time before wasting five hours on a face vise that doesn’t hold.

wp-1486953243633.jpg

So far I’m at about 30 minutes, including the ripping.

All that’s left to do (after easing the corners) is drill and tap the hole in the beam and pre-drill for the lag bolts which will mount it to the face of the benchtop.

I’ve got a surprise planned for the hub on the wooden screw.  Much more understated than the last time.

But that will have to wait for now.

JPG

Glamour Shots

Does anyone remember glamour shots?  Those airbrushed-to-all-hell personal photos that could make anyone look good?  They were like the Barbara Walters interview of photos.  I’m sure they still exist, because human vanity still exists.

I ask for a very specific reason (and the title of this post is not arbitrary).  I finished the front vise on my new workbench.  And it’s beautiful.

wp-1486908580900.jpg

Soft focus and natural light only.

Aesthetically, it’s everything it’s supposed to be.  The lines are clean, the color match on the jaw and hub are fantastic, and the walnut handle offers a nice contrast.  And look how perfectly it cinches down to the benchtop!

wp-1486908584315.jpg

There is even a bit of wain to give it a rustic look.

But looks aren’t everything.  Truth is: the vise doesn’t work very well.  There is too much play in the maple guide peg, so the vice wracks in all directions.  It works okay with wide stock that can sit on the screw and the peg while I work an edge, but it’s useless for cinching narrow pieces at the top of the jaw.  It also works okay as a crochet for very wide stock that extends below the bottom of the law, but the maple peg wedges itself in the guide hole (like a holdfast) and it’s a pain to free up.

Could I find a metal collar to tighten the guide hole, or otherwise fiddle with it some more, and make the vise work better?  Probably.  Will I?  No.  It’s a sunk cost at this point.  I can re-purpose the jaw for something else and there is nothing wrong with the screw (although I would bet the hub gets trimmed down before it sees use again).  There’s a reason the vise nut is attached to the bench with only hide glue.

One of the hardest things in woodworking, and in life generally, is admitting failure and moving on.  My attempt at a completely wooden front vise has failed.

My heat gun and I are moving on.

JPG