Over the last couple weekends (in what little free time there was), I have been making a simple dovetailed storage container for my car.
Not winning any awards, but definitely sturdy enough to hold a pair of aquasocks, a multi-tool, a portable air compressor, an emergency water bottle and some miscellaneous supplies.
I’ve been meaning to replace with something more permanent the heavy duty cardboard file box I use in my car to maintain organization of odds and ends. Finding myself with some leftover 3/4 birch plywood, I decided it was time to dovetail a box. I don’t cut dovetails often and I like these little, non-critical projects to keep my skills up. Mostly, though, this project was good opportunity to test the capabilities of the Milkman’s Workbench in a situation where perfection is non-essential. Spoiler alert: it performed admirably, as advertised.
Just to be clear, I’m not here to teach you how to dovetail. If you are looking for instructional videos, there are wonderful dovetailing tutorials all over teh interwebs (I highly recommend Paul Sellers or Rob Cosman).
Dimensioning:
I want to say from the get-go that plywood is not ideal for dovetailing (I rarely use the stuff anyway) and dimensioning sheet goods with hand tools is almost more trouble than it’s worth.
I typically rough cut sheet goods with a jigsaw and use a flush trim bit and a straightedge clamp to clean up and square the edges, but I am inside again and plywood dust is gross. Instead, I rough cut four pieces by hand (2 sides and 2 ends) and planed straight and square with a #4 bench plane one end piece and one side piece to use as patterns. I then lined up the factory edges and used double-sided tape to attach the pattern piece to the second rough cut piece (show-side to show-side, which will be important later). Using the affixed pattern piece as a guide, I planed down most of the overhang on the rough piece to approximately 1/32″ (to have as little waste as possible) and cleaned up the final edge all around with a flush trim router bit.

Less waste to remove means less gross dust to clean up.
The bottom piece, which is 1/4″ plywood from the craft store, floats in housing joints in the assembled box and is just hand ripped reasonably square and straight and fine tuned with a block plane.
Joinery:
There shouldn’t ever be a ton of stress on the glued up joints, so at a little under 12 inches high overall, I went with three tails per corner. I’m a “tails first” kind of guy and typically I prefer to hog out most of the recess waste with a coping saw (then chisel down to the line), but go with what works for you.
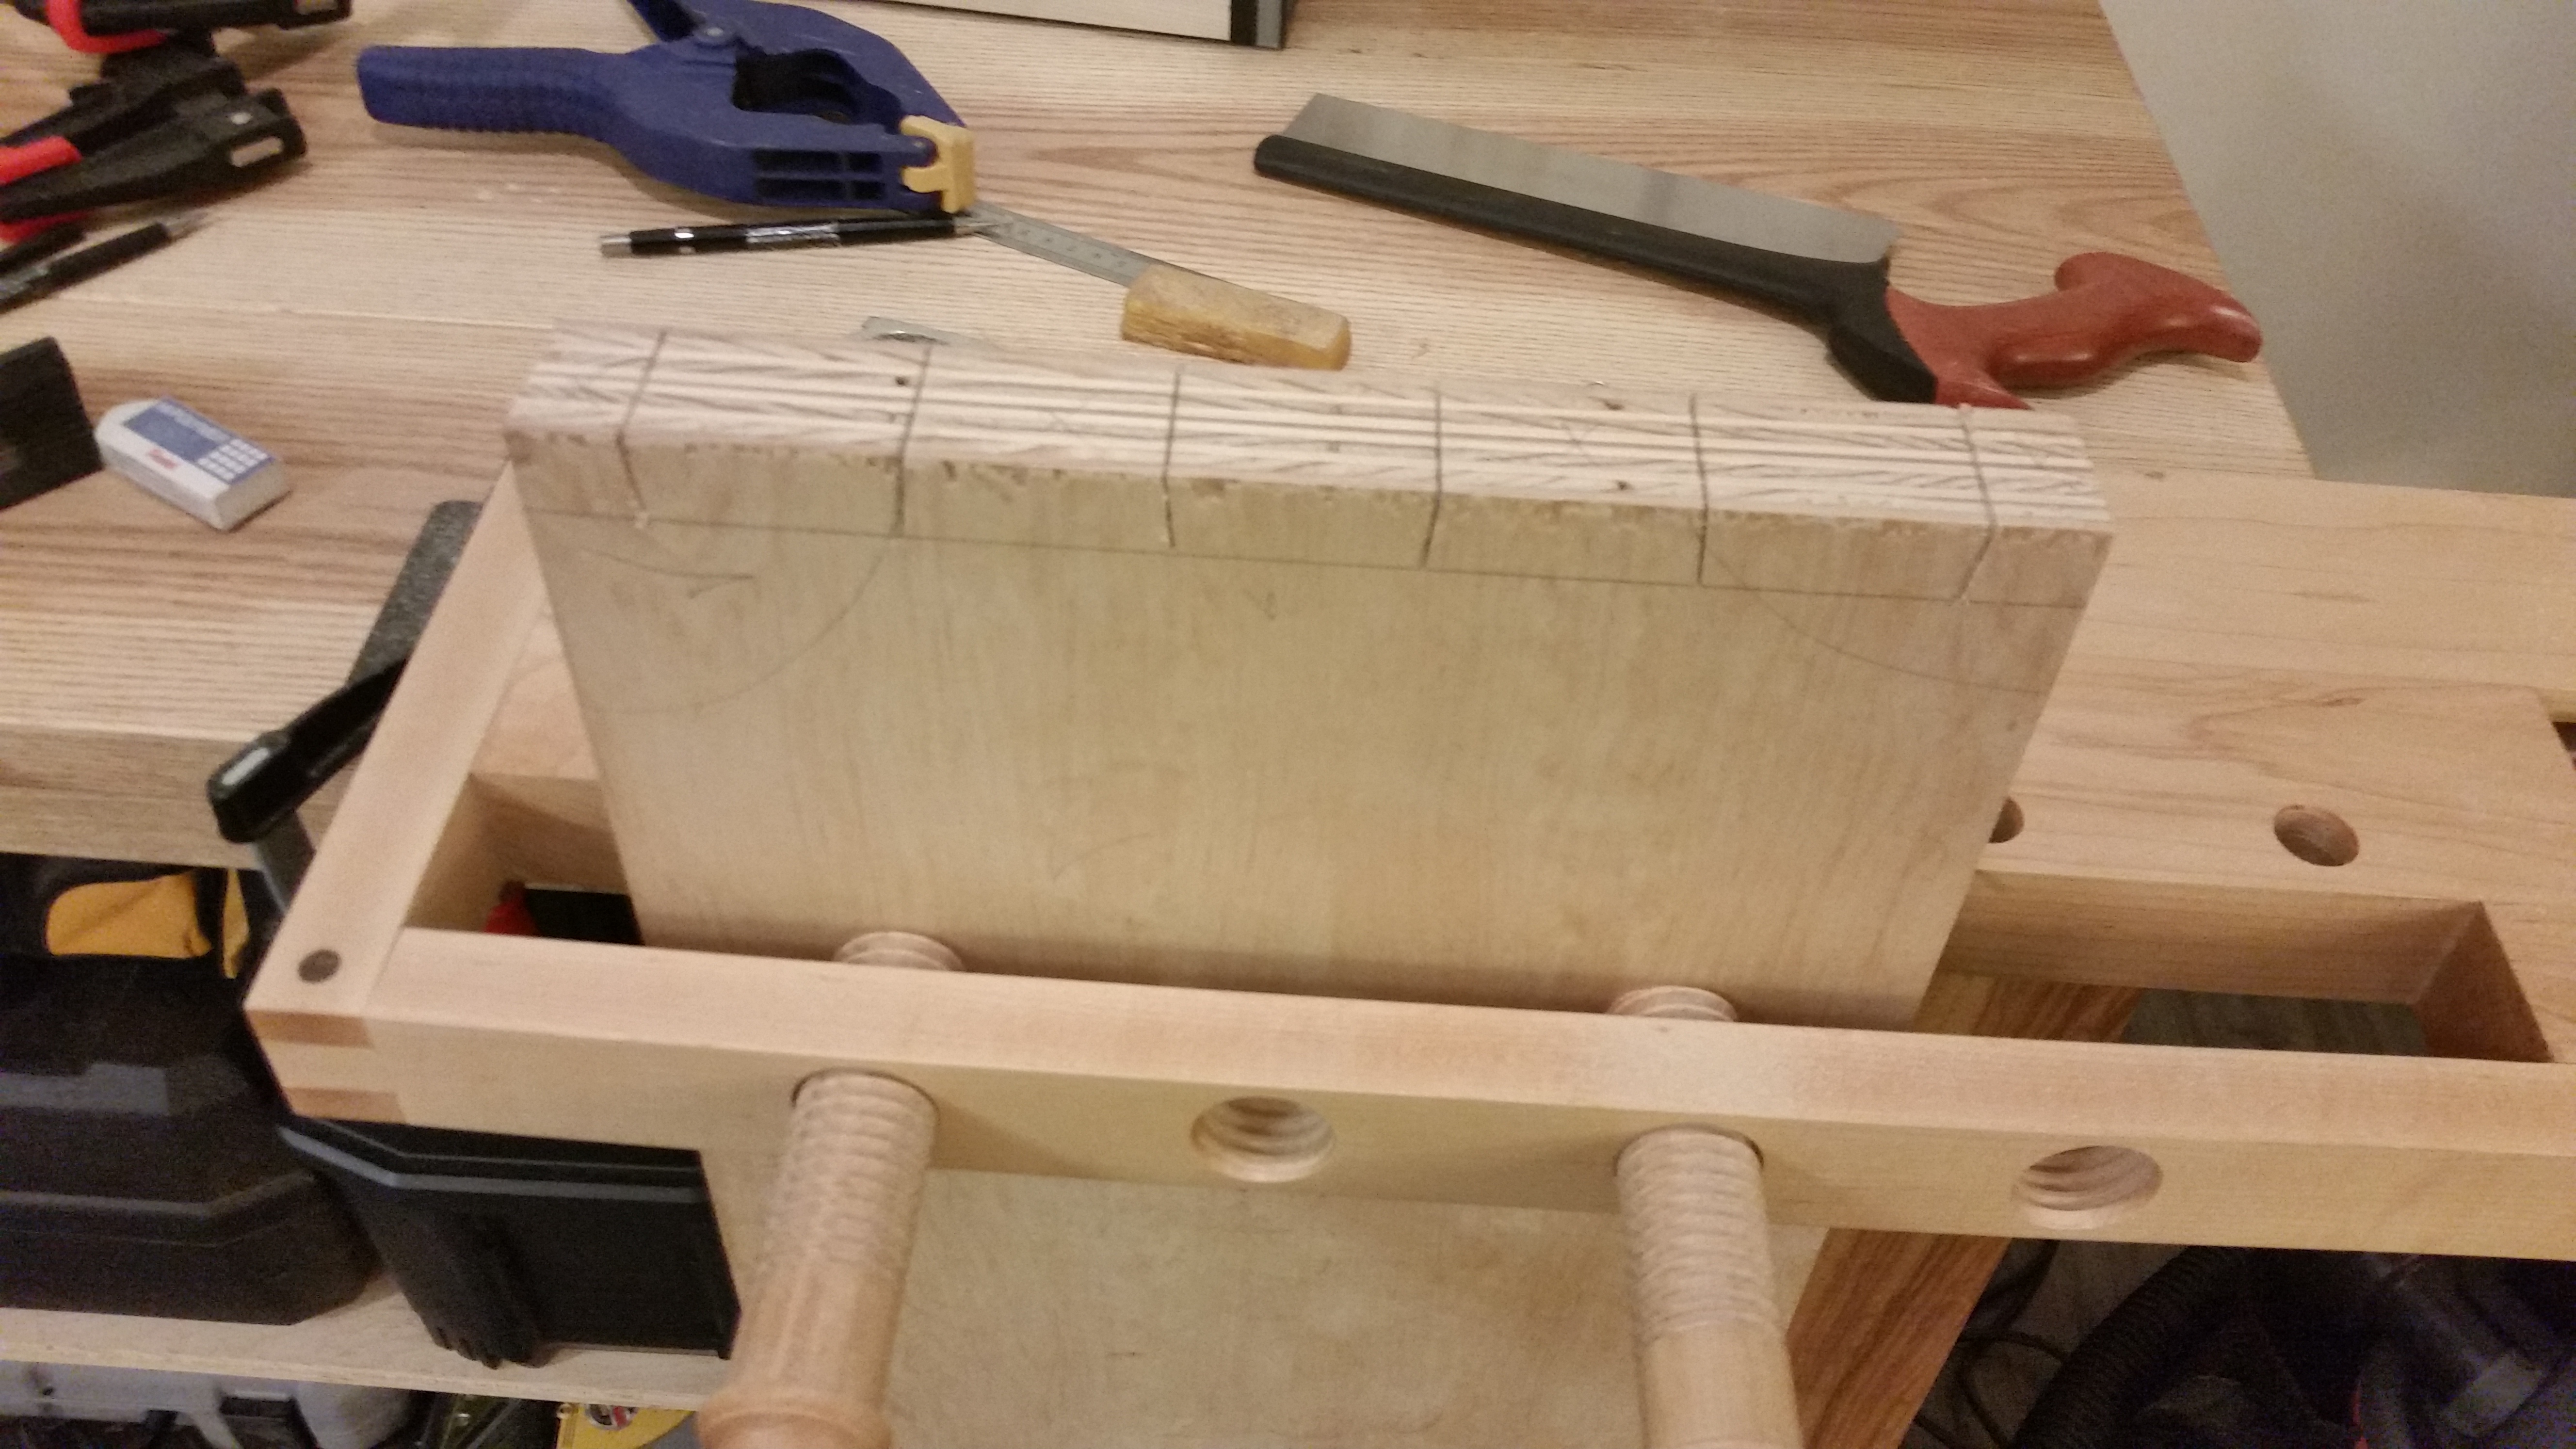
Layout is simple with a decent dovetail marking guide. I use the Veritas version.
I did not separate the now-identical side pieces prior to sawing the tails. I had a good reason, however: supporting the show-side to prevent blowout is critical when dovetailing plywood. By leaving the pieces affixed, the show-side of each piece acts as a backer board for the show-side of the other. As an added bonus, the tails you saw are (hopefully) identical. Plus, I find working on the wider stock makes sawing perpendicular easier (on plywood, you should also eyeball perpendicular against the layer lines). All in all, it saved some time and, again, not a museum piece here. I note that this trick does not work for cutting pins when you cut the tails first; you will need to separate the pin boards. It may work if you cut pins first (I think the pins may be asymmetrical, which may be a neat design element), but I haven’t tried it.

Tails first.
A coping saw and a chisel made quick work of the first set of recesses between the tails. All of a sudden, just after I finished sawing the second set of tails, the double sided tape gave way and I had to finish up the tail boards individually. I also decided to put down the coping saw and chiseled out the remaining pin recesses (more on that later). Beware cracking the veneer when chopping out the waste with a chisel.
I then scribed and sawed the pins in the usual way, also using a chisel to cut the tail recesses.

Not bad for plywood and being out of practice.
I routed the 3/8″ deep housing joints for the bottom piece with a 1/4″ up-spiral bit and a fence (dust extraction works much better in this router orientation) and tweaked the fit of the bottom piece with a block plane.
Assembly, Gluing and Finish:
A backer board also comes in handy when seating the joints during final gluing. I always use a piece of wood to cushion against the mallet blows when seating joints and the support for the tails guards against chipping and blowout if/when the joint is a little on the tight side. Unlike solid wood, plywood de-laminates and cracks instead of compressing, even when lubricated with glue, so the extra support goes a long way. There is a chance the box might get wet, so I opted for overkill with Titebond III.

Mechanical joints mean single-direction clamping pressure.
After the glue had dried, I flushed any protruding pins or tails and trued the base of the box. Then I softened all corners with a radius plane and plugged any large gaps in the exposed plywood “end grain” with some water-based wood filler. No finish required. It’s not pretty, but it’s not meant to be pretty. Everything then got a quick 220-grit orbital sanding to remove the pencil marks.

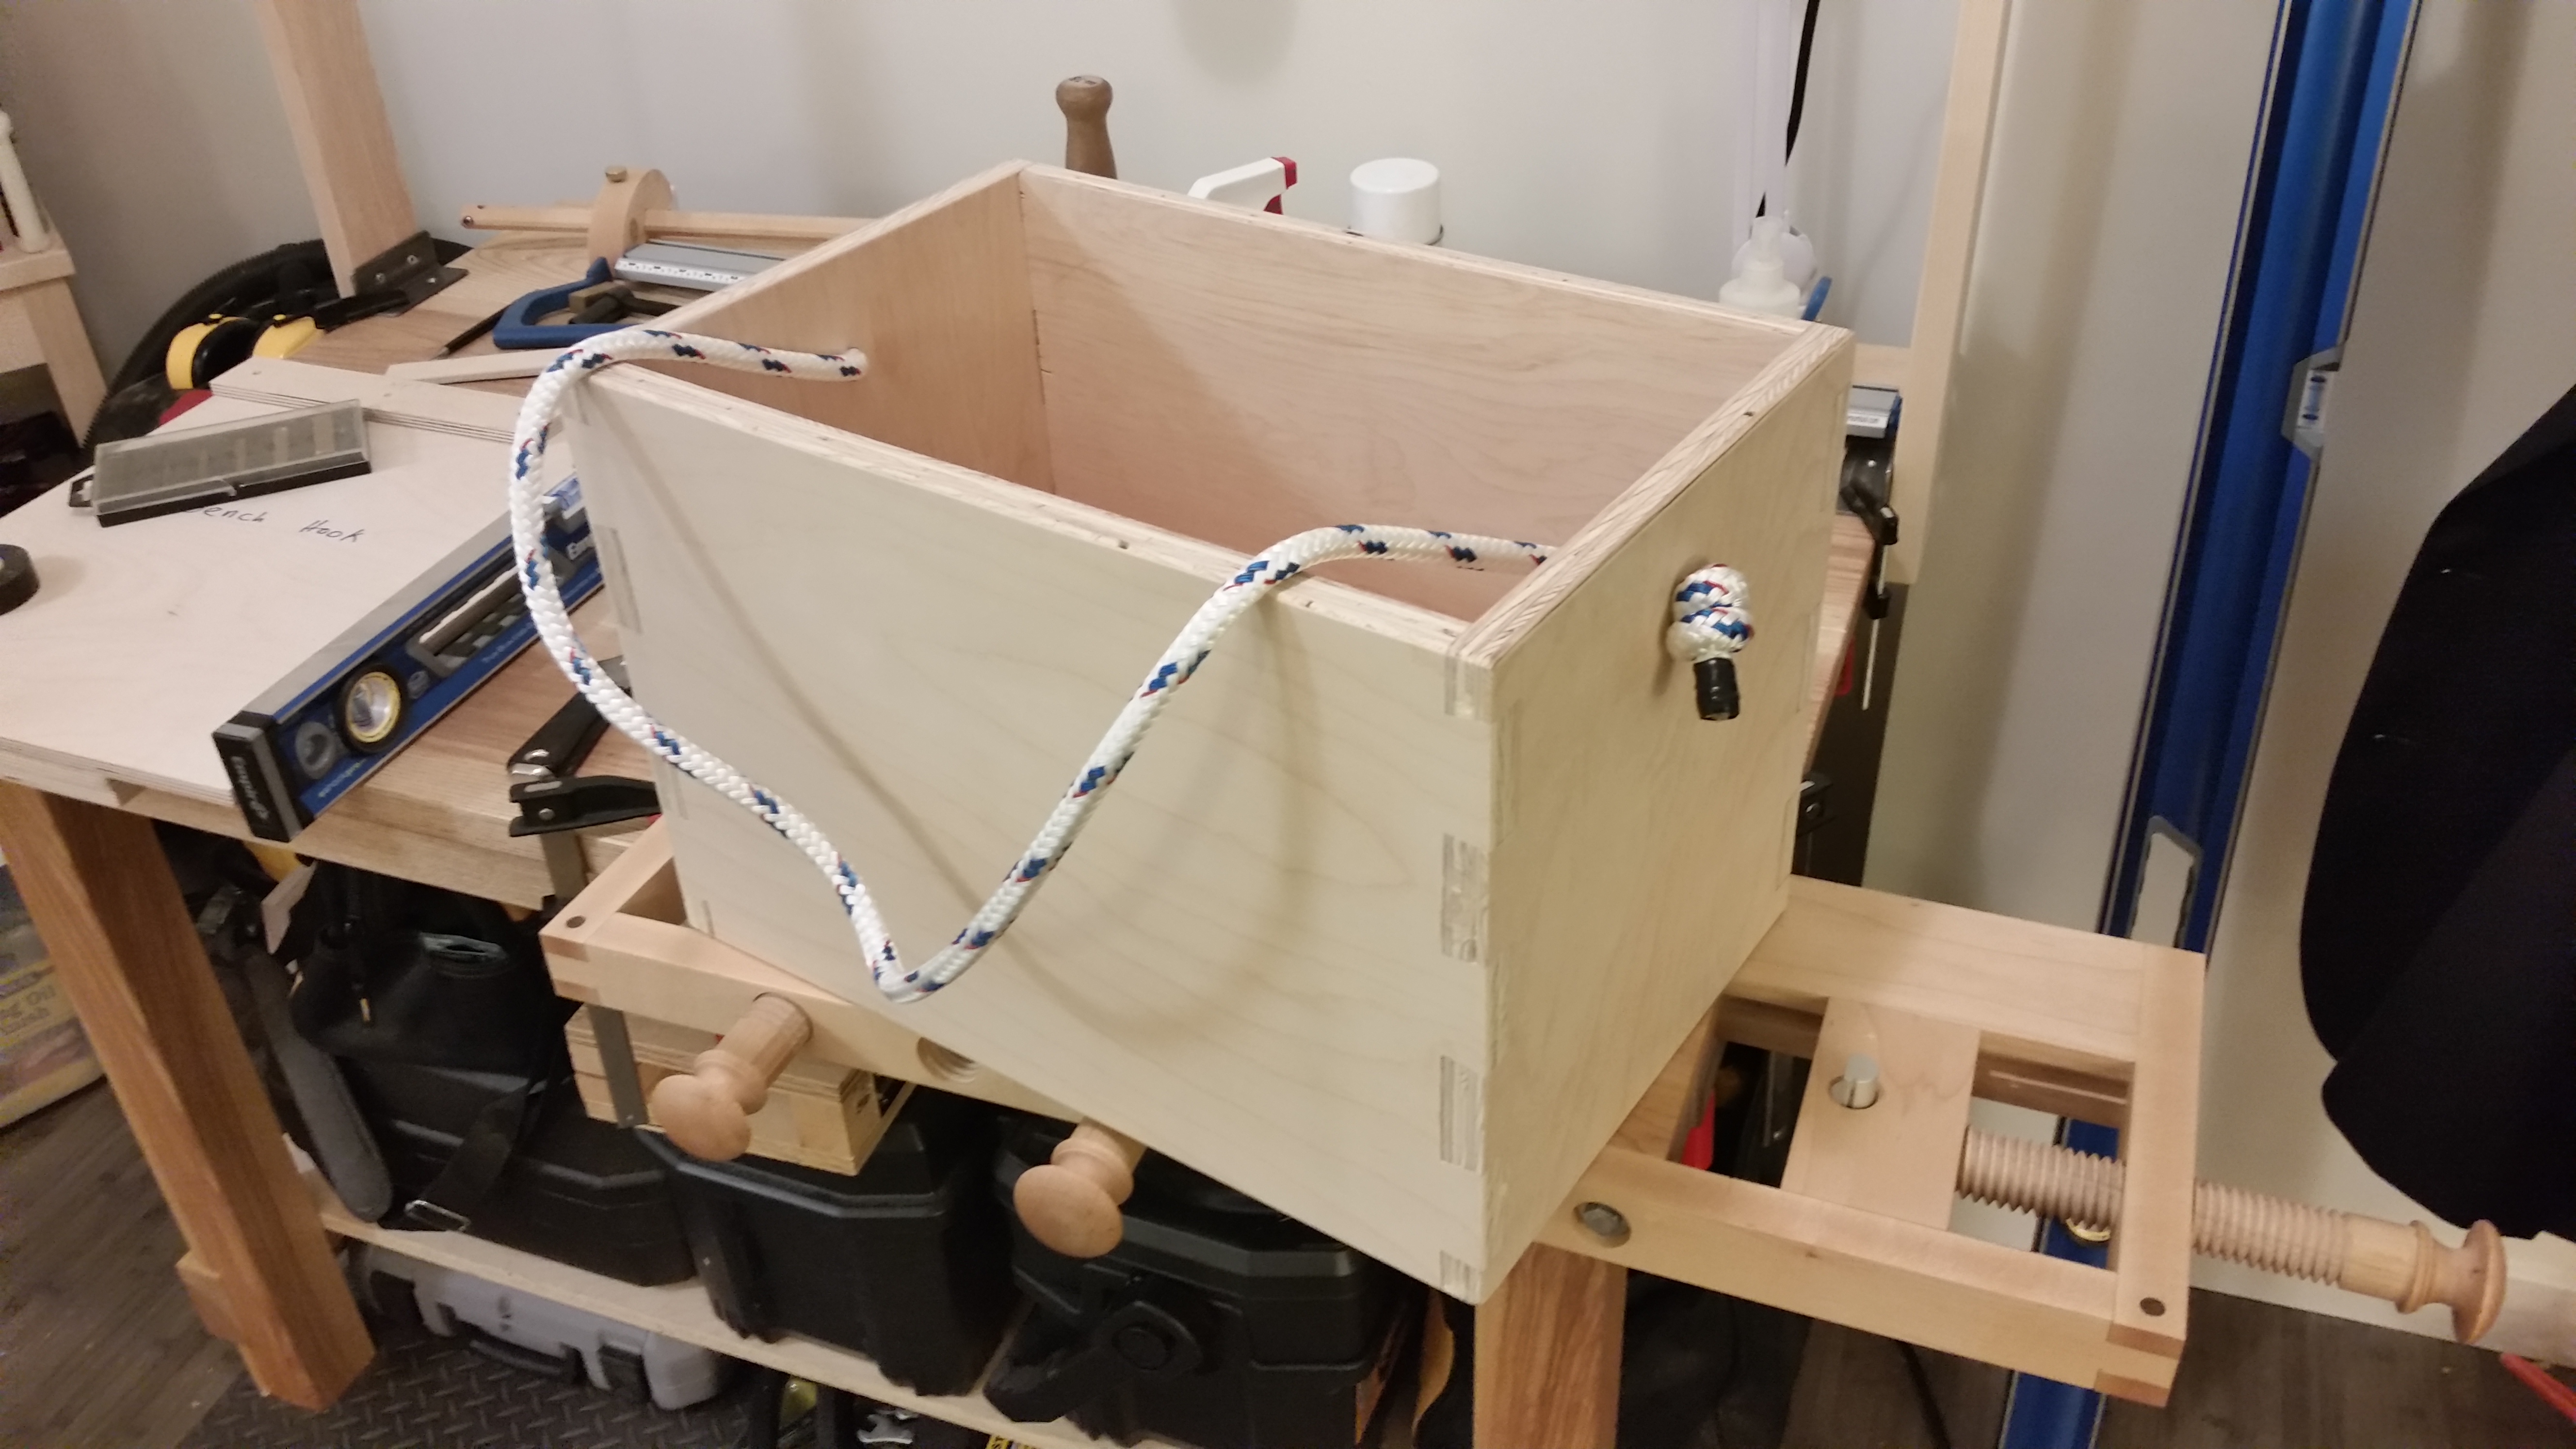
Sitting on my saw bench, “clamping” the work with my feet.
I had the idea of threading some 7/16″ nylon line from the boating supply store to make a rope handle. I tested a couple different lengths and finally settled on a single strap that I could sling over my shoulder (as opposed to individual handles on the ends). I hope I don’t regret the shortcut.
Conclusions:
I’m pretty satisfied with the box; it is solid and it holds stuff. Truth be told, it’s been done for about a week. I am just staggering posts.

There are gaps. It happens. I’m not looking for a critique of my dovetailing.
Next time I dovetail plywood (I still owe my father some marine plywood drawers for his Frers 33), I am definitely skipping the coping saw. It works fine for solid wood, but is tough to control in plywood (with the multi-directional grain of the layers and all) and the veneer can tear easily. Not to mention the awful screeching sound.
The Milkman’s Workbench worked quite well for this project. Early on, it became clear the grip of the front vise screws wasn’t great until turned so tightly they mar the work, so I added leather pads to the ends of the front screws. This improved holding power at much softer clamping pressures and work slippage nearly disappeared (although with increased grip, the work rotates a bit when the screw is engaged). Front vise flex decreased dramatically as a by-product of lower clamping pressures as well, and I recommend anyone using a Milkman’s workbench take the time for this easy upgrade. After a few more months of use, I will do a full retrospective on the bench’s total functionality.

Much gripper.
As I was working, though, I started fantasizing about making a significantly larger version of the Milkman’s workbench. Something with at at least 36″ of maximum clearance between the widest dog and the wagon vise and not less than 30″ of front vise inside clearance. This would mean 40″ plus of total workbench (and probably a third screw in the front vise); my workshop table is slightly over 50″ long and should easily handle a clamp-on bench of this size. I would probably make the main bench deeper too (for a larger chopping surface) and maybe abandon current front vise configuration for something more like a moxon vise…
Several hours with pencil and graph paper later, it became abundantly apparent that what I really need is not a larger Milkman’s Workbench, but rather a planing slab (like a Japanese workbench, maybe with some dog holes and a Veritas inset vise). Something around 18″ x 60″, made of laminated pine framing timbers. I guess I know what my next project will be after I finish those footstools for my brother’s new house.
Also, I can’t say it enough: plywood dust is gross.
JPG

2 comments