Happy [American] Thanksgiving to those who celebrate! It’s November 27, 2025 and things are in a weird place. It’s been a busy year for me, professionally. Workflow is good; the pipeline is strong. And all I want to do is spend some quiet time in the workshop and forget about the chaos out there.
It’s important to take some time for ourselves, if we can. Especially around the holidays.
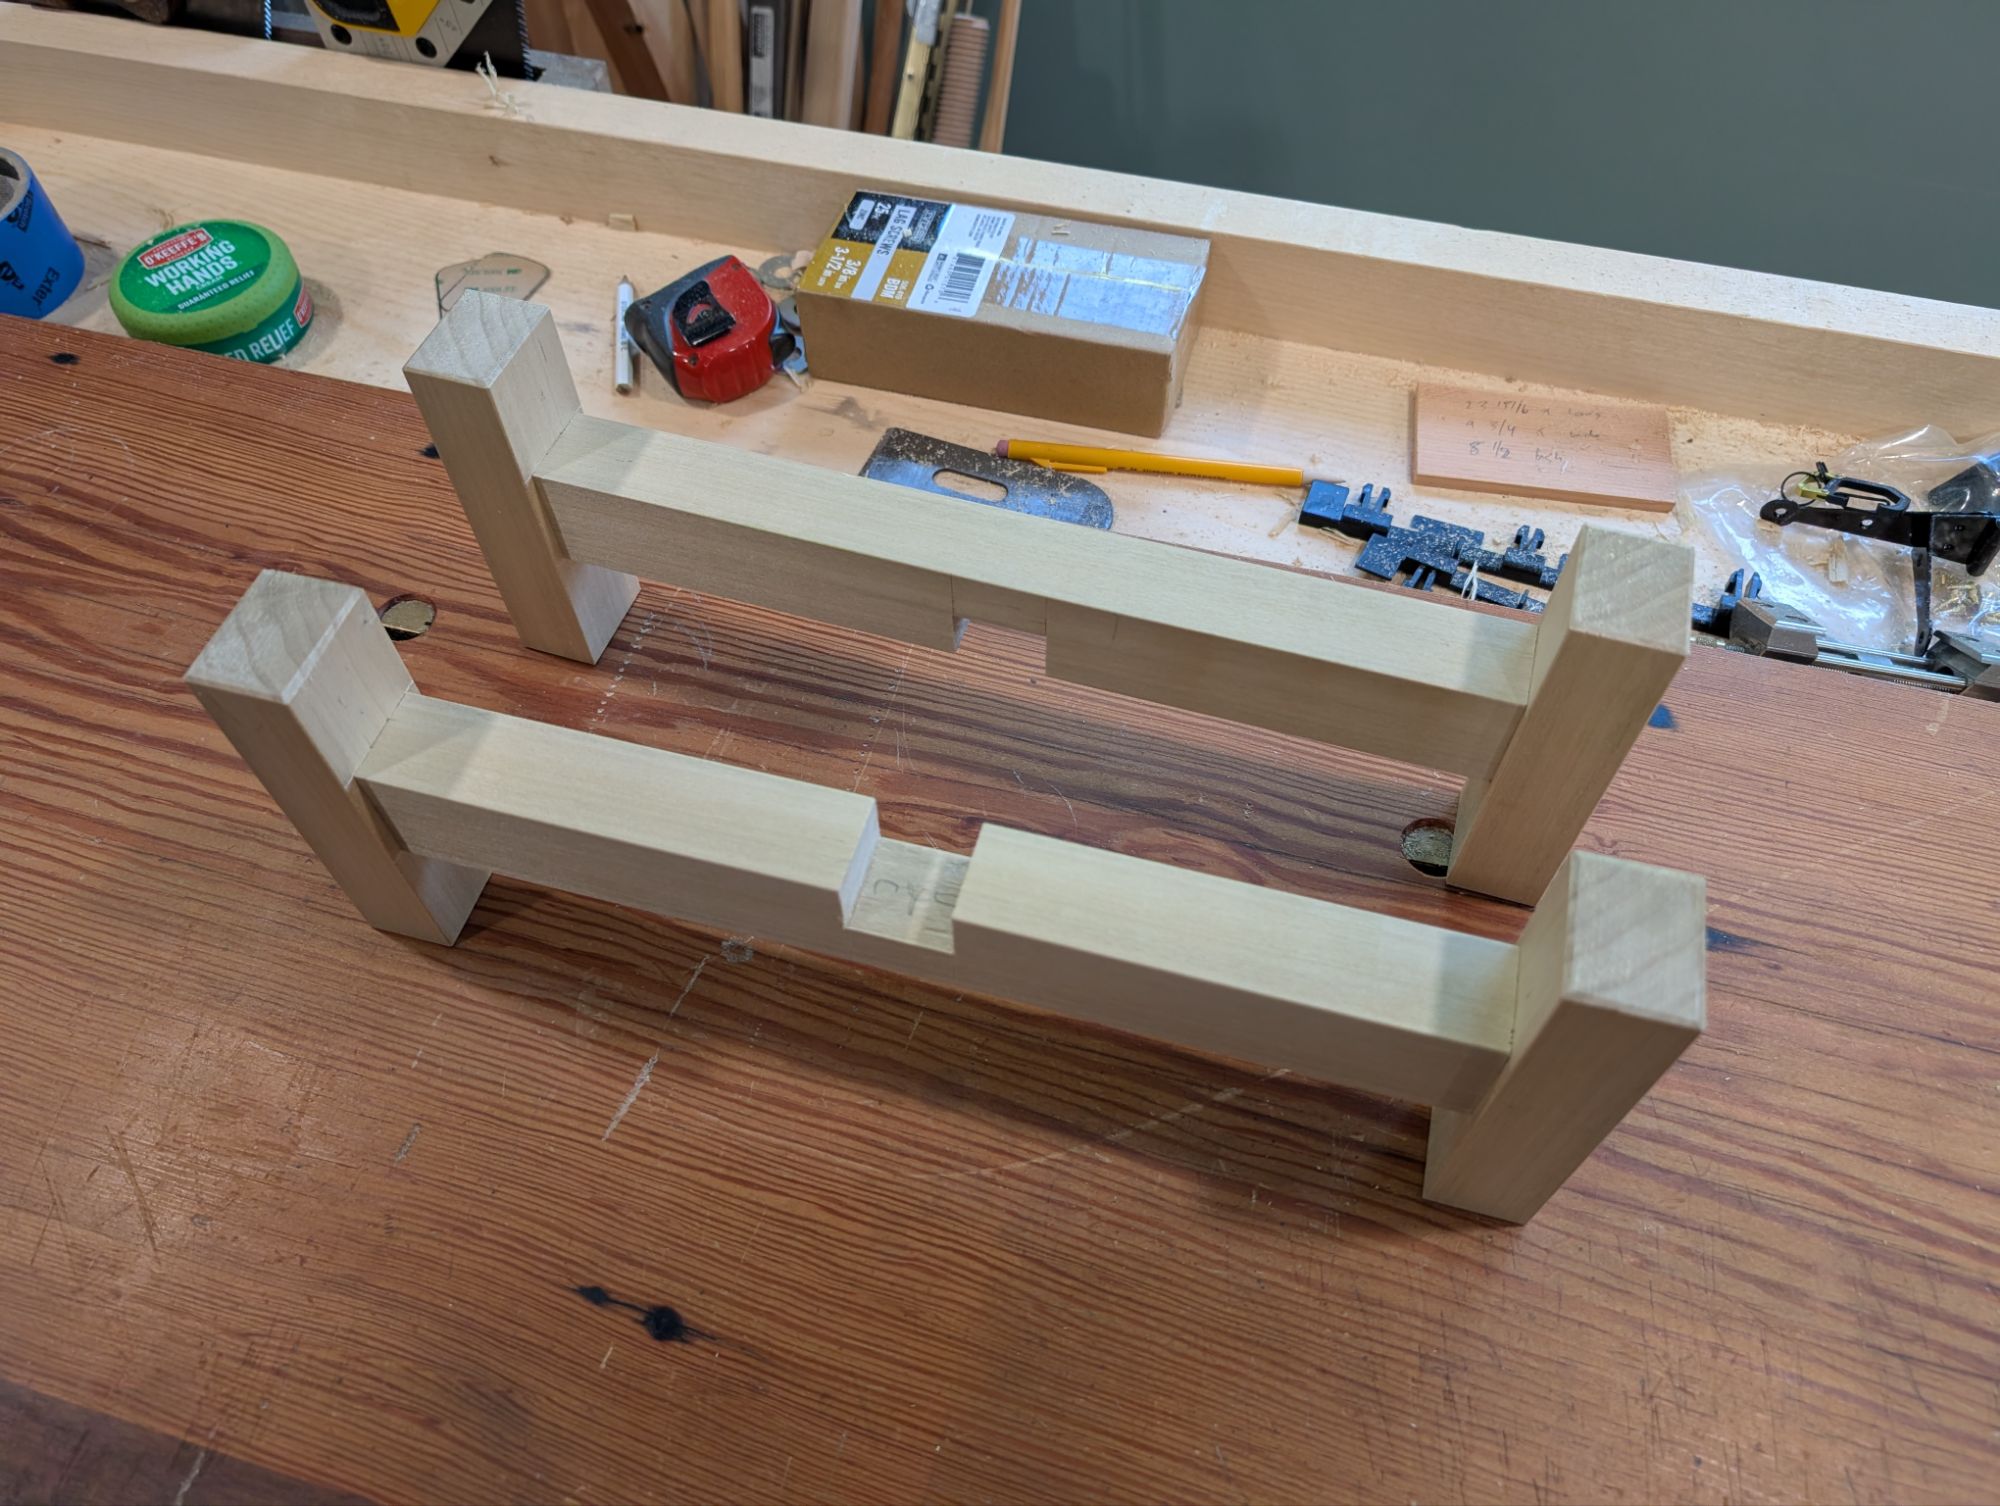
This morning, I spent a couple hours turning an otherwise useless stick of poplar into a plant stand for a colleague of mine. Something that could certainly be acquired at the home center or a big box store for less than $20. And I have indeed bought my fair share of small wooden items even after I started woodworking, both for myself and as gifts.
But it’s the meditative process of making. The weight of the tools in my hands. The smell of the workshop. The empty space on the rack where the material used to be, in potentia. The smug satisfaction of seeing it get use at the office day to day.
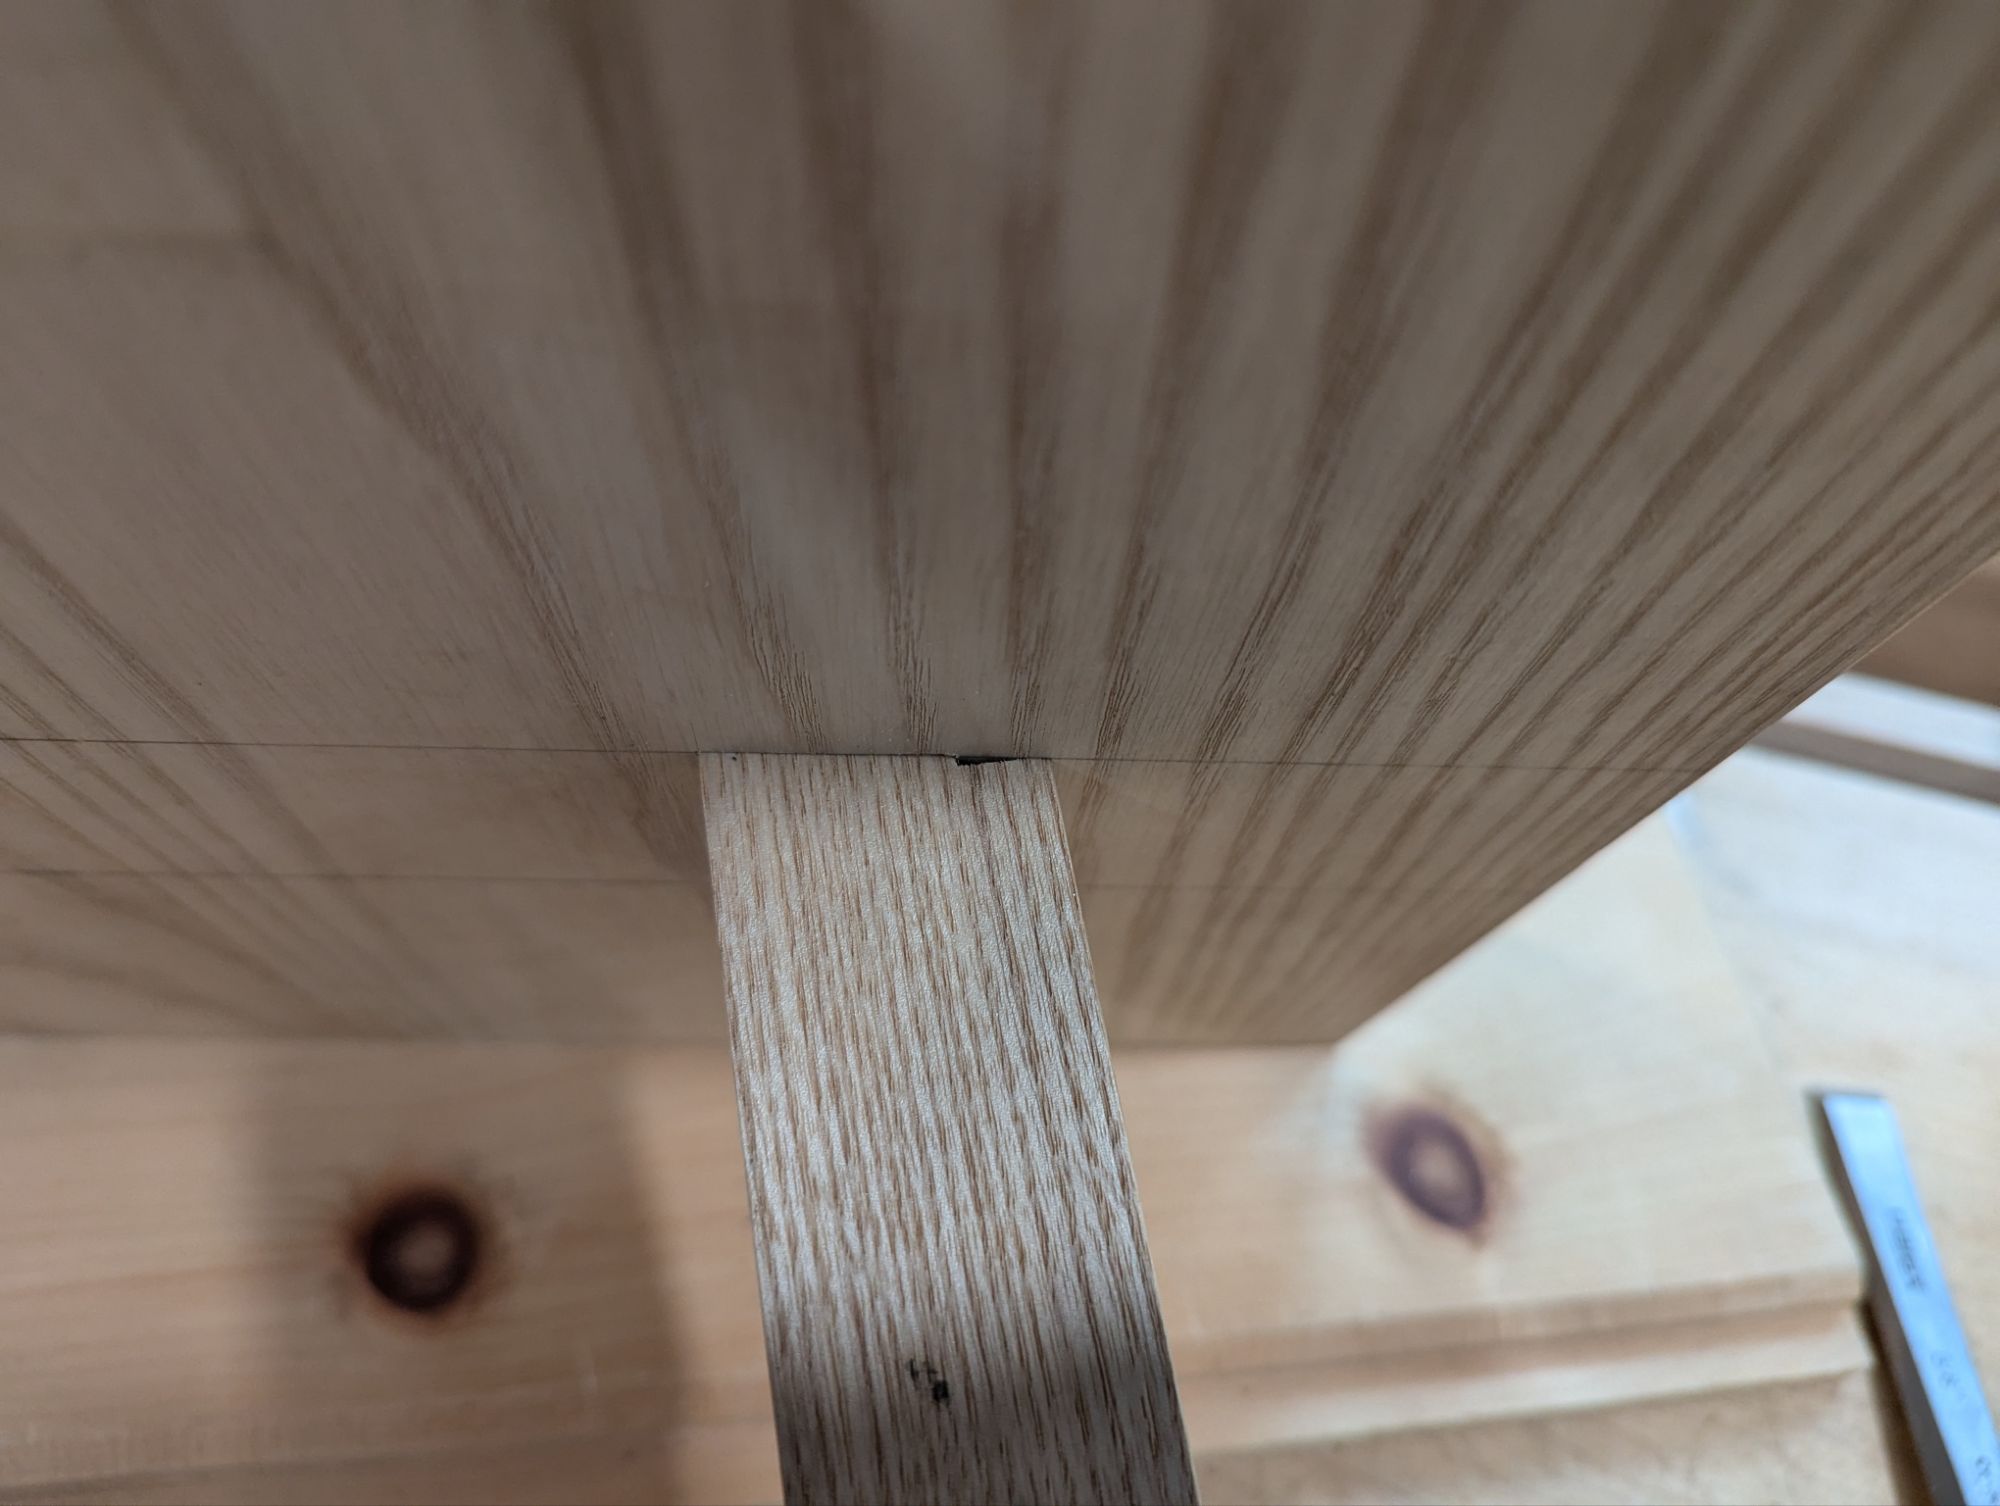
Those protruding tenons will get trimmed when the hide glue dries.
I like these little plant stands because they are an efficient use of materials. Pretty much anything at least 1 inch square will work; I typically use poplar or spruce. And the only critical measurement is the length of the two beams (sized to fit the pot it will support). You can otherwise tailor the height of the legs as needed or desired. And they are collapsible, so they travel well.
Just a simple lap joint in the middle, well fitted but not glued.
You can make them with a basic kit of tools. I use just a No. 6 hand plane, a 1/2 inch chisel, a 1 inch chisel, a crosscut saw, and a router plane, plus a marking knife and a try square. I’ve always meant to do a Basic Projects post on these. Maybe in 2026.
In any event, I hope you and yours have a warm, safe, and happy Thanksgiving.
I was up at the Vermont house the other day and made my periodic pilgrimage to The Red Carrot in Rutland. The store is great for things like rustic boxes (more on that some day), but as a woodworker and general DIYer, I prefer the related warehouse down the street. They have most of the interesting tools (at least for me, not needing any more planes or saws). I usually pick up a few odds and ends (like screw taps or T augers). Once in a while, though, the warehouse will hide a real gem.
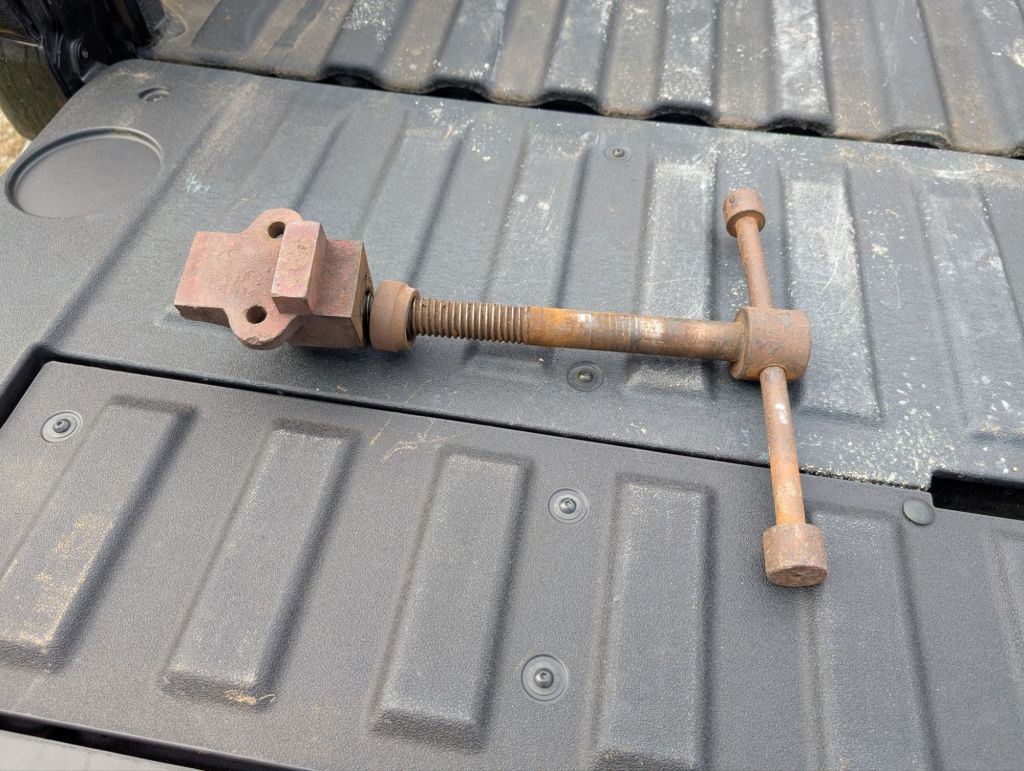
It will clean up nicely.
The metal screw above came from what I think was a portable leg vise. It had two white oak jaws: insect riddled and good for nothing but throwing in the woods to rot. But the screw is in great shape and the nut is rather beefy. It just needs a de-rusting and to straighten the handle.
Unlike typical woodworking leg vise screws, which mount horizontally (in line with the screw itself), the nut had vertical mounting holes and a flange. This means it’s screwed into the underside of the work surface (like a modern bench vise). It could also be for blacksmithing too.
I don’t have a place for this right now. But for $20, how can you go wrong?
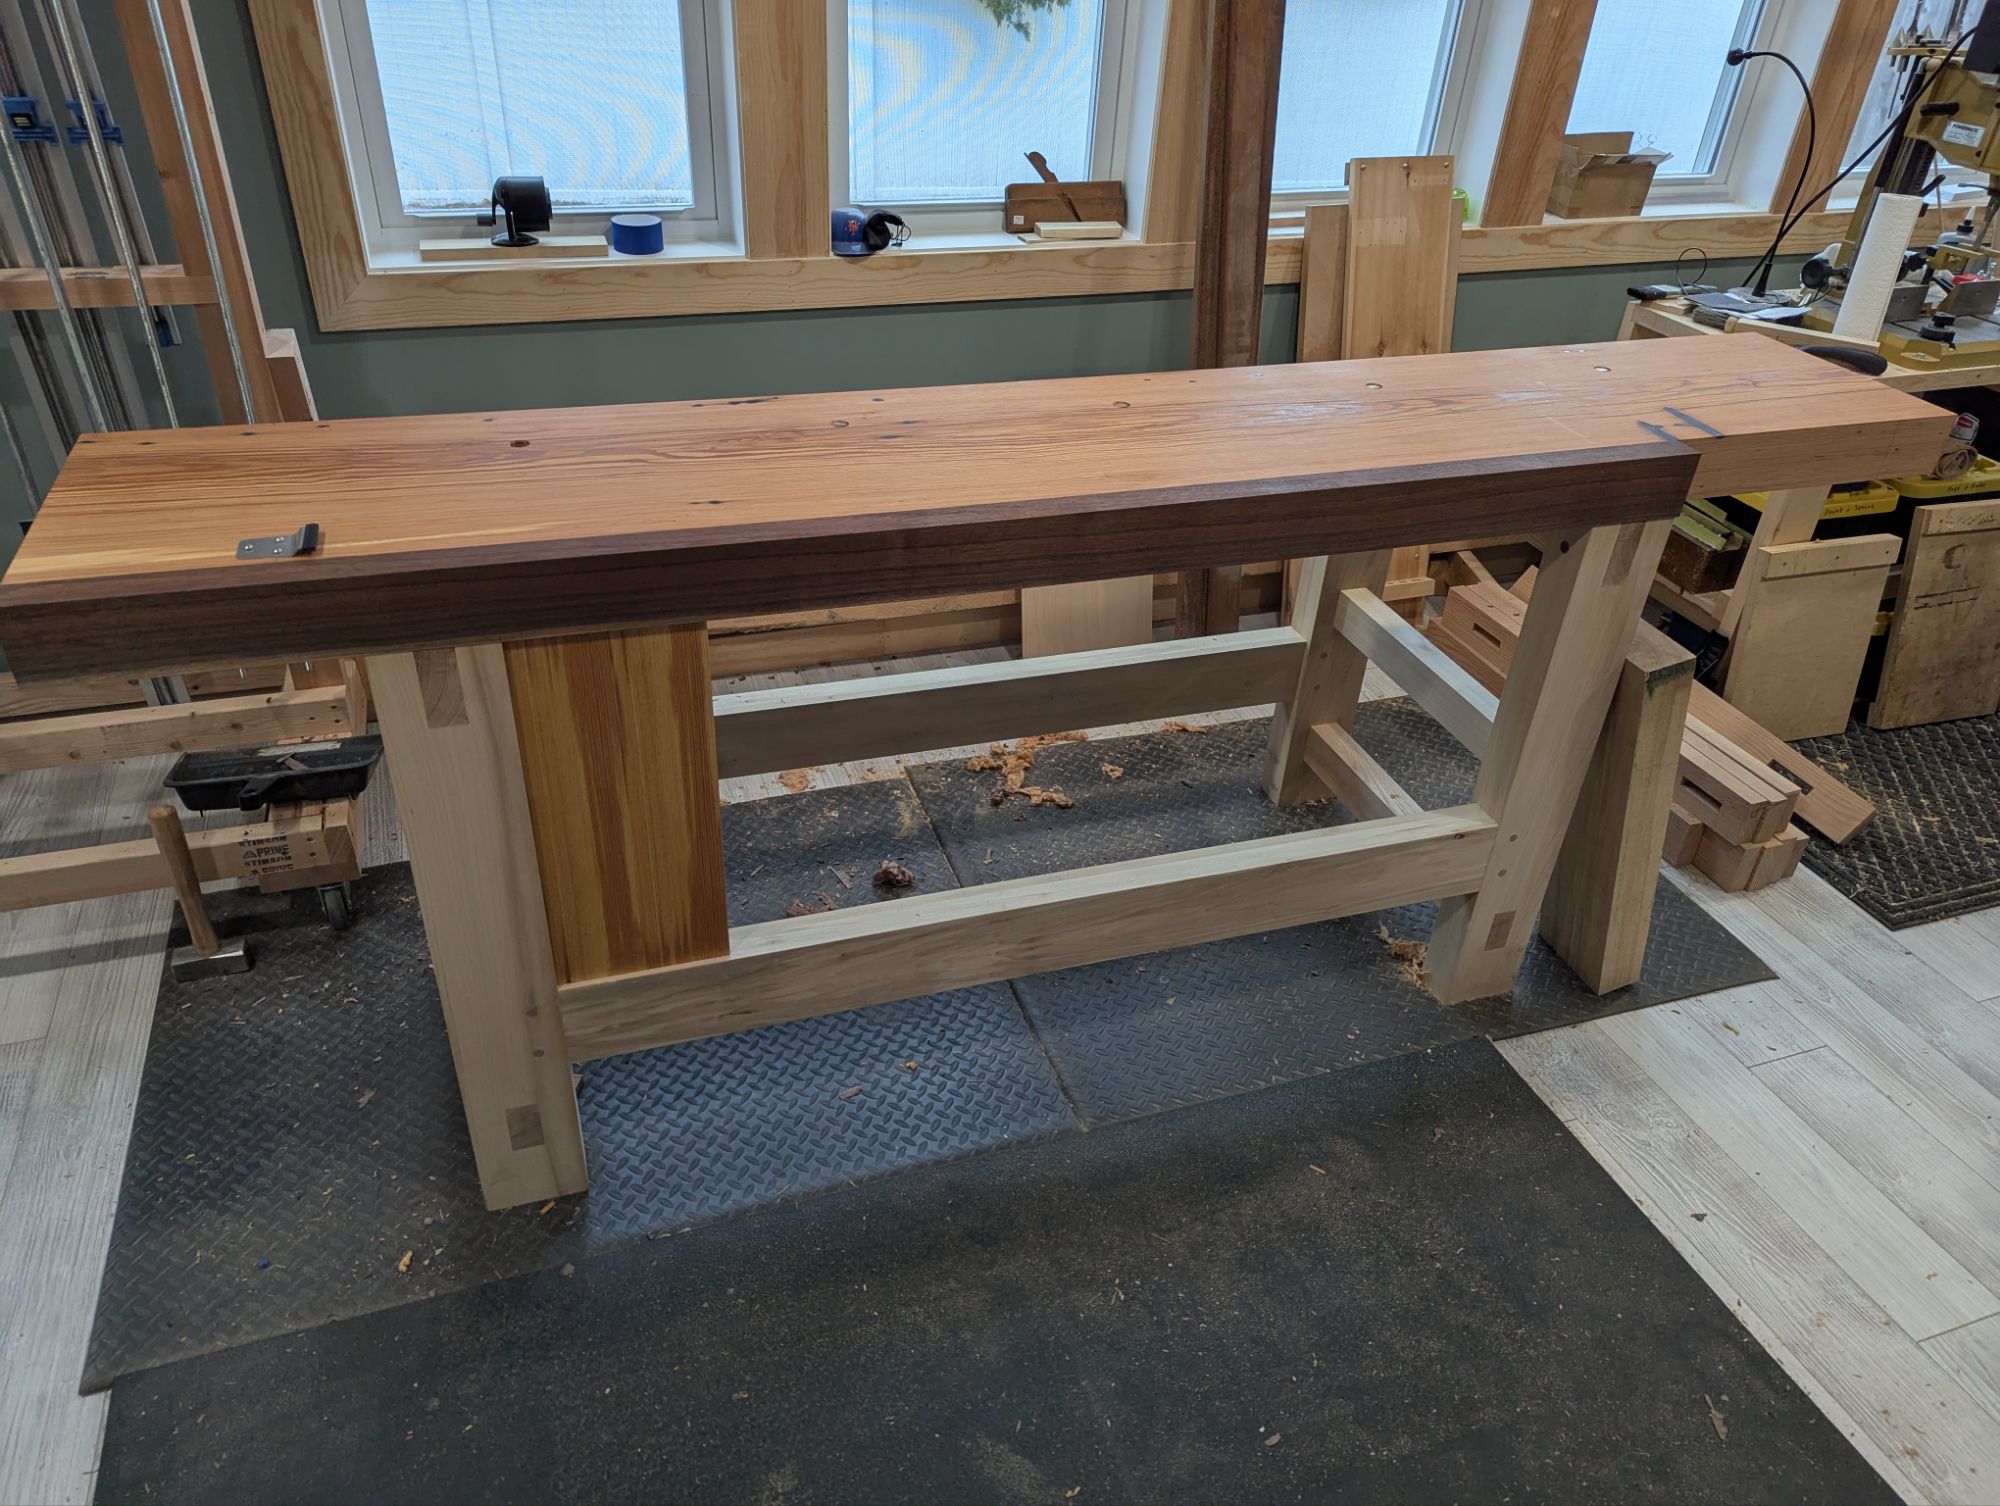
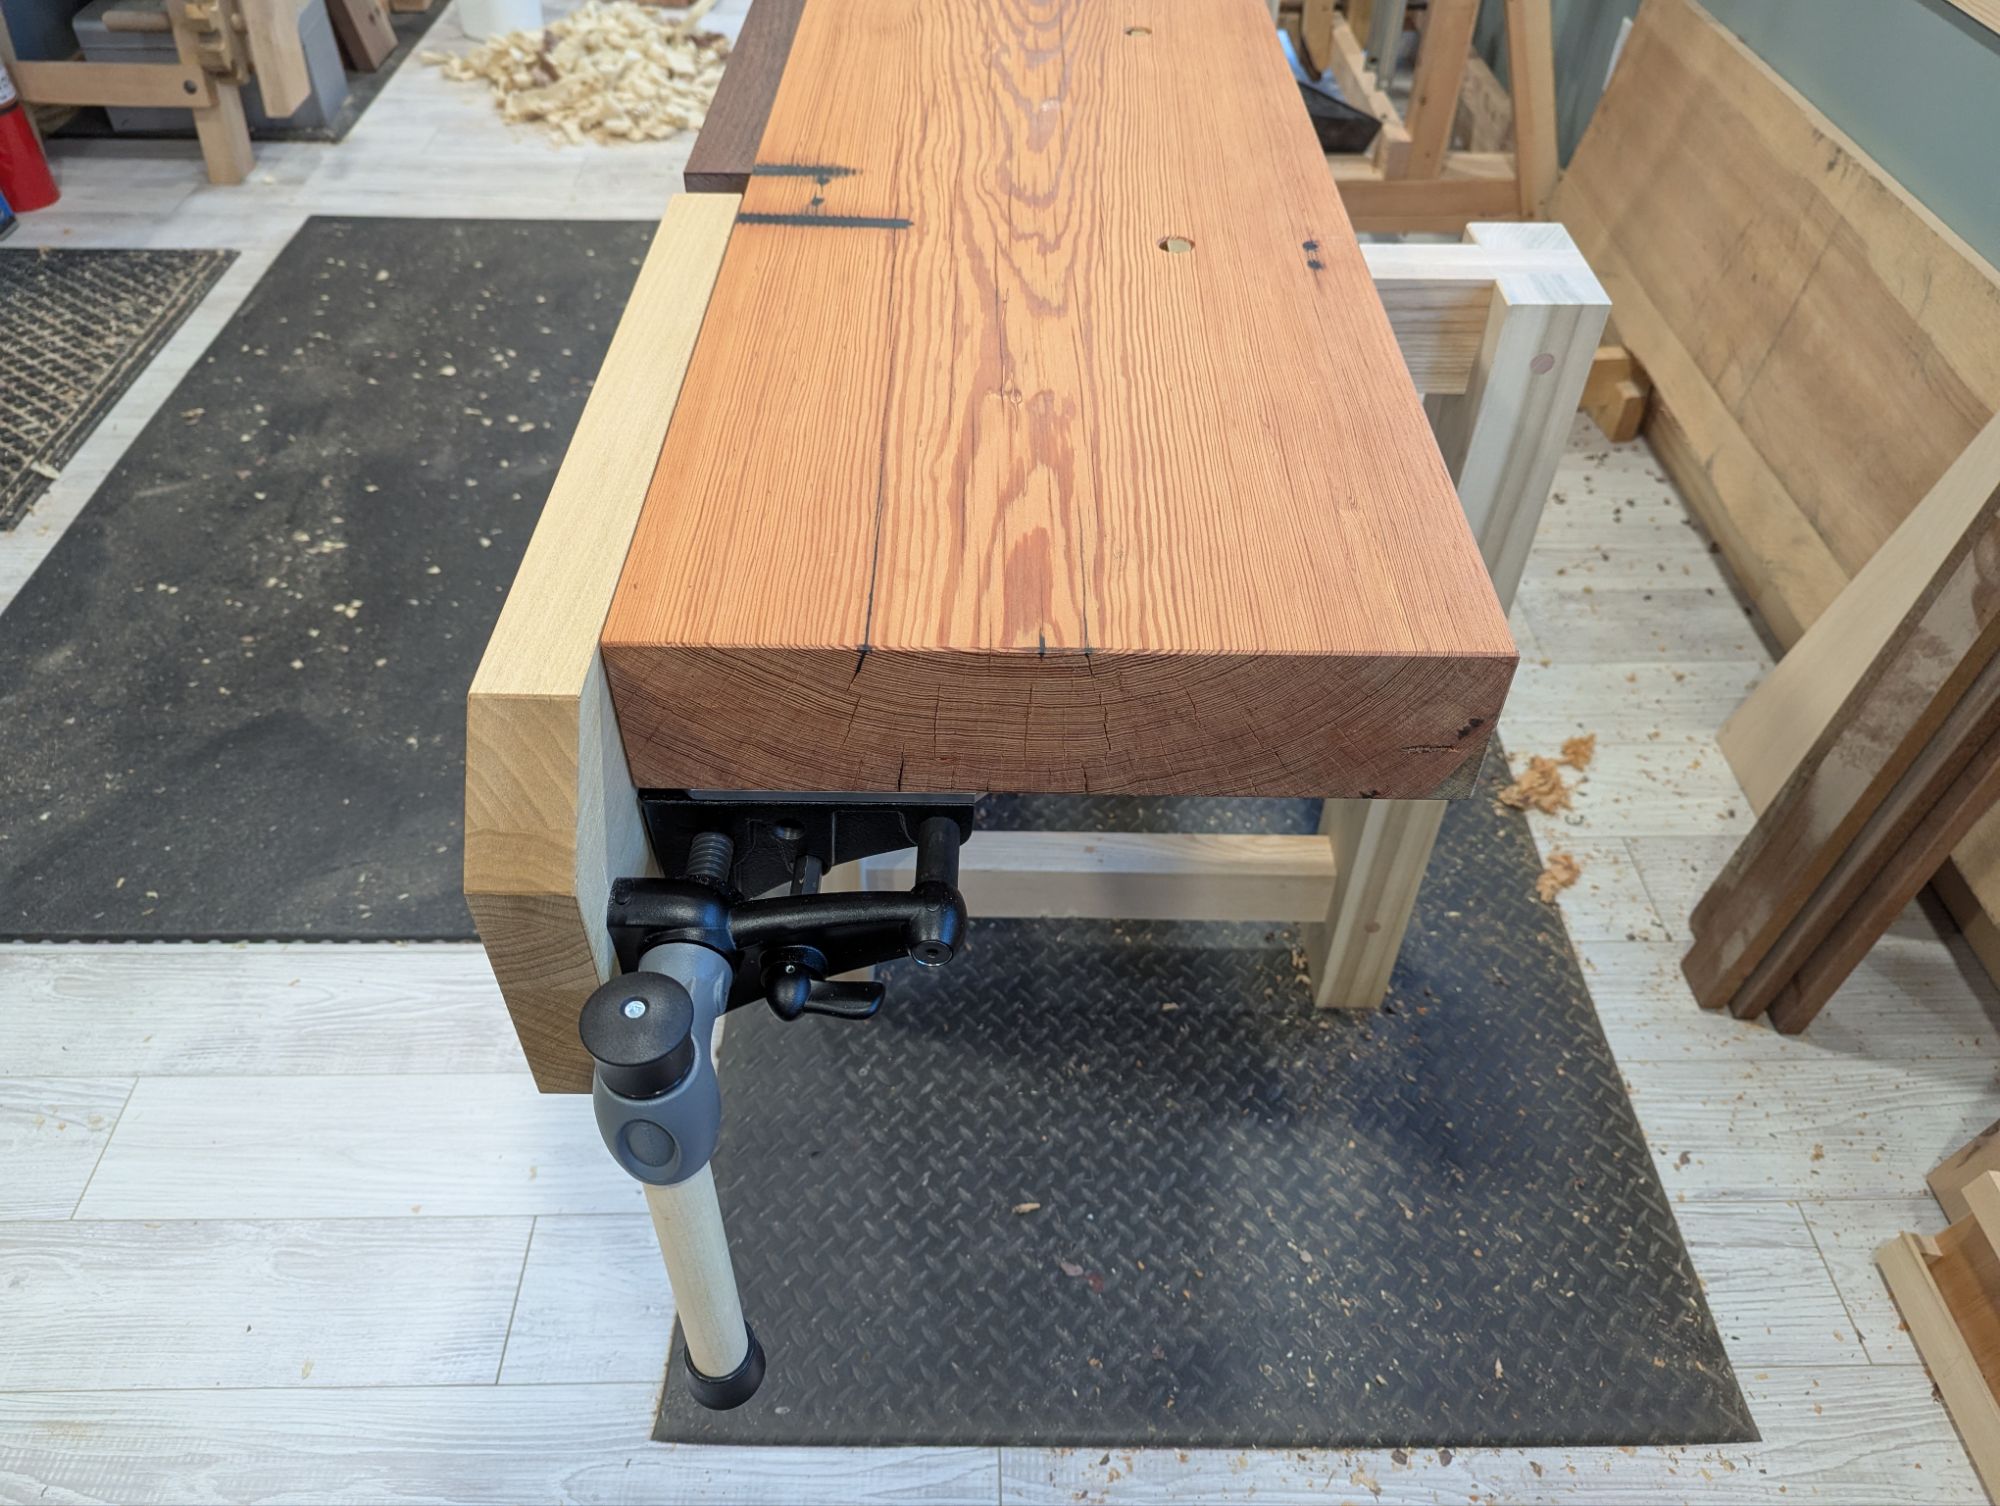
Just a quick update on my new workbench: I have attached the slab top (with pegs like a Moravian workbench) and oiled it a few times (with untinted Danish Oil), which I think looks super neat.
I’ve also bored holdfast holes in the top (12″ back from the front edge of the bench and 14.5″ on center, which I think is the right spacing for Grammercy Holdfasts) and attached a Compass Rose planing stop. Finally, the vise back is mortised into the stretcher and the underside of the top, so I’m ready to work on the vise chop itself.
I’m not one for sentiment, but that top sure looks nice with a couple coats of oil.
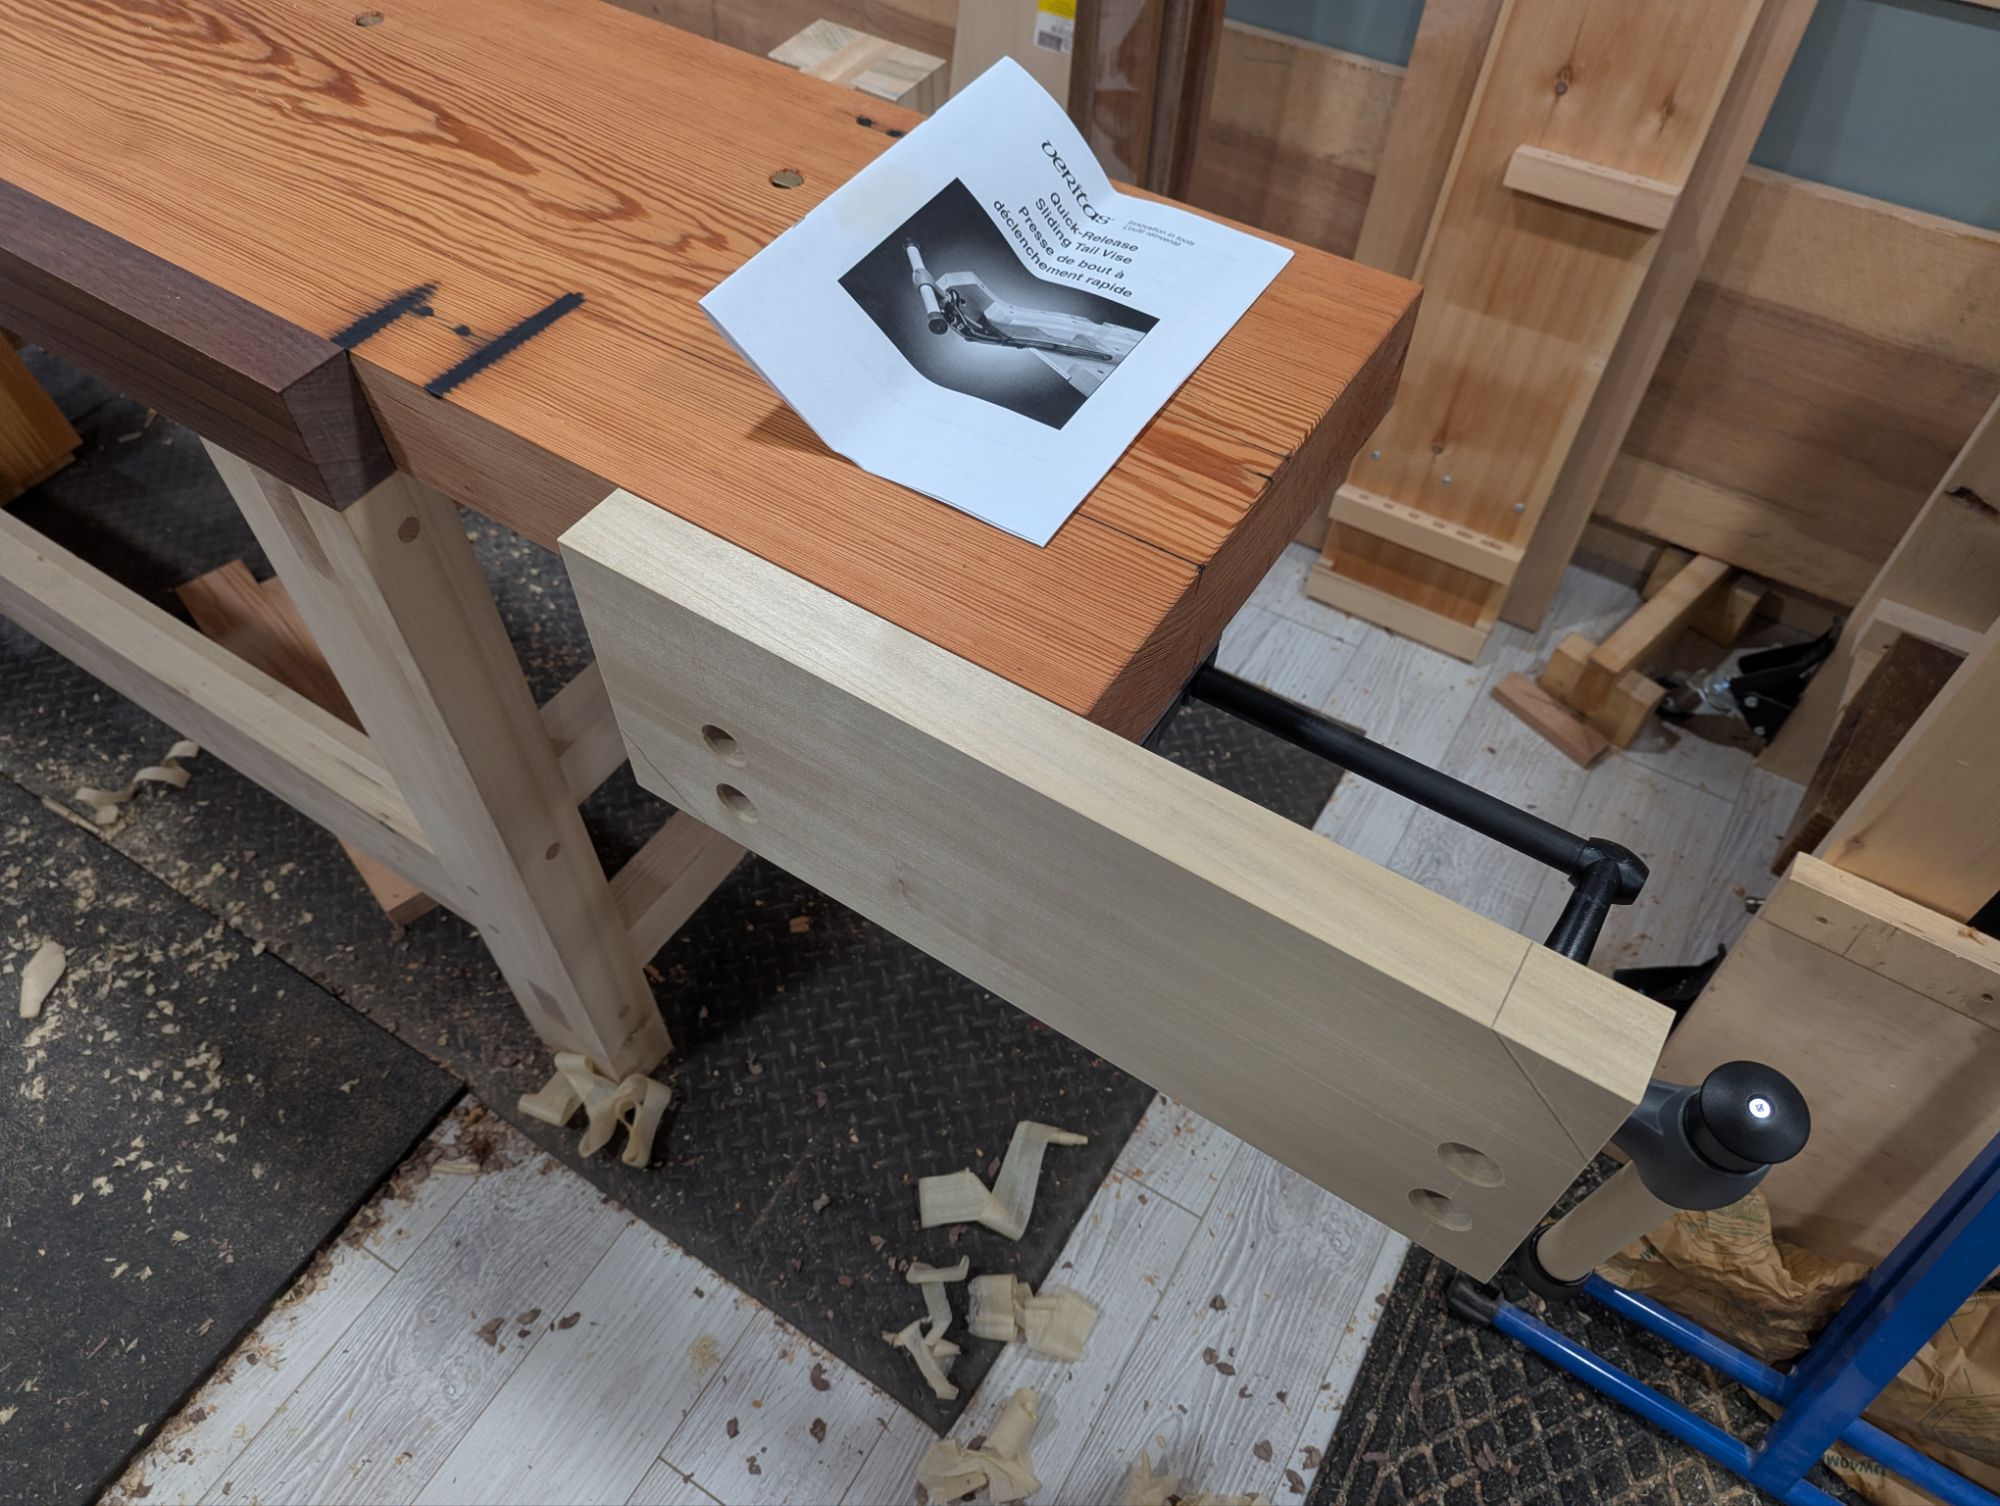
In addition, I finally unboxed my Veritas Quick Release Sliding Tail Vise and attached it to the workbench. I followed the directions exactly but I guess my vise (which I bought for myself in 2021, right in the thick of the pandemic) had some issues with the casting or the machining. The attachment points for the vise chop were not in plane (more than 1/16″ off) and the threaded holes for the bolts to attach the vise chop were not spaced as described in the instructions (exactly 1/8″ off). Perhaps there was a setup issue in the factory?
This meant I had to scrap the continuous grain walnut vise chop and laminate a new one out of poplar (again, trying not to buy new materials for any part of this workbench).
Kind of annoying but ultimately not an issue.
It’s still a very nice piece of hardware and works great (after I was able to sort out the problems with some fender washers as shims and the aforementioned replacement vise chop). Outside of the irregularities the build quality is great. I have no doubt it’s just a bum unit from the dark times when quality control wasn’t ideal. It happens.
I by no means intend to stop shopping at Lee Valley and I don’t want anyone to think I’m disparaging them. The instructions for the vise were detailed and super useful. If the mounting holes hadn’t also been off, I don’t think I’d even be posting this.
This thing is really becoming a Frankenbench, though.
Having used the finished vise for a few days, I’ve noticed a couple things, though. First, the vise is clearly designed for thinner workbench tops. The first attachment point is 5/8″ below the underside of the workbench, so there is a lot of unsupported chop on a 3 1/2″ workbench top. This leads to some vise chop lift. I’m not quite how much clamping pressure would be lost on an even thicker workbench top because of the twisting force on the unsupported part of the vise chop.
Second, everything is attached with screws (No. 14 wood screws for the mounting plate and 3/8″ lag screws for the vise assembly). They are beefy, for sure. But especially for softwood benchtops, I bet carriage bolts would be a better long term option. If it works for metal face vises, it should work for this.
That said, I am not a production woodworker. So I doubt I’ll ever put enough stress on this vise to test either of my theories.
This weekend, I’ll be building the leg vise. This one will be pinless, with a metal screw (also Lee Valley) and a 1 1/2″ linear bearing (and carbon steel shaft), both from McMaster-Carr.
When last we spoke, I was walking through my process for laying out and cutting angled, rectilinear mortises through a slab top to make low benches and other staked leg furniture without the need for large boring bits and round tenon cutters.
At the end, I promised to discuss my process for cutting the tenons, so here we go.
For most applications, a bare faced tenon (i.e., with one shoulder) is more than sufficient for these types of compound angled joints. The legs splay outward (sometimes as much as 10-15 degrees), so gravity is trying to spread the legs apart, especially where splay (outward angle) is greater than rake (front to back angle. This spreading puts most of the force is on a single shoulder oriented to the outside of the slab in the direction of the play. And tight fitting joint (wedged to fill any gaps lengthwise will more than carry any load in the rake direction). No need for a second shoulder.
I have one more mortise to cut.
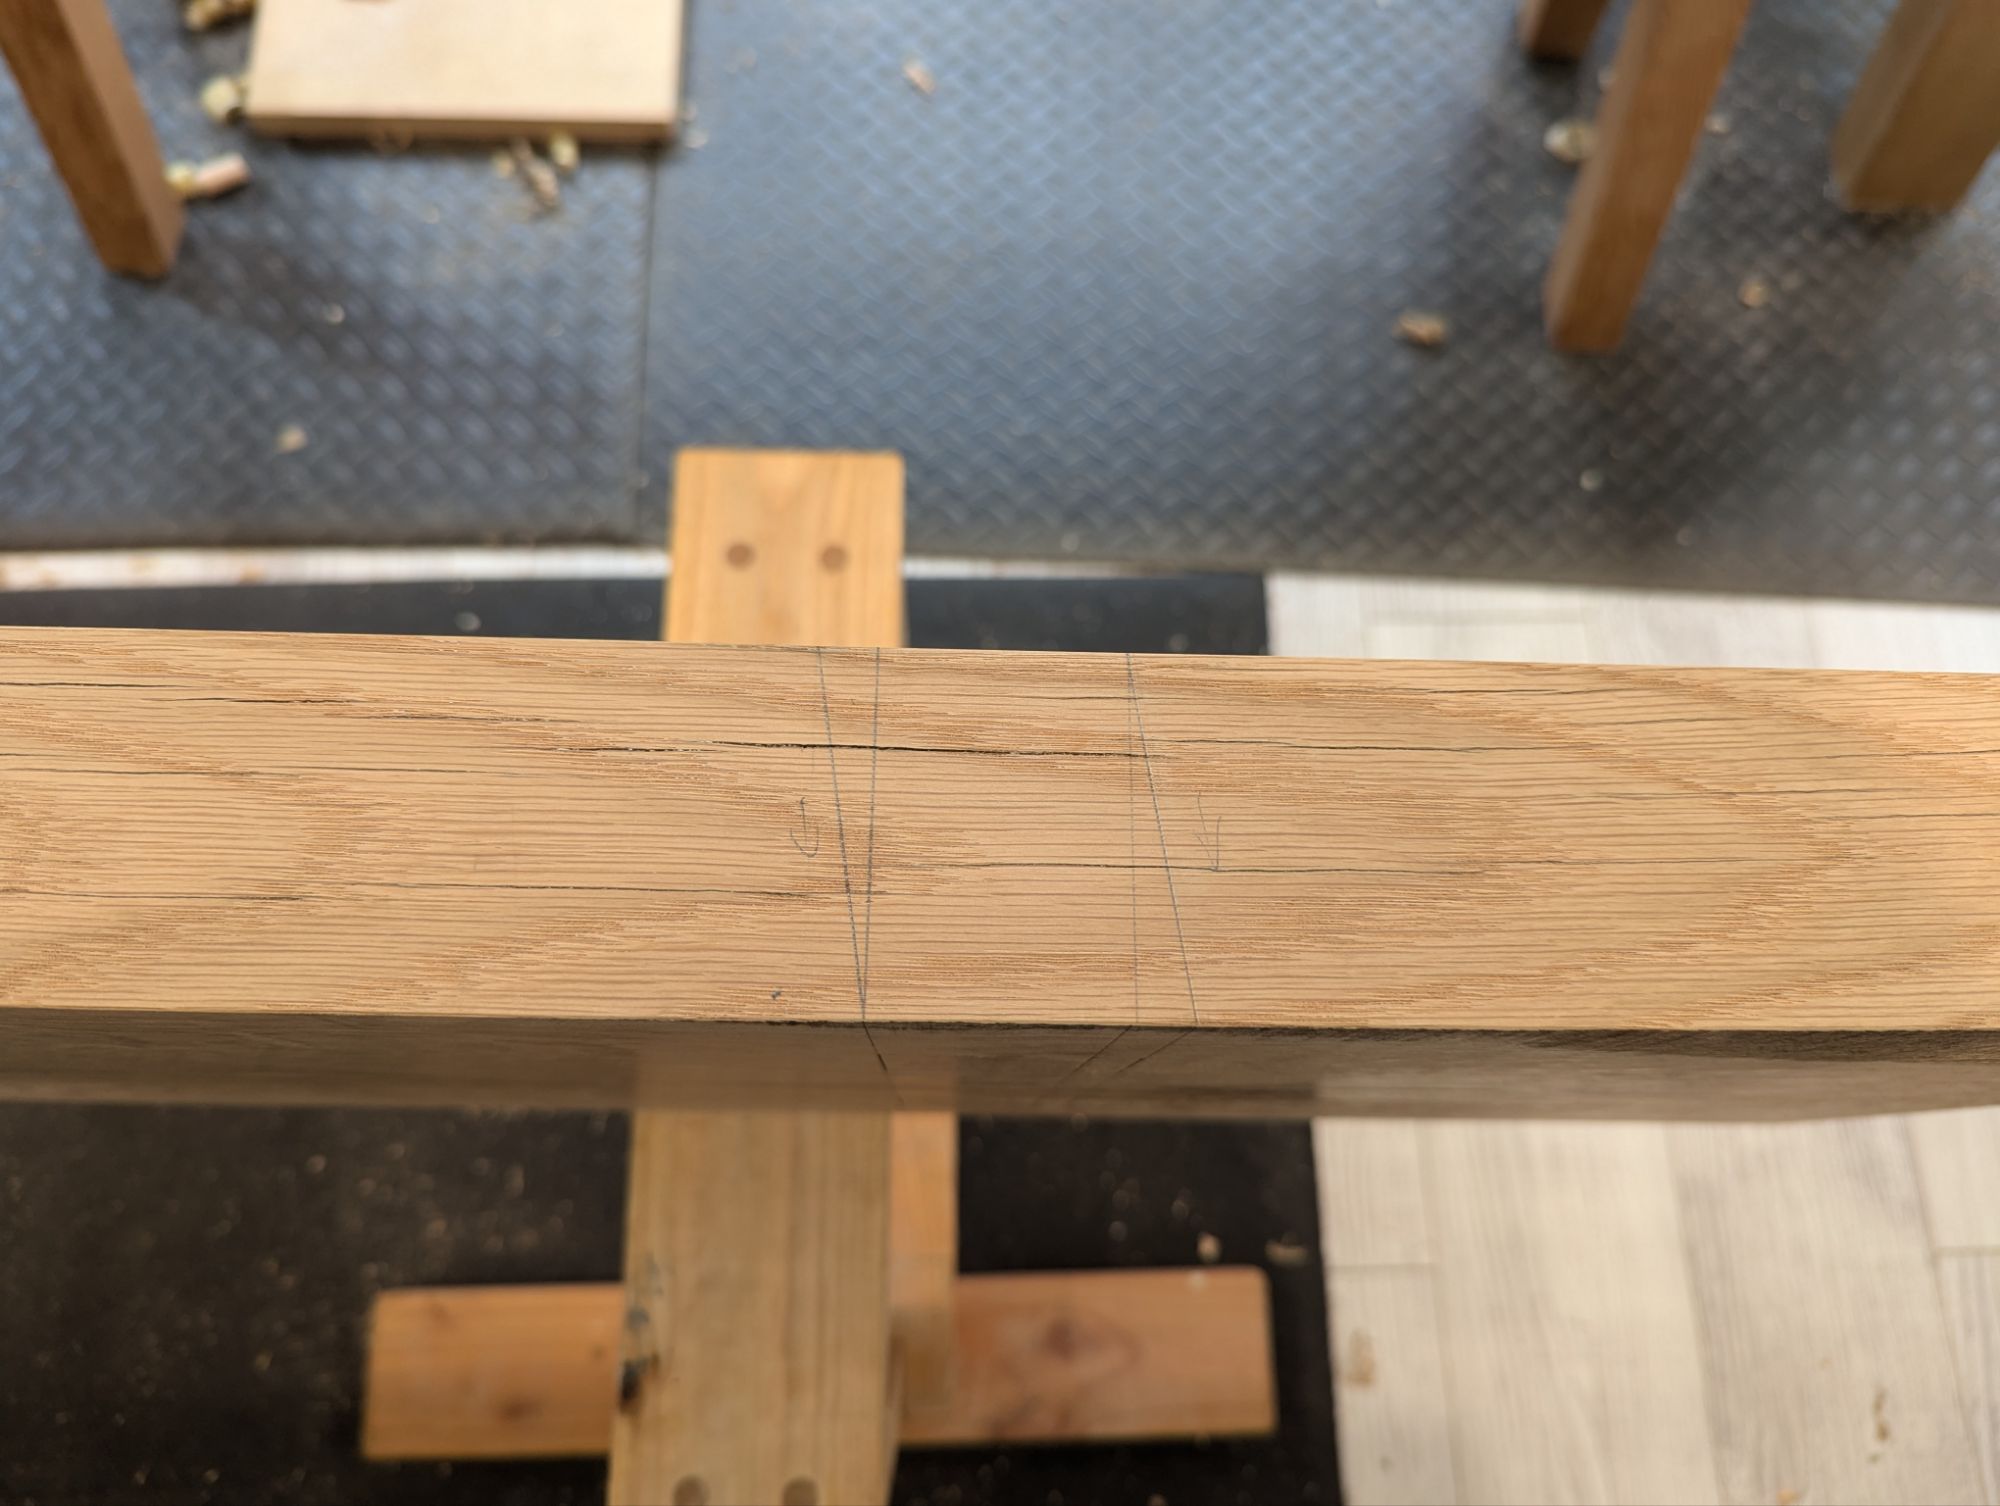
For compound angle legs, I start by measuring the overall length of the tenon I’ll need. I like to measure from the back inside corner to the front outside corner (ie, diagonally across the joint), then add 1/4 inch or so per 1 inch of tenon thickness. This leaves enough tenon proud of the top of the slab to trim it fully flush after glue up. When in doubt, add another 1/4 inch. Mark the tenon width like you would any other tenon.
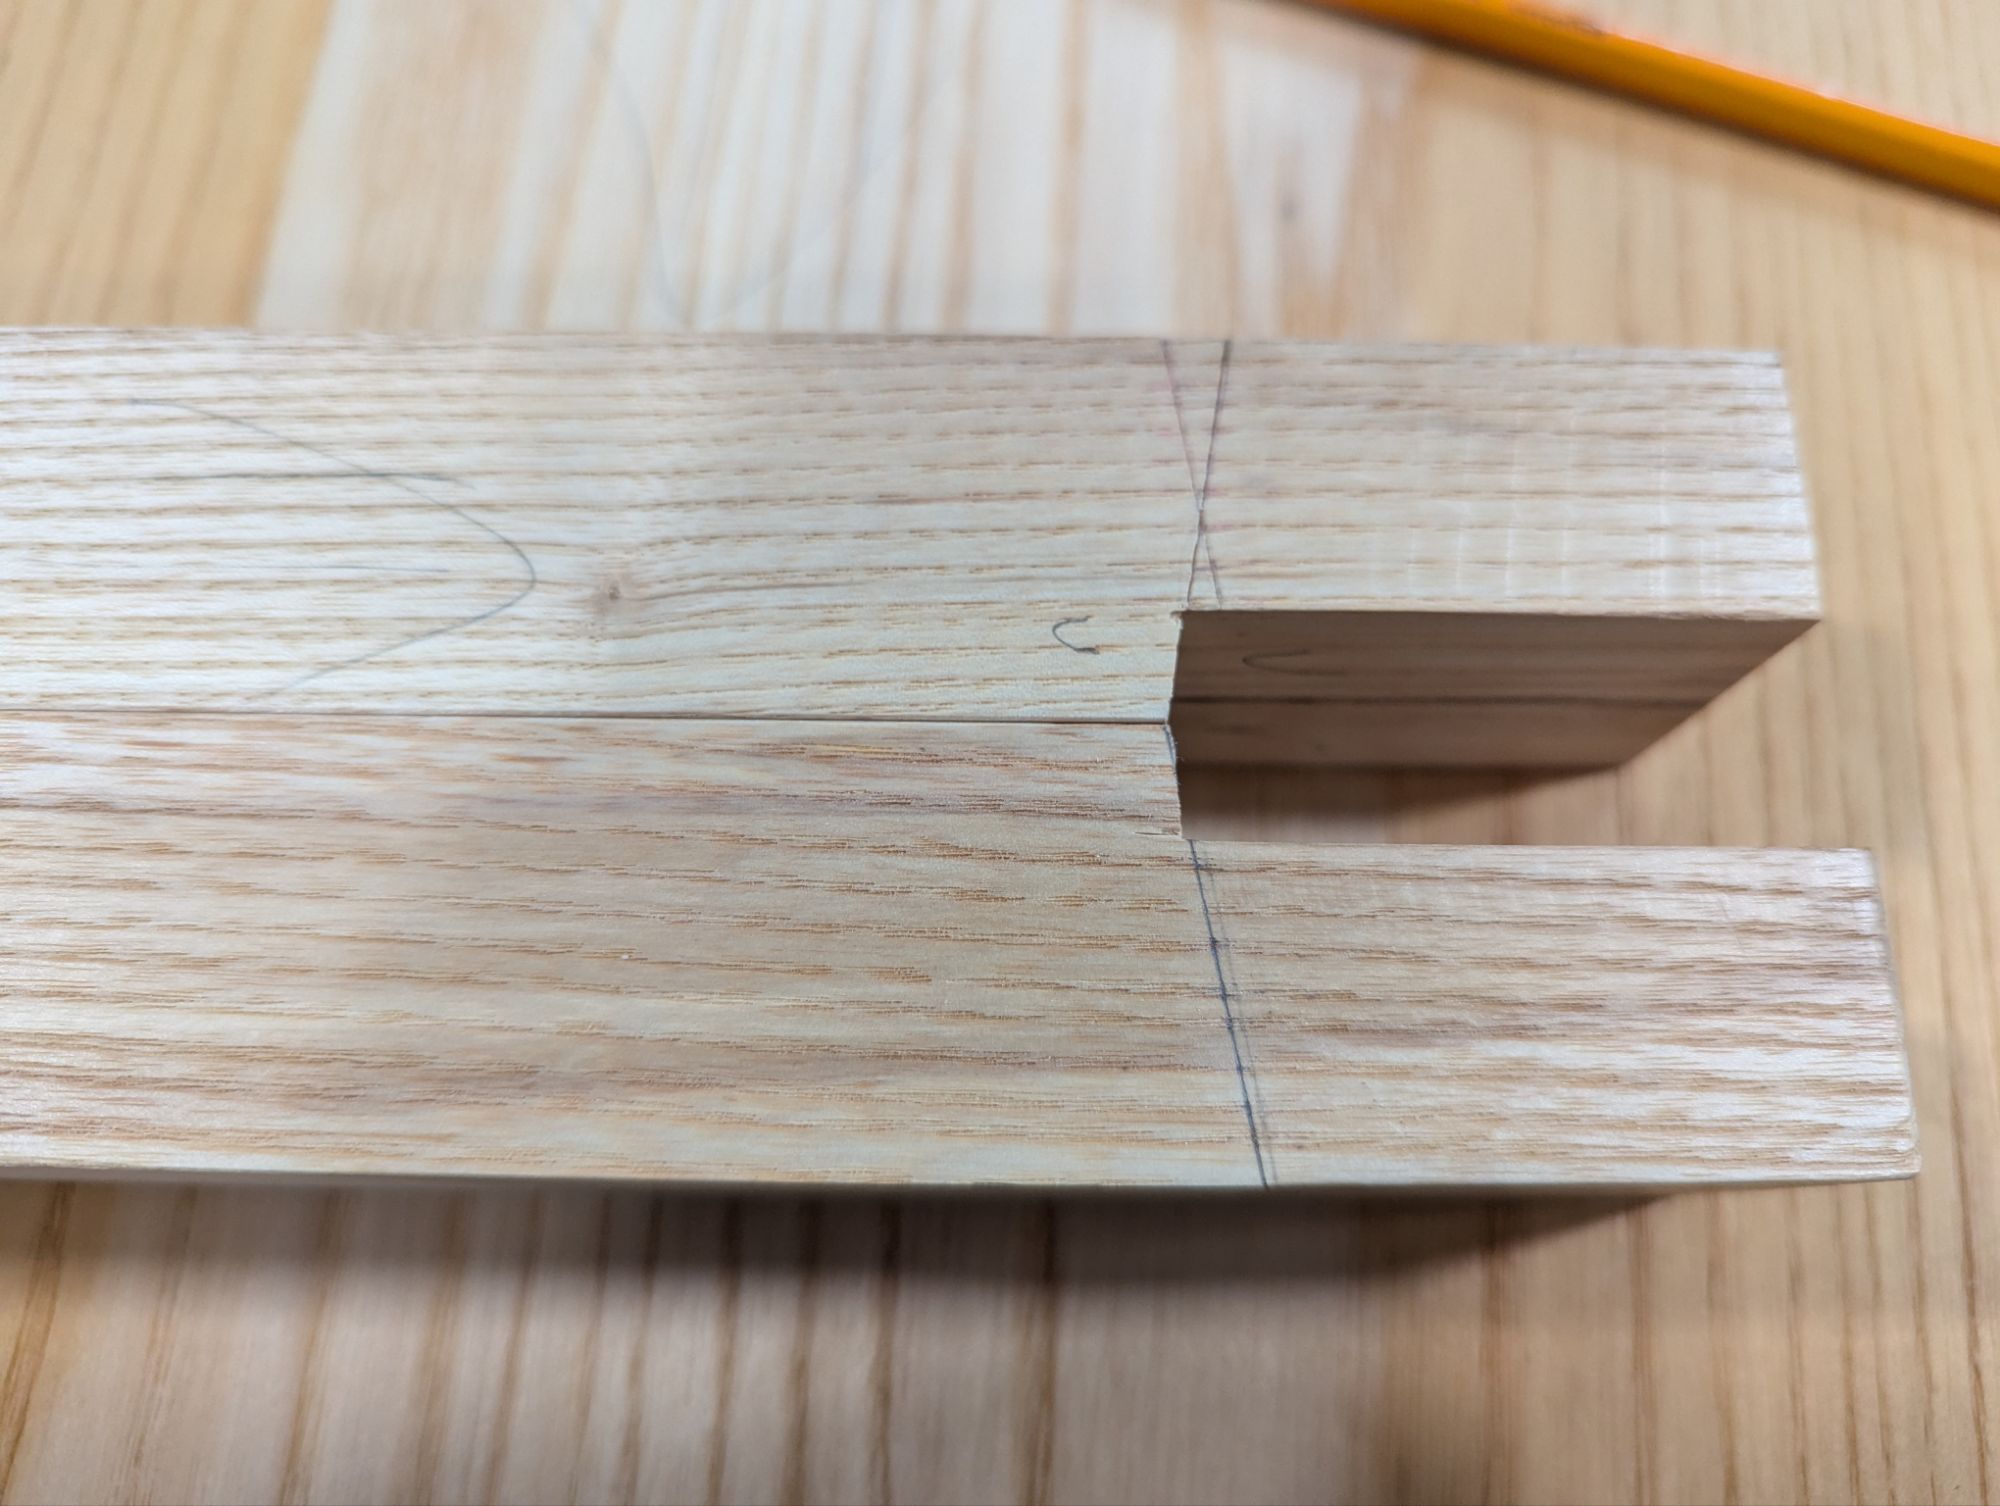
Now mark the splay angle on one side of the leg using a marking knife. This is really important: the splay angle should slope downward and away from the flat of the tenon. As shown below.
Ignore that second mark on the top. After initial marking, I noticed a defect to cut around and had to invert the board.
Now it’s time to mark the rake angle (if you have one). This is where having two bevel gauges really helps. The rake angle slopes downward from the side of the leg that faces the midpoint of the slab lengthwise (or, it slopes upward from the side of the leg that faces the end of the slab). If you’re having trouble visualizing it, it will be painfully clear the first time you mess it up and the corner of tenon shoulder digs into the underside of the slab top.
I’m only using a 1 degree angle on this, but I think you can still see it slope right to left here.
Then carry the splay angle line around the other side of the leg, being careful to orient your bevel gauge so the splay angles are parallel (even if one is lower on the leg than the other). Now it’s time to cut the mortise.
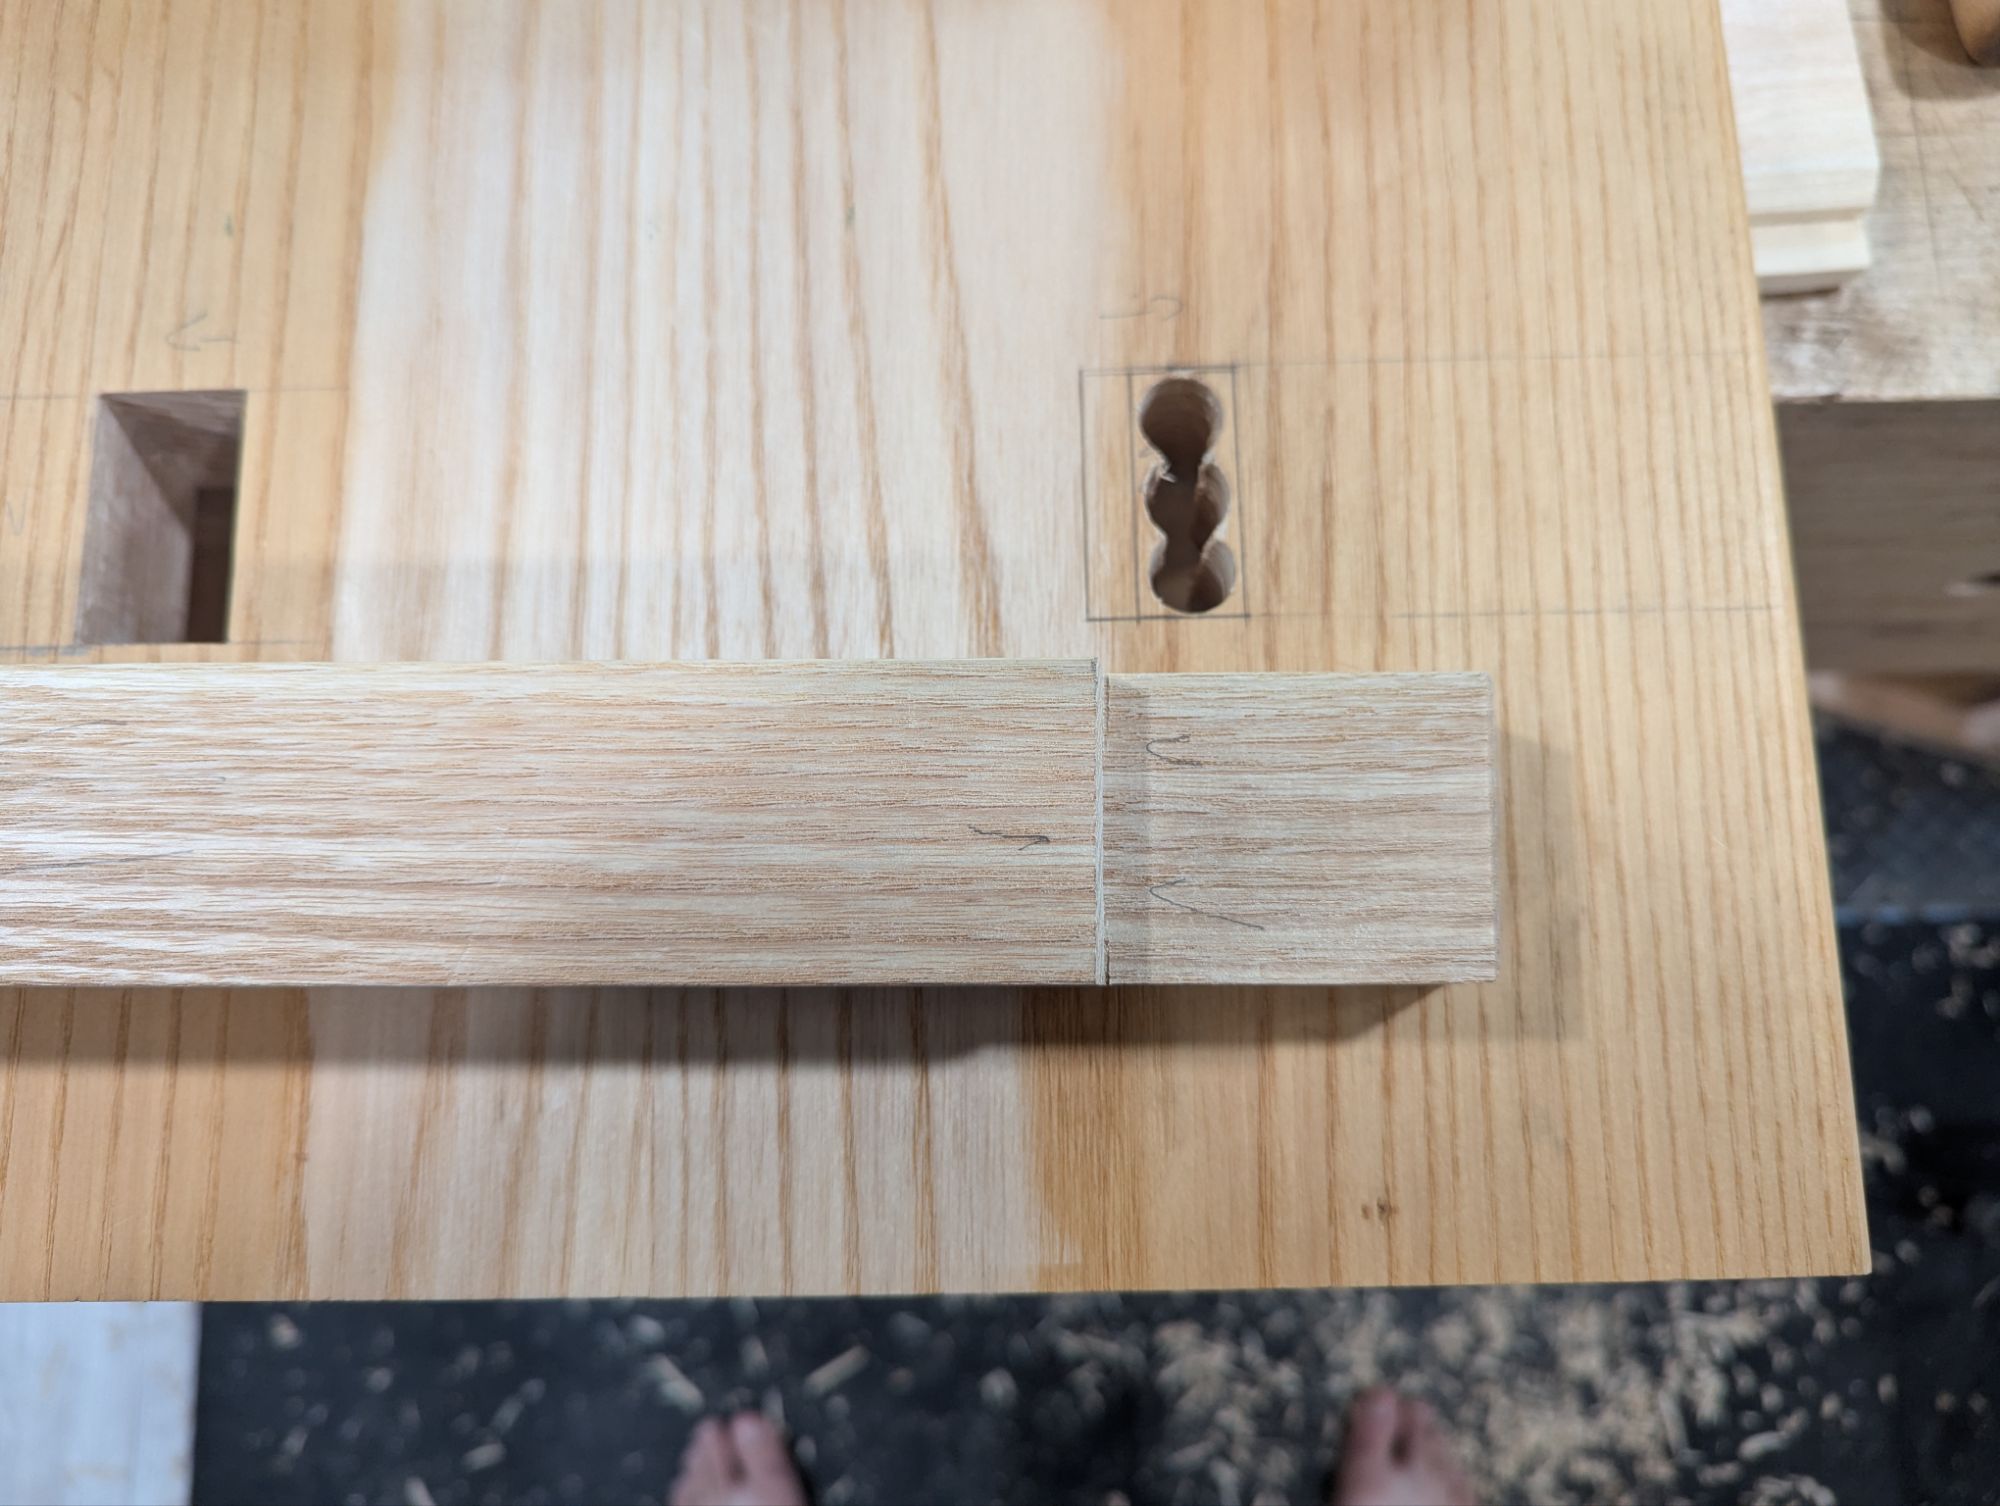
I like to start with the shoulder cut, using a small crosscut saw. If all goes well, it should come off the saw at the correct angle. If not, more on that later. Then rip down the tenon length (although you could split it too, like any other tenon). Because ever one of these mortises will be different, be sure to leave the line so you can pare down later.
Both of these were good right off the saw.
As someone who started woodworking in the golden age of Paul Sellers, I refine all of my tenons with a router plane. For these, though, be careful and take very small bites (i) to ensure the tenon isn’t too thin (there really isn’t a good way to wedge that) and (ii) to avoid tearing the grain (especially in open pore woods like ash and red oak). Any undulation in the tenon face will show when you flush the tenon to the slab top.
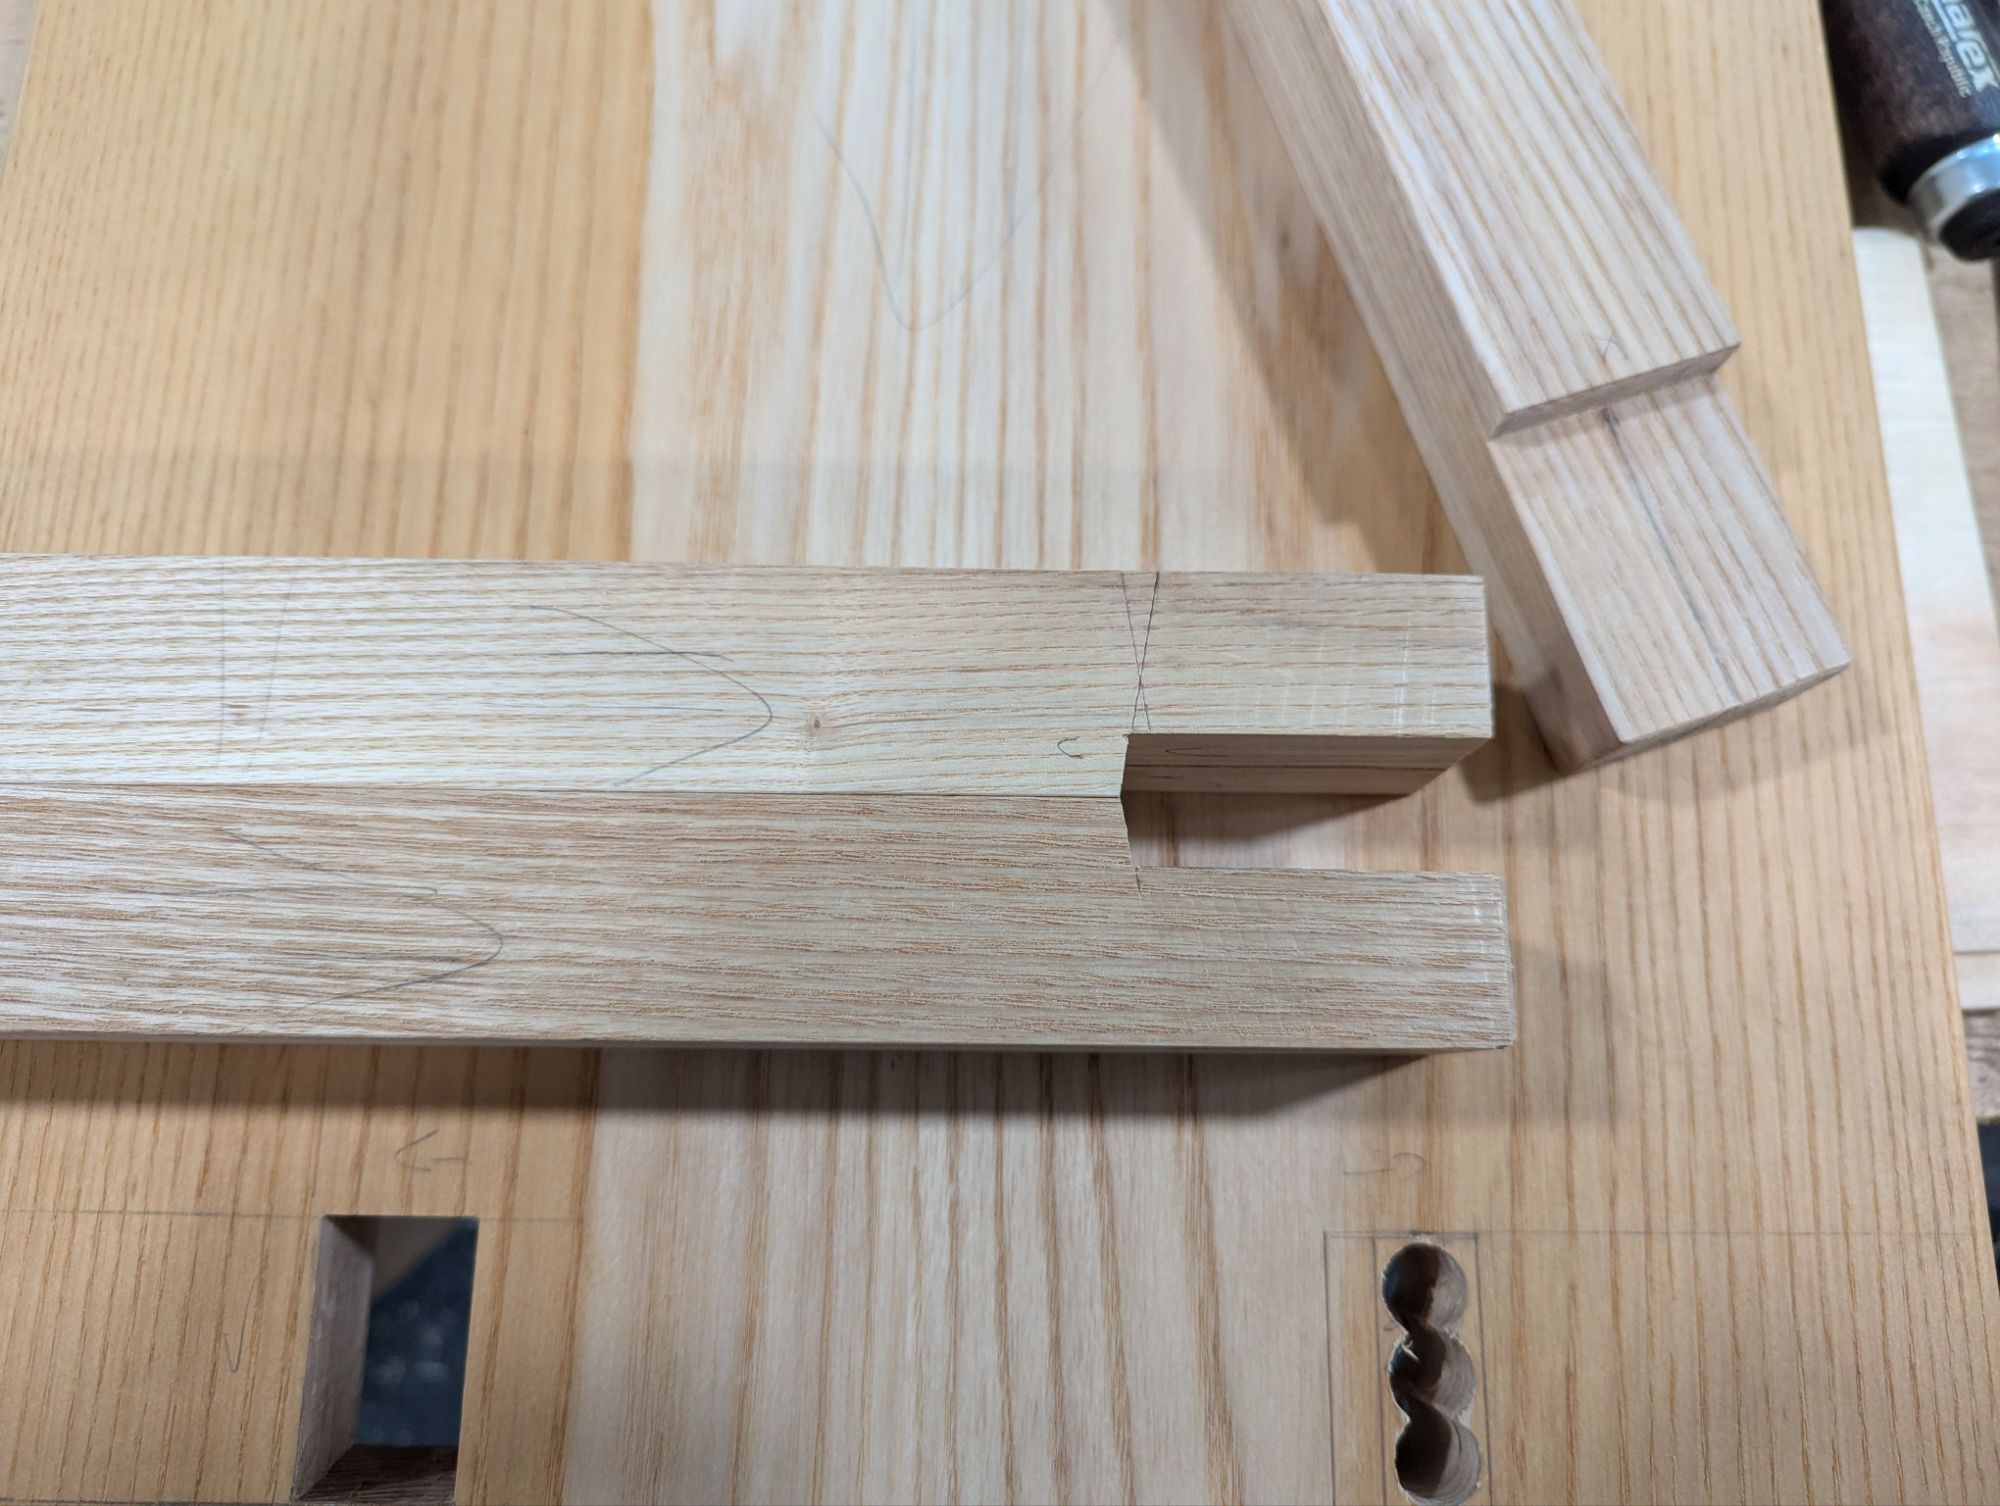
After a quick test fit, it’s likely one of your shoulders won’t seat perfectly. I sawed at the wrong angle on one of the legs and ended up with the gap below. Now, this would probably be fine (the other side of the tenon actually seated quite well and the rake angle was spot on. But for a low workbench or a footstool that will see heavy loads, or if you need to fix a wonky rake angle, here is my process.
This is actually going to be a coffee table, so I could have left it alone.
If you have a good flush cut saw (most likely a low set Japanese pull saw or dedicated flush trim saw), you can very gently and carefully saw away flush with the slab top and you’ll be done. If, like me, your flush trim saw plate is thinner than the gap you’re trying to overcome, it may just be worth remarking the splay and rake angles and paring down with a chisel. As long as you left your leg stock overlong, either approach will work. Even if you screw it up a few times.
Now repeat three more times (or as many times as legs you have). You’ll quickly notice that the diagonal legs are identical (other than tenon thickness, probably, since that depends on the mortise). So if you screw up a leg by cutting the angled shoulder wrong, don’t necessarily throw it out or recut it. It will be useful for the opposite set of diagonal legs you haven’t done yet.
I’ve got one mortise and one leg left to go on this new project (an entirely too beefy coffee table made of 8/4 white ash that will also be a large stepstool in a pinch), and will post pictures when it’s done.
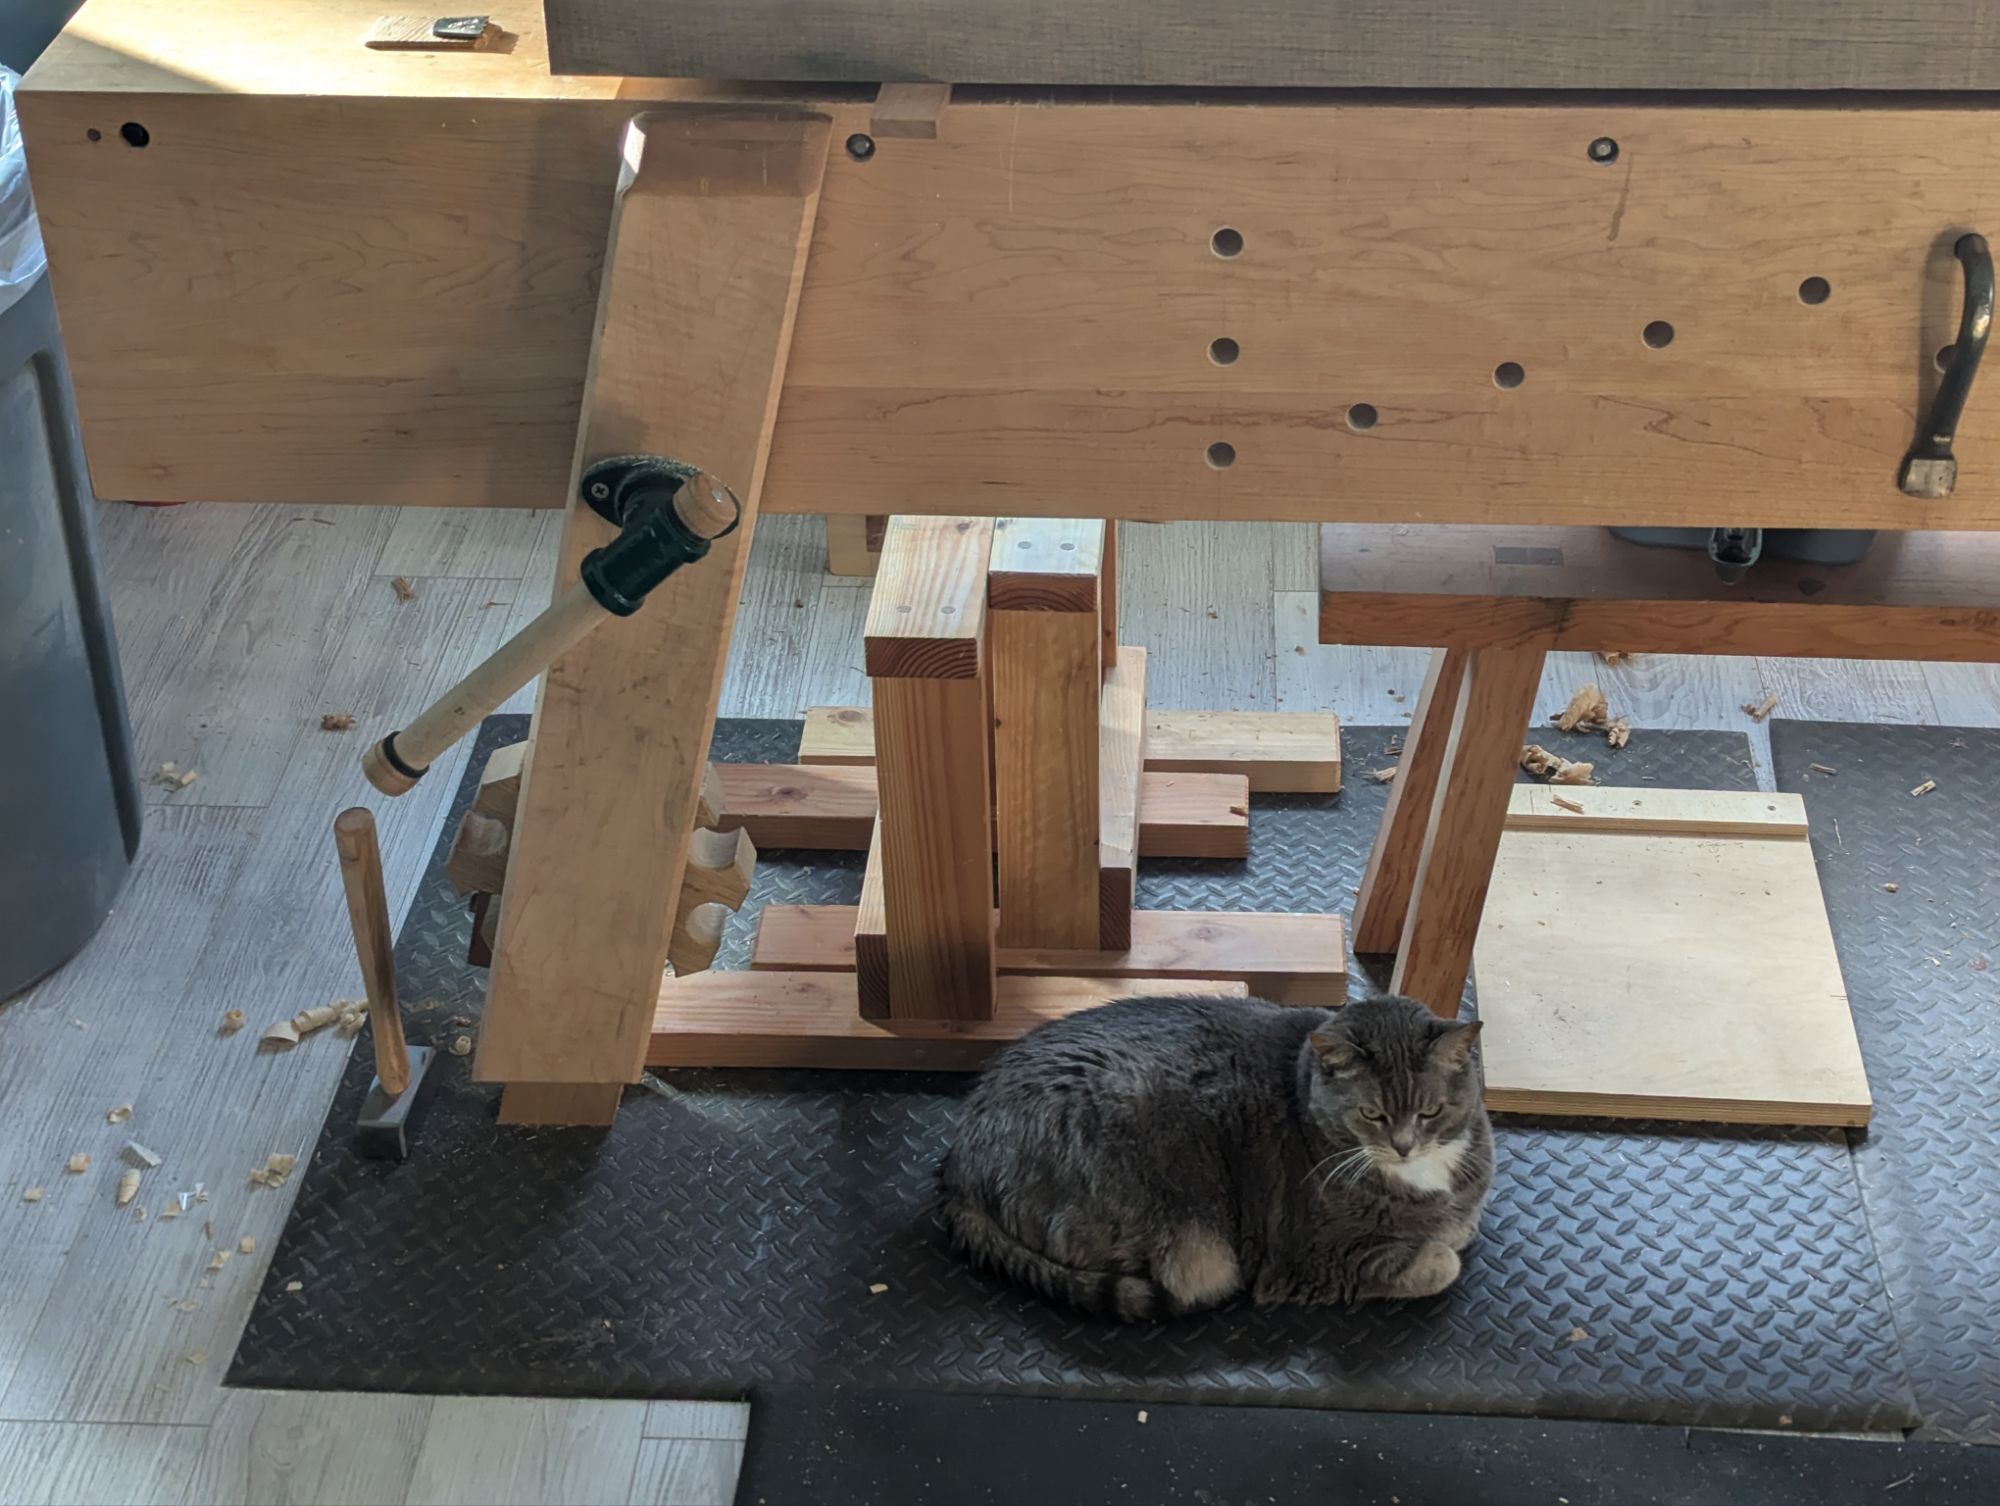
Hello, everyone! It’s July 2024 and things are weird, generally. The Mets, despite being a pretty shaky team, are in the playoff hunt. The world is on literal and figurative fire. And I have a new workshop.
Complete with shop cat!
More on that soon.
But today I’d like to revisit something I’ve talked about previously: rectangular tenons on low benches. It’s no secret that I’m a fan of the traditional Chinese workbench. And in the past I’ve showed off several versions of a sawbench or sitting bench that use angled, rectangular tenons. But today, I’d like to do a deeper dive on how I lay out the angled mortises. Because if you lay them out correctly, it’s tough (but not impossible) to screw things up.
By definition, for any angled mortise, the mortise hole on the top of the slab is in a different position than the mortise hole on the bottom of the slab. Unless you want a super tippy bench, the top of the mortise hole should closer to the center line than the bottom of the mortise hole. And if it’s a compound angle, the mortise hole on the top of the slab will be closer to the midpoint of the slab than the bottom of the mortise hold (which will be closer to the end of the slab). This means that since the mortise (and the corresponding tenon) is a three dimensional object, there will be a portion of the entire mortise is completely vertical. Making angled tenons is, essentially, just strategically relieving the wood around that vertical mortise.
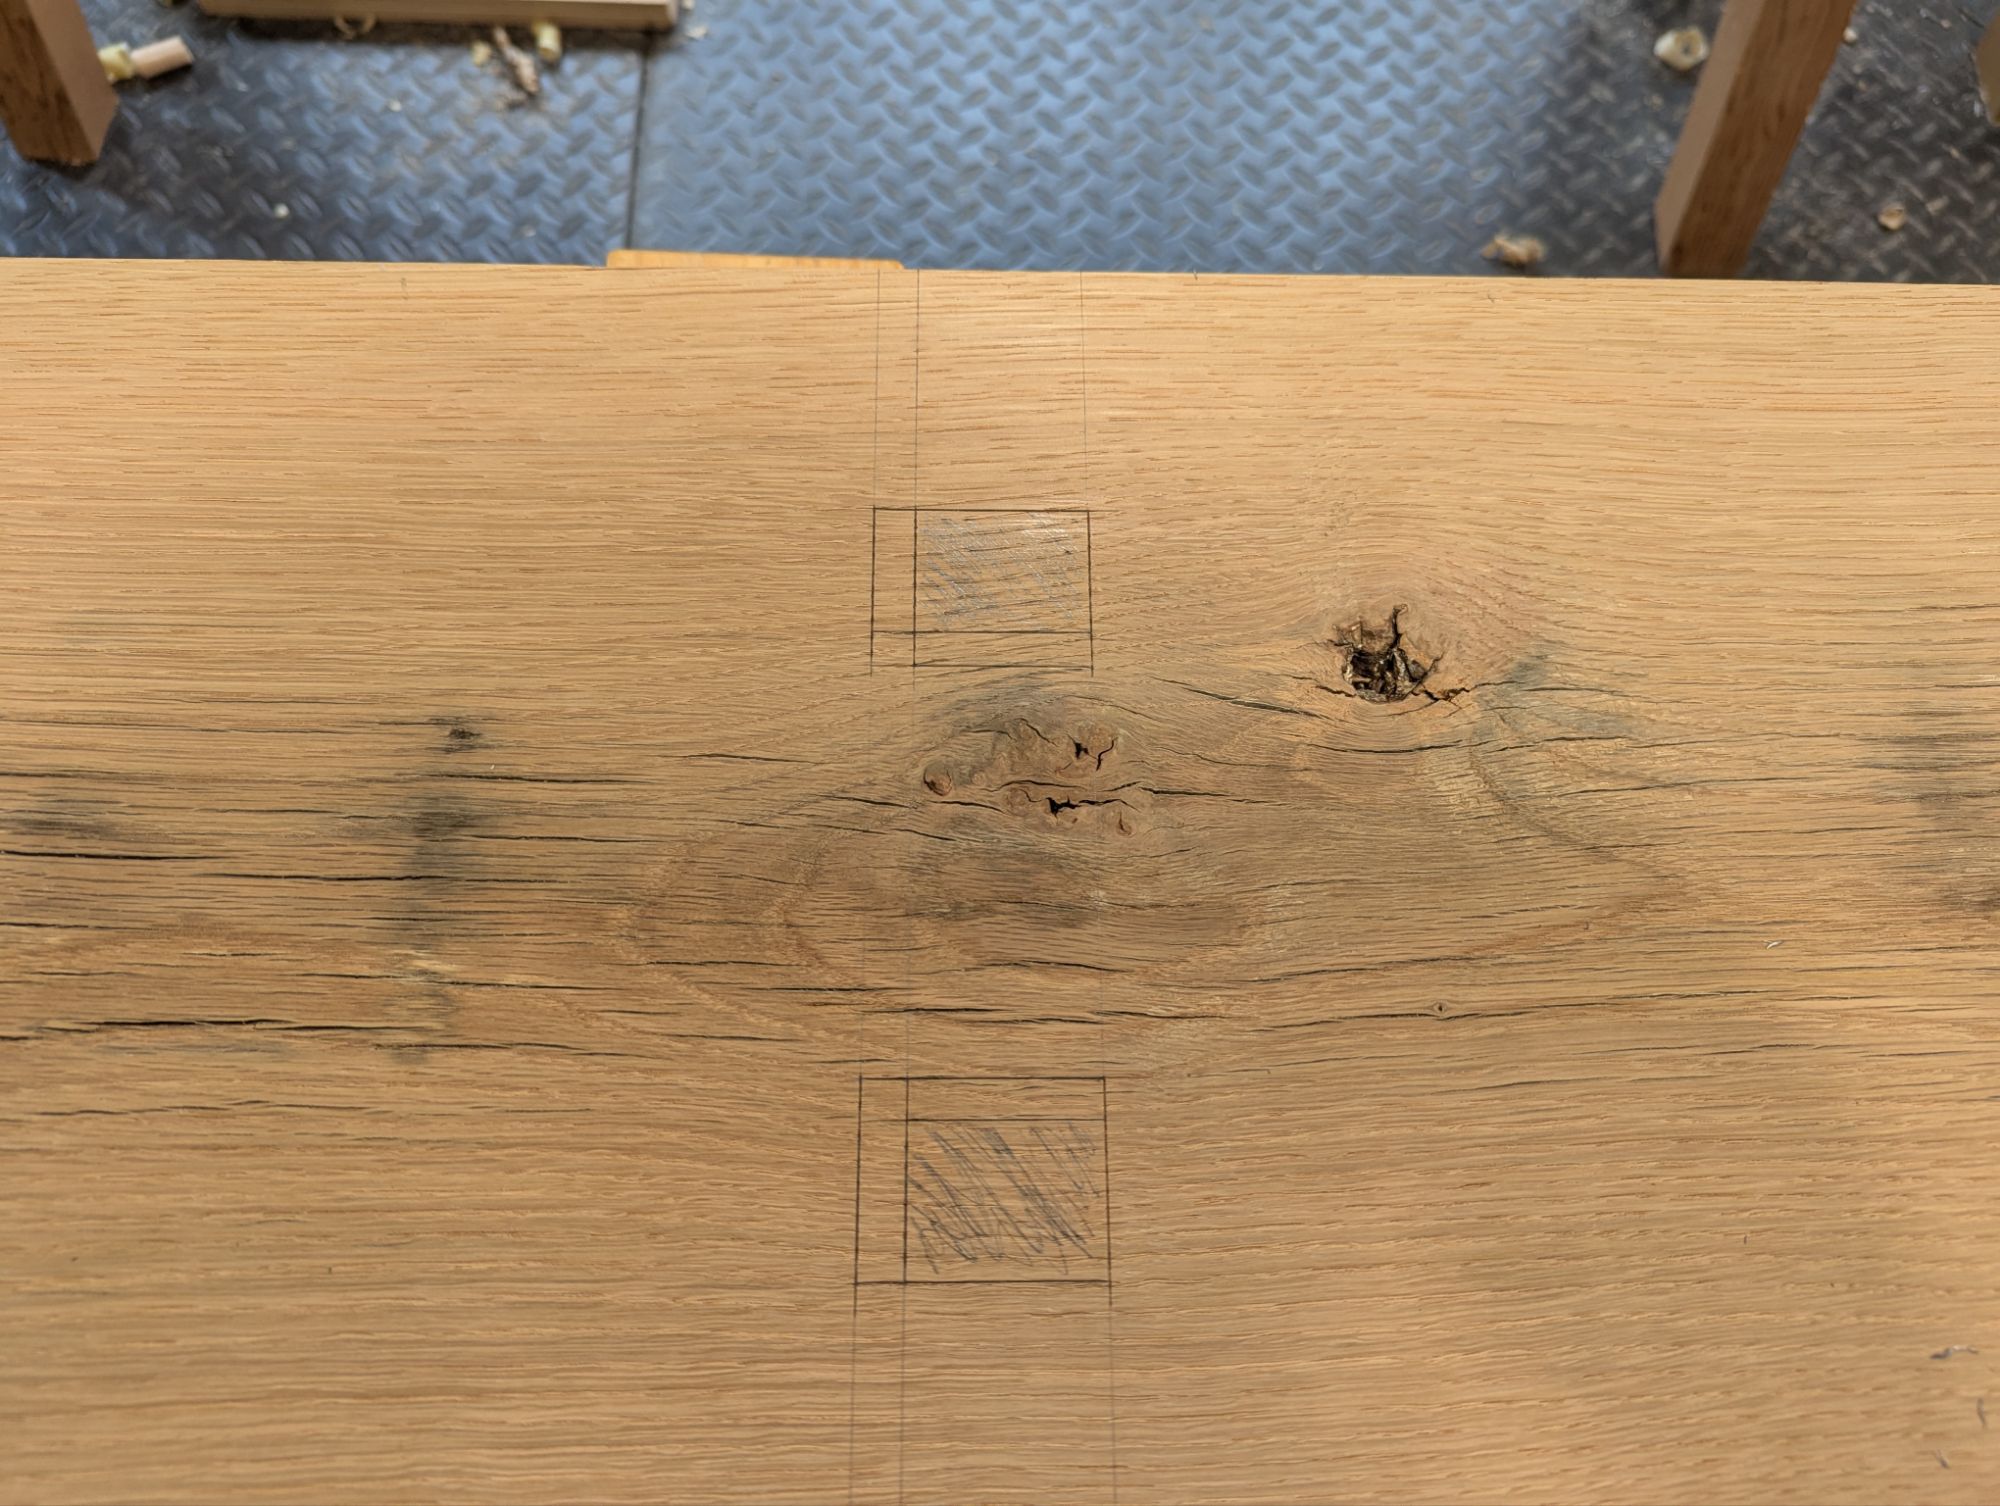
Take a look at the below image, which shows the layout for the mortise on the top of the slab. The greyed out area is the entirely vertical part of the mortise. The unshaded boxes between the other knife lines are the extants of the angled mortise. You’ll see that on the top of the slab, the mortise angles inward. In this case, because of the compound angle, it’s both inward toward the center line and inward toward the mid point of the slab.
The end of the slab is to the right.
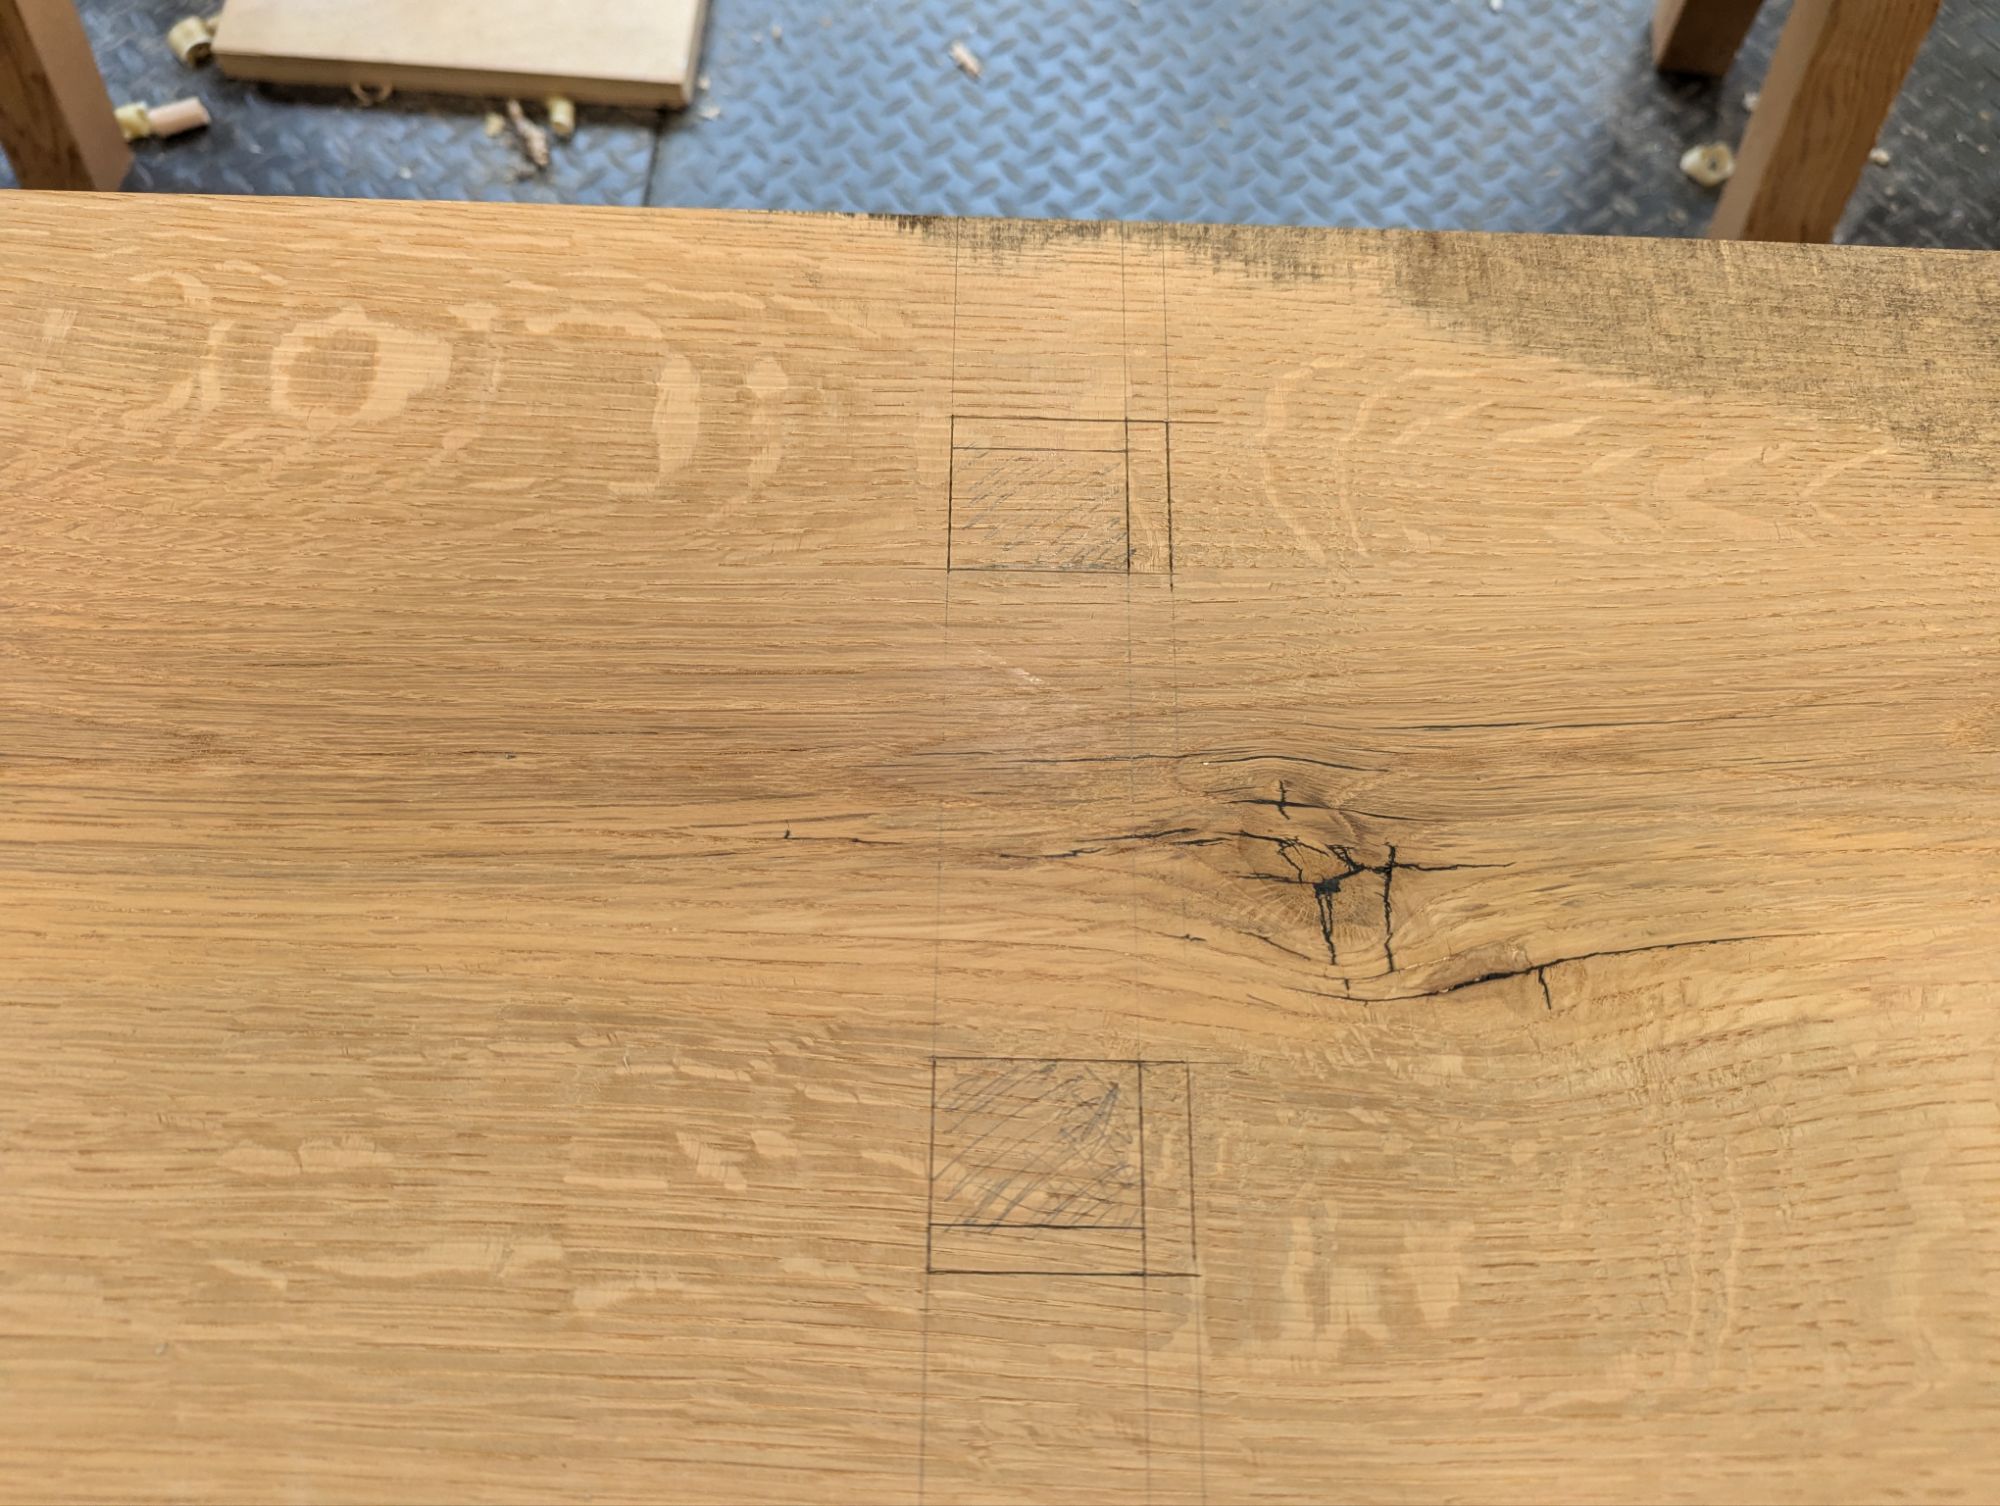
Compare that to the underside of the slab (shown below). The vertical part of the mortise is greyed out again. Because the legs are angled both forward and out, the mortise angles outward (both outward from the center line of the slab [and toward the edges of the slab] and outward from the mid point of the slab [toward the end]).
End of the slab also to the right.
One more note: when laying out, I find it helps to carry your lines down the sides of the slab. This also can show the vertical parts of the mortise more clearly and make sure that is accurately carried around the edge.
I also use a trigonometry calculator to figure where to start the mortise on the top of the slab so the legs don’t stick out too much beyond the plan of the slab itself. For most slabs in the 10-12″ range, the mortise on the top side of the slab should be centered around 2.5″ away from the center line.
This just lays out the forward rake.
So what is my preferred method for cutting these angled mortises?
First, I would bore out the vertical part of the mortise with a brace and bit and then pare roughly to the lines. Second, set up a bevel gauge and chop down the angles until I get pretty close. Finally, use a block of wood as a paring guide to refine the mortise until the angle is perfect. Then cut the tenon to fit each mortise, as there will likely be some slight variance in mortise width (and the wedge will take care of any variance in mortise length).
What are some other viable techniques? If you go the chisel only route (i.e., no boring it out first, which is the traditional method), I would still recommend chopping the vertical mortise first. Then you can pare it down to the lines as described above, with or without the guide block. I do not recommend freehanding the angled mortise right off the chisel. At least not for furniture grade pieces. For a workbench, it’s probably fine.
Once you have the vertical mortise, you could use a floats, rasps, or files to shape in the angles. These tools are also helpful to refine the angles and make everything as uniform as possible.
The nice thing about rectangular mortises is that you really don’t need any of the above special tools. You could do the entire thing with a chisel and mallet no problem (and I’ve heard that the lack of boring tools in China is how the form came to be). Although, although a bevel gauge and a rasp or coarse file will definitely help.
Next time, we’ll talk about cutting the tenons. Including how to cope the shoulder so it mates perfectly with the underside of the bench.
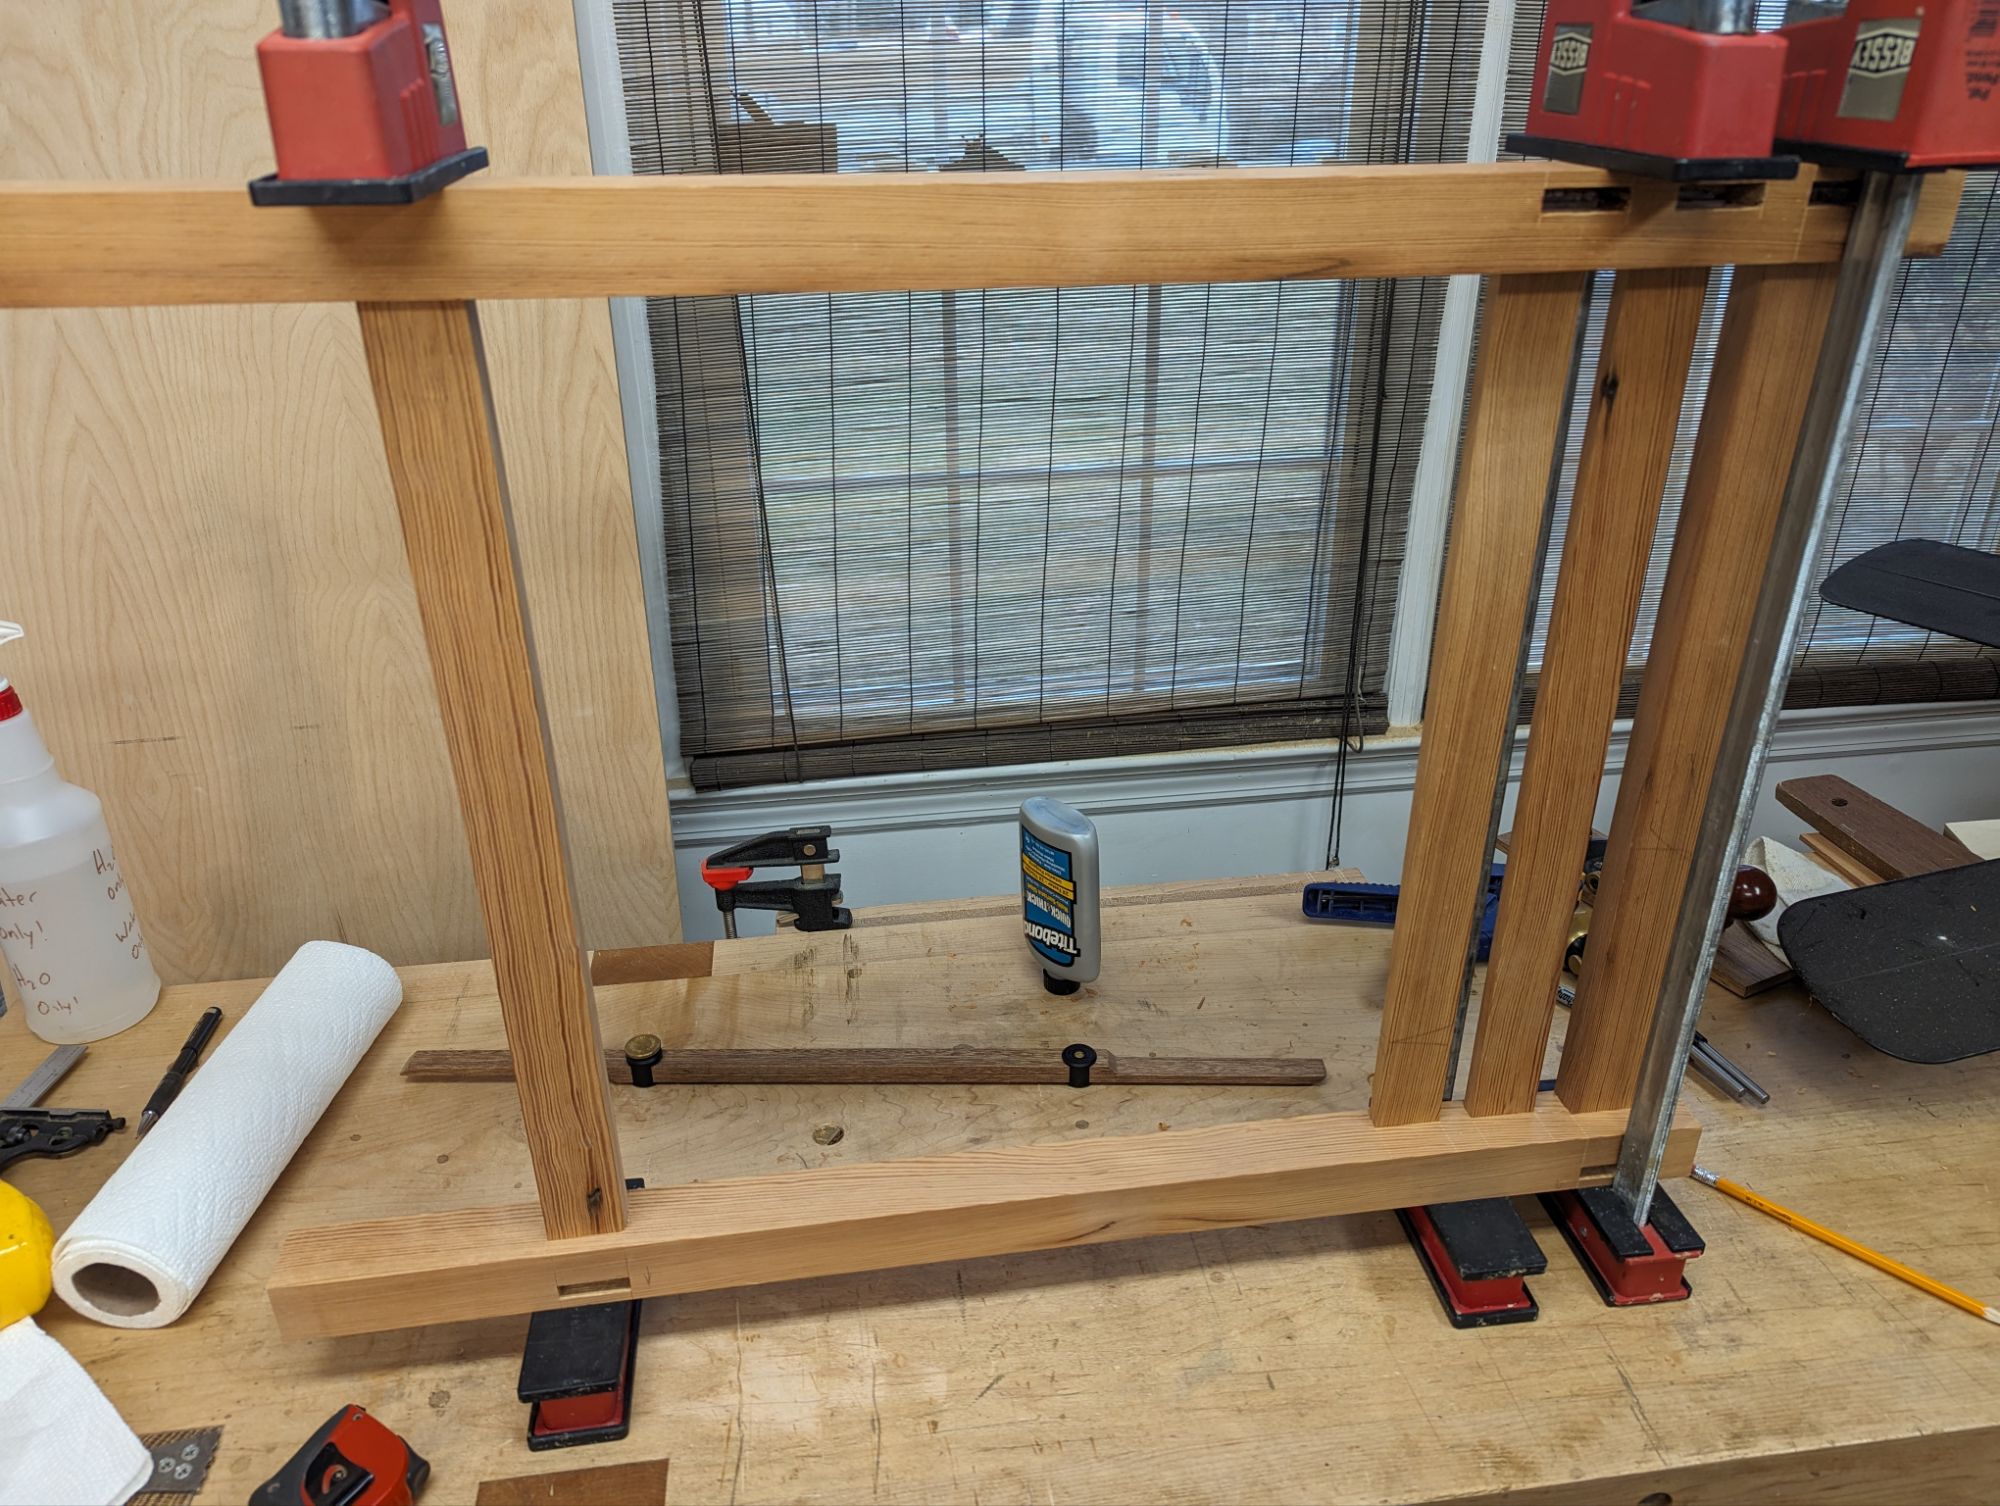
I’ve glued up the frame for the bathroom vanity, and I think it came out great. The entire frame came out of a single chunk of reclaimed Southern Yellow Pine barn beam, so the color match is pretty good. I’m quite pleased. An exterior oil finish will darken the wood a bit, but won’t detract from the character of the reclaimed wood. And die forged nails will reinforce each of the stretchers and slats (mostly because it will look nice).
Ignore the white pine spacer in the bottom front; that was just for alignment during glue up.
The table top will also be SYP, but from a different board. I just didn’t have enough after cutting around the worst nails and checks and defects to get the wood for the frame, even taking into account the massive cutout for the vessel sink. The color match isn’t perfect, but I’m arranging the boards to make it work.
The small remaining chunk of the beam that went into the frame would have been enough for a lower shelf (slatted and nailed onto the lower stretchers). But upon further reflection, I think having the shelf boards match the tabletop boards will balance things aesthetically.
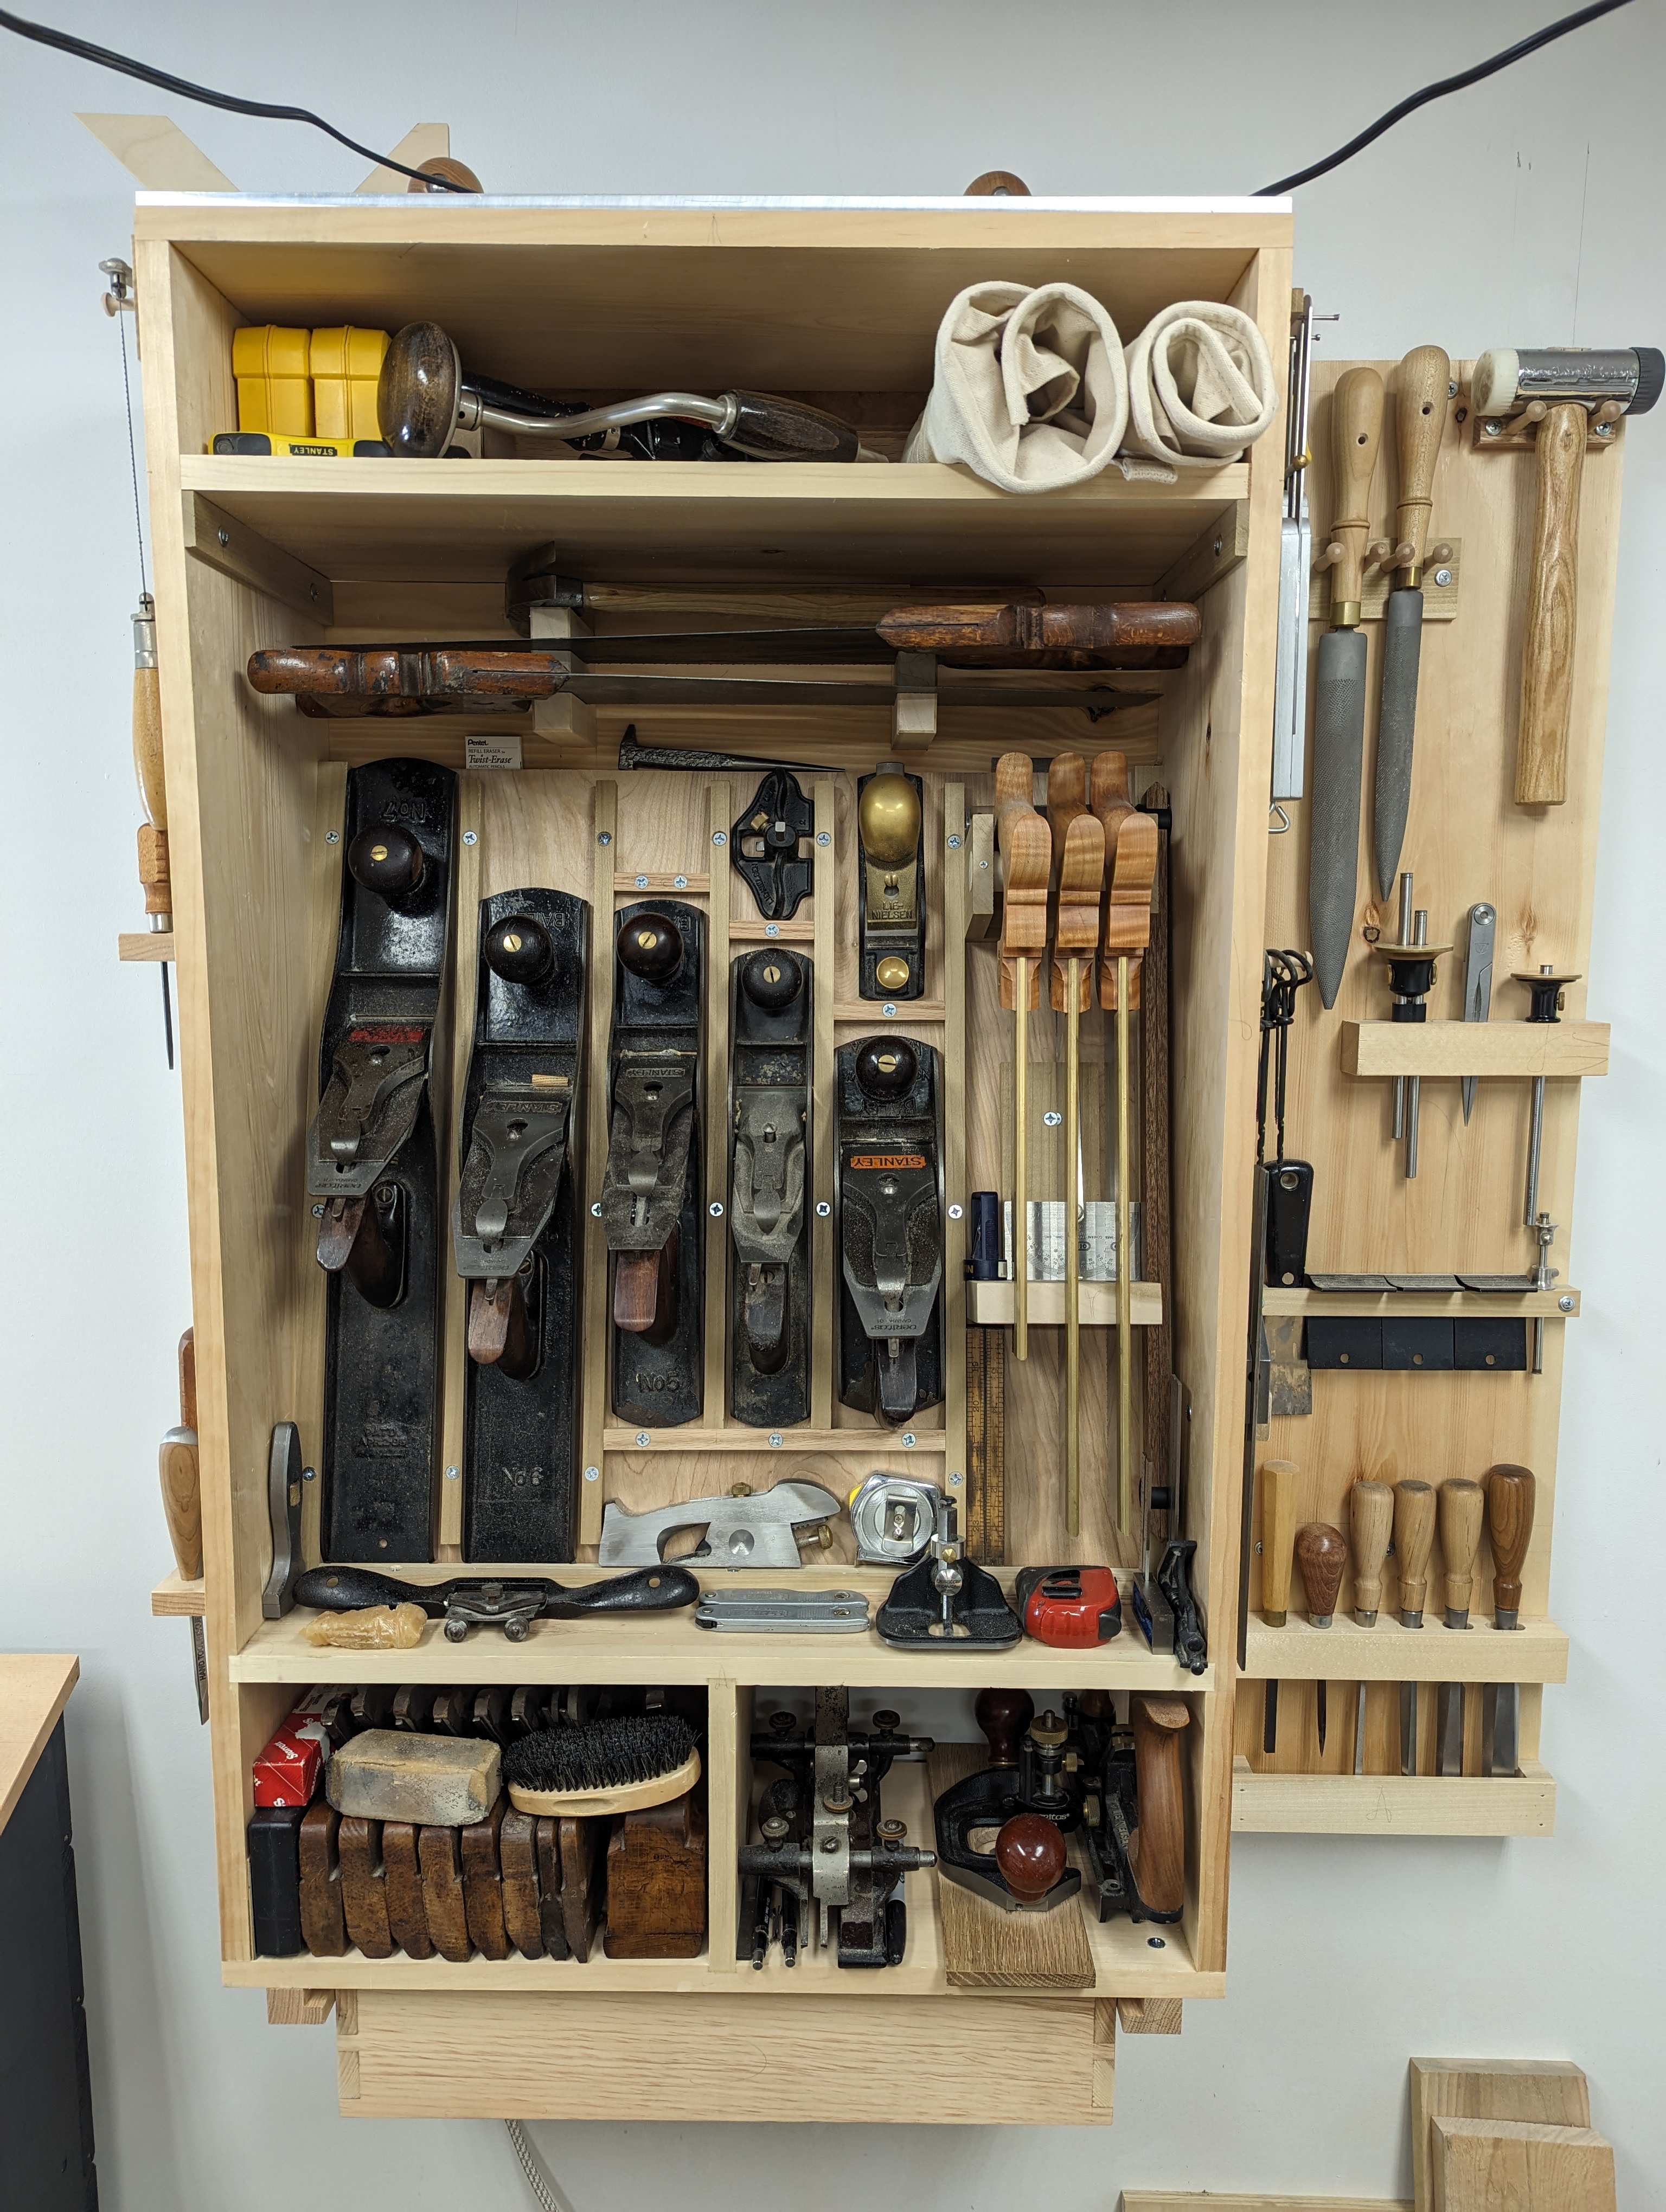
It’s been tough to find enjoyable workshop time of late. There is some work being done on the house and as cramped as my 12′ x 13′ (3.5m x 4m) workshop is at the best of times, it’s even worse when more than half of it is filled with furniture from other rooms. I’ve got about 5 feet of workbench (at the vise end) and 2 feet of space along the front to move around. I can reach all the tools in my wall cabinet, but it takes a bit of leaning on my tiptoes to get the coping saw. Even so, I’ve a project I need to complete, so I push onward.
Not sure if I’ve ever posted this image of the finished wall cabinet.
The vanity in the downstairs bathroom has always been subpar. It’s internet furniture pressboard bullshit that I bought when I first got the house just needed to make a gross washroom usable on a DIY basis. Now that the whole bathroom is being updated by professionals, I figured I’d tackle making a new vanity that is up to my own specs.
The last few chunks of reclaimed old growth Southern Yellow Pine barn beam would be just enough for the frame and a top. My little bandsaw was instrumental in this; I don’t think hand ripping would have left enough stock. I have officially hit “can’t live without it” status on that tool, for what it’s worth.
In terms of style, I’ve always been fascinated with the “slatted” style of furniture. I think the first time I saw it was a Restoration Hardware media cabinet. But it seems a dreadful waste of material because the slats tend to be decorative (and not structural). But what if they were structural? They’d essentially make a wide board out of a few small sticks (id est, offcuts from the bandsaw): maximum strength with minimum material.
While also hiding the plumbing below.
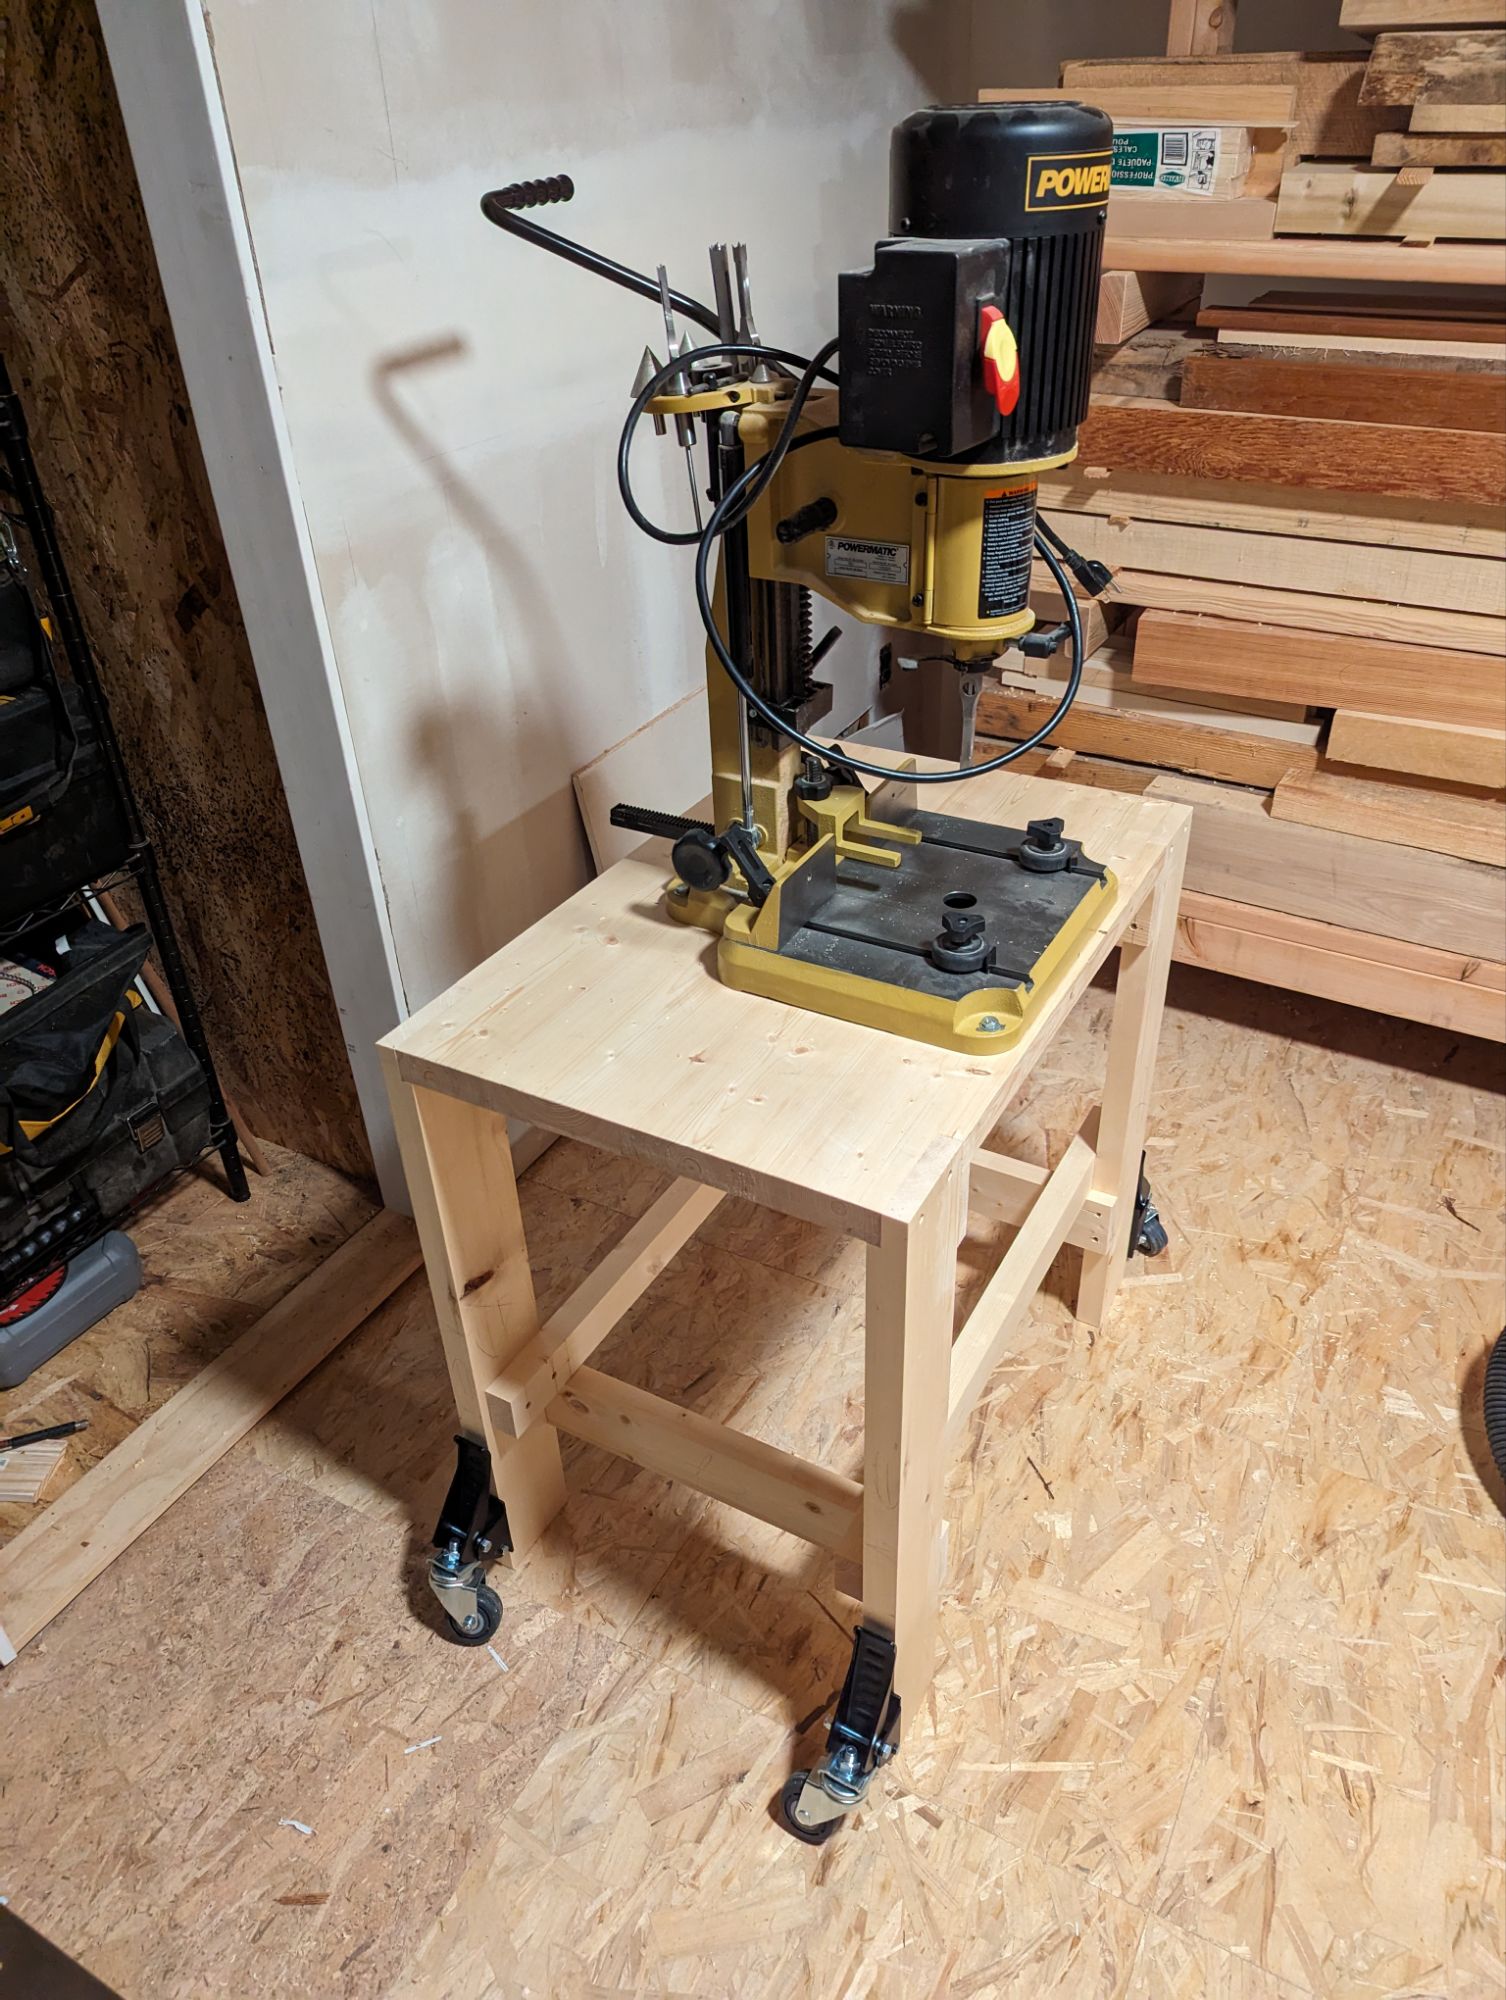
As an aside (as if my entire collected works weren’t just one massive, frenetic soliloquy), this is the kind of project where a hollow chisel mortiser really expedites things. I couldn’t centralize the mortises for the top the rails or the slats and have mortises of any great substance, so the outer walls of the mortises ended up less than 1/4″ (6mm). So not something where brace and bit boring or chisel chopping is without significant risk of blowing out the whole thing. And when you don’t have material to spare (and can’t afford to scrap the work), a hollow chisel mortiser really shines.
The second of the power tool triumvirate for a small space, hand tool woodworker.
It occurs to me that, even with multiple slats, a piece like this still needs substantial, double shouldered tenons for the top rails and the lower rail. This will increase the bearing surface of the main joints in the structure and should encourage squareness in the overall assembly and a strong frame. The slats themselves can be single shouldered, I think (again, just to use all of the available material). On the lower rails, a tight fit becomes a necessary. So everything gets fettled with a router plane.
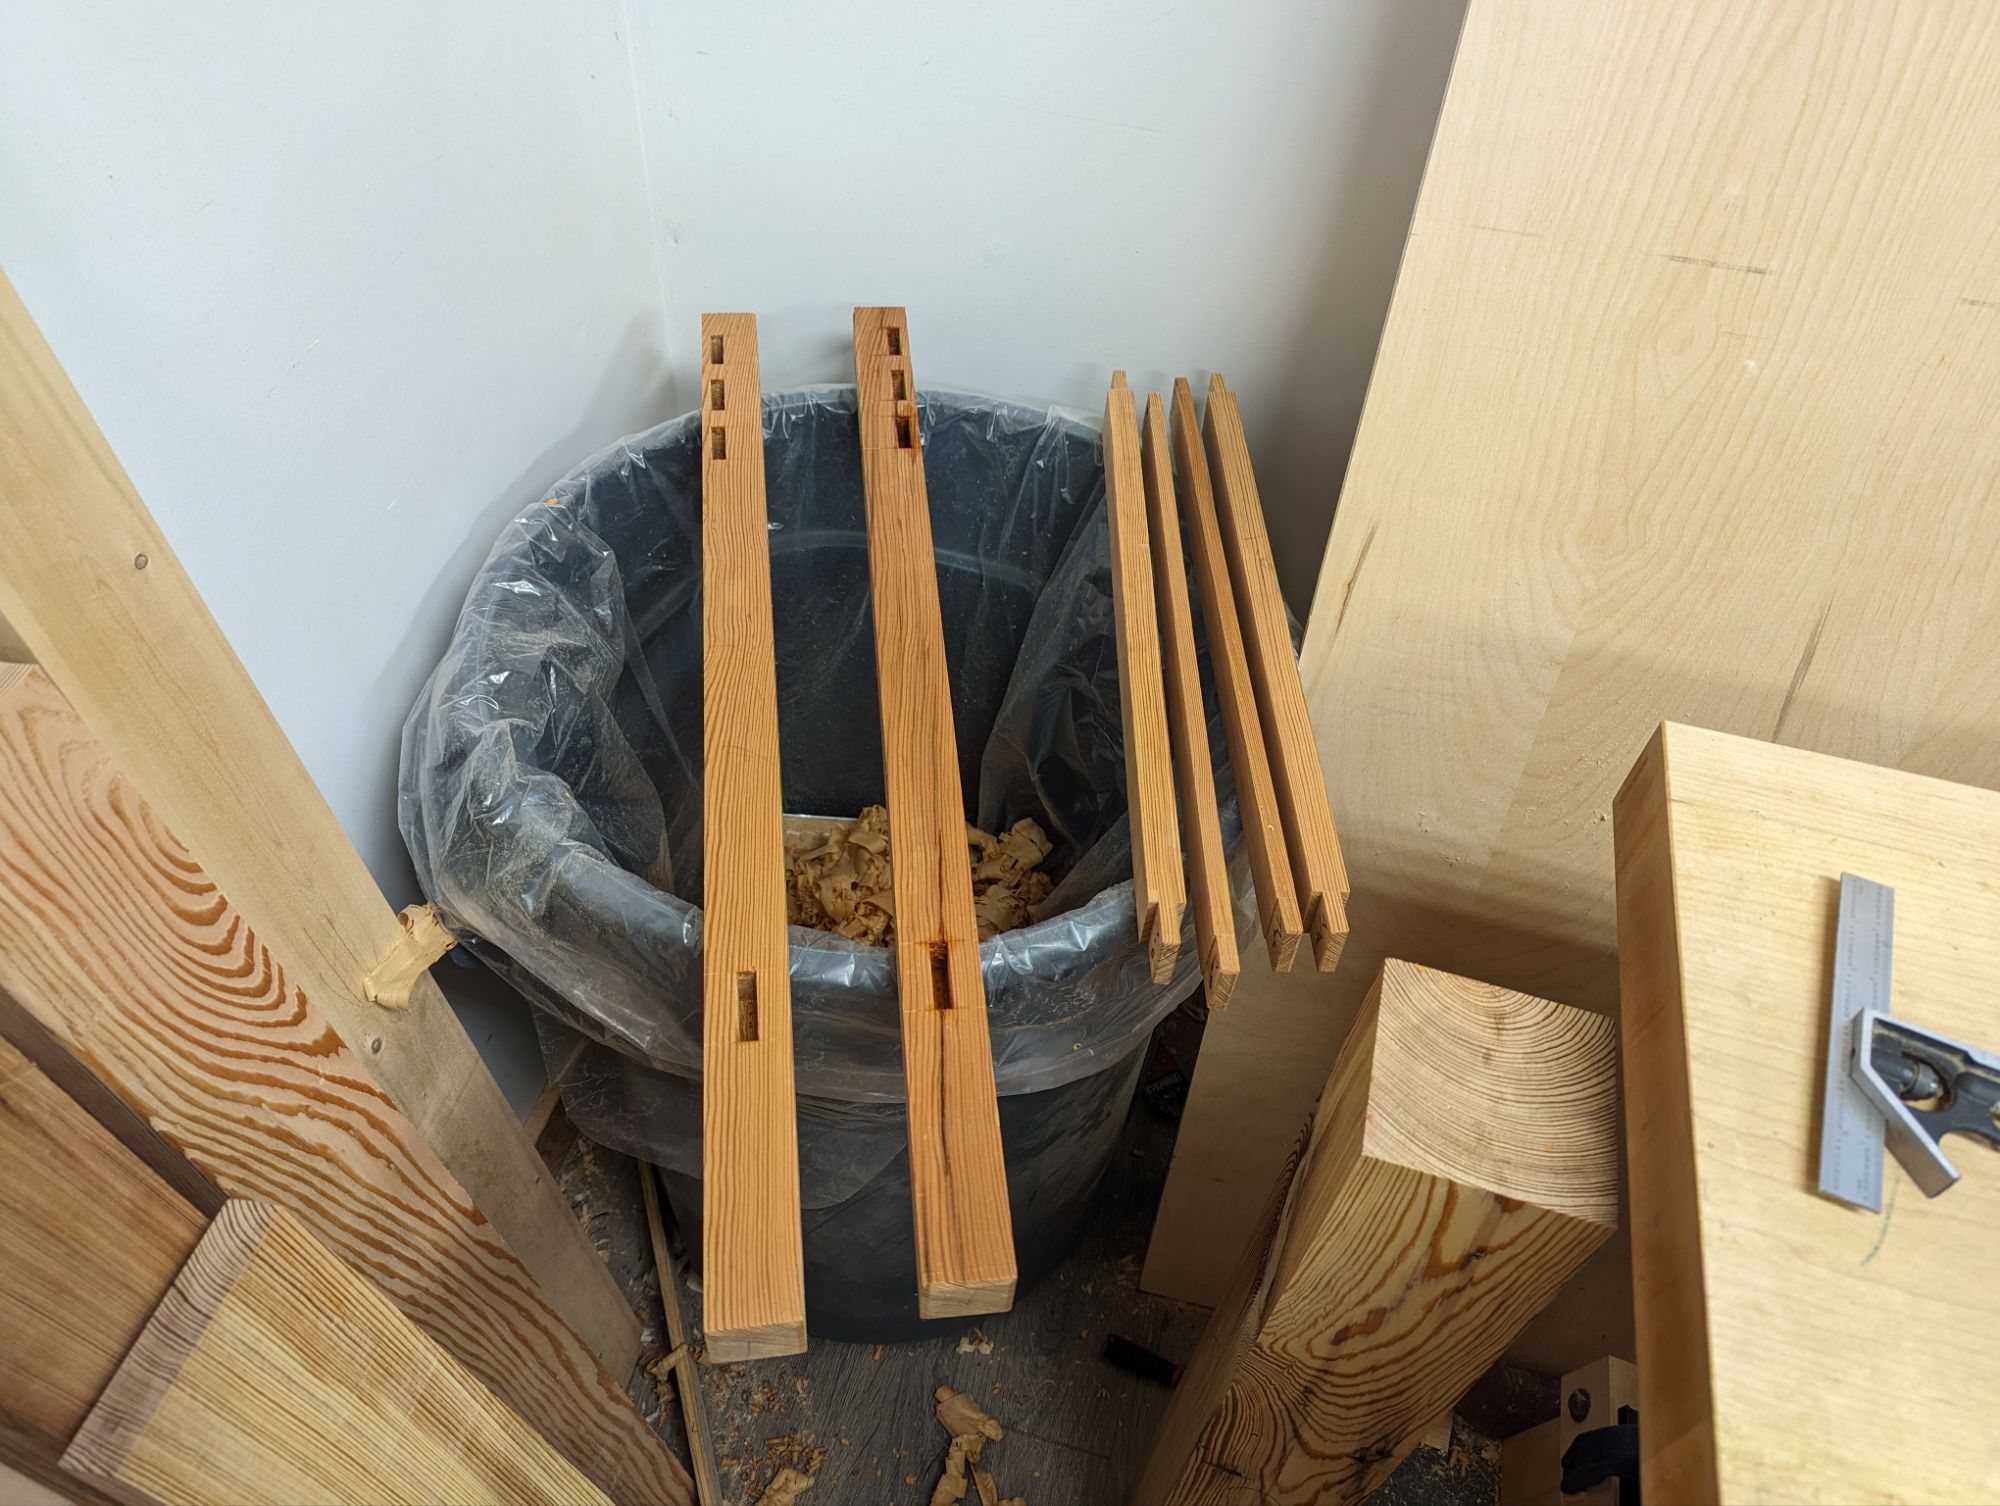
Do others use the “over the garbage can” method for storing ready-for-glue up pieces?
I would typically drawbore each joint on something like this, but there really isn’t room for a size of peg that would give any real strength. I think, instead, I’ll use die forged nails (after finish) to lock everything in place. I’m not worried about the glue failing, I don’t think. But some extra reinforcement can’t hurt in a bathroom with wildly-varying humidity.
But I’ll tackle that after I finish the frame. I’ll also talk more about making the top where the sink will sit (this is for a vessel sink).
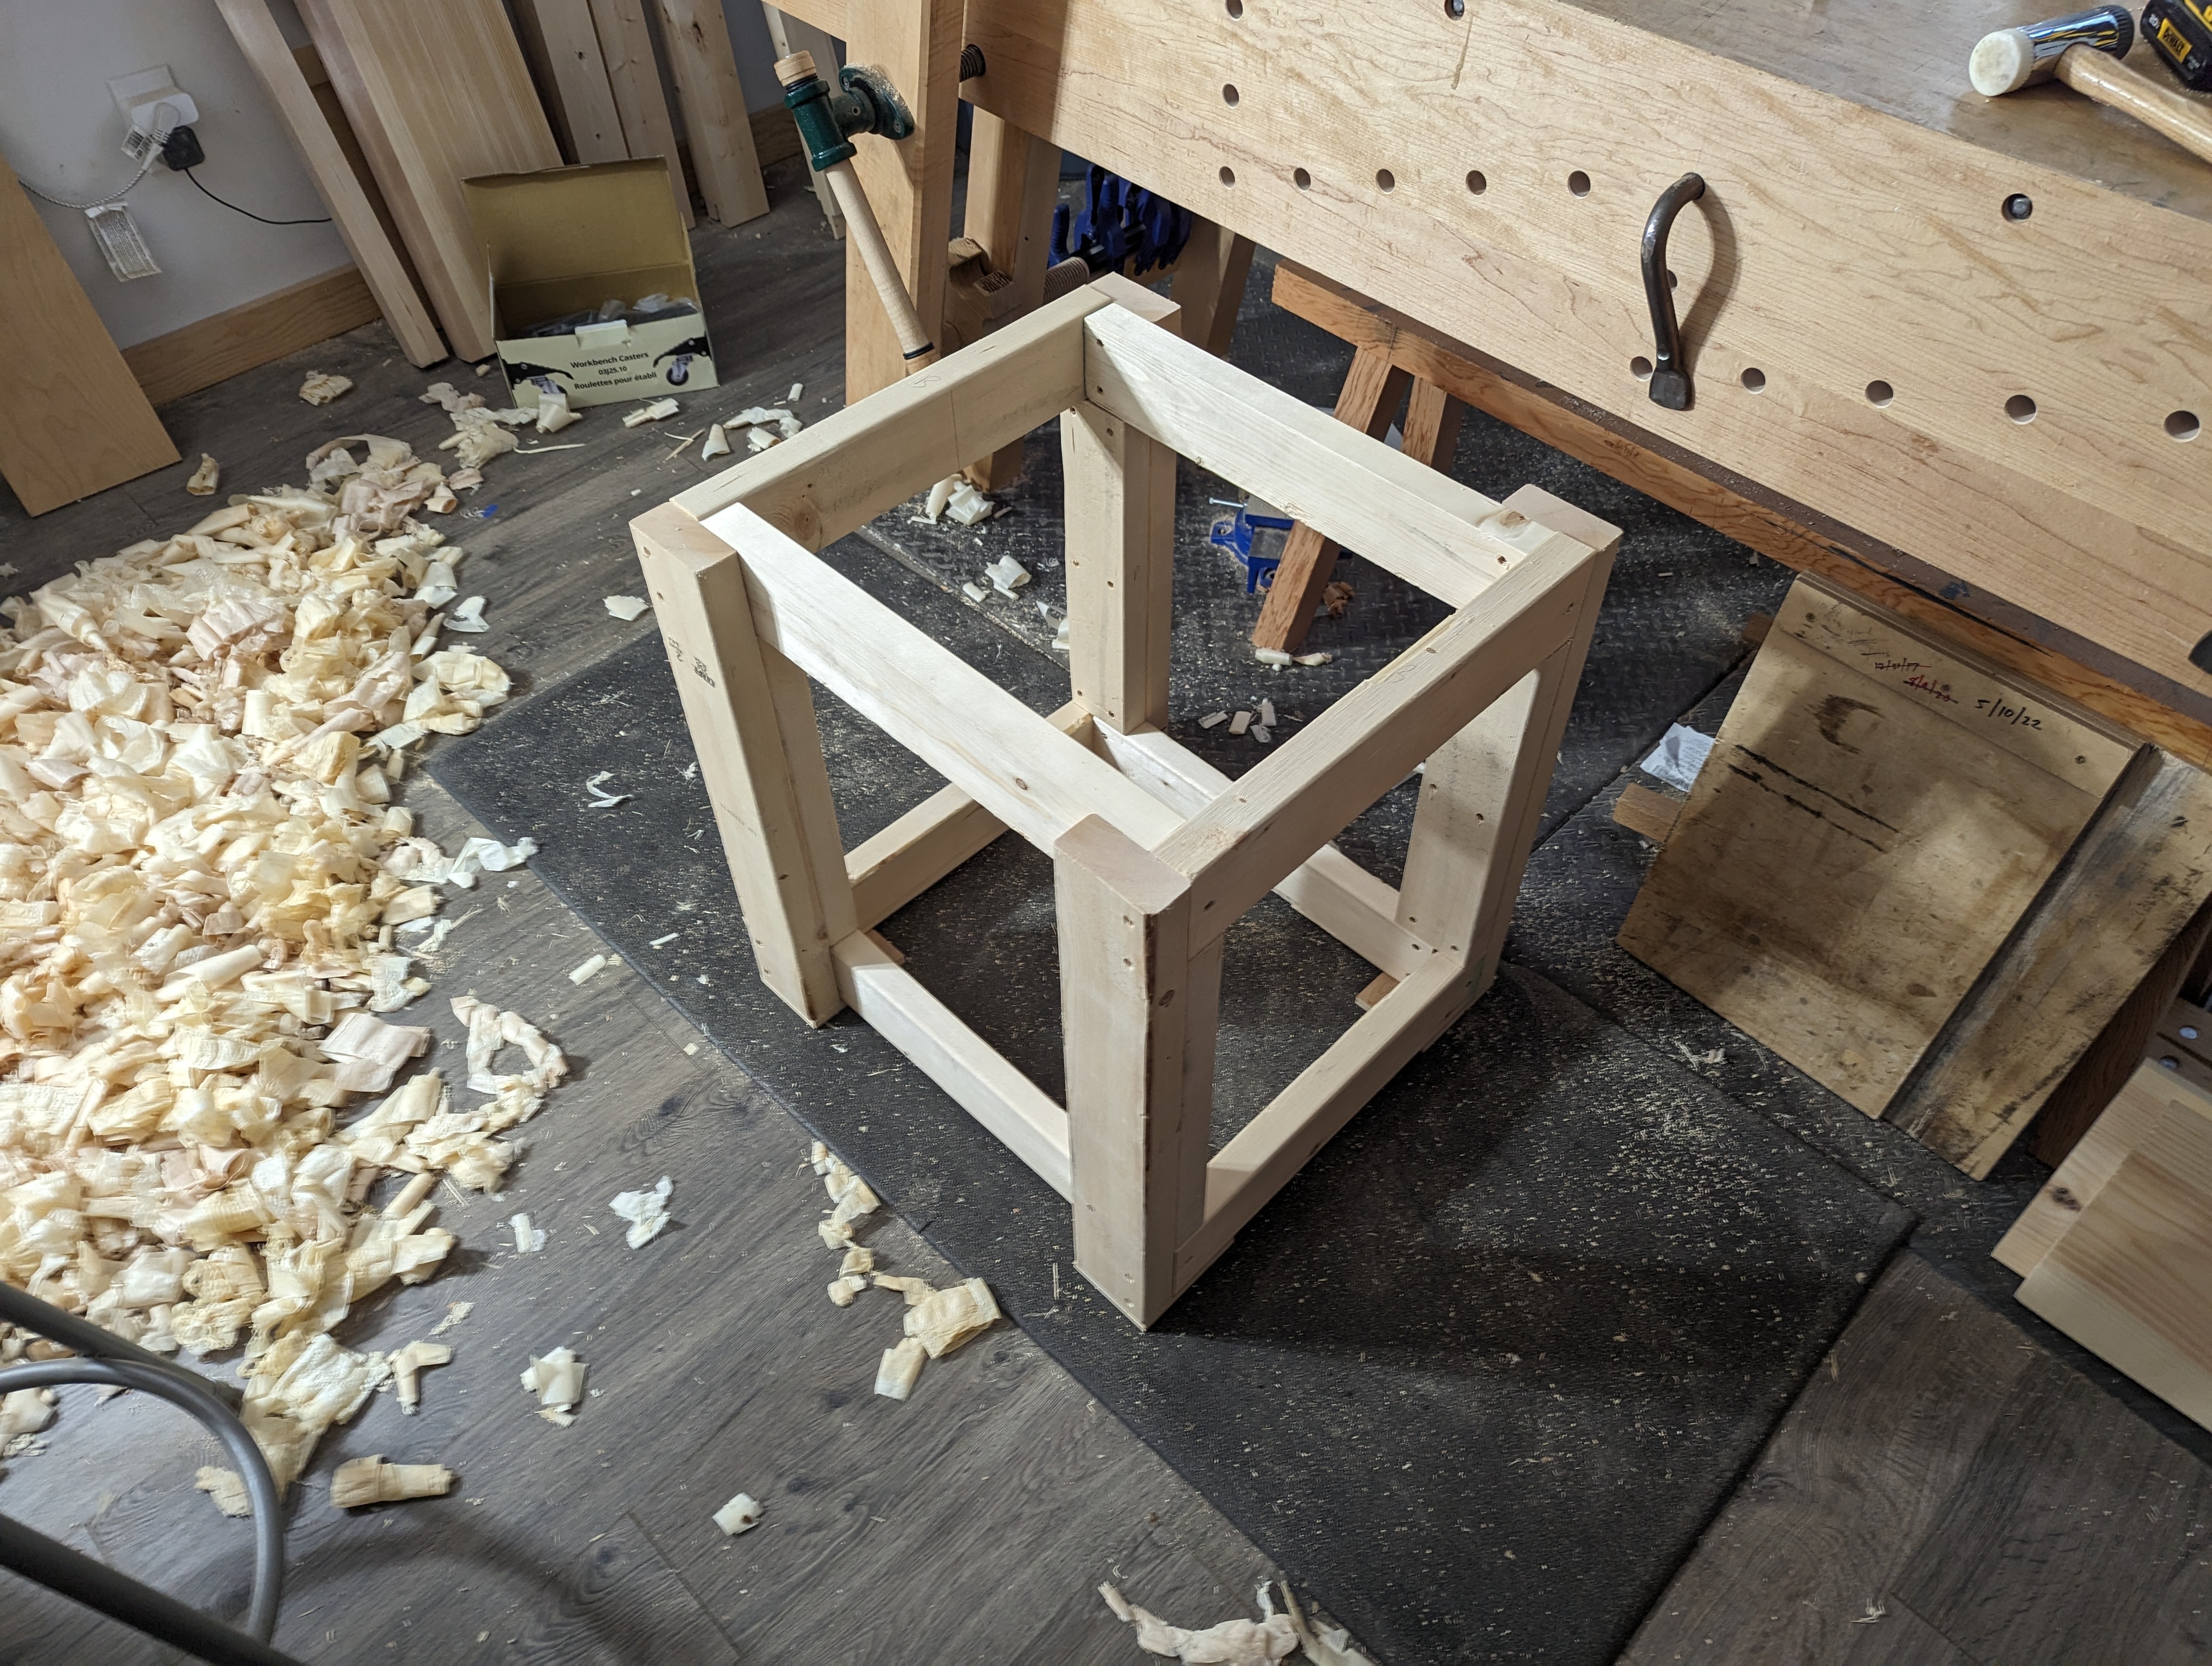
If anyone asks me what kind of workbench they should build when just getting into woodworking, I have only one answer: a Mike Siemsen-style Naked Woodworker English workbench. The video is an excellent step by step (my only complaint is that it doesn’t show cutting the lap joints on the lower stretchers for the leg assemblies). But more importantly, it is a design that a true beginner with a small set of tools can knock together with a reasonable chance of success.
I have built a few such workbenches. But I’ve noticed that pretty much all of my shop furniture pieces end up in the Naked Woodworker style too. Id est, glue and screw laminating various pieces to create the lap joints and other connections without having to cut any real joinery.
A bandsaw stand in potentia, illustrating the style.
One of the important things about Mike’s design is leaving the top rails a bit proud (shown above), so they can be leveled with a hand plane to form a flat plane to attach the tabletop. This is very useful when using rough construction lumber but still wanting precision in the final piece.
Abrupt segue:
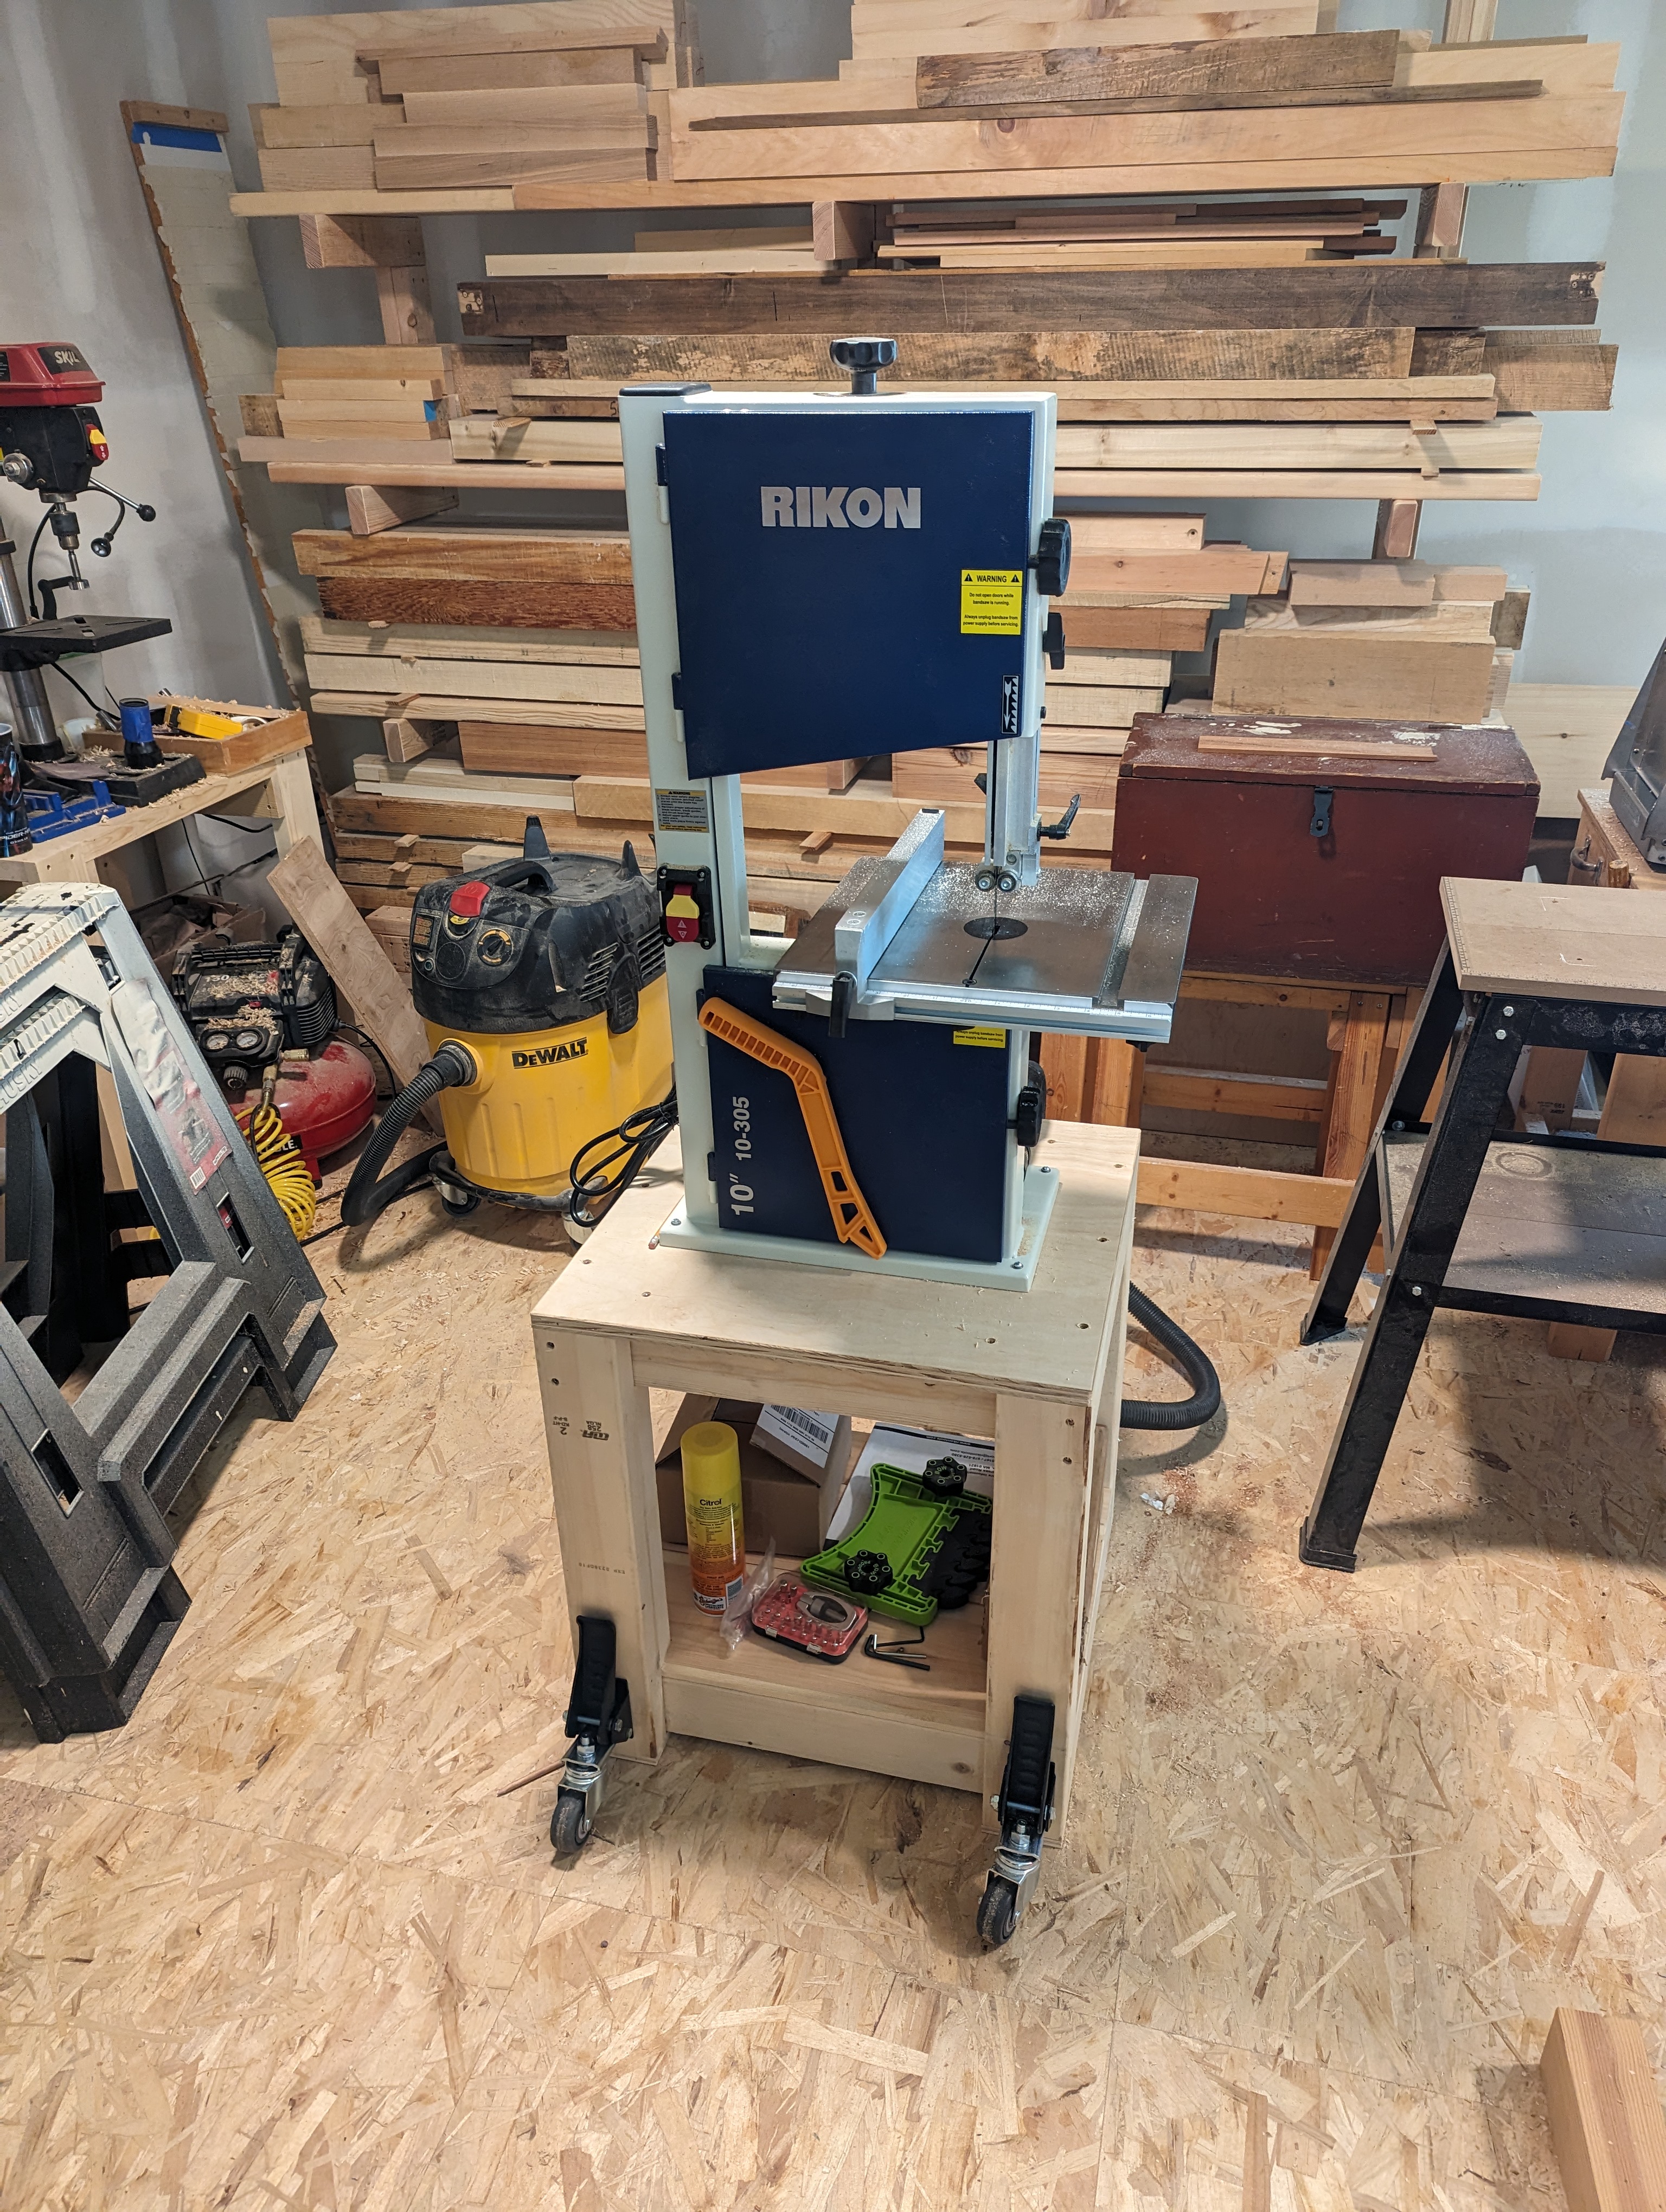
I fully subscribe to the hypothesis that the best woodworking hand tool is a band saw. I can absolutely spit a gauge line with a hand saw (although it has taken practice) and I am able to saw a perfect shoulder with a back saw (with a little bit of chisel paring). But a well tuned band saw just makes things go quicker (at least the cheek part of the cut).
I have the most basic version of a band saw with a coarse (skip tooth) blade, but it can cut as fine of joinery as I need. If I could go back in time, I would have bought this thing so much sooner. And now, it moves around.
Stationary stand seen to the right.
Sometimes I wonder if having a bandsaw will atrophy my hand sawing skills. But then I need to resaw some 16/4 stock and I forget about my previous qualms.
And that, my friends, is the true meaning of Christmas.
I went up north for a quick summer weekend and did something I don’t usually do: peruse the antique shops. This was pretty fruitful, honestly. I found a boarded chest made from 12″ x 7/8″ clear pine which will clean up very nicely. It’s about 24x14x14. It was last used as a toy chest (I know from the several Battleship peg pieces inside it) but it has some signs of old tills. More on that another time.
I also found a nice Disston D7 (I think) hand saw, crosscut. The plate is arrow straight with no kinks that I can see. Even the nib is intact. The only defect (aside from a heavy black patina on the blade that comes from being stored in barn-like conditions) is a small chip off the top horn of the tote. Easily fixed (or, honestly, just sanded smooth and left alone). I’ll do a quick restoration post on that one too in the future.
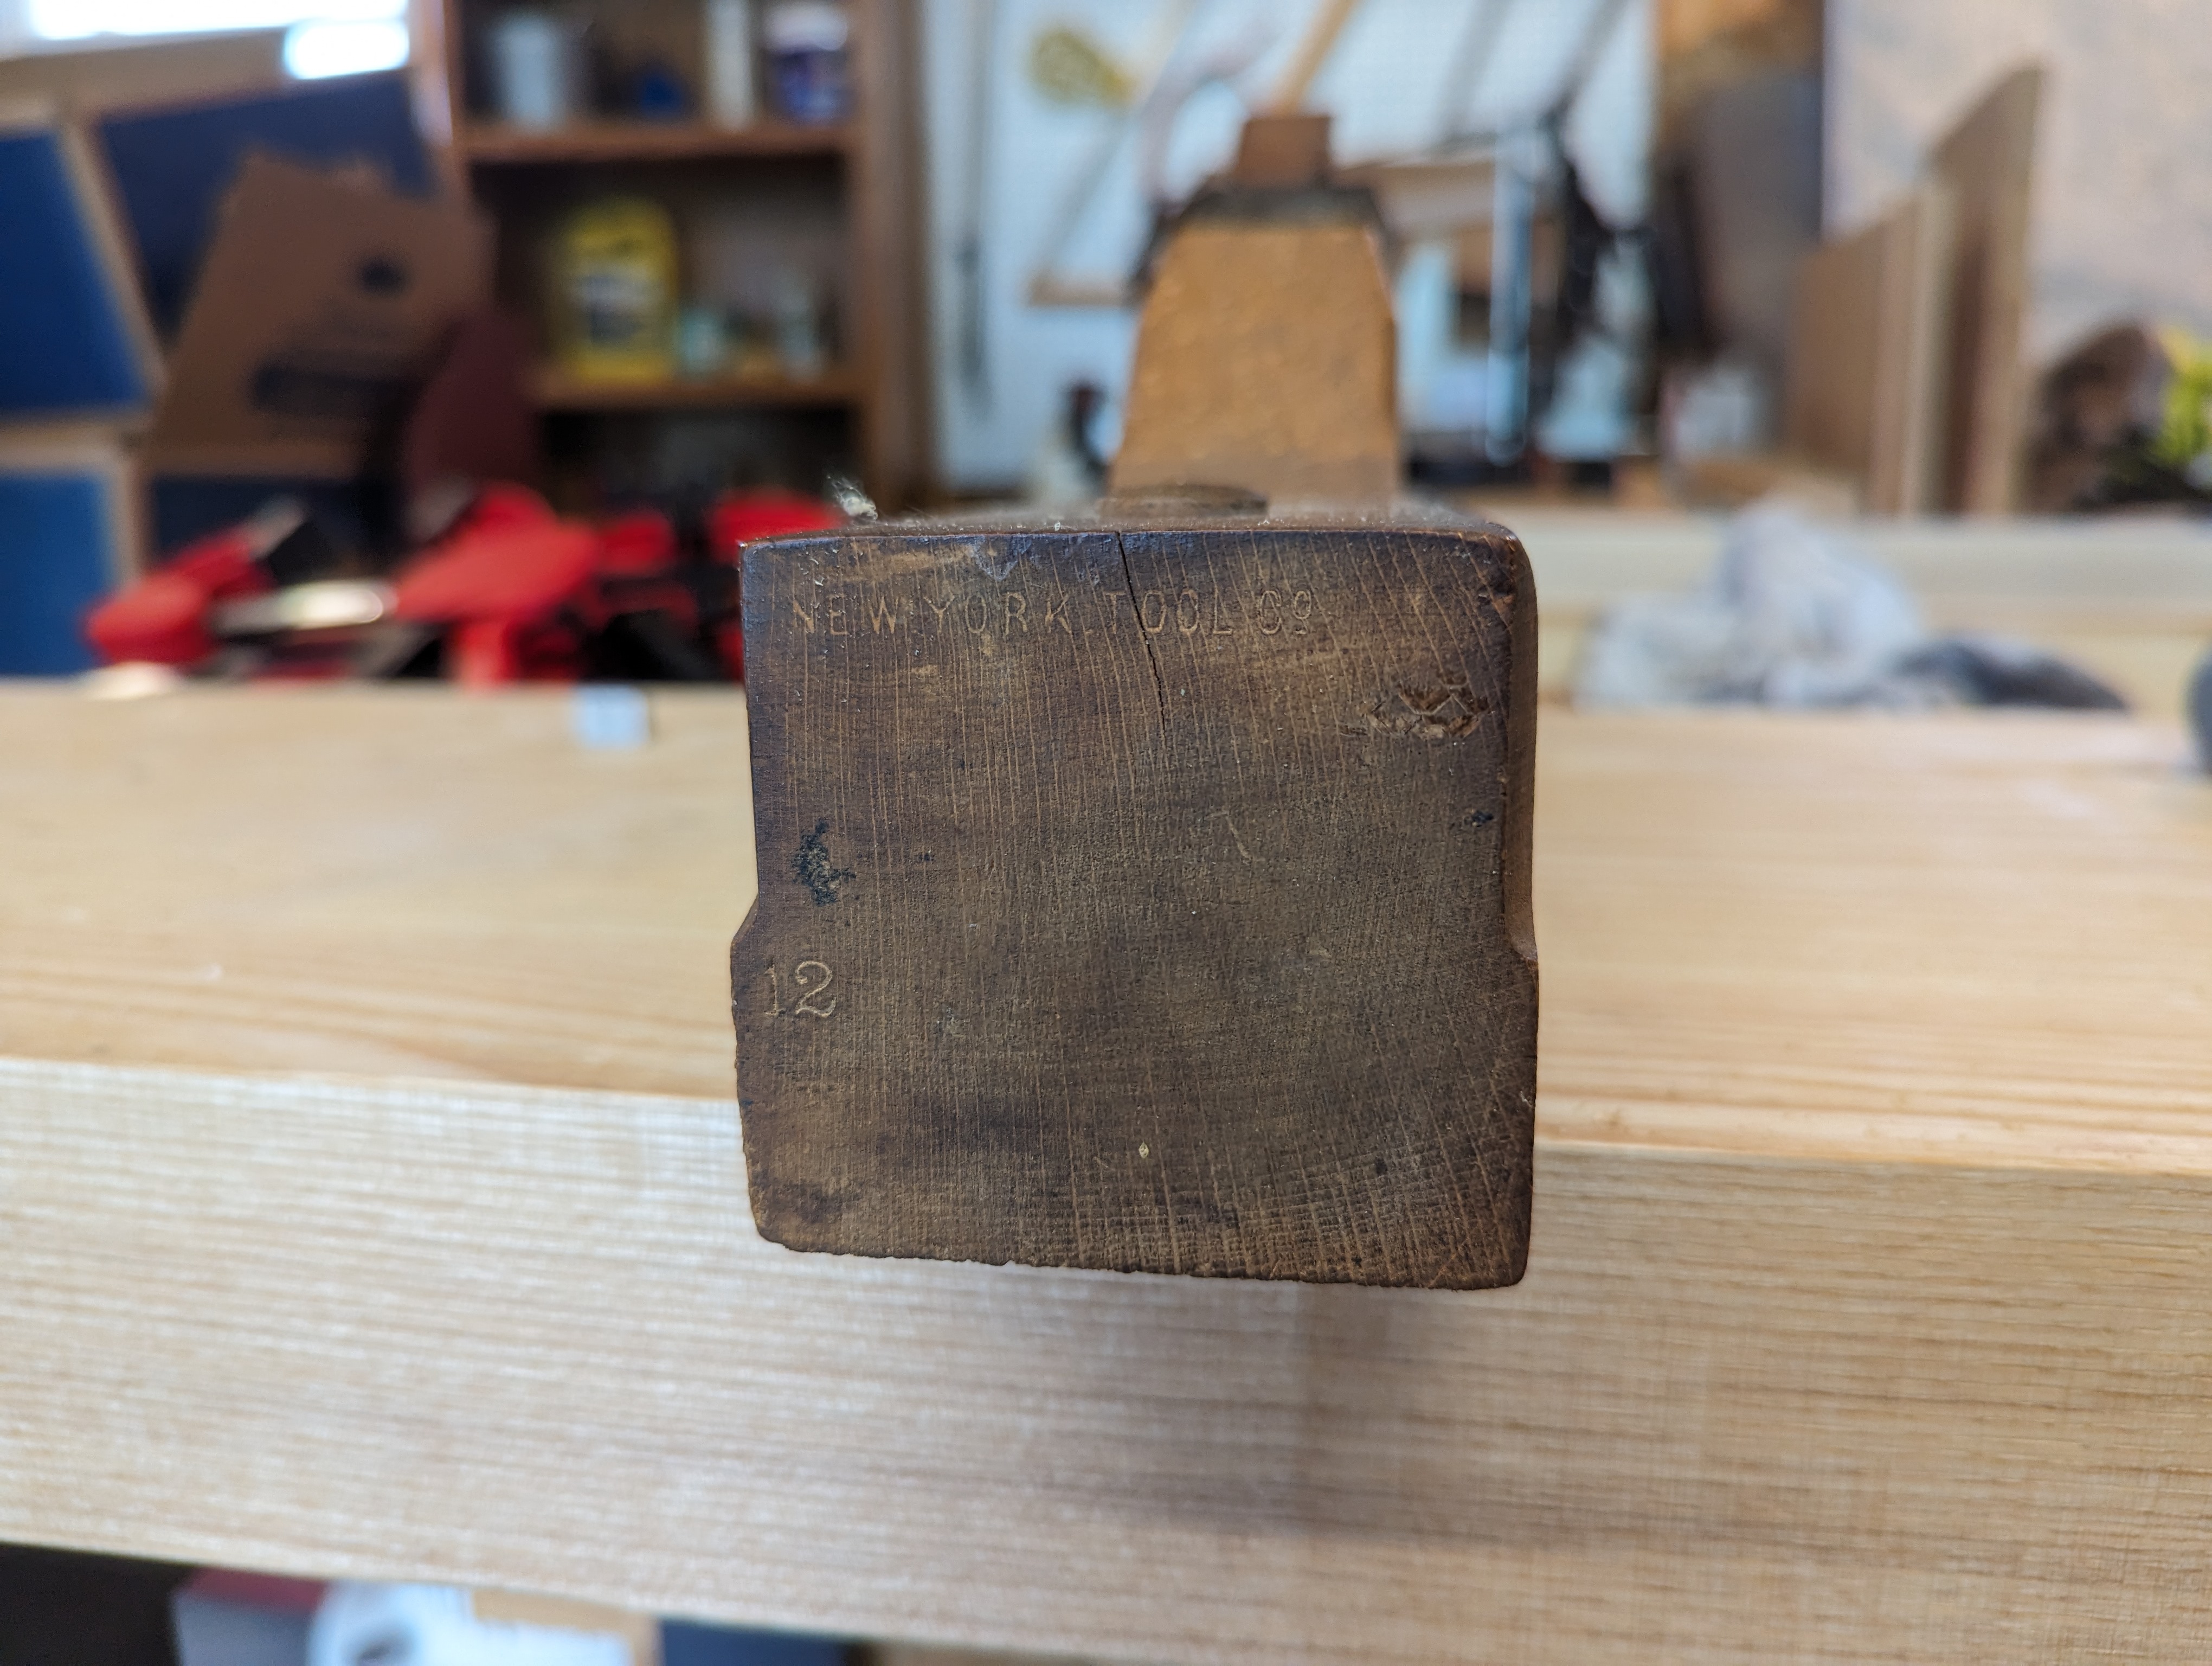
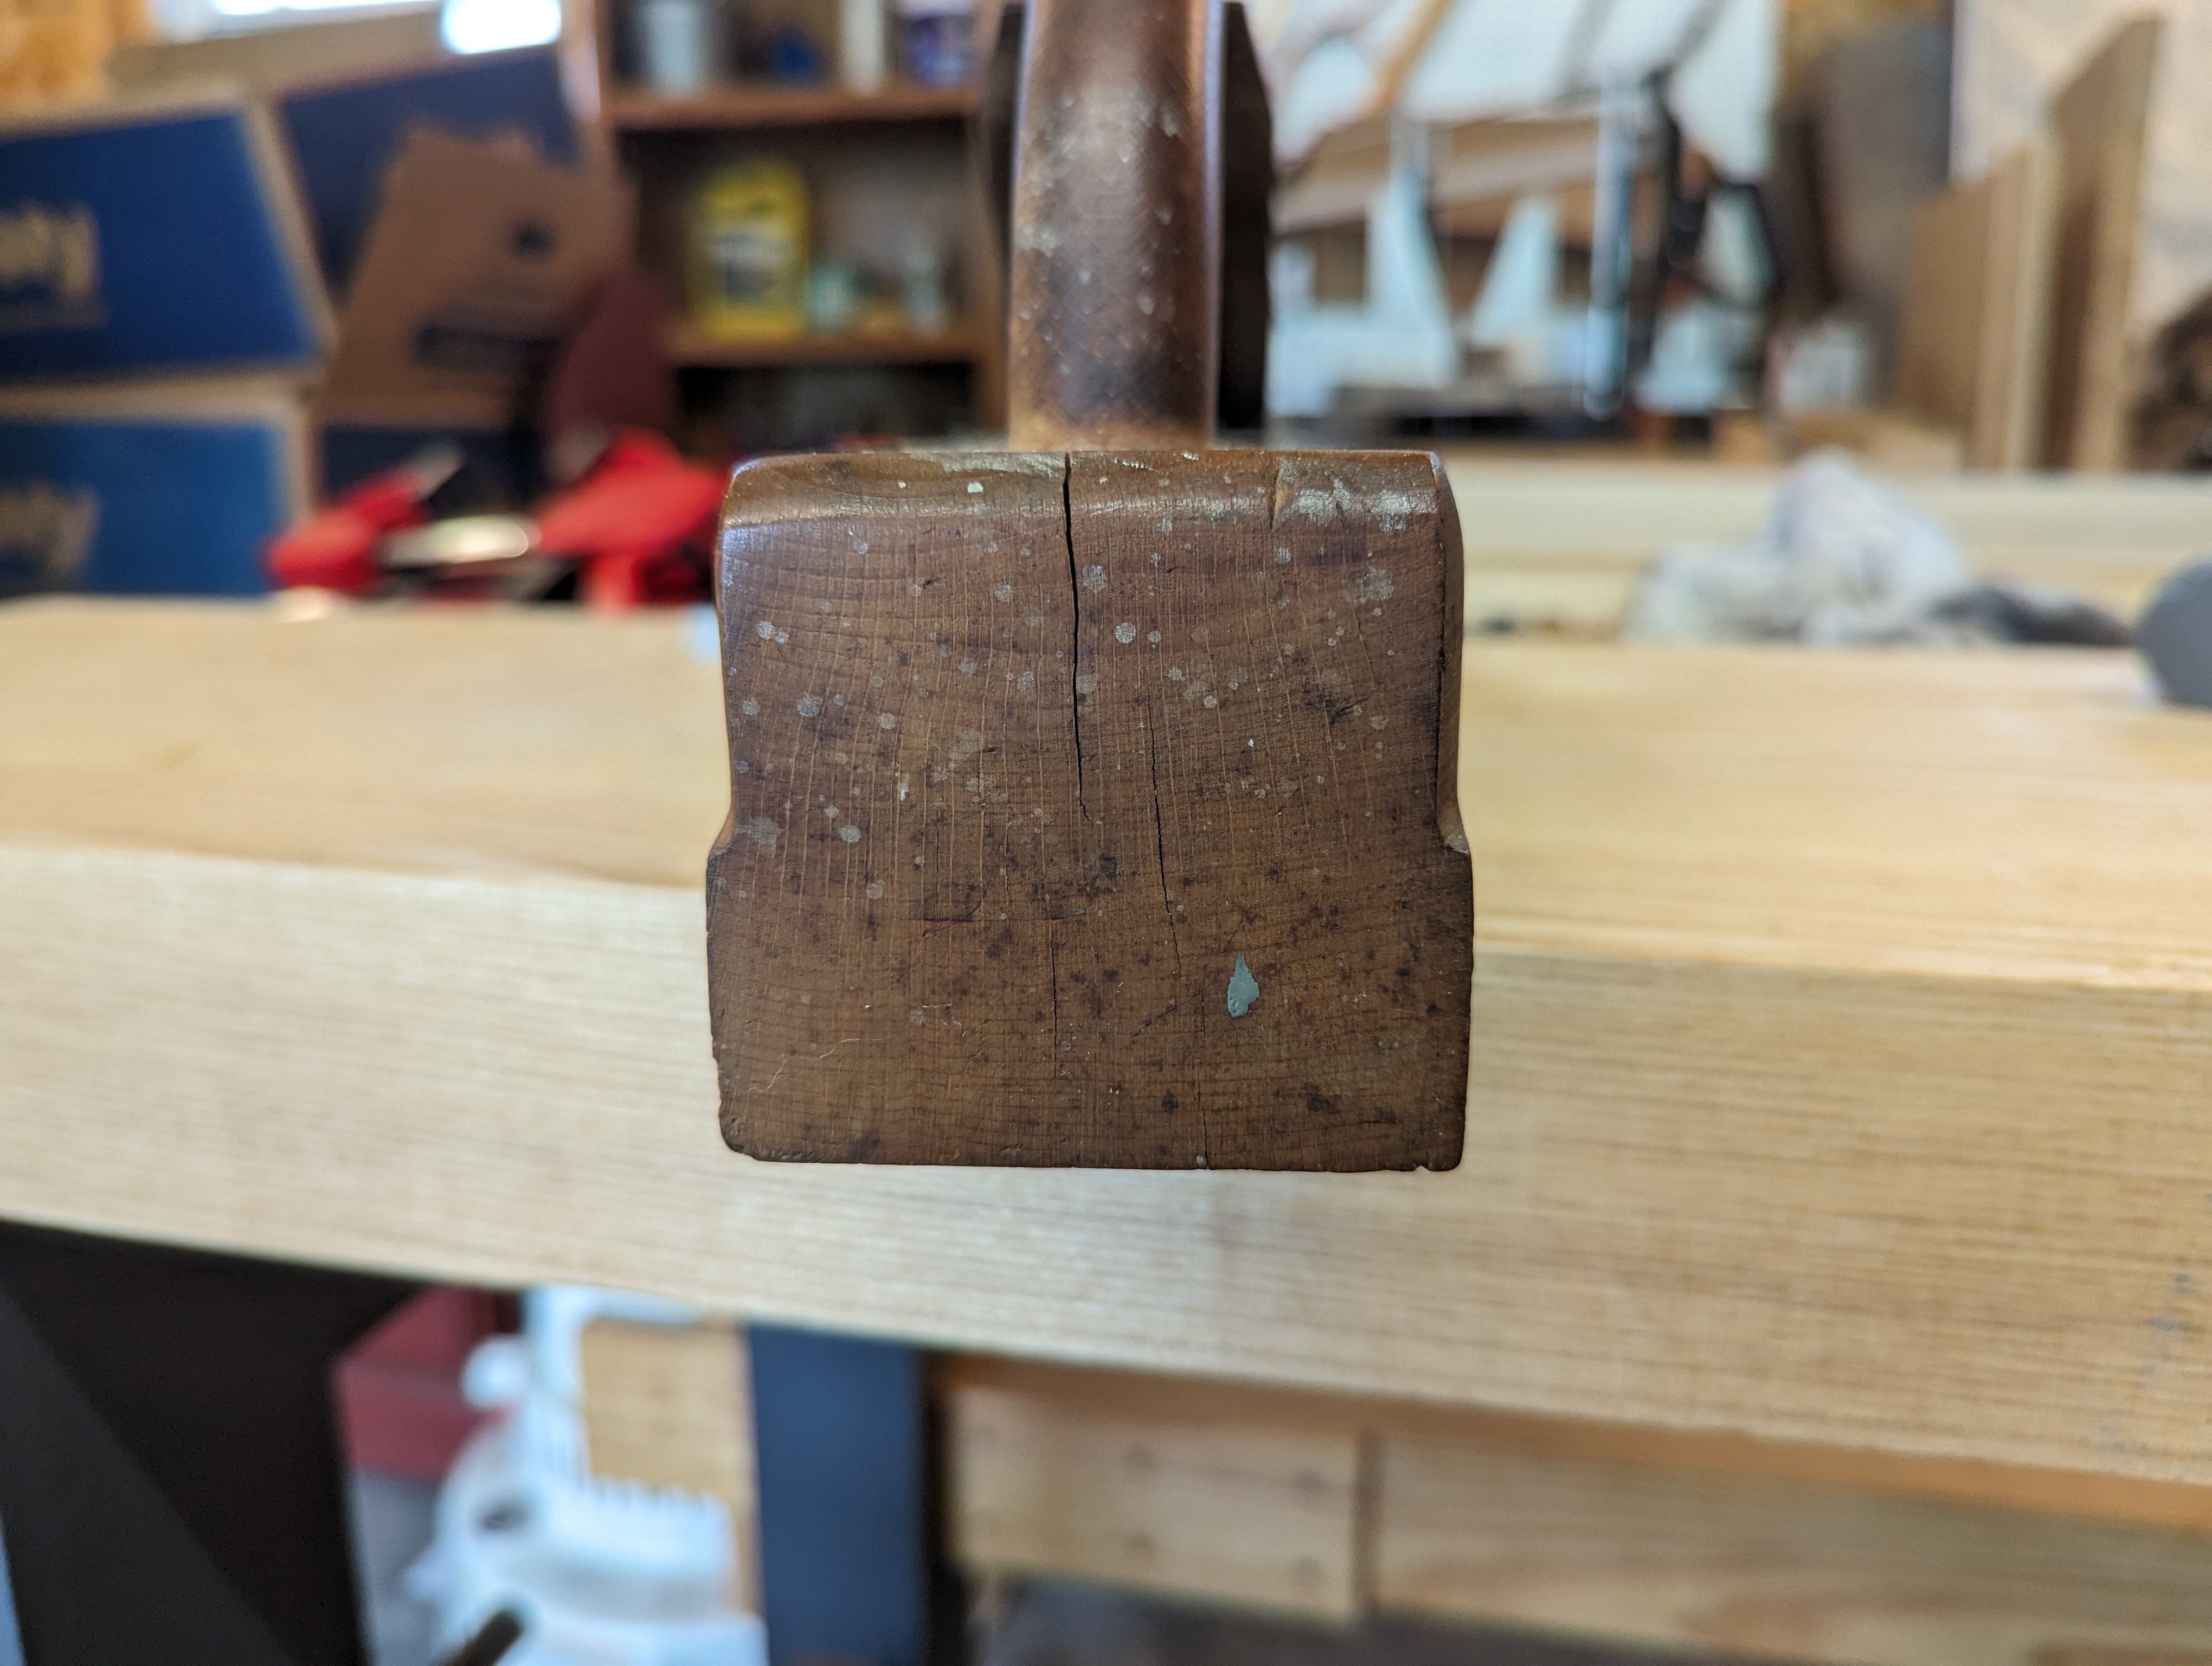
But the best find (in my opinion) was a wooden jack plane in remarkable condition. It’s stamped with “New York Tool Co.” (which my cursory research showed was a brand used by the Auburn Tool Co in the late second half of the 19th century). It’s 16 inches long and seems to be a No. 12. I didn’t even argue with the sticker price at the antique shop (which was $25).
One tiny check on the toe of the plane.
The strike button on the front of the plane is pristine and there is no mushrooming to speak of on the iron (mushrooming happens from consistent use of a metal hammer or mallet to adjust the depth and lateral adjustment of the iron). There are also no mallet dents on the heel of the plane; just a few shallow checks away from the sole.
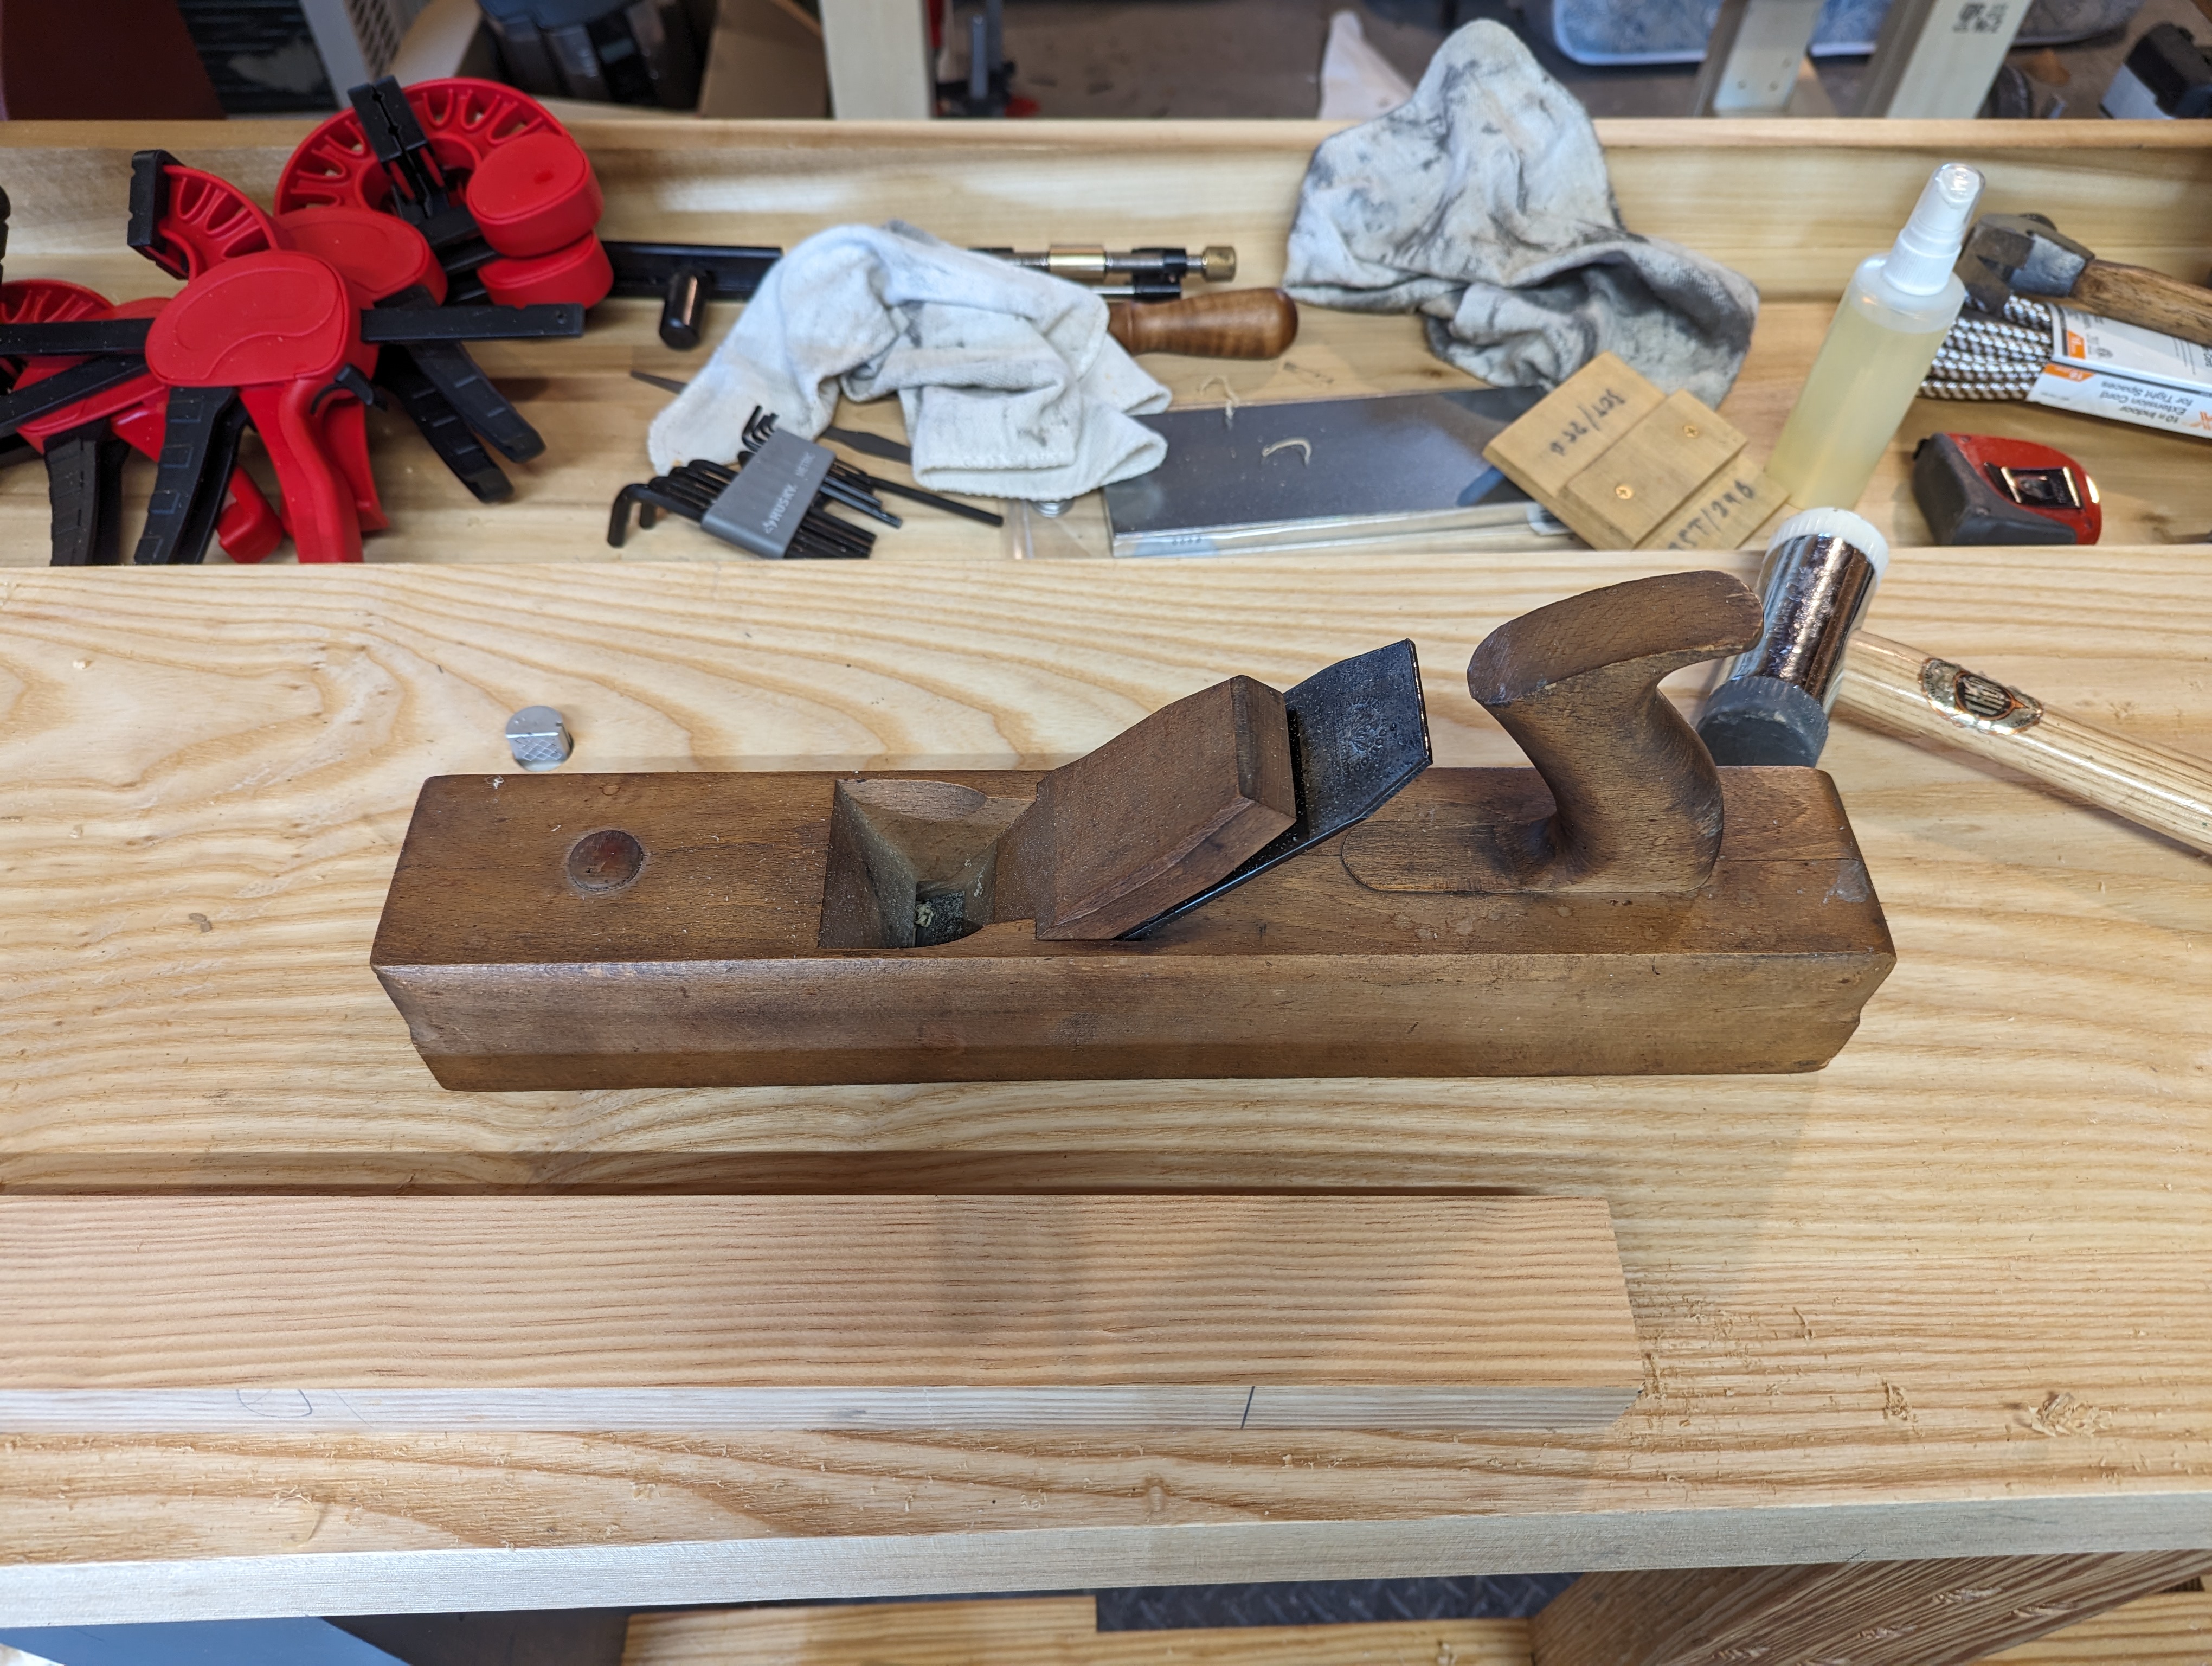
It’s honestly a bit silly how nice this thing is.
The tote is fully in tact, with just a couple of knicks showing lighter wood below which are probably just from being in a box bumping into other antique store fare (and not from use). The tote itself is a bit wobbly and just need regluing after 130 years. In fact, the only meaningful patina on the entire plane is on the back of the tote (where the palm of the user would be). If I had mineral spirits and denatured alcohol with me on the trip, I probably could have freshened it up to like new.
That could easily just be grime sticking to the exposed end grain and not patina from use.
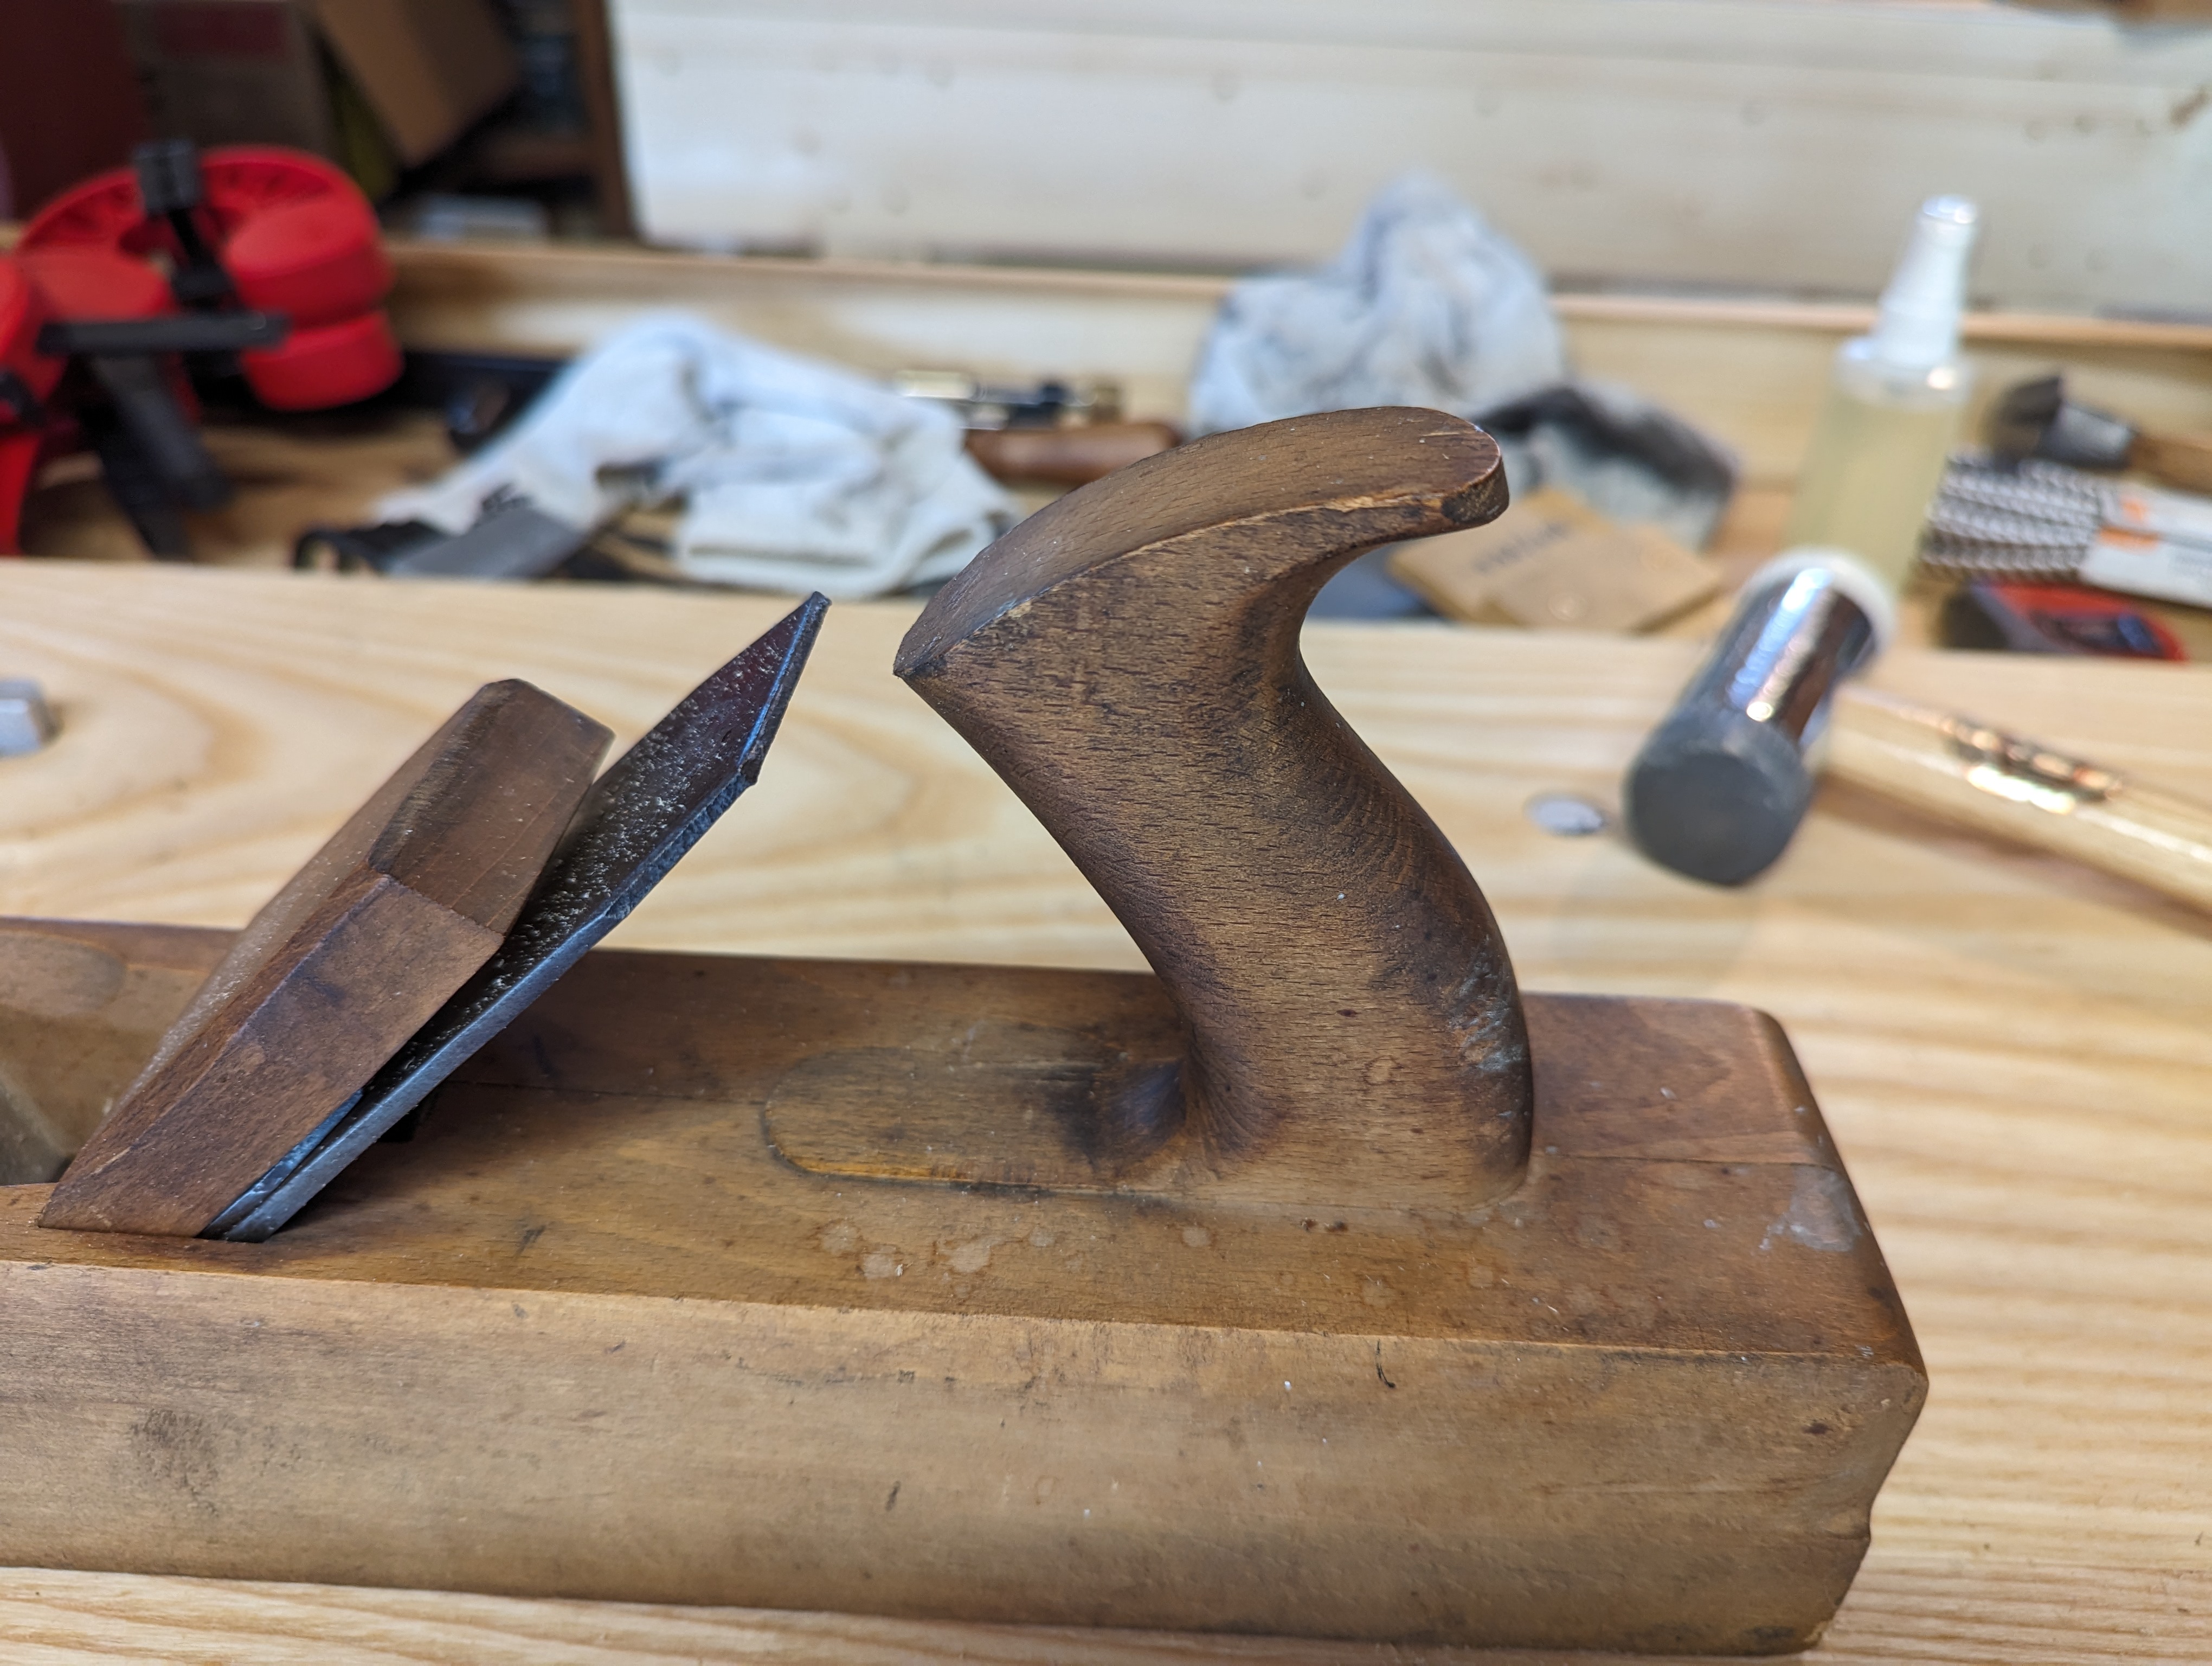
The mouth is still tight. Not tight for a jack plane, mind you; tight for any wooden plane. The front of the mouth is crisp and 90 degrees to the sides of the sole. The back of the mouth (behind the iron) is a little chipped but that seems pretty common on wooden soled planes where the bed comes to such a fragile point. A couple swipes with a fine cut file will clean it right up. I’m not even sure the sole has ever been flattened, but it didn’t take much to true it with a fore plane. And there are no splits on the cheeks around the wedge.
Seriously. Look at that crisp mouth on a 130 year old wooden jack plane.
The iron looks pretty much fresh to me; I don’t think it’s ever been reground. There were no shavings caught between the iron and the chip breaker when I pulled the two apart; just a little flaky orange rust. Other than being sharpened a bit out of square, and some camming on the cap iron screw, you’d be hard pressed to prove this thing ever actually saw any real use. There aren’t even any of the usual paint splatters or other stains from being near a workbench.
Those Victorian era prisoners sure knew how to make ’em!
All in all, I have a hard time believing that someone made even a part time living with this tool. It’s just too pristine. It’s possible there was a hobbyist in the late 19th century, perhaps an attorney or accountant, who took pride in the upkeep of his tools, even though he rarely put them to heavy use. But that seems a bit too romantic and hits a bit too close to home.
In any event, it will have a good home with me. Even with occasional use (I’m not giving up my metal planes any time soon), this beauty will probably see more action with me that it did in its youth.
I had in my mind a singular vision. A mini workbench, surrounded by a tray, that sat upon an office desk. Like those perpetual motion clacking ball desk toys. But where one could plane small sticks of wood with a block plane in meditative rhythm. The small curls falling gently into a rimmed collection tray to keep things neat.
I could have sworn such a thing existed. Maybe it was advertised in an old Popular Woodworking issue. It might have been Fine Woodworking or WOOD. But it eluded me.
So I made a prototype. And it turned out great!
As I saw it in my mind.
The bench itself is roughly 1:8 scale. The slab is 12 inches long and 3 inches wide. 1/2 inch thickness would have been to scale, but I bumped it up to 7/8 for stiffness. The wing, which functions as both a tool shelf and a shooting board, is about 1 inch wide and 1/4 inch thick. The planing stop is 1/2 inch square. For those who care, the entire setup is 19 x 7 x 3.
About the footprint of a large gaming keyboard.
Let’s talk materials for a moment. This is just a prototype, so I used some tight grain Spruce framing lumber from up north. In Vermont, where my parents have a house, you can get stuff that has birdseye pattern and blue streaks but still arrow straight grain. It’s beautiful and a joy to work with.
This stock was a bit more plain, but I think still looks good. The only non-Spruce materials in the piece are the planing stop (red oak) and the base of the tray (1/2 inch birch plywood).
Spruce is rather rigid and dimensionally stable, so a good choice for this.
The workbench legs are 1 1/2 inch x 4 inch x 1 inch posts that are rabbeted (cross grain) into the slab top. The oak planing stop is also rabbeted in. The planing stop actually hides some nails reinforcing the joint between the slab and the front legs. The tool shelf is just brad nailed down to the legs.
To attach the bench to the collection tray, the legs are glued and screwed from the underside of the plywood. The tray itself is banded in 1/2 inch spruce just butt jointed around and glued and nailed on. I stuck on some nonskid furniture pads to the underside so it won’t slide around.
Top view with some blanks.
There is admittedly a practical purpose to this piece. There is a step down on the window sill in my office at work. The larger pots overhang the stepdown and it’s unstable without a spacer that’s level with the main sill and fully support the pot. Each spacer needs to be somewhere between 1/2 and 11/16 but the height varies. This will allow me to fine tune some pine 1 x 3/4 spacers on site.
A full size, modern block plane is probably a bit much for this setup. Perhaps I’ll clean up a slightly smaller vintage block plane from the user pile. We’ll see.
When I make a nicer version in mahogany or walnut, I may do a Basic Projects writeup. But for now, the prototype is rather serviceable.