Let’s get one thing straight: this is not the easiest way to make a hand tool woodworking workbench. It’s not even fifth easiest. But I’m the boss, and this time, the Stent Panel is in the hizzy.
This is just a test fit.
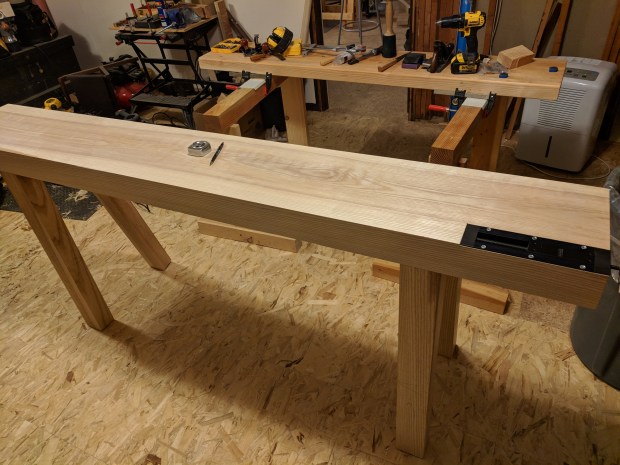
Each of the legs is mortised directly into the main slab. Because of leg stock length constraints, I was not able to do the traditional Roubo sliding dovetail joint on the front legs. But some beefy tenons and double drawbore pegs (not shown above) will hopefully keep things together. I find birch dowels flexible enough to resist cracking when drawboring and the color match should be okay.

Front legs flush with the benchtop, like a good workbench should be.
The back legs each rake out at a 14° angle, which I calculated based on the stock I had to allow an overall footprint of 21″ and an overall height of 36.5″. Net of the heavy duty anti-fatigue rubber mat, the workbench will be 35.5″ high. A full 1.5″ taller than my current workbench.

Heart-side up, just like Andre Roubo said.
Angled internal tenons are not exactly the easiest joint to cut. But through a combination of boring and careful paring (to match a pre-cut leg) it can be done. By some miracle, the joints are beyond piston-fit and I could likely get away without anything but hide glue. I don’t even know how I would drawbore the angled legs (maybe something on the drillpress?). But I have some lovely black powder-coated square head lag bolts that seem like a good belt-and-suspenders solution for keeping everything together.

Just insert tenon (bottom) into mortise (middle) at pre-determined angle (top).
The only thing left before gluing in the legs is mortising the benchtop extension posts into the slab. I found a lovely piece of 8/4 ash at the lumberyard that will extend the benchtop to approximately 22″ (about the same as my current bench and only an inch beyond the rake of the back legs). Being 8/4, it’s probably at equilibrium, but it still needs to acclimate for a week or so before I feel comfortable flattening it. The posts will also be drawbored into the benchtop, so I should probably figure out holdfast hole placement before chopping those mortises.
More later in the week on the leg vise, including why I’m adding a single notched stretcher to the left side of the workbench. I’ve already bored the screw clearance hole and applied the threaded nut. I could have threaded the leg directly, but something tells me this setup will be longer-lasting.
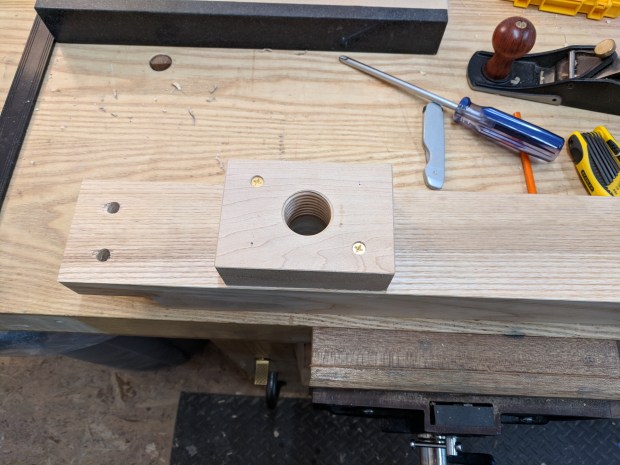
It’s also hide-glued on. Two brass screws are clearly not strong enough on their own.
In the meantime, huge shoutout to Brady and Jamie who helped me push the slab through the thickness planer for just 3 more passes.
JPG

Lookin’ good!
LikeLike