Big Projects

Back on Track

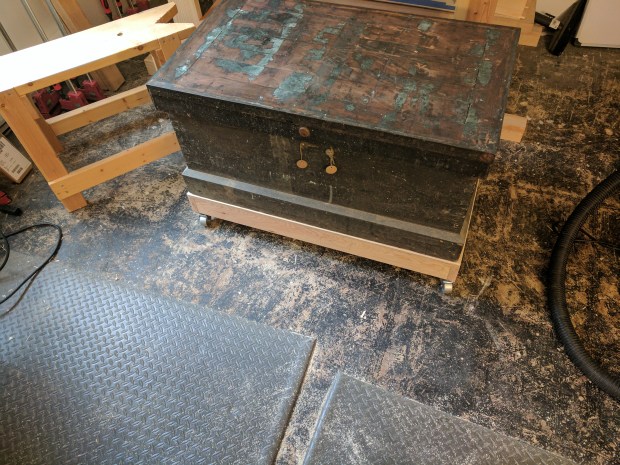
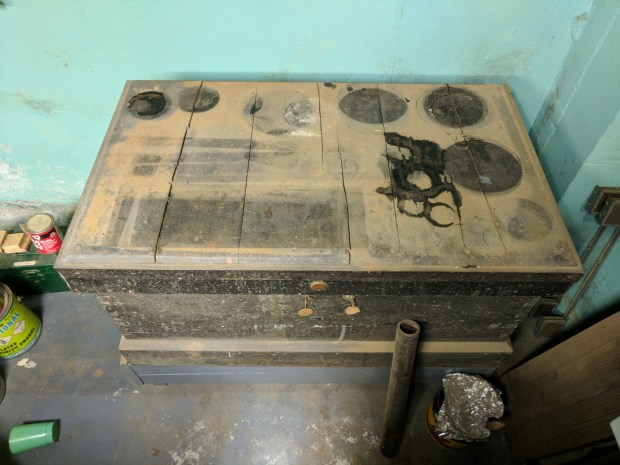
For various reasons, I have resumed work on the large Dutch tool chest.  It was pretty far along when first abandoned, needing only the fall front and the lid (and racks/tills).  I couldn’t justify scrapping it after so much work.  So I spent the day making the fall front.

IMG_20170514_201242

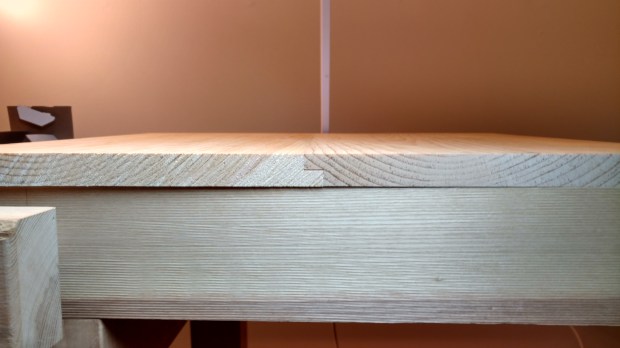
Some flushing still to do.

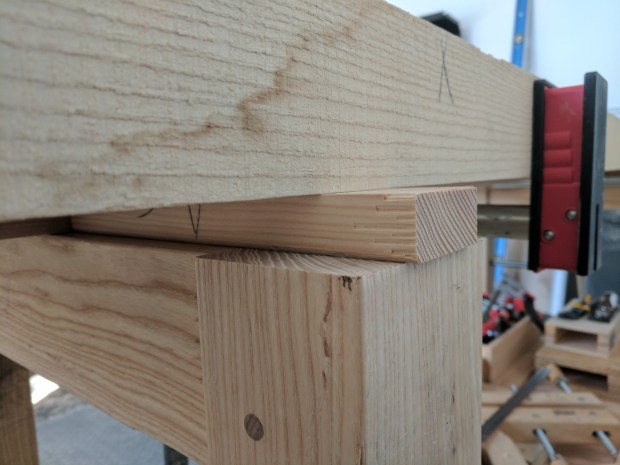
I was unsure how the wooden latch system would work.  It didn’t help using a material I’d never used before: home center poplar for the battens, latches and locks.  It wasn’t so bad (I chose only quarter- or rift-sawn hobby boards) and overall the alignment is pretty good.  I especially enjoyed cutting the shallow dadoes on each of the four latches by hand.

IMG_20170514_201200

Screws on the latches, nails on the battens.

Not so much for the shelf, however.  In the PWW article, there is no mention of the notches for the battens.  I should have realized I needed them, but didn’t.  I therefore  glued and screwed the lower lip and face board before I cut the notches for the battens.  There was barely clearance for a dovetail saw, and none for a coping saw.  I made due with chisel and router plane, though, and they came out okay.

IMG_20170514_201308

Live and learn, I guess.

Next up (before tills and racks) is making the lid.  But first, I must flush everything to the carcase.  A trim router should make quick work of any overhang on the face board and back boards, and I’ll bring the front and back edges into 30 degree plane with the sides via jointer plane.

But I’m out of daylight and motivation for now.

JPG

Mobile Command Center

I know I promised an inventory, but the first agenda item was making the English tool chest mobile. I wouldn’t dream of attaching casters (despite my willingness to pry off the old raised panel), so I made a low rolling base the chest can sit on.   It’s 3/8″ larger than the chest’s footprint all around and raises the chest to about 25″ overall. A perfect height for a floor chest (I’m exactly 5’10”).

Looks fairly proper from this angle.

The rolling base is rabbeted and nailed, which I felt was fine for it’s application and construction. Not only do the casters hold together the joints, but the plywood top is glued and screwed in place. Net net, this thing is never coming apart.

I love me some beefy rabbets.

The most important takeaway here is that mobility of the floor chest is vital. It’s taking longer than expected to scrape the old adhesive off the lid base.  Which means it’s taking longer than expected to add a new raised panel to the lid (a prerequisite to using the floor chest).   I may or may not have resumed the Dutch tool chest build.

But more on that next time.

JPG

Baby Steps

Having acquired a 19th century English joiner’s chest from my godfather, and somehow managing to get it into the back of my car (with my father’s help), I was faced with the great challenge of getting it out of the car and into the workshop (without any help).  After pulling out the tills and most of the tools , it was still too awkward to lug into the house.  Saw benches and rolling dollies to the rescue.

IMG_20170430_140033

Ignore the lawn.  My landscaper was scheduled for the next day.

I think it’s worth mentioning that the overall dimensions are 37″ long, by 22″ wide by 19″ high.  Subtract 1.5″ all around to get the true size of the carcase.  That makes it somewhere between the full Anarchist’s Tool Chest and the traveling variety.  That’s a long way of saying it is every bit large enough for my entire set of hand tools.  And that’s a very long way of saying I’ve officially abandoned that large Dutch tool chest I was building.

IMG_20170429_224951

I was pretty close too.  And yes, I realize I went overboard with the screws on the bottom lip.

The chest clearly needs some cleanup work, but I have no reason to believe I’m not up to the task.  But before I get too far along that route, I think an inventory is in order.

More on that next time.

JPG

To Cherish, Always

Last week, I learned that my godfather is very ill.  While we are not particularly close, we’ve always gotten along, and I recently learned he is a woodworker.  I went to visit last weekend.  Just to see how he was doing, and maybe check out his workshop that I’d heard a little about.  What transpired since has literally changed my life.

When I went downstairs into his basement workshop, the first thing I saw was a beautiful metalworker’s vise on a sturdy tinker’s bench.  I admired it and took a picture. Next to that, in the corner, was a joiner’s chest, buried beneath a pile of expired (and ostensibly leaking) West Systems epoxy containers and 30 years of dust.

IMG_20170430_112842

I’ve seen worse.

It was immediately apparent that the raised panel on the lid was not attached properly, having split long ago in many places.  In striking contrast, the miters on the lower skirt, nailed at the corners, remained perfect. And both the dust seal and the upper skirt had well fitted metal banding, creating a double rabbet on the dust seal.  I had absolutely no idea what to expect when I opened it.  Turns out, this is no ordinary tool chest.

IMG_20170430_112917

Never judge a tool chest by its split raised panel.

My godfather was willing to part with it, and I have since brought the chest home with me.  What will follow is my journey through restoring the chest and the tools inside, and making it and them my own.  And hopefully learning more about the chest, its maker and my godfather.

More to come.

JPG

For Those About to Rock

I’ve spoken on the matter before, but a good workshop soundtrack does wonders.  My absolute favorite album to woodwork by is “Day and Age” by The Killers.  I can go an entire day in the shop with that album on repeat.  I’ve gotten really into Florence + The Machine lately as well, and Matt and Kim continue to be a guilty pleasure.  [I know I’m late to the party and I don’t care].

I mention it because on the docket this weekend I begin work on the frame for the RH-inspired bathroom vanity.  First on the list is hand-ripping about 16 feet of quartersawn 8/4 white oak to to rough width.  And I find a good beat (and a very sharp saw) is the key to controlled saw strokes.

IMG_20170218_094801

All from one tree board for best color match.

The boards are all about 9″ wide, hopefully enough to get four 2″ wide boards from each.  My plan to ensure I do is to make the first rip and leave the 4.5″ wide boards to sit for a couple hours.  If the wood behaves, I may true and joint the 4.5″ wide boards (to at least S3S) before doing the second set of rips.  I have every reason to expect it will behave; it’s air-dried and quartersawn.

I also need to do something about my lumber storage situation.  But that’s a problem for another day, once I clear out some of my pile with a few spring projects.

JPG

Almost Too Deep

With the negligible exceptions of squaring the ends and boring a few more holes (for holdfasts or otherwise), my workbench is officially done.

wp-1489775913627.jpg

Maybe one more pass with the jointer plane as well.  

After the new benchtop extension, the workbench is officially 22.5″ deep (plus 1/8″ or so in places along the still-rough back edge).  I know I will eat these words sooner rather than later, but 22.5″ almost feels too deep.

My last workbench, the Stent Panel (i.e., stretcherless) knockoff, was only 19″ deep.  Before that, I worked primarily off a 10″ deep clamp-on slab with two planing stops and holdfast.  And before even that, there was my Milkman’s Workbench.  See here for a size comparison of the two.  I got all the way back to the middle of 2014 for when I last had a workbench deeper than 19″ (it was 23.75″).  That’s a long time ago.  I’m sure I’ll get used to it again

I promised everyone pictures of pegs going into holes, so here you go.

wp-1489777990392.jpg

This one actually broke off in the hole during the glue up.

wp-1489777995653.jpg

Spacers work well after a bit of finessing.  

Are you sick of phallic double entendre yet?  Me neither.

JPG

Real Bench Extension

After a couple months of acclimating, I surfaced the 12/4 ash board which will form the rest of the benchtop. It had almost no twist, but even with a bit of cup, I still ended up with over 3″ of total thickness. But as you’ve probably observed, that’s still about 1″ thinner than the main benchtop. 

What’s worse than a tool tray? A really shallow tool tray.

I have a solution, though.  Some Douglas Fir spacers will raise the back board up to the same height as the rest of the benchtop. A little higher, actually, so I can plane everything into flatness. I used DF because while it will ding and mildly conform to any irregularities, it’s still tough and rigid. Eastern White Pine would compress too much over time, methinks. 

I will probably leave the back edge rough, until I don’t. 

I plan to glue the back board to the main benchtop, so here is the question: do I glue the spacers to the back board, or just screw them on (so I can replace them later)?  In any event, I want to add some alignment dowels into the short stretchers that will keep everything in order.

I have a process for that, which I’ll detail in the next post. 

JPG

What the Hell am I Doing?

It’s no secret that “Mythbusters” is one of my favorite shows. I’ve probably seen each episode, other than the really gross one with the earwax candle, five times. And I’m very fond of ruining party conversations with “Well, actually, the Mythbusters tested that and…”. Damn me and my science.

One of the recurring themes on the show is the “What the Hell are We Doing?” moment, where one of the hosts realizes how absurd a turn the experiment has taken. I had one of those moments yesterday.  Having just finished the saw till for the new chest, I realized, all at once, that it’s stupid to make this a tool chest.

Seems to work pretty well, though.

It’s not the right size for my tools and I already bought lumber for an anarchist’s tool chest clone. But I glued in the saw till anyway, because I couldn’t help myself.

This is dumb and I’m dumb for doing it.

But I came to my senses after two lower runners and a saw till.  Blanket chest, it is.  At least I can skip the frame and panel lid (or at least the dust seal).

Trust your instincts, folks.

JPG

What am I Ashamed of?

I’ve been building another chest and it’s coming along pretty well.  Overall dimensions are 30.25″ long x 20″ wide x 15.25″ high.  The inside dimensions are 28″ long x 18″ wide x 14.5″ deep.  Sound familiar?

wp-1488766823255.jpg

This one has rabbets and nails, not dovetails.

Several people have asked me what I’ve been building lately and every time I’ve said “a blanket chest”.  But is it?  It could easily be a tool chest.  I’m not sure it’s not a tool chest.

There are rabbets and nails at the corners, and there would be regardless of what the chest will hold.

wp-1488768898794.jpg

Sawn and split by hand, like always.

There are shiplaps for the floorboards, cut with my shop-made fillister plane.

wp-1488766830932.jpg

The toothed texture on the edge of the benchstop is very grippy.

And the chest will be painted, whether or not it holds hand planes or doilies.  So what’s the difference?  I think a tool chest has a proper skirt and dust seal, which isn’t necessary on a blanket chest.  The lids may differ a bit as well.

But maybe, just maybe, there isn’t any real difference other than in my mind.  I think I’m just ashamed that rather than build the furniture I need (like some more plant stands or a cat jungle gym for River), I’m building yet another chest.  But I like building chests and I’ve had these boards for over a year.

And who knows, it might really be a blanket chest this time.

JPG

Something Old, Something New

The point at which you first install workholding on a workbench is a bit thrilling.  The bench transforms from furniture to functioning tool.  Even if the workholding is just an aluminum planing stop.


wp-1485520332717.jpg

Final flattening of the bench only took about 30 minutes.

I have been enamored with these Lee Valley-Veritas planing stops for some time.  I tried a toothed planing stop on my previous workbench, but I never really liked it.  Unless I needed the extra 6 inches or so of benchtop, I always went back to these aluminum stops. They are low profile and easy to install (requiring only two 3/4″ dog holes).  And they can be cut to perfect length.

This time, I even remembered to space the holes so they’d line up with a row of tail vise dog holes, if I ever install a metal front vise as a tail vise.  I mean to, eventually, but I only have 12″ from the end of the benchtop to the top stretchers, so I’d need a pretty compact front vise.  Before I do, though, I’m going to try working with just holdfasts and does’ feet.  I hear it works pretty well.

My first project on the new workbench will be that plant stand I was making last year, which is very similar to a previous prototype.  I’ve said it before and I’ll say it again: working home center spruce is such a joy.

JPG