small projects

Head Over Heels

Every time I get to a certain point on a project, I ask myself the same question: should I stick with the plan or go in a completely different direction?

I had built this whole project with the idea of putting the video game cases on the bottom and the drawer for controllers on the top.  But that would be stupid, because the drawer would be above eye level.  My solution: flip it 180 degrees.  So it goes in a literal different direction.

wp-1470526126452.jpg

Because why not?

The cleats are more for hanging than anything, and it’s not like they are asymmetrical anyway (having foregone a french cleat in my design).  With the drawer on the bottom, the bottom shelf can immediately be used for holding controllers (because the cleat acts as a stop).  Plus, the game cases fit so tightly on that shelf it doesn’t matter whether the clean (which is also a stop) is on the top or the bottom.

Problem solved.  Not it just needs some paint, before I whip up two more as presents.

JPG

Small Victories

Sometimes I get a little impatient in my woodworking.  Case in point, a random dovetailed pine box I had always meant to section off for nail and screw storage.  Instead, it’s become a rabbeted and nailed box.

wp-1470433702381.jpg

Most of one, anyway.

But I started nailing it together before I cut the rabbets for the dividers.  Lucky for me, I had a stroke of genius: make a single shelf (for a drawer) and hang it on the wall.  And what do you know, it not only fits console game cases on the bottom shelf, but the drawer will be large enough to hold console game controllers.

wp-1470433706050.jpg

Amazing how that works out.

Since I had already nailed on two sides before I started cutting the rabbets, I couldn’t use a chisel other than in the vertical position.  My solution: use a block plane blade.  Surprisingly, the joint fits tight enough for the application.

I will post some pictures of the finished project when I’m done.

JPG

Basic Project: Rabbeted/Nailed Box

Today’s basic project, a rabbeted and nailed box, is a sub-project of my new traveling tool chest.  Although I alternate between through dovetails and rabbets/nails for carcases, when it comes to sliding trays for tool chests, I always go for rabbets/nails.  It’s faster, holds almost as well, and is a great way to practice hand-cut rabbets.  The project can be scaled to any length, width or depth you desire .  The tray pictured below is 8″ wide and 22 1/2″ long by 4 1/4″ high (4″ not including the tray bottom).

wp-1468700479189.jpg

Easy as can be.

moving fillister plane (with scoring spur) is great for cutting cross-grain rabbets, but I still enjoy the hell out of hand-splitting rabbets.  Hand-splitting is definitely not faster than using a dedicated plane, although in my experience it can be more accurate both in terms of depth and shoulder squareness.

Materials and tools for this project were as follows:

Materials:

Carcase ends:  4″ x 8″ x 5/8″ eastern white pine
Carcase sides: 4″ x 22 1/8″ x 5/8 eastern white pine
Tray Bottom: 8″ x 22 1/4″ x 14″ red oak
Carcase Nails: Dictum 40mm door nails
Bottom Nails: Tremont “Fine Finish” cut nails
Hide Glue

Tools:

Wide chisel (I used 1″)
Chisel Mallet
Marking Gauge
Router Plane (if you don’t have one, you can just use a chisel)
Dividers (a ruler and awl will work just as well)
Hammer

After you’ve prepared the pine stock for the carcase, first set your marking gauge to the thickness of the carcase sides.  Mark the inside face and the sides of each end board.  Then reset your marking gauge to exactly half the thickness of the end boards and finish laying out the rabbets on the end boards.  Chop the rabbets with the wide chisel, same as when making a dado.

wp-1468700445889.jpg

Until your relief cut gets down to the line.

Next, split the rabbets, just like you would with a tenon.  Keep an eye out for grain direction and don’t be afraid to leave a little bit of waste to paring away later.

wp-1468701582418.jpg

It’s nice to use a metal vise once in a while.

When you are reasonably close to your gauge lines, break out the router plane.  I recently upgraded my small router plane, which I unboxed just for this operation.  Set the depth to your gauge line and pare the rabbets to depth.  A chisel works just as well if you don’t have a router plane: just go slowly and pay attention to your depth lines.

wp-1468700465785.jpg

An huge upgrade from my previous small router plane.

At this point, you should have all four rabbets cut and parallel, resulting in two identical end boards.  If for any reason the shoulder lines on the two boards aren’t identical, pare down the shoulders until they are.  Cut the carcass sides to length, square up the ends and get ready to glue and nail the boards together.  Pre-drill your nail holes and assemble the carcass with glue and the 40mm door nails.  Three at each corner should do the trick.

wp-1468700473804.jpg

Level the seams if you have to (I did).

Once the glue is set, it’s time to attach the tray bottom.  A bit of glue on one carcase side will control the direction of expansion and contraction.  Assuming the tray carcase is leveled, clamp the tray bottom and tray together (against the bench) and pre-drill your nail holes every 3-4 inches or so.  I like headless cut nails for tray bottoms, so be sure the nail is oriented with the grain to prevent splitting.

wp-1468702301504.jpg

Add nails along all four sides.

The ends of a tray bottom in a tool chest extend slightly beyond the ends of the carcase (for clearance when sliding), but you should at least level the bottom to the sides of the carcase.  If you are making a stand-alone tray, skip the overhang and flush the bottom perfectly to the carcase on all four sides.

And there you go.  As Christopher Schwarz would say, when done right nails are not “second class joinery”.  They can be beautiful and functional.  And very quick to throw together (the above box took less than 3 hours, including stock preparation by hand).

JPG


New Sharpening Jig

It was time to make another depth stop jig for use with an off the shelf Eclipse/Record-style sharpening guide.  My current version of the jig, made of 2×3 offcuts, is way too bulky for carrying around in my traveling tool tote.  I don’t freehand sharpen my plane irons, so this is an essential piece of shop equipment for getting consistent edges across multiple sharpening sessions. I did not make one for chisels, though, because I freehand (or machine, if available) sharpen my chisels.

wp-1463935046348.jpg

The sharpening guide in question shown in the middle.

I had considered making this a “Basic Project”, but it’s been done so many times I don’t want to take credit for the plans.  This new version is just a variation of Christopher Schwarz’ design.  Please note that if you don’t use the Eclipse/Record-style of sharpening guide, the depths listed below won’t work for you (but the numbers can be adjusted to fit whatever sharpening guide you use).

wp-1463935036436.jpg

Instructions for the full-size, benchtop style seen top left.

There is no real joinery in this project, which I love. Each stop block is CA glued in place and tacked with brads once the glue is set.  What makes this project a little tricky, however, is the need for perfectly square edges. Once you have a straight reference edge (planed or factory, if using sheet goods), the shooting board really gets a workout squaring the ends of the stop blocks and the base board.

I could not find a link to the instructions pictured above, but the depths are as follows:

  • 25° = 54mm
  • 30° = 40mm
  • 35° = 29.5mm
  • 40° = 21mm
  • 45° = 15mm

One thing I didn’t realize before this build was how quickly CA glue sets on white pine (spoiler alert: VERY quickly).  Even so, CA glue does not have great shear strength, so pre-drilling the brads was important.  Two brads per block seems to be more than enough.

wp-1463935043153.jpg

I put the depths I use the least on the underside of the jig.

I eschewed the 1mm shim on a string for creating 1° microbevels (seen in the full-size instructions pictured above).  Mainly because using the same metal ruler I use for the David Charlesworth Ruler Trick works just fine.

It may only be quartersawn white pine, but this thing should last forever.  And if the CA glue gives way, I’ll just scrape it off and use hide glue (the nails will guide the block into place again).  Or I could preemptively drive a third, larger nail into each block and be done with it.

JPG

Basic Project: LN-style Saw Vise

This new “Basic Projects” segment is a Lie-Nielsen-style saw vise.  A good saw vise is essential, hand-tool woodworking shop equipment. This saw vise is simple to make from a few scraps and basic hardware and can be held in a bench vise during use.

wp-1457658364376.jpg

The materials list below is for a 12″ saw vise, which I’ve sized to fit my dovetail saws (and therefore pretty much everyone one of my other saws).  A larger 16″ version is fantastic for my panel saws and larger tenon saws, but not so great for saws with smaller plates.  Please note that all materials were what I had on hand, so feel free to mix and match what’s available to you.

Materials list:

  • 2x birch plywood (1/4″), approximately 12″ x 6″ (for the sides)
  • 4x white pine blanks, approximately 12″ long and sized to fit your saws (for the upper and lower jaws)
  • Metal hinges
  • Wood screws/Cut Nails
  • Wood glue
  • Suede leather strips (to line the jaws)

Tools list:

  • 22″ panel saw
  • Low angle block plane
  • Hand drill and screwdriver/hammer
  • Scissors, chisel or razor blade (for trimming the leather jaw lining)

First, make the plywood sides.  Mine came from some craft store birch ply I picked up at the same time as the suede to line the jaws.  Saw them to length and width and plane to equal size with a block plane.  You can shoot them if you’d like, but exact squareness is not critical.  All that matters is they are identical and the long sides are roughly parallel.

Then, to size the upper jaws, take your smallest saw and subtract 3/8″ from the height of the saw plate at its narrowest point (probably by the handle): that’s the height of each upper jaw.  Then make each upper jaw about the thickness of the saw tote (or 2x overall) to accommodate different size saws in the finished vise (but there is no magic to this measurement).  Using my Vertitas dovetail saw as a reference, each upper jaw is 7/8″ high and 1″ thick.

When you glue the leather lining onto the upper jaws, you can use pretty much any type of glue when bonding leather to wood.  I use hide glue for the longer open time.  Either glue the leather down proud of the wood on all sides and trim flush with a chisel and mallet (like I did), or cut the strips to size before gluing.  Either will work.

wp-1457528797584.jpg

In scales this small, a hand plane is a good as a granite slab.

Height on the lower jaws is not critical, but they should be substantial enough to take wood screws or nails.  Depth on the lower jaws is more important: they must be overall pretty close the upper jaws (including the leather lining) so the upper jaws will close tightly when clamped around the saw plate.  If you can, leave the lower jaws larger to accommodate the leather jaw lining on the upper laws (which can add up to 1/8″).  I always forget that part and make all four jaws identical.  So instead, I added leather to each of the lower jaws also.

Now glue and screw one upper jaw and one lower jaw to each plywood sides, driving from the outside.  Three screws for each jaw should be more than enough.  Cut nails will work also.  I actually used 1″ headless cut brads (from Tremont Nail) because I don’t have a No. 8 countersink bit handy.  If you use nails, remember to orient the head of the nail with the grain of the top piece.

wp-1457615220386.jpg

Light pressure from the holdfast keeps everything cinched while driving the nails.

Then clamp the assembled halves together in a bench vise or with some F- or spring-clamps.  Mount the hinges on the outside of the lower jaws, about 1″ from each end (and in any event, clear of the screws or nails holding the jaws onto the sides).  The hinges I had on hand were overkill for this application, but I wasn’t about to buy more.  Finish is optional

wp-1457658360257.jpg

Good thing I added leather to both sets of jaws; I installed the hinges on the wrong side!

And that’s it.  You’re ready to sharpen your own saws.  If you’d like, go ahead and chamfer the top front edge.  Although not strictly required, this detail will save your knuckles in the long run.

I will be hand-flattening the core slab of the new workbench this weekend, so wish me luck.

JPG

What to do?

My car took longer than usual being serviced, and traffic was absolutely horrendous, so I didn’t make any workbench progress on Saturday. Instead, I spent some time dicking around with scrap 1/2″ x 3″ red oak left over from the tray runners on the medium tool chest. About 20″ total of flat and square stock was just enough for the carcass of a tiny dovetailed box.

P1000309

Shooting with a block plane on my counter. Not recommended!

When it comes to dovetailing in softwoods, as long as you can saw straight, fiber compression will do most of the work toward achieving perfect joints. In hardwoods like red oak, though, there is such a thing as too tight.  But if you go slow and apply some persuasion, everything can come together nicely.  And dovetailing in hardwoods is a great opportunity to determine if your dovetail saw needs resharpening (mine needed both sharpening and set, in fact).  Le sigh.

P1000313

Meh, I’ve done worse.

On a related note, the bench chisels in the background are my spare set (made by WoodRiver).  They hold an edge well and are quite balanced, but the side lands are way too thick for tight dovetail work.  Not like my Narex chisels (which are still at my parents’).  As a result, the tail recesses are not as neat as I would have liked.  But the carcass is finished.

P1000317

And sturdy as can be.

With the inside dimensions of only 3.75″ square, I would think it has potential as a keepsake box.  Or at least an adequate receptacle for collar stays and cuff links.

Stay tuned for the upcoming “Basic Projects” installment for this piece.  But first there will be more on the workbench later this week.

JPG

I Had Almost Forgotten

It’s been a struggle putting together a design for a workbench.  Not because I don’t know what I want to make, but because I need to figure out the best way to make it by hand from construction lumber.  I have about 60 linear feet of Douglas Fir 2×10’s that will become the frame, and I plan to laminate over a dozen Douglas Fir 2×4’s for the top, but creating a step-by-step plan has been elusive.

And for me, that means taking a step back from the theoretical and diving into some practical research.  And what could be a better practice run than those Japanese-style Saw Horses I’ve always wanted?  And what better place to start than the feet, which are a perfect scale analogue for the laminated workbench legs?

Each foot is approximately 24″ long and consists of two boards.  I don’t have any 2×4’s, but I do have some 2×8’s and a panel saw, so here we go!

Step one: rip a 48″ 2×8 into two lengths of 2×4, then crosscut to 24″ each and reassemble in sequence.

P1000303

Hand sawing gets the blood pumping.

Step two: carefully mark where the boards meet, and stack each right board on top of the corresponding left board without changing orientation.

P1000305

This ensures consistent grain direction, just like a single board.

Step three:  surface plane the two faces where the boards will meet, then square up one edge to each reference face.

IMG_20160128_204049456[1]

And mark carefully.

Step four: thickness plane each board to S4S and prepare for glue up.

[Picture not found…yet.]

Before I actually glue up the feet, though, I should create the mortises for the legs by cutting dadoes in the reference faces.  The bottoms are already square to those reference faces, so there is no reason I can’t cut those joints in advance of thicknessing.

The legs, btw, will be made from approximately 30″ of Douglas Fir 2×6.  But that, along with the top and bottom cross rails, is for another day.

JPG

Basic Project: Sushi Tray

As a new segment here at The Apartment Woodworker, I will be documenting some of the smaller projects I find interesting and which I think are good for skill-building.  I’m not one for CAD, so the focus will be on the (sometimes extremely) limited set of hand tools these projects require.  There may be basic cut lists as required, but most of it will be rough dimensions.

This isn’t about teaching people how to woodwork.  There is a body of instructional material out there far better than I’m capable of producing.  Just Google “Paul Sellers the three joints” and go from there.  The goal here is to inspire people to pick up some hand tools and make something, without breaking the bank on a tool collection or materials.  So without further ado:

I love sushi (specifically, spicy salmon rolls).  I’ve always wanted wood sushi trays (I see them called “geta”).  So I recently decided to build a prototype.  I like this project because it requires friction-fit dadoes, which are my favorite joint to cut.  Mine was built from scraps, so I’ll make more as I have the materials.

wp-1452377922651.jpg

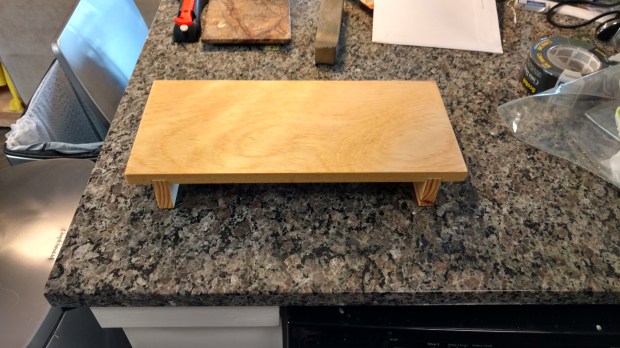
As far as first tries without plans, it’s not bad.

It’s true that similar items retail for under $20 each on Amazon.com.  But you know what also costs under $20?  An eight foot select pine 1x 8 from the home center, and you can get four trays out of a single board.  You’ll need some food-safe finish (like butcher block oil) and food-safe glue (like Titebond II), but that’s still about half the cost of paying someone else to make you a set of four.

Use harder, food-safe cutting-board woods if you’d like, but they probably aren’t necessary for the amount of abuse these will take.  That having been said, everyone has allergies, so go with whatever food-safe wood works for you.  And regardless of wood, I also like to surface plane every board I get from the home center.  I have no idea what kind of gunk it’s been exposed to, so I always feel more comfortable with clean fibers showing.

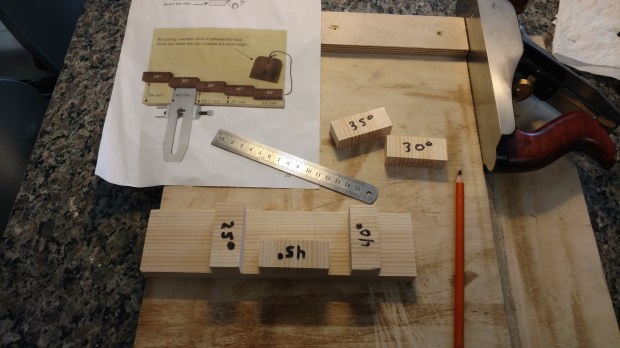
The essential tools for the project are as follows:

  • 1/2 and 3/4 chisels, plus mallet
  • No. 4 or No. 5 bench plane
  • 9-14 TPI Rip cut saw (panel or tenon is fine)
  • Combination square and marking knife
  • Tape measure
  • Sandpaper
  • Food-safe glue (I used Titebond II)
  • Food-safe finish (I used Goddard’s butcher block oil)

Optional tools (which will make the work easier) are:

  • Router plane (any size will do)
  • Wide chisel (1″+)
  • Shooting board (if you don’t have one, walk away from this project right now and make one)

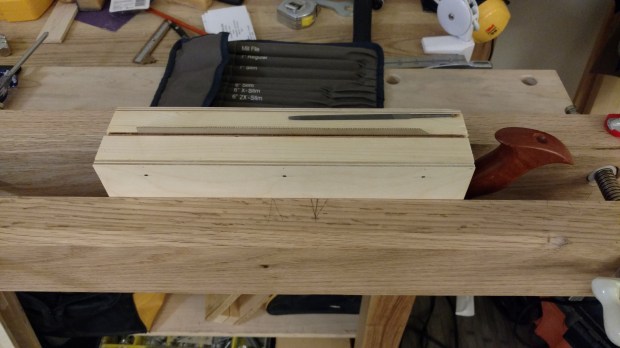
The top is made from a 15″ length of 1×8.  The feet are made by ripping a 7.5″ length of 1×8 into thirds and squaring everything up with a bench plane (you need two feet per tray).  There is no magic to the height of the feet, but anything between 2″ and 3″ should be fine.  For aesthetics, the feet are slightly longer than the top.

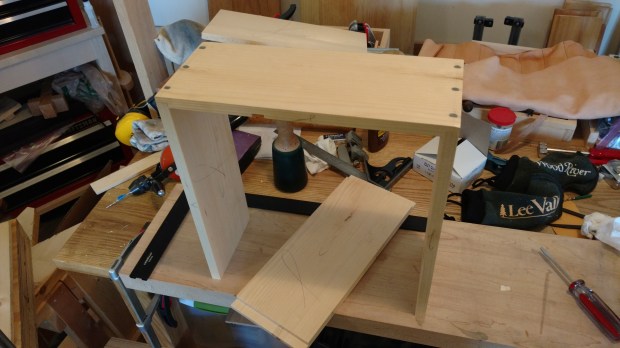
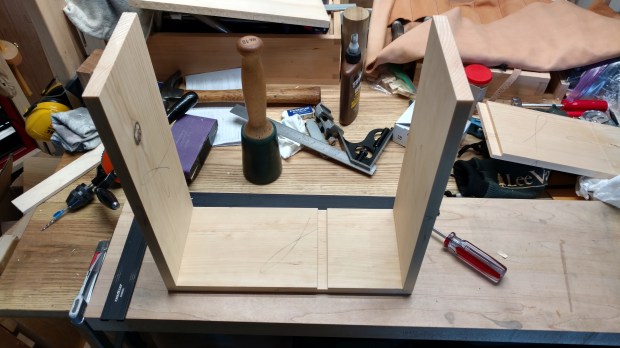
There are two dadoes on the underside to accept the feet.  Because the top has a 2:1 ratio, for symmetry I started the dados 2x their thickness from the outside edges (in this case, about 1.5″).  Each dado is supposed to be 1/4″ depth, but if you’re like me, you always end up deeper because of errant depth chops on the sidewalls.  If you have a router plane, awesome.  If not, pare the dadoes with a chisel (and go slow, being careful about uniform depth).  None of the above measurements are requirements, but I have found that dado depth probably shouldn’t be more than 1/2 the thickness of the top piece.

wp-1452356031714.jpg

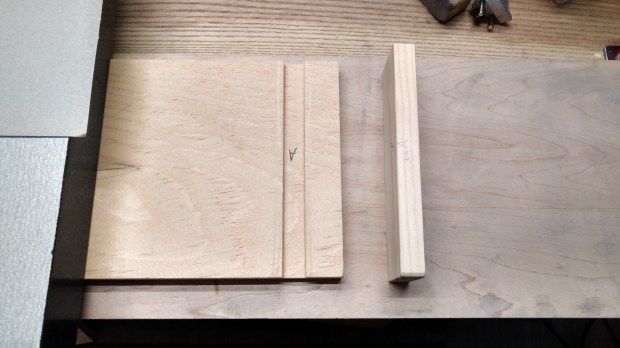
And be sure to label your parts.

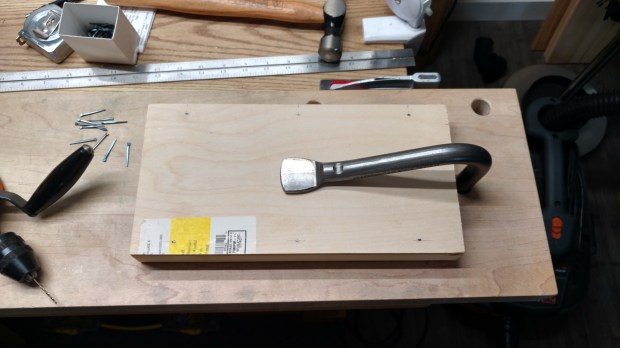
Break the corners everywhere (except where the feet fit in the dadoes) with a plane or sandpaper.  A bead of glue on the floor of a friction fit dado is more than enough for a permanent joint.  If you need to, drive the feet home with a mallet and a piece of scrap and leave them for an hour.  Then lightly sand the top, clean off the dust and finish all over with a thick rub of butcher block oil (the pine will be thirsty).  After a wash or two, reapply more butcher block oil to the top face.  It should be good for many uses after that.  And if you used a PVA glue, it should be dishwasher safe.

And that’s it.  Repeat as many times as you like.

Congratulations! You now have practice hand-cutting open dadoes, which you will use in woodworking forever.  And the trays are quite multi-purpose, working just as well for cheese and crackers or as coasters.

I hope this has been informative.  If not, keep it to yourself.

JPG

Words to Cut Joints By

Admittedly, my previous post was a bit harsh.  Without any remorse and sans even one iota of apology to the douchenozzles in question, I concede that things got a little out of hand on Friday.

I like to keep it pretty highbrow around here, so let’s talk about one of my favorite joints: the cross-lap joint.


The cross-lap joint is all about precision.  In its simplest form, two pieces are joined to form an overlapping “T” through two dadoes.  Each dado must be precisely sized to snugly fit the mating piece and (usually) the combined depth of both dadoes is equal to the thickness of one of the pieces.  This precision is achieved, first and foremost, through careful layout.

For me, the most accurate way to mark each dado is to scribe an initial line with a marking knife and, leaving the square in place, use the mating piece to transfer the dado width.  I tend to mark my dadoes about 1/64″ narrower than the mating piece when working in softer woods.  In harder woods, it might be only a few thousands of an inch.  I then transfer the width lines to the sides and scribe my depth line normally.

Unless the boards are wide (6″ or more), I will use a tenon saw to establish the outside walls and then chisel out the waste to just above my depth line with stabbing motions.  On twider boards (or in the case of stopped dadoes), I may only establish the show faces of the walls with a saw and the do the rest by chisel.

P1000258

I always wear safety glasses when paring in this orientation.  

After test fitting for snugness (and paring down the walls to the scribe lines, as necessary), I then fine-tune the dado depth with a router plane, taking very shallow passes until I hit my scribed depth line.  Rinse and repeat for the other dado, fine tuning dado depth to ensure the pieces are joined flush.

When done right, and used in the correct orientation, a cross-lap joint can have mechanical strength and may require little reinforcement.

P1000266

The first dado in process.

The cross-lapped pieces above are the base of a small plant stand.  Assuming I accurately locate the through-mortises on each of the legs to evenly distribute the vertical load, the cross-lap joint won’t require any reinforcement.  Assuming.

JPG

It Comes in Waves

I’m taking a long weekend to recharge the batteries a bit.  What better way to unwind than to jump right into some asymmetrical dovetails?

wpid-wp-1448064223988.jpg

Quite the grain match, huh?

The above board is the tabletop for a 24x24x12 console table.  The top will overlap the sides about an inch, which will permit me to eventually add a drawer, flush to the top.  That’s the point of the straight pin on the left.

wpid-wp-1448110463064.jpg

If it will support itself across 24″ when half-fitted, it’s a tight-enough joint.

I need the table now, so I’ll add the drawer later.  Which is good, because I don’t have any idea how to attach it.  One step at a time, I guess.

JPG