Month: November 2016

Slippery Slope

I’ve been watching a ton of New Yankee Workshop lately. Norm Abram is the Bob Ross of woodworking; and Christopher Schwarz is right: Norm is hilarious. Roman Ogee, not Roman Orgy. Lolz. 

It’s gotten me thinking though: what if I had Norm’s signature tool, a radial arm saw?  It goes against everything I believe in (not really).  But I do have a double bevel compound miter saw, so would halflaps on that be any slower or worse than doing it by hand?  Probably not, and as long as I cut the shoulder by hand (so I knew it was perfectly square), wouldn’t hogging out the waste by power tool be okay?  I already use a thickness planer on boards I made S2S by hand. 

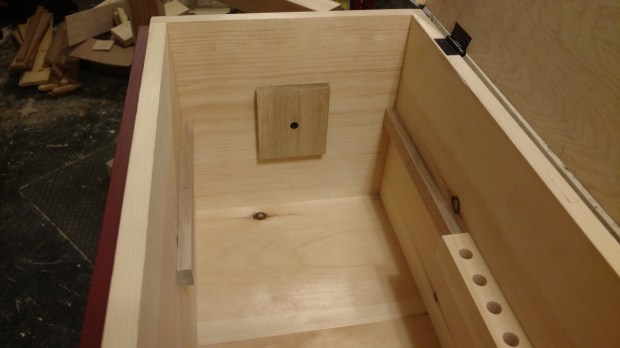
This will need paring with both a chisel and a router plane.

I’ll give it a try and see how slippery the slope really is. 

JPG

Lock and Load

I’ve been rapid fire finishing smaller projects, in the hope of clearing out some space in the shop. 

First, I finished (literally and figuratively) my travel-size tool chest. It’s not a coffin. 

But I would be okay being buried in it.

Then, I completed the first of two Japanese saw horses. The second one is in process, and I will probably make two more in short order. 

I will skip the bevel on the feet next time.

Next, the rolling cart for my new Craftsman tool chest went together rather easily. It’s solid, if unspectacular.

I plan to add a saw till under the lid with rare earth magnets.

Finally, a hanging corner shelf for my bedroom was an exercise in directional planing. After some espresso stain, it may become an upcoming Basic Project.

I’ve never had studs to screw into before.

There are a few other things to clear out as well, but nothing woodworking related.  The shop feels less cluttered, at least. 

JPG

My Heart and My Soul

I have poured my heart and soul into many woodworking projects.  The rolling cart for my new Craftsman tool chest is not one of those projects.  It’s a utility piece and there is no mistaking it.  That having been said, there are a few things about the project that I really like.

  • Halflap joints are exceptionally strong when done right.  The shoulder on the vertical stiles is a load bearing surface.  And if the shoulders are square to a reference face, they go a long way toward keeping the horizontal rails (and therefore the entire frame) square.  Finally, face grain to face grain glue surface translates into a joint that will never come apart.  And it’s relatively easy to cut with a single saw.
wp-1478474628601.jpg

I even get to use my large tenon saw.

  • Whitewood is a joy to work.  Home center whitewood 2×4’s often have a birdseye figure that glistens after smoothing.  The wood is kiln-dried, gentle on plane irons and saw blades, and the price per board foot is unbeatable.  The frames pictured below were made with less than $6 of wood.  The entire whitewood frame for the rolling cart will cost less than $20 (and that includes 2″ decking screws).  Add in casters and a 24×48 sheet of birch plywood and that’s the entire basic cart.
wp-1478474479946.jpg

The screws just hold the joint together until the glue dries.

It makes me wonder: would a whitewood workbench be tough enough?  It would certainly go together with hand tools much easier than the equivalent of Douglas Fir, I’d think.  For a light duty bench, say a 10 foot planing bench, I bet whitewood works just fine.

One last thing on whitewood: I’ve noticed is that the grain direction doesn’t quite work the same as other woods.  These boards often have the pith running straight through the middle.  This means the grain runs in the same direction on both faces.  I always manually check the grain first, because flipping end over end (like you’d do with other boards) could be a quick way to some nasty tear out.

Next up is cutting 3/4″ recesses for the long rails, then more gluing and screwing.

JPG

One and Done

So maybe it does look like a coffin, but the traveling tool chest 2.0 is officially done.  I use the word “done” on purpose, because it’s not quite finished (cough).


wp-1478043821336.jpg

But it is ready for finish.

In the end, there was very little agonizing over how to attach the iron handles.  Two oak blocks were glued to the inside of the chest and screws were driven from each side.  Simple.

wp-1478043828606.jpg

Seen here, like a very lazy dog bone handle.

Unlike its precedessor, this chest has a single stationary till.  I don’t usually dovetail tills (preferring to rabbet and nail for speed of assembly), but in this case, only dovetails would do.  There will be too much stress on the left wall of the till every time it comes in and out of the chest.

wp-1478042618573.jpg

For strength and woodworking pr0n.

Having never built a stationary till before, I reach an organic solution that but for modesty I would claim credit for.  The rack on the back wall is proud of the runner and acts as a stop to keep the till from sliding around.  I am undoubtedly not the first to use such a trick.

wp-1478043824738.jpg

If it ever wears out, I’ll add another rack on the front wall.

The till itself is only 9″ wide, which limits its holding capacity to smaller items.  But that means about 13″ of floor space is unobstructed: plenty to get a jointer plane in and out without having to remove the till.  This is a vast improvement over version 1.0, where the “sliding” till blocked all access to the well.

Now to psych myself up for painting.  In the meantime, I’m making the crochet for my workbench.

More on that soon.

JPG