I’ve resisted it for a while, but finally gave in to this Roubo Workbench craze (if you can call something at least 15 years old a craze). Not because I need it (I have to many workbenches already); but because I need to prove to myself that I can do it.
I was never able to sell my old workbench, so cut the back wing off the slab and set that side after plugging the holdfast holes with epoxy and covering them with poorly matching dutchmen. That repurposed wing is still about 3″ thick and 7 inches wide and will become something, eventually. Probably a mantle, if I’m being honest.
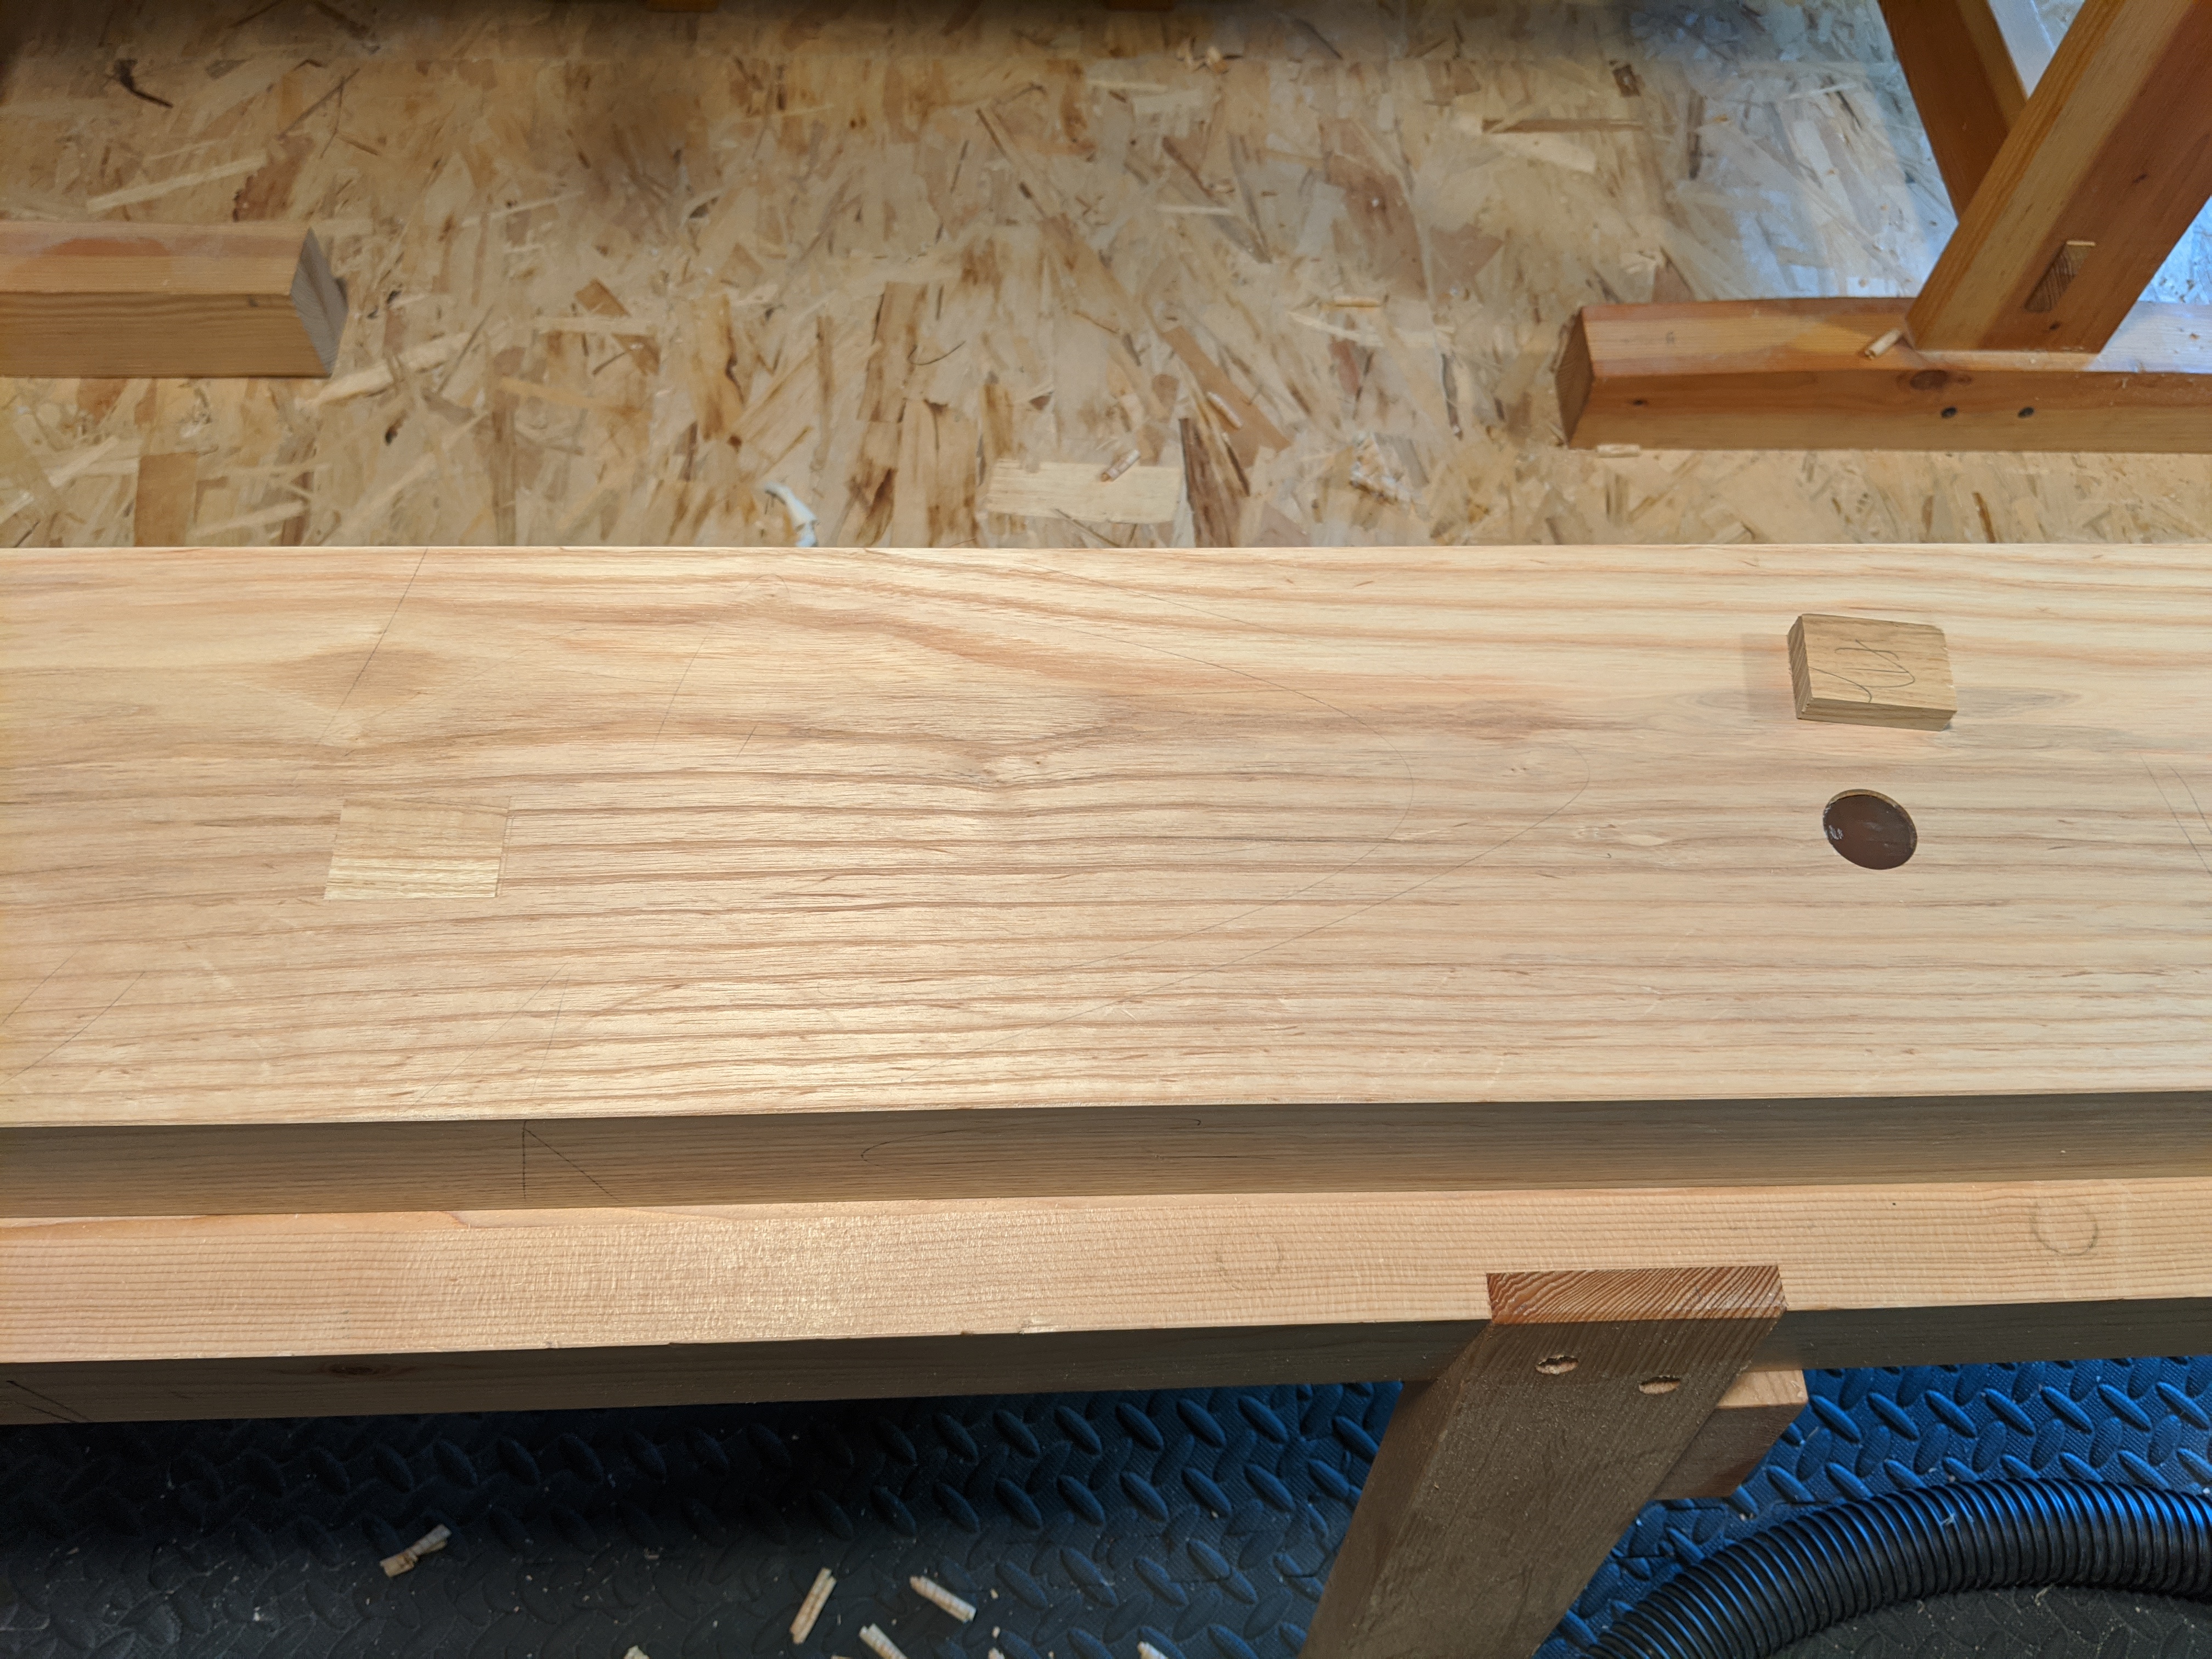
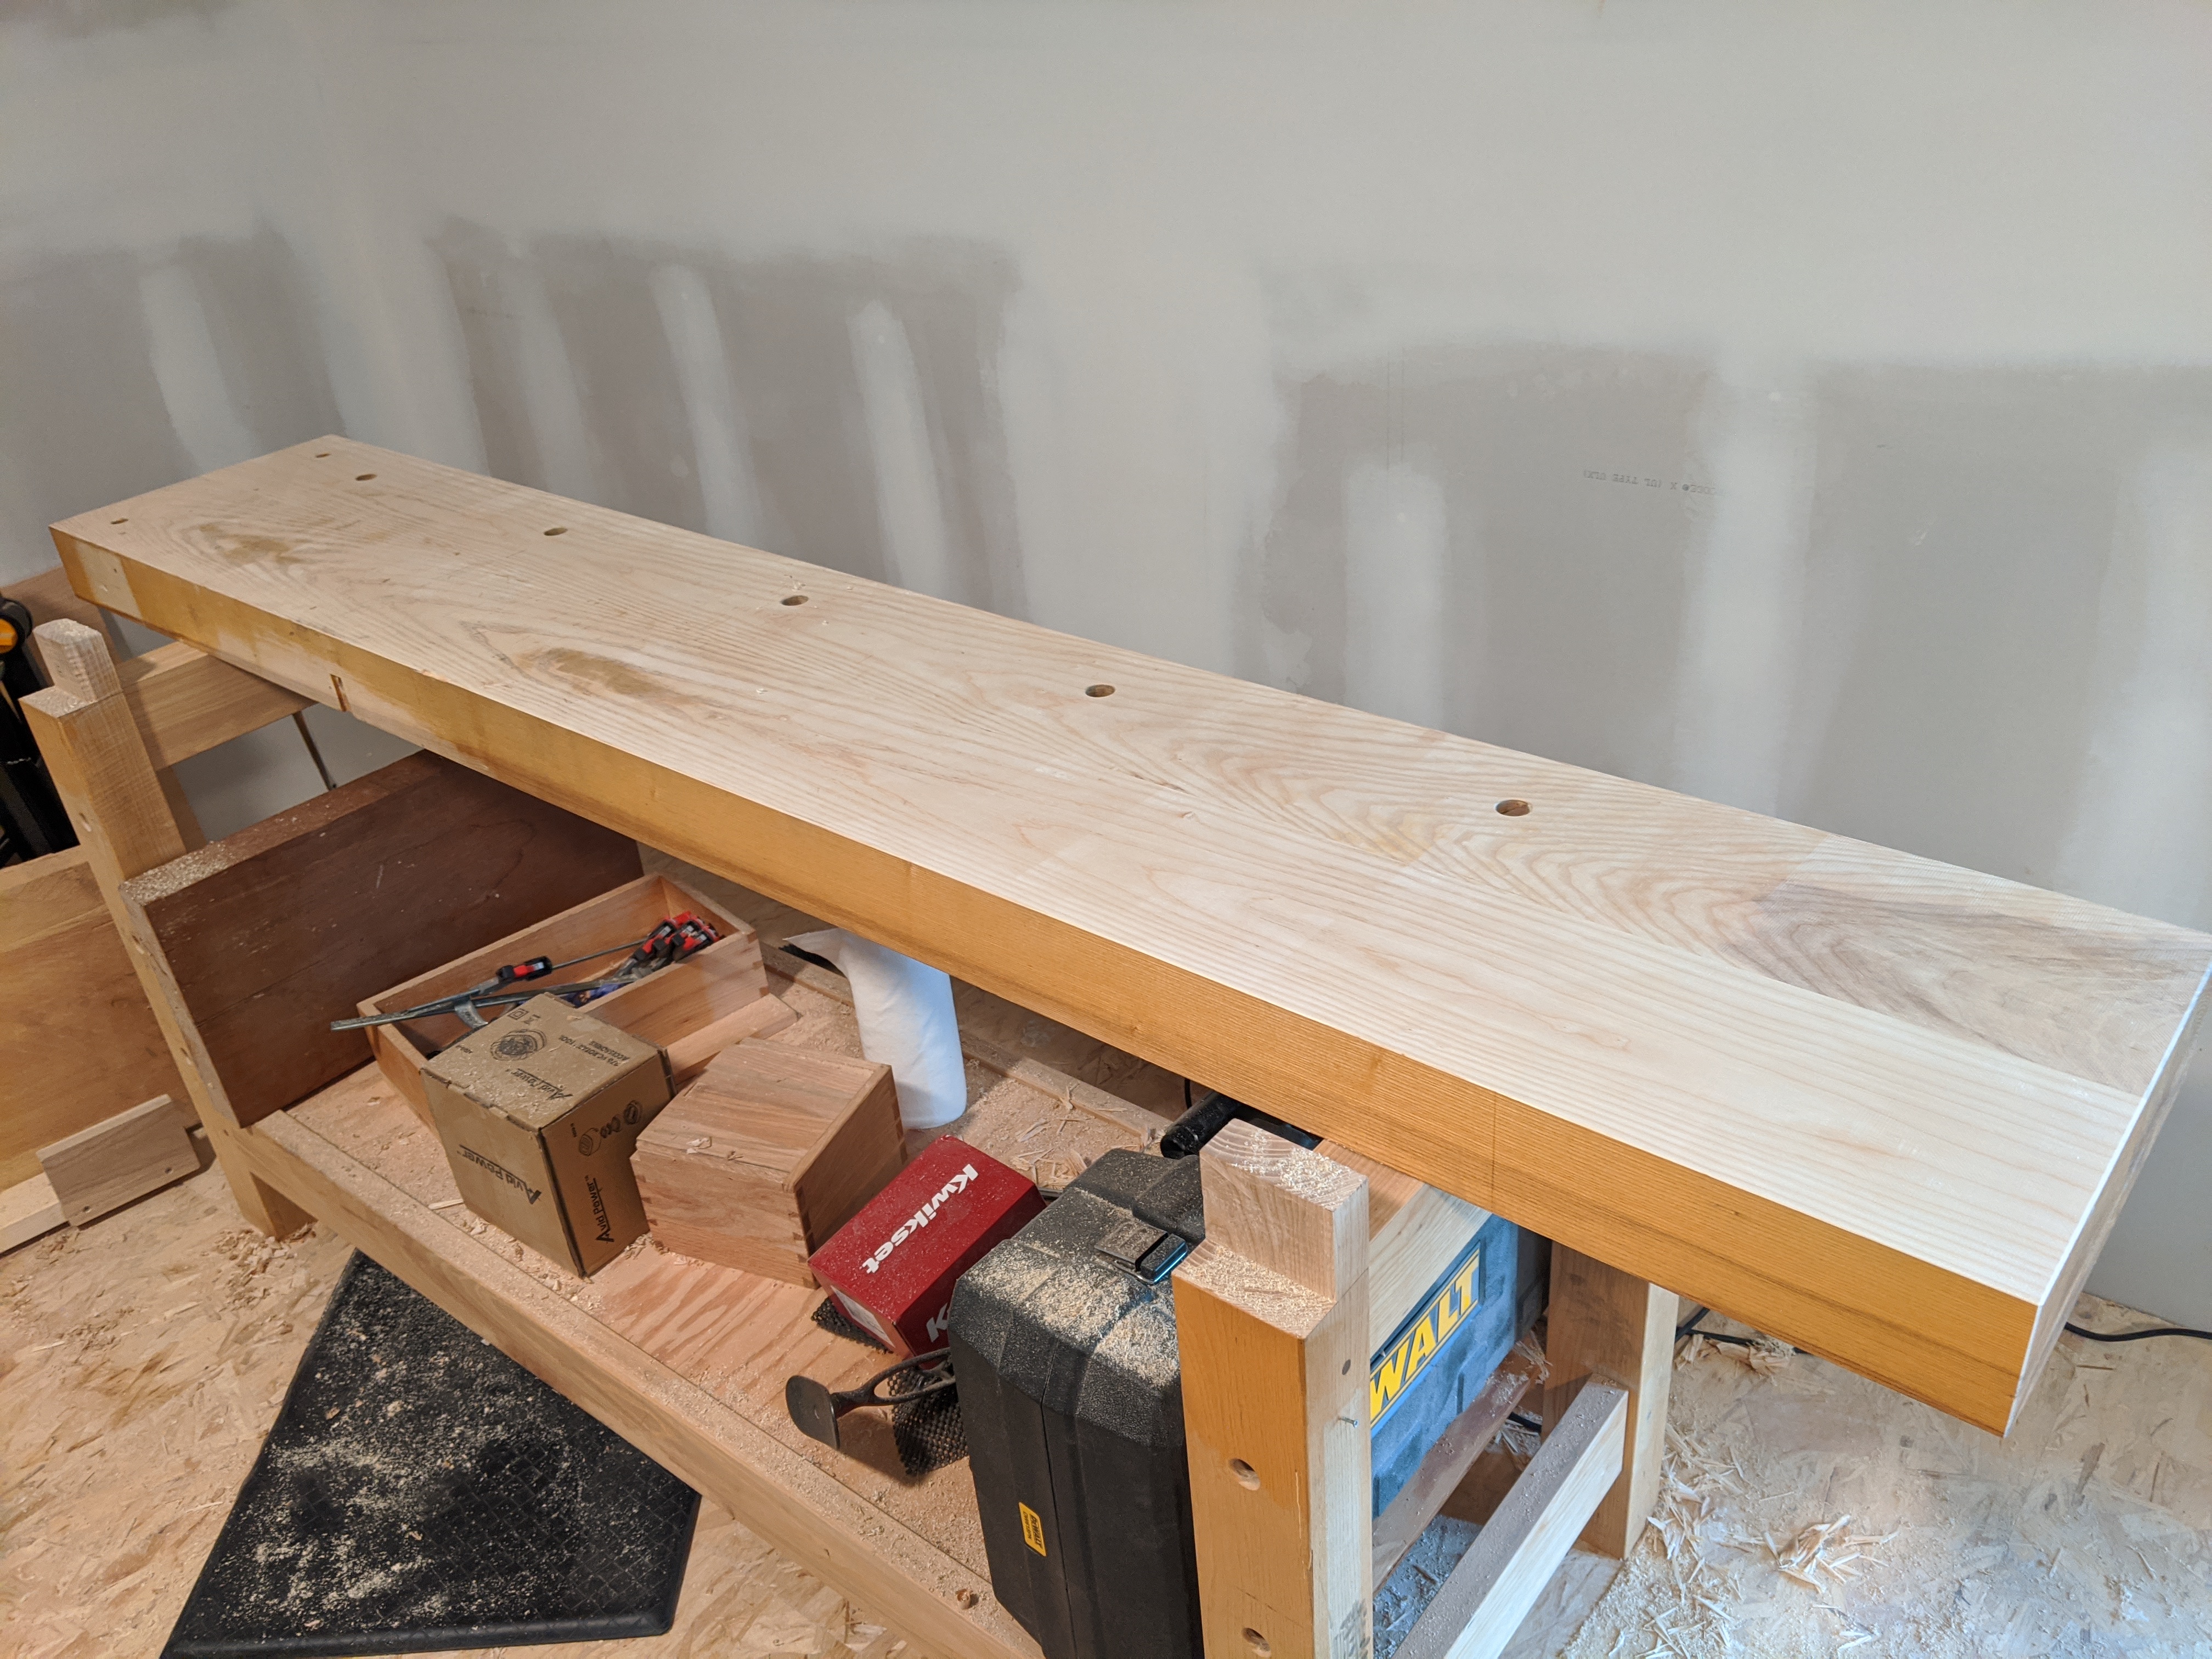
The main slab was still about 3.75″ thick, even after several flattenings. It’s 90″ long and about 15″ wide, consisting of two boards edge glued together. It started as a single, 180″ long piece of 16/4 ash, as a reminder. And after 5 years or so seems to be pretty dry and stable. And the holdfast holes are still pretty plumb even after all that flattening. This is no 6″ thick, 24″ wide slab of green red oak. 15″ is far too narrow for all four legs to be straight up and down (the bench would be too tippy).
So that means another weird Stent Panel (i.e., stretcher-less) style workbench!
I’ve made a quasi-Stent Panel workbench before, with angled back legs. Unlike the last time, though, I won’t mortise the angled back legs into the underside of the slab. Instead, just like a saw bench, I’ll dado the back legs into the side of the slab and cut an angled lap joint on the leg itself. Glue and a large lag screw will secure those back legs to the slab. I contemplated a sliding proper dovetail, but there is a ton of glue surface here (although I may cut it at a couple of degrees for a little bit more mechanical strength).
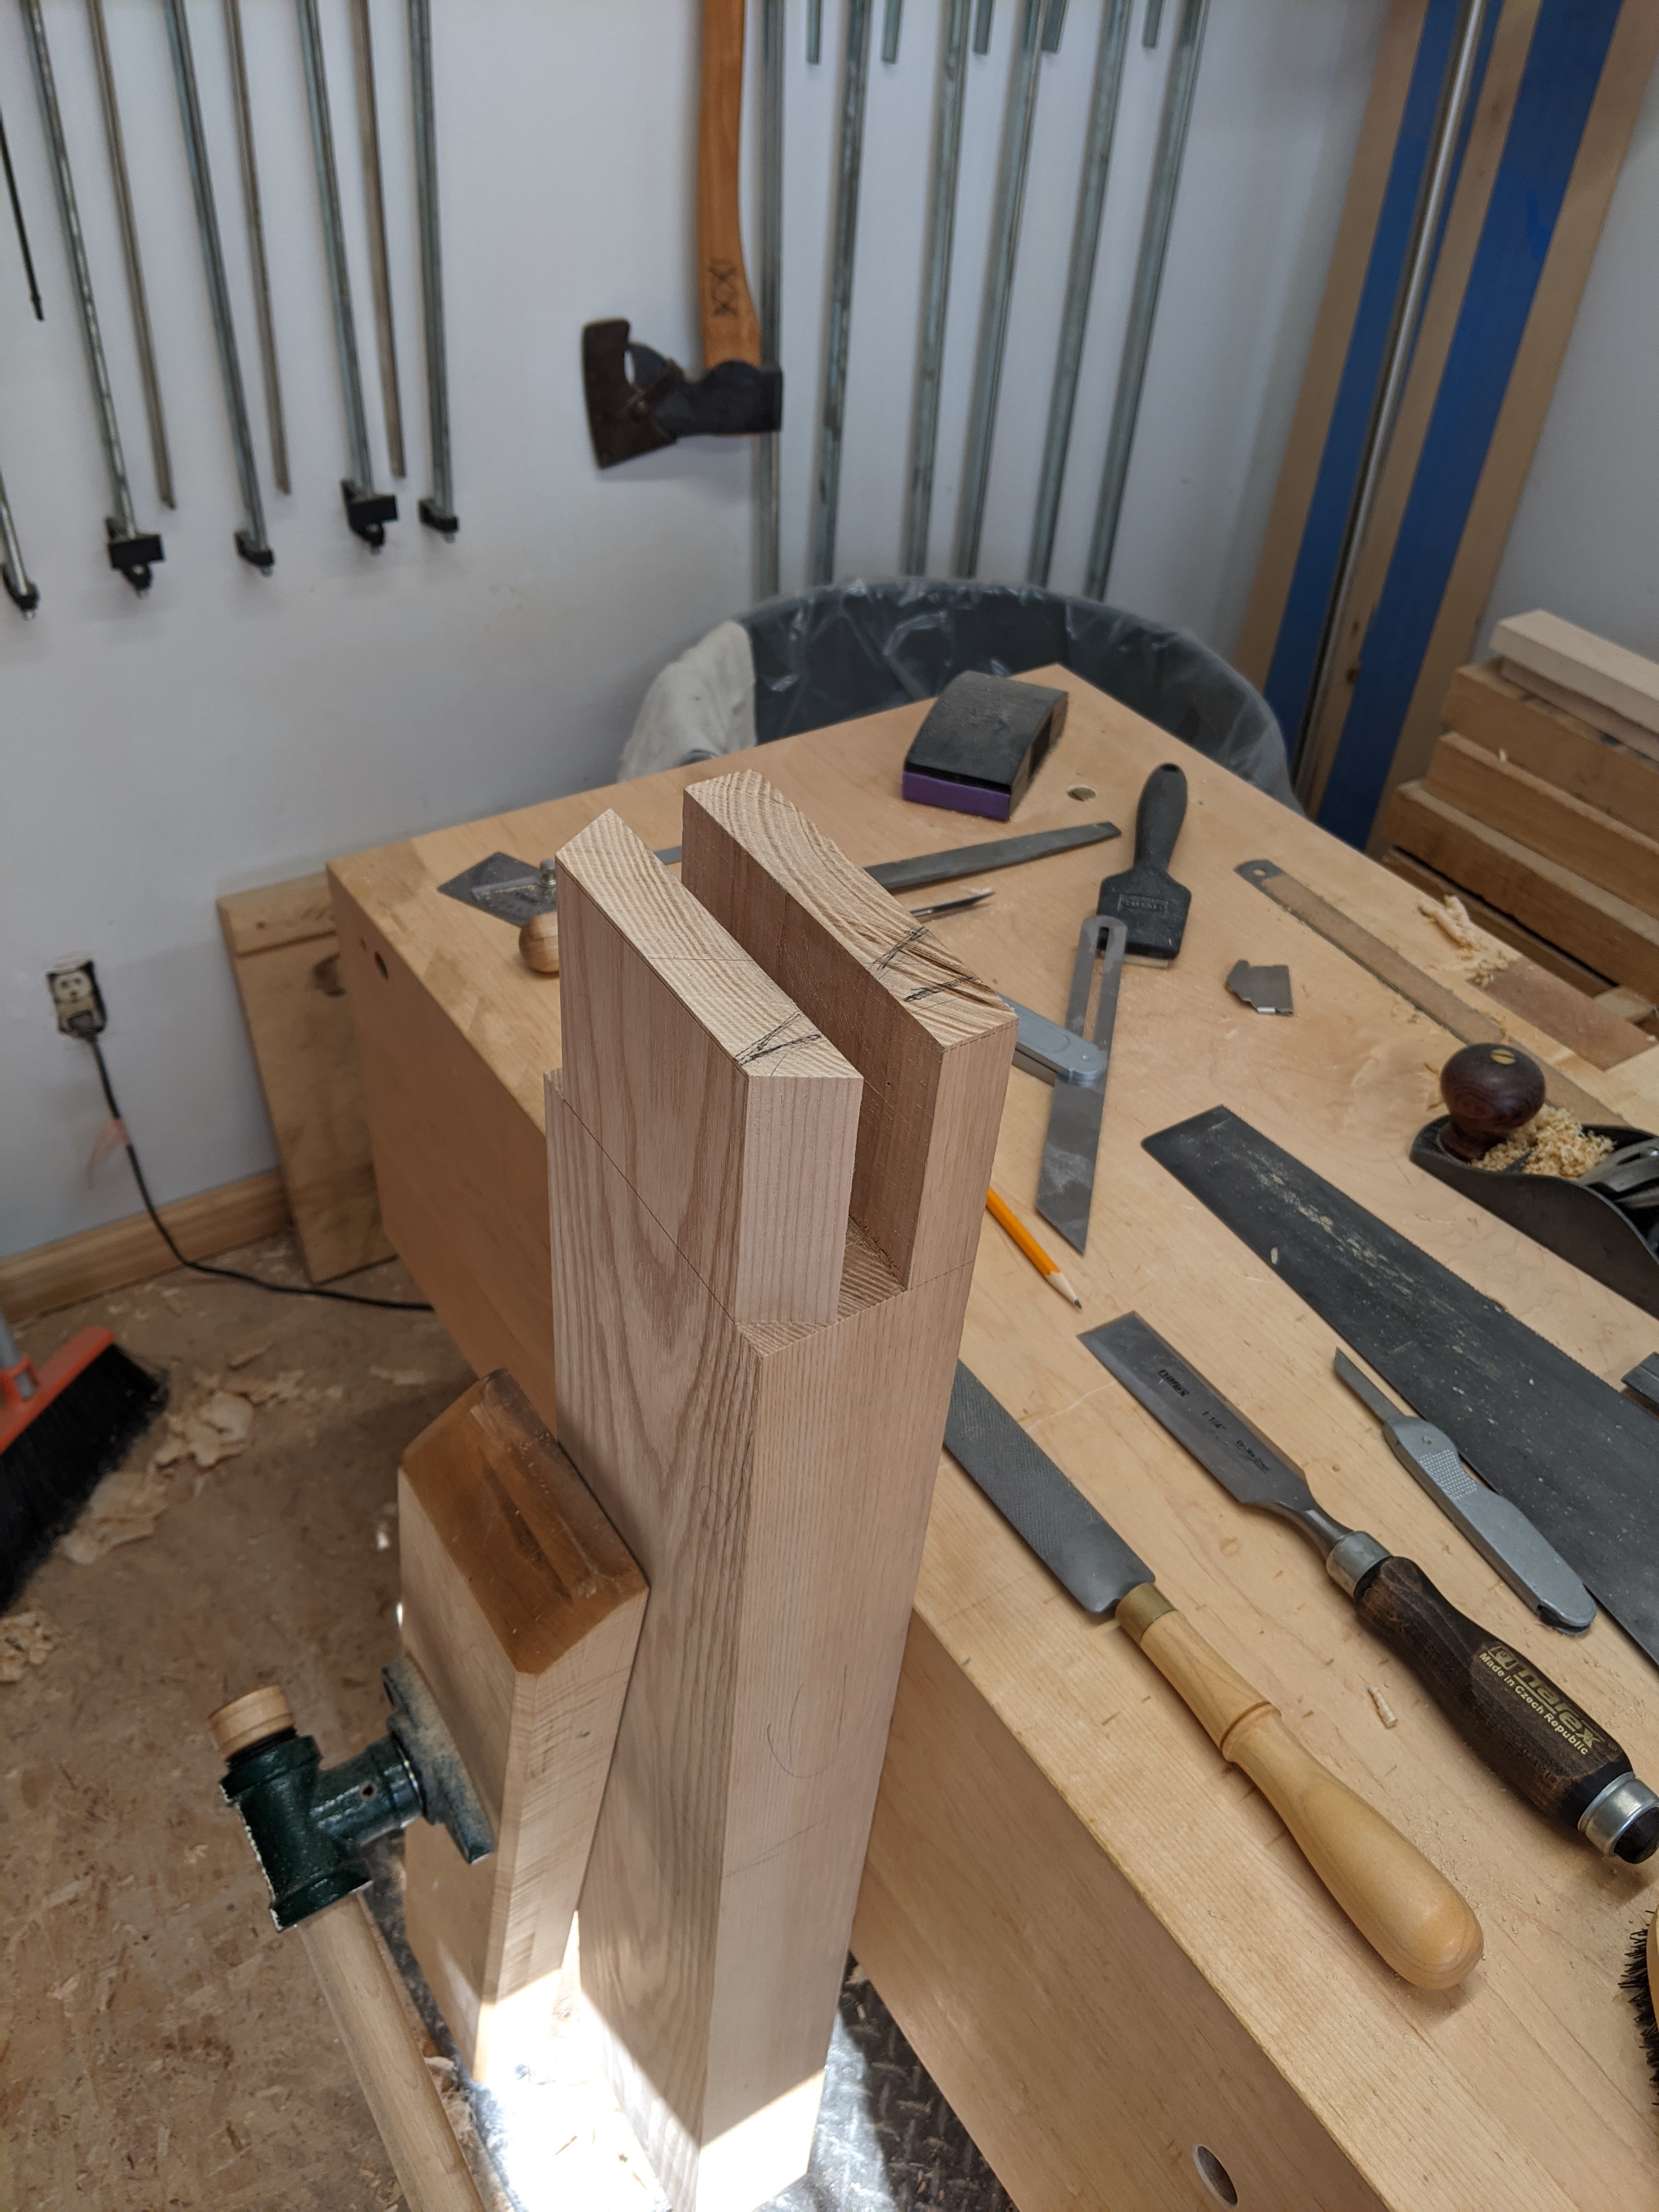
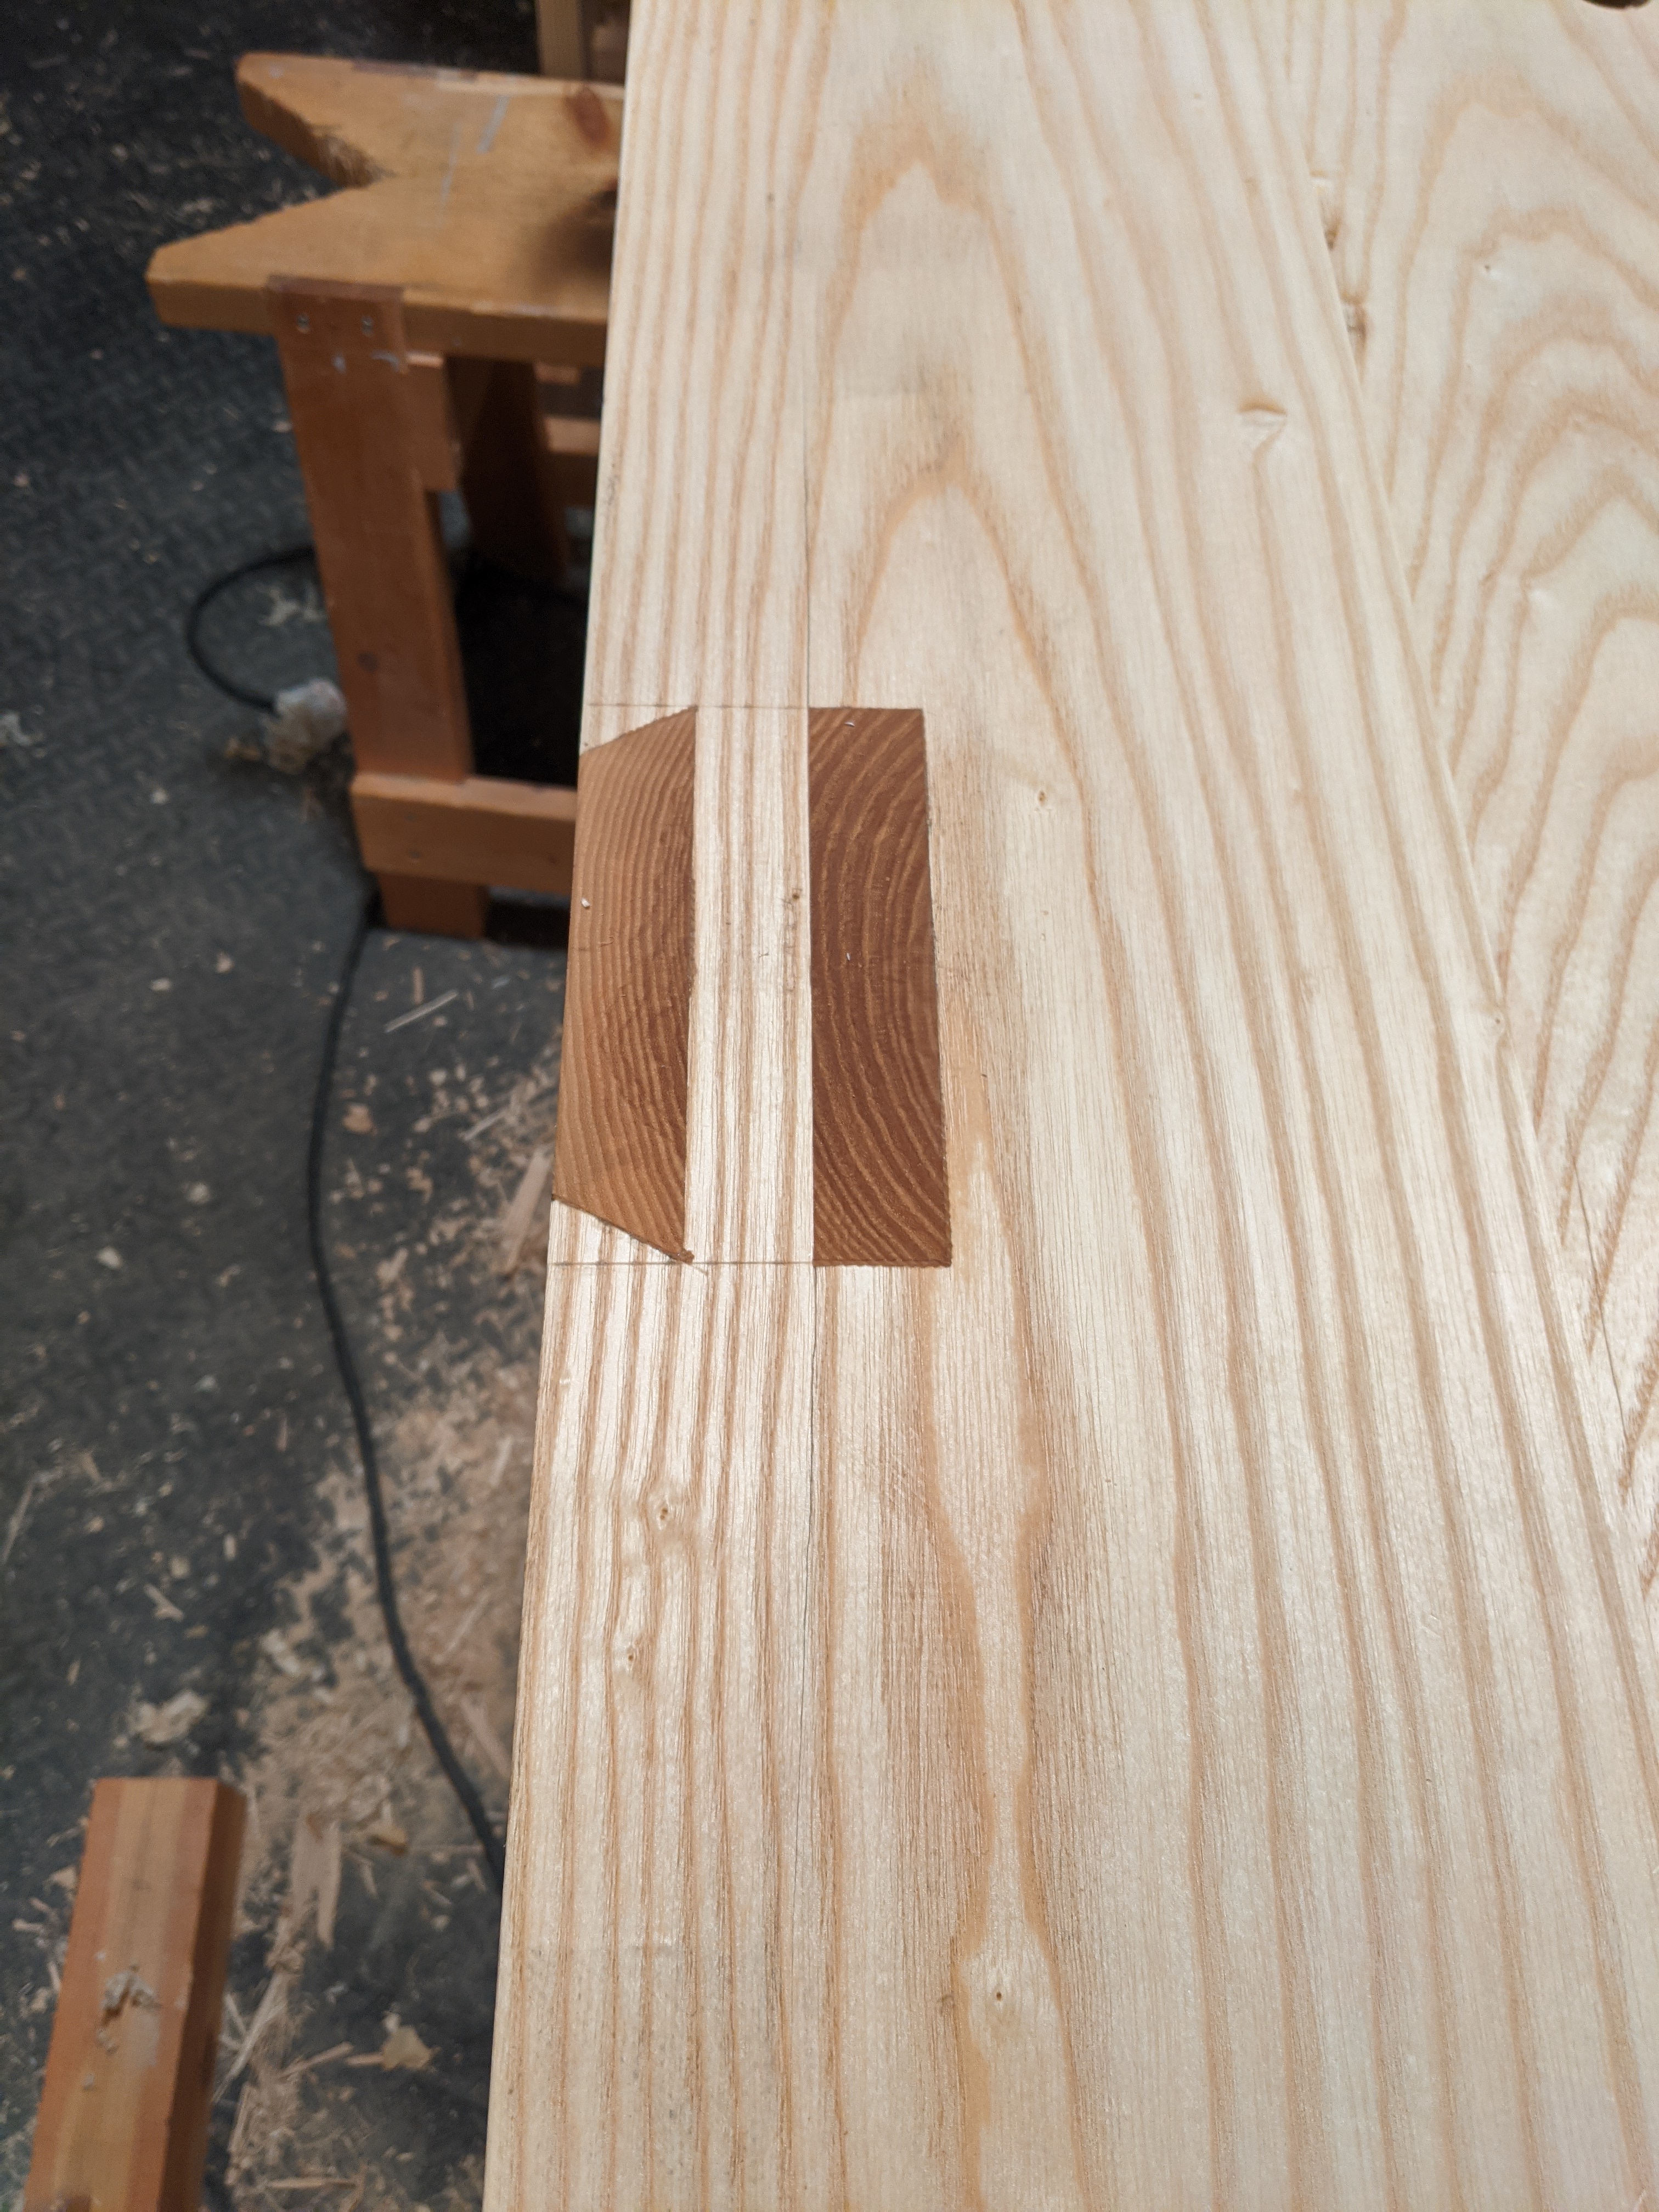
The front legs, however, need to be more solidly attached to the top due to strain from the leg vise and the holdfasts. In my previous Stent Panel workbench, the legs were merely blind-mortised into the top. A friction fit, with glue and drawbores, made a very stout joint that was nothing special to look at. But that was last time. This time, we’re doing the Roubo tenon/sliding dovetail! All these years later!
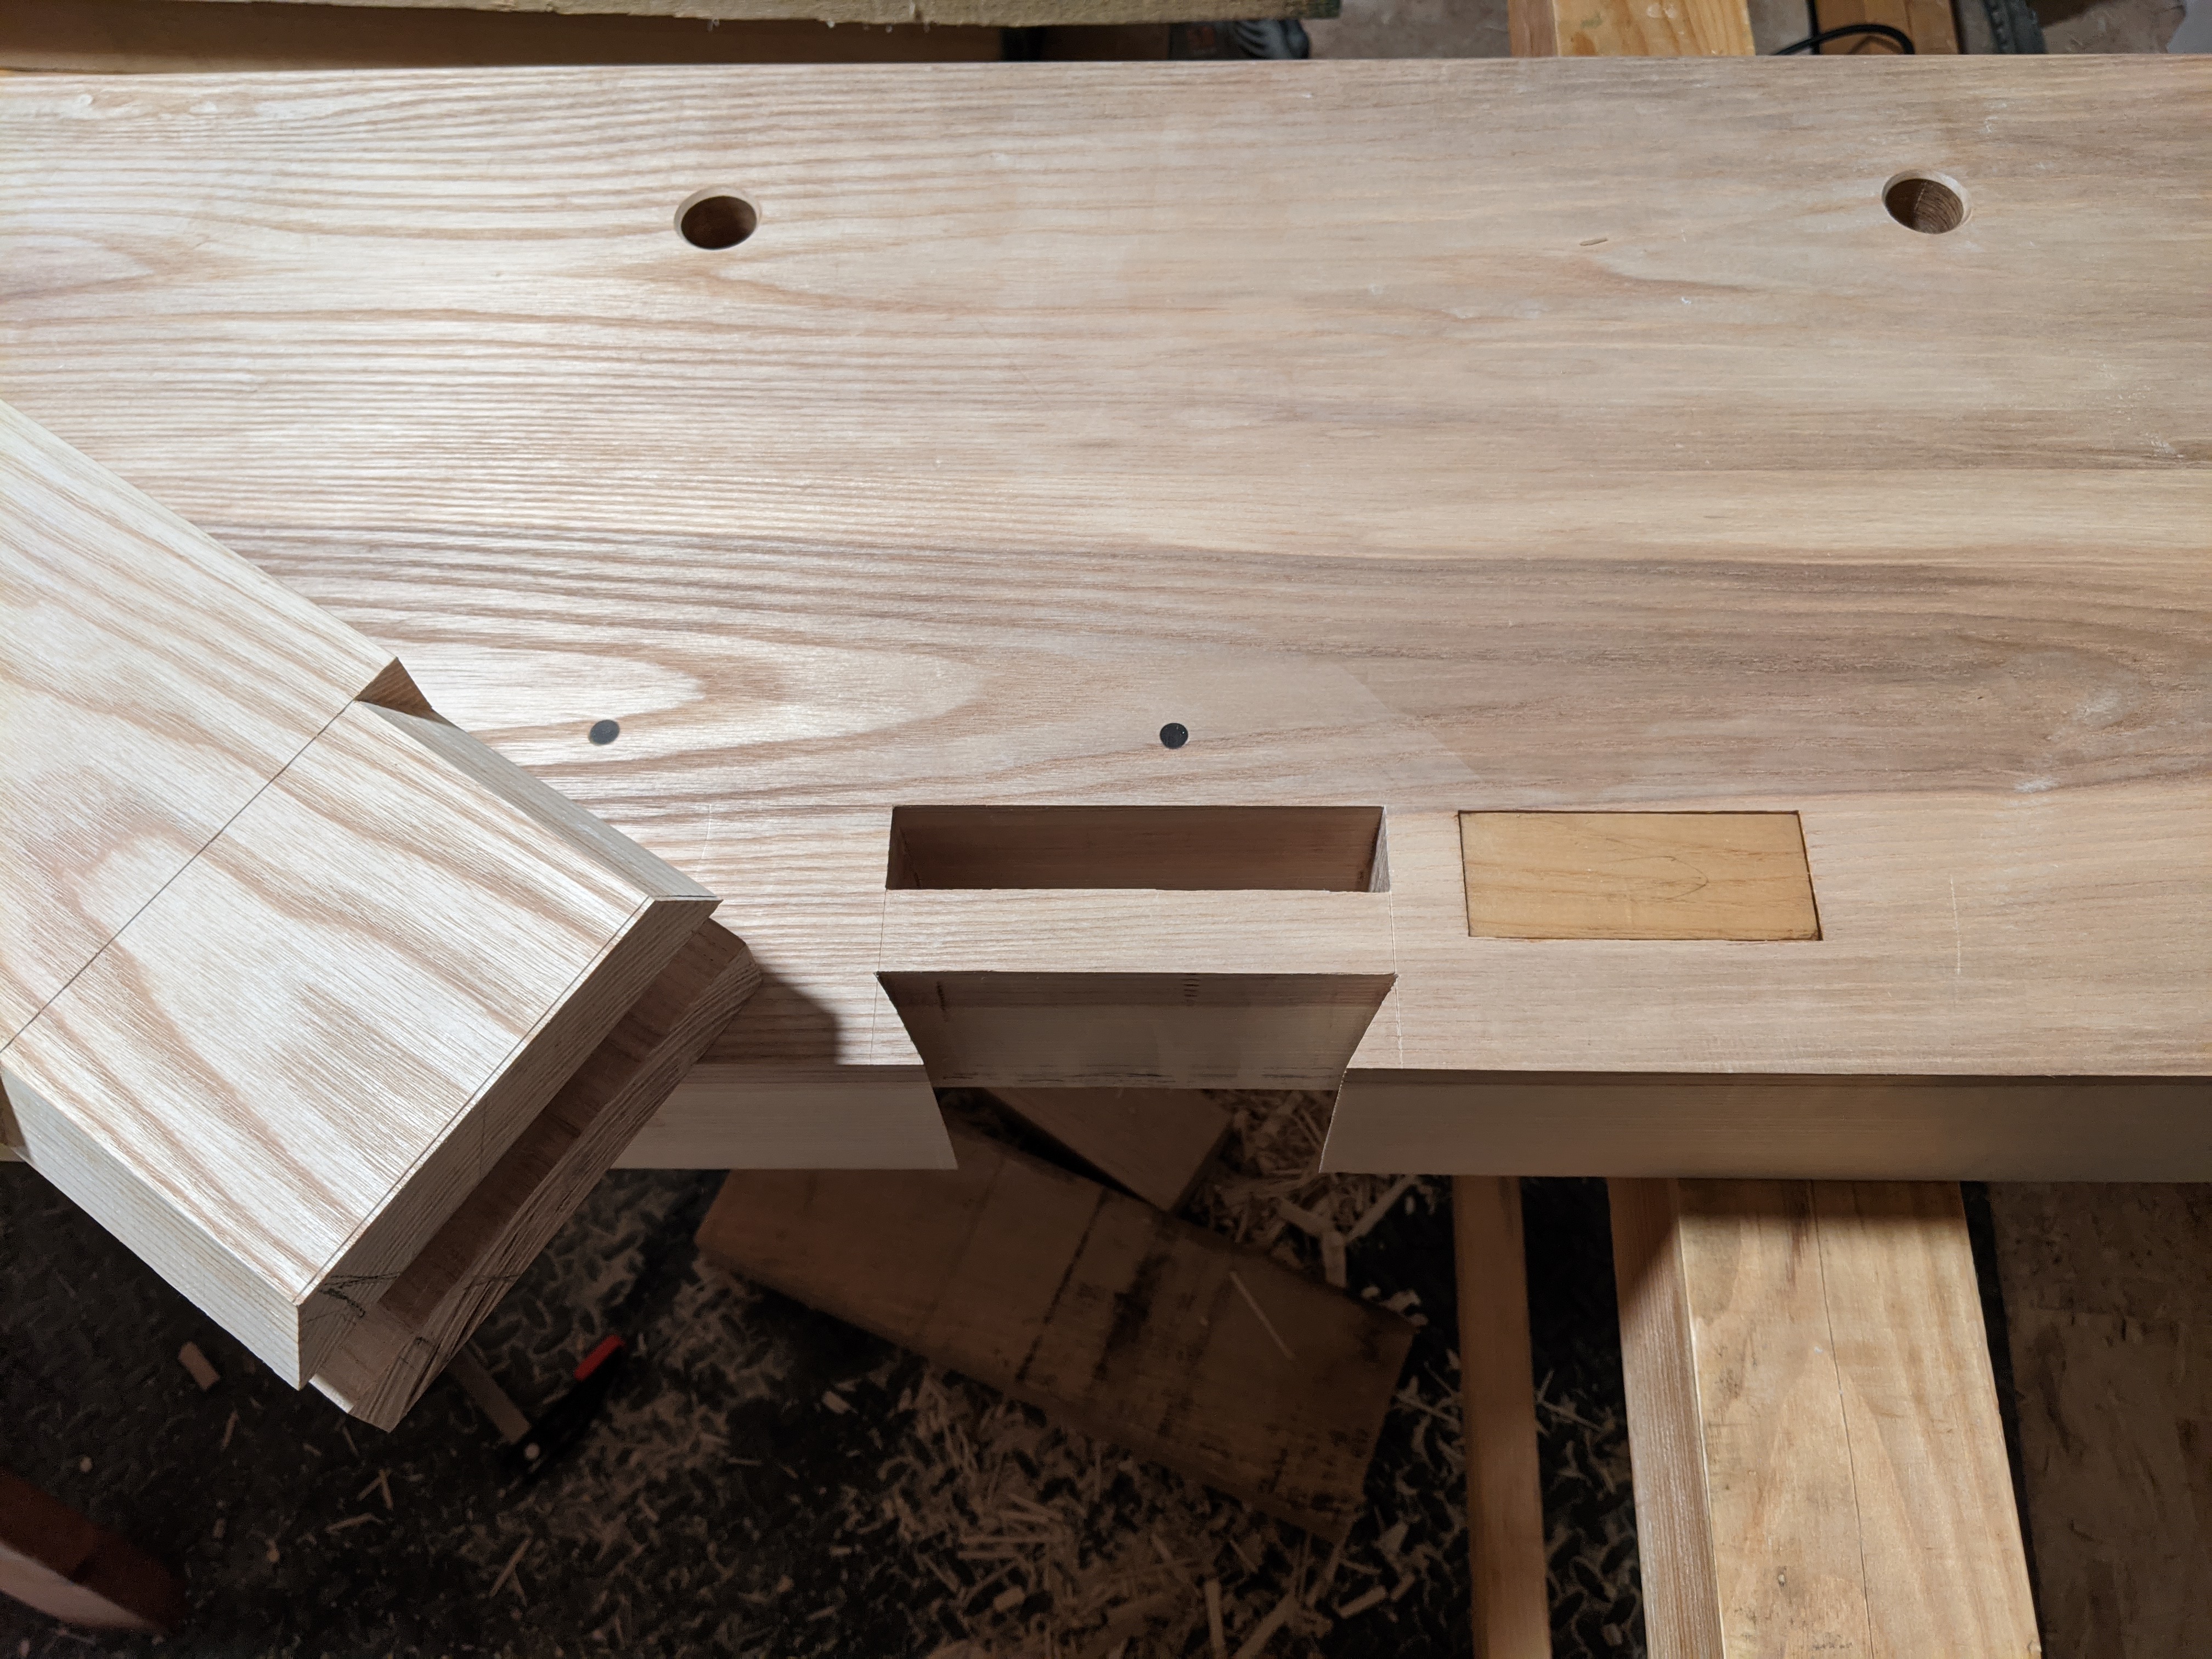
I’m not sure I agree that this is a simpler joint than a double tenon (i.e., where the front recess is also square instead of angled for the dovetail). Well, at least the mortise part. The dovetailed tenon is dead simple to cut, if a bit fiddly to get those little front shoulders in line with the center shoulders.
But it does look nice, especially after a few wedges fill up any remaining gaps. I apparently cut one of the joints a bit too tight, as a hairline split emerged along the front of the inside tenon. I don’t think it will be structural, and it doesn’t appear to have gone all the way through the slab. The glue joints are large and sound, so we’ll see if I need to drive some lag bolts in to secure it.
I had never cut a double tenon before (sliding dovetailed or otherwise). I’m now satisfied that I can do it effectively now. But if I ever do this again, I know now to make it a bit less friction fit and let the glue do the work.
And knowing is half the battle.
JPG
