Projects

Would You Believe It?

Crossing another one off the list is such a great feeling.  I’m very pleased with how the plant table ended up.  It was my first experience with Milk Paint, but it certainly won’t be my last.

wp-1450629633464.jpg

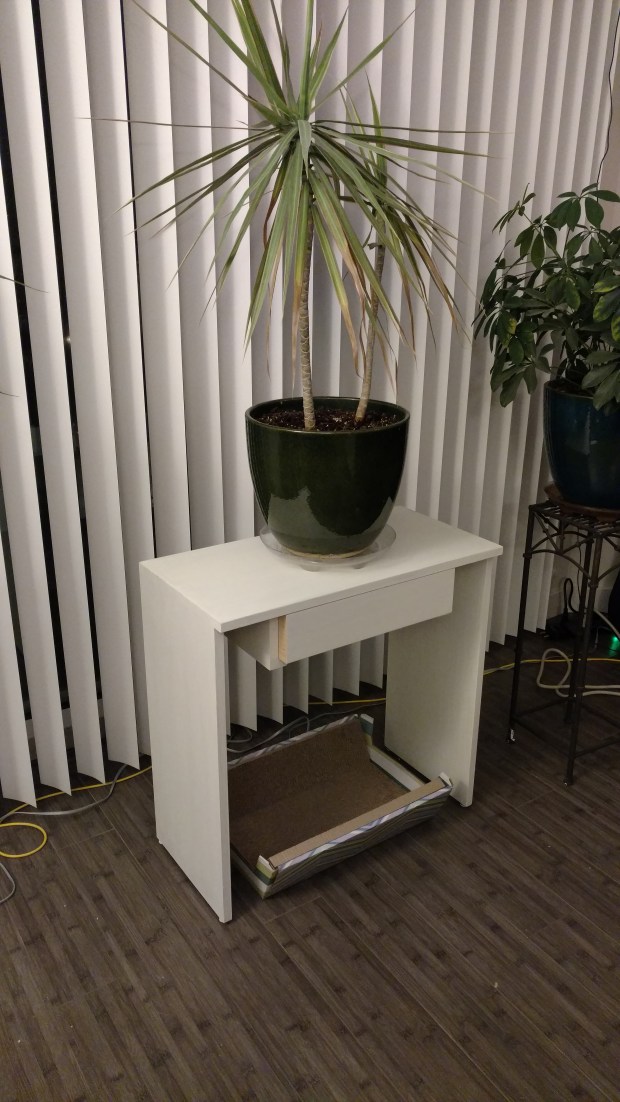
I have since touched up the drawer sides to cover the exposed wood.

Start to finish, each coat took about an hour to apply.  First, a thick base coat of Seagull Grey (which got me a strange retweet from someone on Twitter who apparently retweets every bird-related tweet; very meta). Second, a thinner top coat of Antique White.  Both from General Finishes, purchased off Amazon.

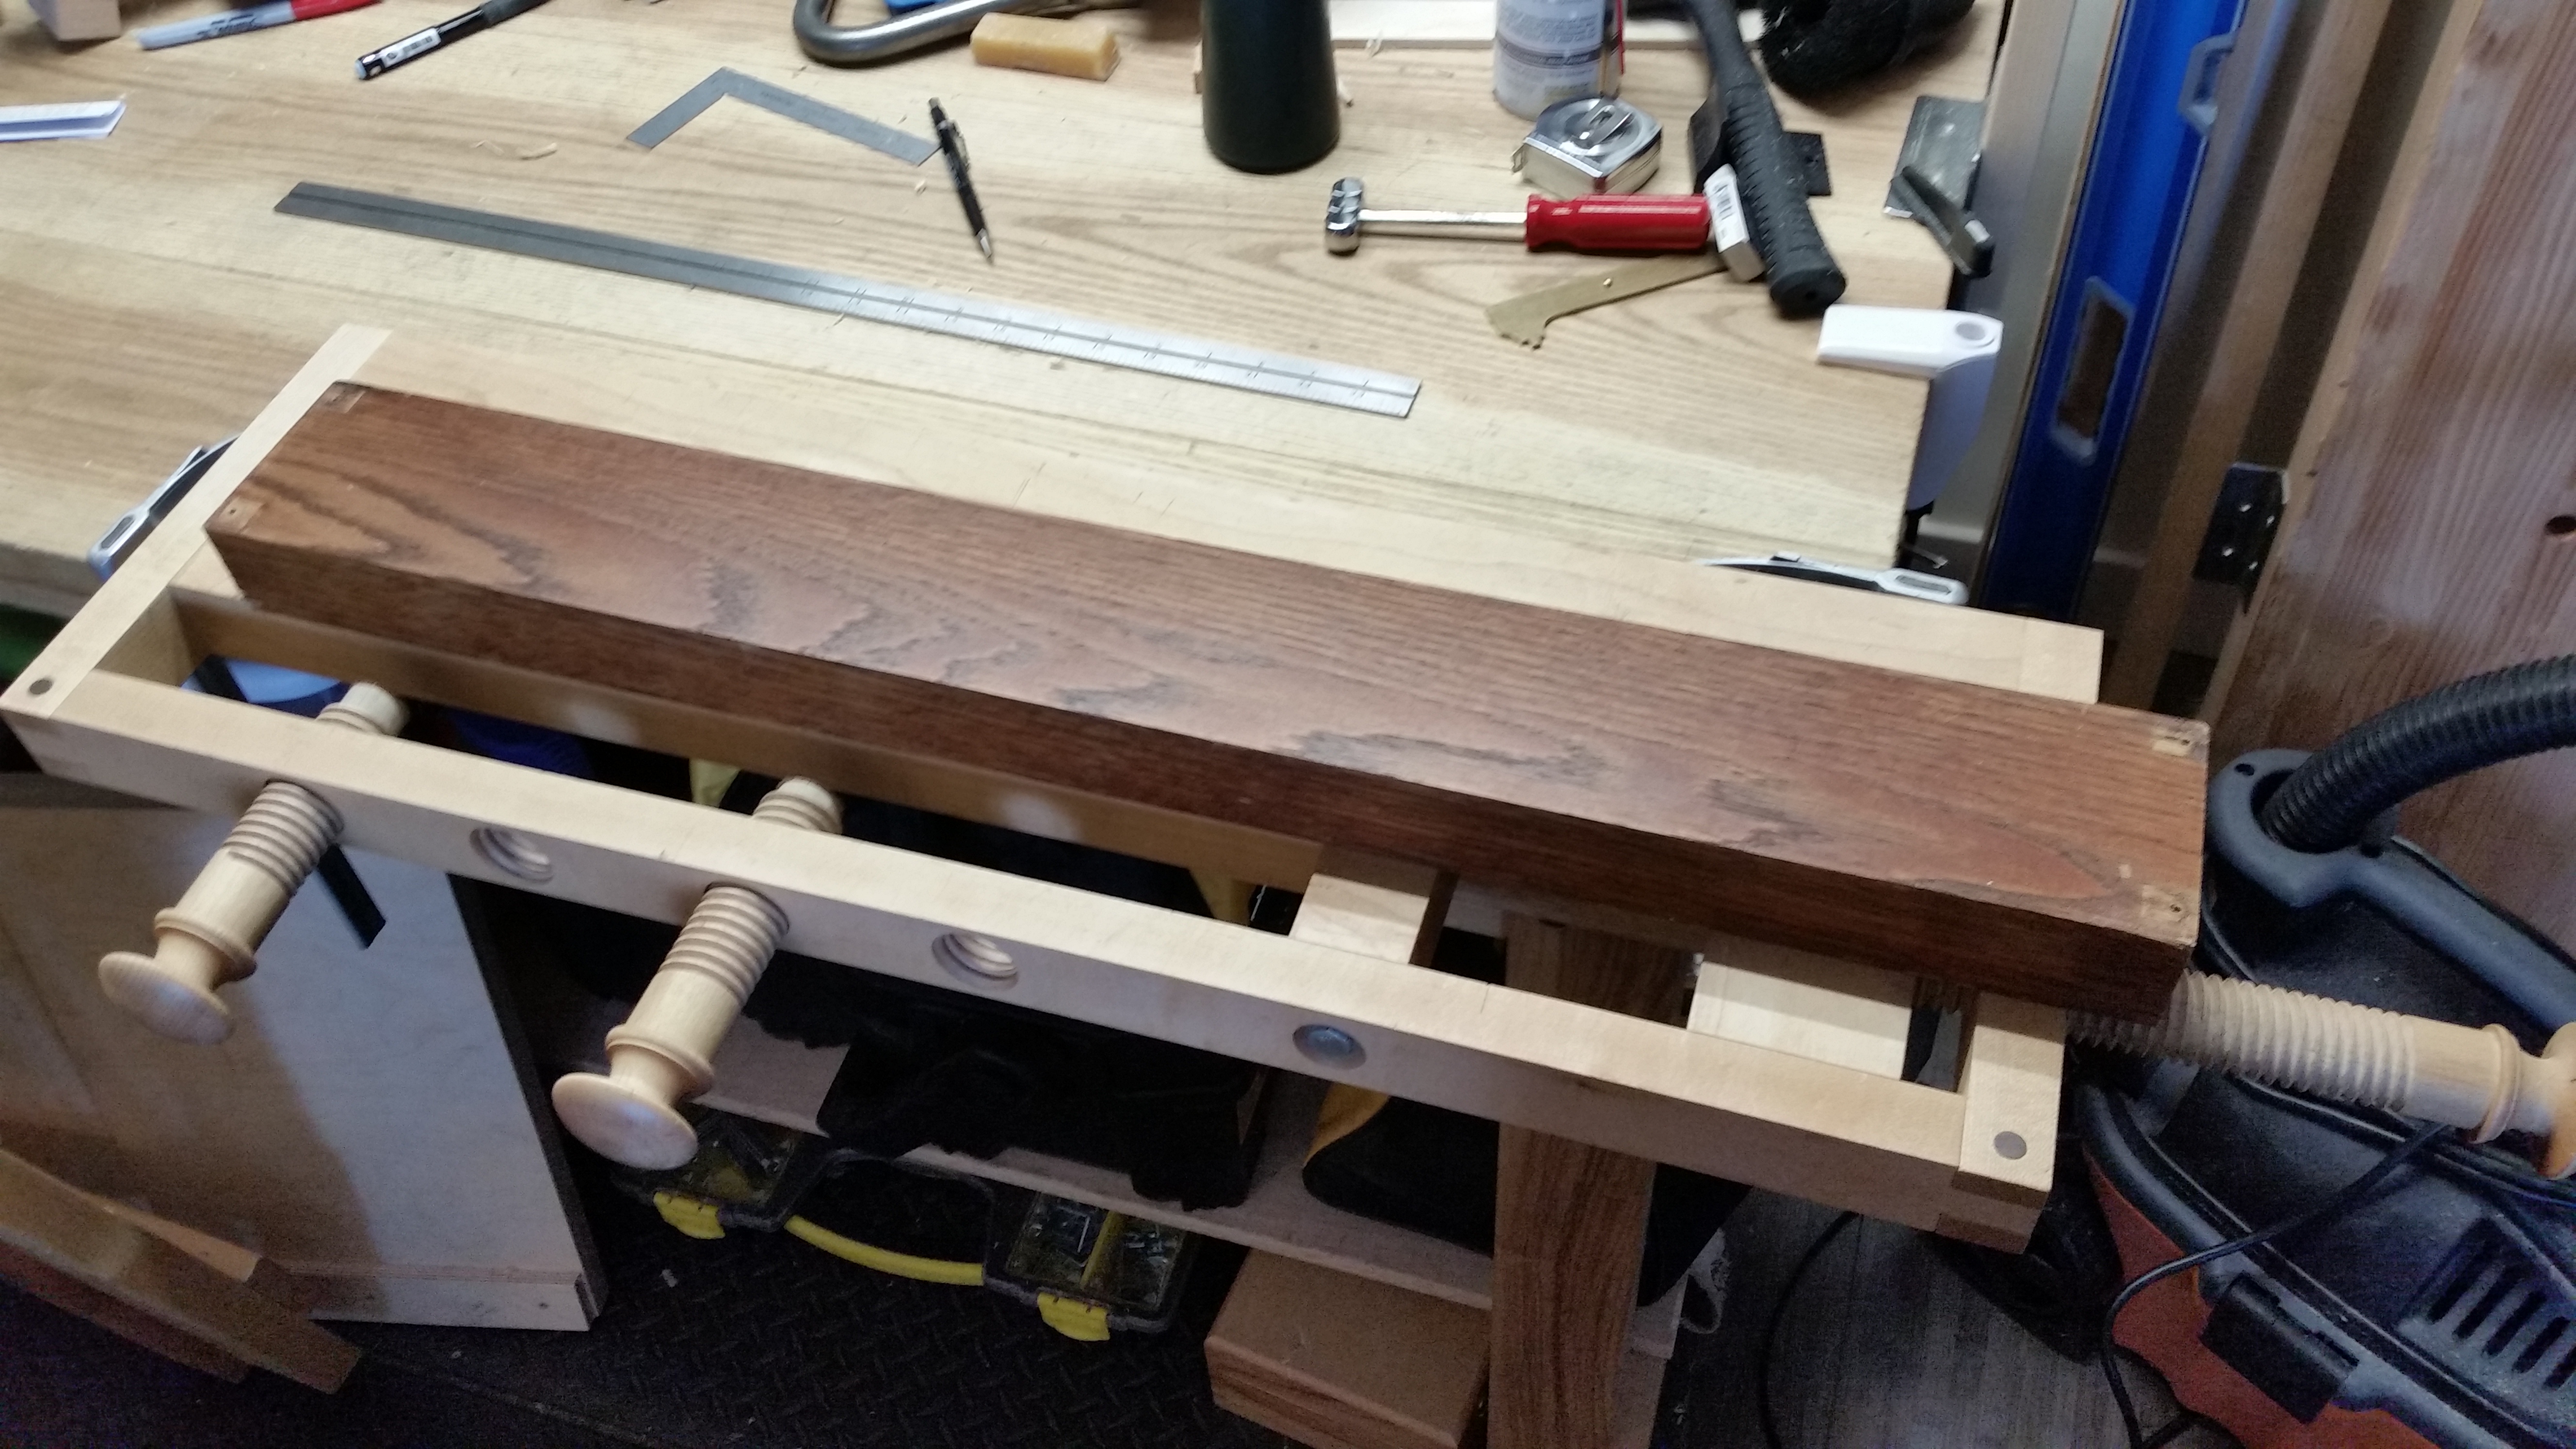
It’s a smaller piece, but it’s quite open, which meant full coverage on every surface, both inside and out.  Only the drawer has any bare wood, as it would not have fit the runners with the extra thickness from the paint.  A good problem to have, I guess.

Milk Paint is easy to apply, dries quickly and seems to be rather forgiving.  A light touch with 320 grit knocked down the nibs and I even got a bit of a distressed look around the dovetailed corners.

I have much of both colors left over, so I expect several upcoming projects will be Seagull Grey or Antique White.

JPG

I Think She’s Ready for a Paintjob

After much delay, the drawer for the dovetailed plant stand is done. It’s about time, too, as the table has been finished for a while.

P1000284

It’s so hard to get things done.

I think part of the delay was caused by apparently sharpening the 1/2 inch blade on my router plane slightly out of square.  That made the rabbets on the drawer a PITA to get perfectly parallel.  In the end, the glue up/nailing took some coercion.

The drawer fits snugly on the sides, with no wracking whatsoever.  I imagine it will wear down against the runners overtime , so I set the nails slightly.  The vertical fit is not so perfect: about 1/16 inch between the top of the drawer and the underside of the tabletop (due to removing the slight twist in the fully-assembled drawer).

P1000283

But the balance is good, even when fully-opened.

I don’t have a picture, but the 1/4 inch birch ply drawer bottom fits into a groove I plowed with my router plane.  It was also a PITA, but you make due in an apartment woodworking shop with what you have.  The router plane fence attachment worked fine, but the fence itself could be wider.  I’ll attach a wood extension.

I ultimately decided against adding a veneer to cover the rabbets, partly because of laziness but mostly because the piece will be finished with Milk Paint.  I think a base coat of Seagull Grey, a single top coat of Antique White, and some paste wax will do just fine.

It’s a function piece, after all.

JPG

Words to Cut Joints By

Admittedly, my previous post was a bit harsh.  Without any remorse and sans even one iota of apology to the douchenozzles in question, I concede that things got a little out of hand on Friday.

I like to keep it pretty highbrow around here, so let’s talk about one of my favorite joints: the cross-lap joint.


The cross-lap joint is all about precision.  In its simplest form, two pieces are joined to form an overlapping “T” through two dadoes.  Each dado must be precisely sized to snugly fit the mating piece and (usually) the combined depth of both dadoes is equal to the thickness of one of the pieces.  This precision is achieved, first and foremost, through careful layout.

For me, the most accurate way to mark each dado is to scribe an initial line with a marking knife and, leaving the square in place, use the mating piece to transfer the dado width.  I tend to mark my dadoes about 1/64″ narrower than the mating piece when working in softer woods.  In harder woods, it might be only a few thousands of an inch.  I then transfer the width lines to the sides and scribe my depth line normally.

Unless the boards are wide (6″ or more), I will use a tenon saw to establish the outside walls and then chisel out the waste to just above my depth line with stabbing motions.  On twider boards (or in the case of stopped dadoes), I may only establish the show faces of the walls with a saw and the do the rest by chisel.

P1000258

I always wear safety glasses when paring in this orientation.  

After test fitting for snugness (and paring down the walls to the scribe lines, as necessary), I then fine-tune the dado depth with a router plane, taking very shallow passes until I hit my scribed depth line.  Rinse and repeat for the other dado, fine tuning dado depth to ensure the pieces are joined flush.

When done right, and used in the correct orientation, a cross-lap joint can have mechanical strength and may require little reinforcement.

P1000266

The first dado in process.

The cross-lapped pieces above are the base of a small plant stand.  Assuming I accurately locate the through-mortises on each of the legs to evenly distribute the vertical load, the cross-lap joint won’t require any reinforcement.  Assuming.

JPG

I Love It When a Plan Comes Together

Or, rather, a lack of plan.  Over the weekend I finished the bulk of a console table which will support two medium-sized plants.

IMG_20151122_140552322[1]

Out of River’s reach!

It’s a super simple build and I never even made a drawing.  Three pine boards, joined at the corners by dovetails.  I added a single rail that is [haunched] stub-tenoned to the sides.  After gluing, I plan to pin the stub tenons with some cut nails, which should be a sufficient substitute for drawbores.

IMG_20151122_140531517[1]

It’s like adding an apron to a workbench.

I think with thicker material I could have done without the rail.  But the boards are less than 3/4″ all around and wracking under the load of two heavy plants is a big concern.  Also, the rail will serve as a drawer stop (more on that below).  I’ve only done a dry fit so far, and the thing is solid as a rock under load, thanks to the tightly-fit dovetails.

IMG_20151122_142855_01[1]

Way more tails/pins than I’m used to, but I think it’s my finest work so far.

Perusing ideas for attaching the drawer, I came across a Lost Art Press CAD drawing for a staked table with drawer.  From the illustration, it looks like the wide and shallow drawer rides on two L-shaped runners that I assume are dadoed into the underside of the tabletop.   This should work well for my similarly wide and shallow drawer.

P1000251

I’m not inclined to over-complicate things.

I haven’t made the drawer yet, but I’d rather hang the runners first and then worry about drawer size.  In fact, I will cut the dadoes, assemble the carcass, then attach the runners, then worry about the drawer.  I think that’s the right order.

And the drawer, for variety, will be rabbeted and nailed, rather than dovetailed.  With a wider drawer front to cover the runners.

JPG

It Comes in Waves

I’m taking a long weekend to recharge the batteries a bit.  What better way to unwind than to jump right into some asymmetrical dovetails?

wpid-wp-1448064223988.jpg

Quite the grain match, huh?

The above board is the tabletop for a 24x24x12 console table.  The top will overlap the sides about an inch, which will permit me to eventually add a drawer, flush to the top.  That’s the point of the straight pin on the left.

wpid-wp-1448110463064.jpg

If it will support itself across 24″ when half-fitted, it’s a tight-enough joint.

I need the table now, so I’ll add the drawer later.  Which is good, because I don’t have any idea how to attach it.  One step at a time, I guess.

JPG

Deviating from the Norm

There has been much going in lately: both in the world and in my own life. Though it all, I’ve been wrapping up some projects and figuring out where to go next.

I have serious need of some indoor plant stands and keep vacillating over the design. So much, in fact, that I’ve decided to go in a different direction.

Osborne Wood Products has begun selling hairpin legs, in 18″ and 29″ heights at very workable prices. I expect some roughly 19″ square maple slabs will be more than sufficient and aesthetically pleasant, but I’ll wait until the legs actually arrive before preparing any stock. I do have just the material, though: some 6/4 rough-sawn hard maple.

JPG

Small Projects

It’s always the small projects that cause the most trouble.  The projects that most often remind me of a certain adage about the relationship between haste and waste.

My brother and sister-in-law asked me to create a mounting board with a simple moulding for a brass clock and matching barometer.  It’s a rather nautical setup, and having no mahogany or teak on hand, I opted for some cherry.  Simple enough, and a great opportunity to use my white charcoal pencils.

P1000246

I don’t know much about cherry, but it looks a bit curly to me.

Instead of ripping down two strips from the same piece for the best color match, I thought I might be able to color match and laminate one wide piece and one thin piece.  The color match is good, but not great.  Once the seal coats of dark walnut Danish Oil are set, I’ll blend the color further with a coat of dark paste wax.

P1000248

Actually, in softer, less-direct light (id est, not shop lighting), it’s more than adequate.

I have exactly no idea how they plan to hang the thing on the wall.  I have a keyhole router bit if needed, but I would think a better way is hanging wire and rubber pads.

I’ll post a picture on Twitter once the clock and barometer are mounted.

JPG

Rift- and/or Quarter-sawn Pine

I finally got around to preparing the stock which will comprise the main panel of the medium tool chest lid. In order to minimize movement, I will be laminating the lid from four pieces of rift- and/or quarter-sawn pine.  I say “and/or” because I don’t really know where the transition point between the two lies.  Suffice to say, it’s not flat-sawn.

P1000220

If someone would like to explain an empirical difference between rift-sawn and quarter-sawn without needing a chain of custody on the tree, please do so in the comments.

The loveliest part about non-flat-sawn lumber is how it resists warping.  After flattening and thicknessing, the 3/4 inch nominal stock is still 11/16 inch in thickness.  This means that, straight off the saw bench, there was no more than 1/32 of twist across roughly 30 inches of length on any of the four boards.

It's almost a shame this will be painted.

It’s almost a shame this will be painted.

The stock for the dust seal around the lid has been ready for a while, so it’s just a question of getting the panel glued up and fitted to the chest itself.  I have already cut both sets of tails on the side seals and one set of pins the front seal (on the show corner) and the lid itself will come together quickly once the panel is fitted.

I’m just looking forward to clearing this project and giving it to the recipients.

JPG

Prepping for Some Trial and Error

The main benchtop of the new clamp-on workbench is done.  It’s been thicknessed to 1 5/8 inches, the arrises are broken and the first set of dog holes (for the far left planing stop) are drilled.

Although I could have gotten away with less (it’s doubtful there will ever be much clamp pressure on these dogs holes), I left 1 1/4 inches of benchtop behind each dog hole.  Even without an end cap, this should be more than enough support.  I also like to round over the rim of each dog hole.

Oh, the glamour!

The Rockler Jig-it Drill Guide is an adequate replacement for a drill press in a hand-tool woodworking shop.  Just be sure to get the long shank forstner bits.

Now that I have attached the angle iron and wiped on a couple coats of natural tint Danish Oil to the top face only, I have a fully functional work surface.  It’s a good thing too, because I needed the larger surface to work on the front vice.

I have never even made vice chops before, let alone DIY’d an entire moxon vise from scratch, so I’m starting with some replaceable material.  Out from the scrap bin came some some 8/4 red oak, reclaimed from a very defunct desk project.

wpid-20150926_163324.jpg

That color ain’t natural.

This stuff is gross.  There are two coats of home center stain and at least two coats of brush-on polyurethane.  All on an open-pore wood.  There might even be some broken-off screws. So if and when I tap the holes for the veneer press screws crookedly or butcher chiseling the recesses for the collets, I won’t feel bad about starting over.

Or the vise will come out well and I won’t have used any new wood.  Either way, a win.

JPG