Happy New Year, everyone! Hopefully everyone has fully recovered from their New Year’s Eve partying and is back in the shop. I certainly am.
As with every new year, I try to tackle a few small but important projects (I call them “fixgasms“) around the shop. The term is not exclusive to the workshop. A fixgasm can be anything that’s been on the to-do list for too long and won’t really take a ton of effort to complete, but will have outsized impact when done.
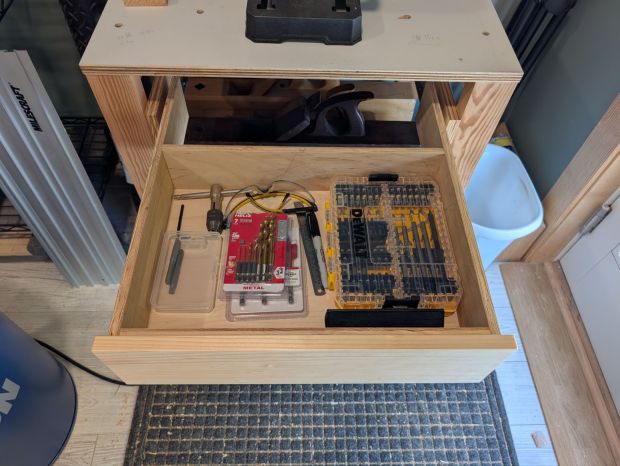
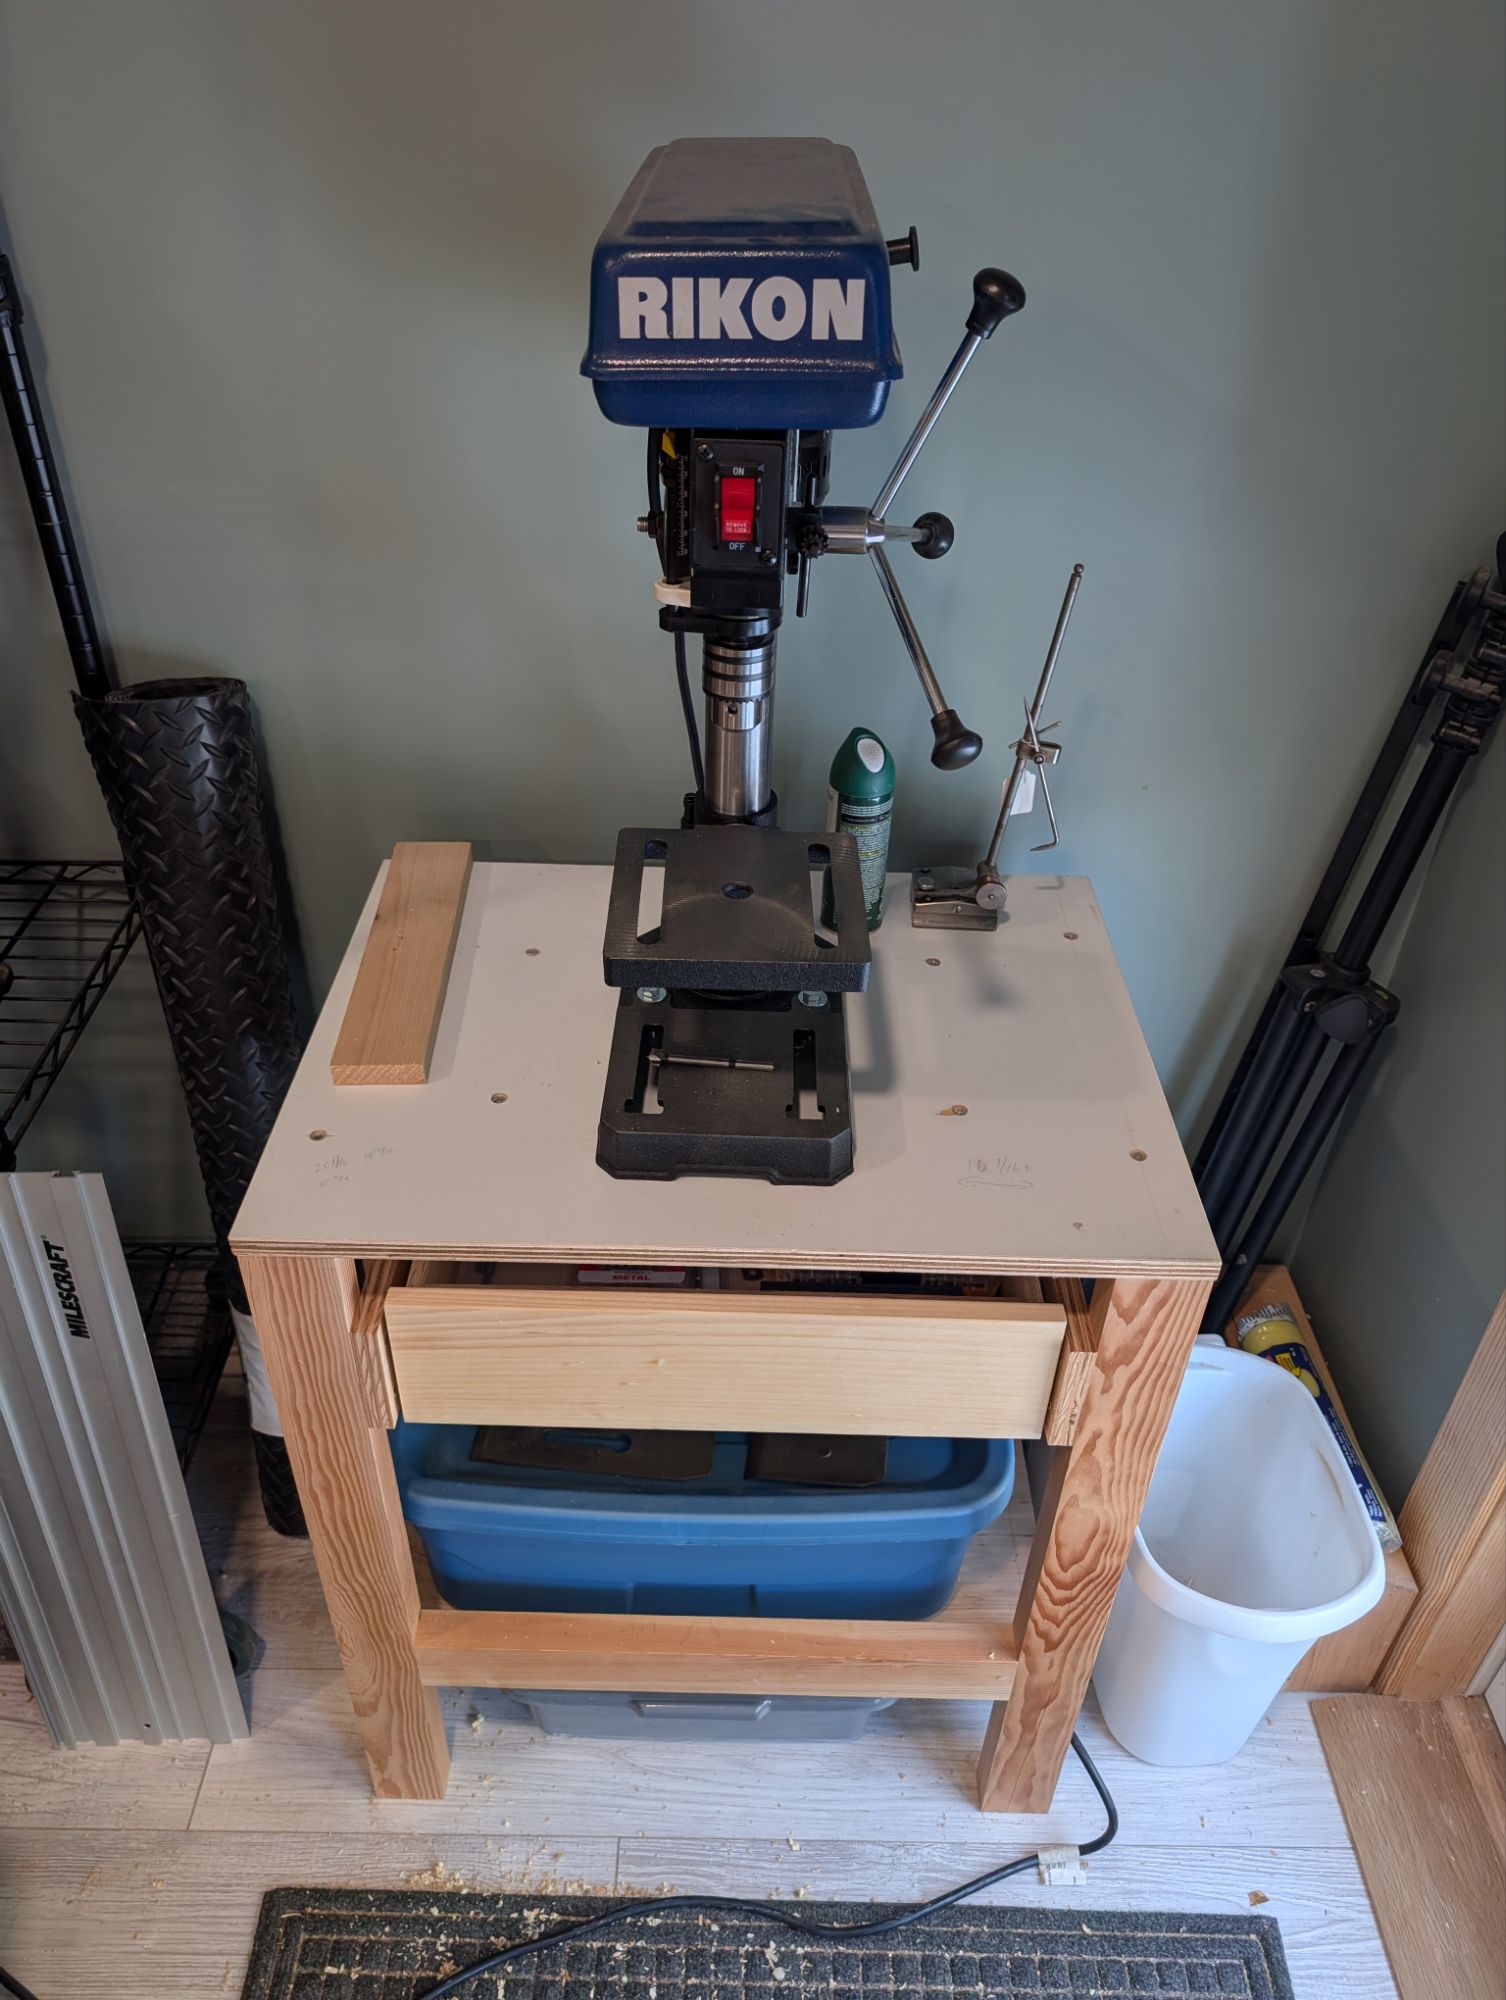
First one up is a drawer for the drill press table. The table frame is Douglas Fir and joined with glue and pocket screws. I’ve come to really appreciate pocket screws for these types of shop furniture. The top is 3/4″ painted plywood reclaimed from some kitchen cabinets. It’s slick but pretty water resistant.
An 8″ drill press is all I ever really need for the hand tool shop.
The drawer is made from scrap 1/2″ plywood, also joined with glue and pocket screws. The drawer bottom is 1/4″ plywood glued and nailed on. The drawer front is white pine and there is a 3/4″ lip underneath to use instead of a separate drawer pull. The drawer inside dimension are about 16×12 and 3.5″ or so deep. More than enough for drill bit sets and accessories.
I used some full extension drawer slides from the home center and they work well enough (they are “soft close” according the packaging). I contemplated making oak drawer runners, but laziness won out in the end.
I still need to migrate my Forstner bits from the garage Craftsman chest.
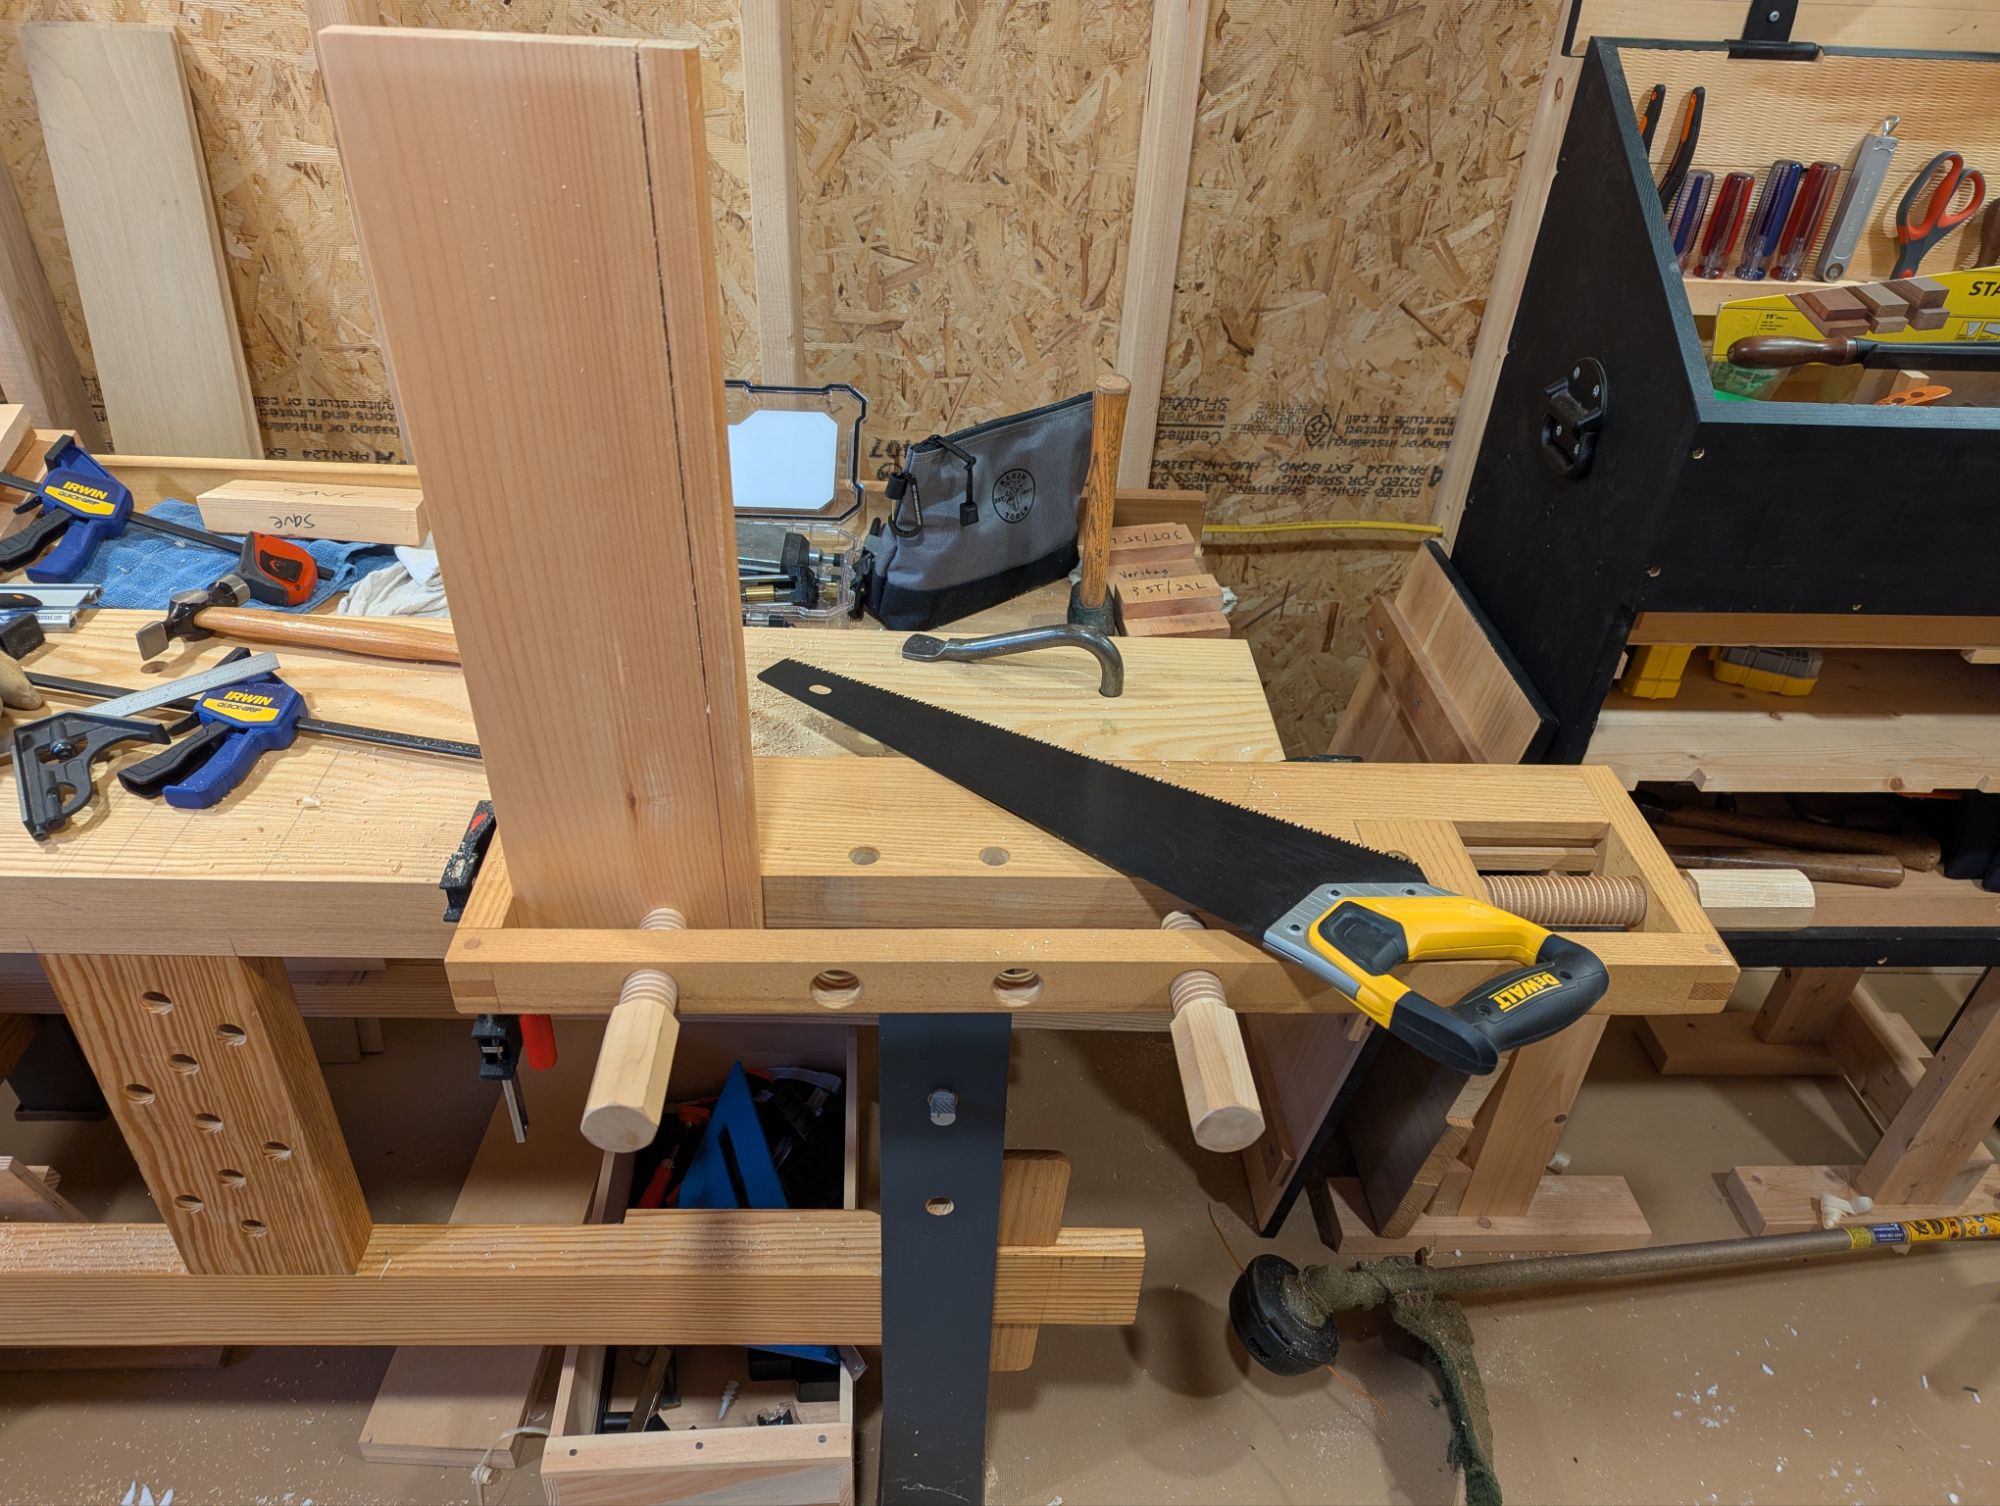
The next fixgasm on my list (for today or tomorrow) is to hang some wall mounted clamp racks and free up floor space. I never really move my mobile clamp cart around the shop, so it’s pretty much just in the way. It’s also way too big and not a super efficient use of space anyway.
I hope you all find some time in the coming weeks to tackle those little but important projects around the shop.
Happy [American] Thanksgiving to those who celebrate! It’s November 27, 2025 and things are in a weird place. It’s been a busy year for me, professionally. Workflow is good; the pipeline is strong. And all I want to do is spend some quiet time in the workshop and forget about the chaos out there.
It’s important to take some time for ourselves, if we can. Especially around the holidays.
This morning, I spent a couple hours turning an otherwise useless stick of poplar into a plant stand for a colleague of mine. Something that could certainly be acquired at the home center or a big box store for less than $20. And I have indeed bought my fair share of small wooden items even after I started woodworking, both for myself and as gifts.
But it’s the meditative process of making. The weight of the tools in my hands. The smell of the workshop. The empty space on the rack where the material used to be, in potentia. The smug satisfaction of seeing it get use at the office day to day.
Those protruding tenons will get trimmed when the hide glue dries.
I like these little plant stands because they are an efficient use of materials. Pretty much anything at least 1 inch square will work; I typically use poplar or spruce. And the only critical measurement is the length of the two beams (sized to fit the pot it will support). You can otherwise tailor the height of the legs as needed or desired. And they are collapsible, so they travel well.
Just a simple lap joint in the middle, well fitted but not glued.
You can make them with a basic kit of tools. I use just a No. 6 hand plane, a 1/2 inch chisel, a 1 inch chisel, a crosscut saw, and a router plane, plus a marking knife and a try square. I’ve always meant to do a Basic Projects post on these. Maybe in 2026.
In any event, I hope you and yours have a warm, safe, and happy Thanksgiving.
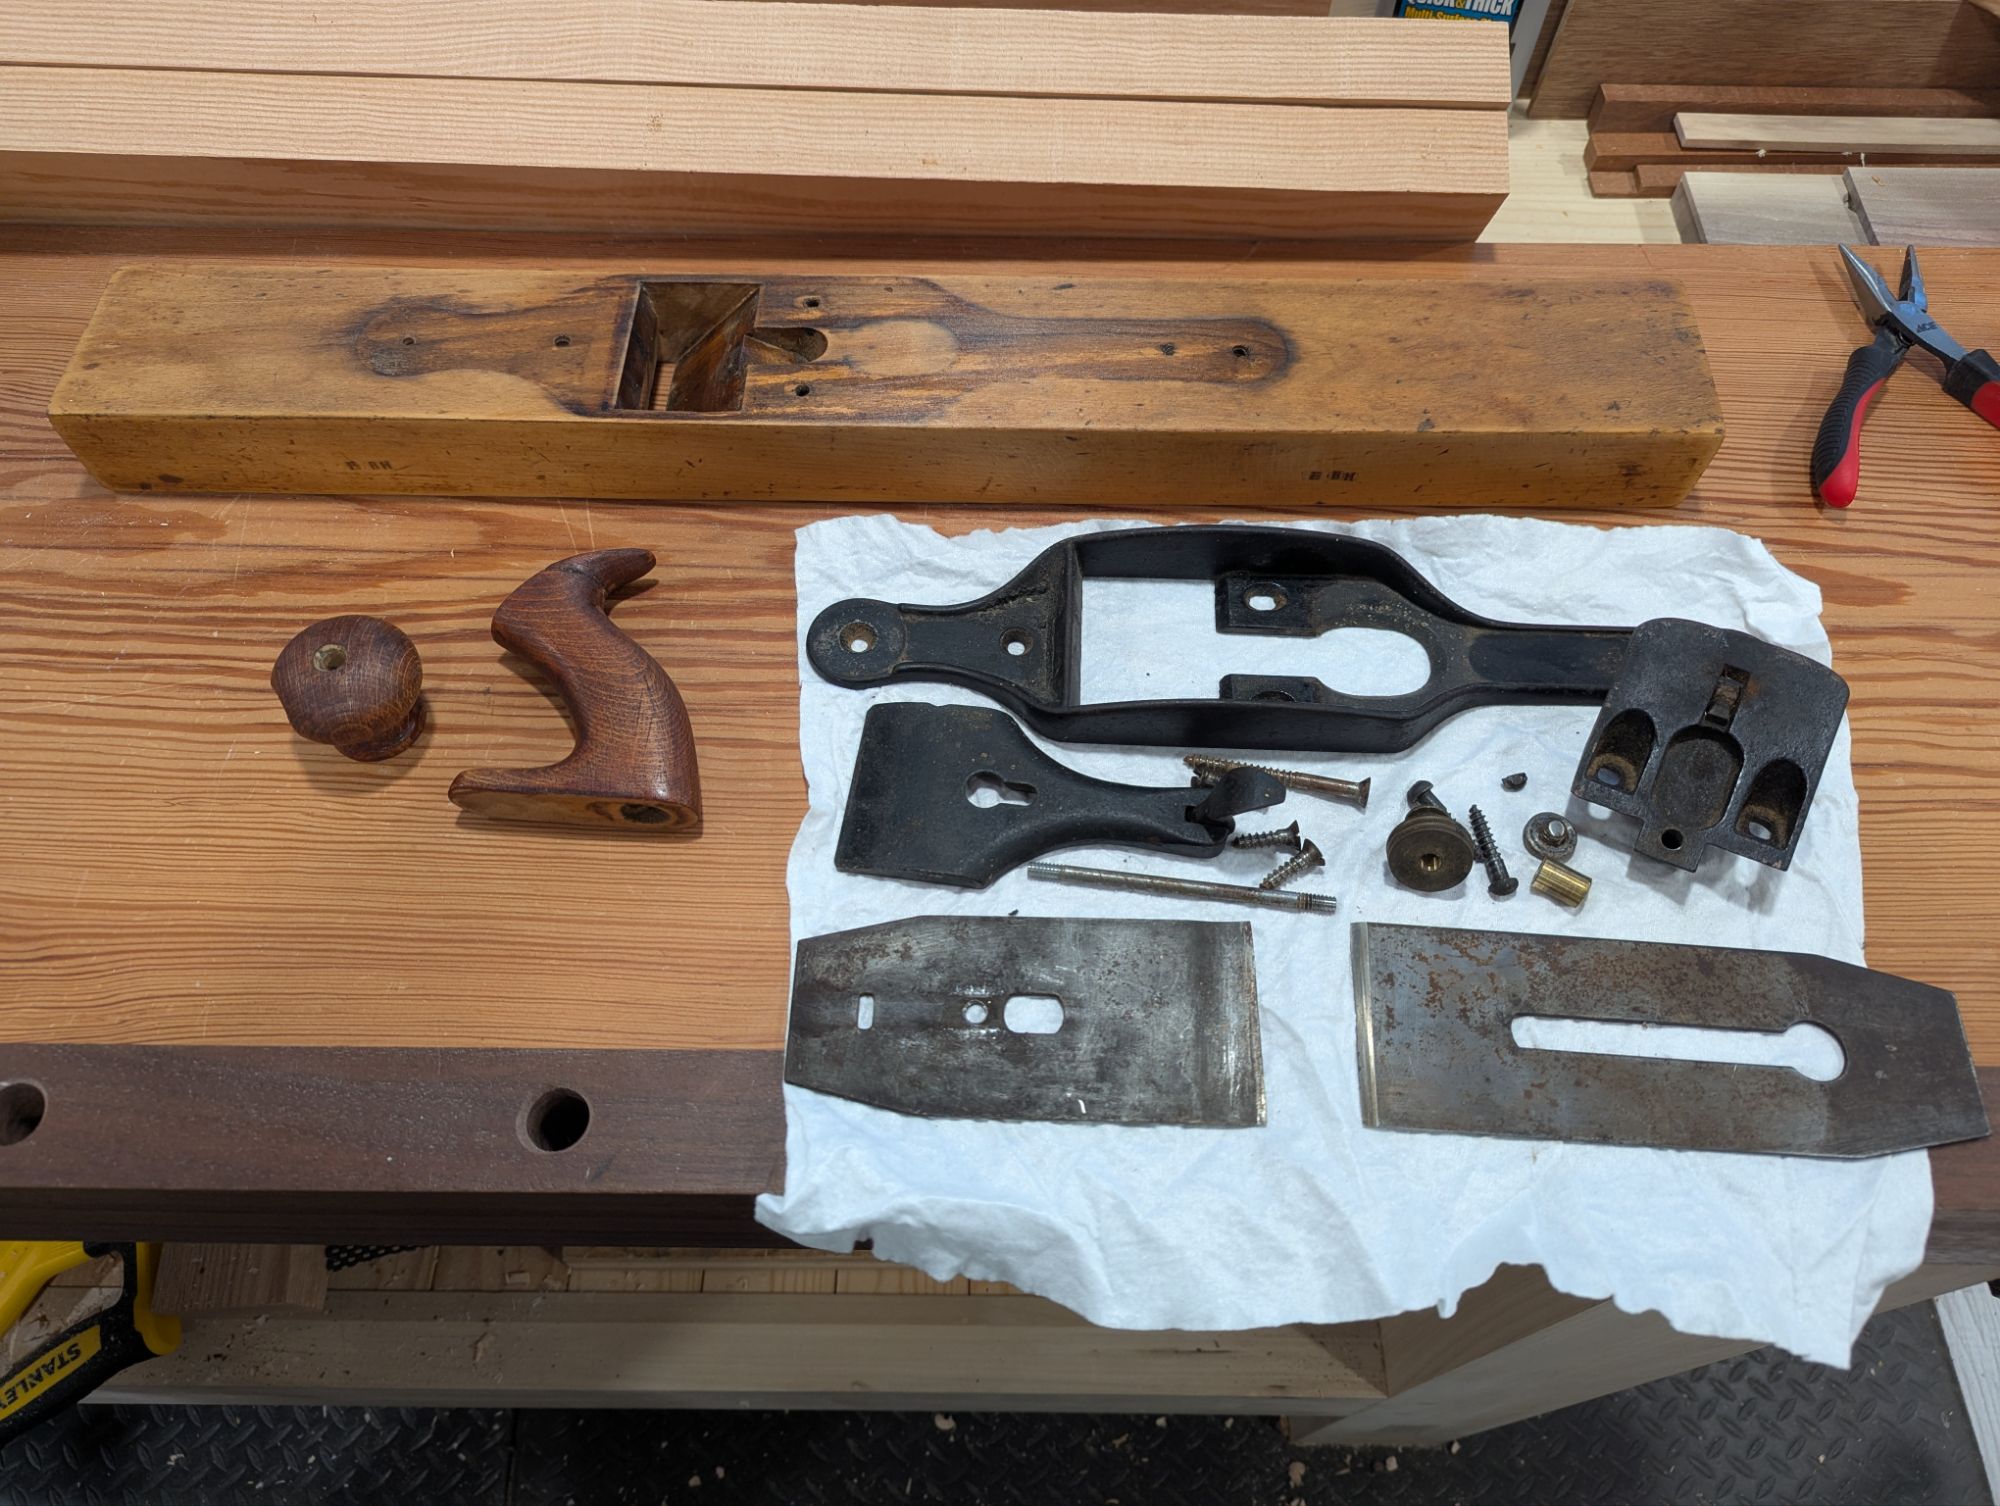
I was up at the Vermont house the other day and made my periodic pilgrimage to The Red Carrot in Rutland. The store is great for things like rustic boxes (more on that some day), but as a woodworker and general DIYer, I prefer the related warehouse down the street. They have most of the interesting tools (at least for me, not needing any more planes or saws). I usually pick up a few odds and ends (like screw taps or T augers). Once in a while, though, the warehouse will hide a real gem.
It will clean up nicely.
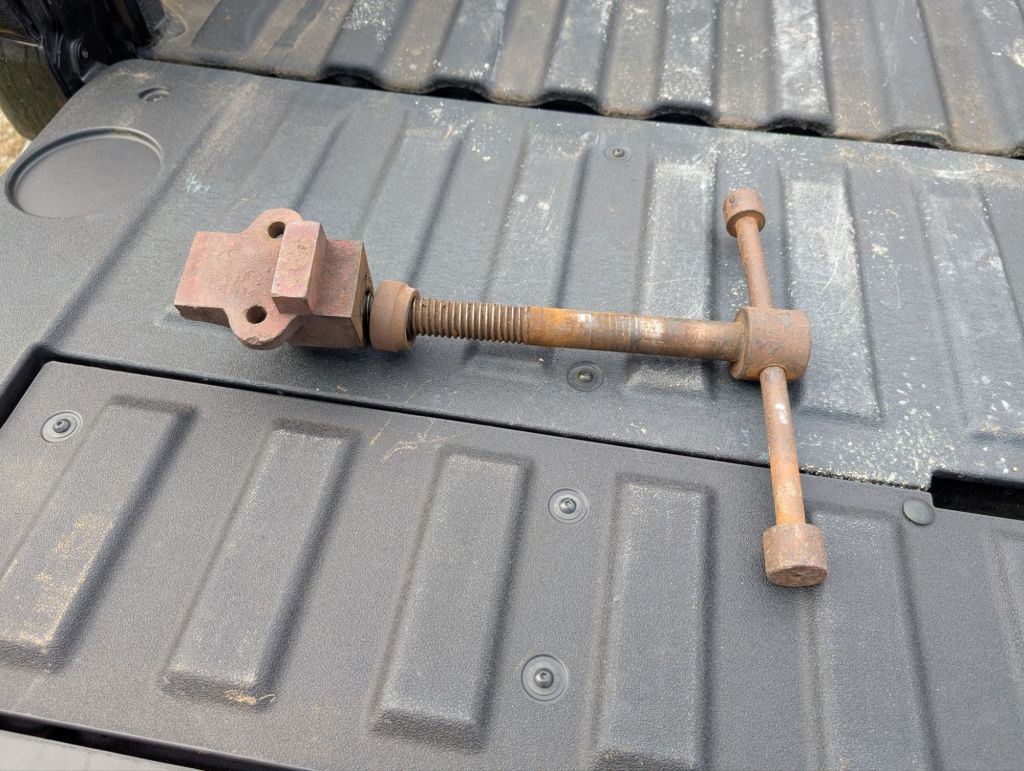
The metal screw above came from what I think was a portable leg vise. It had two white oak jaws: insect riddled and good for nothing but throwing in the woods to rot. But the screw is in great shape and the nut is rather beefy. It just needs a de-rusting and to straighten the handle.
Unlike typical woodworking leg vise screws, which mount horizontally (in line with the screw itself), the nut had vertical mounting holes and a flange. This means it’s screwed into the underside of the work surface (like a modern bench vise). It could also be for blacksmithing too.
I don’t have a place for this right now. But for $20, how can you go wrong?
Hope everyone’s 2025 is off to a great start! I am actively ignoring the shitshow that is the United States federal government for the next 2-4 years, so that means more woodworking!
I was recently up north where I have a basic set of hand tools and a pretty good workbench in a shed. My tool kit consists of a few bench planes (No. 5 1/2, No. 4, and scrub plane), saws (a 20 inch hardpoint and a 12″ hardpoint, plus a 12TPI crosscut carcase saw), chisels (1″, 3/4″, and 1/2″), plus a small router plane, a small shoulder plane, a brace and bit, and all the basic marking and measuring tools. This is, in my view, an essential hand tool woodworking kit and I can do most home improvement and general construction tasks that cross the bench. Speaking of which, the workbench is 62″ long and the main benchtop slab is 15″ deep, which is plenty.
I have a dedicated Milkman’s Workbench for when I need vises.
But when I’m up north, when I’m not making spice racks and rebuilding exterior stairs, I like to scour the antique stores for two things: gate leg tables and vintage handtools. Most recently, I found a nice double gateleg table that now sits under a window in my living room. For furniture, I highly recommend The Red Carrot in Rutland, Vermont. Especially when the warehouse down the road is open. They also have a great selection of rustic boxes, most of which seem to have been joiner’s chests at some point. I don’t buy them to use them, but rather to study the techniques.
For tools, though, I find the foofier antique stores and thrift shops tend to be goldmines. While everyone else is looking at the jewelry and lamps and sewing machines up front, I’m digging through the back corner to find Disston and Simmonds hand saws and Stanley bench planes. On this trip, in addition to a nice 9 PPI Simmonds crosscut hand saw (26″ plate length) I extricated from a pile of painted kitsch, I finally bought a transitional jointer plane I’d been eyeing for a few years as it migrated around the store.
Not bad for 150 years old.
As far as I can tell, it’s a Stanley No. 31 transitional jointer plane, Type 4 (manufactured between 1871 and 1872). No lateral adjustment, right handed threads on the depth adjustment knob. The japanning on the casing is like 95% intact and aside from the horn of the tote being cracked (I’ll make a new tote), and one of the slotted frog screws having split (you can see the half moon fragment next to the frog, and replacement screws are readily available on electronic bay dot com), it’s in amazing shape. The beech sole, while a bit twisted, seems never to have been seriously flattened. The mouth is still crisp and tight and should remain so after truing the sole. The throat has shrunk a bit (again, 150 year old wood), so I might have to grind 1/16″ off the iron width so it adjusts easier. Or just get a modern replacement blade which is a bit narrower. Even the knob is sound (despite a small flake off the side).
Do I need a transitional jointer plane for my toolkit? Definitively no. I have a Type 1 Stanley Bedrock No. 7, and one of the very last Old Street Tool trying planes ever made. Plus I have a No. 6 fore plane that is just as good as a jointer for most of the work that I do. And is my every day plane, as it were.
But this transitional plane was $45 dollars and a piece of history. So I will clean it up and use it as I see fit.
Suffice to say, it’s been a very long year. I lived through some serious renovations on the house, moved my workshop to another room in the house, and generally just had so much going on professionally and socially I did far less woodworking this year than I would have hoped. But even with all that, I still found some time on Thursday to put down the work mobile and pick up the plane, saw, and chisel.
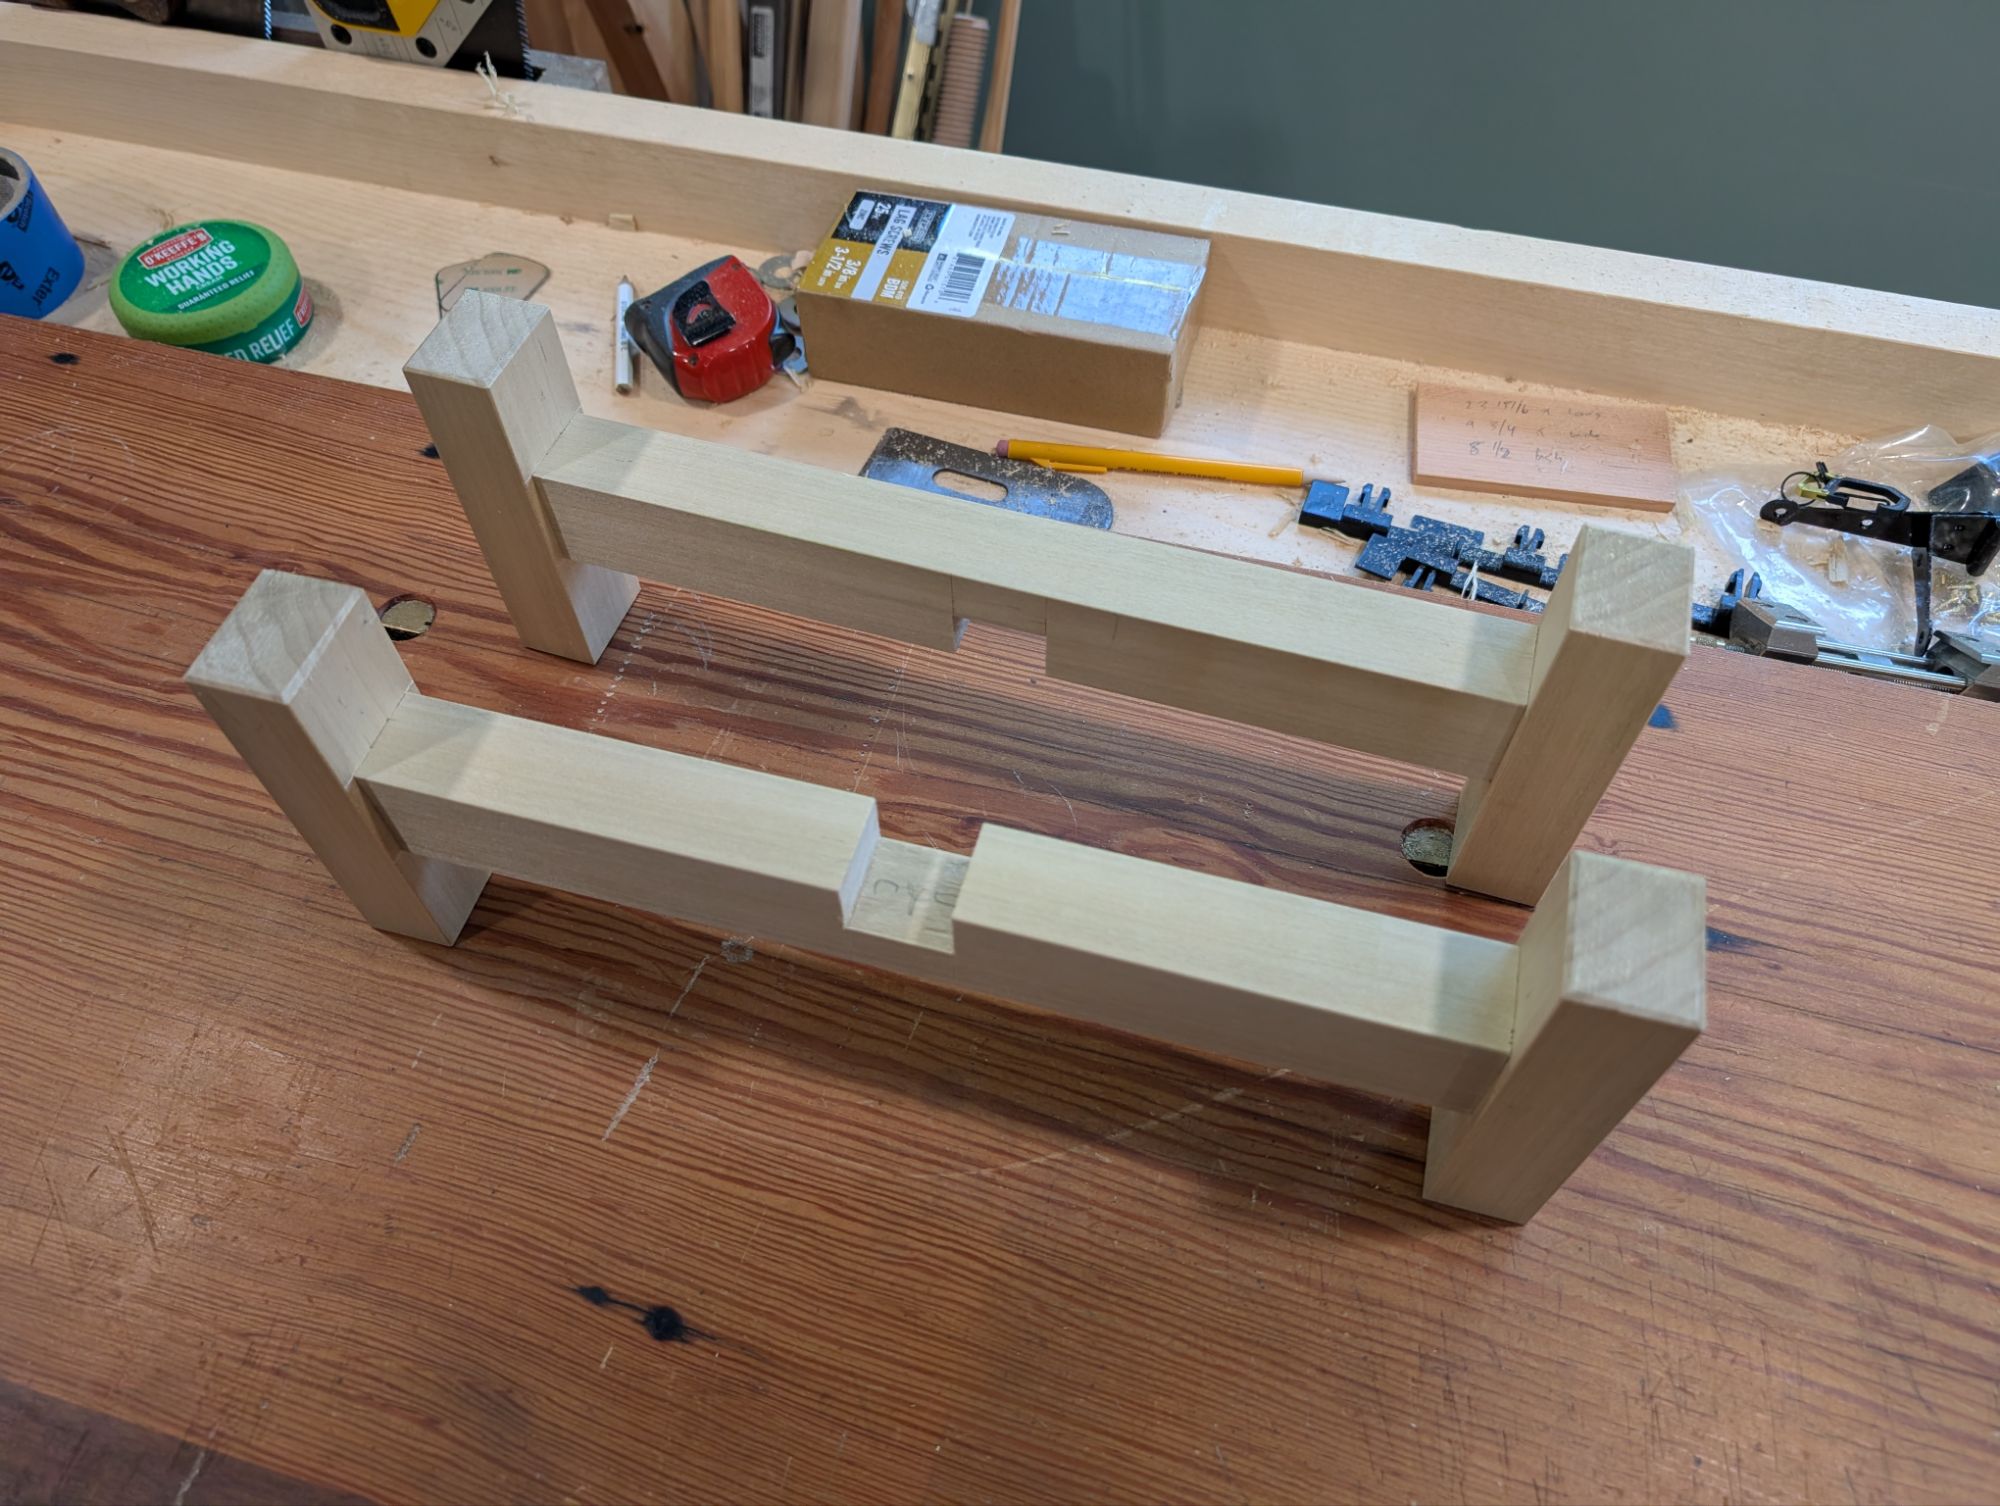
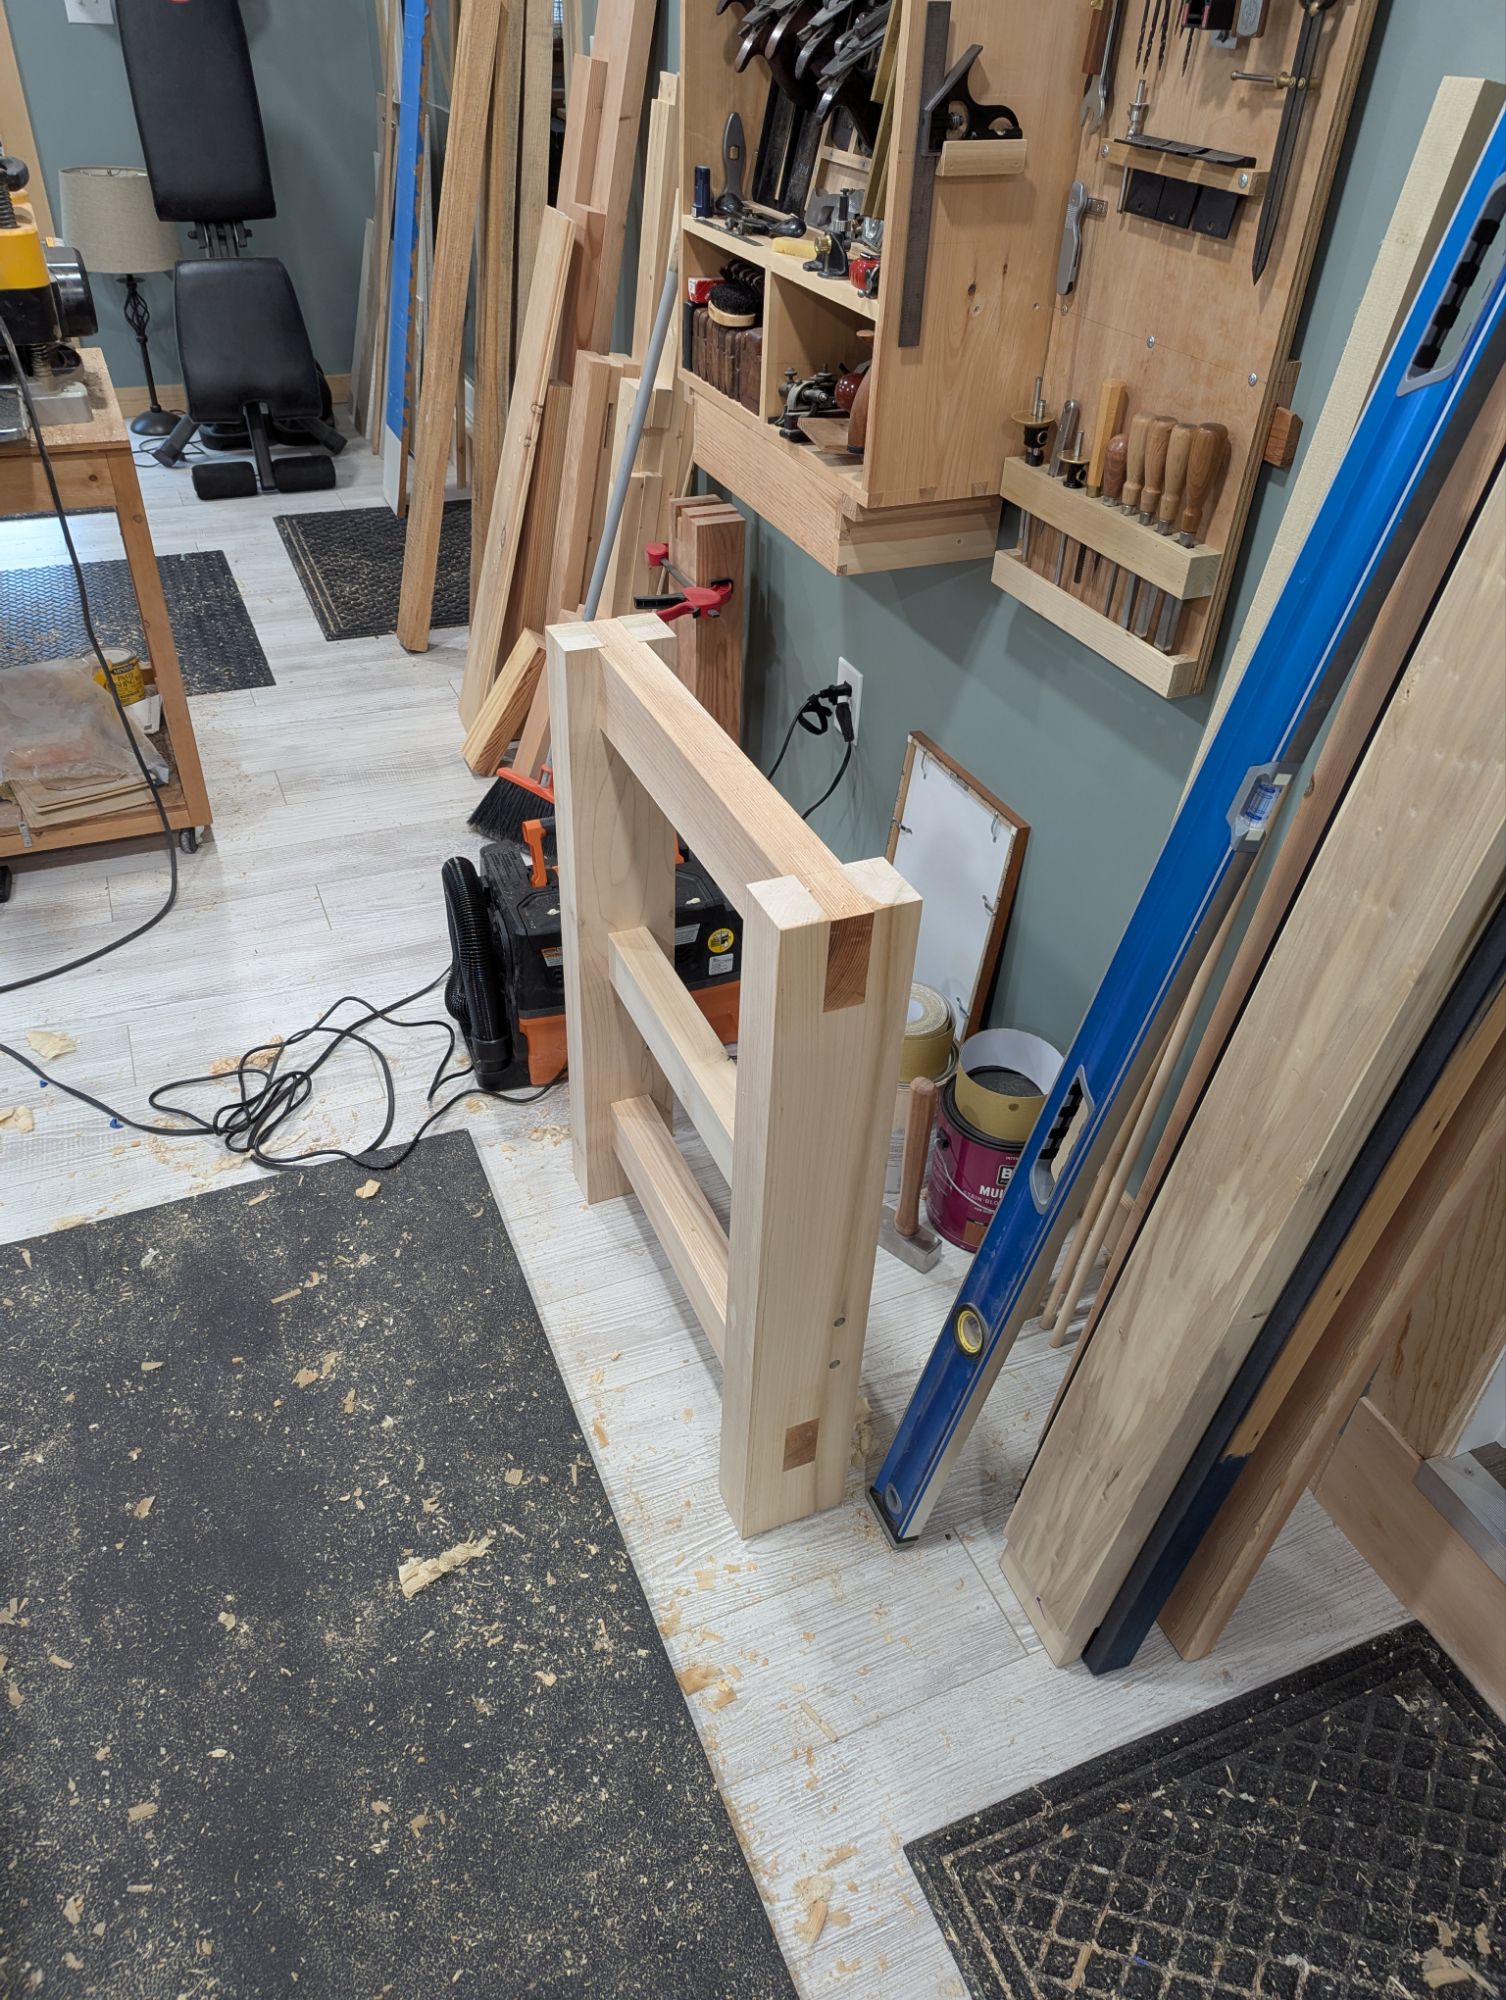
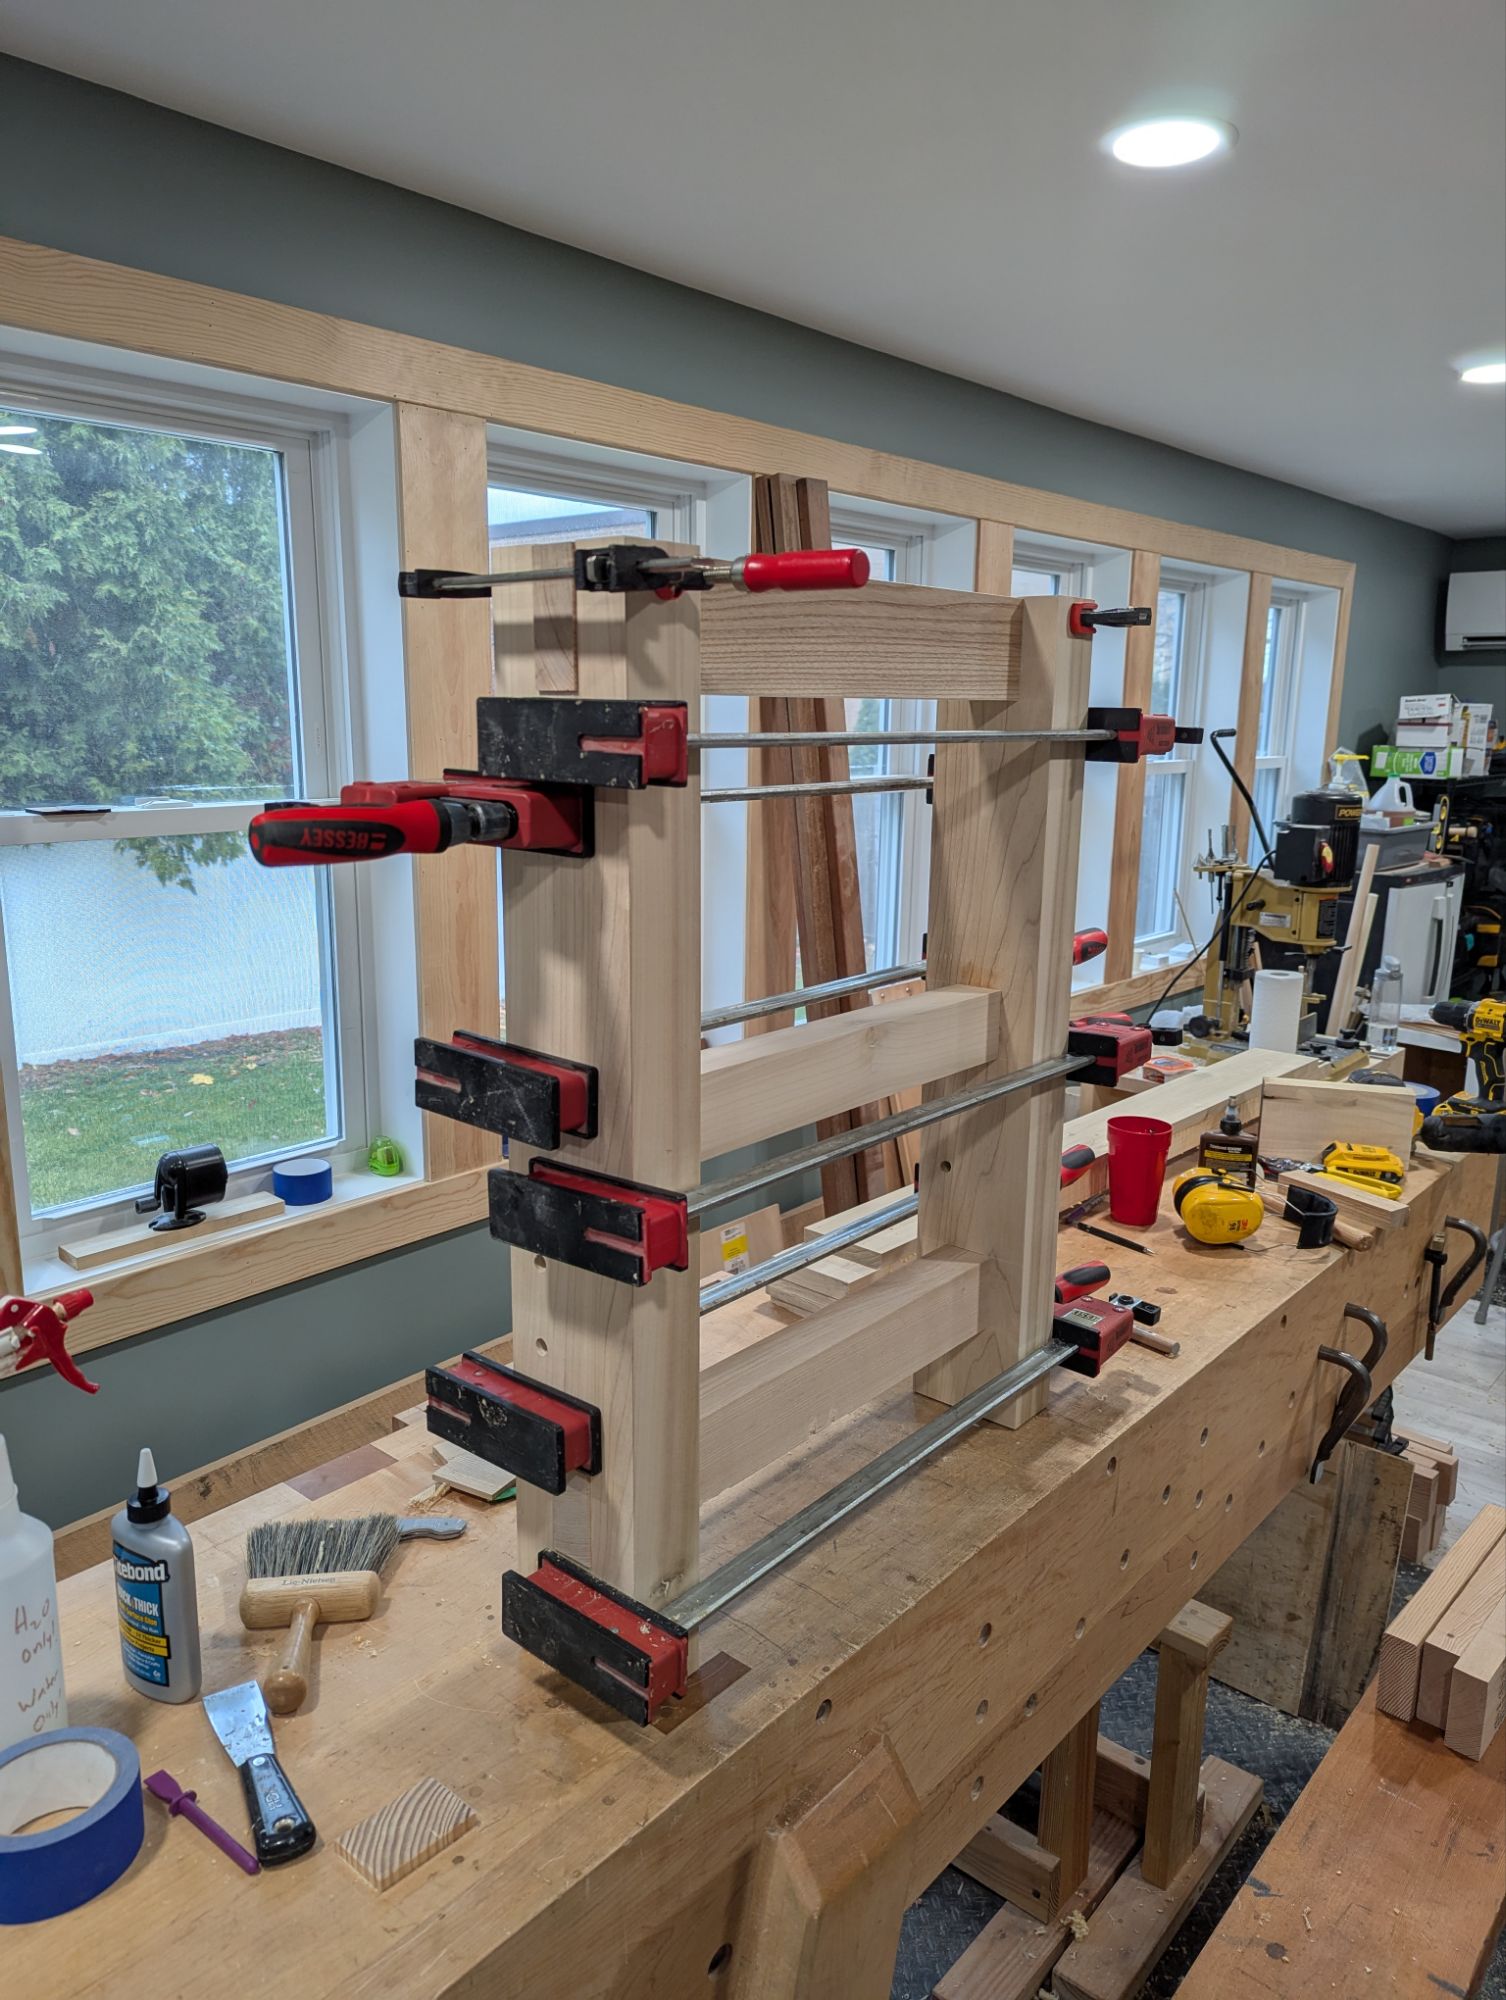
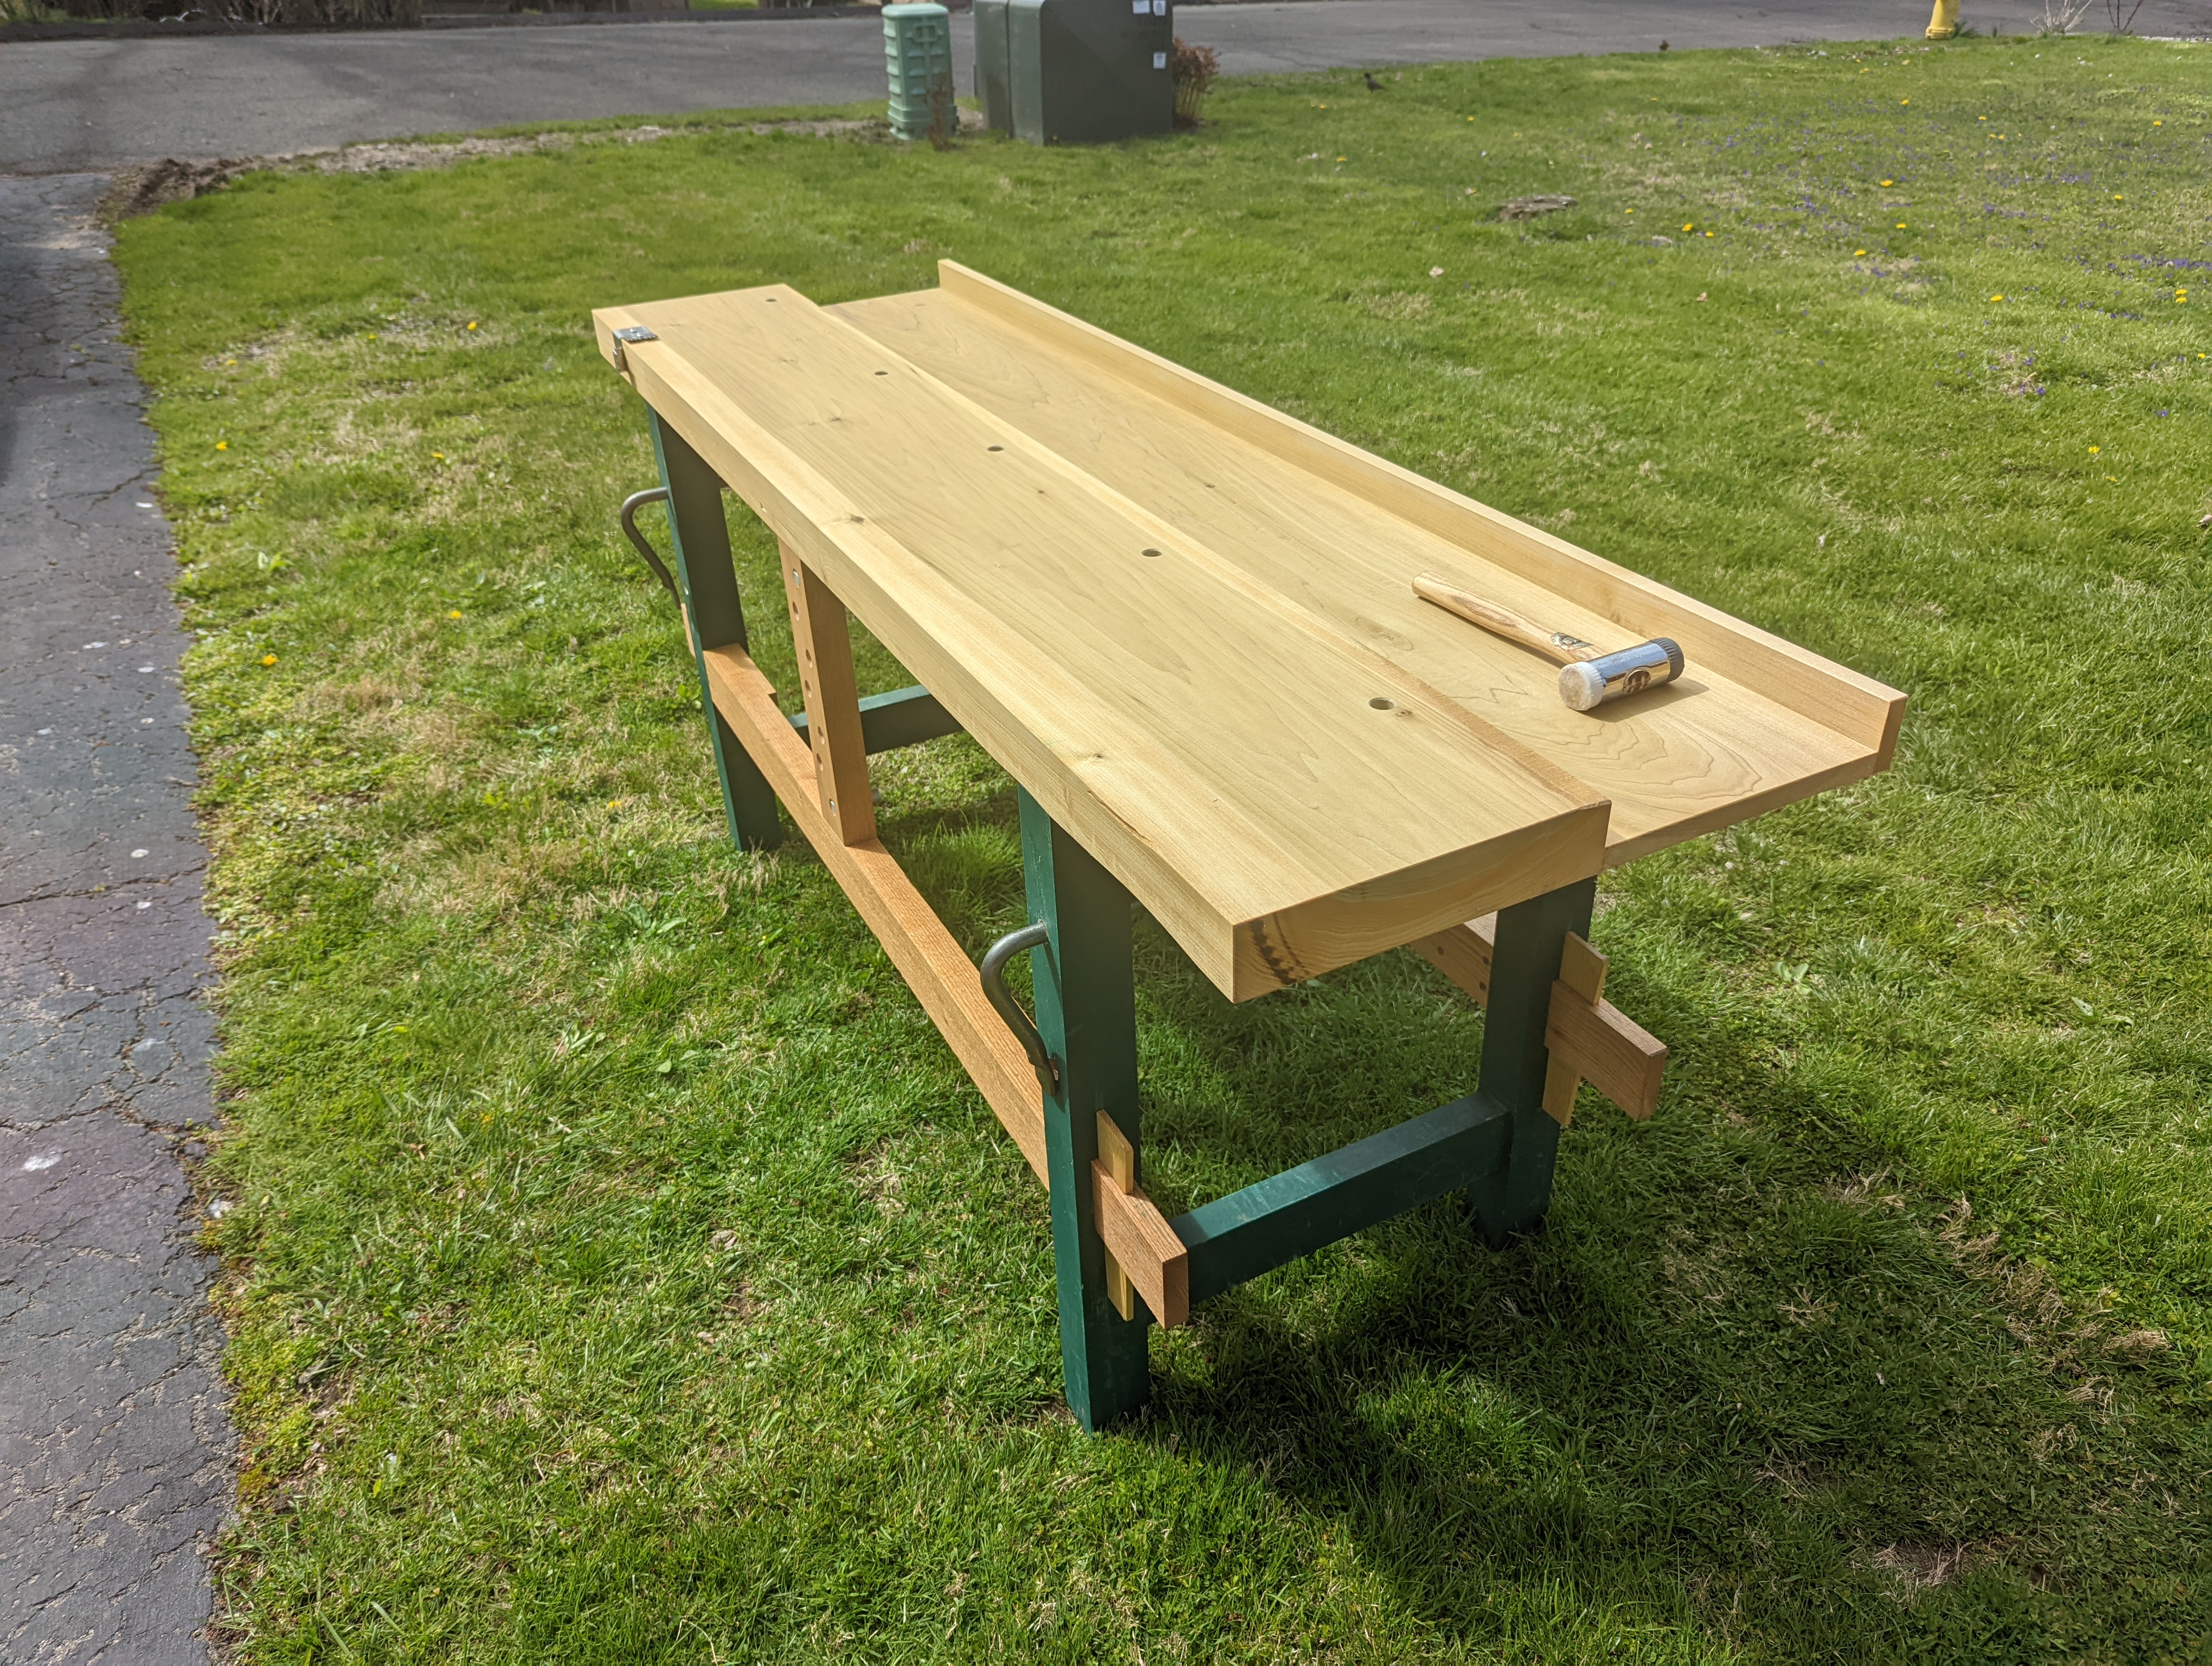
I am in the thick of a new workbench build (it’s been almost four years since I built one for myself, if you can believe it). And I’m at that point where it’s just about to start feeling like an actual workbench, rather than a bunch of beefy sticks.
One of the two leg assemblies.
So even though it’s after the holiday, I hope everyone finds some time in the shop this weekend. Even if it’s just an hour to glue up another leg assemble before your next conference call.
I’ve really learned to love Titebond Thick & Quick for mortise and tenon joinery.
Happy American Thanksgiving from The Apartment Woodworker, to you and yours.
In between my day job as an M&A attorney and my social responsibilities (which are legion), I have been slowly organizing the new workshop. Recently, this has included updating the tool wall that goes with my hanging wall cabinet. The tool wall itself hangs from the same french cleats the main wall cabinet hangs off, and I actually now have enough room for a second tool wall on the other side of the cabinet (that I may or may not ever get around to).
My first goal for the new tool wall was to move a number of tools that used to hang off the sides of the wall cabinet itself (or just lived on or around the workbench) onto the tool wall. I largely kept the previous hangers for the other tools (chisel mallet, rasps, dovetail layout guides, and chisels/marking gauges, etc.), but I did remake the rasp hanger so they would hang a bit more uniformly.
As for new tools on the wall, the plane adjustment hammer (red handle), the sliding bevels, the large dividers, the gimlets and dowel plate, and the wrenches all used to hang on the right side of the main cabinet (above where the combination square is currently). Happily, by moving those to the wall (and shrinking the footprint [wallprint?] of the cabinet itself), I was actually able to widen the tool wall too and fit even more tools on it.
I was even able to fit my discontinued Lee Valley pencil gauge on it. For the record, mine had no “character” to speak of when I unwrapped it. It really does work great, though.
A thinner top shelf also helped fit more boring tools.
The new wall is 14″ wide and 44″ tall (the height matches the cabinet height including the drawer), and is made of 3/4 birch plywood (the 5 ply, veneered home center stuff). There is still some space above the chisels and below the dovetail guides but aside from a bar magnet to hang my marking knifes, I’m not 100% sure what to put there. I really like where the 12″ combination square sits currently. I’m just too used to it to change it (and I’m proud of how well the hanger design works).
There are still a coping saw and my gunsmith pattern screwdrivers on the far side of the wall cabinet, which will go on the opposite tool wall if/when I get to it. I will also hang my Crucible bench square, my drawknives (yes, I have two now!), and a few other things on that opposite wall when the time comes.
It goes without saying, but I buy all my tools with my own money (the ones I didn’t get as a gift from my godfather or inherit from my grandfather).
I’m not sure I could ever go back to a floor chest as my main tool storage. But that’s just a luxury I’ve worked hard to attain.
For several years, the floor of my workshop has been the OSB top of DriCore tongue and groove subfloor squares. DriCore is a modern miracle (not a sponsor, just to be clear) and going from working on the bare concrete of the basement to a fully insulated, slightly cushioned wood floor was nothing short of staggering. Not to mention eliminating the risk of a falling chisel needing a full regrind by landing edge down to the concrete. I’ve recently added some tongue and groove laminate on top of the DriCore which, even though it’s darker in color, it has actually brightened the room (I assume because the albedo of the shiner floor is higher than the OSB of the DriCore squares).
That lonely Veritas jointer plane on the back wall.
Since adding the laminate floor, I’ve been working off my 98″ Nicholson workbench, made of hard maple. This bench has by far the best leg vise I’ve ever made. It works smoothly, doesn’t bind and the foot operated cog gets real momentum because of the heft (8/4 white oak). It’s still too big for the space, and honestly could use another 2″ of benchtop depth (being a hair under 22″). But it’s the only bench currently in the room. My last buddy to buy a house needs a better workbench than the one I made him pre-pandemic. So I’m giving him my proper Moravian knockdown bench. And with my outdoor workbench neatly stacked in the garage, I’ve got room (and time) to make another full size workbench. But more on that later.
Blue skies and green grass are only a month or two away.
I like the vise on the maple Nicholson when cutting tenons. Unlike a pinboard variety, the cog and screw parallel guide easily adjusts between holding the tenon board widthwise to cut the tenon shoulders and cheeks and holding the mortise board lengthwise to chop and pare out the mortise. Although, in fairness, I’ve been using a hollow chisel mortiser more and more these days to do the mortise chopping.
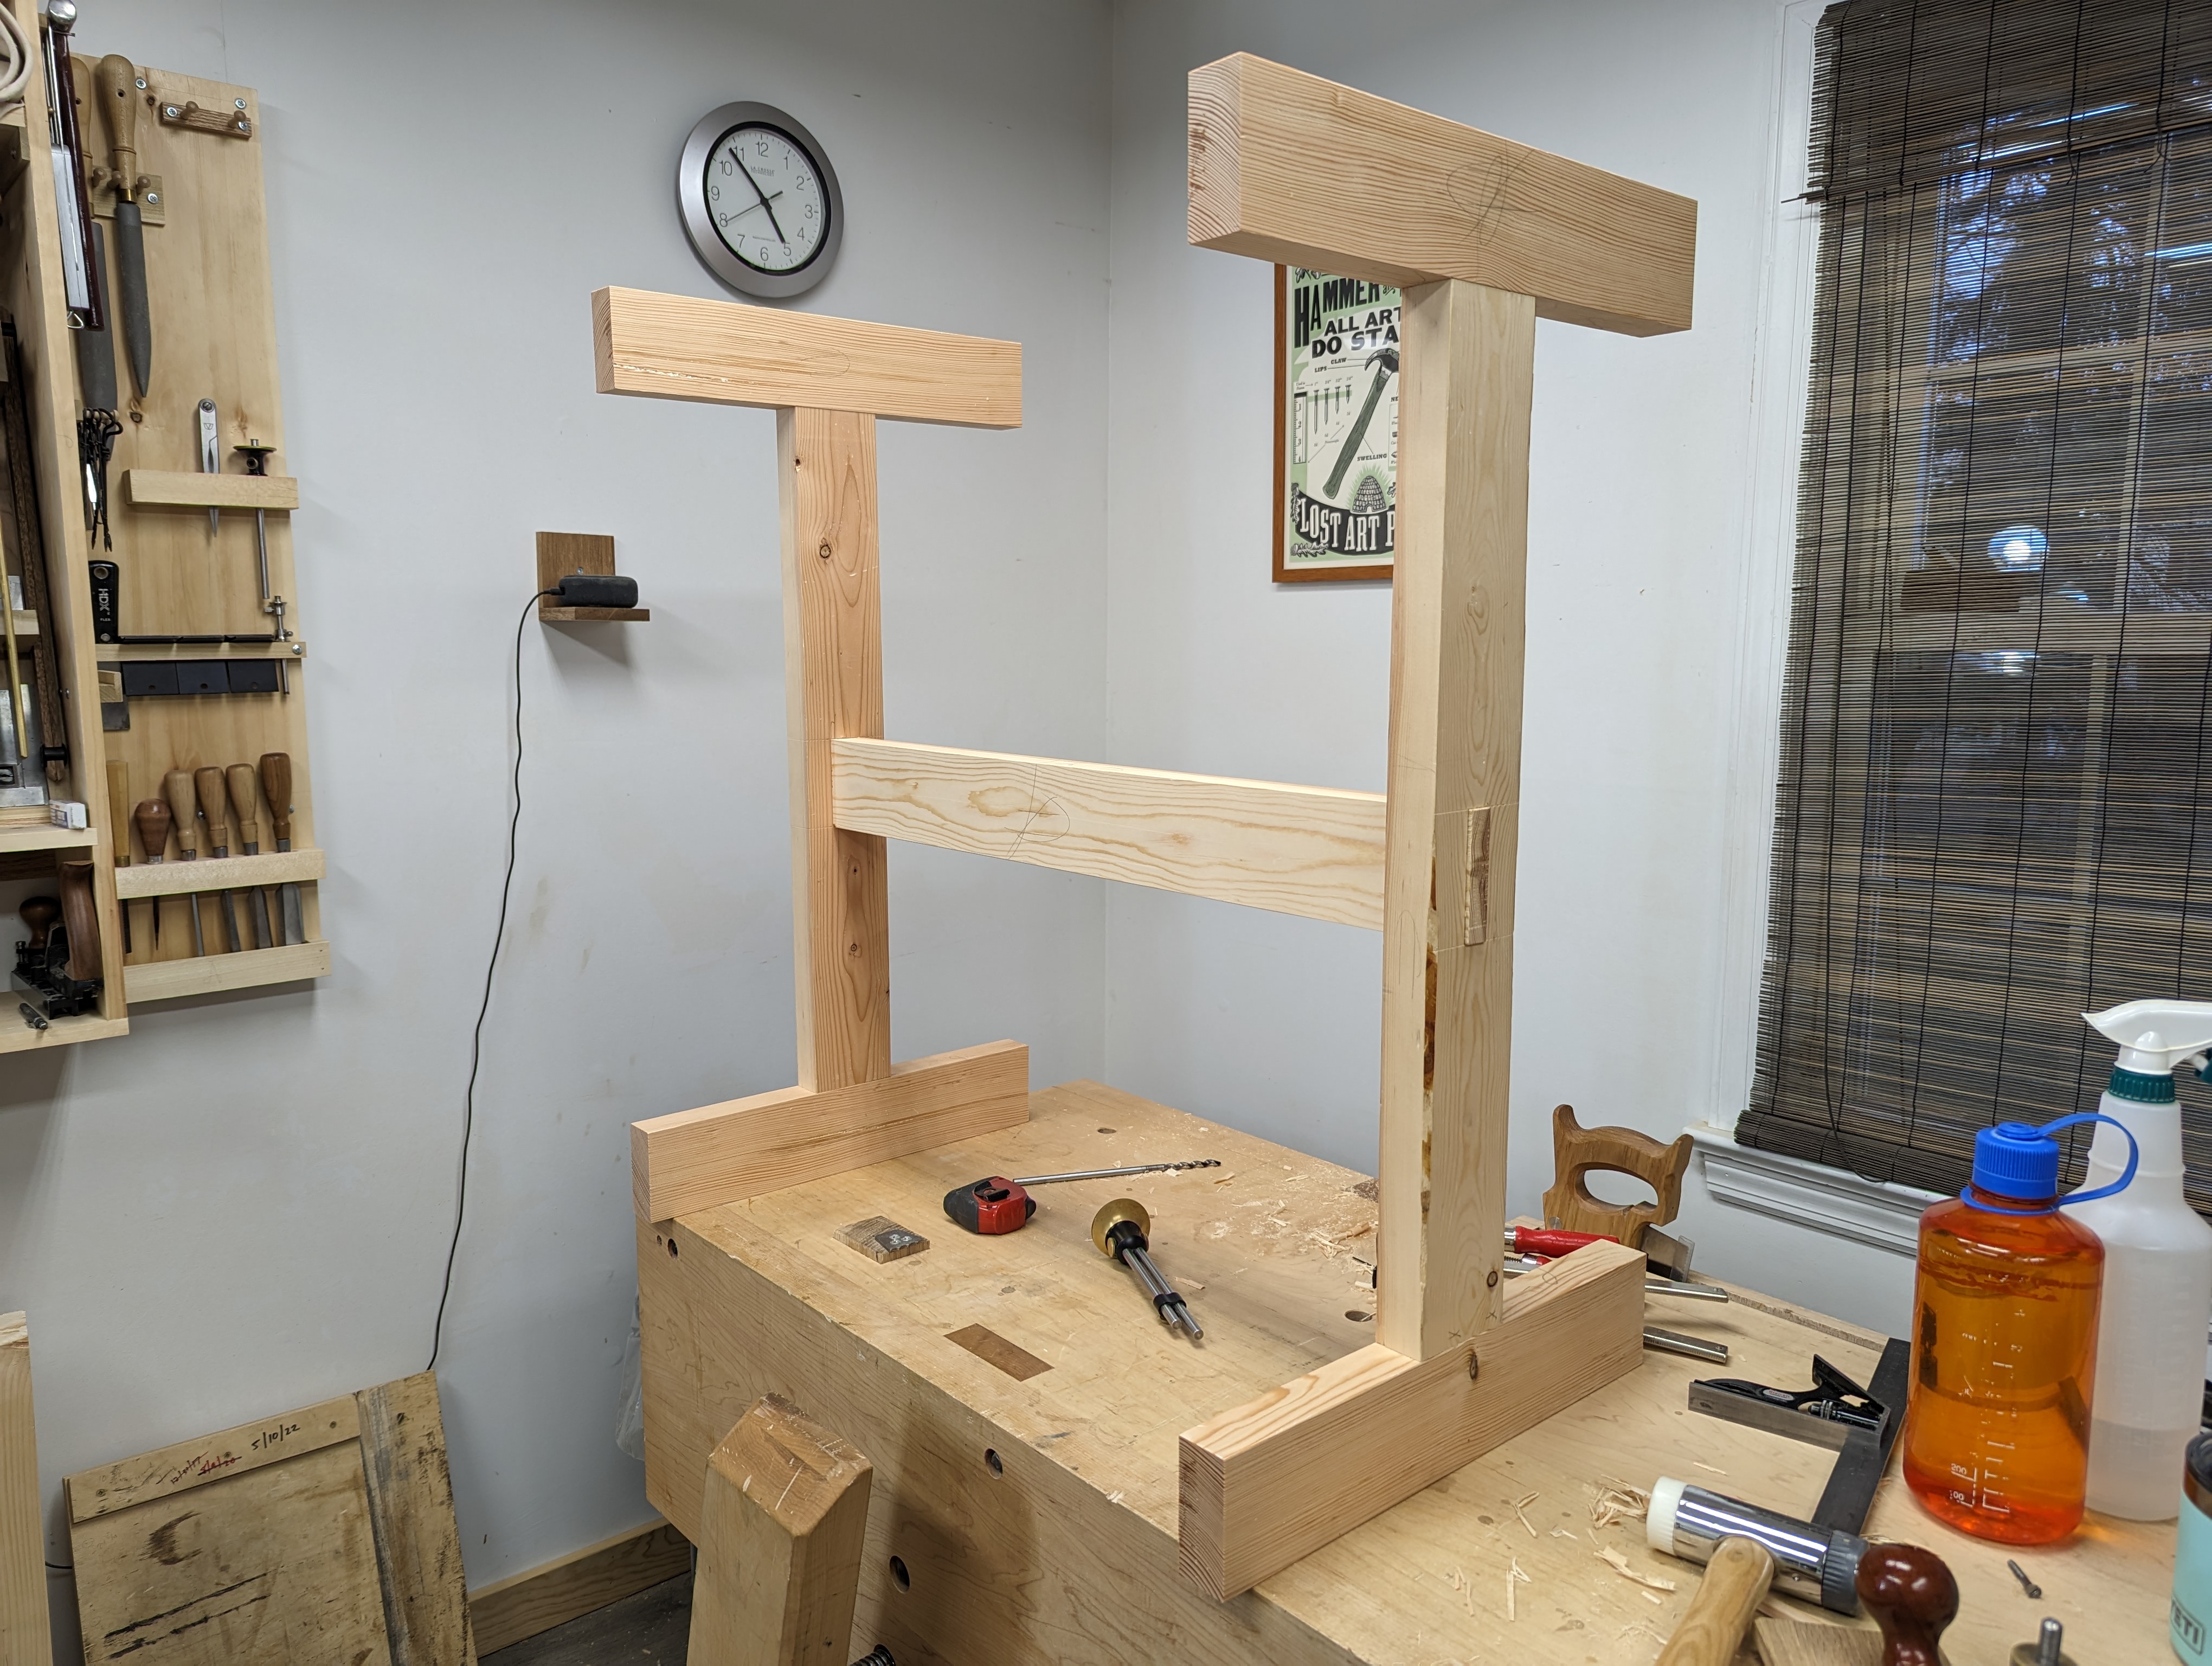
All those tenons are currently for a new sharpening station. Essentially a trestle table about the size of a sawhorse (and, quite frankly, patterned off a Krenov-style sawhorse). The frame is made of scrap Douglas Fir 2×4 leftover from the lumber rack build and the top will be Spruce offcuts from a planting table built up in Vermont. When it’s done, it will also have a drawer for saw sharpening gear. I might even use full extension, metal drawer glides that can open from either side.
Haven’t decided yet whether to angle the ends of the feet like Krenov did.
I had missed having a dedicated sharpening station that stashes in the corner. When I was working on the green Moravian, the maple Nicholson was pushed up against the wall and the sharpening station was all the way at the end. Besides having to squeeze in between my tool chest and whatever I was working on, the rest if the workbench top got super cluttered all the time. This new station will hold everything it needs to without any extra room to accumulate detritus. It will also be more accessible.
Just look in the background. What a mess. Also, a good shot of the leg vise cog mechanism.
After I finish the sharpening station, the next thing is to take down the lumber rack on the right wall. It barely stores any lumber and just collects clutter (seeing a theme here?). I’ll move whatever lumber (mostly reclaimed red pine) is on it to the new lumber rack (by, unironically, hanging the racks on the back side of the lumber rack posts). That will free up more than a foot of usable floor space (and force me to organize the other crap on the racks currently).
That’s all for now. Will share some pictures when the sharpening station is finished.
I recently celebrated my 10th woodworking anniversary. About this time in 2012, I got sick of paying for furniture that didn’t quite match my sensibilities and took matters into my own hands. I’ve probably covered this before, but growing up, we were a New Yankee Workshop household (not a Woodwright’s Shop) household. So when I decided to get back into woodworking as an adult, I went first for some power tools. A home center run with my father resulted in 12″ chop saw, a plunge router kit, a cordless handheld tool bundle, and a boatload of wood screws (plus one hard point saw and one chisel). Those tools alone got me through a bed (that was reclaimed into the base frame for my bar), a desk (that was reclaimed into the base frame for my regular outdoor workbench), and a console table (reclaimed into god knows what).
But I quickly gravitated toward working primarily without power. Not just because it’s loud and dusty using a plunge router in your foyer, no matter how great your shop vac. But also because it’s meditative to me. Now I am sure there are some folks who Zen out with the random orbit sander. But not I. My happy place is a No. 6 or No. 7 hand plane and a stack of rough sawn lumber to S4S.
My other happy place.
Sure, I still have that same chop saw and cordless circular saw. And I regularly use them, along with a hollow chisel mortiser and a thickness planer. I even bought an impact driver a couple months back and can’t believe how I’ve lived without one for all these years. But the fact is, nowadays my power tools support my hand work; not the other way around.
Although I joke that I am an artist, I will never make anything that ends up in a museum. I’m not a savant at anything woodworking related (although I consider myself well above average at hand cut dovetails). I have a day job, that keeps me very busy. And in these 10 years, I’ve devoted enough time to the craft to have picked up a thing or two. And I’d like to share that collected wisdom with the world.
This will be a multi-part series. I’m not sure how many installments there will be, and I certainly expect I won’t make it straight through without deviating to regular posts. I have literally no sponsors.
Getting Started in Woodworking
If you’re here, it may be because you’ve searched “Woodworking in an Apartment” or “Small Space Woodworking” and took a flyer. If so, welcome. I’m James and I have very strong opinions on literally everything.
If you think you might want to get into hand tool woodworking with a limited tool kit and limited space, there are better resources than me. You should go to YouTube and check out Paul Sellers and Richard Maguire. Paul and Richard are giants to me. Paul’s 10 part workbench video came out a few months before I started woodworking (although I didn’t discover Paul until 2014, after 2 years of fapping about with power tools). Paul is like a combination of Mr. Rogers and Bob Ross.
Richard started posting a year into my woodworking career. Paul’s website, Common Woodworking, didn’t exist when I needed it most. Richard’s site, The English Woodworker, has long form content (both paid an unpaid) that cannot be beat. Richard is at the same time exceedingly practical and esoteric. Trust me; you’ll see.
So check their stuff out and maybe come back here if you want more of those very strong opinions of mine. If you’re open to using more substantial power tools, the Woodworkers’ Guild of America and the Wood Whisperers Guild are both good resources.
Beginner Woodworker Hand Tools
People have written entire books on this question. I have my own thoughts, sure. My only piece of real input is to buy a few tools of good quality, rather than a bunch of tools of crappy quality. But if you want my 10 year retrospective take on the absolute core tool kit, here it is.
Hardpoint panel saw from the home center (Home Depot has DeWalt; Lowes has Craftsman; I have used both)
1/2″ (and maybe 1″ too) Lee Valley bevel edge chisel (the ones with the clear handle; they work both for fine work and mortising)
No. 5 Stanley Bailey pattern Hand Plane (Patrick Leach at http://www.supertool.com/ can get you a good worker that won’t take much to restore; sign up for his monthly tool list so you can build your kit with good vintage stuff if you want to go forward)
Stanley 10-049 folding utility knife (Paul Sellers swears by this knife and so do I; get it from Amazon)
Thorex double face mallet (both Paul Sellers and Richard Maguire use one and so do I; get it from Amazon)
12′ tape measure (the Starrett “exact” one is pretty great, and cheap, from Amazon)
12″ combination square (I use a Starrett, but Lee Valley sells a 12″ in a set with a 6″; they are pretty accurate for the price)
Taytools double sided diamond plate sharpening stone (these are pretty good for the price, Amazon available, but also get a sharpening stone holder from powertec or peachtree and some 3 in 1 oil)
Vise type honing guide for plane and chisel sharpening (I like the eclipse-style one you can get from Lee Valley, but make sure to make a stop block system for repeatable angles)
Cordless drill driver (let’s face it, you probably have one already)
And that’s it. Don’t forget the glue and the mechanical pencil.
You can probably get away with a speed square from the home center instead of a combination square.
But for my money, I would check out either The Naked Woodworker workbench, which can be built with just dimensional framing lumber from the home center and the tool kit described above. Or check out Rex Krueger on YouTube and his “Joiners Workbench“, which is similar but arguably easier to build with the same kit.
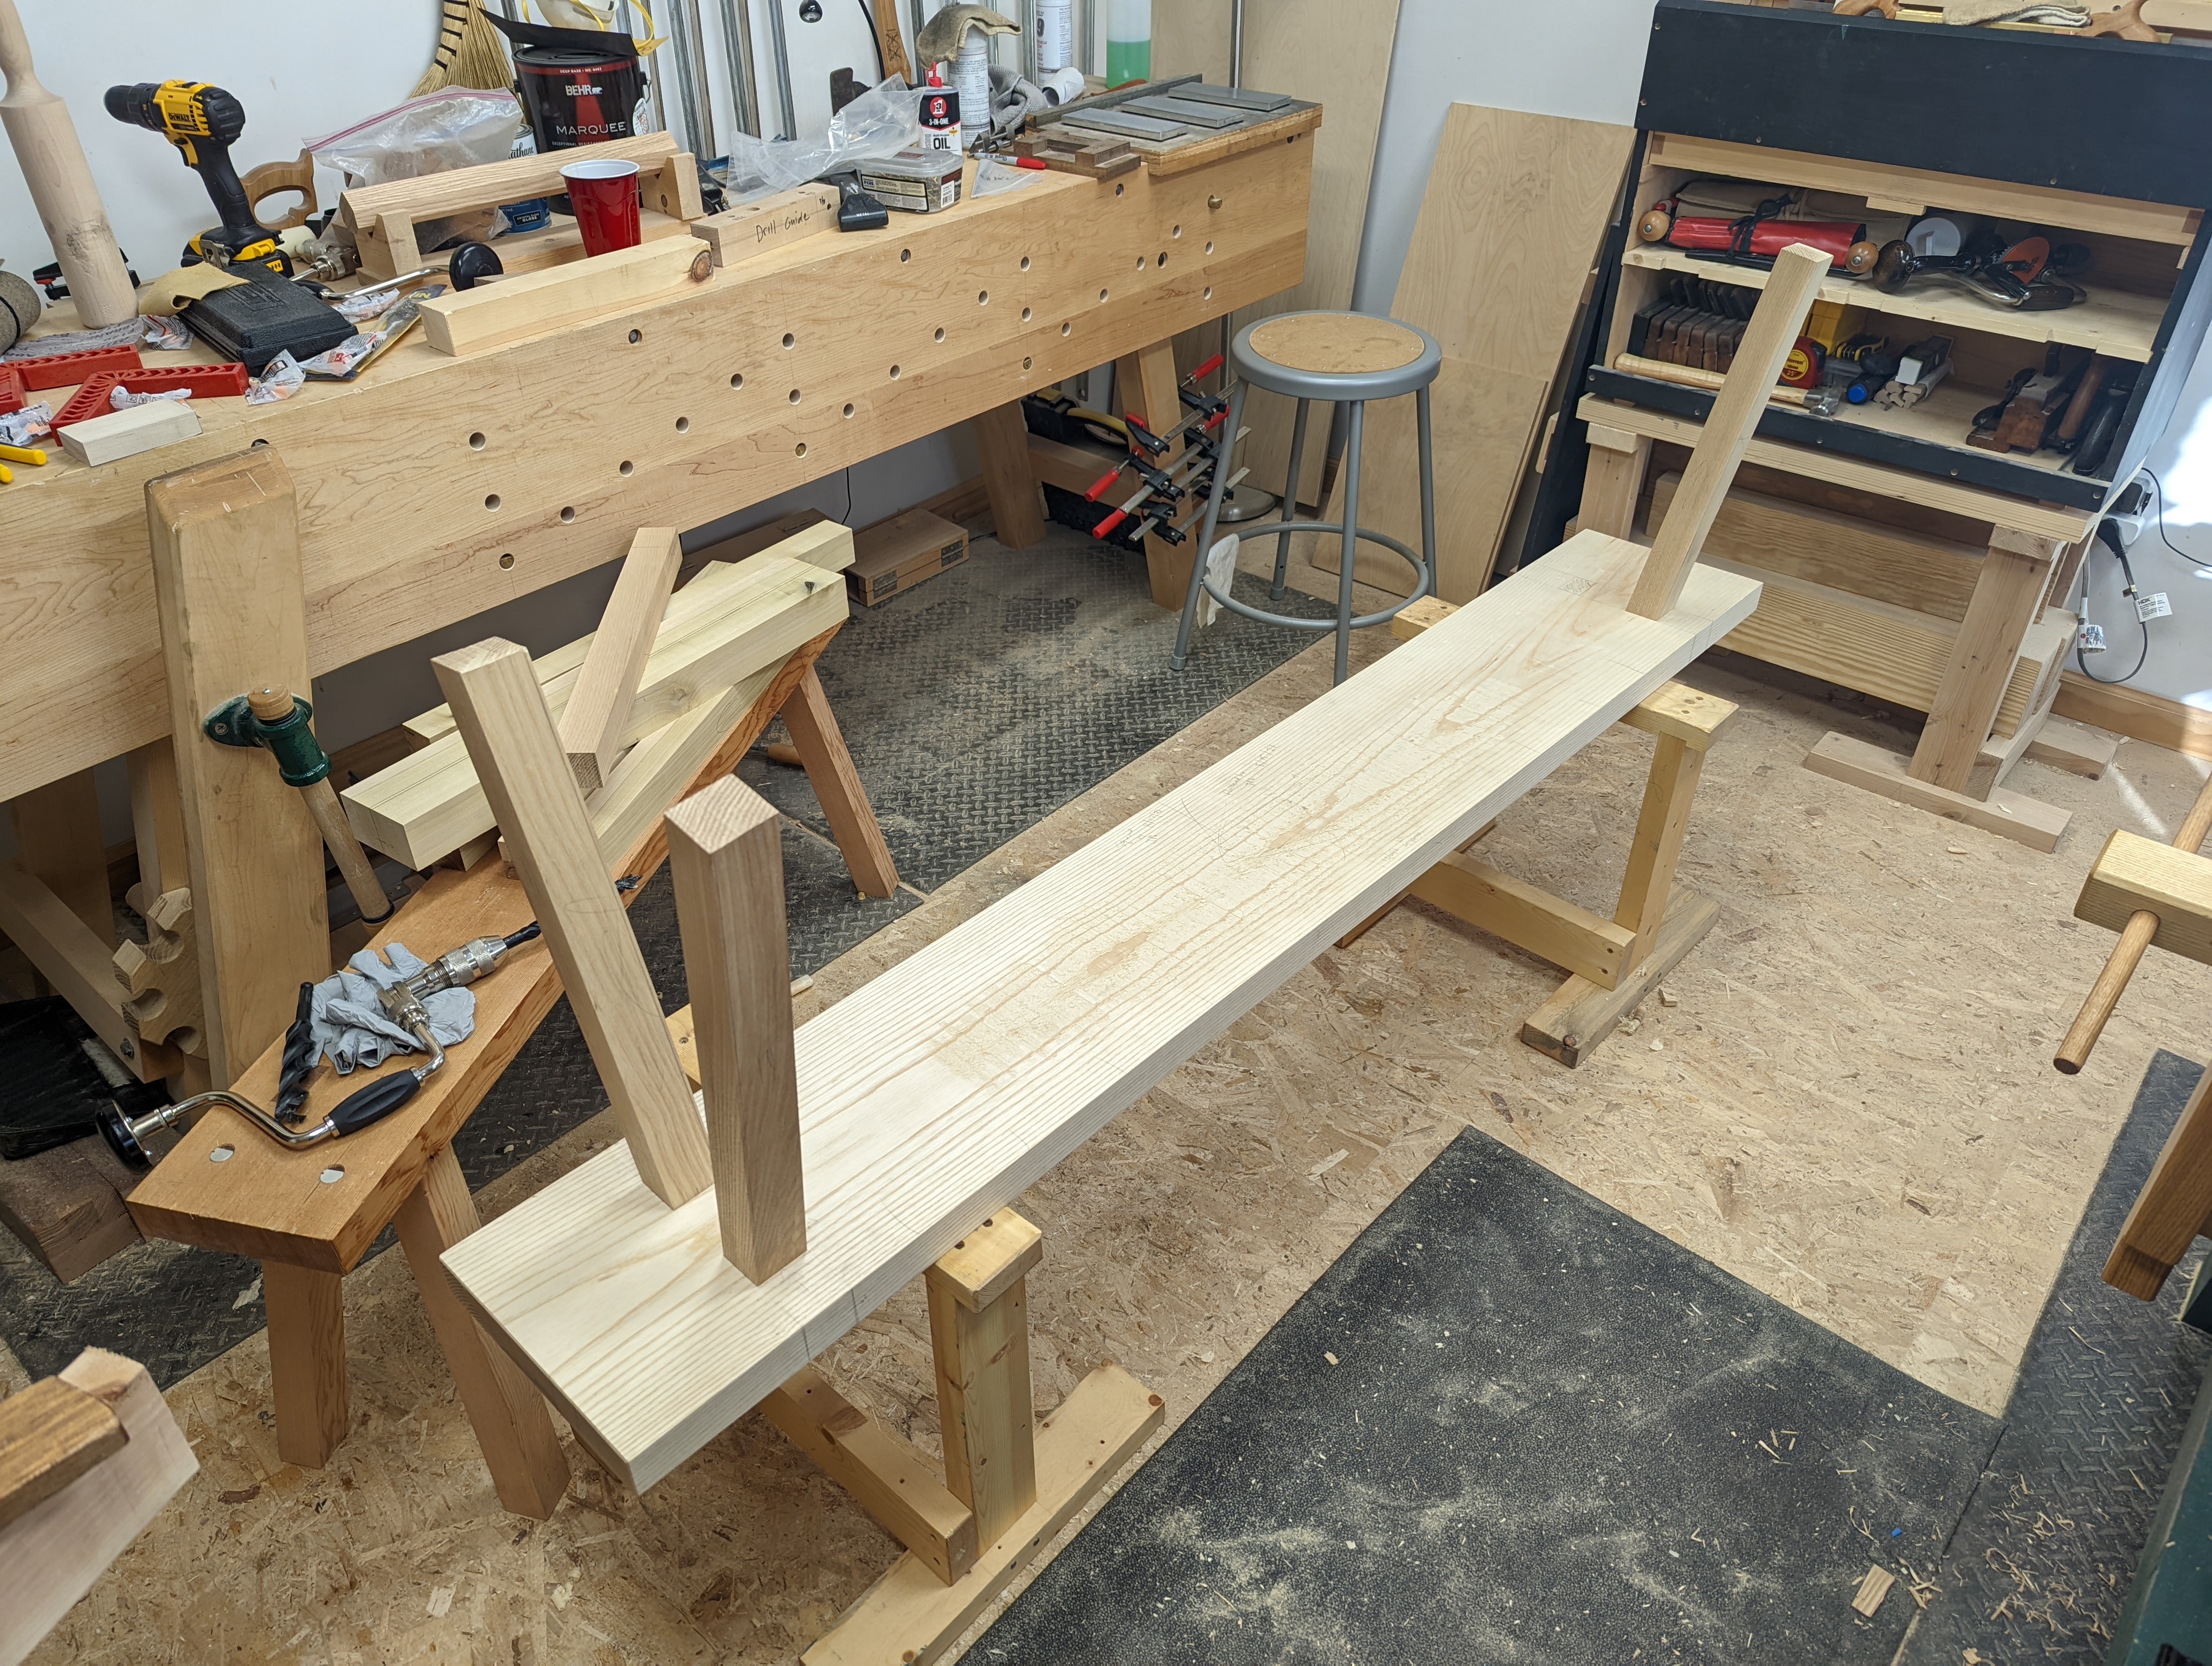
I’ve built a few of those Chinese-style low benches, two of which are shown in this one picture.
I’m going to stop it there for now. I could otherwise go on forever.
Btw, I’m not on twitter anymore. I have a strict “no social media owned by delusional man child” policy (I’ve been off facebook for several years for the same reason and never had an instagram).
So I’ve hit the reset button. Armed with only the tools listed below, I’m going to start again in my woodworking life. First step is to knock together a decent workbench, then follow it up with a tool storage unit.
Deja Vu all over again!
Let’s talk about the tools, first:
Handsaw. For this, I’m using the excellent Brooklyn Tool & Craft Hardware Store saw. I love this thing, but any impulse hardened contractor saw from the home center will do. I especially like the Craftsman 20″ saw from the home center, if you’re going that route.
No. 5 Jack Plane. The body is a Type 11 or 12 Stanley; the rest of it is very much a harlequin baby of scavenged parts from a number of different planes, plus a new Honduran Rosewood knob and tote. I could easily have gone with a No. 4 smoothing plane, such as the very decent Taytools version. I just like the slightly longer sole for quasi-jointing. I’m using two different irons: one for scrubbing and one for smoothing.
Speed Square. Nothing fancy here; just a plastic Stanley speed square from the home center. I agonized about whether to use my Starrett Combination Square. But, amazingly, this speed square (which I’ve had for a billion years) is pretty square. This will, in fairness, be the first thing I swap out for a high end tool.
1/2″ Chisel. If I had to choose just one size chisel to use forever, it would be a 1/2″. And the Lie-Nielsen socket chisels are second to none. Period, full stop. Narex are pretty good too. Buy buy the ones from Lee Valley; the Amazon ones seem to be poorer quality, for whatever reason. That’s a Thorex hammer, which I bought on recommendation from Paul Sellers (and I can’t live without it now).
Folding Utility Knife. As noted above, I fully consider myself a disciple of Paul Sellers, and this knife is absolutely all the marking knife you need. Cheap and effective: the apartment woodworker’s dream.
Cordless drill driver. Whatever you’ve got. Mine is a DeWalt 20V. A two or three jaw brace would work just as well.
Sharpening Stones (not pictured). I use Atoma diamond plates. You could honestly get away with just the 1200 grit version, which after a little use breaks in nicely. But having the 400 grit version makes flattening and regrinding easier. I’m not bold enough to freehand sharpen, so I’m keeping my Lie-Nielsen sharpening jig (but a cheapo Eclipse knockoff will work fine too).
The plan is to make a low workbench. Not a staked version. That would require auger bits for a brace and a spokeshave to make round tenons, not to mention a bevel gauge or comparable jig. This low bench will be patterned roughly off a Schwarz-pattern saw bench. I prepared the slab off camera.
Yes, I have lots of parallel jaw clamps. That doesn’t count.
Douglas Fir 2×4’s at my local home center are about 102″ long. That’s eight and a half feet, in the vernacular. Which means the off-cuts from a 72″ workbench are long enough for legs and gussets on a low workbench. That said, there are not four clear off-cuts from the seven boards I had. And I would never lie to my readers. I’ll use some 2×8 offcuts I have left over from a Naked Woodworker workbench I made for my brother for the legs. Or just buy a couple more 2×4’s from the home center.
Speaking of not lying to you guys, I’d like to be clear about something. I surfaced two of the seven boards for the glue up using buckets as saw benches, to prove I still can. But for the sake of my lower back and sanity I did the rest on my 60″ roman workbench. I’m not a masochist, after all. At least not in my woodworking.
I’m going to leave it there for now. Next post, I’ll work on the legs and change up the rules a little bit.
So it’s still a global pandemic, and I’m running out of lumber for projects. I used up the last of my 1×12 eastern white pine for a sweet wall-leaning bookcase, which is really just for displaying my vintage Lego sets. This was only supposed to be the prototype, but it came out so nice, I’m leaving it at that. More on that soon.
Space 1989-1995 FTW!
I also finished my new workbench, which is roughly in the Nicholson style. Made of hard maple (other than little bit of soft maple blocking under the holdfast holes), it’s 98″ long, 22″ deep and 34.75″ high. It’s the longest workbench I’ve ever worked on, and, to be fair, it’s probably bigger than I need it to be. Honestly, it’s probably too big for the 12.5′ x 13.5″ bedroom that I use as my shop. I’m not banging the walls with a jointer plane or anything, but it’s definitely tight clearance on the ends.
It has no rear apron, like a true Nicholson.
I’ve also been practicing staked furniture (mostly low benches). I think I’ve found a layout that I like, both structurally and aesthetically. 65 degree sight line and 10 degree resultant angle. It keeps the round mortises near the outside of the top but is still fairly stable. There is always one wonky leg, but what can you do?
At least, this time, it’s too little splay and not too much.
So all this is a way of saying I’ve been keeping busy as best I can. But I need a challenge. And I need to get back to my apartment woodworker roots. I’ve gotten too cozy with my proper workbench and full tool chest.
So I’m hitting the reset button. I’ve got seven Douglas Fir 2×4’s and only these tools:
Although, in fairness, I might use my No. 4 smoothing plane.