Month: August 2017

There is Always One

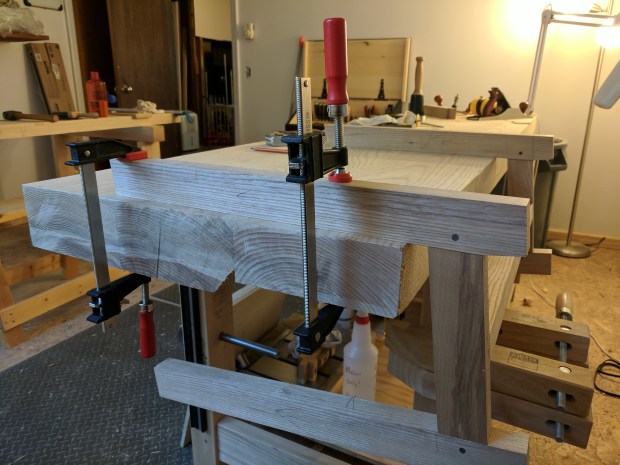
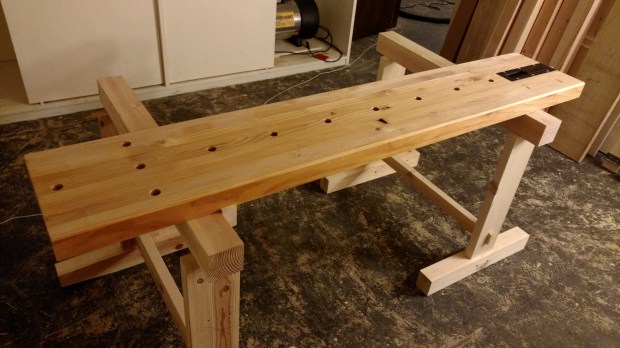
I’m no stranger to angled mortises.  But I’ve never done staked furniture before, so when it came time to bore the through mortises into the Roman Workbench slab, I didn’t know what I was getting into.  I read and reread the entries in both The Anarchist’s Design Book and Roman Workbenches, and I think I nailed the sight line and resultant angles, but it was still a bit touch and go.

IMG_20170826_104812

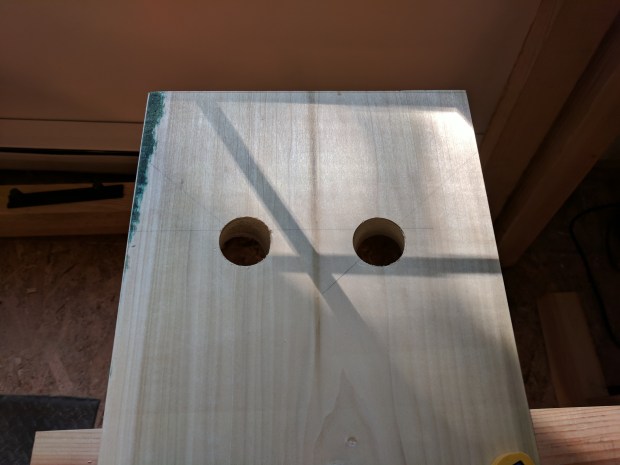
The front two mortises look pretty good.

I should have done a test mortise because, as often happens, the first one is a bit wonky.  It’s not quite lined up laterally, and I can tell the rake is off by a few degrees.  Not just by eye, but also because it’s the only mortise that had any blowout on the top face. While I can fill in the chipping (and might even paint the top), there is not much I can do about the angle.  Luckily, it’s the back right leg, so I won’t see it day to day.

IMG_20170826_104835

There is always one.

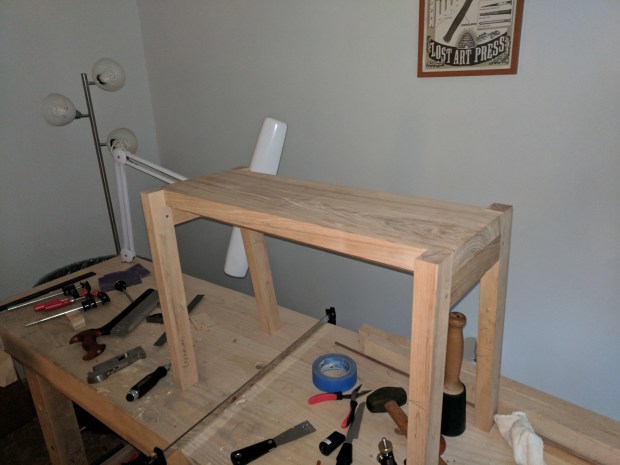
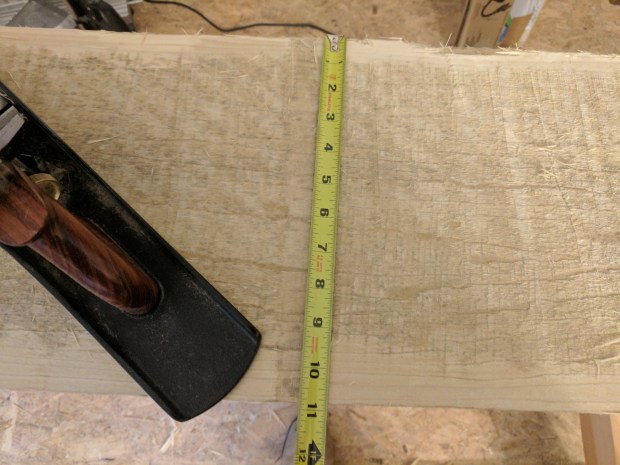
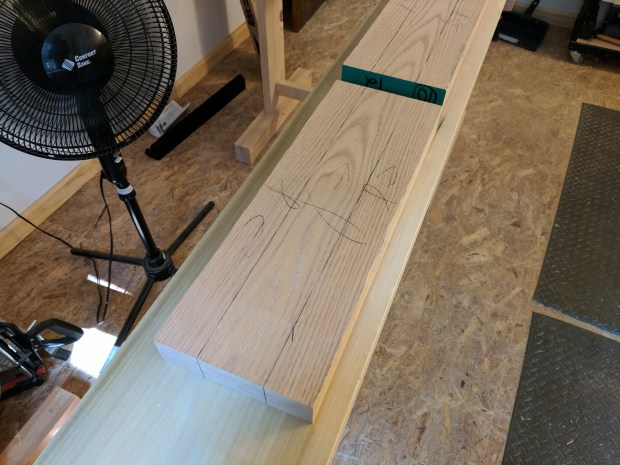
So that means it’s just about time to make the legs.  Shaping the tenons without a lathe will be one challenge, but before that, I’ve got to rip down the legs.  By hand.  Out of 8/4 air dried red oak.  At least it will be a workout.

IMG_20170826_104822

I wish I had a table saw right about now.

Speaking of wishful thinking, it would have been great to know about the Roman Workbench form when I first started woodworking five years ago.  This seems like the perfect workbench for getting started in an apartment with a limited set of hand tools.  It’s easy to make and straightforward.  Hell, you could probably even make the top from a single sheet of 3/4″ plywood ripped four times down the length.

Plus, with an extra cleat on the underside, a Roman Workbench could also go up on saw horses and act like a Japanese-style workbench for added flexibility.  And flexibility is the key to apartment woodworking, in my experience.

wp-1480513262955.jpg

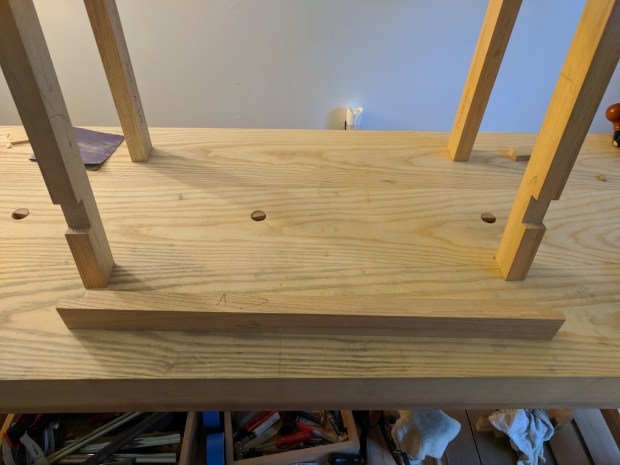
Like this, basically.

Oh well, coulda, woulda, shoulda, right?

JPG

Everyone Leaves in the End

I think about death pretty often.  My own, mostly.  It intrigues me, in a way.  I certainly do not fear death.  Why waste the energy worrying about something that will absolutely, with one hundred percent certainty, happen to each and every one of us?  Those who are scared of dying have something to hide.

And when I die, what will I leave behind?  My clothes, my shoes, the stuff in that one drawer I keep locked: I doubt those things will last much beyond my natural life.  But the work of my hands: who knows?  Through the motise, tenon, dovetail and dado, I may live forever.

wp-1479590861587.jpg

And, if I can, I shall haunt you from my Tuscan Red coffin.

At least until the collapse of civilization, in which case all would be turned to firewood anyway.

JPG

If it’s Wobbly…

then you should have put a stretcher on it.


IMG_20170818_182542

A bit more spindly than I expected.

I thought the drawbored mortise and tenon joints would be enough, but the ash sitting bench has turned out to be a bit wobbly.  So paraphrasing Queen Bey, I’ve decided to retrofit a stretcher to back legs.  In my world, “retrofit” is a synonym for “lap joint”.

IMG_20170819_084743

It’s times like these when I’m glad my workbench is apron-less.

A friction-fit lap joint can be very strong.  Between the long grain-to-long grain glue surface and the mechanical strength of the intersecting joint, it can be nearly as strong as a proper mortise and tenon joint, even without a metal fastener.

IMG_20170819_090714

It’s so pretty.

Because the joint will never be seen, though, I may add a slotted screw to each joint for a little bit more lateral support.  Or perhaps a walnut peg, to mimic the other drawbored joints in the piece.

There was some subtle twist in the entire assembly, so I’ve left the joint clamped for the full 24 hours.  That will give me time to think about whether to screw or peg.

IMG_20170819_093540

It’s almost like I meant to do it.  And now it matches the table a bit more.

The only other remaining question is whether this one stretcher will be enough.  I’d prefer not to add a second stretcher to the front legs.  I tend to cross my legs at the ankles when I sit, and that stretcher would get in the way.

JPG

We Who Are About to Bore

A straight and square board, surfaced on all four sides is a thing to behold. When it’s 7 feet long, 11 inches wide and 2 inches thick, it’s down right beautiful. And that’s what I did over the weekend. It may be poplar, but soon it will be a Roman Workbench.

Little thin for a proper Japenese bench,

Like any pretty board in my workshop, though, it started out ugly and rough. But ugly and rough is how we like ’em ’round here (at least at the start). Then comes the Jack Plane.

My only complaint about the new floor is that it’s slick sometimes.

In my experience, the trick to flattening a wide, thick board is to start on the cupped aide and not get too overzealous. It’s very easy to plane a hump if you’re not paying attention. And that’s no recipe for keeping as much thickness as possible.

This is not a how-to on traversing . So my only other advice is to figure out where the twist is early in the process. It’s no good first taking out the cup then having to take out the twist. That’s likewise a recipe for losing more thickness than necessary. Once I have one side flat, I like to send it through the thickness planer. Others square an edge right away. Either works.

Then I tackle the edges. The goal is to remove only as much width as necessary. I try to square each foot or so to the face, then worry about overall straightness. On this board, I ended up only losing about 1/8″. A testament to the sawyer more than my planing skills.

So glad to have my 5 1/2 back in the shop.

The end result (seen in the first picture above) is a board that’s ready for joinery. And joinery, in this case, means big, round, wedged tenons.

JPG

For All to See

After clearing a few little projects around the home, I turned back to the ash sitting bench I’ve been [slowly] making.  The design includes a 10° rake on the back legs and that means one thing: angled mortise and tenon joints.  One of my favorites.  But that’s not what I’m here to talk about.  I’d like to talk about mistakes.


IMG_20170817_092823

I’ll wedge that gap at the top, no problem.

The cross rails pictured above are a different thickness than the legs.  This means that while the mortises are centered in the legs, the tenons are not centered on the rails.  So keeping track of the reference face for the mortise gauge on the rails is SUPER important.  And, of course, I messed it up on the very last tenon.  Nothing would be square without a fix, and I’d prefer not to make another rail unless I really have to.

IMG_20170816_200834

The saddest “spot the diffrences” puzzle ever.

In the past, when I’ve pared tenons too thin, I glue on veneer of a similar hardness wood to build it back up.  Like the leg tenons on the Stent Panel workbench.  So why not use the same trick to build back up one of the tenon cheeks, then widen the mortise on the rail to accept the fatter tenon?  I grabbed an offcut from one of the tenon cheeks and glued it back onto the tenon.

IMG_20170816_201937

Say what you will, but these squeeze-style clamps work well for light clamping tasks.

After the glue set, I pared the patch down to the correct depth.  Then I reset my mortise gauge and widened the mortise to match the fatter tenon.  Net net, the joint is tight and the reveal is even (as shown in the first picture above).  And because I didn’t lose any of the original tenon’s thickness, the joint is still as strong as it would be had I not messed it up in the first place.  Once glued and drawbored, the joint will last forever.

Of course, none of this was necessary to share.  But I don’t keep anything from you guys.

JPG

Silly Little Details

I’m at a wedding this weekend and have workbench separation anxiety. So for the next few days, I’ll continue building an ash sitting bench in my mind. As of right now, I’ve got everything planed to proper dimensions and the top mortises cut in the front legs. It’s slow going, given everything else I’ve got going on.

I don’t cut many mortise and tenon joints. Not as many as I do dovetails, anyway. So it may be lack of skill on my part, but my mortises never seem to be completely parallel. To compensate, though, I cut my tenons fat: to tighter than piston-fit. This allows me to ease the mortise walls to bring the joint into parallel while still keeping an overall tight fit on the joint.

After all, what’s the point of making the stock straight and square (tried and true?) if the joint is crooked?

JPG