Unrelated

Tiny Workbench

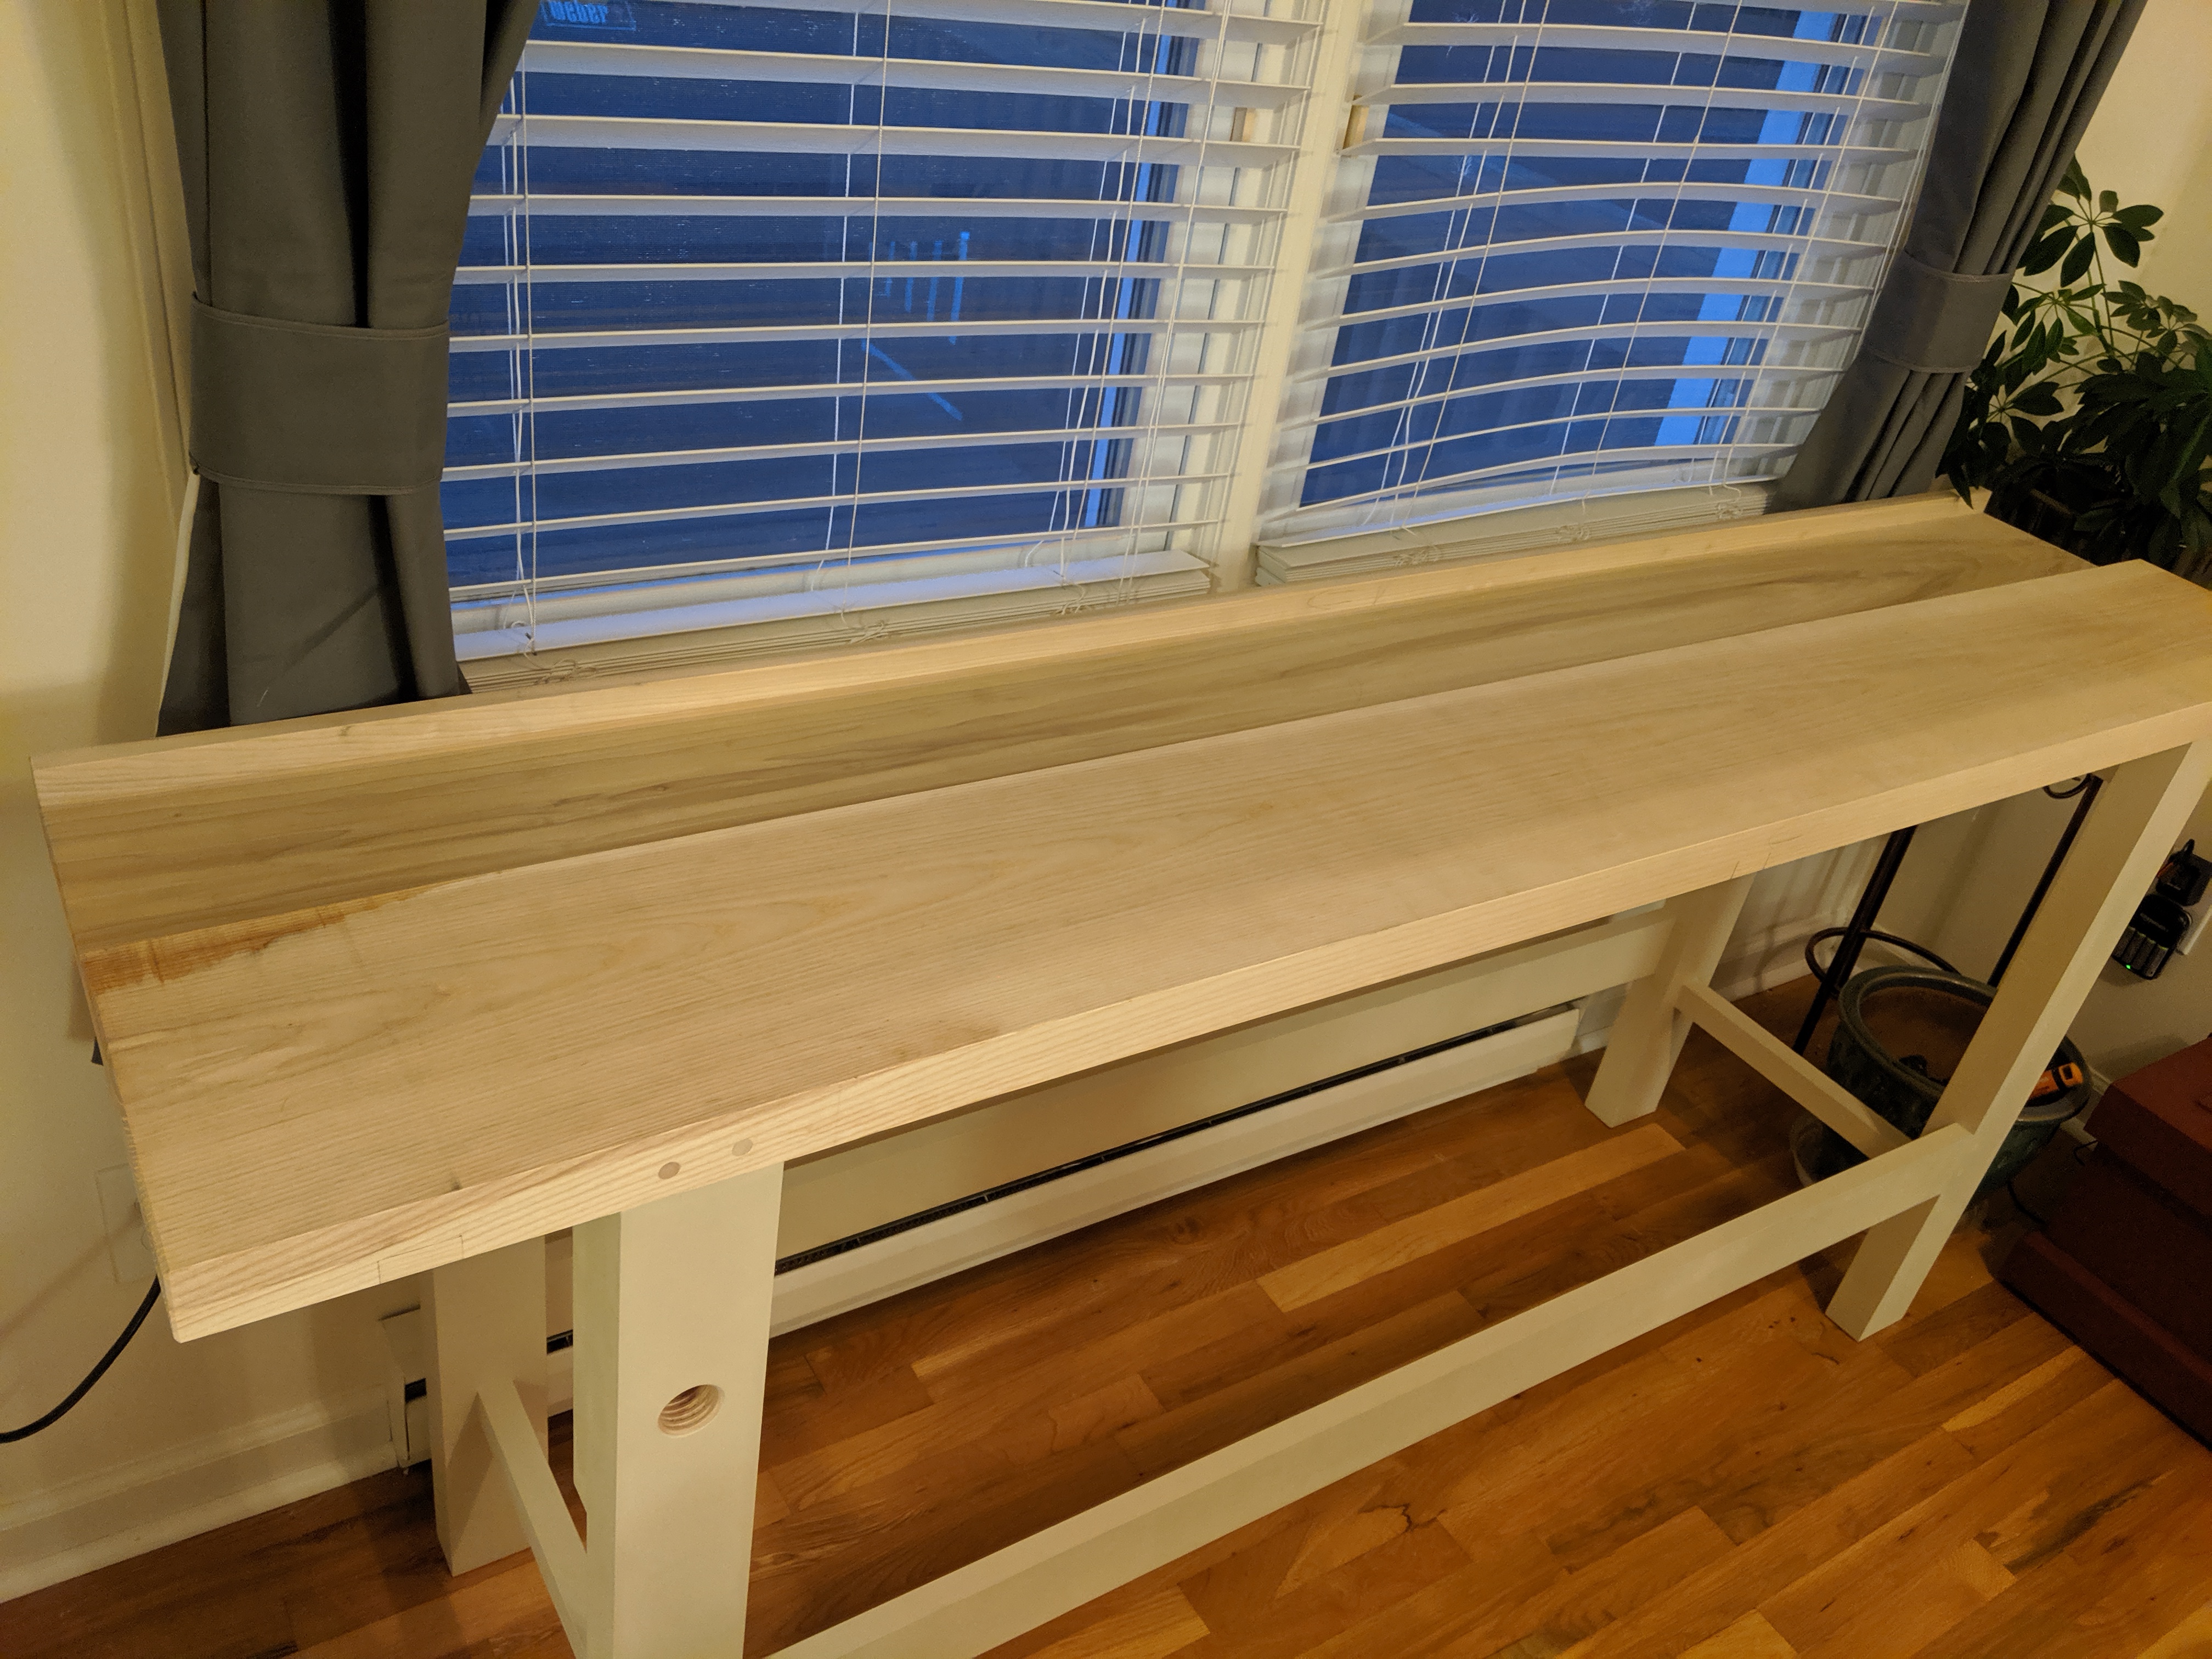
I had in my mind a singular vision. A mini workbench, surrounded by a tray, that sat upon an office desk.  Like those perpetual motion clacking ball desk toys.  But where one could plane small sticks of wood with a block plane in meditative rhythm.  The small curls falling gently into a rimmed collection tray to keep things neat.

I could have sworn such a thing existed. Maybe it was advertised in an old Popular Woodworking issue. It might have been Fine Woodworking or WOOD. But it eluded me.

So I made a prototype. And it turned out great!

As I saw it in my mind.

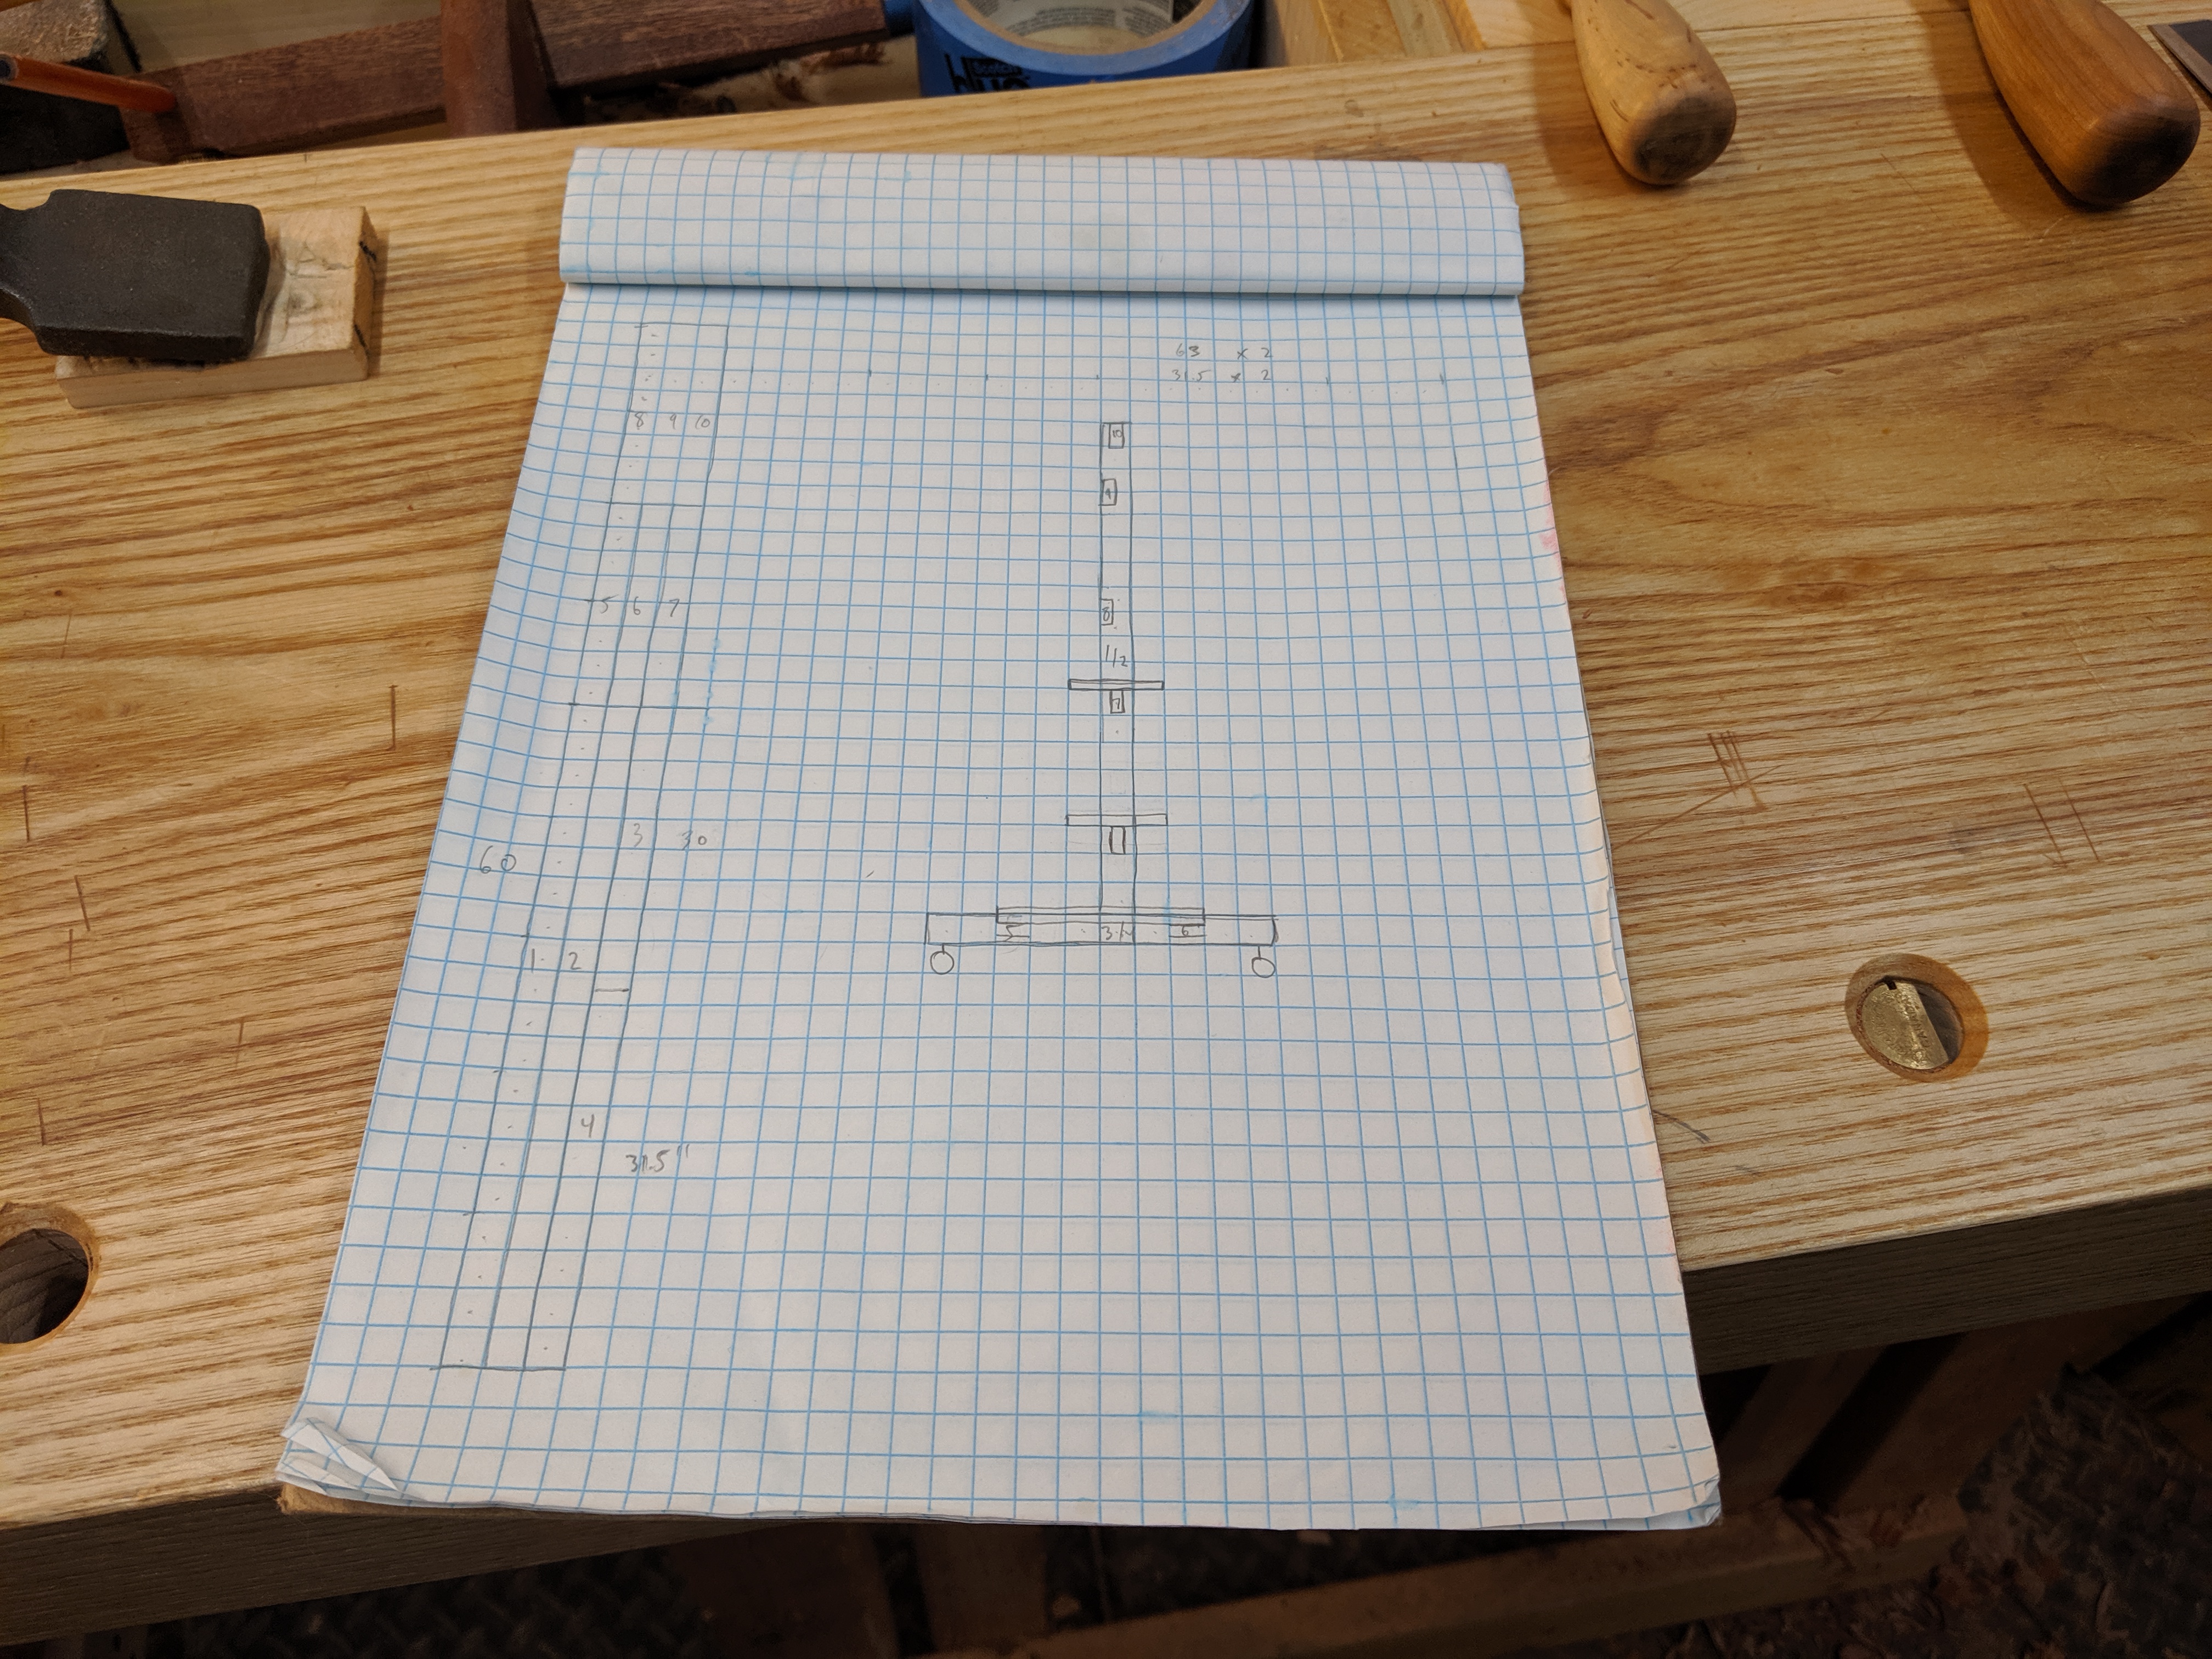
The bench itself is roughly 1:8 scale. The slab is 12 inches long and 3 inches wide.  1/2 inch thickness would have been to scale, but I bumped it up to 7/8 for stiffness. The wing, which functions as both a tool shelf and a shooting board, is about 1 inch wide and 1/4 inch thick. The planing stop is 1/2 inch square. For those who care, the entire setup is 19 x 7 x 3.

About the footprint of a large gaming keyboard.

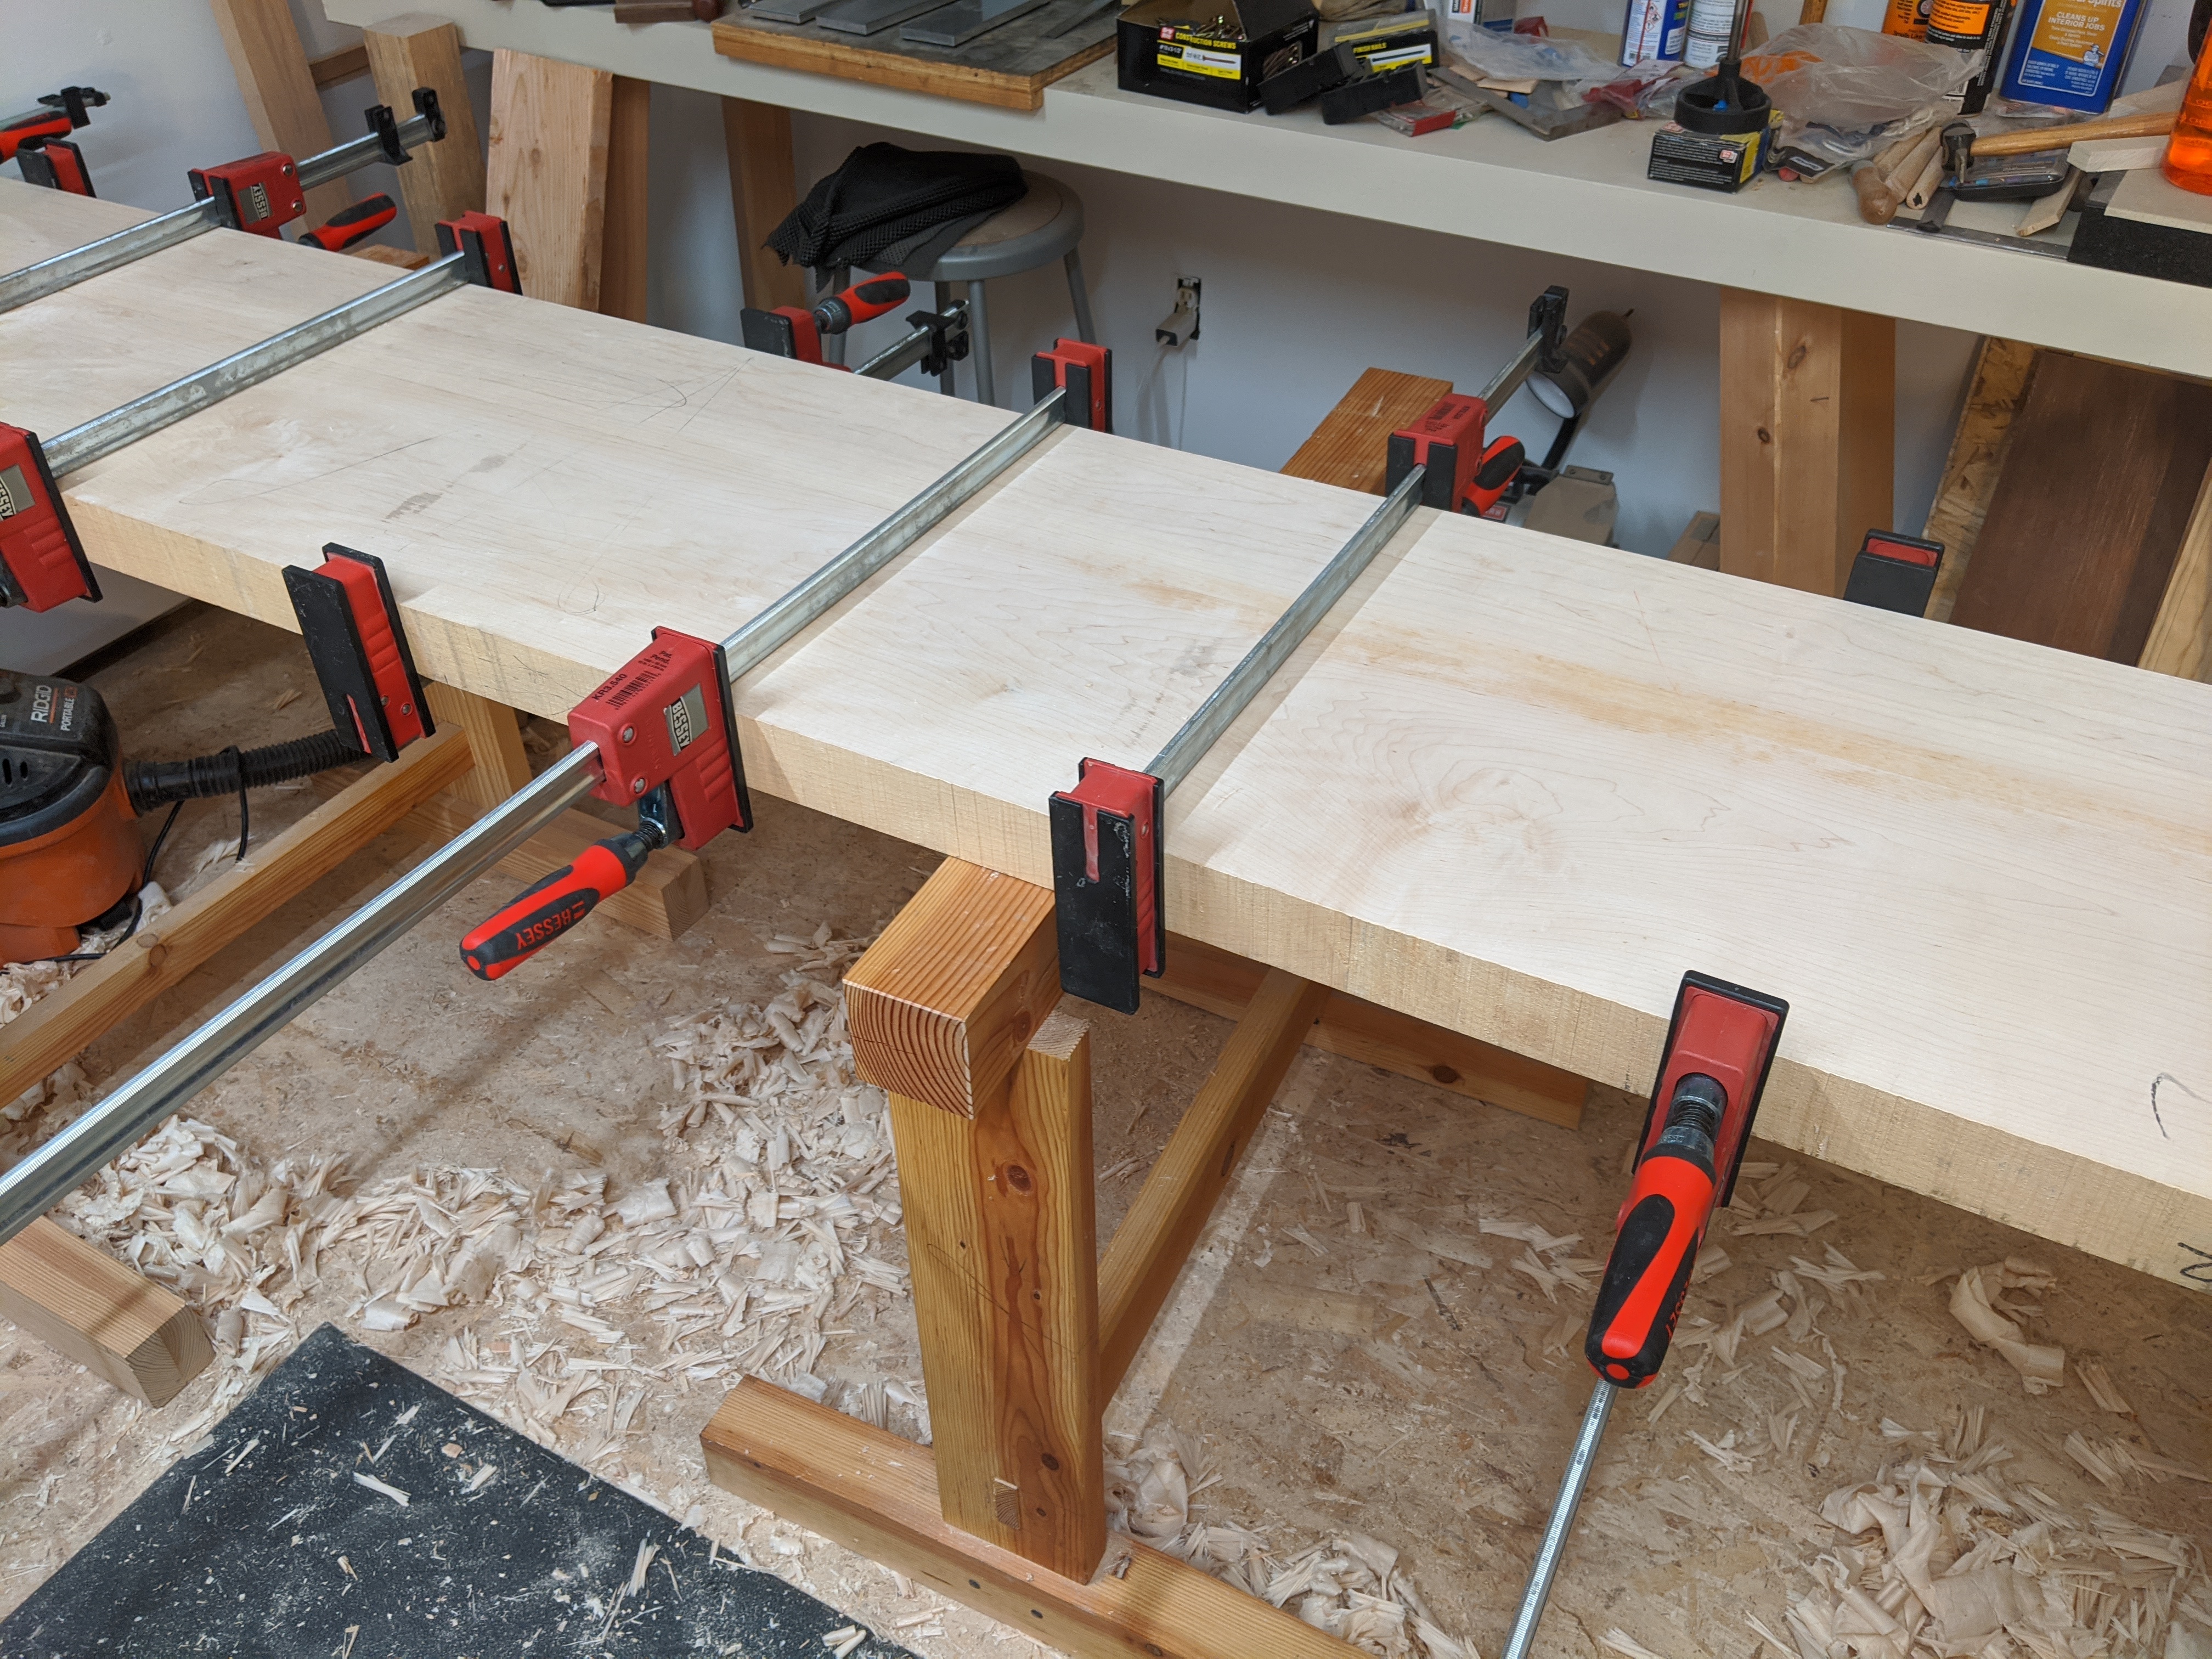
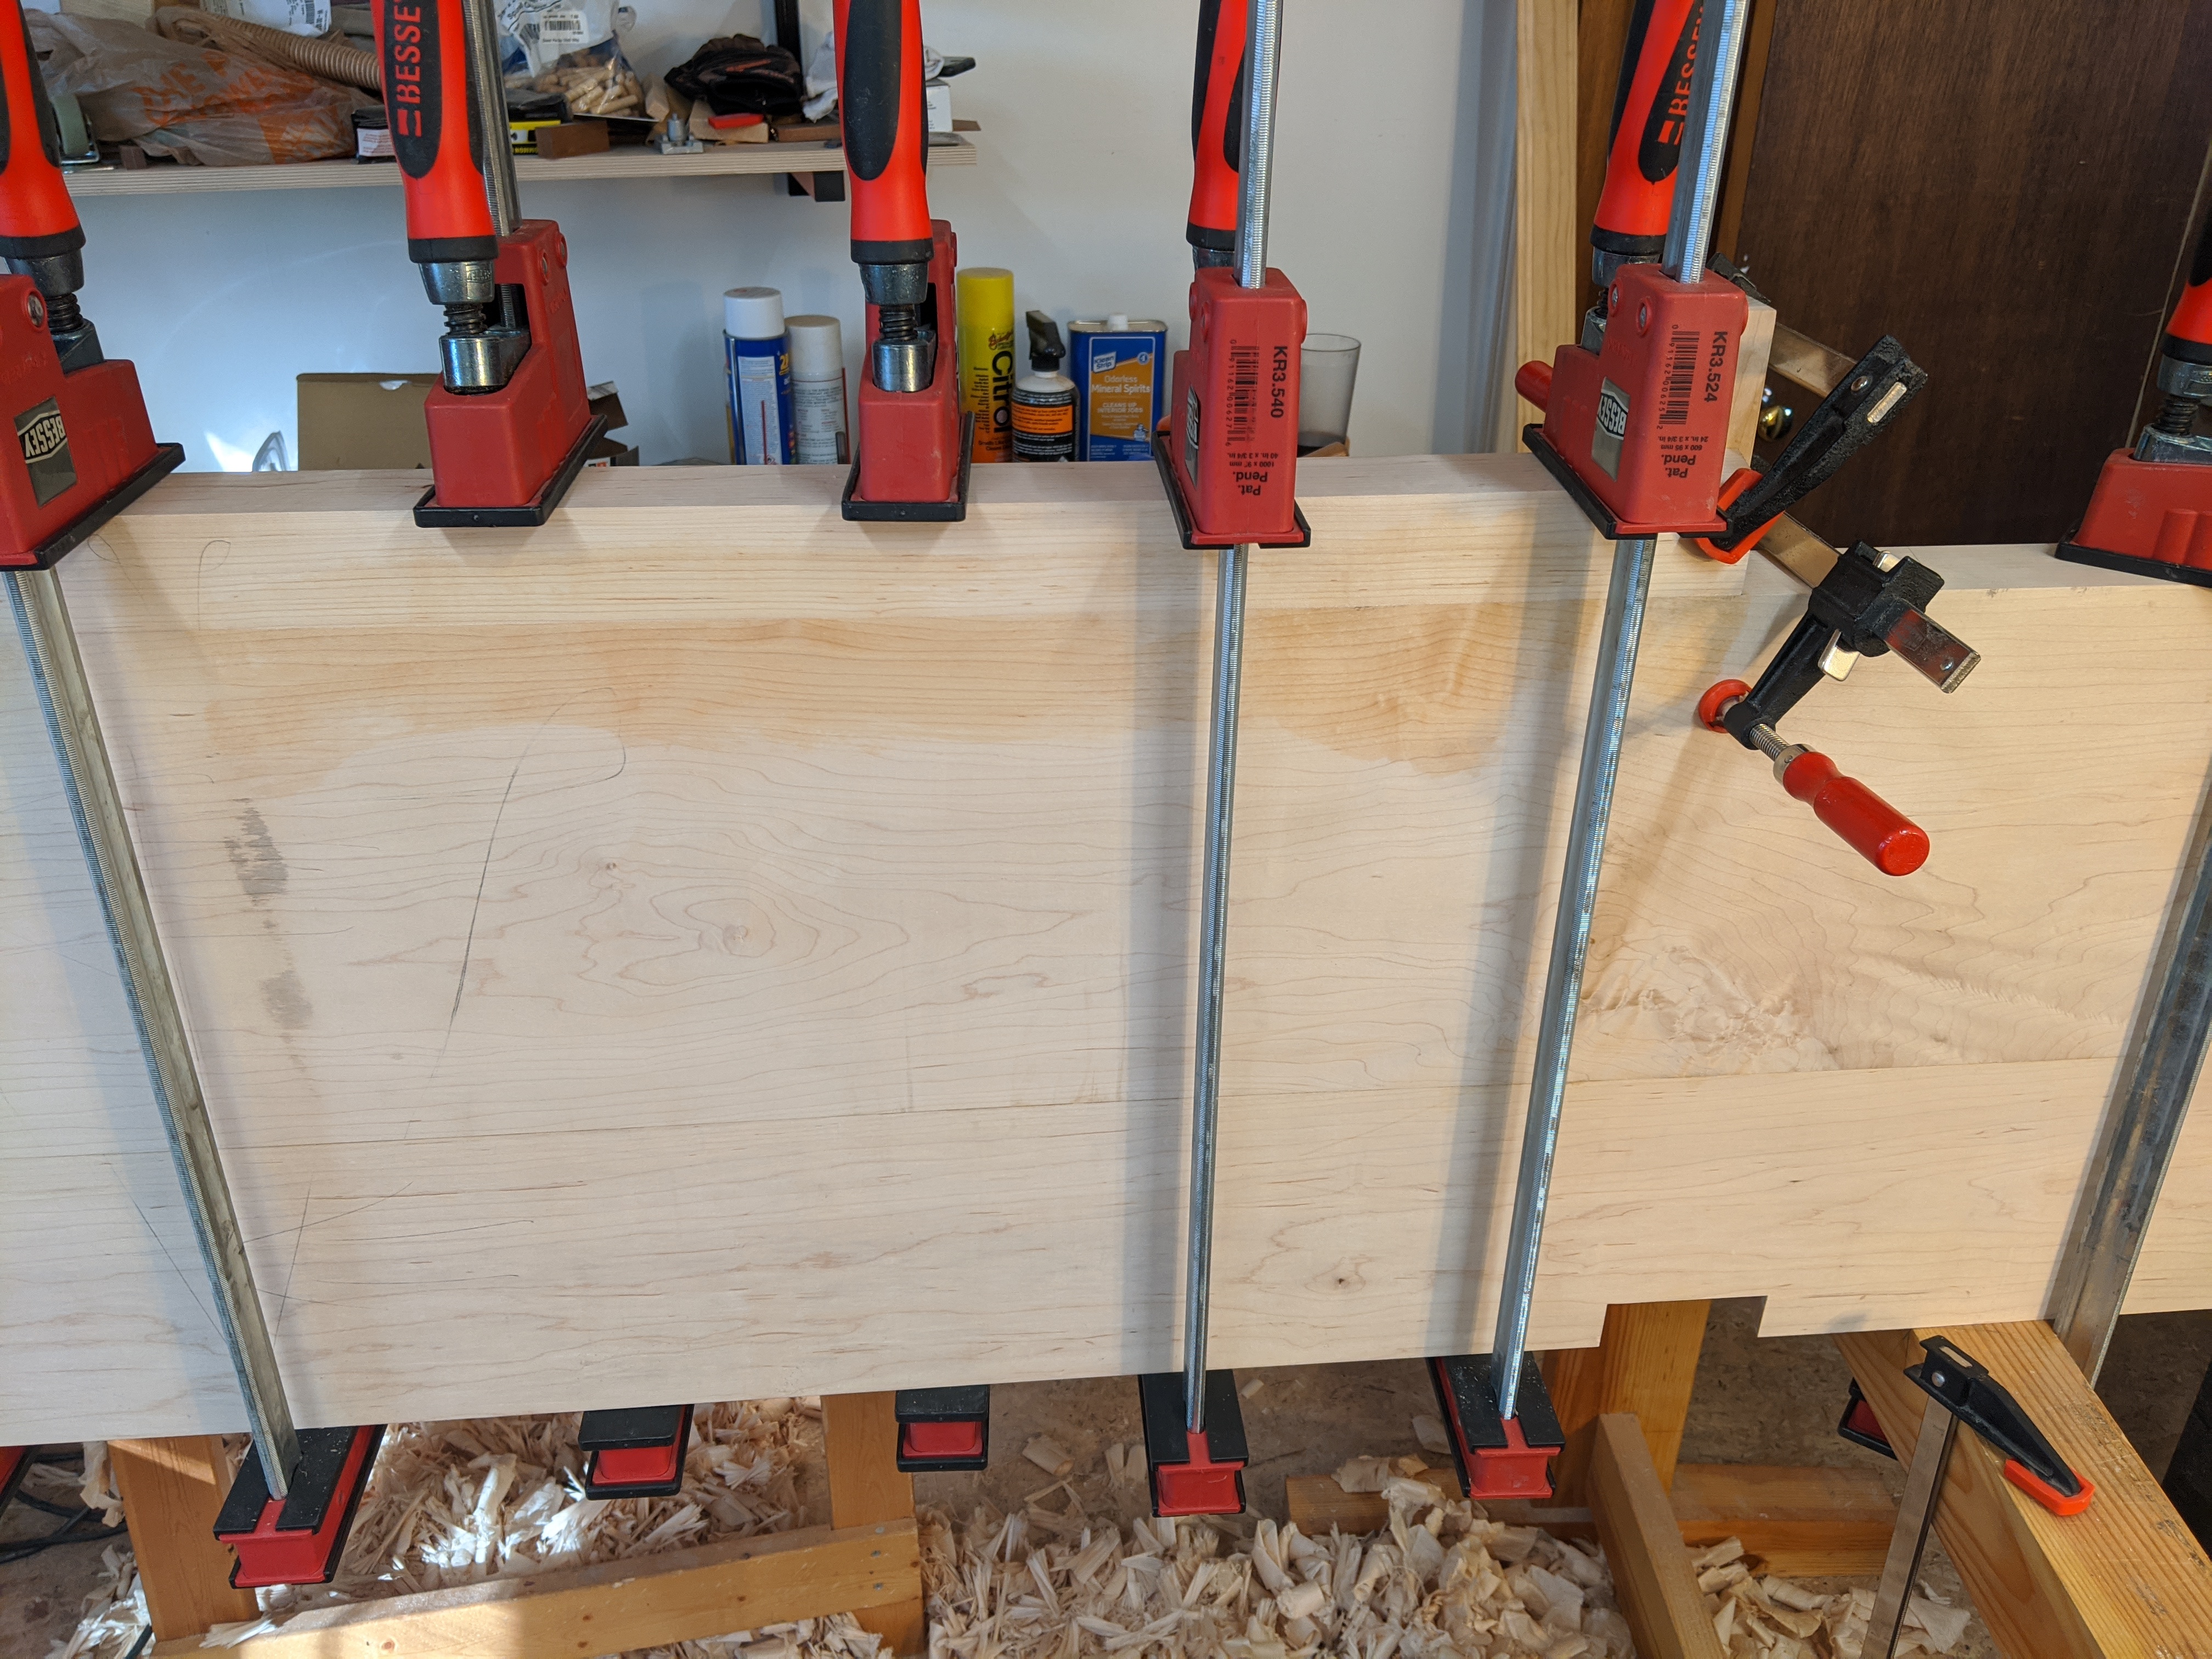
Let’s talk materials for a moment. This is just a prototype, so I used some tight grain Spruce framing lumber from up north. In Vermont, where my parents have a house, you can get stuff that has birdseye pattern and blue streaks but still arrow straight grain. It’s beautiful and a joy to work with.

This stock was a bit more plain, but I think still looks good. The only non-Spruce materials in the piece are the planing stop (red oak) and the base of the tray (1/2 inch birch plywood).

Spruce is rather rigid and dimensionally stable, so a good choice for this.

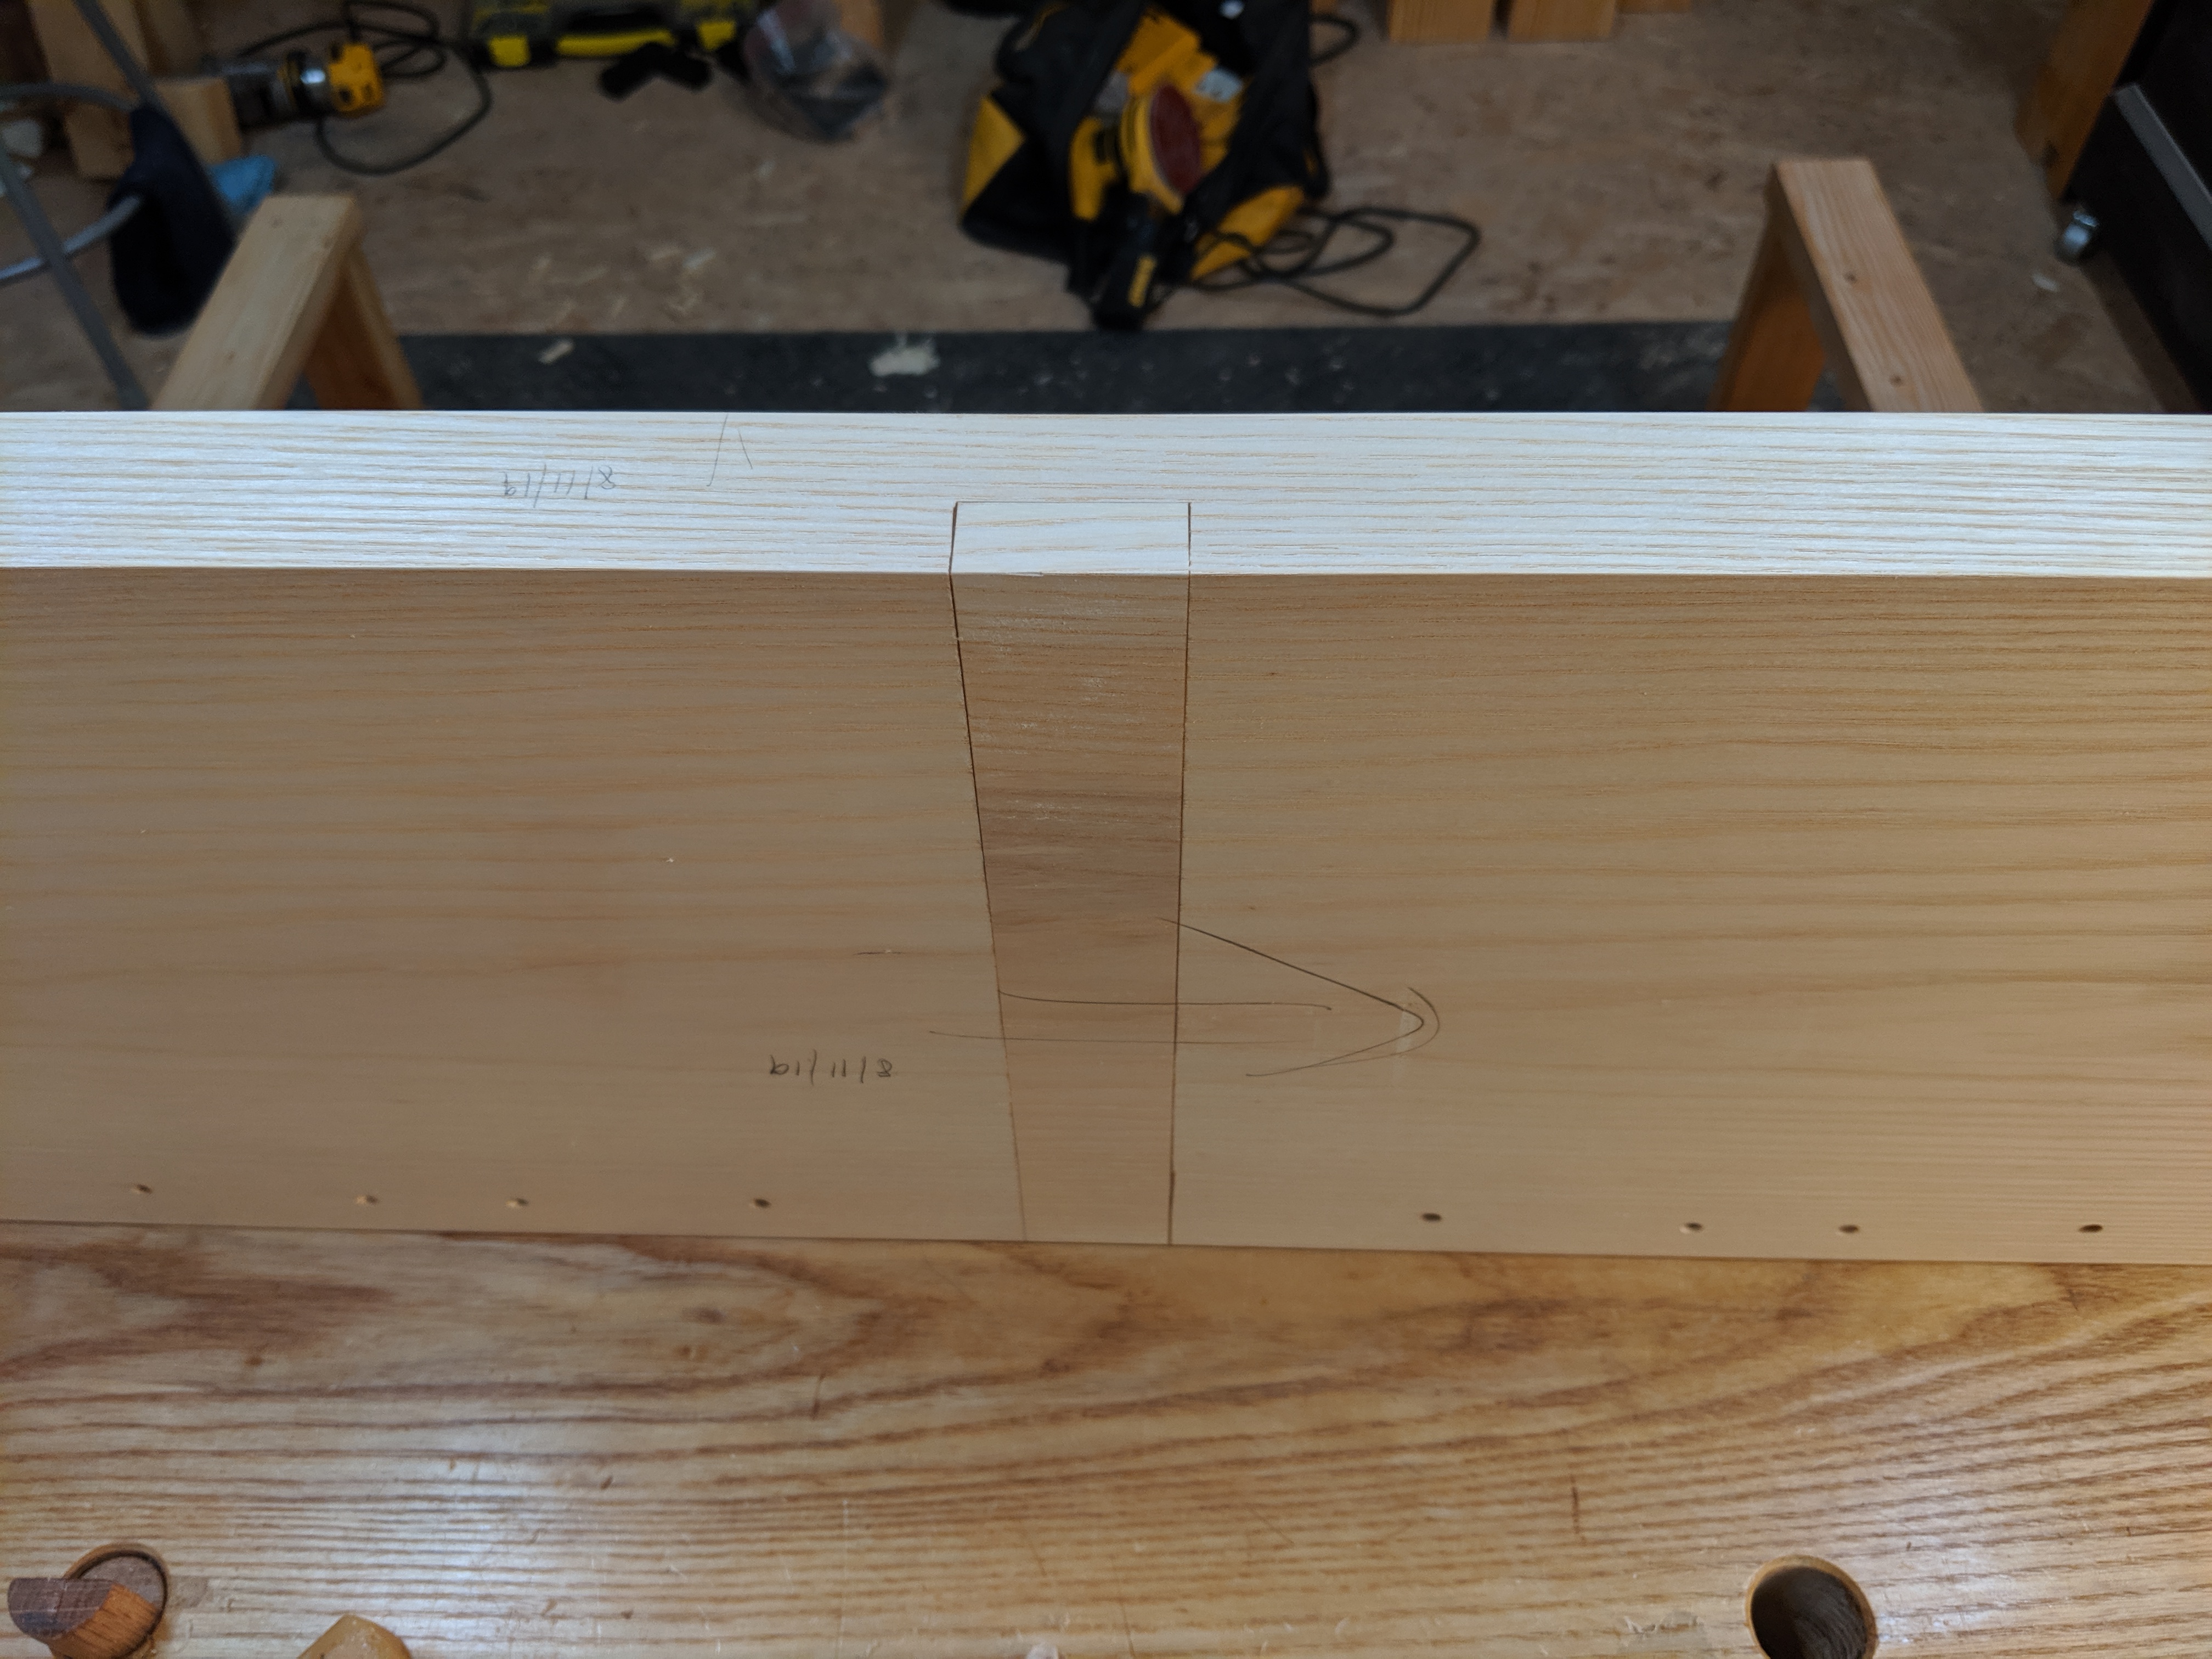
The workbench legs are 1 1/2 inch x 4 inch x 1 inch posts that are rabbeted (cross grain) into the slab top. The oak planing stop is also rabbeted in. The planing stop actually hides some nails reinforcing the joint between the slab and the front legs. The tool shelf is just brad nailed down to the legs.

To attach the bench to the collection tray, the legs are glued and screwed from the underside of the plywood. The tray itself is banded in 1/2 inch spruce just butt jointed around and glued and nailed on. I stuck on some nonskid furniture pads to the underside so it won’t slide around.

Top view with some blanks.

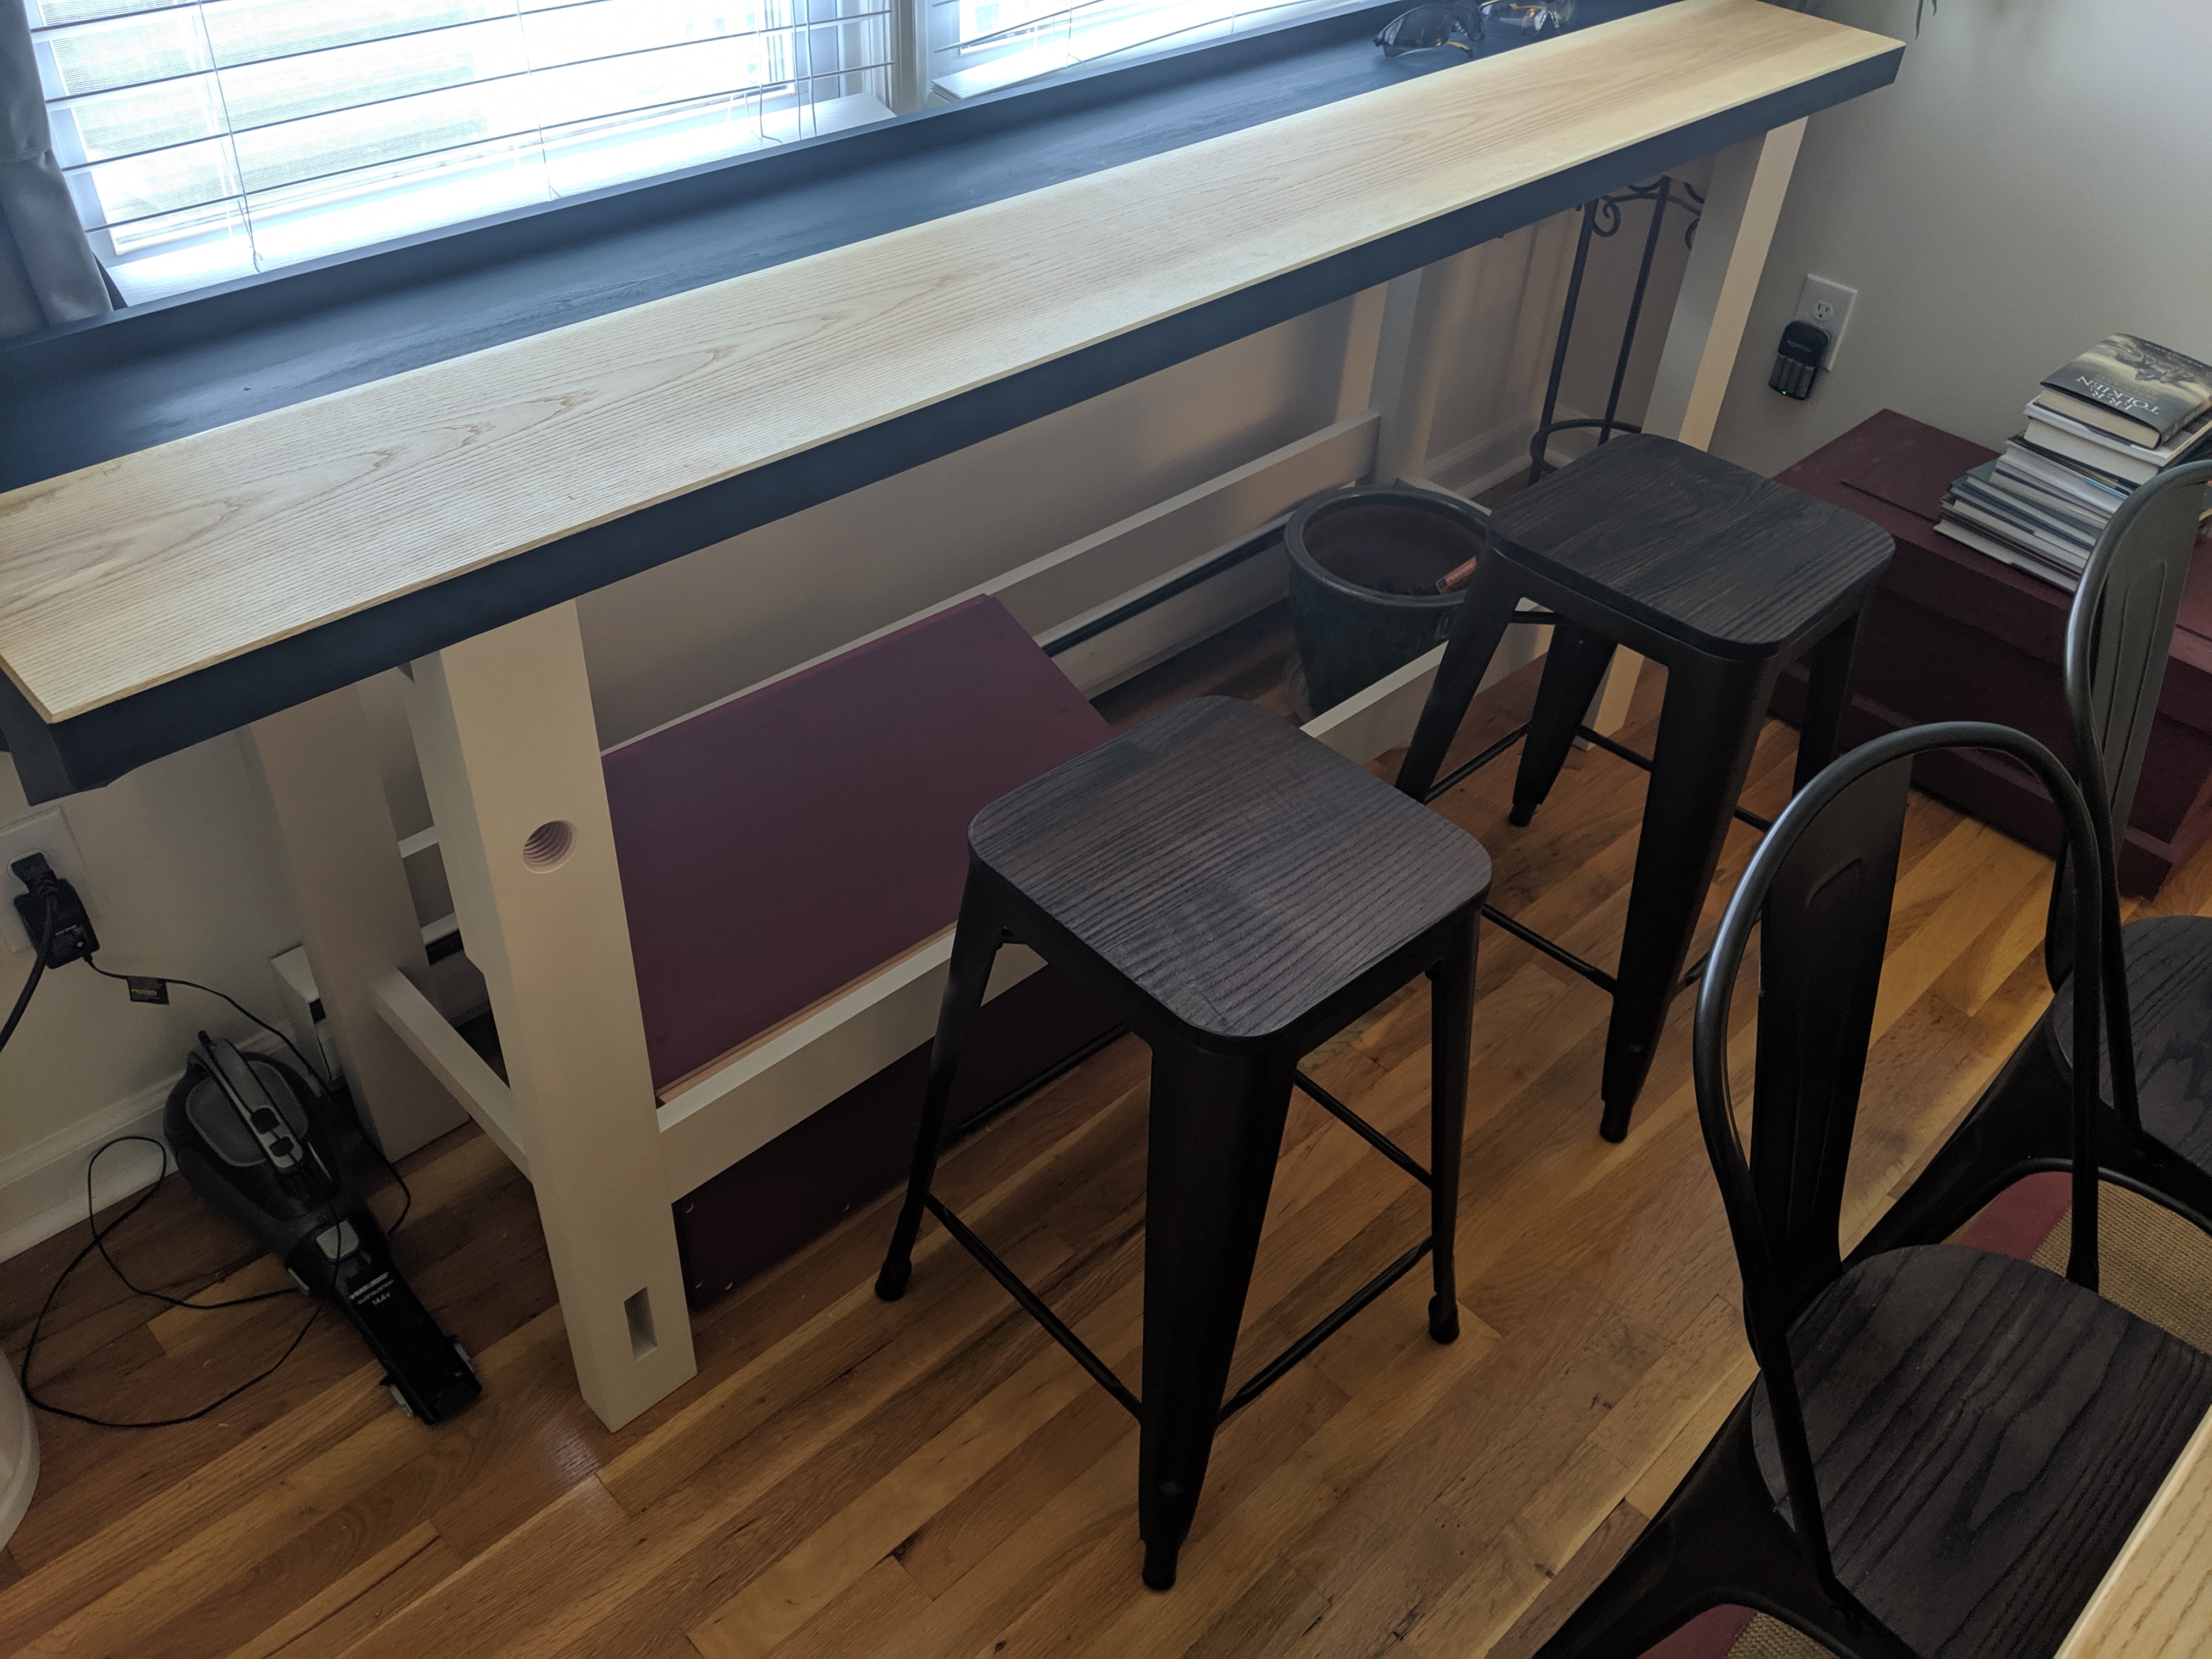
There is admittedly a practical purpose to this piece. There is a step down on the window sill in my office at work. The larger pots overhang the stepdown and it’s unstable without a spacer that’s level with the main sill and fully support the pot. Each spacer needs to be somewhere between 1/2 and 11/16 but the height varies. This will allow me to fine tune some pine 1 x 3/4 spacers on site.

A full size, modern block plane is probably a bit much for this setup. Perhaps I’ll clean up a slightly smaller vintage block plane from the user pile. We’ll see.

When I make a nicer version in mahogany or walnut, I may do a Basic Projects writeup. But for now, the prototype is rather serviceable.

JPG

One for Me

I wonder sometimes if others have similar woodworking experiences to me. Namely, that just after finishing a piece for myself, a friend or relative will ask for it instead.

Now I try to live my life as Tolkien describes Aule, the Smith (“the delight and pride of Aulë is in the deed of making, and in the thing made, and neither in possession nor in his own mastery; wherefore he gives and hoards not, and is free from care, passing ever on to some new work.”). And I like to think that quote describes me pretty well. So many pieces end up in others’ hands, even those pieces purpose built for me, if the giftee seems particularly keen on it.

For that reason, I have been sans dining table for some time. Every time I finish one, it seems it’s claimed within a few weeks. But not this time. At least not yet.

This one is about as utilitarian as I can imagine.

The style itself feels a bit tacky to me. It’s a home center butcher block tabletop (birch) and the legs are poplar. Nice, clear, straight grained poplar (left over from the base of my Moravian Workbench), but still. The table is an inch too low (at 27.75″) because I was just using what’s on hand. The legs themselves are round tenoned and wedged into thick blocks. Essentially making leg brackets. Which are just screwed into the underside with torx deck screws.

Utilitarian, indeed.

I’ve been joking on social media that it’s a lazy table (third laziest, in fact). But I don’t think that’s quite right. The legs themselves are tapered octagons. And the mortises are bored at 12.5 degrees and when attached have about a 30 degree sight line. I didn’t make a full base or dovetail the legs into the tabletop or something like that. But it still took some thought and problem solving.

I really like the way the table sits with this rake and splay. No newborn deer look from any angle.

But that’s not really the point. Calling it lazy seems to me a bit like gatekeeping. And that’s not something I support in any field, especially hobby woodworking. All that should matter is that a person made a thing and had fun doing it (or at least is pleased with the result). I personally don’t use a table saw or a router table, but I also personally don’t give a fuck if someone else does.

Although I sometimes wish that I had a lathe.

There are enough litmus tests in this life. My only one is “do you have a thing that you love to do?” And as long as that thing is not hunting endangered animals for sport, you do you, bud.

And if you do hunt endangered animals for sport, you can fuck all the way off and unfollow me.

Please and thank you.

JPG

Thought Experiment, Part Deux

In my ongoing efforts to replenish my intellectual excitement for woodworking, I have undergone a periodic downsizing of my tool kit.  Using a full sized, English-style floor chest is great.  But it gave me the space for extraneous tools to creep in.  And, when something can happen, it does happen.  So the best solution to reducing a tool kit is to reduce the available tool storage.

IMG_20200605_134104.jpg

Another Dutch Tool Chest for the archives.

This particular Dutch Tool Chest has no dovetails.  For good reason: the entire thing was built on the low, apartment woodworking bench.  Which has no vices.  And I’m a tails-first kind of person.  The bottom corners are rabbeted and nailed, which is more than solid enough, even if it was actually more work to assemble than dovetails would have been.  Well, more clamps and cauls, at least.  I have a feeling it would have been easier if the apartment woodworking bench was more than 9.75″ inches wide.

IMG_20200517_063926.jpg

Wooden hand screws are well worth the investment, if you’ve never used them.

I also, for the first time, just bought shiplapped pine siding from the home center instead of bothering to do my own rabbets or tongue and grooving.  It saved quite a bit of time and effort and, if you pick through the pile, you can find knot-free wood. A sixteen foot board was like $8.  I have no idea why I ever bothered doing this myself.  Just put the course side facing into the chest.

IMG_20200524_133753.jpg

Sure, the chamfers are a bit wide, but it’s the back of the case.  

As I’ve done additional woodworking, I’ve slowly moved tools over to the new tool chest.  A few things that haven’t made the cut yet:

  • 1 1/2″ chisel (my 1 1/4″ is just fine)
  • Scrub plane (my No. 5 is just fine)
  • No. 3 smoothing plane (my No. 4 is just fine)
  • Low angle block plane (I’ve migrated to a rabbet block plane over time)
  • Roll of firmer gouges
  • Quarter set of Hollows and Rounds (Nos. 2, 4, 6, and 8)
  • Yankee Push Screwdriver
  • Large (18″ max) dividers

Although, it’s fair to say, I don’t think there is room for any of that stuff in the new tool chest anyway.

JPG

Starting Out Fresh

Having laminated seven Douglas Fir 2×4’s into a roughly 72″ x 10″ x 3.5″ slab off screen, it was time to set some ground rules.  Going forward, I would only use basic hand tools to make a workbench worthy for an apartment woodworker.  Or, at least that was the goal.  Let’s see how it went.

Using just my No. 5 jack plane, I proceeded to flatten the underside and square both edges to the underside.  I tried supporting it with the buckets I was using as saw benches, but that didn’t work too well.   The buckets were just too slick and the slab rocked too much.  So I reverted to just working on the floor on a non-skid mat.  It was slower going than I wanted, and my back and knees are killing me (heyo!), but it got done.

IMG_20200509_202028.jpg

The sawbucks are just for staging the picture.

It took less time to dress the top, but in doing so, I realized my basic tool kit was missing something: a marking gauge.  So I’ve added a wheel marking gauge to the basic tool kit.  Eventually, the slab was S4S enough for joinery.  But before cutting any joints, a coat of “Tung Oil” to protect against any glue squeeze out when the legs eventually get glued on.

IMG_20200510_103810.jpg

And also some home center saw horses to raise the work.

Nine inches from the end seemed about right for the legs.  When making a saw bench in the Schwarz pattern, the legs are recessed into the sides of the benchtop via square dadoes.  Then, angled lap joints on the legs cause them to poke out at the right angle.

All dadoes start the same way: mark it, saw it, chop out the waste with a chisel.  Typically, I finish off each dado with a light pass from the router plane to ensure uniform depth and a shoulder plane to square the walls of the extants.  But router planes and shoulder planes are luxuries outside the scope of the basic tool kit.  It has been a while since I did this by chisel alone, but I got it done, even if the dado bottom isn’t pretty.  But that might be because Douglas Fir is real splintery.  The extants are square at least.

IMG_20200511_093355.jpg

One of four.

The only hard part about this joint is laying out the leg.  However, if you cut the top of each leg to a consistent angle (10 degrees works great), you’re almost all the way there. But that requires a bevel gauge.  Which has also been added to the core tool kit.  I won’t go through the whole process, nor could I better than Mr. Schwarz does himself here.  But suffice to say, if your shoulders line up, then you can pre-cut each leg to the exact same length and you won’t need to worry too much about leveling the feet.

IMG_20200511_091305.jpg

More paring just via chisel.  I would typically use a carriage maker’s plane for this job.

Part of what makes this joint strong is the large glue surface between the slab and the legs.  Use the offcuts from the angled lap joints to assist in clamping, then drive in a couple screws through each leg (parallel to the bench top, not the legs).  Be sure to countersink them a bit so the screw heads are well below the face of the legs.  Don’t worry; we’ll flush the tops of the legs later.

IMG_20200511_120629.jpg

I was uncomfortable with No. 10 screws and later upped to No. 12.

But the joint doesn’t just rely on glue and screws.  A couple of gussets, glued and screwed onto the legs.  When making gussets, perfectly quartersawn softwood stock will allow you to glue and screw along the entire width with minimal risk of splitting over time.  I also squared up the ends of the slab off camera, but in fairness, that’s not necessary.

IMG_20200511_181533.jpg

I’ve already done an ode to gussets.

And that’s it for the main bench.  Next time, we’ll reassess the full basic tool kit and begin adding work-holding.

JPG


End of Life as We Know It (Part 1)

So the country is a c-hair away from mandatory quarantine and my local lumber yard went out of business.  There is no way I’m paying home center or pre-surfaced lumber prices during a global pandemic.  So I guess I’m stuck with what’s on hand.  And what’s on hand is workbench material (among other things, for another post).

IMG_20200301_175110.jpg

Spoiler alert!

I’ve been working off my 6 foot long Nicholson-style workbench since the beginning of the year.  The Nicholson form is growing on me (coming from almost a year with my Vasa-style stretcher-less workbench).  But 6 feet is a bit too short for my taste.  Not because the boards I’m working with are often over 6 feet (they are, but that’s not the point).  But, rather, in my small shop, I rely on the far end of the bench for assembly and tool storage and there just isn’t much real estate down there.

Pictured above is 10/4 hard maple.  98″ x 17.5″ worth, which is a bit over 2.25″ once fully thicknessed.  That feels a bit narrow to me, so some 8/4 hard maple will build out the back edge of the bench (to bring it to 19.5″ of footprint, assuming the legs are flush to the edges).  I also have enough off-cuts of 10/4 for the aforementioned legs (which will be lapped in at angles of about 14 degrees) and one leg vise chop.

IMG_20200318_093248.jpg

Gluing on the 8/4 strips to form the rear edge mortises.

I recognize that 2.25″ is a bit bit thin for a workbench slab, even in hard maple.  However, the balance of the 8/4 hard maple will become an approximately 12″ wide apron for the front.   That front apron will be glued to the edge of the top slab (to further expand the working depth to about 21.5″).  The apron will significantly stiffen the front edge of the slab (i.e., the working area).  I also plan to reinforce the holdfast holes with strips of 4/4 hard maple, so a good portion of the bench will end up over 3.25″ anyway.

On top of all that, there will be cross-stretchers spanning the legs and flush with the underside of the workbench.  So as long as I chop directly over the front left leg (by the leg vise), there will be plenty of stiffness.

That said, I don’t do a ton of heavy mortising these days.  I prefer to bore out the majority of the waste and pare down to the lines.

JPG

An Iterative Process

Not everything goes to plan the first attempt.  Any decent woodworker has internalized that fact.  Take, for example, a jointing sled I recently made for my thickness planer.  It’s a jig consisting of a tried and trued 2x4x96 with four boards glued and screwed at 90 degrees to the jointed edge.  And it worked okay, I guess, on the first try.

IMG_20191004_070557.jpg

Iteration 1.

See, here’s the thing: I consider myself to be a hand tool woodworker.  But after truing one face and squaring one edge of a board, bringing the other face and edge into parallel by hand starts to feel an awful lot like actual work.  That’s where a thickness planer comes in.

But for a very twisted board, even squaring that one edge to a trued face can be more of effort than I’m willing to expend.  And that’s where this jointing sled comes in.  I can clamp the trued face to the uprights with F-Clamps and send it through the thickness planer to square the edge.  A quick hand planing will address any errors and then back to the thickness planer for S4S.  Just as if I had done the donkey work of hand squaring that first edge.

IMG_20191004_070729.jpg

The clamps go the other way around.

But my prototype sled didn’t work perfectly.  Just clamping to the 90 degree uprights didn’t support the board enough.  Compression from the planer’s rollers bowed the wood and planed a big hump along the length.  I tried using brass bar stock to support the beam but they kept falling out or shifting because of vibration.

IMG_20191004_070601.jpg

And I didn’t have enough for the entire length.

In the end, I added adhesive-backed sandpaper to the uprights and used hot glue to shim under the length of the beam.  Just like a normal planing sled.  This made the whole thing quite a bit more rigid and minimized the hump, even if it did add a bit of prep time.

But it was still less pretp time than hand-planing that edge square.

JPG


Trendy Furniture

I don’t much go in for casework, being sans table saw and largely migrated to digital book collections (outside of woodworking books).  But I have need for more shelf space.  Specifically, to display my vintage Lego collection in my home office.

IMG_20190922_200901.jpg

I’m about 2/3 done unpacking at this point.

A heavy bookcase seems like a waste of time and materials for such a display.  I could build or buy a lighted curio cabinet, but that’s probably overkill for what I’m trying to do here.

But there is a form of bookcase that would do perfectly: the wall-leaning variety.  They are utterly ubiquitous and just behind live edge epoxy river tables and ahead of standing desks in trendiness.  But, they are also easy to make with hand tools and relatively light on materials.  So I’ll have a go of it with some leftover Eastern White Pine 2×8’s from the standing desk build and some clear-ish home center 1x12s

The design I have in mind will incorporate a dovetailed cabinet for a bottom shelf, which will hold some larger books and heavy items.  That way, there can be dovetails in the project.  Three or four additional shelves (over 80 inches of height) should be plenty to comfortably display all the vintage goodness.

In case you’re wondering, my favorite Lego sets are from 1989’s Space Police I and 1994’s Spyrius, with 1990’s M-Tron being a very close third.  Check out http://www.bricklink.com.

JPG

Onward and Upward

After finishing up the leg vise on the long console table, it took less than a week before I actually got to use the thing.  It may be the first, but here’s hoping it won’t be the last.  I think the linen hub on the blue chop does a great job of hiding all the imperfections.

IMG_20190831_104057.jpg

More silliness, indeed.

I took some of last week off and used it well.  I’ve wanted a TV easel for years after first seeing the Restoration Hardware version.  It seems like an efficient use of space and maintains full flexibility for furniture layout.

Now, I assume the adjustable version exists because there is more than one size of TV, which makes sense.  But I only have one size of TV, so I figured a fixed model would work just fine. And it started with a single “African Mahogany” 8/4 board and a sketch.

IMG_20190902_174343.jpg

A sketch to scale on graph paper, but still.

I’ve been cutting many mortise and tenon joints lately, so the entire project took only about 30 shop hours.  Had I not been in practice, I think it would have taken quite a bit longer.  The whole thing begins with a base, from which all the other measurements are derived. All tenons are drawbored and it rolls on metal casters from the home center.  The project is finished in Tung Oil.

IMG_20190905_191408.jpg

Whatever version of Khaya this is, it’s pretty.

I believe in good posture.  So when sitting upright, the exact center of the TV should be at eye level.  For me and my particular couch, that’s 46″ or so.  So after connecting the very top of the uprights and adding a lower cross rail, it was time to figure out where to add the rails to which the TV itself would be mounted.  This could have also been accomplished with drawbored mortise and tenon joints, but that would have ultimately permanent.  With glued and nailed lap joints, I could, in theory, one day relocate these rails to fit a new TV.

IMG_20190906_070542.jpg

Still looking pretty.

The M8 mounting bolts for my particular model of TV are located in a square with corners at 400mm on center (or about 15.748″).  I took great care to drill out the top cross rail so the holes perfectly lined up with the threaded inserts in the TV, and lined the holes with copper tubing for reinforcement.  The holes in the bottom rail, however, were also drilled at 1/16″ larger than the diameter of the mounting bolts but no copper tubing was added.  This gave some wiggle room in case something became misaligned as a result of tolerance stack.

But everything worked out in the end, and each of the bolts seated nicely.  I made two shelves also: one fits in the void in the base and the other laps onto the lower rail.  I think it came out pretty great.  But in the process of oiling the assembly, some of the iron from the nails seems to have bled a little bit onto the uprights, which I plan to correct at some point by planing down to fresh wood and re-oiling.

IMG_20190909_112448.jpg

Both PS4 and XboxOne.  The scandal!

In case anyone was wondering, here is what the back looks like.  I just wish there were M8 bolts available in square head powder black.

MVIMG_20190909_112505.jpg

Hopefully no one can read the serial numbers.

So I had much fun with this build.  And it felt good to complete a project during the allotted time.

Just don’t expect me to keep the streak up.

JPG

More Silliness

You may have noticed the tapped screw hole or the parallel guide slot in the front left leg of the new dining room console table.  It’s highly unlikely to ever be used, but one can never have too many available vises, right?  I really should be working on the bottom shelf for the table, but when have my priorities every been straight?  I freely admit all of this is a vanity exercise, as the vise will just live on the shelf of the console table.

Plus, I had the 1 1/2″ hard maple screw handy (the spare for the leg vise on my main workbench, the stretcher-less Stent Panel workbench).  I also had some leftover 1/4″ hard maple to make a garter (more on that below).  And it would be a shame if they went to waste.

IMG_20190825_135859.jpg

No “Sunk Cost” fallacies to see here.

I’d like this leg vise to be as low profile as possible.  So, instead of a cylindrical vise hub with a through handle, I shaped a wing nut from soft maple to act as the hub.  This not unlike the Holy Roman Hurricane Nut for the crochet on my old work bench.  Some wood glue and a through dowel reinforcement should make a permanent and robust bond between screw and hub.

Before I know where to attach the hub, however, I need to plow the groove for the garter.  The garter affixes the vise screw to the vise chop and allows the chop to move with the screw.  Otherwise, you have to move the chop by hand (which is fine, I guess).

I still don’t have (or want) a lathe, and am certainly capable of cutting the groove completely freehand.  But sticking with what works is no fun at all, so let’s try a different method.  Ingenuity is what small space woodworking is all about.  But “ingenuity” is really just code for “making due with what’s at hand”.

IMG_20190825_182702.jpg

I didn’t get a before shot.

Conveniently, the vise hub I just made will help hold the screw and my machinist granite slab will act as a convenient stop as I rotate the work with my left hand.  Now all I need is a way to plow the groove with my right hand.  A chisel would certainly work, but one handed chisel work is precarious at best and likely to wander.

How about a router plane registered against the vise hub?  I have a 1/4″ blade for my router plane.  And the vise hub would work really well as both a fence for the protruding blade and a platform for the body of the router plane to stabilize everything.

img_20190825_182733.jpg

Let’s play “Spot the ‘chisel hands’ scars”!

Plowing the garter groove this way takes a while, but probably not any longer than getting the screw centered on a lathe.  And it certainly cramps up the hands.  But taking it slowly yields a fairly clean, fairly uniform groove.  Or at least it did for me.  The bottom of the groove had an overall diameter of just under 1 1/4″ when all was said and done.

IMG_20190825_183144.jpg

The vise hub keeps the inside of the hole clean, but the outside needs minor cleanup.

When preparing the garter, some CA glue held the two halves of the garter stock to a sacrificial board for drilling the clearance hole with a 1 1/4″ forstner bit on the drill press.  I then attached the garter to the vise chop with some countersunk No. 10 slotted screws to check the fit.  The vise chop is laminated from the same soft maple as the vise hub.  A couple dabs of hide glue will reinforce the bond between the garter and the chop after final assembly.

IMG_20190825_190618.jpg

“B” stands for “Backup”.

I didn’t get a picture, but I also trimmed the vise screw to length and glued it onto the screw before adding a 3/8″ birch dowel to lock everything in place.  I will paint the vise hub with “Linen” milk paint like the undercarriage of the console table, and the chop will be painted “Coastal Blue” like the table top.

The pinboard for the vise is up next, but that requires a different type of ingenuity.  In that case, “ingenuity” is really just code for “patience”.

You’ll see why, soon enough..

JPG


Better than Ever

Or, at least better than I could have hoped…

I finished the reclaimed wood console table the other day and bought some counter top height stools to match the chairs I have for my dining table.  I think the entire thing came out pretty great.  I’m typing this post while seated at said console table, on perhaps the most beautiful day of the summer.

IMG_20190823_172438.jpg

Yes, I do worship at the altar of Bezos.  Why do you ask?

The back tray is home center 4/4 Poplar.  Made from a single board that was relatively straight and had no wind to speak of, there is not much to the tray other than glue and nails.  A quick test fit ensured it was ready for finish.  Once it was painted, I nailed it on with two brad nails into the top raids (in keeping with the theme of simplicity).

IMG_20190819_200727.jpg

Pre-paint color match is pretty spot on, if I do say so myself.

I have a new favorite color in General Finishes milk paint: Coastal Blue.  It’s essentially Navy Blue, but I live by the ocean.  Get it?  The table top of the console table is bare wood finished in Tung Oil.  I think it works well.

IMG_20190820_082538.jpg

This picture evinced that I needed more paint along the joint.

At my local lumber yard today, 4/4 soft maple shorts were on sale for 2.90/bf, so this table is getting a hardwood shelf (which will also be painted Coastal Blue).  The shelf will likely be piled with books, binders of M:tG cards, and my Milkman’s Workbench.  Which will then add enough weight that if I never needed to, I could use this table for light duty woodworking.

You may be wondering: why paint the front edge of the table top?  To hide the epoxy glue lines of two patches that filled in where there used to be dadoes, of course.  Why else use paint if not to hide unsightly wood situations?

IMG_20190811_200842.jpg

It’s important to note grain direction and the date of planing.

I bought an extra piece of 4/4 soft maple to laminate into a vise chop for the leg vise that shouldn’t be.  I also have a plan for the type of vise hub to make and am thinking about going garter-less for this.  There is already too much metal in this piece with about 15 brad nails and two slotted screws.

No need to push it.

JPG