Let me start by saying that my old workbench is still for sale. Anyway…
To varying degrees of success, I try to live by the Shaker adage: “A place for everything and everything in its place”. In the last six years or so of woodworking, I’ve learned at least one important lesson: the place for sharpening is not on your main workbench.
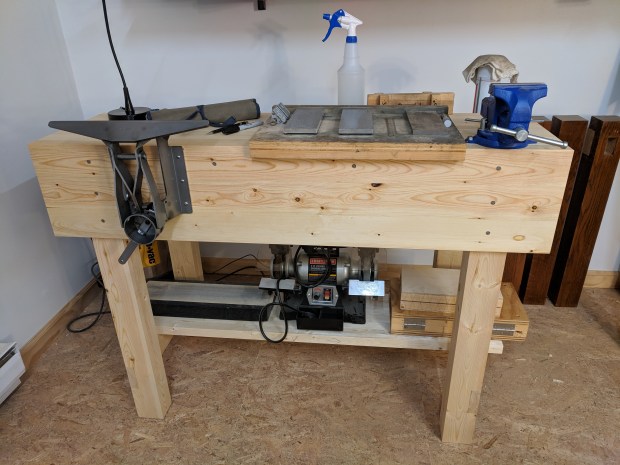
Sharpening is a messy endeavor. Metal filings, steel slurry, honing fluid and tool oils can impregnate the benchtop and wreak havoc on your tools. So I tried to keep my sharpening implements on the far right side of the bench (away from main work area). But that just robbed me of the rightmost two feet of work area. So I decided to do something about it.
I told you I was practicing!
Largely relying on the Paul Sellers blueprints, I turned about fifteen home center whitewood 2×4 studs into a dedicated sharpening station. The Nicholson-style design was important. I needed an apron so I could mount a Grammercy Tools saw vise, which was a gift from my brother and sister-in-law. The overall dimensions are 47.75″ x 20″ x 36″.
It has enough space for the saw vise, my sharpening stones (or bench grinder)…
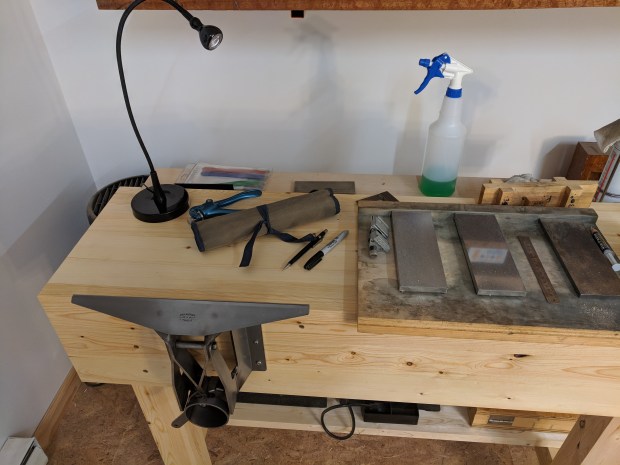
These Ikea goose neck task lights are pretty nice.
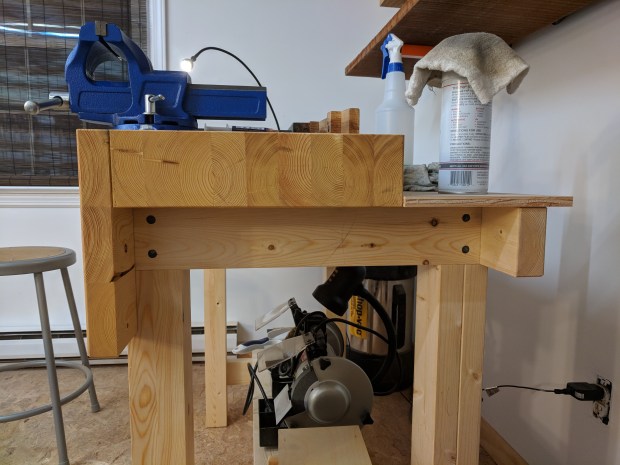
… and a dedicated metalworker’s vise. It also has a tool well for random implements.

Which I still need to finish by adding a skirt around it.
There is no mortise and tenon or dovetail joinery in this build. Only lap joints and housing joints, glue, nails and screws. Without exaggeration, I used a tiny subset of my entire tool kit to make this sharpening station (on purpose), which are tools a beginner woodworker is likely to have:
- No. 5 bench plane (all dimensioning tasks)
- No. 4 bench plane (final smoothing only)
- Block Plane (a shoulder plan would have worked better)
- 3/4″ bevel edge chisel (with mallet)
- Eggbeater drill
- Hammer and die-forged nails
- Screwdriver and slotted wood screws
- Various clamps and hide glue
Never likely to see any hand planing, so I re-purposed the back apron as the bottom shelf.
I took this minimalist approach because I wanted to know whether or not a beginner, with a core set of hand tools, could actually build something like this. The answer is a resounding: probably. I’m no beginner anymore, but some of the joints require pretty tight tolerances (like the housing joints where the aprons connect to the legs). I guess if I went slowly and took great care, I could have pulled this off all those years ago. But it might have ended up slightly wobbly.
But I’m glad to have undertaken the exercise, as it’s a piece of shop equipment I’ve been missing for a long time.
Long live clean workbenches.
JPG

That Shaker adage hits like a hammer.
I am trying to become better at not leaving stuff on my workbench during a build, but it still takes a bit of practice.
Your sharpening station looks great, and I like the idea of making it with a limited tool set.
Brgds
Jonas
LikeLiked by 1 person
Thanks! I’m glad to have done it, but next time I’m starting from solid lumber and not 2×4’s!
LikeLike
Speaking of solid lumber, not that long ago I was at my local big box store, a good client had ordered a 16 foot 4×12 but didn’t want it. The big box store let it go for $25. How can you go wrong at that price? The new price was $100. I need a second bench in my garage for non woodworking stuff thought I will build it so I or my daughter can use it for woodworking.
LikeLiked by 1 person
You could make most of a serviceable workbench from just that piece of lumber
LikeLike
Smart move. Not the clean part 🙂 but making a sharpening bench. It should be placed no more than a step or two from the working end of your main bench.
Good on you,
ken
LikeLike