When I returned from my sabbatical in 2014 and set up my apartment workshop (and started this blog, natch), I was working almost exclusively on a Milkman’s Workbench that you can see in the banner above. This was actually the third I had made, having practiced and experimented on different thicknesses and depths. But I returned to my initial woodworking roots from a couple years earlier, using the full thickness 2×4 hard maple I had left over from one of my very first woodworking projects.
So finding some downtime a weekend or two ago, I decided to finally finish a new version of the Milkman’s Workbench (made of riftsawn ash, natch) that I had been working on for a while. It’s the same length (give or take a half an inch), but there are some important differences.
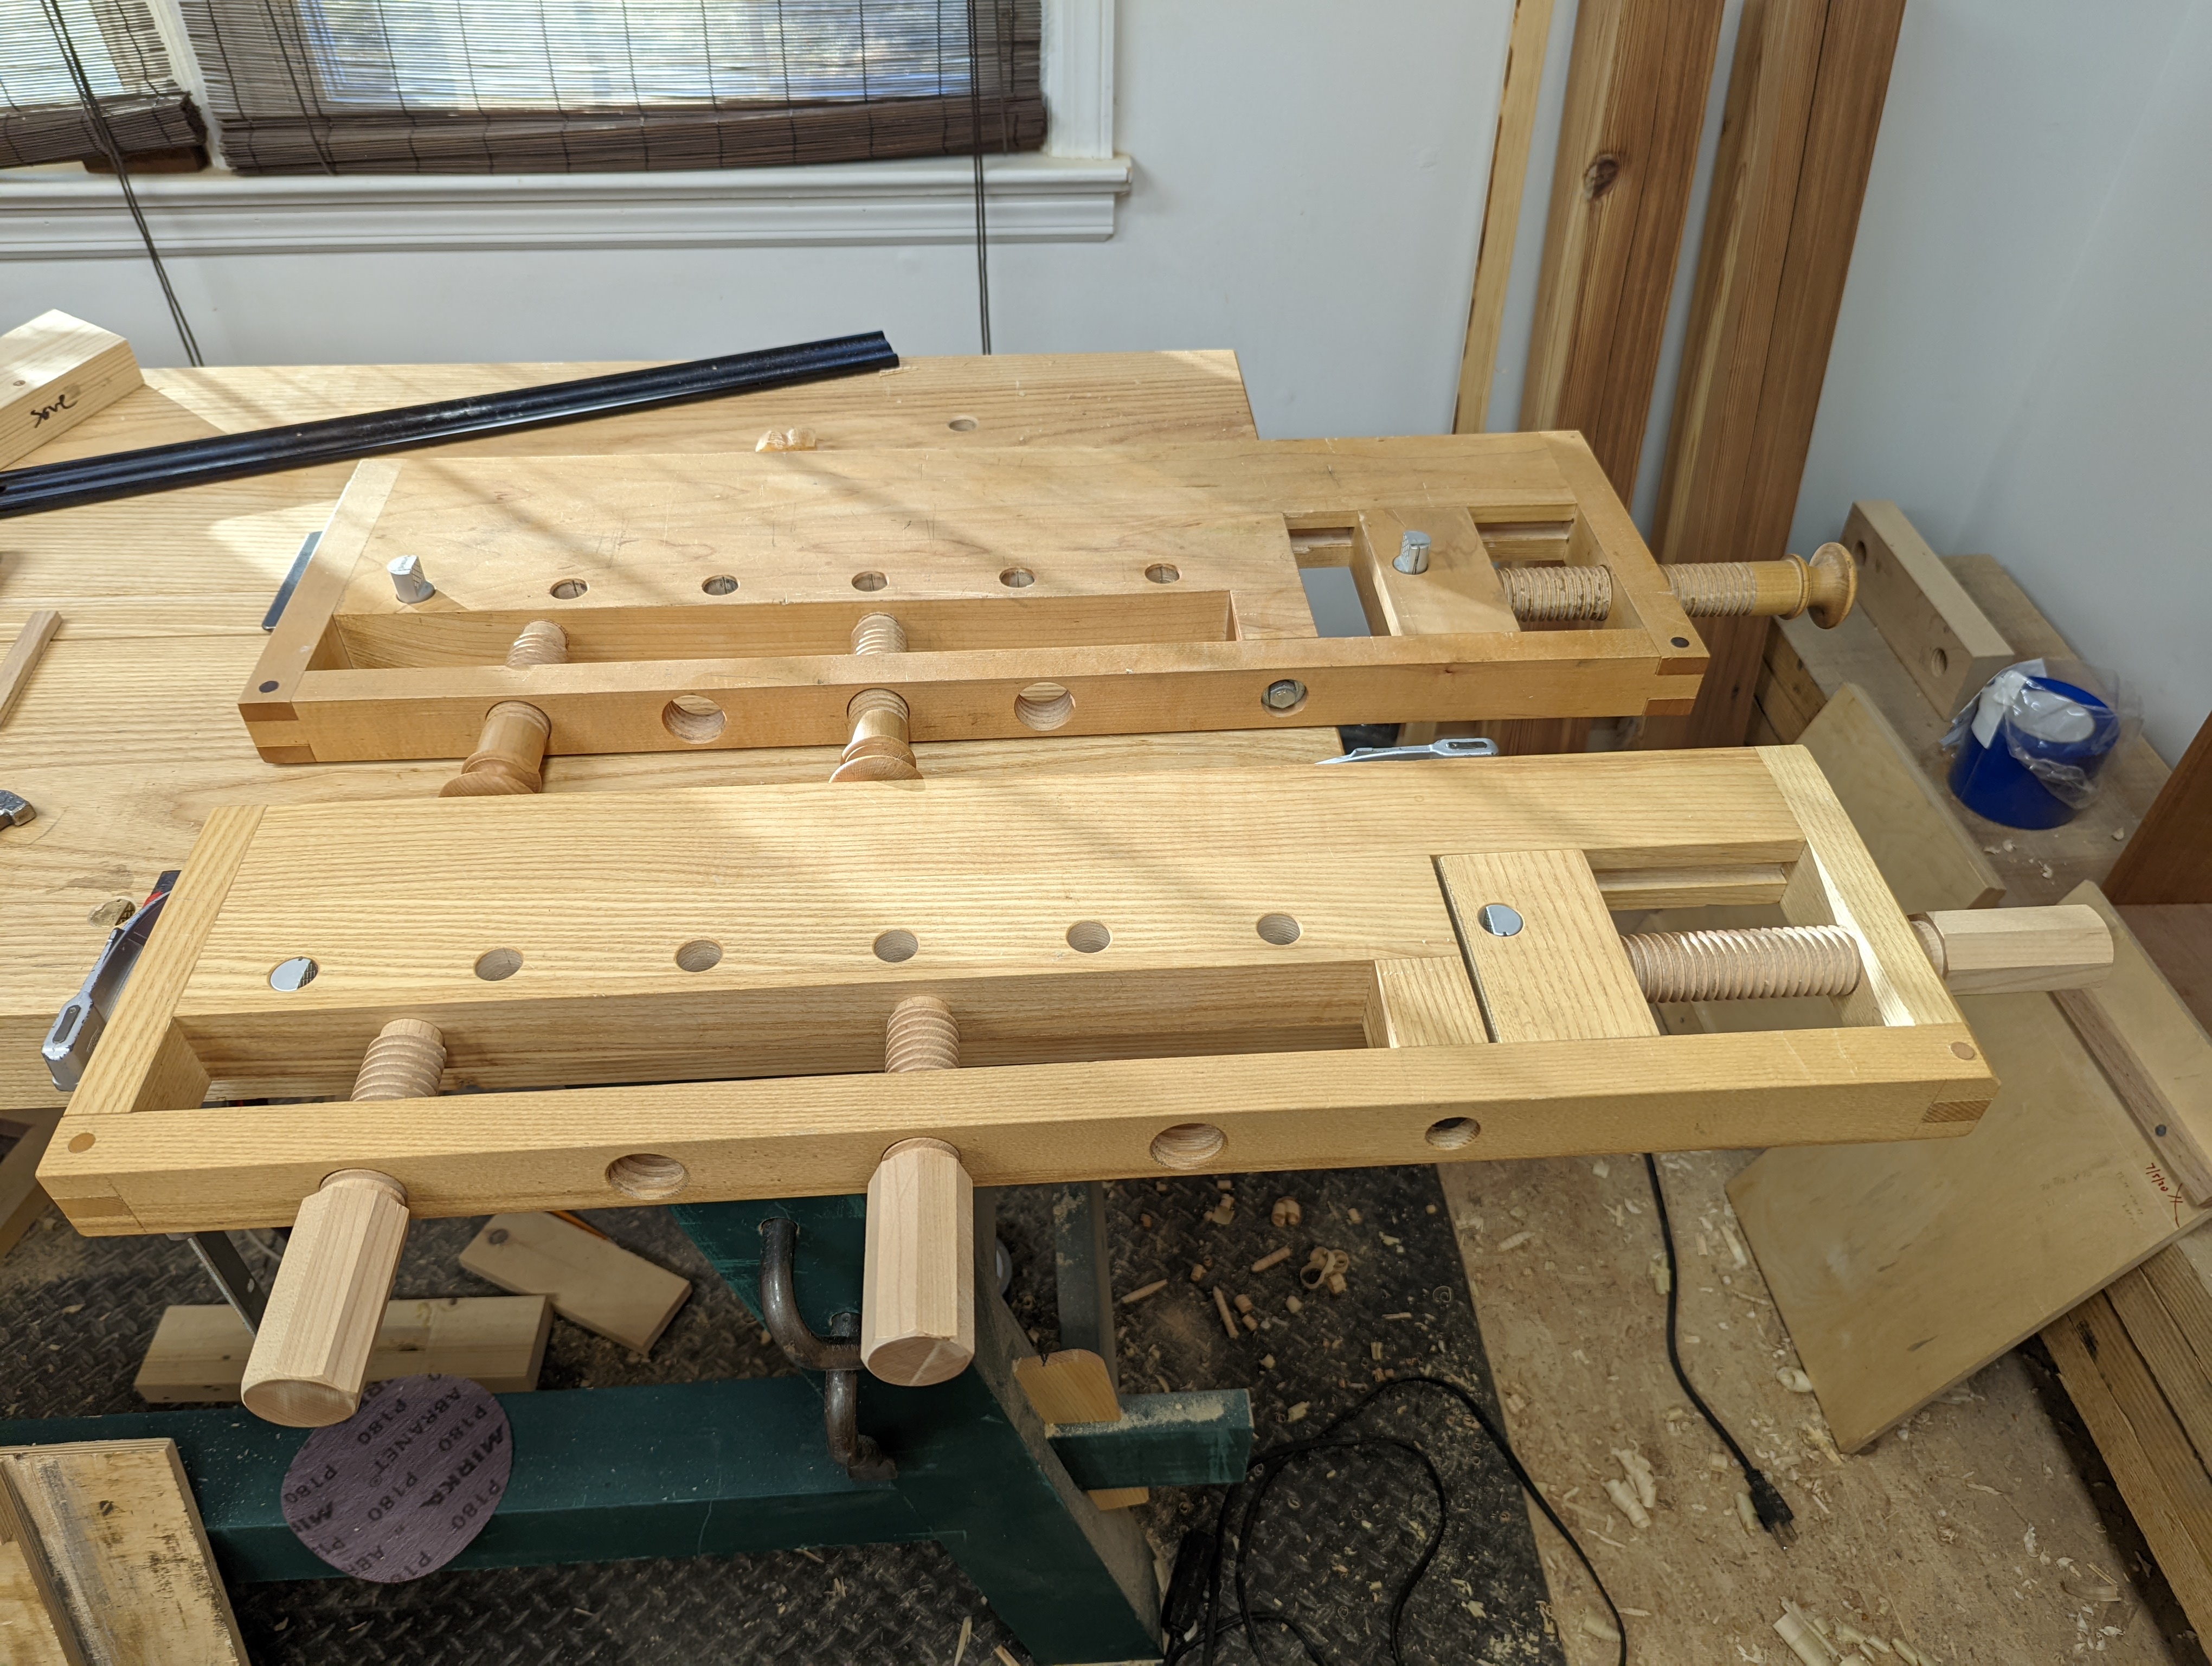
This new bench uses the Red Rose Reproductions Milkman’s Workbench screw kit. In my original, I had made screws with the Beall Tools Big Threader kit (and a router) and added “hubs” with shaker knobs glued into the ends of the screws. It worked fine (in fact, the knobs gave a great grip). But the Red Rose Reproductions screws are very precise and I love the octagon handles. Not to mention the garnet groove that they put into the long screw for the wagon vise.

This new bench is a bit narrower than the original. This, unfortunately, makes it slightly tippy before it’s clamped down (unlike my original bench, which would sit nice and stable on the bench while I got the clamps in place). But it’s more faithful to the original Christopher Schwarz plans.
It was nice to make another one of these workbenches and relive a formative part of my woodworking life. And to do it in my favorite wood (ash), while that wood is still available as it slowly goes extinct because of a parasite, made it even better.
This new Milkman’s Workbench lives in my truck and, quite honestly, has never been used for actual woodworking.
Natch.
JPG

I can’t tell you how happy it makes me to read about a Milkmans bench in use.
My dad had the one that Chris Schwarz bought and since my dad had it from when they cleared out the milkmans basement – that’s how it got the milkmans name.
Your new bench looks fantastic!
Brgds
Jonas
LikeLiked by 1 person
Well, I say with no exaggeration that it is thanks to your father that I am a hand tool woodworker. Had it not been for the milkman’s workbench I would probably still be power tool only or probably not woodworking at all because there would have been no way to keep woodworking in my apartment.
LikeLike
To your credit, at least you started woodworking in your apartment. In 2002, a friend let me be his “shop assistant” while he built a desk for me. I was hooked and even started to remodel the garage. Work was sporadic in the Seattle WA area so I ended up moving back to the SF Bay Area in 2004. Paid twice as much for a condo that was literally as big as my 3 car garage had been in SF if you don’t count the bathroom. It wasn’t until I moved back into a house a decade later that I finally started woodworking. I didn’t think it was possible to woodwork in a condo so I didn’t even try. I feel like I lost a decade.
LikeLiked by 2 people
Not too late! Never too late!
LikeLiked by 1 person
This is a very timely post for me. I’ll be downsizing from a house (with garage) to an apartment (with no balcony) in the near future. This milkman workbench is perfect for me to continue working wood in some capacity. I only wish I had found your blog before I moved into the house because I probably would have started in my apartment!
I’m going to have to perform a similar tool reduction as you did when you first started this blog. I’m curious — has your basic kit recommendation changed at all? I am considering going very minimal with the tool set.
LikeLiked by 2 people
You can do it! Let me think about the basic kit question.
LikeLiked by 1 person
So I feel pretty comfortable with the core tool list in my new years 2022 post. If you have more room, certainly add a dovetail saw or a carcass saw (some kind of backsaw that crosscuts). And no need for a no 3. A no 4 works just fine. It just happens that the no 3 fits that particular chest.
LikeLiked by 1 person