I made a comment on a recent post about how I ever managed to live without an impact driver for almost a decade of woodworking. I’d like to expound on that a bit more.
As folks may know, I build a lot of workbenches. I haven’t actually built one for myself in a while. I’ll find a design that seems intellectual stimulating, build it, and then gift it to a friend or family member. So whenever I’m at the lumber yard, if there is a particularly wide and clear slab of 12/4 or 16/4 lumber (typically ash, poplar, douglas fir, or red oak), I can’t usually help myself. The pile of slabs was becoming a problem, so I made a full size lumber rack. Not one of those wall hangers (Bora, you’re great, but I am constantly worried my entire wall is going to tumble down). A proper, free standing, rolling cart.

There are probably 250 star drive construction screws of either 2 1/2″ (65 mm) or 3 1/2″ (90mm) screws in the entire assembly. As much as I’d love to say I drove each with a brace and bit, I in fact used an impact driver. It’s just so useful and effective (if a bit loud; I wear foam earplugs for work like this). To put it in perspective, I wore out not one but two (!) of the included star drive bits in the boxes of screws. I know these aren’t of the highest quality, but still.
I used a lot of what I learned from the television easel project in making this project. That is, the lumber rack is a series of posts set into a foot that is offset from center based on the calculated center of gravity when loaded with lumber. With a 24 inch foot and 13″ or so of shelf, I calculated that the post should be centered at roughly 8″ from the back of the foot.
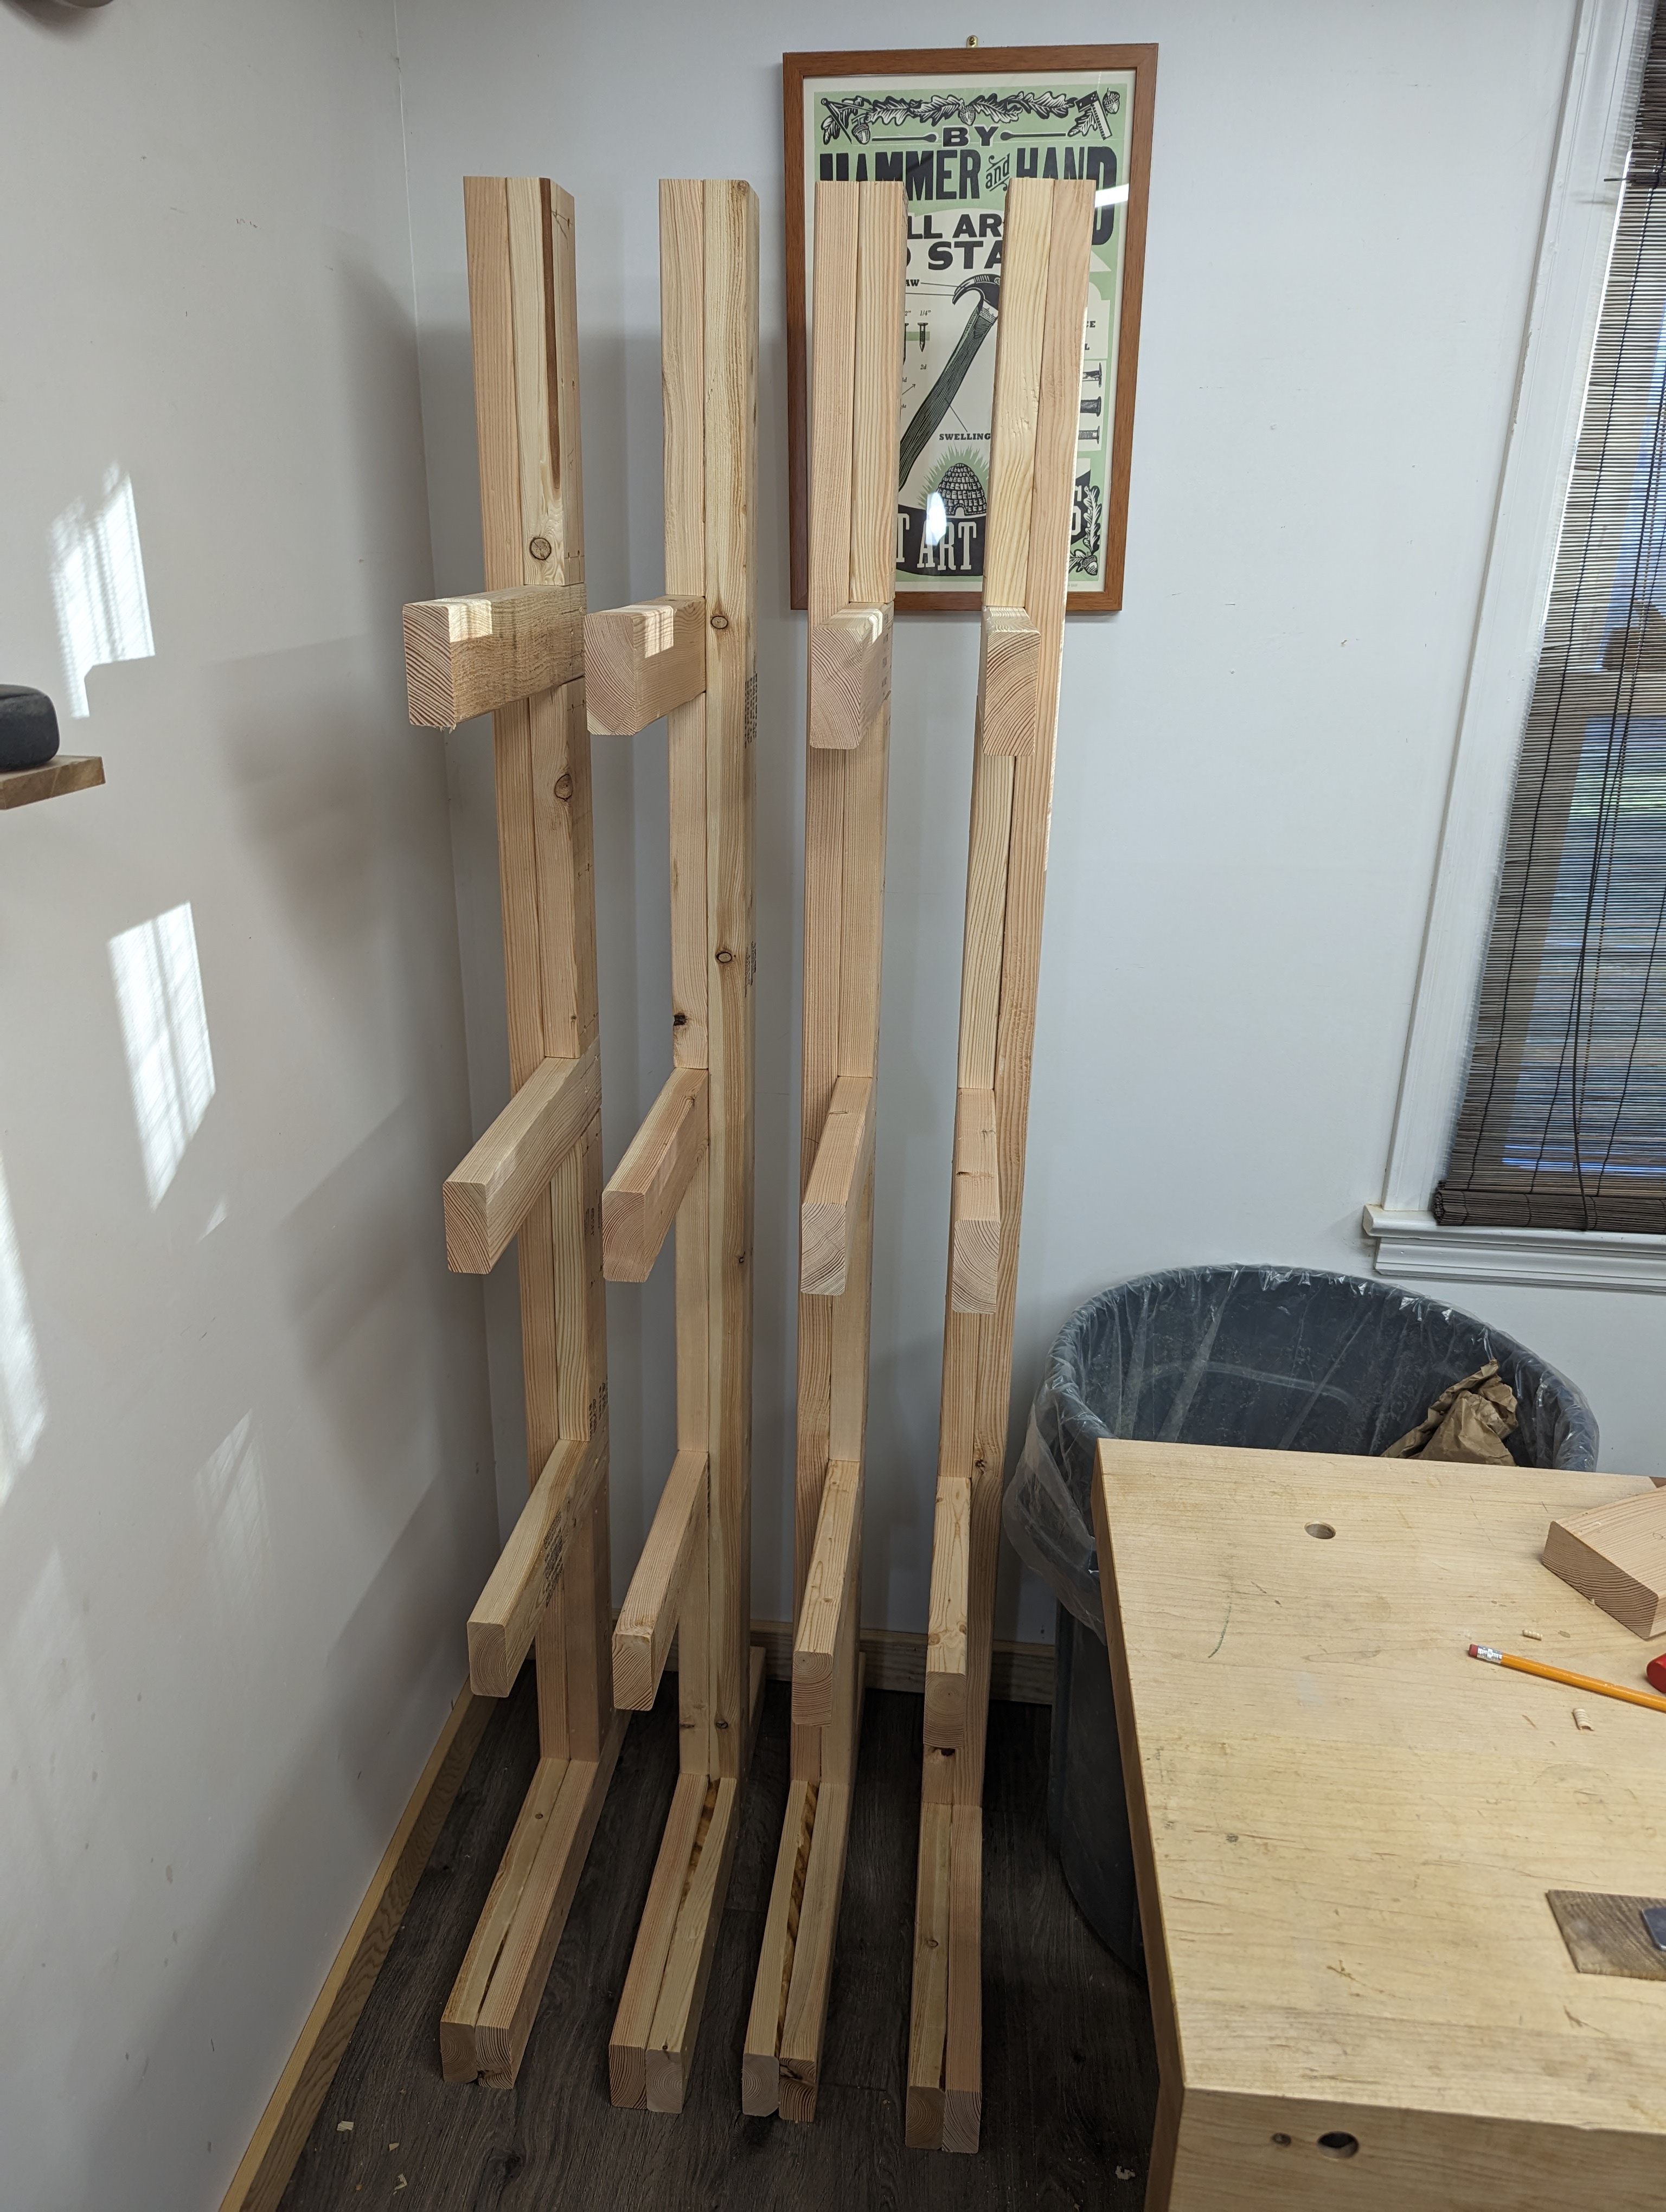
So each post of the lumber rack was comprised of the following, all 2×4 framing lumber, glued and screwed together (a la Naked Woodworker workbench) after drilling clearance holes for the screws.
- One vertical beam at 72″ high (part of this is a tenon that laps into a dado in the foot)
- Four shelf spacers of 15″ high (although the top one is cut to length)
- Three shelf bars at 16″ long
- One foot beam at 24″ long
- Two foot spacers, on at 6″ long (back) and one at 14.5″ long (front) [these create the dado around the vertical beam tenon)
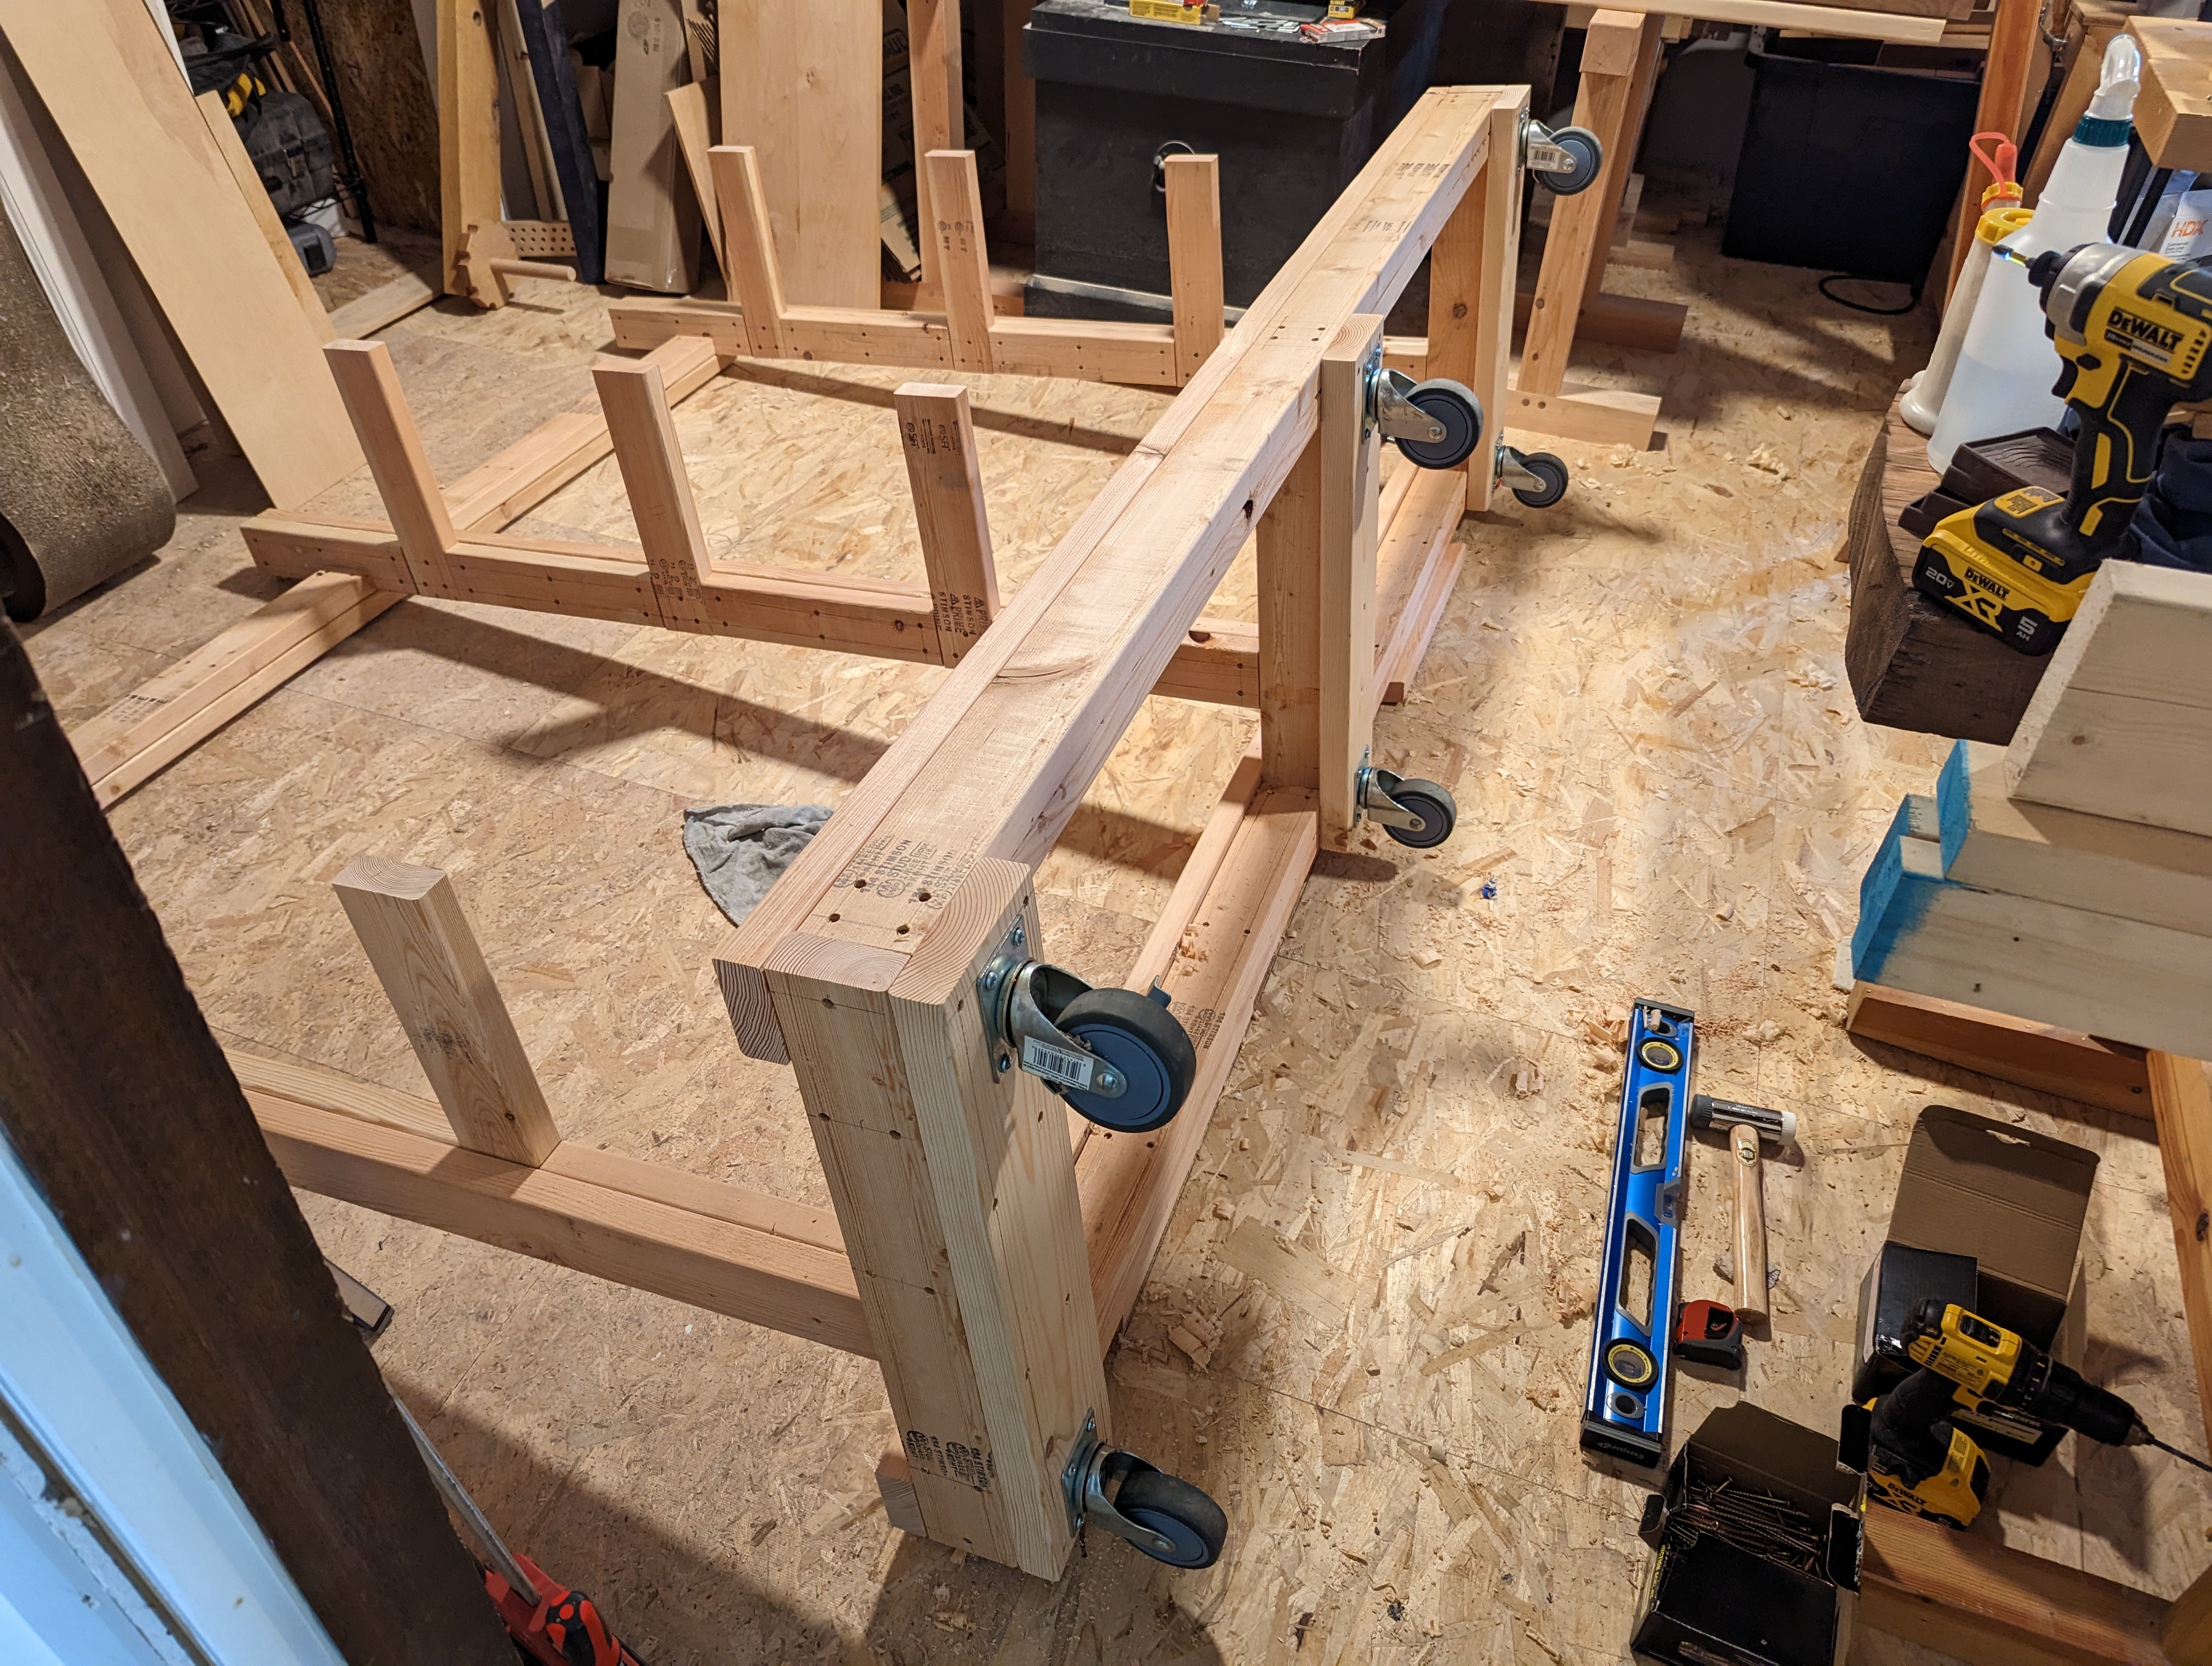
With the posts made, it was time for the base. I started by joining the two end posts with an 84″ long beam, and added a 27″ long end cap on both (creating an enclosed mortise for the tenon on the vertical beam, rather than just a lap joint). Then I added spacers between the ends and the middle post (to form dadoes) and tied everything together with an 87″ long cap beam on top. The back cap beam also created a convenient catch for storing a few things vertically, leaning against the posts.

After adding a long rail to plumb up and tie together the tops of the posts (with spacers to make more dadoes), it was time to add some bearers beneath the post feet. These, made of 2×6 (instead of 2×4), would both (a) further support and secure the posts and (b) give a wide surface (away from the joinery screws) to attach some heavy duty casters.
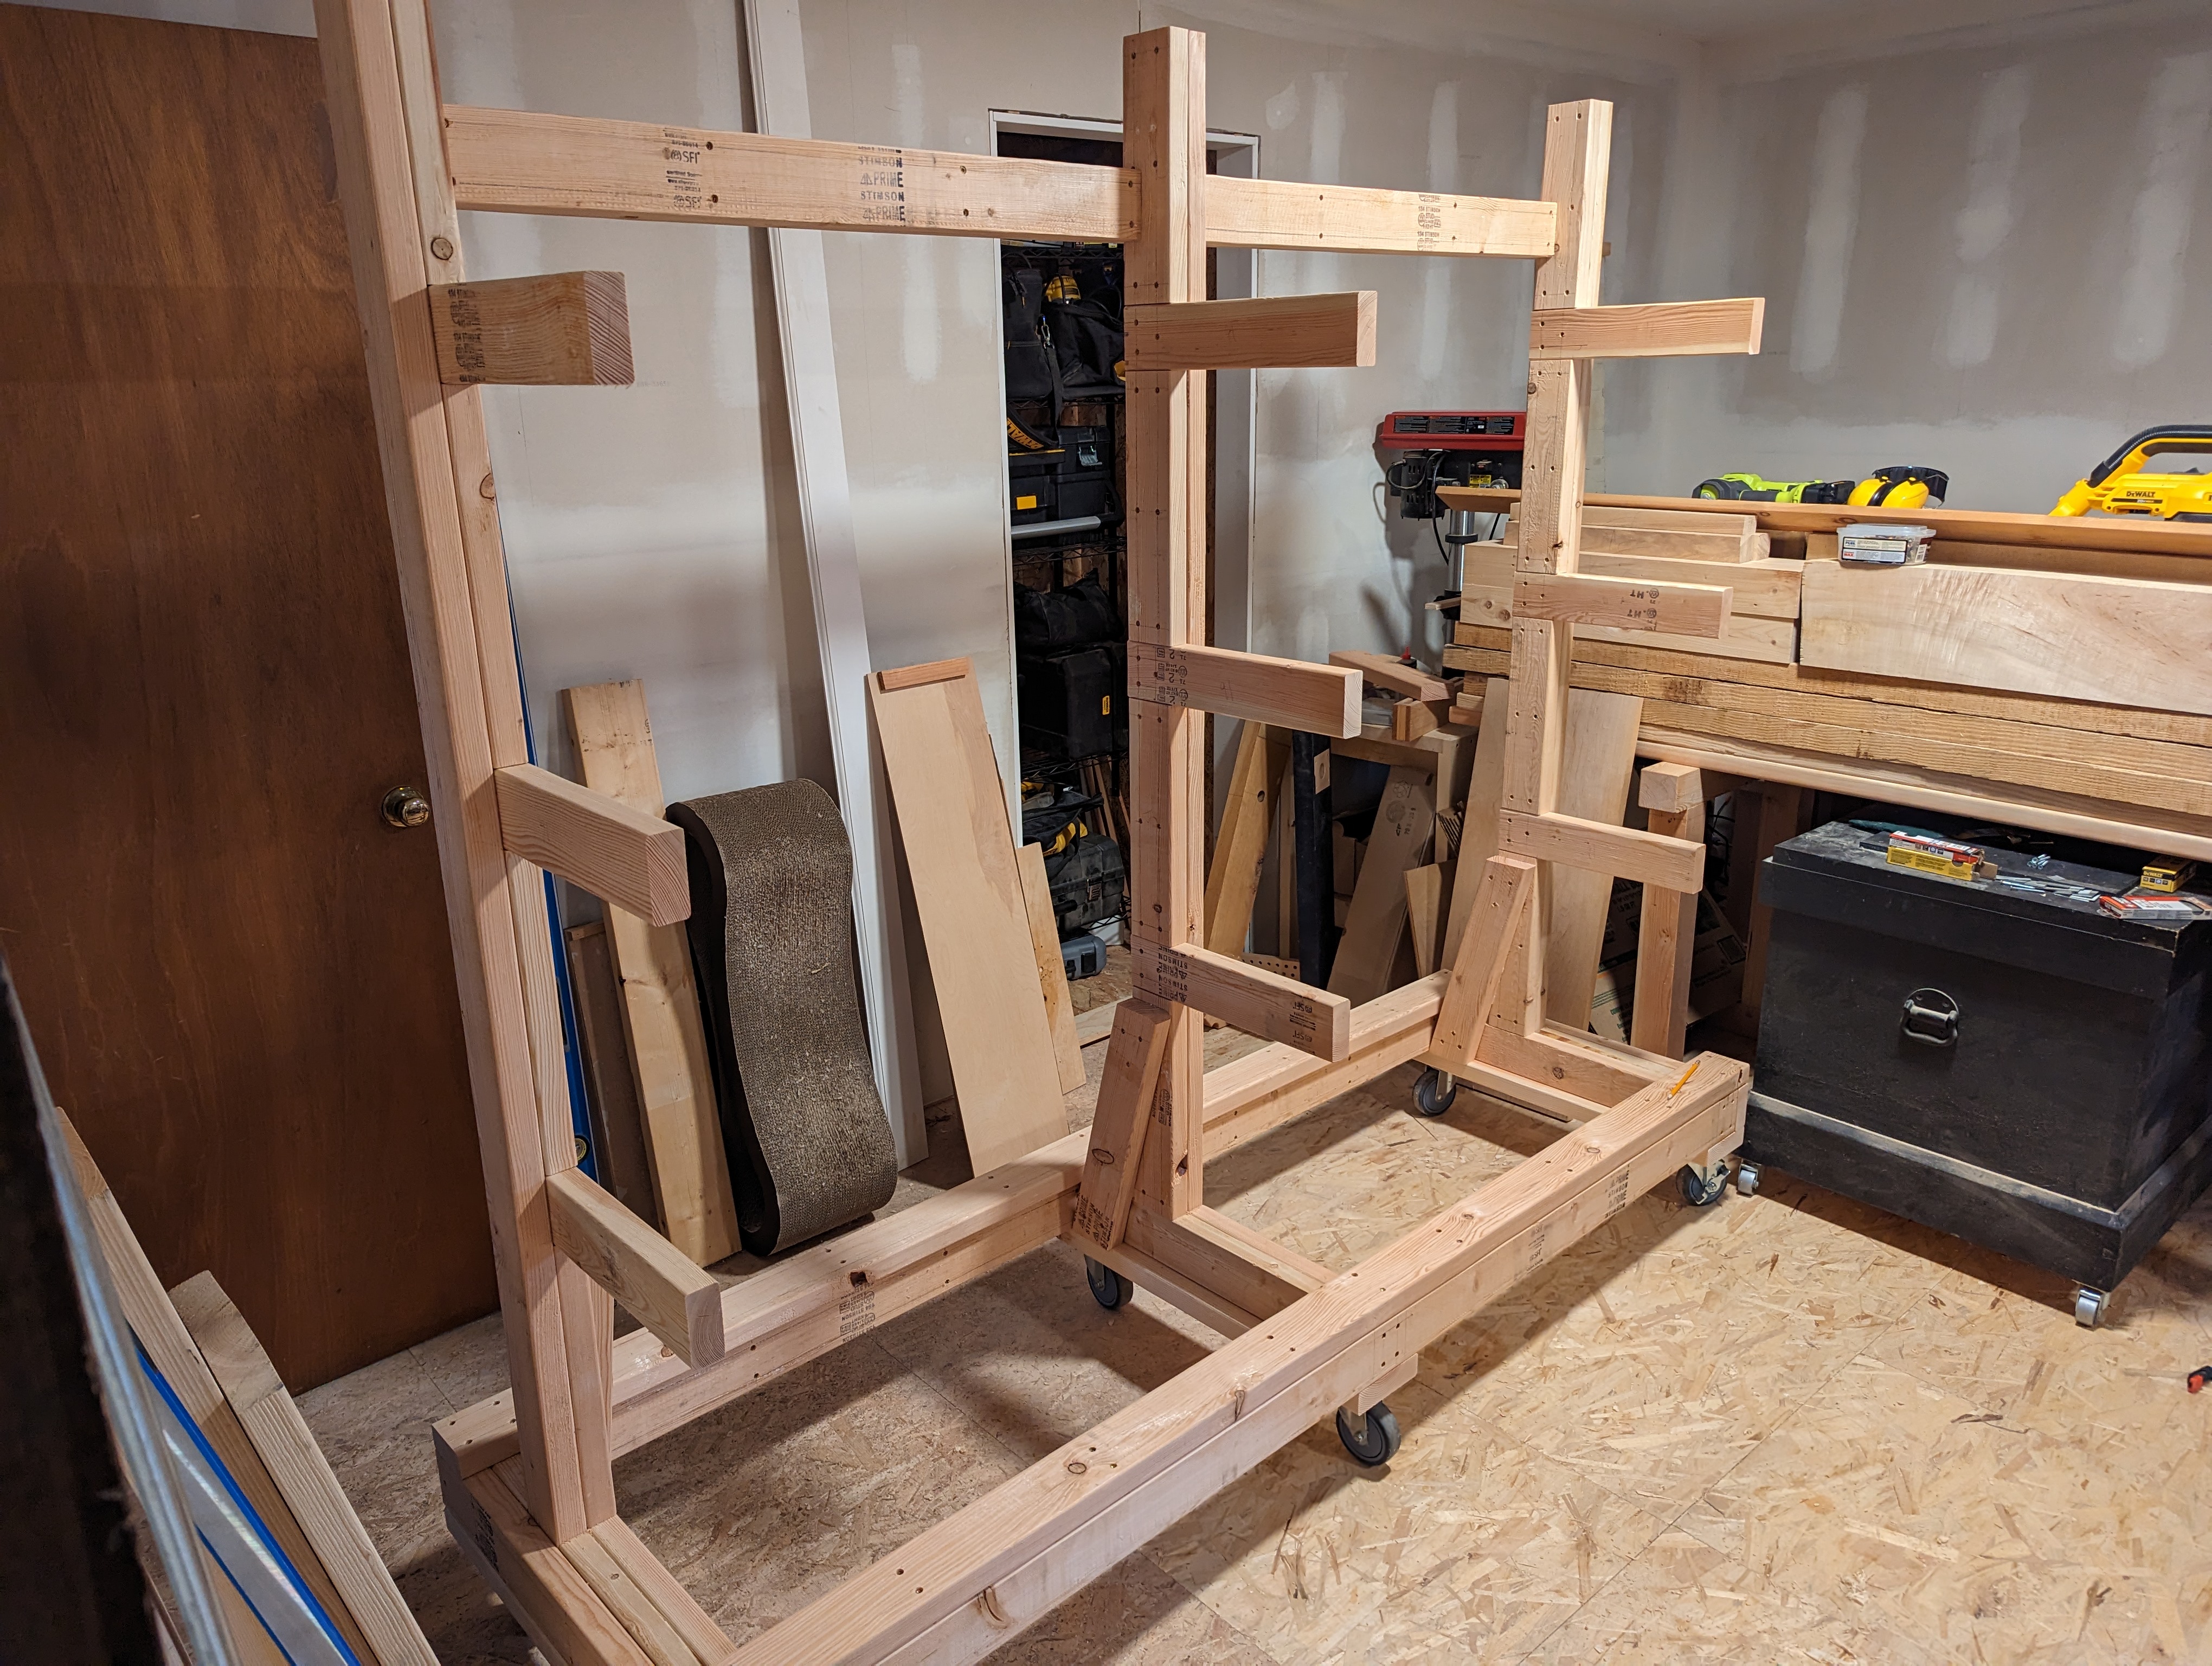
The last step (aside from knocking down the rough corners with an orbital sander) was to add a diagonal brace to each post, reinforcing the base of each post. I’m not 100% sure these were needed, as the posts were each secure and restrained by ![]() a tenon that lapped into each foot assembly, (x) cap beams front and back on top of the foot, (y) a bearer below where the casters attach, and (z) a shitload of glue and screws on the general base assembly. But they make me feel better and this thing will have about half a ton of lumber at the outset. It was either this or add some rachet straps, which looked ugly(ier) to me.
a tenon that lapped into each foot assembly, (x) cap beams front and back on top of the foot, (y) a bearer below where the casters attach, and (z) a shitload of glue and screws on the general base assembly. But they make me feel better and this thing will have about half a ton of lumber at the outset. It was either this or add some rachet straps, which looked ugly(ier) to me.
I am sure (because I checked) there are plans out there for prettier lumber racks. And I absolutely could have spent 10x the time and 2x the money mortising 4×4 posts and drawboring everything. I wish I could say otherwise, but other than a combination square and a marking knife for some more precise cuts, I did not use a single traditional hand tool on this entire project.
But when you need a giant lumber rack, and you’ve got handy a chop saw, an impact driver, some 2×4’s, and a giant box of screws, you do what you have to. I even think I learned a thing or two in the making.
And, most importantly, I can at least walk around in my basement again.
JPG

I think you may have shamed me into finally building one of these. I have been putting it off. Lumber prices were a good excuse. 🙂
LikeLiked by 1 person
Always a pleasure to read about your woodworking adventures.
LikeLiked by 1 person