Another year on the Gregorian calendar has passed and I’m back in the workshop. As I always say, “ABCD – Always be Carpen them Diems!” And today, like every other New Year’s Day, is no different.
My first project of the year is making a panel saw from “scratch”. Those quotes are doing some pretty heavy lifting, as the plate is taken from a 26″ vintage Simonds 10 TPI crosscut hand saw. I’m not in the mood to cut new teeth today. The plate is in very good shape but the handle was a mess. Clearly an aftermarket job, the slot for the saw plate was at like 10 degrees to the handle and it made for terrible hang.
So first I made a new tote. There are a ton of good tutorials on the yutubs about this, so I’m not going to offer any real pointers here. However, a small oscillating spindle sander (I have the handheld one from Wen, which seems to be a knockoff of the Triton model) makes the job a lot quicker. I don’t have a band saw, so bringing the outline of the tote into flat on the OSS (instead of by hand with rasps and files) is a godsend. Especially on quartersawn hard maple.
Once the outside was shaped, I took my cues from the BTC Hardware Store Saw and busted out the trim router with a chamfer bit. Once the hard arrises are sanded down, it’s just as comfortable as full rounds. Plus, the intersection of the chamfers made a cool lamb’s tongue-like feature at the bottom of the tote, without having to do an actual lamb’s tongue.
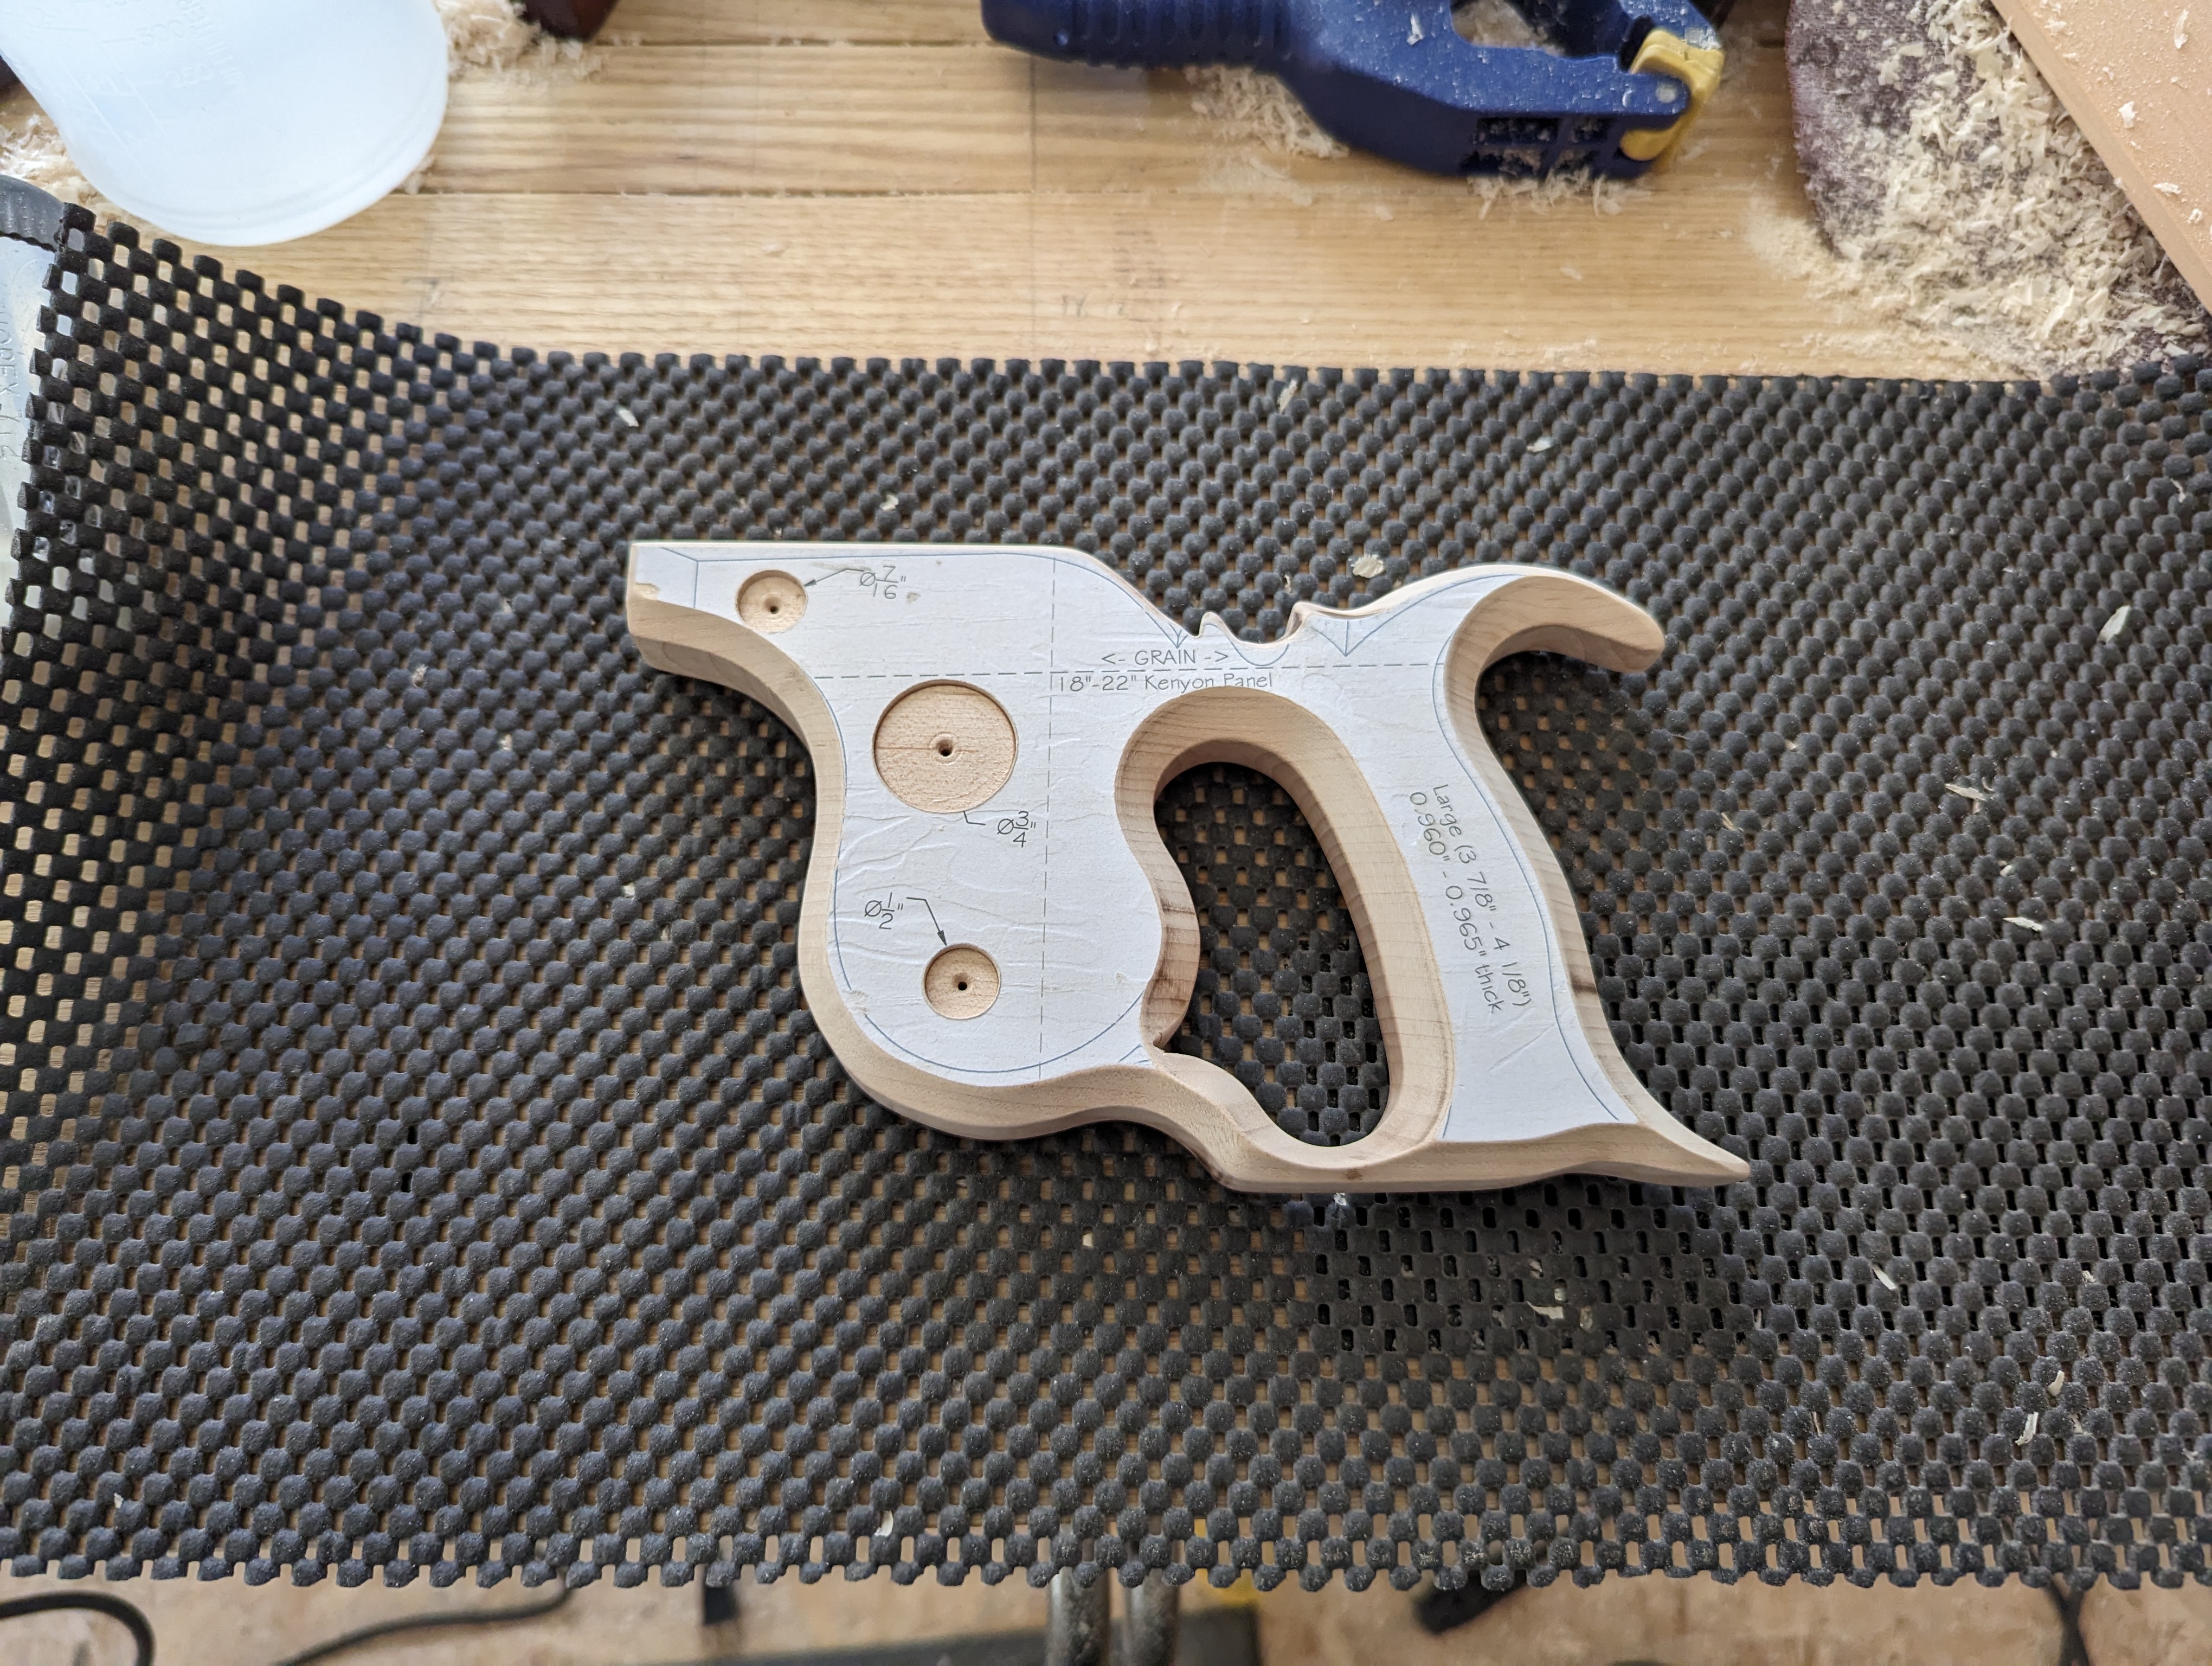
When I make the next hand saw tote, if I use this pattern again, I will lighten the chamfer along the front (seen left, where it meets the saw plate). That heavy chamfer, as cool as it looks, nearly overlapped with the top saw nut and left a fragile edge that will probably break off soon.
Next I had to modify the plate to fit the tote. That vertical dotted line on the pattern to the right of the saw nuts shows where the plate seats into the tote. Problem is, the sourced plate did not have a straight line at the heel. That means it’s angle grinder time. I just use a scrap of plywood as a fence (learned that one from Pask Makes) and go to town. I also nibbed off the corner at the heel.

The angle grinder leaves the plate rather work hardened at this point. Files still work, but you really have to draw file to get down to fresh steel. I pop it in the saw vise and use the same jig for jointing the teeth. It’s important this be straight and true so it seats nicely in the tote.

I didn’t get pictures of it, but I next cut the slot in the tote for the plate. You can freehand this (like the guy who last owned the saw did), but three is a better way. Just clamp to a flat surface (like a benchtop) another panel saw with a thinner plate and a fine set to the bench with a spacer underneath that centers the cut. Then draw the tote, flat against the bench and cut the slot as deep as you can. You can then finish the cut by hand in the vise, as the portion of the slot you already cut will guide the saw the rest of the way. Lee Valley has an excellent guide on this. If the slot is slightly off center (mine was by about 1/32″), just plane down the thicker side.
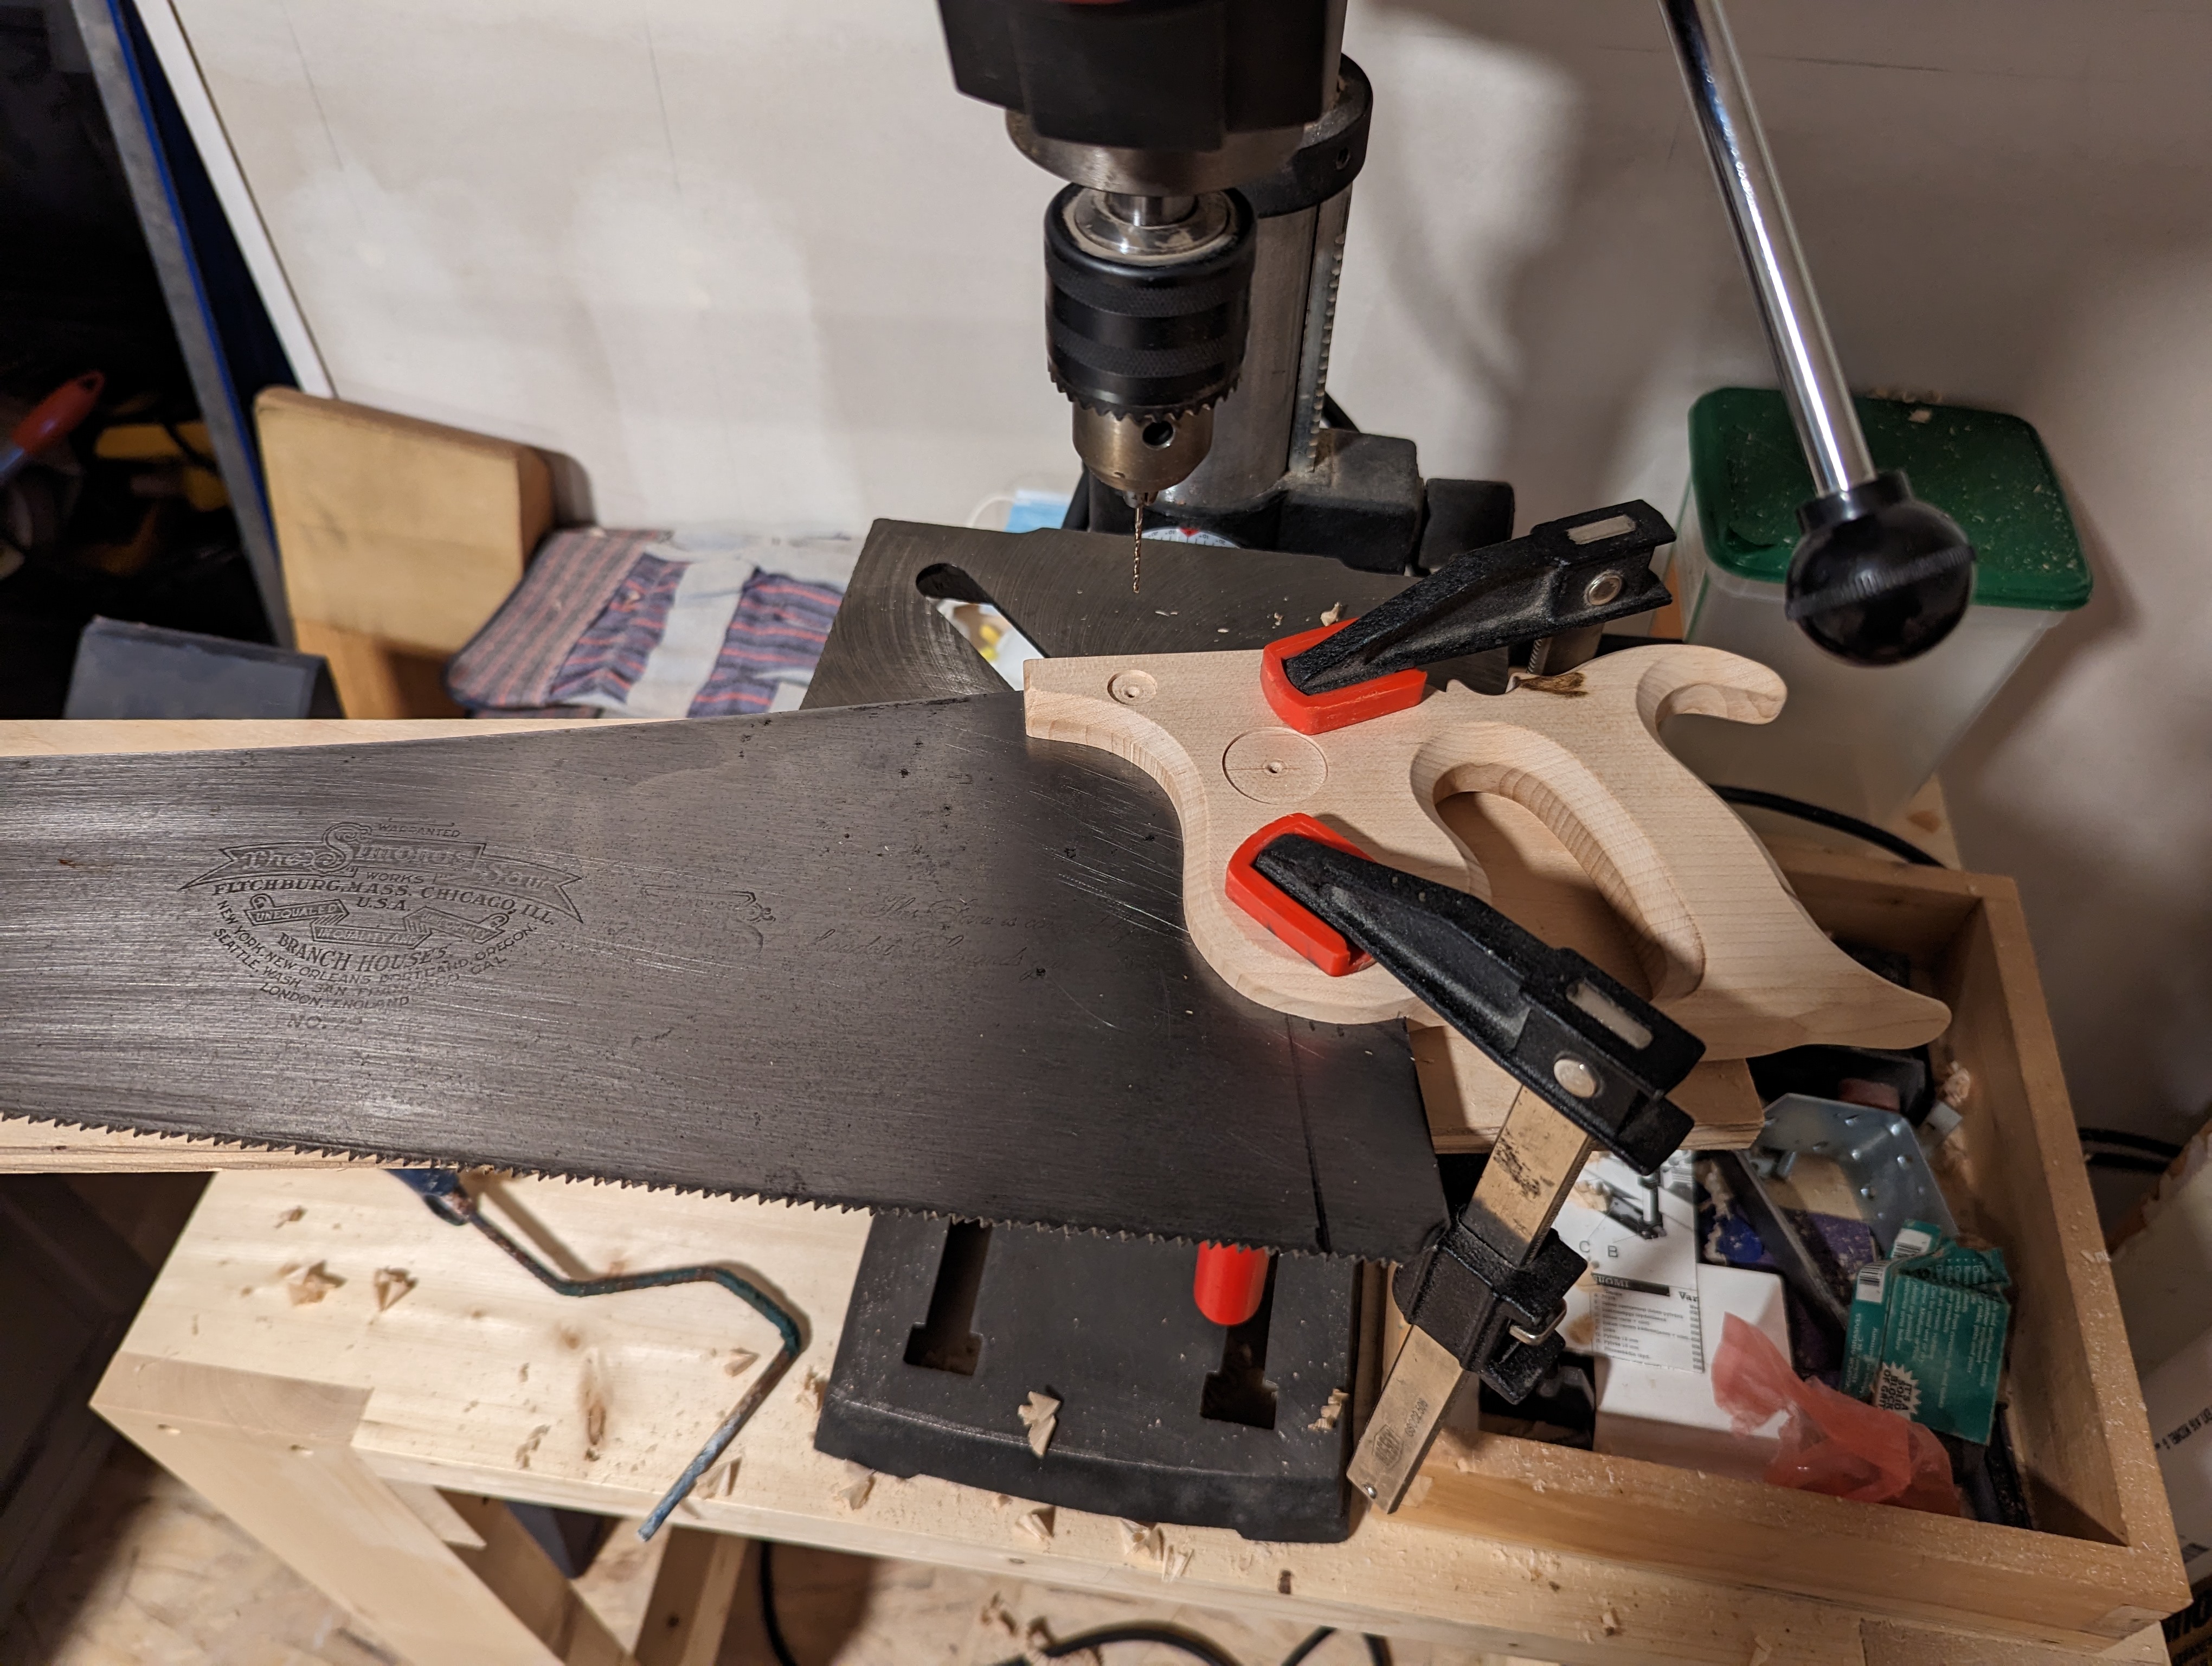
Now came the part I was dreading. When re-handling panel saws in the past, I used the existing handle as a pattern and located the saw nuts exact where they had been on the previous tote. For this, I was starting fresh and that meant drilling new holes in the plate. The spring steel plate. With a cheap benchtop drill press.
I had previously drilled 1/16″ pilot holes through the tote and bored the initial recesses for the saw nuts. So I started by clamping assembled saw onto the drill press table and locating the 1/16″ holes, which I then drilled through the plate. I then set the handle aside, recentered the drill press on each pilot hole in the plate, and clamped down the plate to the drill press table. You do not want a spinning hand saw plane. Then I just worked my way up from 1/16″ to 7/32″ incrementally until there were three 7/32″ holes in the plate. In truth, I cooked about four 7/32″ drill bits. It’s just too much for my little drill press to handle. But they were cheap drill bits (scavenged from various box store sets).
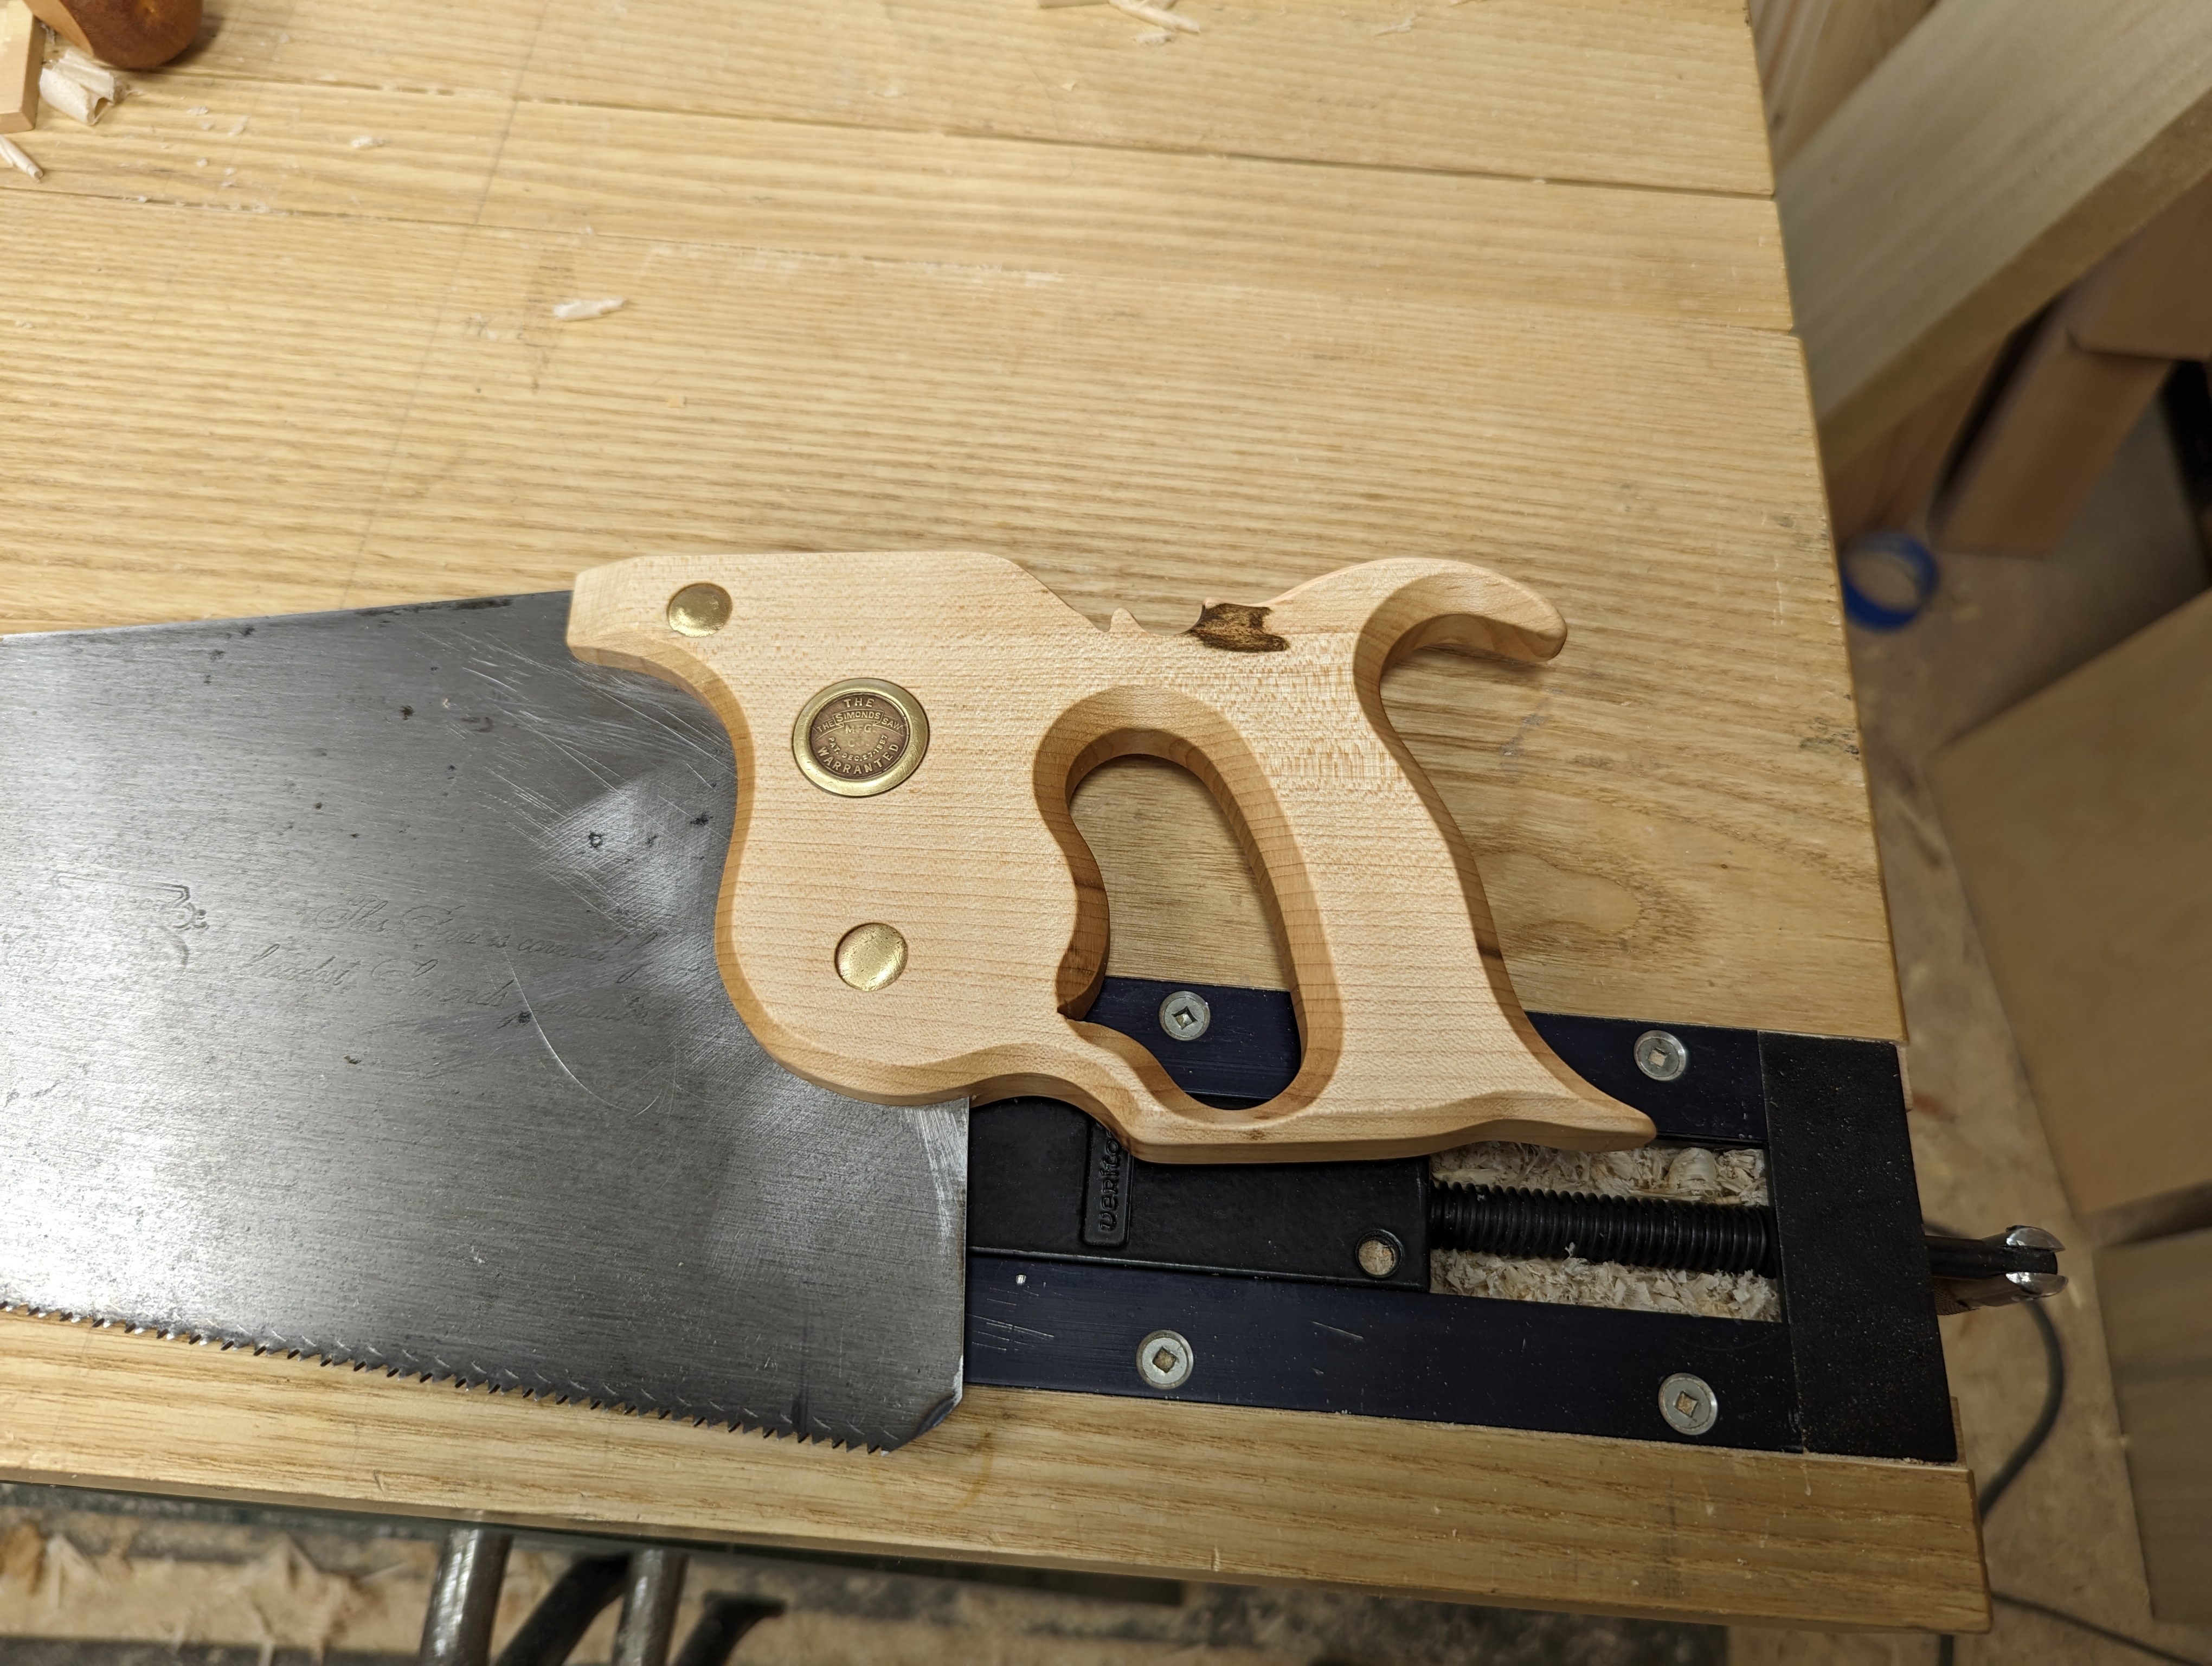
All that was left to finish the tote was drilling out the saw nut holes (9/32″ for the slotted nuts and 1/4″ for the medallion and bolts) and tweaking the depth of the recesses. I think I set the recesses in a little deep, but it works. Some boiled linseed oil really makes the quartersawn holographics of the hard maple pop.

I still need to hack off some of the toe to get the plate itself down to about 19″ of tooth line. That, in my experience, makes the plate stiff enough to not need a half back or magnetic guide for basic joinery. Plus it gets rid of that kink that always develops about 5-6″ from the toe of every 26″ hand saw. And, of course, that will allow it to fit in the toolbox.
The hang of the saw is a bit toe heavy, which makes me think it should be a medium rip (8-10 TPI). I find that useful for crosscutting wider, thicker stock on the saw bench and still able to rip efficiently at the vise. A saw like that is a workhorse for my travel toolbox. Once the BLO dries, it’s time to carpe some more diems and reshape the teeth.
But, for now, Happy New Year and I hope you find some time in the shop soon. Thanks for being a reader and stay tuned for some new and exciting things this year.
JPG

Your drill press will love you if you use cutting oil when drilling metal. You won’t burn up drill bits either. Nice handle!
LikeLiked by 1 person
I used like half a bottle of 3 in 1 oil! It didn’t matter!
LikeLike
That’s not cutting oil.Right where the cutting edge meets the material, friction can create enough heat to “weld” the material to the cutting edge rendering it dull.Cutting oil prevents this problem. Tools last much longer due to this and can work much faster.
LikeLiked by 1 person
Gotcha. Will get proper cutting oil, then.
LikeLike
Great start for 2023. Happy New Year!
LikeLiked by 1 person
Thank you and likewise!
LikeLike
How did you drill a concentric 9/32 hole after the 7/32 or did you drill the 7/32 after the 9/32 with Forstners? You said you drilled 1/16 pilots and bored the initial recesses.
LikeLiked by 1 person
If you leave the work clamped in place you can just switch drill bits and they will stay located. But I generally drill larger holes first and then proceed to smaller ones. The 1/16 pilot was so I could drill the ate separately but accurately.
LikeLike
Always fun to give new life to an old tool, I like the handle also. Beautiful proportions.
LikeLiked by 1 person
Credit where credit is due, the Blackburn Tool pattern is fantastic.
LikeLike
Blackburn sells a carbide drill bit for saw plates, works great and worth the money.
LikeLike
Nice job, and website. Why not extend the pattern instead of using less chamfer?
Jonathan
LikeLike