Author: The Apartment Woodworker

The Apartment Woodworker is a weekly blog with insights, projects and tips for making the most of woodworking with hand tools in confined spaces.

A Short Time Ago, in an Apartment Pretty Close By

Last weekend weekend, I cut dadoes. Two, to be precise.  Of the stopped variety.  To install the drawer runners in the dovetailed plant stand.

P1000276

All dado bottoms flattened with a Veritas router plane.

There was a time when I would not have hesitated to strap a parallel guide clamp on the work and plunge-router the whole thing. A time not too long ago. A time I do not miss one bit.

The dado on the above right was cut with a 1 1/4 inch chisel.  After marking and chopping to depth one side, I then scribed the other side of the dado against the mating piece.  Knowing the vertical chisel chops would compress the fibers and move the knifewall, I intentionally marked the other side of the dado a bit narrow (1/64 or so).  The end result was a wonderfully fitting joint.

P1000274

No reinforcement yet.  Only friction.

The dado on the right, however, was cut differently.  At the time of day (about 6am Eastern), I couldn’t be chopping with a chisel.  I live in an apartment, after all.  So instead, I scribed deeper and deeper knifewalls with the marking knife to get to depth.  This meant that, without the compression from the vertical chisel chops, the narrower scribe line on the other side of the dado was never compensated for.  I ended up planing the mating piece to fit the dado.  It’s still a very snug joint, just with a different approach.

I have since glued in the runners into place, with a bead of hide glue along the long grain bottom of the dado.  While I suspect this will be enough, I will also reinforce with some nails or buttons.  The drawer is almost done too; I’m merely figuring out the best way to fit the drawer bottom (without a plow plane).

Then it’s time for assembly.

JPG


More Routine Maintenance

Last night, I had a nightmare that all my chisels had rusted over and bellied.  So this morning, during my breakfast of mini-bagel and green tea, I made sure they had not.  I actually only got through 1/4-5/8, and will do the rest tonight.

wp-1449248491594.jpg

Screw you, subconscious.

I love my 3×8 diamond plates for grinding and sharpening, but they are not ideal for lapping and flattening.  When I need something perfectly flat, I turn instead to the machinist’s granite slab pictured above and adhesive-backed sandpaper of various coarseness.

For flattening chisels or plane irons, I typically use 80 grit, 120 grit and 220 grit sandpaper.  I care more about flatness than mirror polish, so any additional polishing done on the diamond plates in the course of sharpening.  For plane soles, I might go up to 320 grit (which is overkill for everything but a smoothing plane, I know).

I’ve experimented with sanding belts and spray adhesive in the past, but I’m never happy with the adhesion, and certainly loathe the mineral-spirits cleanup of the spray adhesive.  With adhesive-backed sandpaper, I just need a scraper and a spritz of Simple Green cleaner.  The grit on the sanding belts definitely lasts longer, but it’s a small price to pay.

JPG

Words to Cut Joints By

Admittedly, my previous post was a bit harsh.  Without any remorse and sans even one iota of apology to the douchenozzles in question, I concede that things got a little out of hand on Friday.

I like to keep it pretty highbrow around here, so let’s talk about one of my favorite joints: the cross-lap joint.


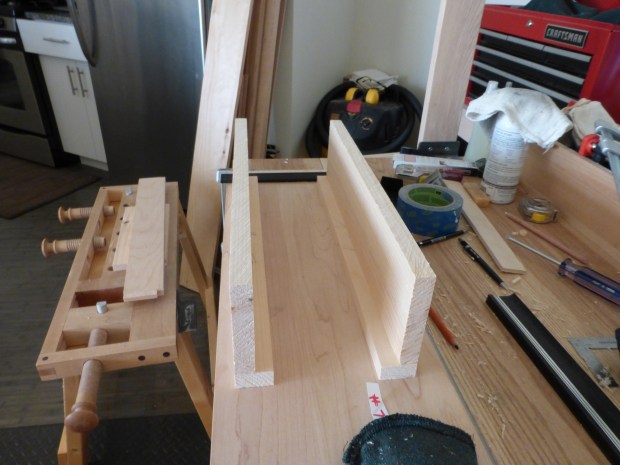
The cross-lap joint is all about precision.  In its simplest form, two pieces are joined to form an overlapping “T” through two dadoes.  Each dado must be precisely sized to snugly fit the mating piece and (usually) the combined depth of both dadoes is equal to the thickness of one of the pieces.  This precision is achieved, first and foremost, through careful layout.

For me, the most accurate way to mark each dado is to scribe an initial line with a marking knife and, leaving the square in place, use the mating piece to transfer the dado width.  I tend to mark my dadoes about 1/64″ narrower than the mating piece when working in softer woods.  In harder woods, it might be only a few thousands of an inch.  I then transfer the width lines to the sides and scribe my depth line normally.

Unless the boards are wide (6″ or more), I will use a tenon saw to establish the outside walls and then chisel out the waste to just above my depth line with stabbing motions.  On twider boards (or in the case of stopped dadoes), I may only establish the show faces of the walls with a saw and the do the rest by chisel.

P1000258

I always wear safety glasses when paring in this orientation.  

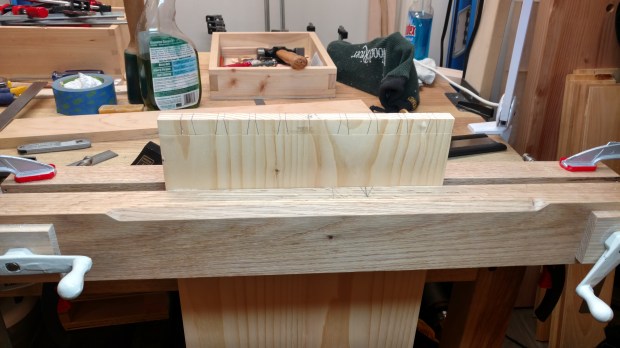
After test fitting for snugness (and paring down the walls to the scribe lines, as necessary), I then fine-tune the dado depth with a router plane, taking very shallow passes until I hit my scribed depth line.  Rinse and repeat for the other dado, fine tuning dado depth to ensure the pieces are joined flush.

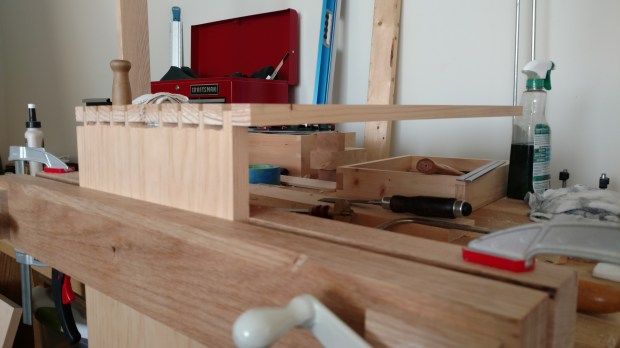
When done right, and used in the correct orientation, a cross-lap joint can have mechanical strength and may require little reinforcement.

P1000266

The first dado in process.

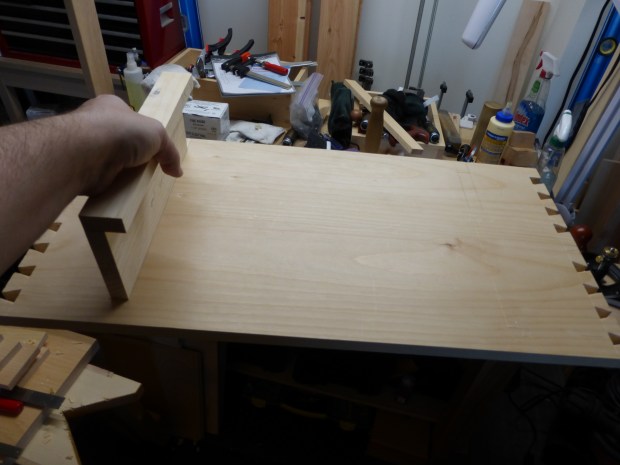
The cross-lapped pieces above are the base of a small plant stand.  Assuming I accurately locate the through-mortises on each of the legs to evenly distribute the vertical load, the cross-lap joint won’t require any reinforcement.  Assuming.

JPG

The Plank in My Own Eye

I don’t much go in for 2,000 year old metaphors, but there is one passage in the Christian Scriptures that always made sense to me.  Matthew 7:5 makes a pretty poignant point about judging others.  We’re all flawed, some of us more than others, so fix yourself before you criticize your fellow man.  Nowhere do I wish people lived by this concept more than in woodworking forums.

A gentleman I follow on twitter named Christopher Bowen (@abysmaljoiner) is making a beautiful side table, with a striped inlay and a curly something or other drawer front.  He recently posted a picture of his burnisher laying on top of the table, with ostensibly burnished corners (something I had never thought of, as I tend to just break them with a smoothing plane).  Hoping to learn more about the practice, I went to teh interwebs. The very first search result was to the forums of a major woodworking magazine.  And the very first response to a question about burnishing miters was by some intractable dickbag who, instead of answering the quite-reasonable question, admonished the person to just cut better fitting joints.

Sadly, this dickholery is the norm through most of the woodworking forums out there.  For every one stronghold of enlightenment, knowledge and community out there, you’ll find ten wastelands where you’re pretty much guaranteed nothing but rants from sad old men comparing dick sizes fresh off their chop saws.

The internet can be such a force for good, where knowledge, experience and advice is freely exchanged by people who care about the topic, and we’re all made better for it.  But I’m sick of having to slog through pages and pages of ePeen just get a comprehensible answer.

Besides, if they were really that good, they ought to care more about helping the rest of us get to that point than about bragging and putting other people down on the internet.  No one’s impressed, you incorrigible fucktards.

Happy Black Friday.

JPG

Happy Thanksgiving

Happy Thanksgiving from TheApartmentWoodworker.com.  As the holiday season ramps up, I am (as always) grateful for my readers and followers and, most of all, the support of my family and friends who humor my woodworking hobby (obsession?).

Here’s wishing everyone a happy and healthy holiday. Travel safe and, if you can, get some time in the workshop!  Even if it’s just to flatten your saw bench.

P1000252

Sometimes, even shop furniture needs some maintenance.

JPG

I Love It When a Plan Comes Together

Or, rather, a lack of plan.  Over the weekend I finished the bulk of a console table which will support two medium-sized plants.

IMG_20151122_140552322[1]

Out of River’s reach!

It’s a super simple build and I never even made a drawing.  Three pine boards, joined at the corners by dovetails.  I added a single rail that is [haunched] stub-tenoned to the sides.  After gluing, I plan to pin the stub tenons with some cut nails, which should be a sufficient substitute for drawbores.

IMG_20151122_140531517[1]

It’s like adding an apron to a workbench.

I think with thicker material I could have done without the rail.  But the boards are less than 3/4″ all around and wracking under the load of two heavy plants is a big concern.  Also, the rail will serve as a drawer stop (more on that below).  I’ve only done a dry fit so far, and the thing is solid as a rock under load, thanks to the tightly-fit dovetails.

IMG_20151122_142855_01[1]

Way more tails/pins than I’m used to, but I think it’s my finest work so far.

Perusing ideas for attaching the drawer, I came across a Lost Art Press CAD drawing for a staked table with drawer.  From the illustration, it looks like the wide and shallow drawer rides on two L-shaped runners that I assume are dadoed into the underside of the tabletop.   This should work well for my similarly wide and shallow drawer.

P1000251

I’m not inclined to over-complicate things.

I haven’t made the drawer yet, but I’d rather hang the runners first and then worry about drawer size.  In fact, I will cut the dadoes, assemble the carcass, then attach the runners, then worry about the drawer.  I think that’s the right order.

And the drawer, for variety, will be rabbeted and nailed, rather than dovetailed.  With a wider drawer front to cover the runners.

JPG

It Comes in Waves

I’m taking a long weekend to recharge the batteries a bit.  What better way to unwind than to jump right into some asymmetrical dovetails?

wpid-wp-1448064223988.jpg

Quite the grain match, huh?

The above board is the tabletop for a 24x24x12 console table.  The top will overlap the sides about an inch, which will permit me to eventually add a drawer, flush to the top.  That’s the point of the straight pin on the left.

wpid-wp-1448110463064.jpg

If it will support itself across 24″ when half-fitted, it’s a tight-enough joint.

I need the table now, so I’ll add the drawer later.  Which is good, because I don’t have any idea how to attach it.  One step at a time, I guess.

JPG

Deviating from the Norm

There has been much going in lately: both in the world and in my own life. Though it all, I’ve been wrapping up some projects and figuring out where to go next.

I have serious need of some indoor plant stands and keep vacillating over the design. So much, in fact, that I’ve decided to go in a different direction.

Osborne Wood Products has begun selling hairpin legs, in 18″ and 29″ heights at very workable prices. I expect some roughly 19″ square maple slabs will be more than sufficient and aesthetically pleasant, but I’ll wait until the legs actually arrive before preparing any stock. I do have just the material, though: some 6/4 rough-sawn hard maple.

JPG

Small Projects

It’s always the small projects that cause the most trouble.  The projects that most often remind me of a certain adage about the relationship between haste and waste.

My brother and sister-in-law asked me to create a mounting board with a simple moulding for a brass clock and matching barometer.  It’s a rather nautical setup, and having no mahogany or teak on hand, I opted for some cherry.  Simple enough, and a great opportunity to use my white charcoal pencils.

P1000246

I don’t know much about cherry, but it looks a bit curly to me.

Instead of ripping down two strips from the same piece for the best color match, I thought I might be able to color match and laminate one wide piece and one thin piece.  The color match is good, but not great.  Once the seal coats of dark walnut Danish Oil are set, I’ll blend the color further with a coat of dark paste wax.

P1000248

Actually, in softer, less-direct light (id est, not shop lighting), it’s more than adequate.

I have exactly no idea how they plan to hang the thing on the wall.  I have a keyhole router bit if needed, but I would think a better way is hanging wire and rubber pads.

I’ll post a picture on Twitter once the clock and barometer are mounted.

JPG