New to me, at least. I’m cleaning up a vintage saw.
And ruining my nice ash table in the process.
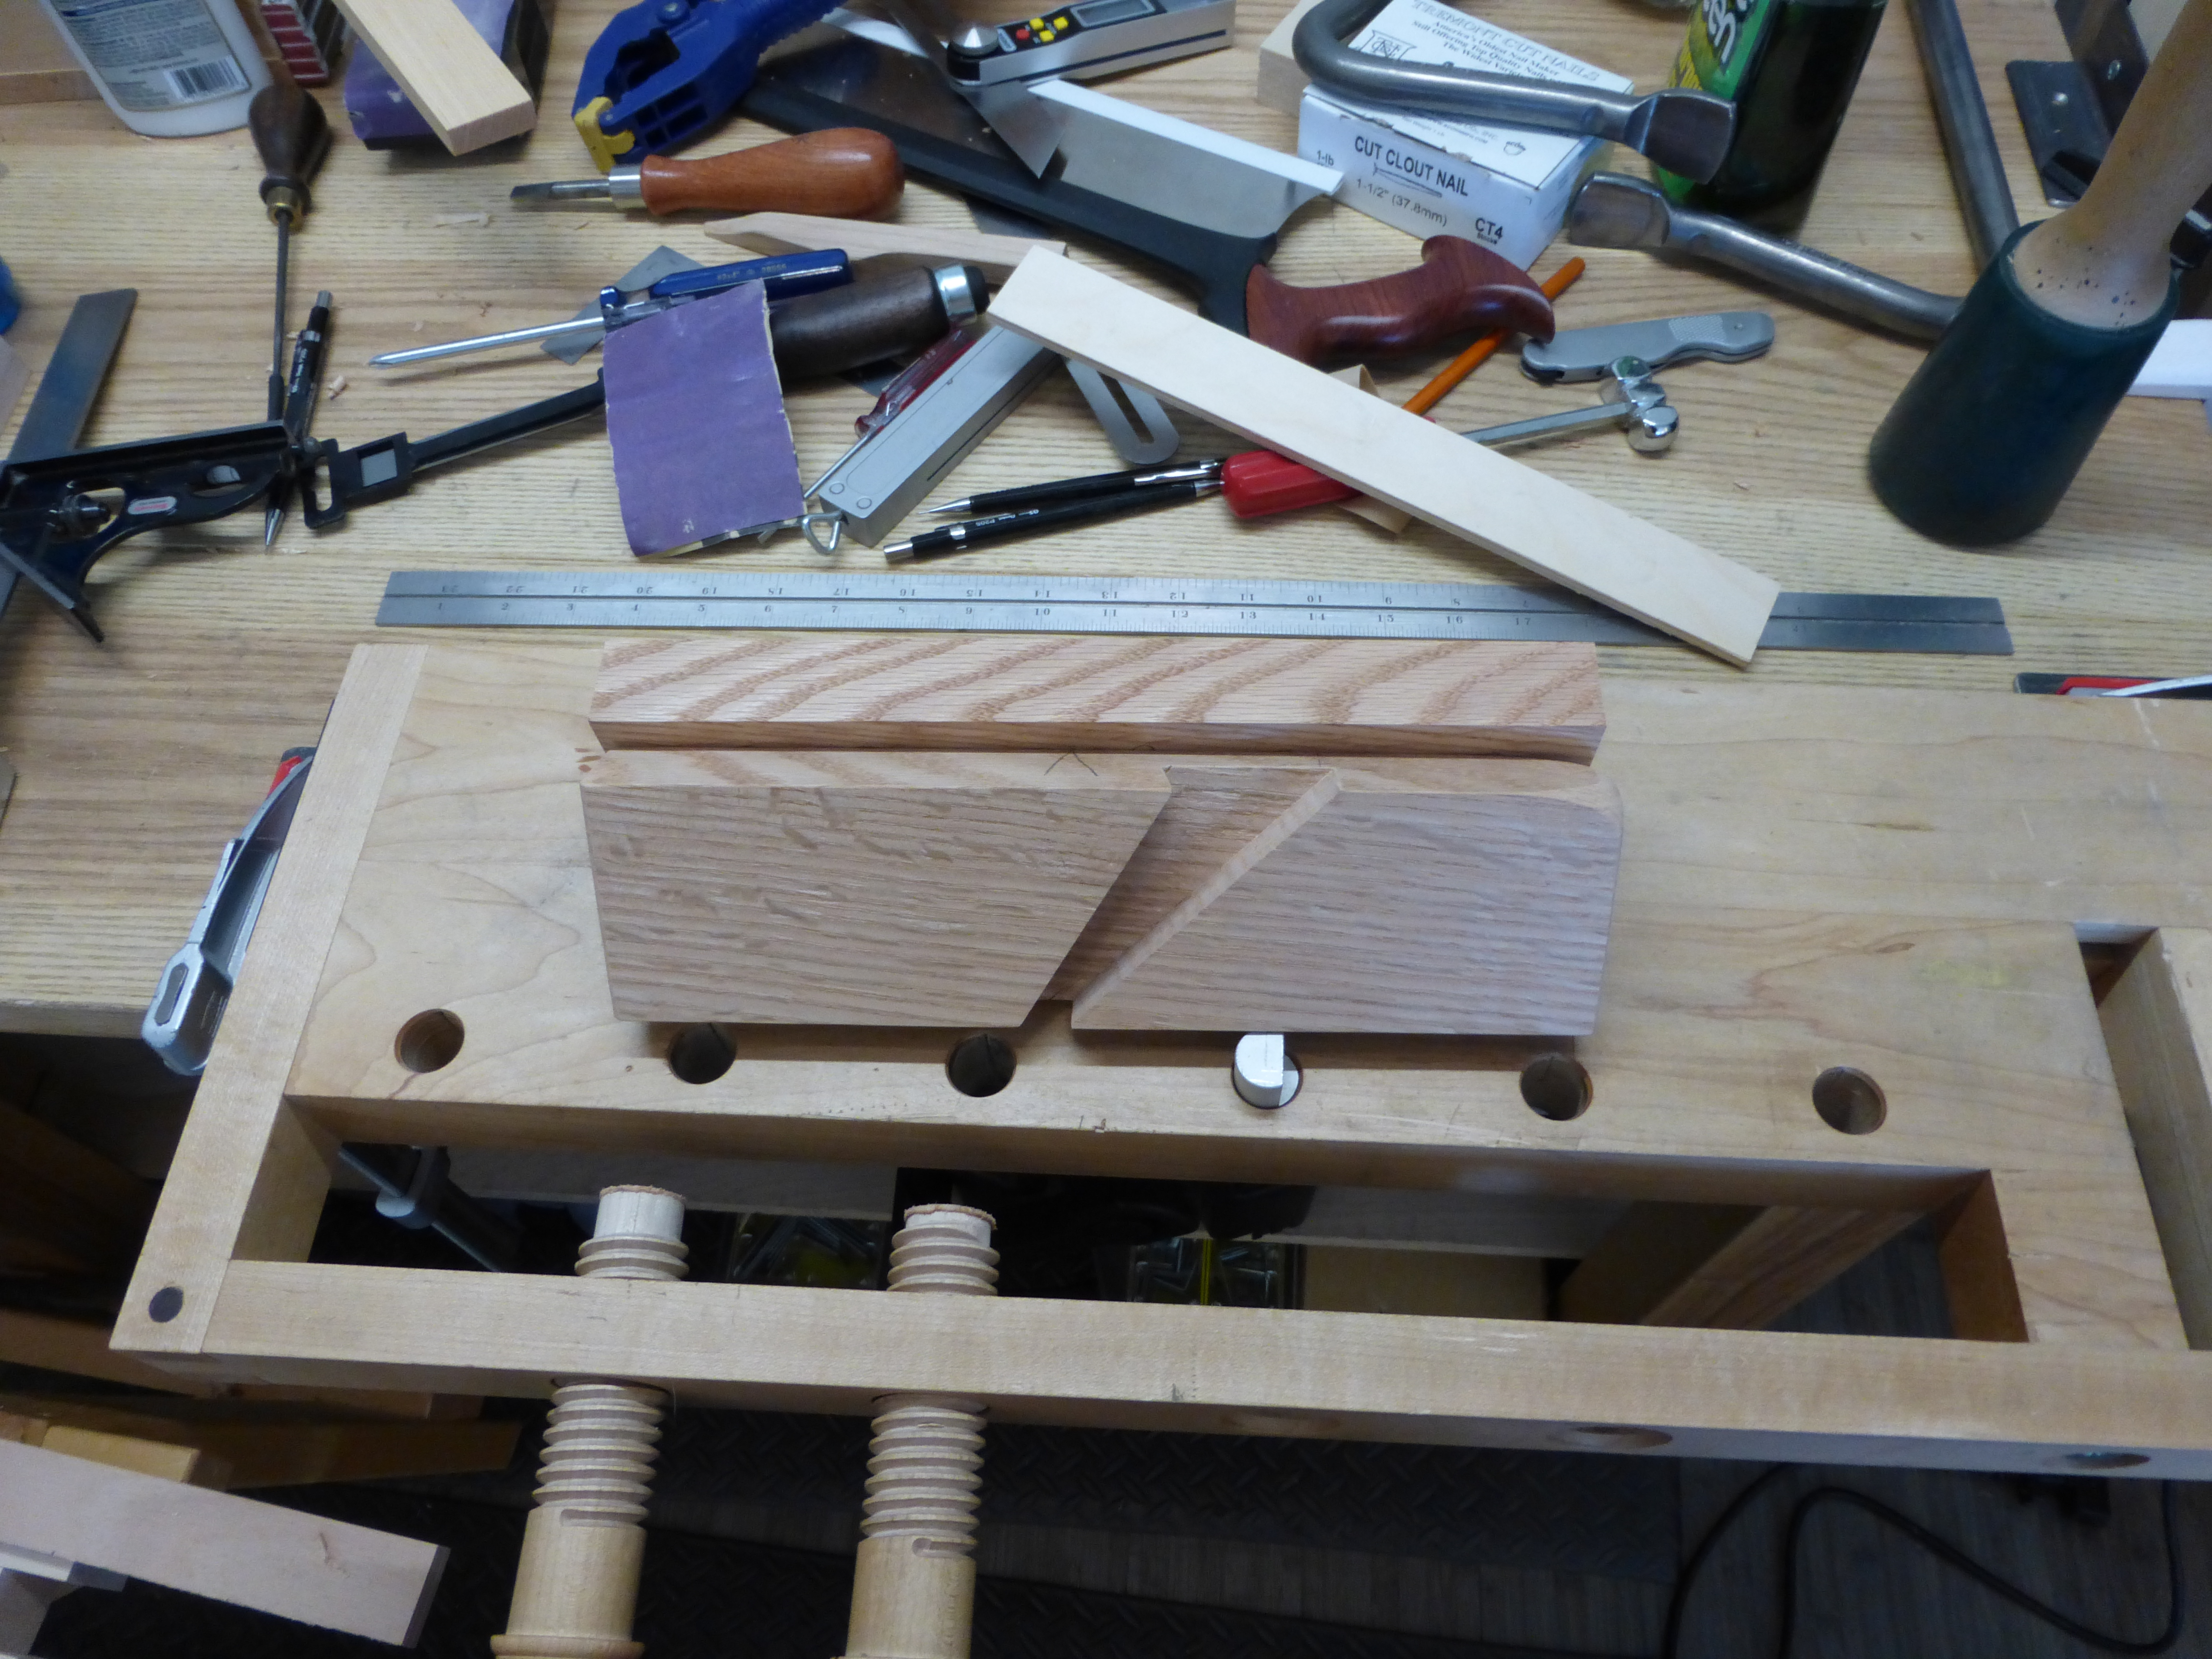
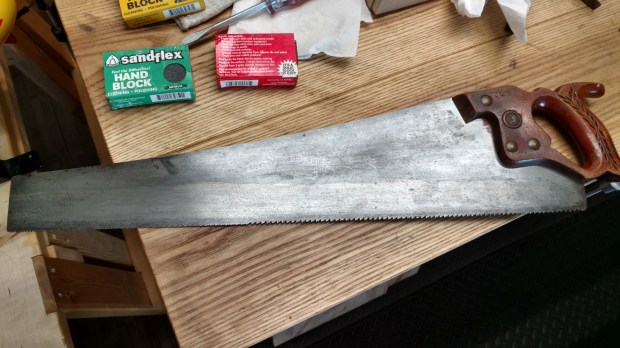
This Simonds saw, a 12ppi crosscut panel saw, came to me through a family friend (a godparent, in fact). The plate was lightly rusted, with little pitting (and none near the teeth). Sandflex hand blocks and some elbow grease quickly led to a passable shine. And the Etch even survived the rust removal process. The plate was slightly breasted along the toothline: unclear to me if the breasting was OEM or a product of uneven filing over time.

Made from 1901 to 1926, according to teh interwebs.
The handle is also in excellent shape, if slightly paint-caked around the plate. There is some chipping around one of the saw nuts (probably my doing), but otherwise, the finish is consistent and no work was needed. I may ease the top tongue on the handle to fit my hand better, but I’d like to see how it works before I do.
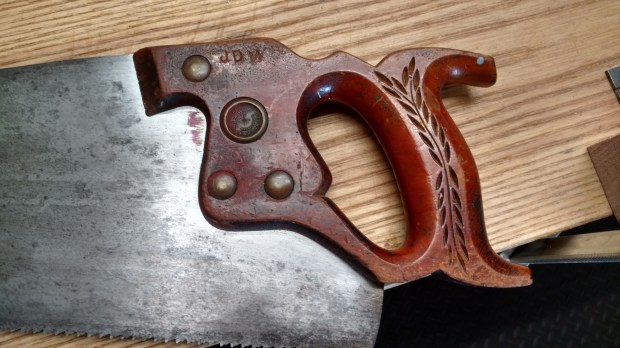
No lamb’s tongue, but whatever.
The only real problem with the saw was the teeth. One side of the plate, the were filed much smaller than other. My best guess is the crosscut filing was consistently done out of horizontal and without flipping the saw around between sides. So my choices were: (i) file the teeth completely away and start all over or (ii) reshape the saw into a 6+ tpi rip saw. There is a great Paul Sellers tutorial on recutting saw teeth, but a 6+ tpi rip saw will fill a gap in my tool chest.

Notice the sharp teeth on the left even after heavy jointing with a flat file
I’m not finished with it yet, but I think reshaping was the right choice. I already own a 10 tpi rip pattern panel raw (which is great for all-around work, including cross-cutting to rough length), but my only other rip pattern panel saw is 4.5 tpi (too coarse in my experience for hardwoods). This saw will almost split the difference and give me a more aggressive option for hardwoods and softwoods alike.
And worse comes to worst, I’ll file them flat and start all over again. There is plenty of plate left. Either way, I’m going to need a new 7″ slim file after this.
JPG