Month: September 2017

To Last Forever

Some of my pieces are utility furniture that could easily be purchased at an IKEA or Bed, Bath & Beyond.  And those store-bought pieces would serve their purpose just fine for a modest price.  But instead, I choose to make these things by hand.  “Why?”, you ask.  Three reasons, really.

IMG_20170923_123510

A very simple wall rack for towels, in situ.

The first reason is probably the most obvious: I enjoy the making.  If I didn’t derive extreme satisfaction from the work of my hands, why bother with the sometimes-arduous act of hand tool woodworking?  And I certainly wouldn’t write about.

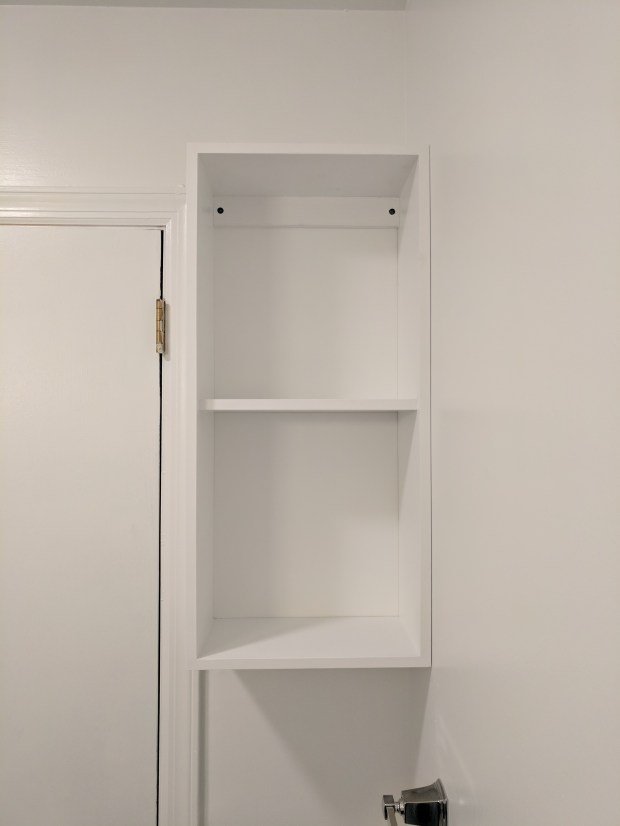
The second reason is probably also obvious: I can make to exact specifications.  Store-bought items are rarely just the right size.  For example, I needed a wall rack for towels that could fit behind a bathroom door.  It also had to hold all my bath towels and hand towels and allow the door open all the way.  What is the likelihood I would find a 14″ x 30″ x 7.25″ rack at a store?  And in the same color white as the walls?  Possible, but unlikely.

IMG_20170924_085658

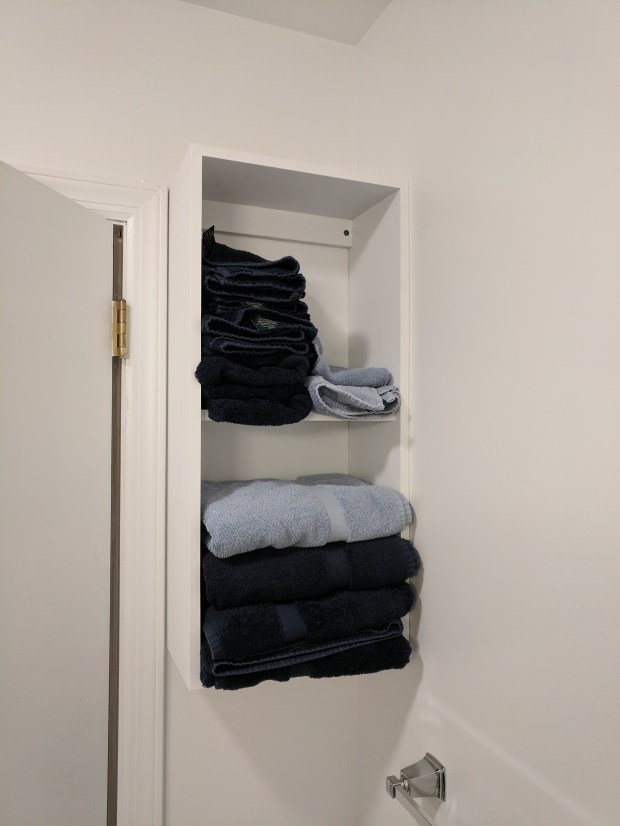
Some of the towels are in the laundry or on the hooks/racks.

The third and final reason is less obvious: I can make something that will last.  This is the core of the Christopher Schwarz philosophy of Aesthetic Anarchism.  The work of my hands is far more durable than anything I can buy at a store.  Dovetail and housing joints  in pine are stronger than metal screws and dowels in MDF by orders of magnitude.  Barring catastrophe or relocation, I will never again need to make another behind-the-door hanging cabinet for the spare bathroom.

IMG_20170923_123532

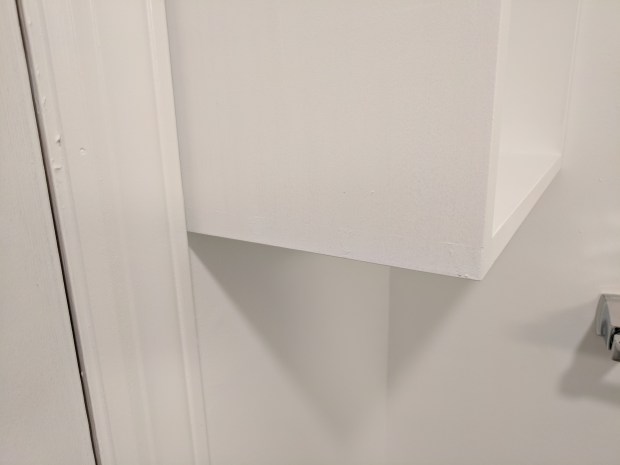
Thar be dovetails under that paint.

I do not discount the labor required to produce the piece.  But, in my mind, the labor costs are worth the benefits of making it myself.

JPG

In Praise of Dadoes

Sometimes it feels like the only joinery I cut is dovetails.  A distant second to dovetails are dadoes (a/k/a housing joints).  And the mortises and tenons I cut for the ash sitting bench felt like the first I’d done since building my workbench, and the first for furniture in years.  I

n my view, dadoes are the easiest (and most satsifying) joint to get right.  You can even cut the dado overly-tight and later fix the mating piece to fit.  The thunk of a fully-seated housing joint is a beautiful thing.  And it can be a very strong joint, in the presence of glue or nails (or both).  

IMG_20170913_205554

An overly-tight joint works quite well in compressible pine.

Whenever possible, though, I will use a stopped dadoes for the show face of a piece.  A through-dado is just fine if it won’t be seen (either on the back of the carcase or covered by a face frame) or the piece isn’t fine furniture.  But on the show face, a through-dado looks too much like a mortise haunch to me.  No matter how perfect it is, I’d rather have the clean shoulder line.

IMG_20170913_205539

Isn’t a dado pretty much a shallow mortise with a shoulderless tenon, anyway?

The trickiest part, I find, is the act of fitting the mating piece into the final joint.  Boards can cup between dimensioning and assembly.  Driving a cupped board into a straight dado is a recipe for brusingt the surrounding face grain.  To combat this, I clamp on a caul to flatten the mating piece.  After it’s seated, the dado itself will hold the board flat.

IMG_20170913_211830

Dovetails typically do this work without need for a caul.

On an unrelated note, I’m deciding on whether to paint the wall cabinet before I glue it together.  I wouldn’t normally, but I’m using latex (not milk) paint for this one.  So working out the kinks on the underside of the bottom board before assembly is probably a good idea.

Probably.

JPG

Needing Something More

It’s a magic thing.  Starting from 7 linear feet of home center 1×12 eastern white pine. Adding the plane, the saw and the chisel.  Then ending up at the finished piece.  In this case, a 14″ x 30″ x 7.25″ wall cabinet, with through-dovetails at the corners and stopped dadoes for the shelf.  It is as perfect as I am capable of making.

IMG_20170913_212240

And perfect for hiding in a bathroom corner behind a door!

But it looks a bit plain to me.  I can only imagine how drab it will be when painted grey to match the vanity in the bathroom.  Rather than shape the sides, though, I may spruce it up with small molded face frame.  Or perhaps just an applied moulding on the shelf.  In any event, something I can do with moulding planes.

It feels like everything I make is square and flat.  Maybe it’s time I learn to cut compound dovetails.

JPG

A Small Oversight

I’ve been on a shop appliance kick lately, including some necessary upgrades for the workshop itself. In addition to finally hanging some proper lighting, I also added a parallel clamp rack to the side wall. I have two more such racks; I just need some more washers to hang them correctly.

IMG_20170902_091015

Much harder to knock down, now.

I also felt it was time for a tool rack on the back side of the workbench, a la Monsieur Roubo. With a scrap of 1/2″ baltic birch and some pine offcuts, I knocked together a rack that gets the spacing right for my chisels and other everyday tools.

IMG_20170904_104420

Holes on 1 5/8″ center are just right for Narex chisels (rather than the 1 1/8″ in my tool chest).

I am 100% certain this would have been a 20-minute job if I owned a table saw. Instead, it was about 2 hours of planing, spacing and gluing (not including drying time), but the result was worth it.

IMG_20170903_213245

That block plane is a clamp.

There is only one problem: I never squared the back edge of my workbench. Time to debate whether to remove the top from the frame so I can square the back edge, or just attach a wedge to level out the surface.

In the meantime, I think I’ll make a “Basic Project” out of it.

JPG

Walking on Sunshine

I had intended to call this post “Let there be Light: the Revenge”, but thought better of it in the end. But the point is the same: proper illumination is an integral part of doing quality work (woodworking or otherwise).

It’s not pretty, but I don’t want to hardwire any fixtures yet.

By now, that I swear by these LED light bars is not news. But as always happens, there is some finesse in the hanging. To hang properly, the hooks in the ceiling should be about 45 inches apart. But in the orientation I desire, that meant hanging on studs 48 inches apart. Too far for just the S hooks to reach.

My solution? Twist some leftover coat hangers from the Roman Workbench mockup.

And I got to use my electrical pliers!

Each is about 5 inches long and much sturdier than the thin wire that originally came in the box. Nothing fancy, totally free, and quick.

The simplest solutions are always the best.

And now I can see what I’m doing. And isn’t that really the point?

JPG

A Brief Flashback

My post the other day reminded me that I never actually posted this.

Once upon a time, as a supplement to my Milkman’s Workbench, I made what I called a “planing slab”.  It was 6 feet long, 13 inches wide and about 2 inches thick (after several flattenings), with a Veritas Inset Vise on one end.  It clamped to my dining table with angle iron, just like the Milkman’s Workbench.  And now, it has reached its full potential.

wp-1480513262955.jpg

Yes, that’s a second Japanese-style saw horse as well.

I had always meant to add a cleat to the underside so it could function like a Japanese-style workbench.  Nothing fancy, like the sliding dovetail shown in the source material.  Just dado and glue.  I used PVA, so I’m pretty sure it’s permanent.

wp-1480514705774.jpg

So tight, it needed clamp persuasion to seat.

The most important thing I’ve learned in this process is that the coefficient of friction on douglas fir is not significant.  A layer of adhesive-backed sandpaper on the underside of the slab in front of the cleat or (better yet) on the tops of both sawhorses does wonders to keep the slab in place.  A couple of F-style clamps holding the cleat tight against the front saw horse also work.

JPG