Only by working on a low bench, like the plywood roman workbench, can you truly understand what they’re all about. And after a week or so, I can definitely say there is something to finding the correct height for your body. I’m just a shade over 5′ 10″ tall and I find 19 1/4″ to be the right height for saw benches. And of the two low workbenches I’ve built in the past, one was 19 1/4″ and the other was 19 1/2″. Both are very comfortable heights for me. I build sitting benches within this range as well. It’s the height from the ground to the bottom of my kneecap.
Like this one.
But I’ve been working with the plywood Roman workbench propped up on my existing saw benches, which are already 19 1/4″ high. That means the working height of the plywood Roman workbench is currently over 22″ high. WAY too high for me to work comfortably. I’m on my tiptoes most of the time, which is at least a good calf workout. So let’s make some mini sawhorses out of construction grade 2×4’s to bring the slab to the correct working height.

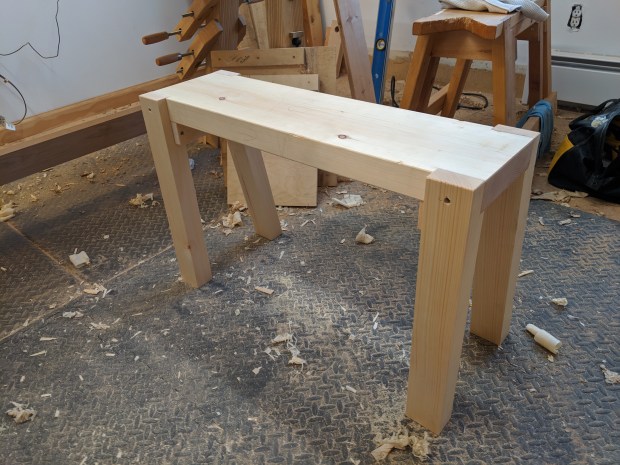
This is where we are going.
I always start with the math:
First, stand straight up with your feet flat on the floor and measure from the floor to the bottom of your kneecap with a tape measure. That is your overall target height (in my case, 19.25″). Second, subtract the thickness of the plywood slab (2.875″ for me). So I need to raise the slab 16.375″ (or 16 3/8″) off the ground. Let’s round up to 16 1/2″ to make the math easy.
In the United States, construction lumber may be called “two by’s”, but it is really 1 1/2″ thick. I dug through the stacks at the local Death Star and found two, 10 foot long 2×4’s in Douglas Fir that were relatively straight, relatively clear and relatively dry. You could, in theory, get everything you need from a couple of eight footers, but why risk it?
Each mini sawhorse consists of six boards, all cut from 2×4’s:
- Two foot boards (20″ long or so)
- One top crossbeam (16″ long or so) – the freer of knots, the better
- One lower stretcher (cut to fit, but around 14″ long)
- Two vertical posts (total height of the sawhorse, minus 1″ [or 15.5″ in my case]) – these should come from the clearest sections of the lumber. No knots at all, if possible.
Start by preparing the boards. If your stock is straight and square and out of twist already, give it a quick smoothing pass and proceed to step two. If not, and you’re feeling like a machinist, plane a reference face and square up a reference edge, then bring the opposite face and opposite edge into parallel. I only had to take off about 1/16″ of total thickness on each board, so I’m sticking to the round numbers for purposes of this guide.
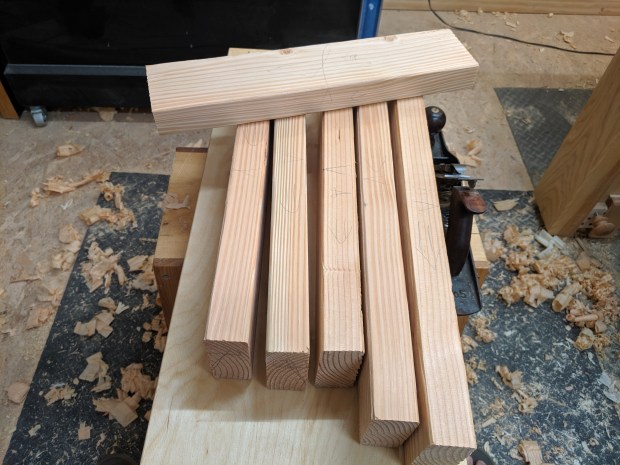
Face mark, square mark, grain direction. Every time.
Each post connects to the foot with a 1/2″ through tenon. For the mortise, bore with a 1/2″ bit and pare to the lines, or chop with a chisel, up to you. I chopped with a 1/2″ chisel to keep my skills up. I also prefer to split my tenons, rather than saw down the cheeks. But it is precarious work to split tenons without a vise. After everything is fit, shorten each tenon to about 1/8″ less than the thickness of the foot board to give some clearance when it sits flat.

One of two.
With one of the posts firmly seated into its foot, measure up to the total height of the finished sawhorse, minus 1″. Cut off the post at this line and mark and use it to transfer the mark the other post (while in its mortise) . This should ensure the two leg assembles are close to or exactly the same height. Now, assemble each leg assembly with glue. I drawbored these mortises and tenons too, but it’s not necessary. Nails or even screws would be just fine to reinforce the joint.
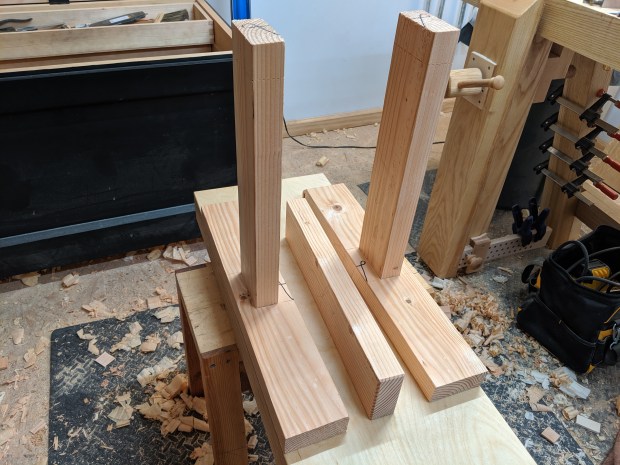
I think this shot was pre-drawboring.
The top beam attaches to the posts with dadoes that are inset from each end of the beam by the same distance the post is inset from the outside of the foot (in my case, 1″). Determine the depth of the dadoes by subtracting from the overall thickness of the beam the height you need the beam to rise above the leg assemblies to get your final height (in my case, about 1/2″ dado depth). Do your best to get tight dadoes, but they will be reinforced with dowels after the glue dries. Err on the side of too narrow, as the construction lumber will compress.

With dadoes seated.
The stretcher connects to the legs with lap joints. You can use the finished top beam to transfer the distance between the shoulders of the lap joints. I trimmed the lap joints to be flush with the outside of the posts, but that’s not strictly necessary. I didn’t get a good picture of the lap joint process, but take a look here.
Glue the top beam onto the posts and seat the stretcher in place while the glue dries. This will help keep everything square during glue up. Then glue the stretcher to both the legs and the feet. After the glue dried, I drove a pair of dowels through the top beam into the posts and couple of nails through the lap joint on the stretcher into the legs. This should help with any wracking (front to back and side to side).
And then do it all over again.
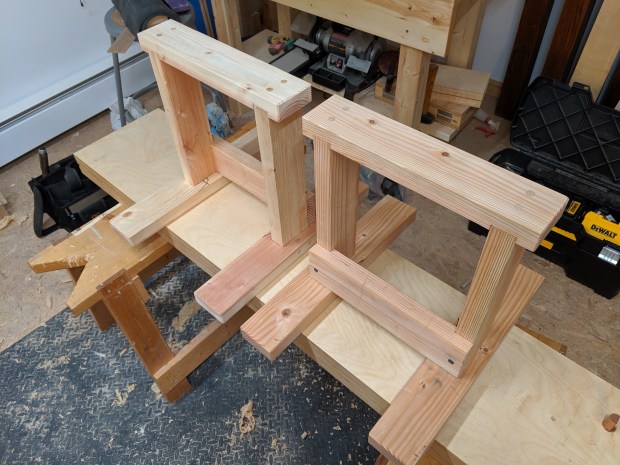
One is somewhat heavier than the other because they’re made from different 2×4’s.
I’ll be taking a slight detour in the next post to make some more workholding for future projects.
For now, Happy Birthday, America!
JPG

James,
Good tick tock. Thanks,
ken
LikeLike