I’m not quite ready to abandon my upright Stent Panel Workbench for the low, sitting variety. But I am ready to correct something that’s bugged me ever since I finished the workbench in the first place: the back wing. It never stayed flat on its own, let alone in plane with the main slab of the bench. There is clearly some design flaw, even though I allowed for wood movement and ample support with three posts mortised into the slab. I’ll re-use the wing (which is 86″ x 10″ x 2″ ash) for another project.

I need more 1″ holdfast holes.
The main slab of the workbench is only 12.5″ wide. That’s nothing to scoff at, but it’s not nearly enough real estate for tasks like gluing up panels or project assembly. And there is pretty much no place to set down tools so they are close at hand. So first up is a tool tray that spans half the area where the wing used to be. After much deliberation, I’ve approached this a bit like a Dutch tool chest. Dovetails at the bottom corners for maximum strength, nailed on back. In 3/4″ poplar, because there was a very nice piece of 1×10 at the home center when I was buying some more 1×12 white pine for general building purposes.

Reasonably consistent color for poplar, and a decent color match to ash once oiled.
The finished tool tray is just a hair under 37″ wide (the posts themselves are exactly 37″ apart) and 6″ deep. There is 3.5″ of clearance below the benchtop. This is plenty for a bench plane on its side and all the other tools I’d like close at hand. Speaking of which, I decided to attach the tool well to the left side of the bench (the end with the leg vise), which seems like the best place to keep tools at hand.

Because if it can’t fit a hand plane clear of the workbench top, it’s not a good tool tray.
There are a few ways I could have hung the tool tray to the bench. But the simplest and easiest was to add some runners to the ends so it just hangs on the posts. The posts are not perfectly in wind, so I clamped the tool tray to the bench and nailed the runners in the right position, rather than squaring them initially and planing them down to fit. Some small blocks, nailed onto the posts, keep the tray from sliding away from the slab.
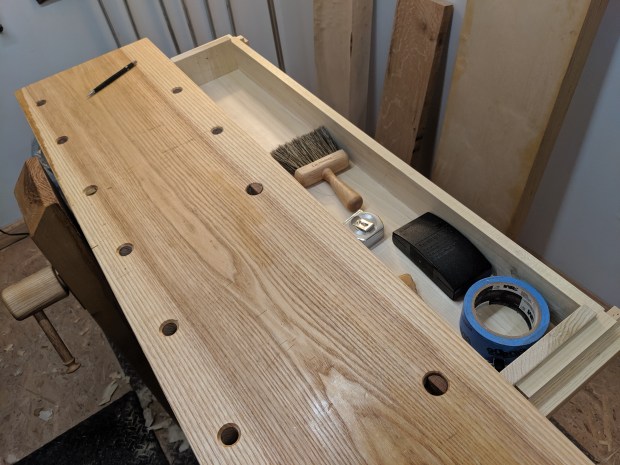
Don’t tell anyone, but I used the 18 gauge brad nailer to attach the runners and blocks.
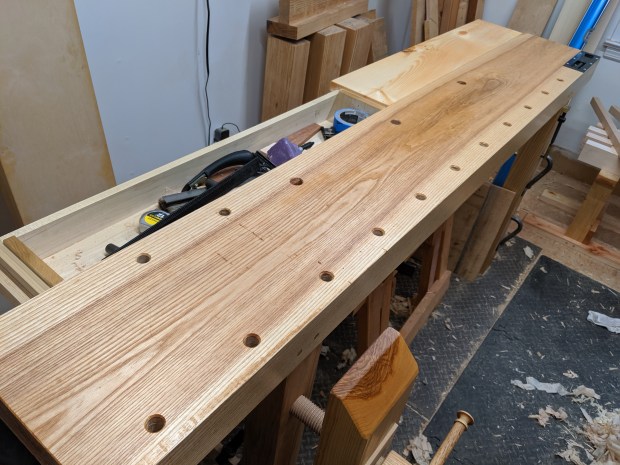
The ends of the tool tray are in plane with the workbench slab. This was intentional, as originally I intended entirely replace the back wing with two tool trays. But after working on the bench with the tool tray for a few days, it became very apparent that I needed at least part of the bench to be solid for the full 20″ of depth.
From 9 months or so of working on this bench, it’s become clear that the wing doesn’t need to be terribly stout. It certainly doesn’t need to be 2″ ash reinforced with 2″ angle iron. So instead I grabbed an otherwise somewhat useless 2″ pine off cut that’s lapped onto the posts. There are a few wire brad nails acting like dowels to support the seam with the main slab and a couple more wire brads through the board into the posts to keep everything in place. Net it, this board can move much more freely with seasonal expansion and contraction than the old wing could. But it will be easily replaceable if I get neurotic and replace it with ash again (which, let’s face it, I definitely will).

And the color match isn’t terrible, either.
For optics, but not functionality, I will probably nail a board to the end of the extension to bring it flush with the right end of the bench (and provide a bit more resistance to cupping, like a breadboard end). Absolutely nothing ever happens all the way at that back corner. It’s just to make it prettier. I could do the same thing at the back right corner, but the end of the tray (which is flush with the bench top) is already in line with the last bench dog hole, so it’s not strictly necessary either.
I unfortunately can’t tell if the color match is getting better or worse with a second coat of Tung Oil. Maybe I just have to open the blinds and let the sun shine in for a couple weeks.
Or paint the whole thing black!
This is a good time to mention that 36.25″ is a bit too high for comfortable hand planing at my height (I’m 5’10”). Even if it is better for sawing and chopping. So I’ll eventually trim about 1″ off the ends of the legs. Which is easier said than done, as the back legs are angled.
But I’ll give it a try and report back.
JPG

3 comments