You may have noticed the tapped screw hole or the parallel guide slot in the front left leg of the new dining room console table. It’s highly unlikely to ever be used, but one can never have too many available vises, right? I really should be working on the bottom shelf for the table, but when have my priorities every been straight? I freely admit all of this is a vanity exercise, as the vise will just live on the shelf of the console table.
Plus, I had the 1 1/2″ hard maple screw handy (the spare for the leg vise on my main workbench, the stretcher-less Stent Panel workbench). I also had some leftover 1/4″ hard maple to make a garter (more on that below). And it would be a shame if they went to waste.
No “Sunk Cost” fallacies to see here.
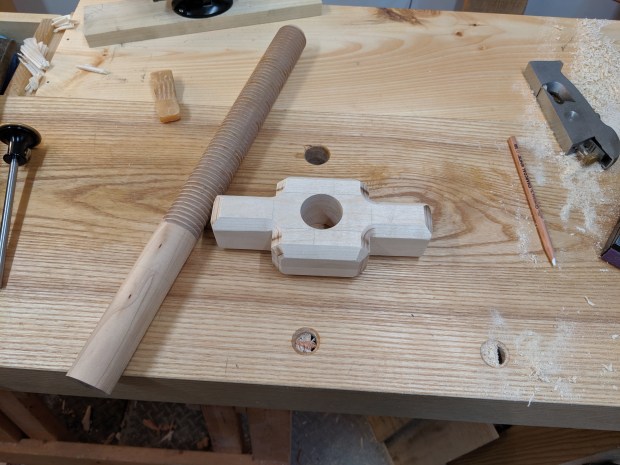
I’d like this leg vise to be as low profile as possible. So, instead of a cylindrical vise hub with a through handle, I shaped a wing nut from soft maple to act as the hub. This not unlike the Holy Roman Hurricane Nut for the crochet on my old work bench. Some wood glue and a through dowel reinforcement should make a permanent and robust bond between screw and hub.
Before I know where to attach the hub, however, I need to plow the groove for the garter. The garter affixes the vise screw to the vise chop and allows the chop to move with the screw. Otherwise, you have to move the chop by hand (which is fine, I guess).
I still don’t have (or want) a lathe, and am certainly capable of cutting the groove completely freehand. But sticking with what works is no fun at all, so let’s try a different method. Ingenuity is what small space woodworking is all about. But “ingenuity” is really just code for “making due with what’s at hand”.
I didn’t get a before shot.
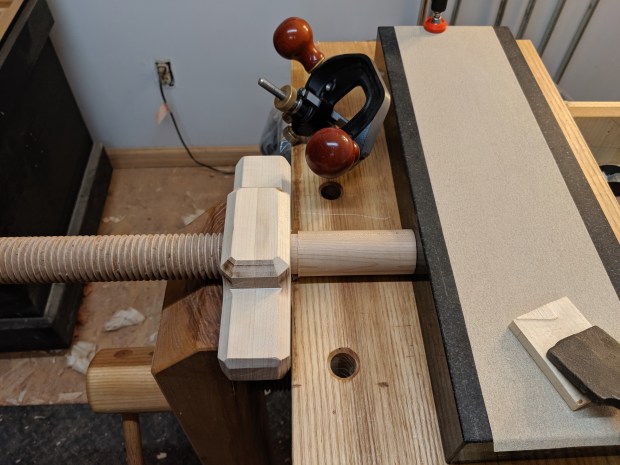
Conveniently, the vise hub I just made will help hold the screw and my machinist granite slab will act as a convenient stop as I rotate the work with my left hand. Now all I need is a way to plow the groove with my right hand. A chisel would certainly work, but one handed chisel work is precarious at best and likely to wander.
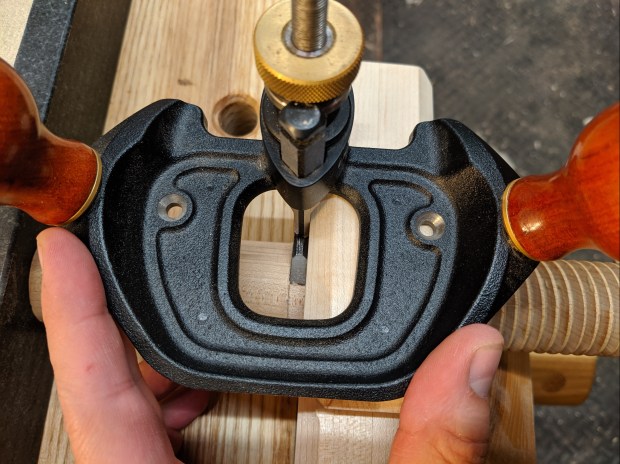
How about a router plane registered against the vise hub? I have a 1/4″ blade for my router plane. And the vise hub would work really well as both a fence for the protruding blade and a platform for the body of the router plane to stabilize everything.
Let’s play “Spot the ‘chisel hands’ scars”!
Plowing the garter groove this way takes a while, but probably not any longer than getting the screw centered on a lathe. And it certainly cramps up the hands. But taking it slowly yields a fairly clean, fairly uniform groove. Or at least it did for me. The bottom of the groove had an overall diameter of just under 1 1/4″ when all was said and done.
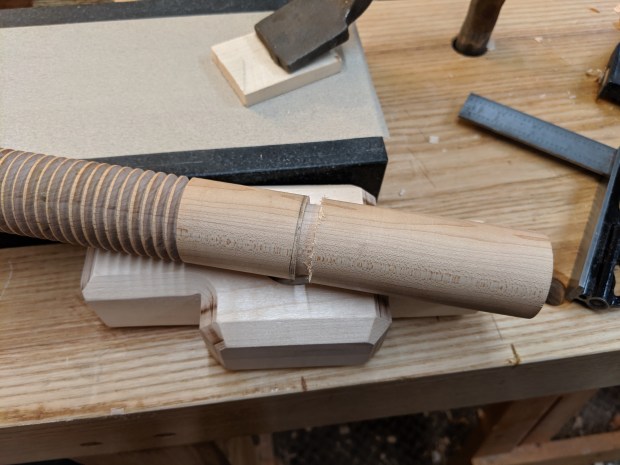
The vise hub keeps the inside of the hole clean, but the outside needs minor cleanup.
When preparing the garter, some CA glue held the two halves of the garter stock to a sacrificial board for drilling the clearance hole with a 1 1/4″ forstner bit on the drill press. I then attached the garter to the vise chop with some countersunk No. 10 slotted screws to check the fit. The vise chop is laminated from the same soft maple as the vise hub. A couple dabs of hide glue will reinforce the bond between the garter and the chop after final assembly.
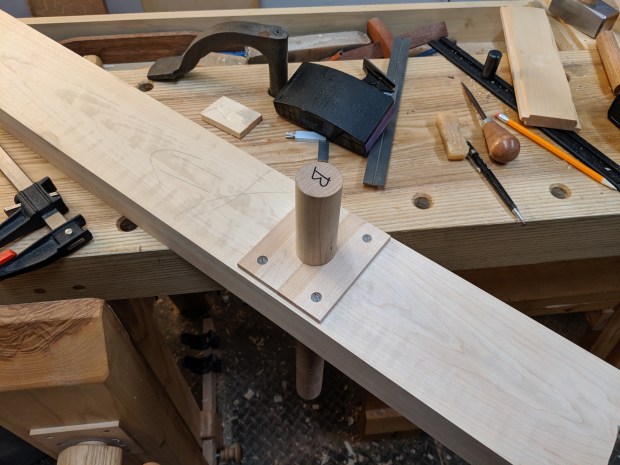
“B” stands for “Backup”.
I didn’t get a picture, but I also trimmed the vise screw to length and glued it onto the screw before adding a 3/8″ birch dowel to lock everything in place. I will paint the vise hub with “Linen” milk paint like the undercarriage of the console table, and the chop will be painted “Coastal Blue” like the table top.
The pinboard for the vise is up next, but that requires a different type of ingenuity. In that case, “ingenuity” is really just code for “patience”.
You’ll see why, soon enough..
JPG

One comment