Where we last left off, I had just about made a functional workbench for the cost of seven Douglas Fir 2×4’s and some construction screws. Before I knew it, I had a sturdy surface that (although a bit narrow, in retrospect) was ready for some serious woodworking. There was just one problem: I had cheated and not even realized it.

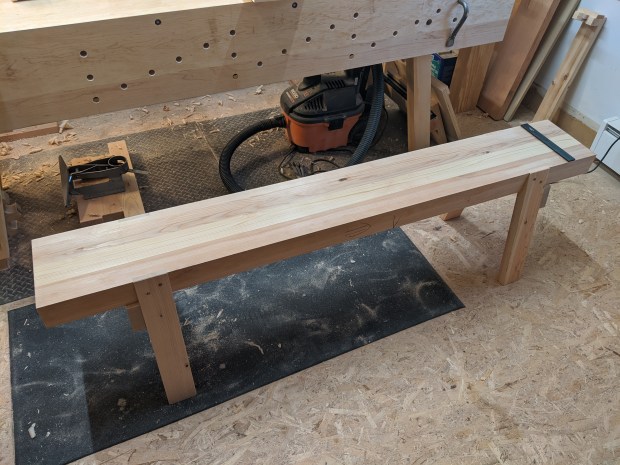
Nice looking bench, if I say so myself.
You may have noticed the Veritas low profile planing stop shown above. They are easy to install (you just drill a couple of 3/4″ holes) and super functional and I swear by them. But there is no 3/4″ bit in my basic tool kit yet. Since I’m not yet ready to compromise this intellectual exercise, the planing stop has to go. Some West Systems epoxy does the trick filling the holes.

Faces in things.
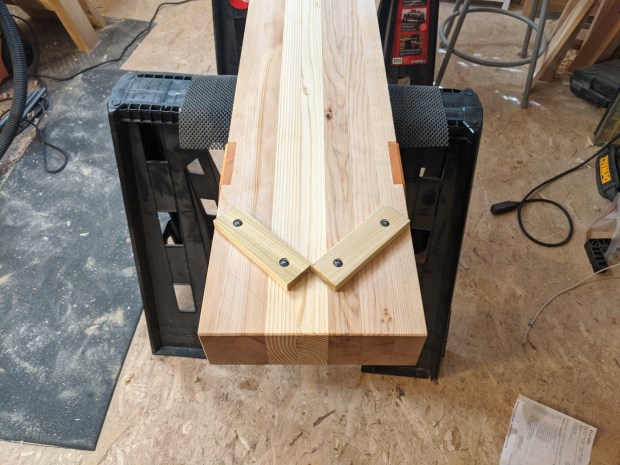
3/4″ drill bit aside, I definitely have a regular set of drill bits and a hammer. So instead of a commercially-available planing stop, let’s instead make a palm, which is a different type of planing stop that’s useful for restraining boards both on the their faces and on their edges.
For those unfamiliar, it’s literally just two 1/2″ boards, nailed on at 45 degrees to the length of the bench and 90 degrees to each other. I used 6d die-forged nails with the heads counter-bored a bit so I don’t accidentally ding a plane sole on thinner stock. Narrow boards (and boards on edge) wedge themselves into the palm (a bit like a crochet), and wider boards but up against the points (like a straight planing stop).

Not sure what additional wisdom you’re looking for here.
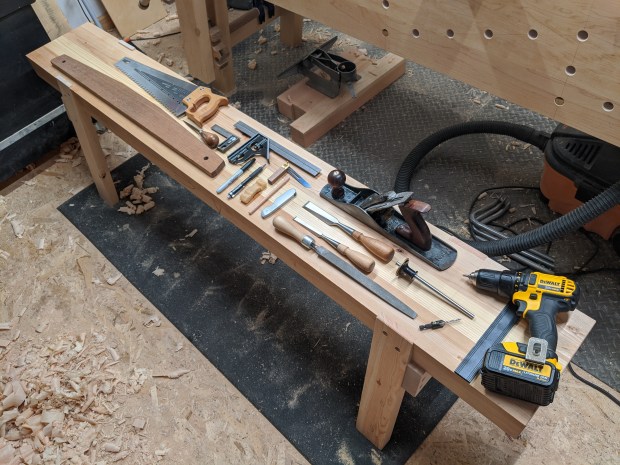
I think that’s all the workholding I’ll need for now. That said, the list of tools has expanded a bit. The current list of all tools I used for building the bench is as follows:
- No. 5 Jack Plane
- Chisels: 1/2″ and 1″
- Panel saw
- Double-faced mallet (not pictured)
- Claw hammer (not pictured)
- 12″ combination square
- 4″ try square
- 36″ straightedge
- 12′ tape measure (not pictured)
- Folding marking knife
- Wheel marking gauge
- Small folding bevel gauge
- Birdcage (square) awl
- Mechanical pencil, etc.
- Medium cut straight file
- Cordless drill driver with standard drill bits and driver bits (bits not pictured)
But I think it’s fair to say that if the entire tool kit for making a workbench fit on the top of that workbench, then it qualifies as an apartment woodworking bench.

I plan to immediately add a large router plane, also. I can live without it; I just choose not to.
Up to this point, I’ve just been keeping track of the tools used and putting them back in my floor chest as I go. But a full size floor chest is not exactly within reach for most small space woodworkers. To be honest, my full size floor chest (40x24x24, not including the casters) is probably too large for my 12×13 bedroom workshop shop. So it’s time to make some tool storage that’s more appropriate for a small shop.
I think a tool chest in the Dutch style popularized by Christopher Schwarz and Megan Fitzpatrick is the best option here. I’ve built two of them before (one large that was gifted to a friend, one extra small with just the angled compartment that is just a residential toolbox) and in my experience they can be built with minimal tools. I’m not bold enough to cut dovetails pins first on a low workbench, so I’ll stick to rabbets and nails/screws for this one. Should be plenty strong for something that will live on a saw bench up against the wall.
But here are the rules going forward for this experiment:
Rule #1A: before I can pull a tool from my floor chest, I have to first do the operation (if possible) using one of the simple tools listed above. For example, when making the workbench, after I cleaned up one of the leg mortises entirely with chisel, I could have swapped in a large router plane to do the same job (I actually did this for one where the grain was particularly unruly). Another example: once I hand crosscut and square a board the first time, I can thereafter use my chop saw to move things along on the rest of the cuts.
Rule #1B: if the operation cannot be comfortably (or safely) done on the low workbench with a simpler tool, I can pull the correct tool as long as it can will in the Dutch tool chest. If the correct tool will not fit in the Dutch tool chest and the operation is not comfortable (or safe) to do on the low workbench, I cannot perform that operation and must use a different joint/feature.
Rule #2: No vises, but clamping boards to the workbench is fair game. I have access to my full set of clamps, in fact. I’m not that much of a masochist.
Rule #3: I have access to my existing shooting board and can do the operation on my high workbench. I can certainly make another shooting board that will fit better on the low workbench (I’ve done it before). However, this same shooting board used to live on my kitchen island and I see no reason to change things up now. And shooting while standing is far easier on the back and shoulders.
Rule #4: I’m also allowed to use my benchtop drill press for the chisel rack that goes in the chest. Yes, I could do it by hand. But I’m not getting into this argument with you.
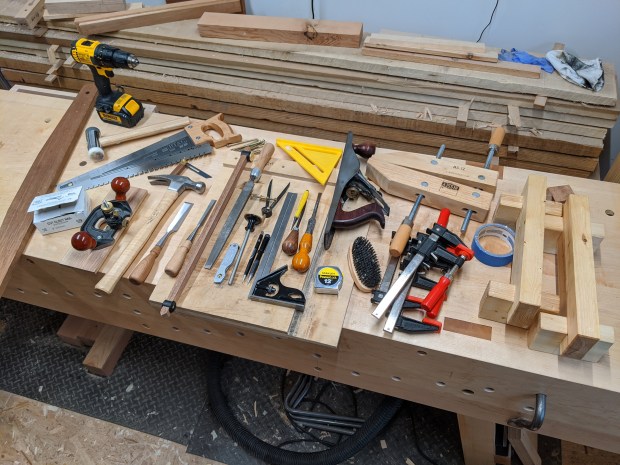
As of the writing of this post, I’m almost finished with the main part of the Dutch tool chest. Here is the full tool kit to date (not counting parallel jaw clamps and the aforementioned benchtop drill press):

Still no 3/4″ auger and bit, though.
This has been a long one, so I’m leaving it at that for now.
JPG
How thick are your 45 degree plaining stops? Looks like a good simple solution to me.
LikeLiked by 1 person
7/16 or so. The Veritas ones are about 1/4 which sometimes is too low profile for very twisted boards.
LikeLike
Thanks for sharing this woodworking article. Here you told us very clearly. Hope it will help me.
LikeLike