General

Some Rando Dovetailing

In prep for the medium-size wooden tool chest project, which I plan to knock out starting next week, I’ve been practicing my dovetails.  Some benchtop tool storage was far overdue, so I took the liberty of knocking together a few dovetailed boxes.

P1000140

Some “every day clamp” storage.  Don’t laugh at the bulk on my sharpening angle guide.  It’s super wieldy.  

And a "benchtop miscellany" tray (which will eventually be a benchtop chisel tray.

And a “benchtop miscellany” tray (which was specifically built to be a benchtop chisel tray for my eventual full-size workbench).

I don’t own a plow plane, so in each case, the bottom is simply glued and nailed to the tray frame (wire brads, until my cut nails arrive in the mail).  Don’t give into the hype: a heavy stone and a flat surface is sometimes all the clamp you need.

A heavy stone and a flat surface: sometimes all the clamp you need.

The lip is so the tray can be spring-clamped to my worktable top.  I’ll rip it off at some point and re-purpose the tray.

I’ve found the pre-sized, 1/4″ birch plywood you can buy at big box craft stores (e.g., Michael’s) is perfect for drawer bottoms.  Off the shelf, it has much less warp than a full 5′ x 5′ sheet from the lumber yard.  Plus, the inevitable offcuts make great battens and holdfast cushions.

There is also a 12.5″ x 18″ x 4″ box (corner detail seen below) that might actually end up being a drawer for something.  I’ve been experimenting with different pin sizes and techniques for hogging out waste (I’m back to the coping saw method) and they are the tightest I’ve ever cut dovetails thus far.

P1000137

Practice makes better.

Even if I opt for the rabbeted and nailed version of the tool chest, I’m glad to have gotten the dovetailing practice.  In addition, each of the boards used in these boxes was 100% hand-prepared.  No thickness planer for once.

Happy Bastille Day everyone!

JPG

The Importance of Hypocrisy

Handtool woodworking is awesome.  It’s relatively quiet and significantly dust free.  In fact, most of the time, “by hand and eye” is far faster and more accurate than “by power and jig”.

Except when it’s not.  Like when trying to square a glued-up panel that is too large for your shooting board.

For my time and effort, this is still the fastest and most accurate way to square a panel.

For my time and effort, this is still the fastest and most accurate way to square a panel.

No purest am I.  I’ll use whatever tool makes the most sense under the circumstances.  In my opinion, nothing beats a carpenter’s square, straight-edge clamp, trim router and flush trim router bit for squaring end-grain on a large panel.

Give it a try.  There is a reason my trim router (and dust extraction unit) has survived every power-tool purge in my shop thus far.

JPG

Medium-Sized Wooden Tool Chest

I just purchased the August 2015 issue of Popular Woodworking (the issue with Christopher Schwarz’ Traveling Tool Chest on the cover) and can’t wait to start work on the tool chest.  First, I need to fetch some 3/4″ pine from the lumber yard for the carcass and the trays.  From there, I’ll figure out additional materials for the rest of the pieces on a rolling basis.

I like my Craftsman Top Chest set up and plan to continue using it as long as I’m in my current apartment.  But I haven’t ever built a wooden tool chest before and would like to give it a try.  The wooden tool chest will probably find a permanent home in my next shop.

I think I should build that benchtop bench first, so I have a moxon-style vise for gang-cutting the dovetails.  I’m sure the Milkman’s Workbench is up to the task, but that might require double-sided taping the boards together because the screws on the Milkman’s can shift the work during tightening.

JPG

Aescetic Aesthetic

Among my favorite movies is Peter Jackson’s Lord of the Rings trilogy. On the special features, there is a discussion of the design for the Elvish armor and weaponry, where the conceptual artists were trying to communicate an elegant simplicity that would permit Elvish designs to cease evolving. I have a similar approach to furniture design.

wpid-20150701_191413.jpg

Still need to thickness, glue up and attach the top.

Clean lines, attractive proportions and functional appointments.  That’s my design style.

JPG

P.S.  I know I’ve been sparse on posts, lately.  It’s been a tough couple weeks, and I hope to get back to more regular posting soon.  Thank you for bearing with me.

—-Bite

I first heard the term in the sailing context. “Boat-bite”: the bruises, cuts and pinches endured in the ordinary course of being out on the water.

I (voluntarily) don’t sail anymore, but a new “—–bite” has taken over my life. “Shop-bite”: the nicks, cuts and  pinches endured in the ordinary course of being in the woodworking shop.

Woodworking is inherently dangerous. Sharp blades and bare skin do not mix well. Nor do flying chips and unprotected eyeballs.  Handtool woodworking employs far fewer spinning blades of death than machine-based methods. Chips just don’t fly out from the chisel with the same velocity as from the  plunge router. But the risks are similar and injuries can and will happen.

I am fortunate to have never had a serious injury in the shop. My worst injury was slicing off the tip of my middle finger with a marking knife, just shy of the nail (it grew back). But I suffer from shop-bite regularly.

My usual injuries all relate to hand planing. I have a fairly loose grip on the knob, so I will often lose a chunk of skin on my palm or a finger between the work and the toe of the plane when starting a pass. And I still blister a bit during long stock preparation sessions.

I have a strictly-enforced ” sharps get put away when not in use” policy in my shop, so I’ve managed to significantly reduce edge-based injuries. I will still nick myself with a marking knife occasionally, but my finger-slicing incident scared me into great care when marking. To the extent I can, I mark at the start of a session, while my limbs are fresh.

“Shop-bite” is unavoidable, but with care and respect for the tools, serious injuries can be avoided.

JPG

Christmas in June?

The Woodworking Masterclasses video course on the housing joint carrying tote is one of my favorites.  Not sure if it’s Paul Sellers in a santa cap or the beautiful simplicity of the project, but I’m a big fan of this particular set of videos.  I watched it the other day, so one of the techniques Paul Sellers teaches in those videos was fresh in my mind and of use today.

The tabletop for the angled leg side table will consist of two 24″ x 12″ boards cut from the same piece of 1″ pine.  As a result, I can use the double knifewall method shown in the housing joint carrying tote video.  By sawing between the scribed lines, each end has its own knifewall to plane down to, guaranteeing square ends and eliminating chipping from the saw cut.

I haven't used this knife in a while.

I haven’t used this marking knife in a while, either.

I don’t crosscut boards this wide very often, so it was nice to use my 22″ crosscut panel saw and some saw benches for a change (instead of my usual carcass saw and bench hook for smaller crosscuts).  Using my least twisted, flattest piece of premium pine for will hopefully mean there won’t be a ton of mill work to be done once the boards are cut to length.

Mid-cut, for illustrative purposes.

Mid-cut, for illustrative purposes.

On a side note, the table will end up overall 1/4″ shorter than it is wide/deep, which will allow me to use those felt furniture pads to get it back to cubed overall.

JPG

About Damned Time

In a vulnerable and impressionable state the other day, I splurged on a new scrub plane. I’ve mostly gotten my retail therapy habit under control as of late, but in this case, the price point was too good to resist.  I weighed the benefits of merely buying an extra iron for my No. 4, but without a bench grinder in my apartment, this seemed a less attractive option.

This is my favorite part of woodworking.

This is my favorite part of woodworking.

I’ve been managing well without a true scrub plane for a while. Lately, all my traversing is done with an exaggerated camber on a No. 4.  This is perfectly fine for pines and softer hardwoods, but some upcoming hardwood projects (real hardwoods: oak, ash and maple) made it time for an upgrade. I’ll straighten the iron on my No.4 so it can return to general purpose/shooting duties.

What drove me over the edge, though – aside from over-tiredness and crushing existential dread – was taking down the width of several long boards, where the waste was not thick enough for hand-sawing away but was too much for even a heavy-set bench plane. So I splurged.

This is my first Lee Valley/Veritas plane.  I own several of their saws (as well as some winding sticks, wheel marking gauges and other miscellany) and am always impressed with their quality and pricing.  I was nonetheless blown away by how little tuning was required.  Right out of the box, the sole was dead flat.  As was the iron, which was already ground to radius (thankfully).  After a mineral spirits wipedown to remove the shipping grease and a quick coat of T-9, I assumed all the plane would need is a secondary bevel on the iron before taking shavings.

The quality of machining is a joy.

The quality of machining is such a joy.

Christopher Schwarz did a great blog post on scrub plane iron sharpening a while back that demystified the process.  I am always grateful for his wisdom.  A quick thumbnail test, though, revealed the iron was already rather sharp.  I could polish it further, but “well enough alone” is the rule of my apartment woodworking shop.  I literally just had to center the blade and tighten down the set screws before the plane was ready for use.

Overall, so far so good.  I will post a follow-up with some pictures once I’ve had a chance to take shavings.

JPG

Another Benchtop Appliance

The wood is acclimated and the veneer press screws were delivered a while ago, so I think it may be time to finally make that bench top joinery bench. I’ve always liked the plans and I think there is some room left in a corner of the shop where it can live when not on the bench.

Maybe

Maybe

I wonder, though: is it worth including any storage underneath?  I think I’d add a drawer (or maybe just a sliding tray) to hold my dovetail saws and coping saw (and spare blades).  Not sure it’s practical to store anything else in a mobile joinery bench.

Either way, my “clamp-on worksurface” collection might be getting out of hand.

JPG

The Sound (of Mallet Blows) and the Fury (of the Neighbors)

A close second on the overall list of questions people ask me about small-space, apartment-based woodworking is, “Don’t the neighbors complain about the noise?”. I get the question frequently enough to warrant a full post response.

Woodworking, even the hand-tool-only variety, is noisy. The thud of the chisel mallet echoes down a long hallway just as the whirr of the plunge router does. The wheeze of hand-sawing is unmistakeable to even the most casual aural observer.  And other more muted work, such as hand-planing, can nonetheless audibly rattle bench-top accoutrements.

So what can you do, if you want to make furniture in an apartment or a side room and not also accumulate noise violations or the scorn of your family members?  Each situation is unique, but there are some tricks that I employ. And since chopping mortises is the loudest thing I do other than a quick orbital sanding (rarely, if necessary), I will use that as my basic example:

  1. Don’t chop mortises during quiet hours. Apartment buildings usually have a range of hours during the business day where loud noise is tolerated.  So keep your loud tasks to the daytime hours and generally be cognizant of what you’re doing.
  2. Space out louder tasks. You’ve got 8 or more mortises to chop, I get it. Chop two at 10am and then two more at each of noon, 2pm and 4pm. Short bursts of loud banging are less likely to attract attention than sustained pounding.  Use the time in between for quieter tasks, like sawing, planing or sharpening.
  3. Sharpen early and often. Sharp tools mean better results for less effort, so trim down your total mallet blows by keeping your chisels sharp.
  4. Fully support the work.  Wood vibrates and resonates when struck.  Trying to chop a mortise in a piece of wood that’s partially overhanging the bench top is not very different from banging on an impromptu xylophone.  Fully supporting the piece over it’s entire length will reduce vibration and help deaden any resonance.
  5. Dampen outbound noise.  My walls are solid concrete, but my front door certainly isn’t.  It’s a hollow metal box that works pretty much like an amplifier into the hallway.  In a pinch, I will drape a heavy cloth blanket over my front door (not unlike the soundproofing they put in music studios).  There are commercial sound-dampening tapestries that work even better, if you care to spend the money.

Some combination of these tricks will go a long way toward keeping your neighbors and loved ones tolerant of your furniture-making.  And time spent disputing noise complaints or apologizing to your family is time not spent in the workshop.

JPG

Cleaning Up a Modern Stanley No. 5

What feels like ages ago, I set out creating a list of the first tools a beginner handtool woodworker should acquire. That list has never been far from mind, as it’s the question I get asked most.

I always felt guilty, though, because one of the tools on the list I did not own: a regular No. 5 jack plane. Well, it turns out I did own one; I had just forgotten about it when I culled my tool chest during the move into my new apartment. The regular No. 5 in question is a “contractor grade” Stanley purchased off Amazon. The one with the molded plastic handles. Everyone makes bad tool purchases, but I recently took the plunge and put in the work to make it serviceable, which was less laborious than expected.

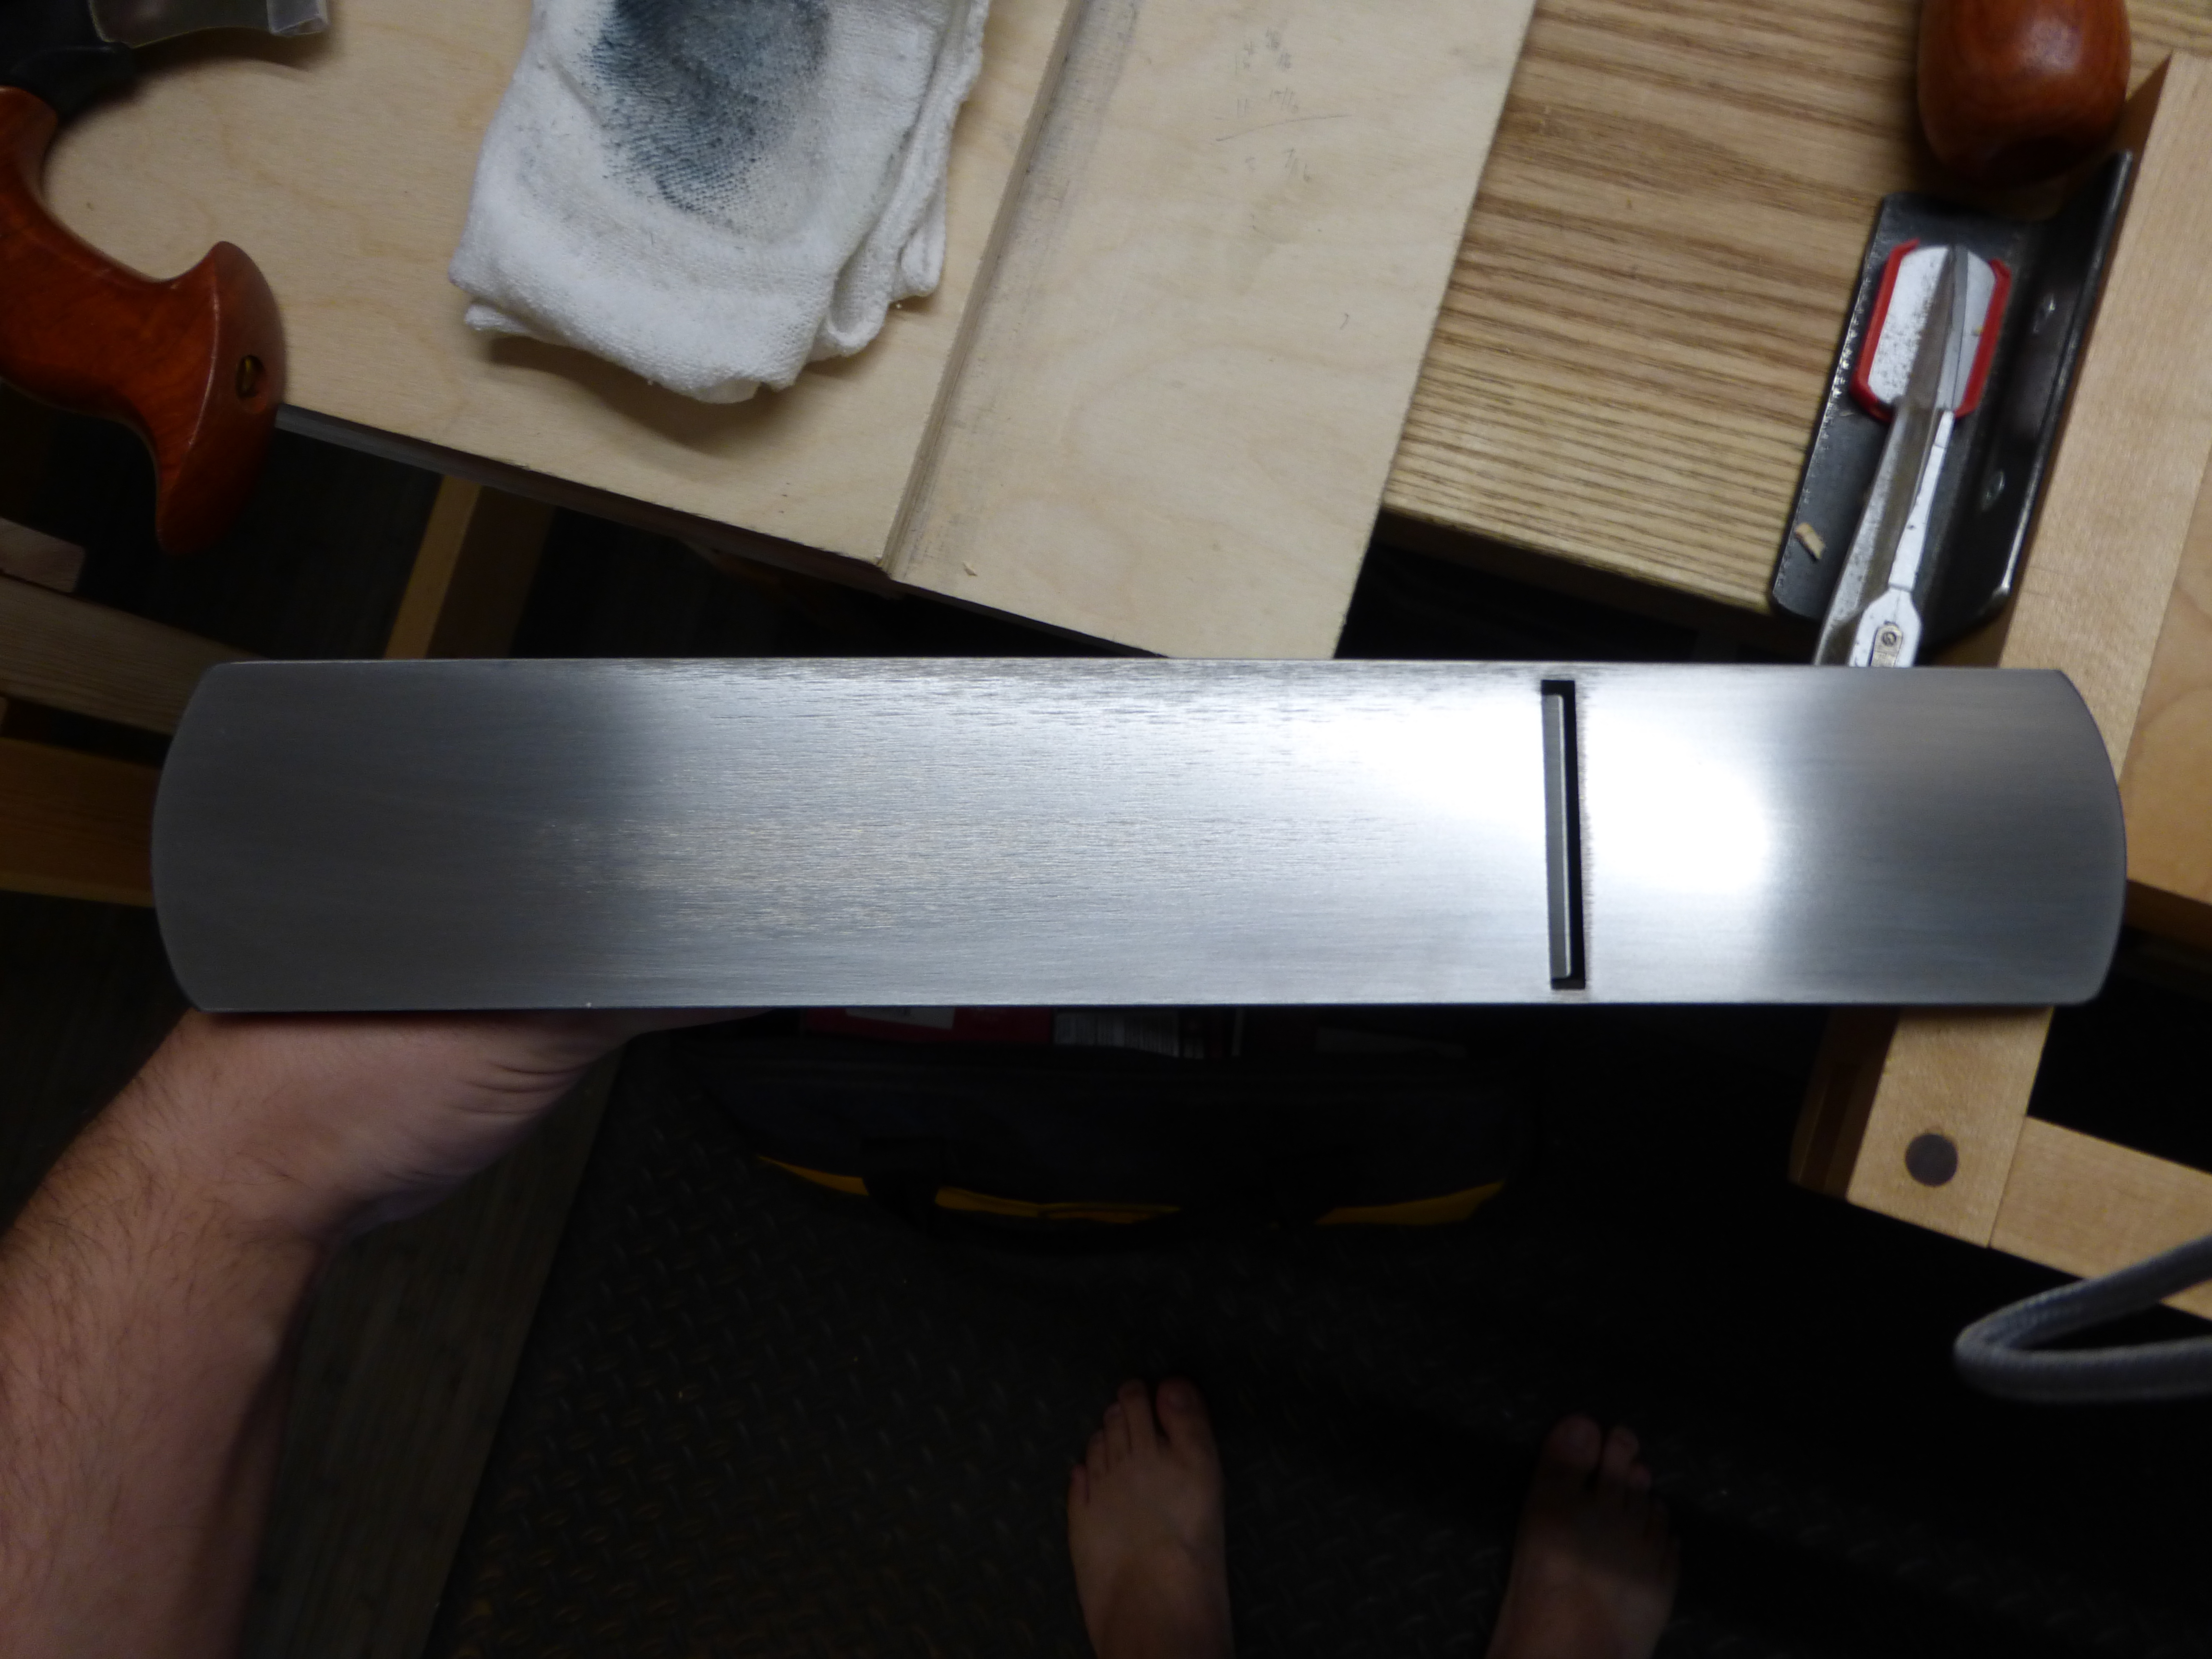
Before anything else, I knew I wanted to replace the plastic handle and tote. I cannot thank Greg Droz at http://www.drozsoldetymestanleytotesandknobs.com/ enough for his excellent work and great price point on a replacement tote and knob. Made of rosewood, they fit the modern plane perfectly and have a great look and finish. I highly recommend you check him out.

Almost looks like a real plane, doesn't it?

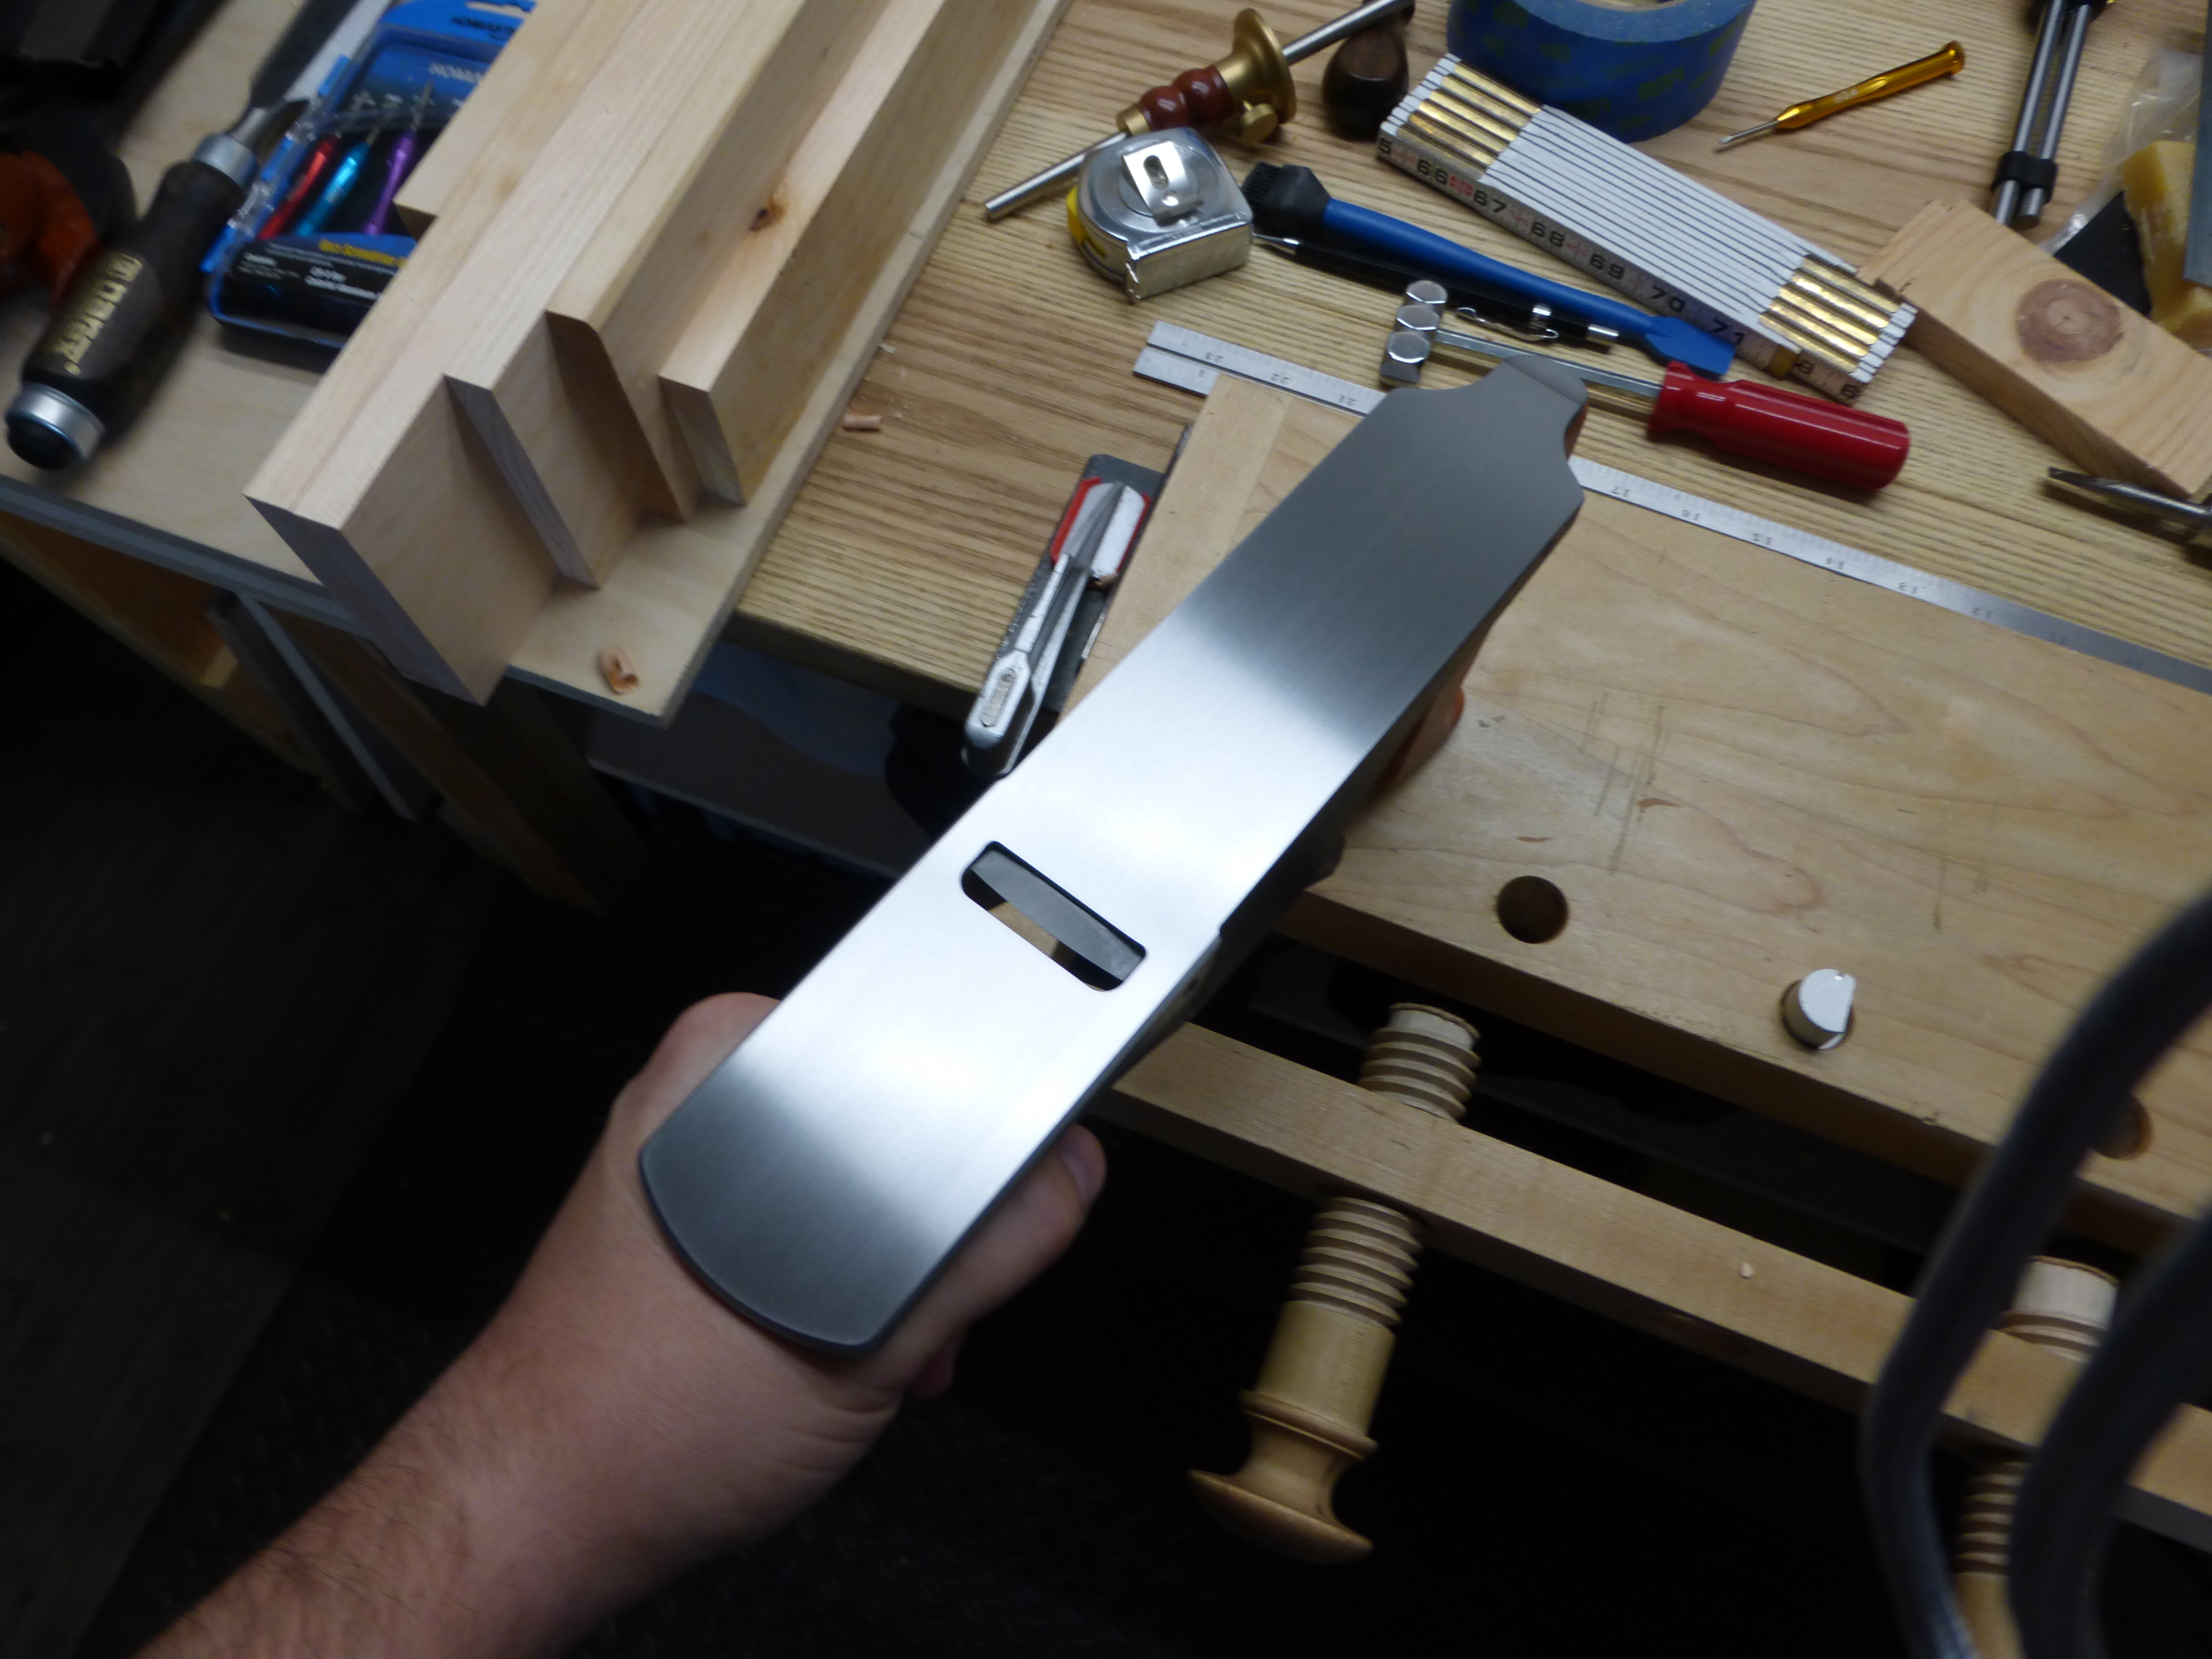
Almost looks like a real plane, doesn’t it?

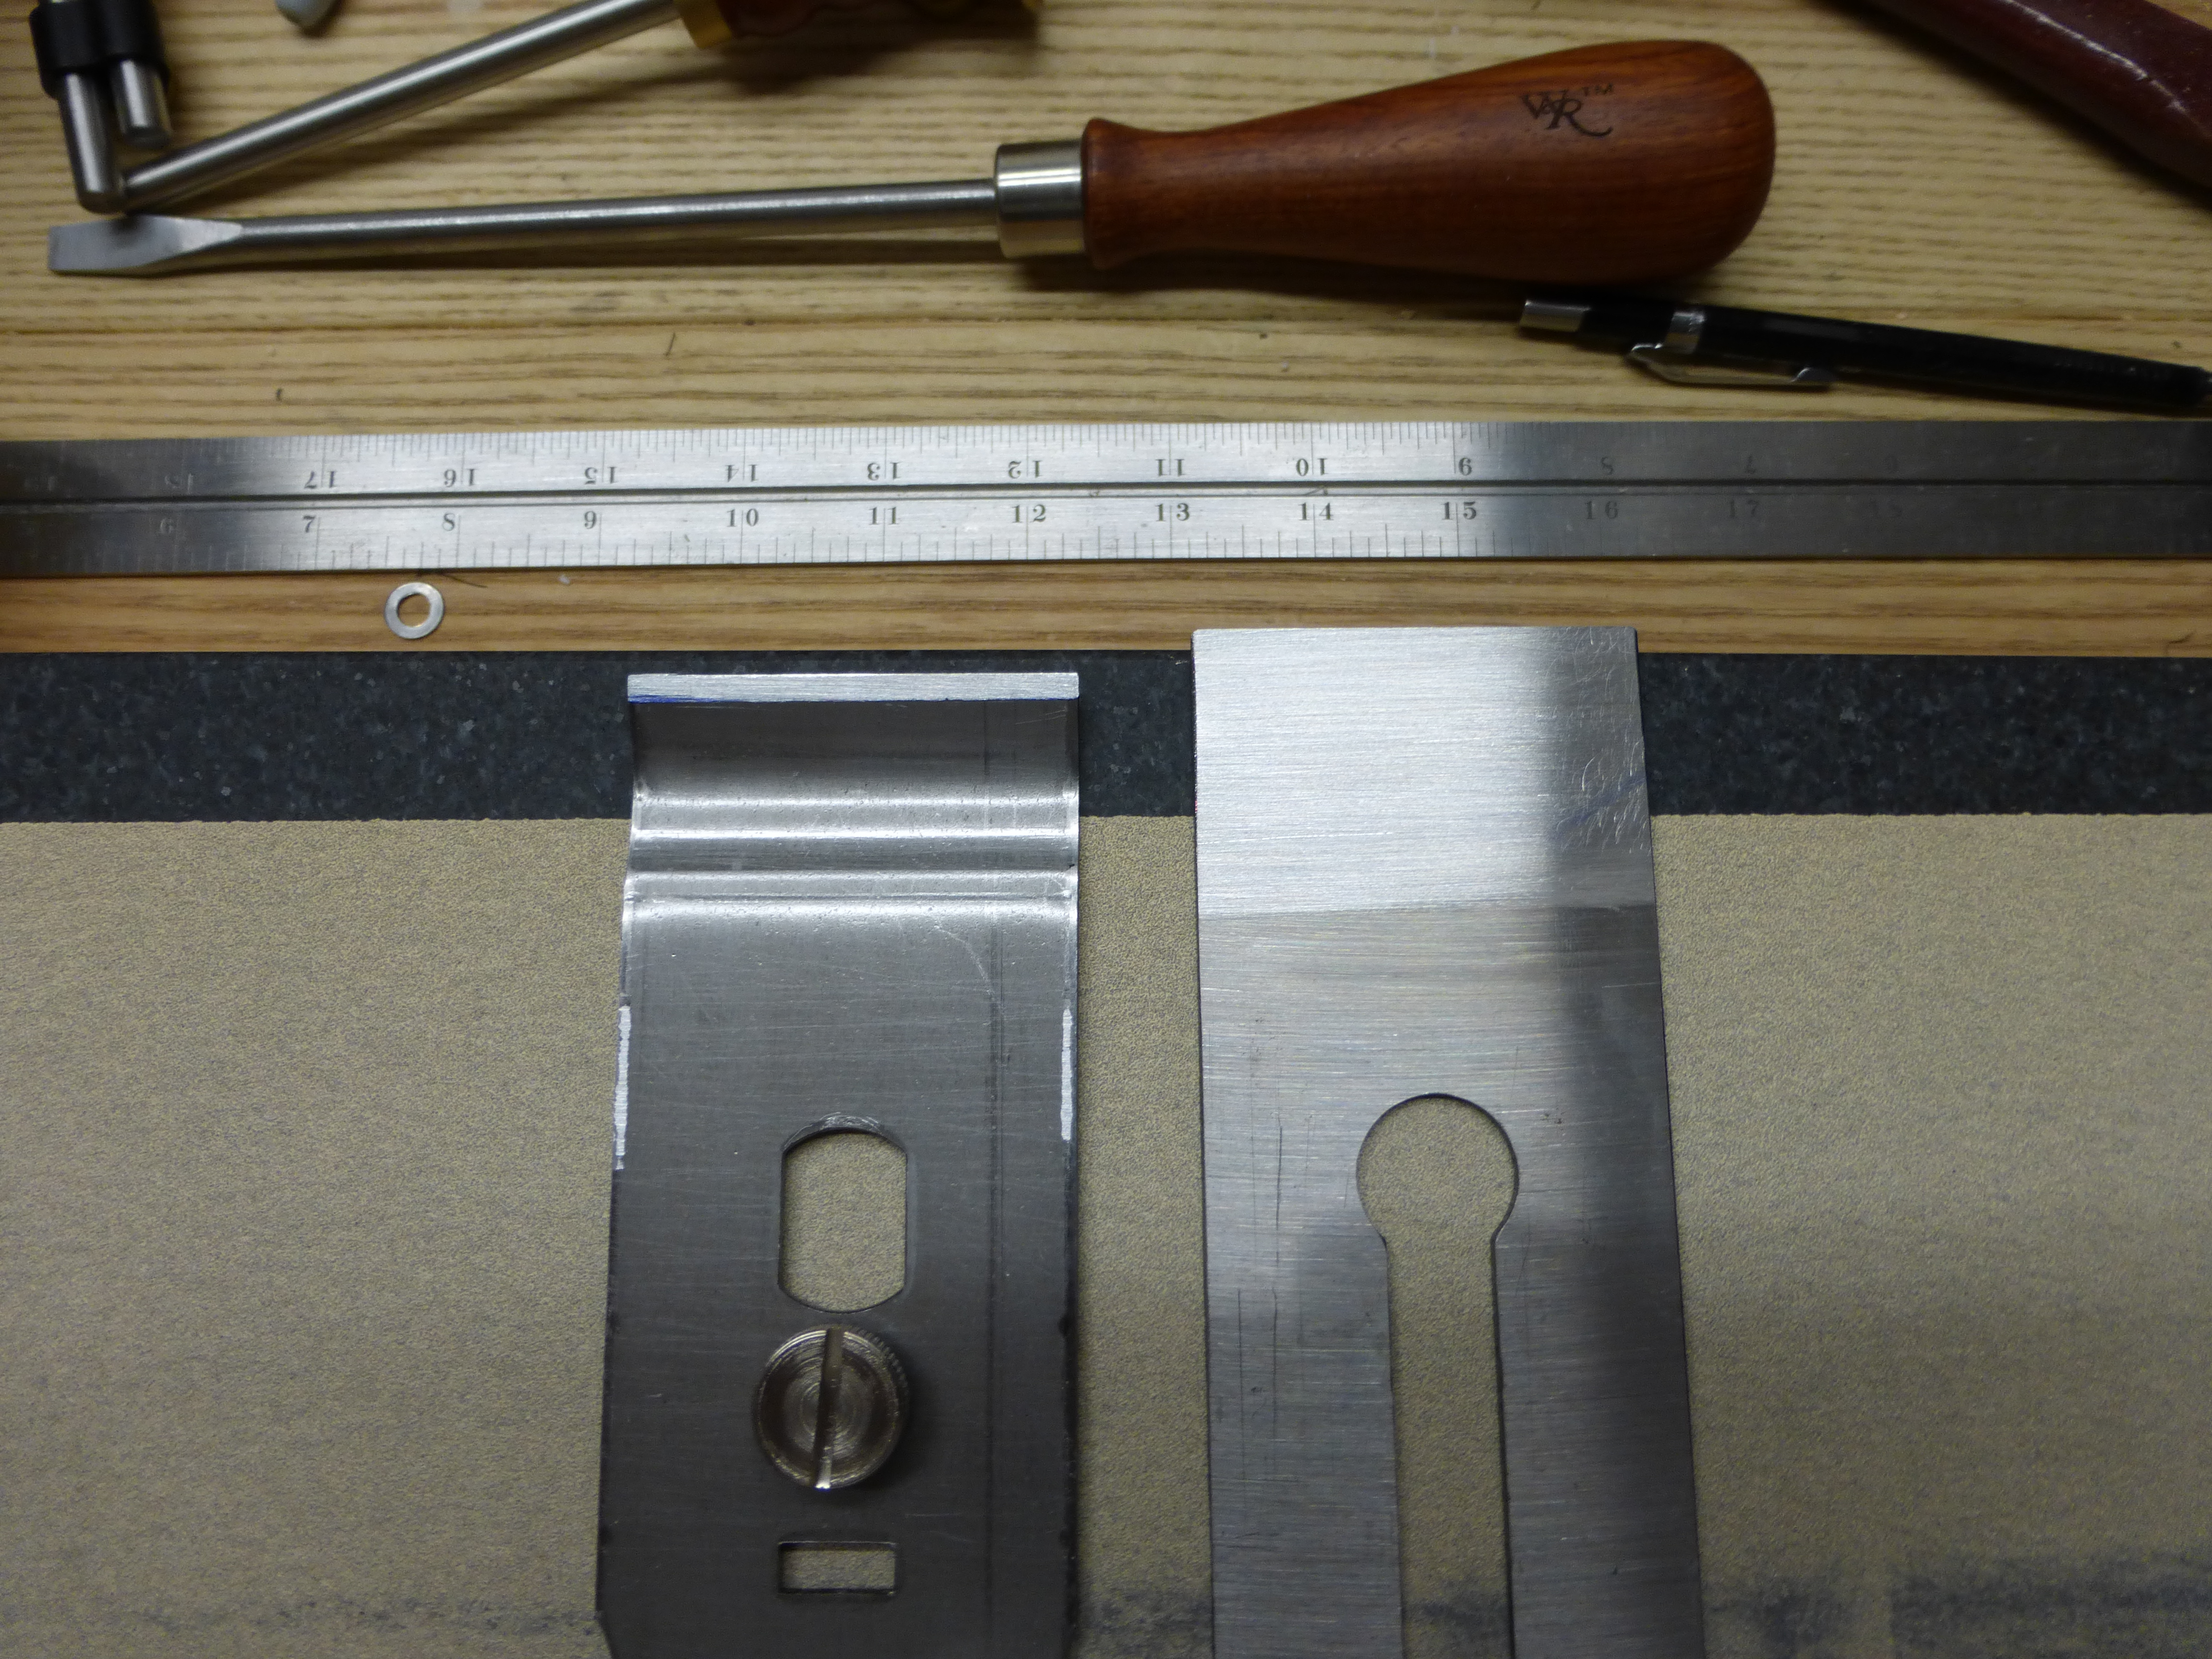
Next on the agenda was flattening the sole a bit. Even just by eye, I could tell it was severely dished. Three sheets of 80 grit adhesive sandpaper on a granite slab brought the sole flat enough for the work I’d require of it. Then a bit of polishing with 120 and 180 grit to a dull shine.  I also cleaned any metal shavings out from under the frog and squared it to the mouth as best I could.

I plan to use this for edge jointing thinner stock, so that remaining hollow along the side doesn't really bother me.

I plan to use this for edge jointing thinner stock, so that remaining hollow along the left side doesn’t really bother me.

While I had the 80 grit sandpaper on the stone, I also took a moment to flatten the back of the plane iron. Of all the sub-optimal machining in this tool, the iron was surprisingly flat and only took a couple minutes on the 80 grit then the 120 grit to flatten nicely. The chip breaker mates perfectly after only a few strokes as well.

Both were then polished on my diamond plates.

Both were then polished on my diamond plates.

Finally, it came time for iron sharpening.  Flat as the iron may have been, it certainly wasn’t ground square, so the new 30° bevel ended up a bit wider and certainly more skewed than I would have liked. Perhaps I will break out the WorkSharp 3000 to grind it square to reestablish the full 25° bevel in the future. For now, though, it’s fine.

No OCD here.

No OCD here.

And that was it.  There is a bit more slop on the depth adjustment knob than I am used to and the lateral adjustment lever feels cheap, but all in all, not bad for what essentially amounts to a found tool and 90 minutes of work.  I also should move the frog forward a bit and square one side if I ever plan to shoot with it, but for now the plane is functional and comfortable to use.I took some basic shavings on a scrap of hard maple to test it out.

No chatter, but there was some skudding easily solved by beeswax.

No chatter, but there was some skudding – easily solved by beeswax.

I’m not saying this will become an everyday plane.  But it is serviceable now and will be used mostly for edge jointing and flattening thinner stock. The tool is drastically lighter than my modern bedrock-copy No. 5 1/2 (and even my No. 4 of the same brand), which should give me better control on those delicate jobs.

All told, including the purchase of the new knob and tote, the plane came in just over $100. I don’t think I would go this route again, considering I could either pay just a bit more for a solid mid-grade brand or put just a bit more work into a restoration project from a flea market or estate sale. But the tool was on hand, and sunk costs are what they are, so I’m happy with it.

So now I have functioning versions of each of the tools on my list of beginner hand tools.  I plan to build a project using only the tools on that list and see if I can in fact practice what I preach.

JPG