Big Projects

Squaring Up

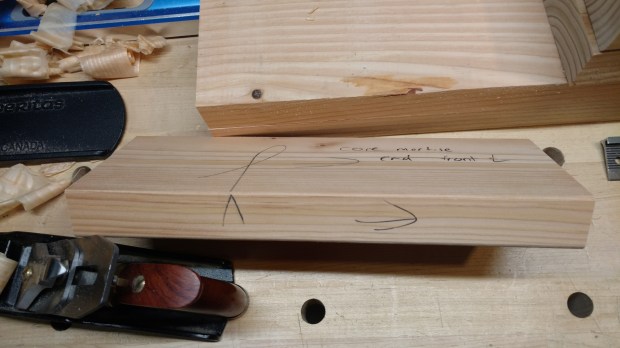
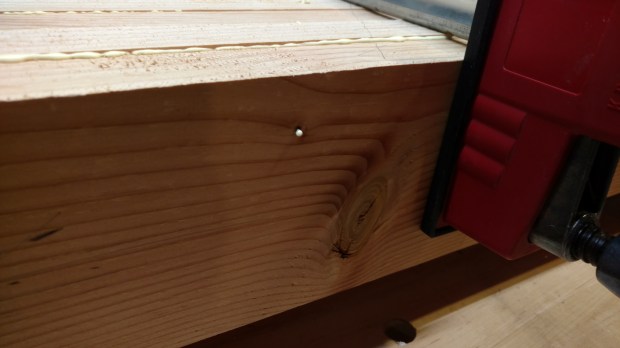
Using a router and a straightedge clamp to square the ends of the core slab went better than anticipated.  With some fussing, the straight bit worked like a charm, giving me a crisp step down to run the bearing on the pattern bit against.  There wasn’t even any chipping on either first pass with the straight bit.

wp-1458436431391.jpg

Quite a bit of fussing, actually.

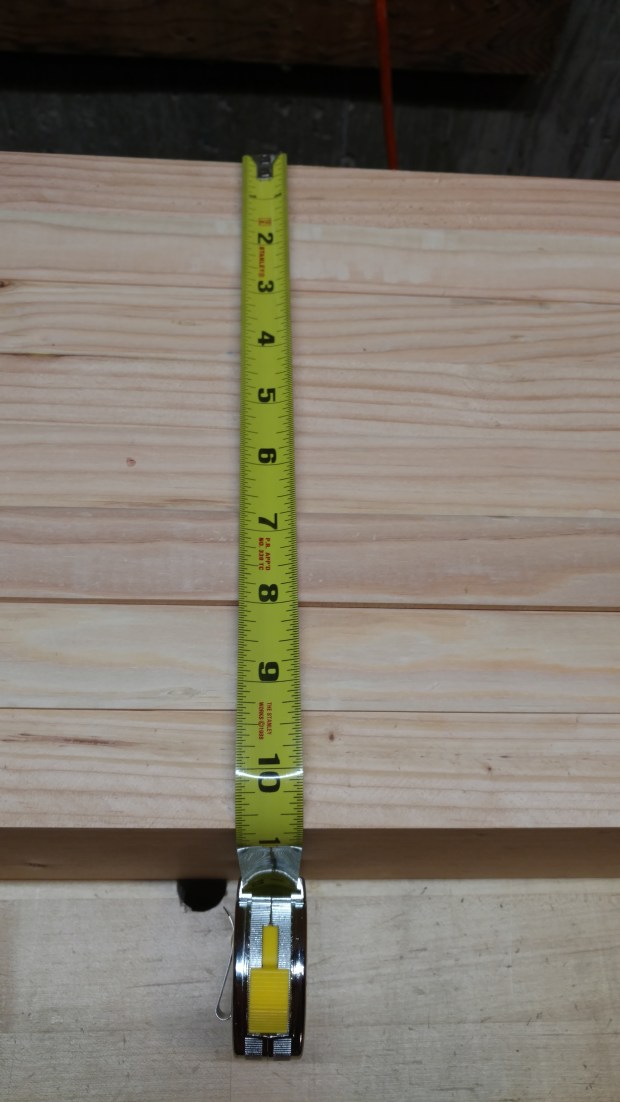
Unfortunately, the pattern bit didn’t work as well and I did get some blowout on the second passes.  Nothing terrible, but I was kicking myself for not first scribing the ends (to sever the fibers and prevent chipping).  No harm, no foul, though, because I still had to plane the front face square to the underside.  All in all, I’m very pleased with the final length of 71 7/8″, which will be further augmented by the inner and outer jaws of a quick release tail vise.

wp-1458436437134.jpg

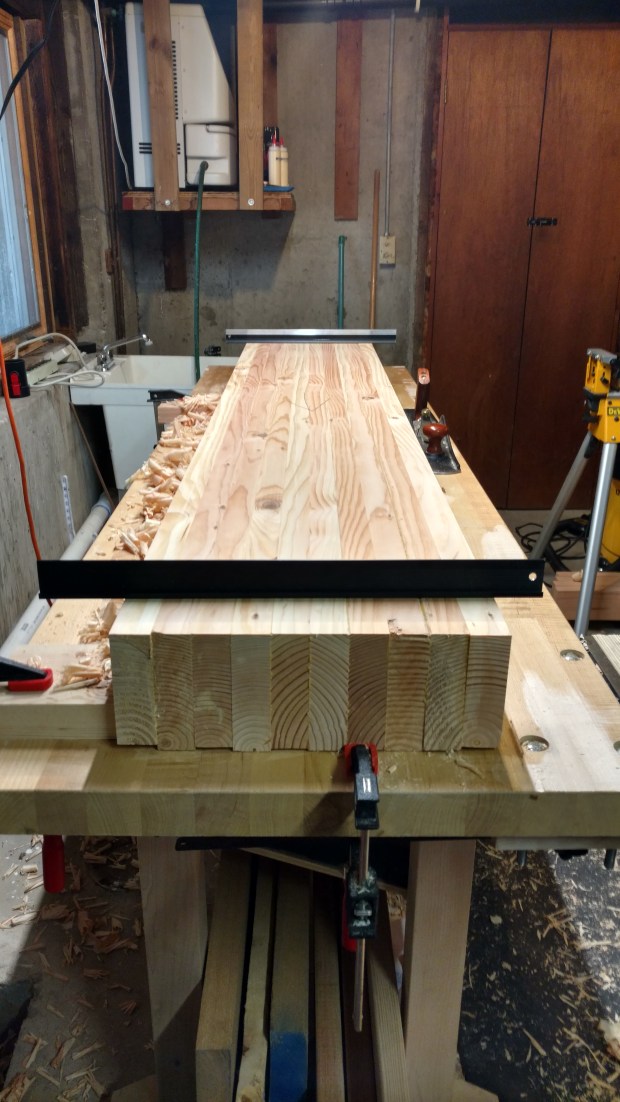
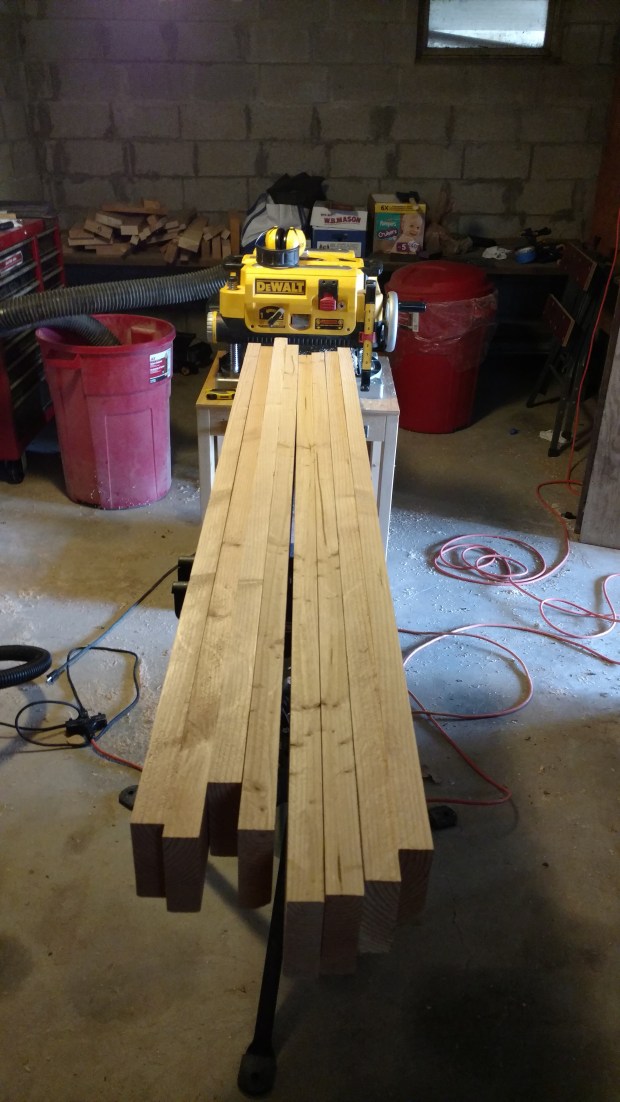
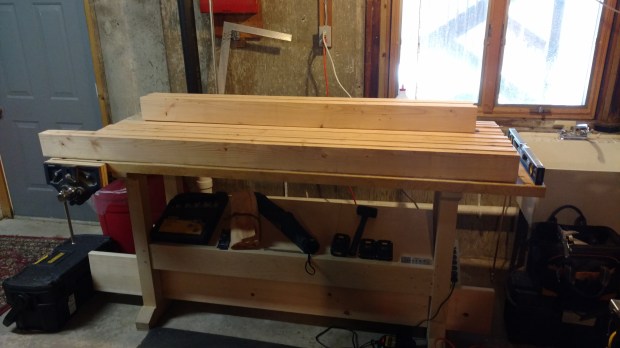
Not bad, starting from twelve foot 2×10’s.

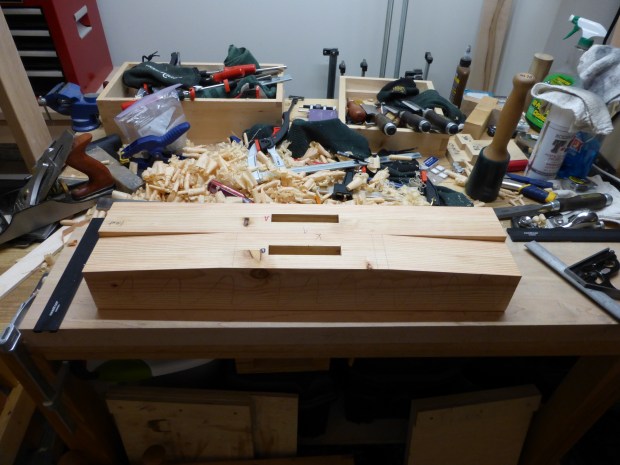
The core slab, now S3S with only the top to go, is approximately 4 1/16″ thick.  Assuming the slab doesn’t move any further (it cupped very slightly in the week after initial thicknessing), I doubt it will take more than 1/16″ to flatten the top.  At any rate, anything over 3 1/4″ validates my choice to use 2×10’s instead of straight 2×4’s.

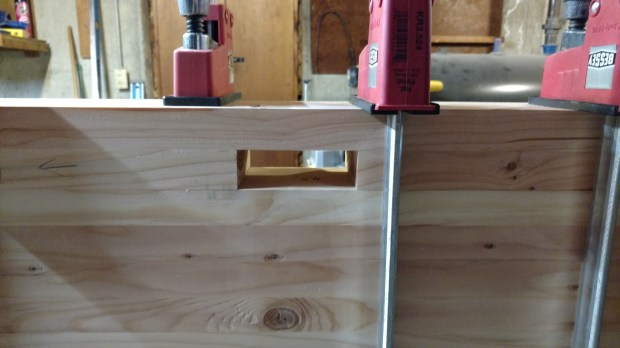
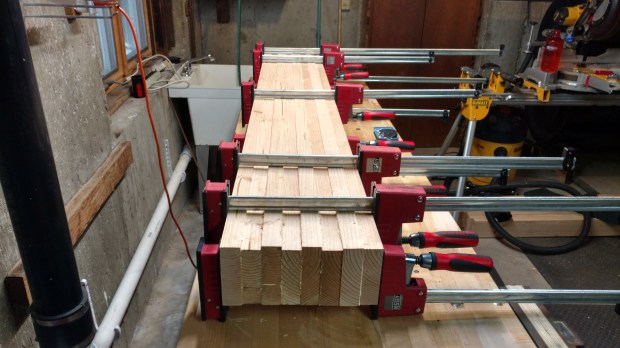
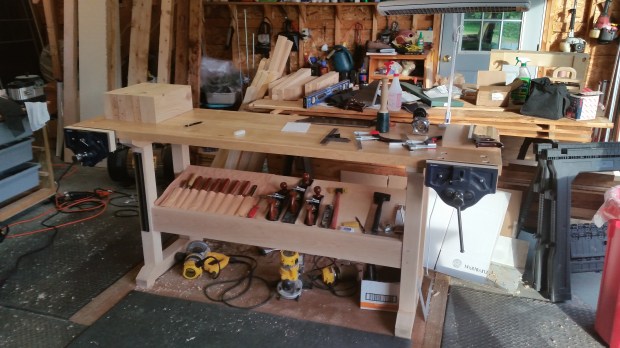
I’ve already created the mortises on the back edge, and I’ll be creating the front mortises over the Eastern weekend.

JPG

A Different Direction

The first set of mortise strips went onto the core slab without a hitch (almost).  I’m very pleased with the result, but I’m glad I did the back mortises first.  When I get to the front mortises, I’ll have perfected my technique.

wp-1458436358874.jpg

I don’t think this was faster than boring and paring, but it is certainly crisper.

After all the flattening, squaring and gluing (which I promise to write more about later), I’m sick of the workbench build.  Instead, I’ll distract myself for a couple weeks with a traveling tool tote, based heavily on Christopher Schwarz’ boarded tool chest from 2015, but scaled down.  I outgrew my soft tool tote long ago.  It’s time I upgraded my traveling setup.

I like this boarded tool chest design because it’s rabbeted and nailed, rather than dovetailed.  Dovetails are great, but this is a working piece that I want to complete on a decent timeline.  And call me crazy, but I really enjoy splitting rabbets (my shop-made fillister plane is only 5/8″, after all).  I will likely follow the oak-battened lid design of the source material, also for no other reason than it’s easier than a full dust seal of a traditional floor chest (but also because this tool tote won’t be populated full-time).  The entire carcass, including the ship-lapped floor, is only seven boards.

wp-1458496591661.jpg

Two sides, two ends, three floor boards, all cut to rough length.

Made almost exclusively from 1×12 common pine from the home center, the inside dimensions of the tool tote will be slightly over 26″ long x 12″ wide x 11″ high. There will be plenty of room in the floor plan for a panel saw, two back saws, a jointer plane, a smoothing plane and a router plane, plus a chisel rack on the inside wall.  A single sliding tray on oak runners will hold everything else I need for on-site work.

One final note: it’s amazing what you can find when you dig through the stacks of common pine.  In addition to a nearly knot-free carcass, there is enough clear, quarter-sawn wood to laminate a stable lid.  Plus, the quarter-sawn off-cuts from the floor boards will become the walls of the sliding tray.  All of this from only twenty-four feet of home center common pine.

I feel energized.

JPG

Improvisation

I had hoped to quickly and easily square the ends of the new workbench’s core slab with my compound miter saw.  Unfortunately, the slab is too heavy for the extending arm on the base and no amount of clamping pressure could keep it steady and square.  As a fallback option, I will use a straightedge clamp and a full size router.  A 3″ straight bit should hog off most of the waste, with a pattern bit to finish the job on the flip side.  My little trim router may have the torque, but it definitely doesn’t have the collet, so my full size router and D-handle base are coming out of retirement for one last job.

Once the core slab is squared off, I can begin applying the boards that will form the mortises.  Each mortise strip is comprised of three boards: two ends at 12″ long each, and one center board, sized to fit.

wp-1458089211001.jpg

Seen here, surfaced but not yet cut to final length.

Each mortise strip board will be pre-sized and glued directly to the core slab, using the underside of the core slab as the reference surface and the tenon boards for each of the four laminations as spacers.  As a result, the front and back faces of the core slab must be absolutely square to the underside of the core slab.  The slab has probably moved since initial flattening last weekend, so the last thing before glue-up will be re-dressing the underside and faces.  And I still have to surface those tenon boards

The mortises are completed by adding another, full-length, board to each face of the bench top.  Then, on the front face only, a second full-length board, picked for its beauty, will complete the bench top and be the show face of the bench top.  This added depth also keeps the dog holes out of the mortise strip.

Finally, each front leg will be brought co-planar with the show face of the bench top by similarly adding show boards.  Having not thought it completely through yet, I would nonetheless imagine the show-faces of the legs will be sized and added after assembly and settling.

If I do it all correctly, only the topside of the bench top will require any further dressing.  IF.

JPG


Reflections on a Theme

The internet contains a wealth of information on how to properly laminate a workbench.  Some are better than others, but something useful can be gleaned from all.  Let me add to that wealth with a few reflections on a topic: grain direction in the laminated bench top.  I know workbenches are supposed to be tools, not furniture, but this isn’t just about optics.   Minimizing tear-out serves both structuring and aesthetic purposes.

Perhaps because I rely heavily on a thickness planer after S2S’ing boards by hand, I am conscious of grain direction at all times.  I keep a charcoal pencil handy and every board, in addition to face and edge marks, gets two arrows, each indicating grain direction on the reference face and reference edge.  This allows me to quickly orient the boards, flip them end-over-end, and pass them through the machine for tear-out-free thicknessing.

wp-1457910947687.jpg

Every board.  Every time.

Minimizing tear-out on face grain will increase the overall glue surface and, therefore, increase the overall strength of the laminated bench top.  But, ultimately, those faces are hidden in the glue up and will never be dressed again.  What is most critical when laminating a benchtop is aligning the edge grain direction of the entire slab.

wp-1457830094027.jpg

All of this grain runs in the direction of the giant black arrow.

I have a specific reason for this assertion: the edge grain surfaces will be dressed many times through out the life of the workbench.  Taking a few minutes to orient the edge grain direction during the glue up means less work both (i) when initially flattening the bench top during construction and (ii) when re-flattening the bench top from time to time.  And over the life of a workbench, that will add up to quite a bit of time and energy saved.  And you might possibly save yourself some awful splinters down the road.

Plus, it will look nice.  After all, your workbench may one day be someone’s antique dining room table, right?

JPG

Taking Stock (Literally)

Saturday was another productive day on the Douglas Fir workbench build.  I surfaced and glued two additional boards to the core slab, bringing it to just over 13″ deep.

wp-1457213524532.jpg

The same length and depth as the planing slab, but nearly twice as thick!

Dodging a bullet on the previous eight boards, the expired/near-expired PVA glue has in fact held.  Being paranoid, I plan to add a couple full-length mending plates to the underside of the bench top once fully assembled.  Not because I think it will do anything, but because it will make me feel better.

I also rough cut to length the remaining stock so that I could take, umm, stock of how much more lumber I needed.  What’s shown below is almost everything required to make the full bench.

wp-1457213250309.jpg

wp-1457213253579.jpg

DeWalt, I am open to sponsorship…

Here is what’s still on the buy list:

  • Eight feet of 2×6, which will become (i) the tenon board and the inside board of the left front leg and (ii) [probably] the outside vise chop on the tail vise.  Not sure if I’ve mentioned it, but unlike the other three legs (which are comprised of ripped down 2×10’s), the left front leg is laminated from 2×6’s for extra stoutness when chopping.
  • Twelve feet of 2×10, which will be ripped in half and cut down to (i) four 48″ lengths for two long stretchers and (ii) four 24″ lengths to make two short stretchers.  I also have two other 24″ lengths which are flagged as short stretchers.  The prettiest of the six 24″ boards will become the end cap/inner chop on the tail vise.  I will decide on the fly if I want to add a second end cap to the benchtop (unlikely).

All in all, should be another $30 or so from the home center.  I’m definitely under budget on this build, having carefully planned out my cuts from what was available.  I will eventually need some pine for the slatted shelf, but I’m not worried about that right now.

I’m torn about something, though.  My thickness planer is only 13″, so to use it I’d have to remove about 1/4″ of depth from the core slab as it currently exists.  However, my local woodworking club has a 15″ thickness planer.  If I use theirs, I can add one more board to the core slab.  But then I’d be using tools other than my own (and it would cost me for shop time).  A good problem to have, I guess.

JPG

Lessons Learned (So Far)

A few things on the workbench build thus far:

  1. Always check your glue expiration date.  I’ve been agonizing this entire week over whether or not the first lamination of eight boards will hold up.  The PVA glue I used was (unbeknownst to me) nearing its expiration date.  After clamping the work for over 72 hours, I am leaving it un-clamped for another 72 hours or so.  By the time I check the lamination again on Saturday morning, if the glue is going to give, it will have (or so customer support told me).
  2. Finished length is never enough.  A twelve foot board from the home center is usually no more than 1/2″ overlong.  Subtract the kerf from crosscutting it to rough length and (theoretically) you’ve got about 3/8″ extra from which both ends need to be squared.  It never really works out that way, and I’m always short of my desired 72″ length.  An end cap on the tail vise side to cover the inner vice chop will get me back over six feet for the main bench (plus whatever thickness the outside tail vise chop will be).
  3. Finished thickness is never enough.  A home center 2×10 is about 1 1/2″ thick off the rack, but do not use this as the base multiple for buying the bench top lumber.  After dressing for the glue up, I was lucky that one or two of the boards even came in at 1 3/8″ thick.  Most were closer to 1 1/4″.  Eight boards combined for only 10 1/2″ of total depth (or an average of 1 5/16″), so I needed to buy another twelve foot 2×10 just to complete main core of the bench top.
  4. Remember the limitations of your tools.  All of Item Three aside, I own a 13″ thickness planer.  This means the actual core can only be ten boards total and still fit through.  Each of the laminations containing the mortises (3 boards thick each) must therefore be created separately and added onto the main slab after.  If I can get the mortise laminations square and straight (using the dressed core slab as a reference), they can each be glued onto the main slab (with fresh glue, this time, and maybe a lag bolt or two) to full the form bench top.
  5. Improvise.  The total bench top lamination described in Item Four is sixteen boards deep, and should be approximately 21″ total.  This is a fine depth for a bench, but I plan to add one more board to the show face of the assembled bench (i.e., to the bench top and the front legs.  Party because I know dressing the entire slab will remove additional material and partly because it will allow me to move the dog strip out of the mortise layer.  I already have the prettiest boards set aside.

Sorry for the block text.  This was more an exercise of me thinking through these issues than content generation.

JPG

So here is the plan…

Before I could turn this:

wp-1456709374406.jpg

Why is there a diapers box in my planer dungeon?

into this:

wp-1456710569005.jpg

2/3 of the core slab.

I had to replace these:

wp-1456709203568.jpg

I wonder if the old blades are re-sharpenable…

The previous blades got pretty beat up when re-flattening the old planing slab.  It turns out that water-based wood filler > carbide blades.  But I must have known this day was coming, because I had a spare set of blades.

So after a morning of flattening one face of each board (by hand), then an hour or so of thicknessing (by machine) and smoothing for final glue up (by hand), I had eight boards at a total depth of 10.5″.  Exactly half of the total depth on the new workbench.

wp-1456705606998.jpg

It’s actually 10 9/16, but who’s counting?

The glue-up was a nightmare, though.  Despite some aggressive shaking, the older PVA glue was starting to get viscous and kept clogging in the nozzle. I am hoping the glue holds up, as it was over two years old.  It would be a pain to redo the glue-up, but I do own a heat gun if worse comes to worst.

wp-1456705613414.jpg

Ordinarily, the sign of a good glue-up is squeeze-out from the knots!

I can add two more boards to the core and still be narrow enough to pass through my thickness planer.  Which I will do next weekend.

JPG

So Many Things Change

My weekend was somewhat productive.

On Saturday, I set up the temporary workshop at my parents’ house.  I even solved the biggest problem with my old workbench: stability.  I did so in two ways.  First, I screwed the top down to the frame with some 3″ No. 12 screws (no longer just relying just on the friction-fit 3/4″ stub tenons for lateral support).  Second, I loaded up the underside of the frame with additional ballast in the form of five-to-six foot lengths of lumber.  The net result is a workbench that now weighs about 300 lbs (better known as approximately what a workbench should weigh).

wp-1456092500977.jpg

From L to R:  8/4 red oak, 6/4 maple, 8/4 maple, 2×6 Douglas Fir and 2×10 Douglas Fir.

On Sunday, I got right to ripping down almost all of the Douglas Fir 2×10’s that will become the new workbench.  Approximately 60 feet of 2×10’s became the following:

  • 2 x 4.5 x 72 (times 12, for most of the laminated benchtop)
  • 2 x 4.5 x 62 (times 4, for most of the laminated legs once crosscut)
  • 2 x 4.5 x 82 (times 2, for the tenons on the laminated legs once crosscut)

The final 82″ of 2×10 (seen below the bench) is the prettiest lumber of all (even with a knot or two) and will become the faces of the front legs and the benchtop.  Some of the off-cuts from the 82″ lengths will also go to the strips of the benchtop that form the mortises (more on that below).

wp-1456092509414.jpg

To be left out, for a week, to further acclimate.

Four things became apparent during the stock breakdown process.

  1. really miss my miter saw.  For this build, waste is anathema, and a clean, straight, crosscut is key to ensuring full length.  And it’s so much quicker than by hand.  my miter saw used to live in my old apartment.  I had no idea how much I missed it.
  2. Even quarter- and rift-sawn lumber has internal stresses.  One of the 12 foot lengths of 2×10 (in fact, the clearest and straightest-grain of the batch) split lengthwise along the grain while I was crosscutting it on the miter saw.  There was so much energy bound up in the piece that upon splitting a shard of wood shot off the main board and hit me in the eye protection.  After cutting around those stresses, the remainder of the piece will become one of the strips that form the mortises on the benchtop.
  3. I don’t have enough lumber for the entire bench.  The plan was for the lumber seen above to be the entire bench, but I don’t think that will work.  This should nonetheless get me a 4 x 20 x 72 benchtop and four 4 x 4 legs, and probably the short stretchers.  I think another 16 feet of Douglas Fir 2×6 will be plenty for the long stretchers.
  4. Battery-powered circular saws have limitations.  Just ripping the lumber shown above used four full charges of double 20V batteries and three full charges of single 20V batteries.  I either need another charger or a corded circular saw.

More than anything, this post has helped me think through exactly how to use the available materials in the most efficient way practicable. I may need one or two more boards, but for about $100, I will have most of a proper workbench.

JPG

Out of Retirement

As I begin the new workbench build this weekend, I won’t be in my apartment woodworking shop.  For starters, there is just not enough room.  And the entire operation relies on proximity to my thickness planer.  So I am pulling my old workbench out of retirement.

20140702_191541

My, how far I’ve come.


At 84″ long and 24″ deep, my old workbench (which has been collecting dust in storage my parents’ house) is the perfect work surface for laminating the new benchtop.  The old workbench needs to be moved inside, though, and will reside in their basement for the foreseeable future.

I’m also pulling a few power tools into the mix for this build in particular.  The top will be laminated from 72″ lengths of Douglas Fir 2×10’s ripped down the middle and a circular saw will rip much squarer (and quicker) than I can by hand.  The end result should be a thicker overall bench top.  In fact, I am hopeful the slab will be over 4″ thick after flattening, so my 12-inch double bevel sliding compound miter saw will be indispensable as well.

I’m doing 72″ for two reasons.  One, it should still be transportable (in pieces).  Two, the use of a quick-release tail vise will add extra length as required (and I can always make an insert).

More details to come, but suffice to say, I’m heavily influenced by Roubo’s Plate 11 in this build.  There will be a crochet, but I do plan to skip the sliding dovetails.

JPG

Nothing Too Extreme

While I wait for the Douglas Fir posts to dry out and become the top rails for my new sawhorses, I’ve doing a little bit of shaping around the edges. Literally.

One design element I’ve noticed in most saw horses of this style are the beveled feet.  Although the rake varies, very rarely are the feet left four square.  So I went with the crowd.

P1000306

Subtle on its own, but noticeable in comparison.

Each bevel is about 3/8″ deep and 7.5″ long, but the measurements are not exact.  I am sans band saw, so all work was done with a No. 4 set as heavy as I could.

The most surprising part was the ability to work in both grain directions.  My No. 4 is by no means supertuned for smoothing, but it was sharp and I was able to work in both grain directions with only slight tear out.  And a couple final passes with my No. 4 1/2 in the correct direction cleared all of that up.

It’s nice when something actually works right the first time.  I’m pleased enough with the shape of this first foot that it will become the pattern for the other three feet.

JPG