General

After Further Review

A funny thing happened today when I woke up and went into the shop. Calipers in hand, ready to measure for the plug I was going to make, I decided to give it one more shot. I positioned the holdfast to the left over a scrap of wood, and whacked it with a sledge. Nothing.

Undeterred, I gave it another whack, this time holding the shaft steady as I drove it in. It felt like it seated a bit. After a third whack, it felt like it was grabbing. The fourth whack, it set tightly. Hmm.

wp-1485635194551.jpg

It’s a poor craftsman who blames his tools.

And it works pointed right as well.

wp-1485635198054.jpg

This is not a political metaphor (yet).

I guess the trick is to hold the shaft steady as you drive it in. So, much less sad than yesterday, I bought a corded drill and made a plumb jig to bore the remaining holes (seen above).

wp-1485635460638.jpg

Much like ‘Murica itself, this drill was assembled here with foreign components.

It’s always good to sleep on it.

JPG

Putting On a Brave Face

It only took me a week to ruin my new workbench.  I’m trying to put on a brave face, but it’s no use.   I can’t even look myself in the mirror, I’m so ashamed.  I drilled the first holdfast hole in the bench, and it’s not plumb.  And it’s the hole farthest to the left.  The one for mortising over the leg.  I’ve got woe.

It’s entirely my fault, too.  Instead of reading the directions for my Crucible Holdfast, I chucked the recommended 1″ WoodOwl augur bit in a modern, three-jawed hand brace.  I was blown away by how easily the WoodOwl powered through the wood.  So much that I lost focus and canted the hole back to front.  I’d be lying if I said it wasn’t over 2° off plumb back to front (although negligibly canted left to right).

The directions recommend a corded drill and jig to keep the bit plumb.  Corded (I think) because (in my experience) the wobble of a brace and bit always results in an overlarge hole as it reams itself with every sweep of the brace.  Jig because it’s difficult to keep a bit that large from going out of plumb, no matter how little wobble you impart.  I utilized neither.

wp-1485572514951.jpg

I took a vanity picture during the process and can see the cant in the shot.

The result: the holdfast only holds in a 60° sweep pointed at the front edge of the bench.  It won’t grab at all when oriented lengthwise, either left or right.  It could be worse, but it still makes me sad.

I’m debating plugging the hole with epoxy and a 1″ oak dowel (plus an ash dutchman on the show face).  But that feels like a temper tantrum.  I should probably sleep on it another day.

JPG

Something Old, Something New

The point at which you first install workholding on a workbench is a bit thrilling.  The bench transforms from furniture to functioning tool.  Even if the workholding is just an aluminum planing stop.


wp-1485520332717.jpg

Final flattening of the bench only took about 30 minutes.

I have been enamored with these Lee Valley-Veritas planing stops for some time.  I tried a toothed planing stop on my previous workbench, but I never really liked it.  Unless I needed the extra 6 inches or so of benchtop, I always went back to these aluminum stops. They are low profile and easy to install (requiring only two 3/4″ dog holes).  And they can be cut to perfect length.

This time, I even remembered to space the holes so they’d line up with a row of tail vise dog holes, if I ever install a metal front vise as a tail vise.  I mean to, eventually, but I only have 12″ from the end of the benchtop to the top stretchers, so I’d need a pretty compact front vise.  Before I do, though, I’m going to try working with just holdfasts and does’ feet.  I hear it works pretty well.

My first project on the new workbench will be that plant stand I was making last year, which is very similar to a previous prototype.  I’ve said it before and I’ll say it again: working home center spruce is such a joy.

JPG

Of Proverbial Lights and Tunnels

On every new project, there is a point at which the project passes from being a pile of boards to an actual thing.  It’s a magic moment that never fails to make me smile.  I hit one of those points over the weekend, while transferring the length measurements for one of the long stretchers on my new workbench.

wp-1484601303390.jpg

For the first time, to me anyway, it looks like an actual workbench.

There is one more long stretcher to surface, and four mortises and tenons to cut, but with any luck, the bench will be functional by Sunday.  Then it will just be a question of boring holes in the legs (for Gramercy Holdfasts) and in the benchtop (for bench dogs and my Crucible Tools Holdfast).

I’ve never made my own bench dogs before, so I’ll be excited to try it out.

JPG


Silent World

In case you didn’t know, every episode of MacGyver is available on Netflix.  And I’ve been watching the hell out of it.  I recently saw an episode, Season 2; Episode 9, called “Silent World“, where Mac [30-year old spoiler alert!] stops a plot to steal a guided missile with the help of a friend, who is a teacher at a school for the hearing-impaired.

In the episode, the teacher (who is the best-acted character in the episode) has a recurring nightmare that helps identify the perpetrators.  The nightmare seems at first like a prophecy, but is decoded as the episode progresses and in fact turns out to be based on her recent experiences.  It’s amazing how the human brain works, using dreams to process and catalog the myriad sensory information we receive every day.

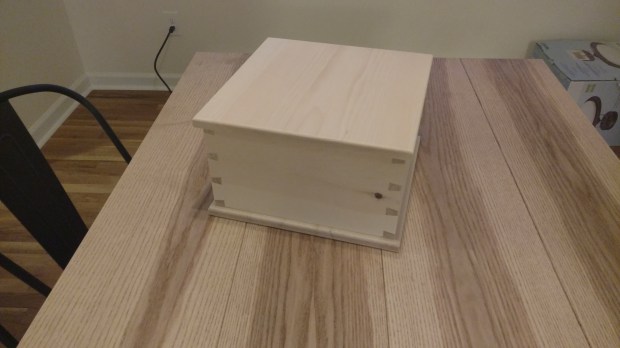
So what does this have to do with woodworking?  I had been thinking about the design of my new workbench build, which I’d characterize as part Roubo, part Moravian.  A bespoke, if not novel, design to utilize the available materials in the most effective way possible.

wp-1484318898288.jpg

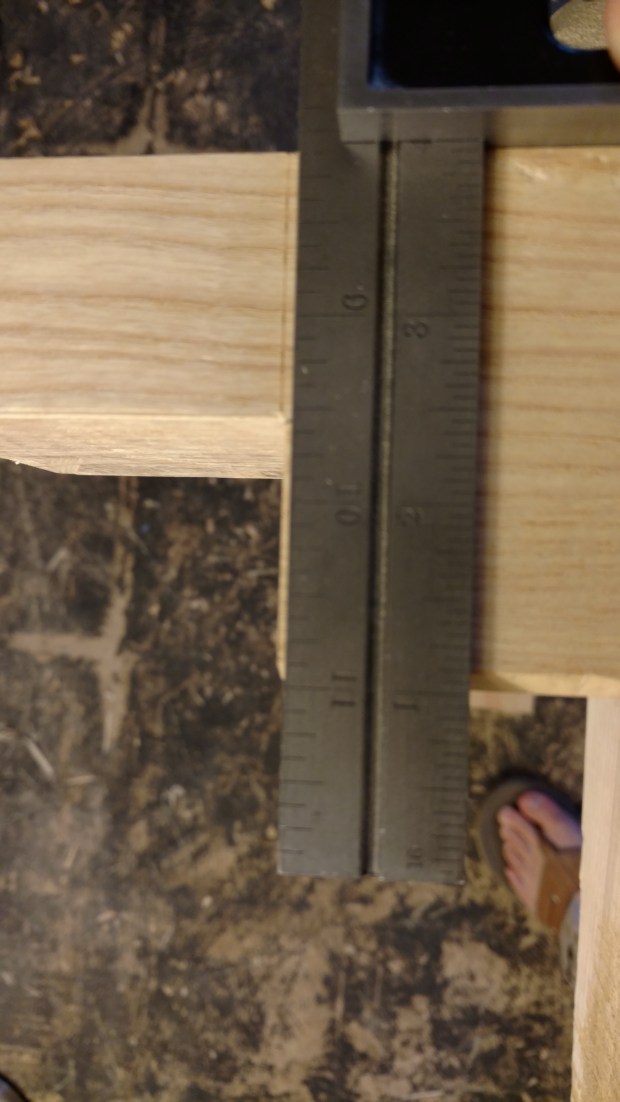
The “Slab to Frame” ratio is about 2:3.

It turns out, however, that my design is a complete knockoff, being positively Follansbeean.  I was reading his blog’s archives and came across the post where he set up his bench in his new workshop (under a tarpaulin).  A post published long before I started building my new workbench.

Although my bench won’t have wedged through-tenons on the long stretchers (I’ll drawbore all the stretchers), mine otherwise matches Peter’s pretty closely, right down down to the spacers on which a thinner shelf will sit to extend the benchtop.  My design is born out of only having 15″ x 92″ of 16/4 ash for the main slab top, and I would be willing to bet Peter was solving the same problem.

wp-1484318223542.jpg

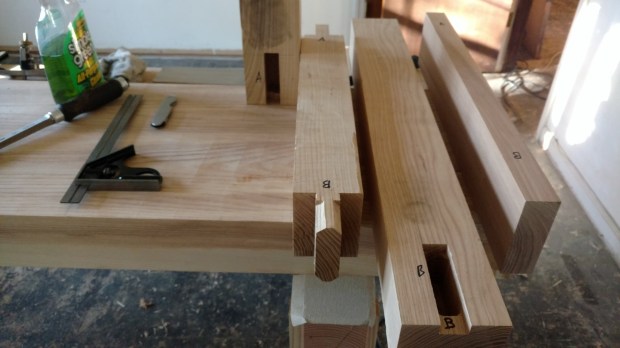
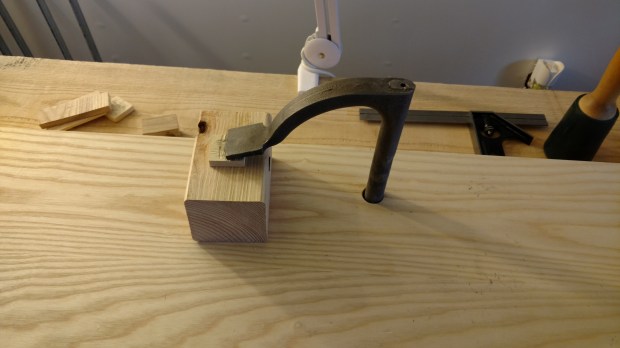
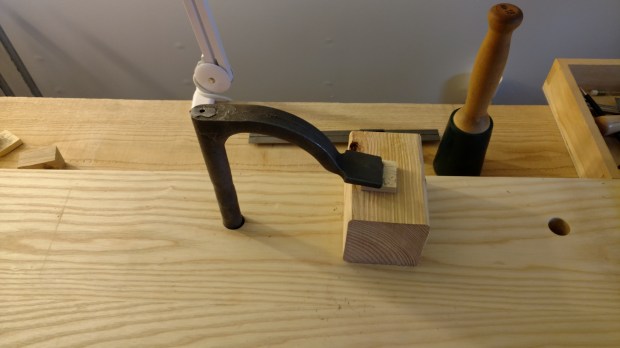
Two stub tenons on the front legs go into the benchtop and keep the slab in place.

Funny how the brain catalogs these things for later use.  But now at least I can give the design proper attribution.

JPG

How to Finish with Shellac

I have little experience with finishes that aren’t Milk Paint or Danish Oil.  It’s a shortcoming; I know.  But I’ve been experimenting with shellac finish on the little box I made.  Here is, as near as I can tell, a fail-safe process for finishing a project with Shellac.

Step 1:  Brush on coat of sanding sealer, then sand with 220 grit sandpaper when dry.

Step 2:  Apply 2-5 coats of shellac, thinned to approximately 50-50 with denatured alcohol, sanding with 220 grit sand paper between coats.

Step 3:  Agonize over puddling and corning and consider throwing entire project away.

Step 4:  Remove shellac with denatured alcohol and paint entire project with milk paint in shame.

Step 5:  Lock project away in closet never to be seen again.

Has anyone had a similar experience?

JPG

I Guess It Works

If you follow me on Twitter, you know that I made a box.  A simple thing, really.  Four sides, with through dovetails at the corners and a bottom that is glued on.  All out of leftover, bone dry EWP from the home center.  For me, none of that is out of the ordinary.  What is, however, is that it has a lid.  And what a glorious lid!

wp-1483568063606.jpg

Okay, maybe not so glorious from the outside.

Both the bottom and the lid are single boards, rounded over on all four sides on both faces.  The lid, however, is not attached by hinges.  Instead, a batten and some buttons on the underside of the lid it keep it from sliding around.  Each is rounded over at the edges to help the lid slide into place.  It seems to work pretty well.

wp-1483568060448.jpg

All leftover Douglas Fir, which I hear is harder and more rigid than EWP.

I am certain that someone will tell me I did this all wrong, and it’s not a sound way affix a lid.  I’m willing to bet I won’t care, especially if I end up nailing on the buttons.

JPG

The Vainglorious Optimism of Despair

It’s that time of year again.  The time for reflection, introspection and after-Christmas sales.  The time when everyone looks back at the previous revolution around the Sun and thinks: “Man, that sucked.  But next year: that’s going to be my year.”  I applaud your hope, whether real or feigned.  But I will not delude myself into thinking things are looking up.  My only hope is that, just like cleaning your room as a child, things have to get worse before they get better.

And so we find ourselves, on the precipice of autocracy, the world almost certain to figuratively and literally burn.  But I have my workbench, and my tools, and my hands and my mind.  And for this, I am grateful.  So if I am needed, you can find me in the shop making something that will last.

And when the world does burn, at least the hide glue will flow better for a time.  Happy New Year, everyone.

Here is a picture of my cat under a blanket.

wp-1483192584546.jpg

JPG

I Think I Figured It Out (Thank You!)

Thanks to everyone who gave me suggestions about why a leg wasn’t seated squarely in its joint.  After quadruple checking my combination square for squareness (it is), it turns out the culprit was human error.

First, the shoulder isn’t perfectly seated after all.  The mortise canted ever so slightly inward, but the toothed underside of the benchtop hid the minute gap between the slab and the shoulder of the mortise.  I corrected  this (with a bit of paring inside the mortise) and the joint still (thankfully) fits very snugly.  The canted mortise was about 75% of the problem.

Second, there is a very slight hollow where I was resting my square.  It must be left over from traversing the underside of the benchtop.  It runs down a couple thou toward the mortise, which doesn’t really show with a long straightedge across the whole width.  But with a small machinist’s square, it’s plain as day.  Not worth fussing over, I think.

Oh well.  At least I got blog two posts out of it.

JPG


I Am So Confused (Please help!)

I cut the first leg mortise in the slab for my new ash workbench and I’ve hit a snag.  I can’t figure out what the problem is.

If the reference surface on the leg is flat and true…

wp-1481808770500.jpg

Which is it.

And the mortise is cut into the undreside of a benchtop in a plane that is perfectly flat…

wp-1481808775404.jpg

Which it is (double checked it with my square).

And my shoulder line for the tenon is perfectly square to the reference face on the leg…

wp-1481808780211.jpg

Which it is (sorry for the blurry picture).

Then why is the reference face of the leg not perpendicular to the underside of the benchtop when the shoulder is perfectly seated to the leg?

wp-1481808784187.jpg

What am I doing wrong?

My best guess is that there is some optical illusion from the toothed surface and the tenon isn’t actually seated all the way.  I can bend the leg out a bit to make it square, and it’s 12/4 ash, so that’s probably at the joint, not the leg itself, right?  But I fear that adjusting the inside of the mortise might make the tenon loose (it’s friction fit right now).

JPG