small space woodworking

End Grain Problems

Monday’s post was apparently number 200 here at The Apartment Woodworker.  I feel like 200 posts in a little over two years isn’t so bad.  Here’s to the next 200 or so.  Still with me?  Good.

Call me crazy, but I left the workbench slab in the clamps for almost 48 hours.  There was a tiny bit of twist (maybe 1/64″) in the mating surfaces between the two timbers and I didn’t take any chance the PVA glue (Titebond II) would fail simply for insufficient curing time.  This isn’t 3/4″ pine here.  But I’m starting to think the twist might have had something to do with this nasty check at the end of one board.

wp-1481044744087.jpg

Masked for when it gets stabilized.

I’ve talked about it in the past, but I like to stabilize end grain checks with thin viscosity cyanoacrylate glue (i.e., super glue).  It dies hard and clear and penetrates deep into the check.  This particular check goes almost 3/4 of the way through the thickness, but seems to angle upward, so I might not need the whole bottle of CA glue.  But if I do, so be it.

wp-1481044749855.jpg

That ridge in the middle of the tape is the gap.

The good news is the check is on the underside of the main slab, and at the back right corner (to hide the bit of wain).  As long as the check gets sealed up, that should be the end of the problem.

Should be.

JPG

That Still Only Counts as One

I’ve been building an even better workbench of late, and today was a major milestone in the build: laminating the top. Unlike my current workbench, the main slab of this benchtop is just two boards. And they both came from the same length of wood, so in my book, that still counts as only one board. 

Gimli would be proud.

The lamination is 91 inches long, 15.5 inches wide, and a shade under 4 inches thick. I would like the benchtop to be about 22 inches of total depth, but I dont have any more 12/4 ash and I don’t want to laminate smaller boards onto the main slab.  So I have a decision to make: add a tool well or make a torsion box out of 5/4 ash to form the final third of the benchtop. Can it be both?

That hollow will come out during final dressing.

I keep thinking about that stretcherless Shaker Workbench and how that back board was held on with pegs in the main slab. But I’d like the option to use the tool well when I don’t need a full-depth bench. 

Has anyone ever made a reversible tool well?

JPG

Slippery Slope

I’ve been watching a ton of New Yankee Workshop lately. Norm Abram is the Bob Ross of woodworking; and Christopher Schwarz is right: Norm is hilarious. Roman Ogee, not Roman Orgy. Lolz. 

It’s gotten me thinking though: what if I had Norm’s signature tool, a radial arm saw?  It goes against everything I believe in (not really).  But I do have a double bevel compound miter saw, so would halflaps on that be any slower or worse than doing it by hand?  Probably not, and as long as I cut the shoulder by hand (so I knew it was perfectly square), wouldn’t hogging out the waste by power tool be okay?  I already use a thickness planer on boards I made S2S by hand. 

This will need paring with both a chisel and a router plane.

I’ll give it a try and see how slippery the slope really is. 

JPG

Lock and Load

I’ve been rapid fire finishing smaller projects, in the hope of clearing out some space in the shop. 

First, I finished (literally and figuratively) my travel-size tool chest. It’s not a coffin. 

But I would be okay being buried in it.

Then, I completed the first of two Japanese saw horses. The second one is in process, and I will probably make two more in short order. 

I will skip the bevel on the feet next time.

Next, the rolling cart for my new Craftsman tool chest went together rather easily. It’s solid, if unspectacular.

I plan to add a saw till under the lid with rare earth magnets.

Finally, a hanging corner shelf for my bedroom was an exercise in directional planing. After some espresso stain, it may become an upcoming Basic Project.

I’ve never had studs to screw into before.

There are a few other things to clear out as well, but nothing woodworking related.  The shop feels less cluttered, at least. 

JPG

My Heart and My Soul

I have poured my heart and soul into many woodworking projects.  The rolling cart for my new Craftsman tool chest is not one of those projects.  It’s a utility piece and there is no mistaking it.  That having been said, there are a few things about the project that I really like.

  • Halflap joints are exceptionally strong when done right.  The shoulder on the vertical stiles is a load bearing surface.  And if the shoulders are square to a reference face, they go a long way toward keeping the horizontal rails (and therefore the entire frame) square.  Finally, face grain to face grain glue surface translates into a joint that will never come apart.  And it’s relatively easy to cut with a single saw.
wp-1478474628601.jpg

I even get to use my large tenon saw.

  • Whitewood is a joy to work.  Home center whitewood 2×4’s often have a birdseye figure that glistens after smoothing.  The wood is kiln-dried, gentle on plane irons and saw blades, and the price per board foot is unbeatable.  The frames pictured below were made with less than $6 of wood.  The entire whitewood frame for the rolling cart will cost less than $20 (and that includes 2″ decking screws).  Add in casters and a 24×48 sheet of birch plywood and that’s the entire basic cart.
wp-1478474479946.jpg

The screws just hold the joint together until the glue dries.

It makes me wonder: would a whitewood workbench be tough enough?  It would certainly go together with hand tools much easier than the equivalent of Douglas Fir, I’d think.  For a light duty bench, say a 10 foot planing bench, I bet whitewood works just fine.

One last thing on whitewood: I’ve noticed is that the grain direction doesn’t quite work the same as other woods.  These boards often have the pith running straight through the middle.  This means the grain runs in the same direction on both faces.  I always manually check the grain first, because flipping end over end (like you’d do with other boards) could be a quick way to some nasty tear out.

Next up is cutting 3/4″ recesses for the long rails, then more gluing and screwing.

JPG

One and Done

So maybe it does look like a coffin, but the traveling tool chest 2.0 is officially done.  I use the word “done” on purpose, because it’s not quite finished (cough).


wp-1478043821336.jpg

But it is ready for finish.

In the end, there was very little agonizing over how to attach the iron handles.  Two oak blocks were glued to the inside of the chest and screws were driven from each side.  Simple.

wp-1478043828606.jpg

Seen here, like a very lazy dog bone handle.

Unlike its precedessor, this chest has a single stationary till.  I don’t usually dovetail tills (preferring to rabbet and nail for speed of assembly), but in this case, only dovetails would do.  There will be too much stress on the left wall of the till every time it comes in and out of the chest.

wp-1478042618573.jpg

For strength and woodworking pr0n.

Having never built a stationary till before, I reach an organic solution that but for modesty I would claim credit for.  The rack on the back wall is proud of the runner and acts as a stop to keep the till from sliding around.  I am undoubtedly not the first to use such a trick.

wp-1478043824738.jpg

If it ever wears out, I’ll add another rack on the front wall.

The till itself is only 9″ wide, which limits its holding capacity to smaller items.  But that means about 13″ of floor space is unobstructed: plenty to get a jointer plane in and out without having to remove the till.  This is a vast improvement over version 1.0, where the “sliding” till blocked all access to the well.

Now to psych myself up for painting.  In the meantime, I’m making the crochet for my workbench.

More on that soon.

JPG

Saving All of [my] Time and Space

My main set of tools has been overflowing from my 26″ Craftsman top chest and middle chest for a while now.  It’s very clear I needed a single storage solution and my first and  natural thought was “build it myself”.  But after making a few medium and small tool chests by hand, as much as I would love to build a custom, proper woodworking tool chest, there just isn’t the time.  Unless I went the plywood route, I’d never finish it on a timeline I’d be happy with.  And then, Sears had a sale and my dilemma went away.

img_20161019_220814345.jpg

But now I need to build a new rolling cart.

When I first saw this top chest, it instantly reminded me of a hybrid English and Dutch tool chest.  Like a Dutch tool chest, the top well is deep and my planes can stand on their soles.  It’s clearly meant to hold rechargeable power tools (hence the power strip on the inside right), so there is plenty of room to also attach a panel saw rack to the underside of the lid (with rare earth magnets).

Overall dimensions of the top chest are 41″, 24″ x 16″, which is pretty close (albeit slimmer) to a full-size English floor chest.  The drawer space is expansive, but not so much that I could be cavalier about tools I rarely use.  Those will stay in my old tool cabinet, tucked away for rainy days.

wp-1477051545173.jpg

Outside the leather roll, it feels like too many chisels.

The rolling cart on which this new tool chest sits will be (once the casters are attached) 48″ x 24″ x 24″, with two shelves to house the balance of my everyday woodworking accoutrements.  Things like my sharpening stones, machinist granite slab and small clamps.  There may even be plans for a drawer or two in a future retrofit.  And that will bring everything up to a comfortable height.

And with the 60 shop hours or so I saved myself by not building an equivalent English floor chest, I can get back to actual projects.  Like a wall rack for fasteners or a crochet for my workbench.

JPG

A Little to the Left

Once the seams on the traveling tool chest lid were leveled and nails were driven into the dust seal to lock it in place forever, it was time to think about internal storage.

img_20161018_200200085_hdr.jpg

If this dust seal comes off, we’ve got bigger problems.

I’ve read enough of The Furniture Record to know that a till goes on the left (unless the craftsman decide to put it on the right).  I’m nominally right-handed, and I keep my planes on the right hand side of the well, so I’m sticking with tradition.

The till will be constructed much like the sliding trays in my previous tool chests: a 1/4″ red oak bottom nailed onto a carcase of rabbeted and nailed 1/2″ pine.  The till will sit on runners of 1/2″ red oak, glued and nailed to the inside walls, and be held in place by some red oak end caps to the runners.

img_20161018_200958108.jpg

End caps not yet attached.

At roughly 9″ x 10″, and almost 5″ deep, the till should have significant holding capacity.  That leaves a little less than 14″ of exposed well on the right side of the chest: plenty for a No. 4 bench plane to go in and out without disturbing the till.  And the 6 1/4″ of clearance under the till is plenty for a tool roll with chisels and marking knives.

But enough about wooden tool chests.  Let’s talk about metal ones.  I took the plunge and purchased a new 41″ Craftsman tool chest that reminds me of a hybrid between a Dutch tool chest and an English floor chest.  So it’s time for a new rolling tool cart to keep the new tool chest off the floor.  And that means spruce 2×4’s.

img_20161018_083140829.jpg

Or “whitewood” as it’s called at the home center.

The frame will be lap jointed, glued and screwed, and topped with a sheet of 24″ x 48″ birch plywood.  With the casters, it will be overall 24″ high, 24″ deep and 48″ wide.  I may add some shelves (or even some wide drawers), but that will come later.

JPG

Unfinished Business (Heyo!)

Having cleared some general carpentry projects from my plate, I got back to doing what I do best: picking up projects I hadn’t thought about in weeks (months?).  In this particular case, it was the travel tool chest.  It’s been lidless for a long time.  So I made a lid.

img_20161014_200856604.jpg

Seems to be a theme here.

It’s probably clear from the picture above, but that’s just a 1/4 piece of home center birch plywood face glued to a 3/4 piece of home center birch plywood.  It’s a trick from Christopher Schwarz’ A Traditional Tool Chest in Two Days and it is fantastic.  I can use plywood here because the chest has a proper dust seal (that works like edge banding and hides the ugly plywood edges).

img_20161014_202853097_hdr.jpg

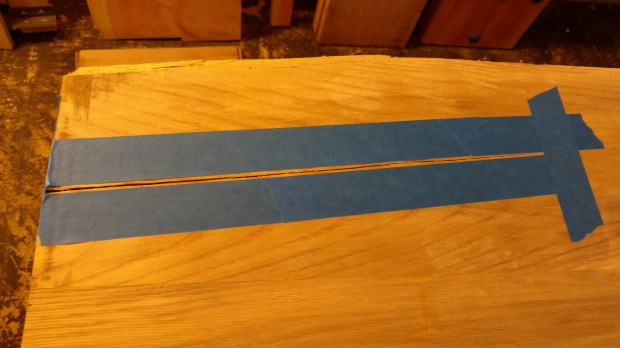
Seen here (2/3 scale).

The benefit of plywood (in addition to the ease of “raising” a panel) is the full length glue-up on all three sides of the dust seal.  There was a bit of twist in the dust seal, but the weight of the clamps was enough to press it flat while the glue dried.

img_20161016_130124330.jpg

Gravity is a wonderful thing, when applied correctly.

Even with the strength of a full length glue up, I plan to nail the dust seal into place.  I am also yet to level the top seams and fill the back edge of the plywood (with water-based wood putty).  Then it’s painting time.

img_20161016_171516014_hdr.jpg

My buddy thinks it looks like a coffin.

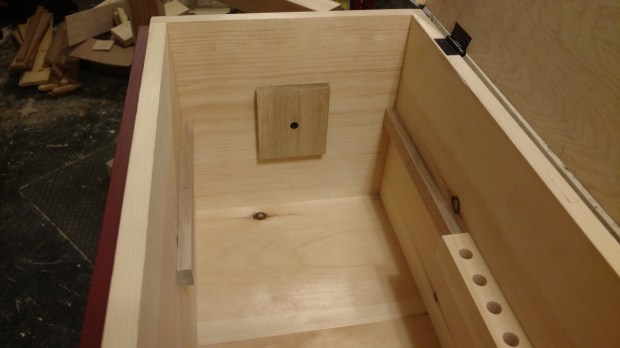
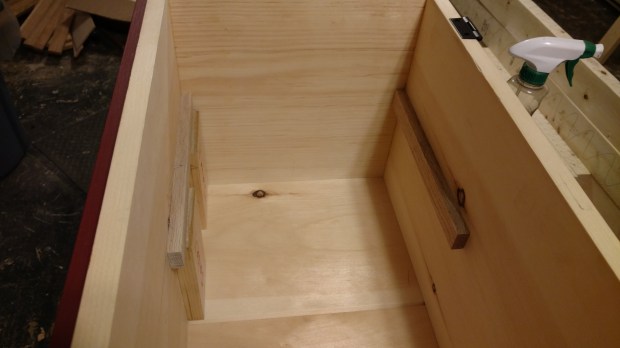
What I haven’t figured out is what to do with the inside of the chest.  On the last incarnation, the full length sliding tray didn’t really have room to slide and totally blocked access to the tools below when in place.  On this version, I might hang a stationary (but removable) till on the inside left.  Something large enough to hold all the odds and ends for on-site woodworking, but not so big that it blocks the well entirely.  That plus a wall rack with 1/2″ holes on 1 1/8″ center should be plenty of storage.

And there is the small matter of how to attach the handles.  Oak runners for sliding tills usually reinforce the side walls enough to use iron chest lifts.  I either need to attach more wood to the inside of the chest, or make rope beckets to screw in from both outside and inside.

Neither option is ideal, but one is clearly easier.

JPG

A Proper Foundation for Dining

Many moons ago, when I first moved into my old apartment, the first order of business was getting my sturdy dining table ready for clamp on workbenches.  Two years later, I’ve moved, and now that I have the space for an actual workbench, it was time to get my sturdy dining table ready for use as an actual dining table.  That meant stripping the finish and reflattening the tabletop.

wp-1476097103453.jpg

And also replacing the plywood shelf with ash.

Ash is quite porous, and the tabletop had soaked in quite a bit of steel slurry and rust particles over its life as a quasi-workbench.  Plus, the Danish Oil finish had fully cured.  As a result, there was nothing to do but have diamond plates on hand for frequent sharpening.  Two hours, half a garbage can of shavings and about ten resharpenings later, the tabletop was tried and true.

wp-1476097110835.jpg

Fun fact: this rug was supposed to be under the table in my old apartment.

It had been a long time since my No. 4 1/2 got a decent workout.  I ordinarily use it only for panel smoothing.  All that resharpening allowed me to work on the blade geometry a bit, getting it mostly straight with a slight camber at the edges (as opposed to a full camber across the entire edge).  When it was time for final smoothing, though, I re-instituted a continuous camber.

wp-1476097119672.jpg

This was sharpening #11.

Ash being a fickle mistress, there is significant tearout at one corner (far right, above), but I’m not so concerned. It’s meant to be a rustic piece. Before I refinish the tabletop, however, I will give it a once over with a tool I haven’t used in ages: the random-orbit sander.  Half an hour at 150 grit should clean up any remaining traversing marks that didn’t come out from smoothing.  I also dressed the long grain edges of the tabletop, just because.

wp-1476097123380.jpg

The top is actually glued down, long grain to long grain.  No splits yet.

I can’t wait to show everyone the new workshop (spoiler alert: it’s larger than a dining nook).  I’ve been making new kitchen cabinet shelves for the new place (the old ones were warped and gross), so it’s high time for a real furniture project.  But everything in due time.

wp-1475783288745.jpg

RIP old shop.

JPG