small space woodworking

Another One Down

I am officially over making footstools.

This is the last one, I swear.

This is the last one, I swear to Glob.

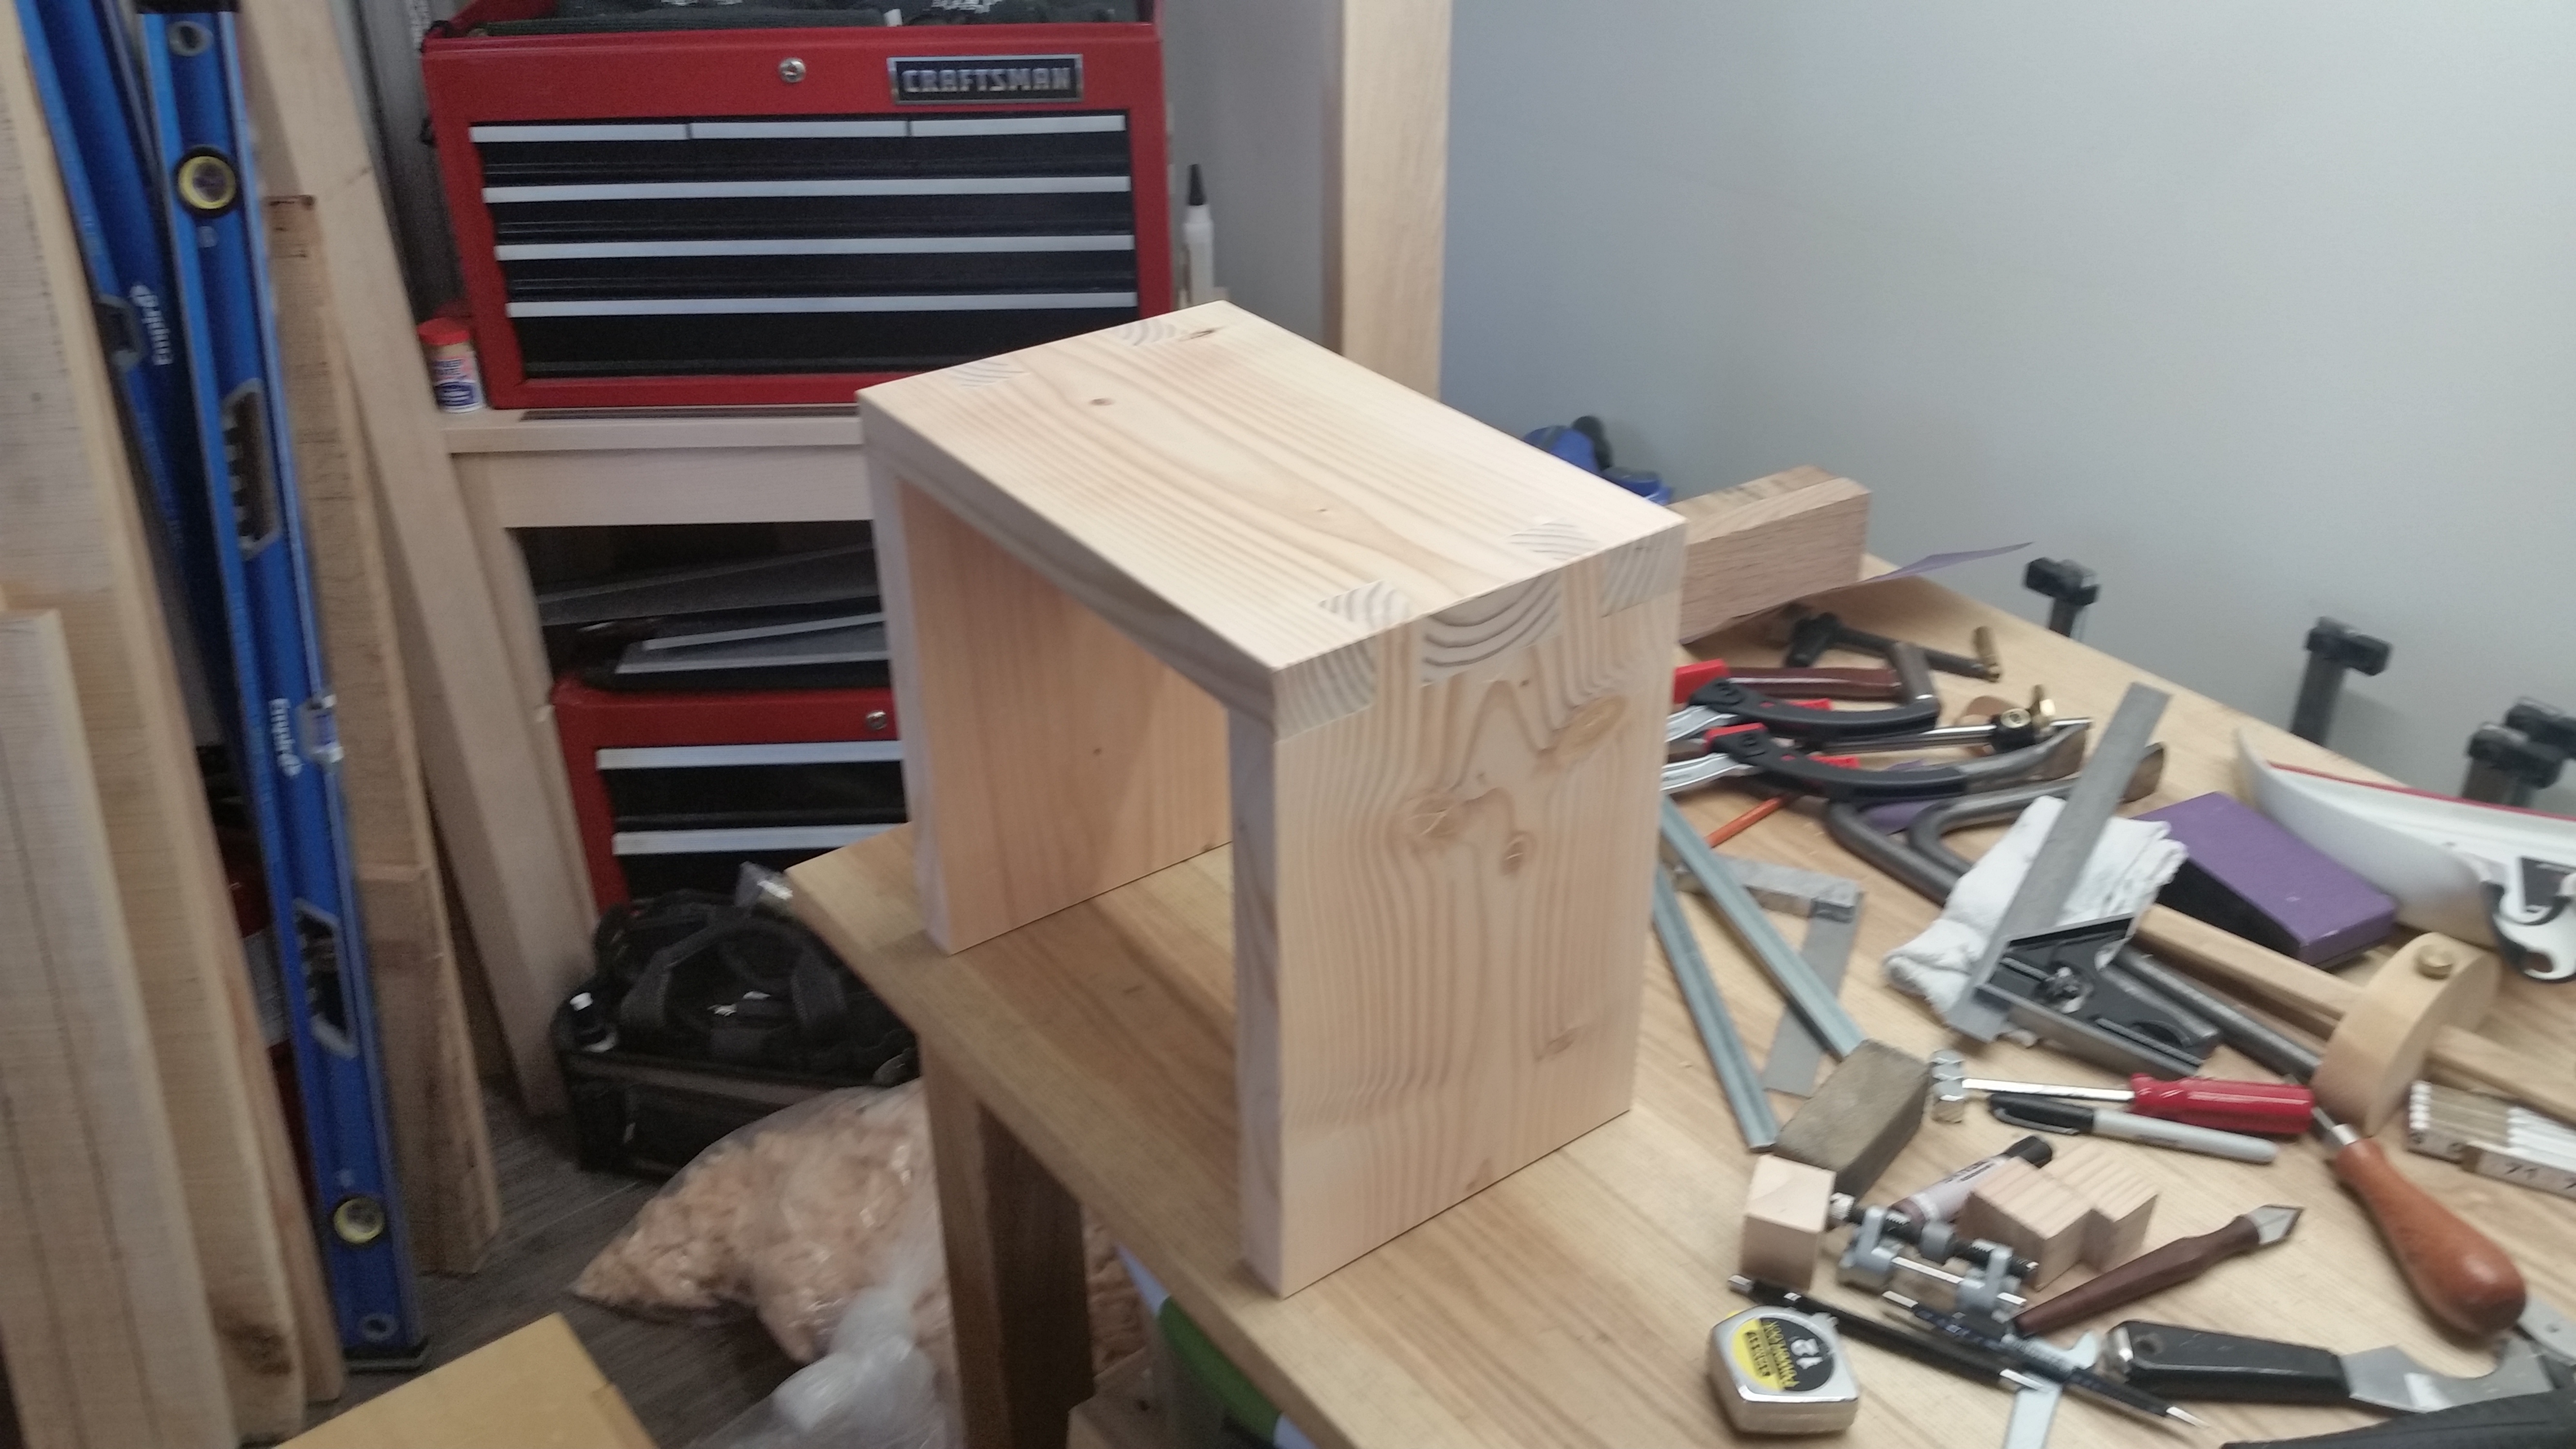
I finally got around to making the third of three footstools for my brother’s new house.  The first two footstools were for my niece and nephew.  This third one is for use in the kitchen.

This is very clearly a utility piece.  Made from home center Douglas Fir 2×10 (leftover from the Planing Slab project), I opted to be super lazy and left the stock pretty close to original thickness and width (after some rough flattening, straightening and squaring).  I just realized that I forgot to mark the pieces to ensure continuous grain in the three main boards, but I imagine it will get a couple of coats of paint regardless.

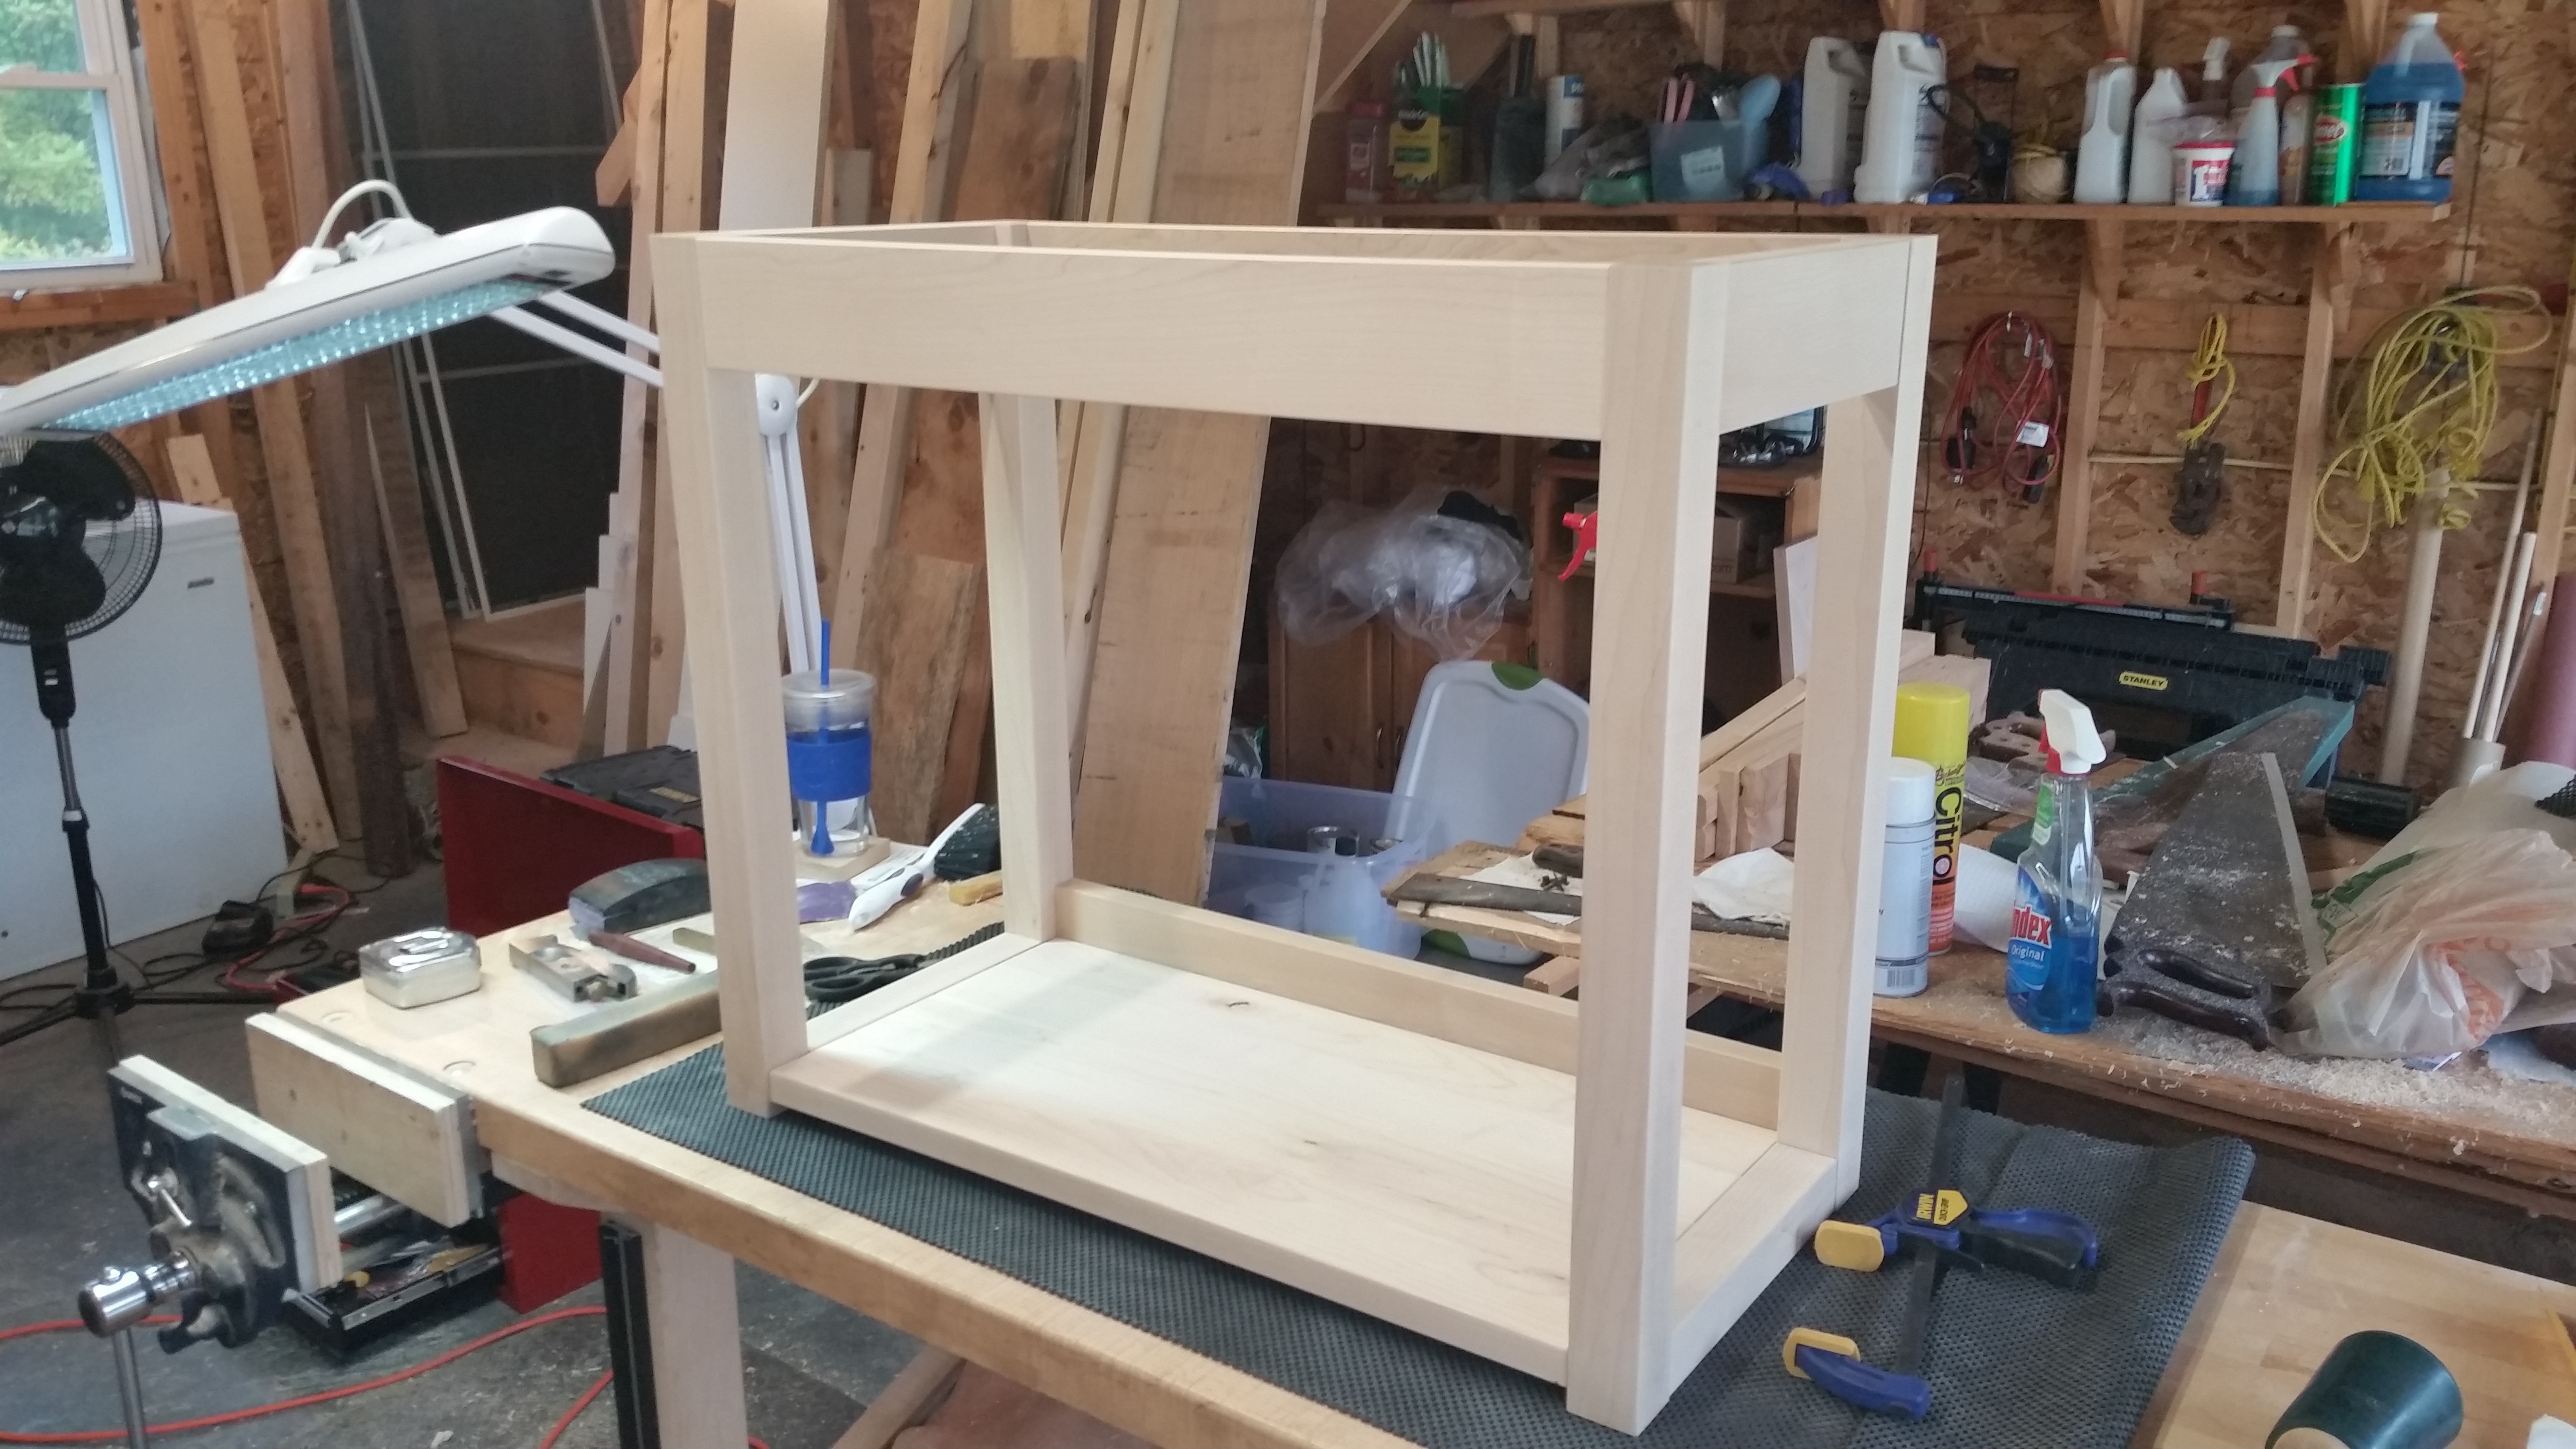
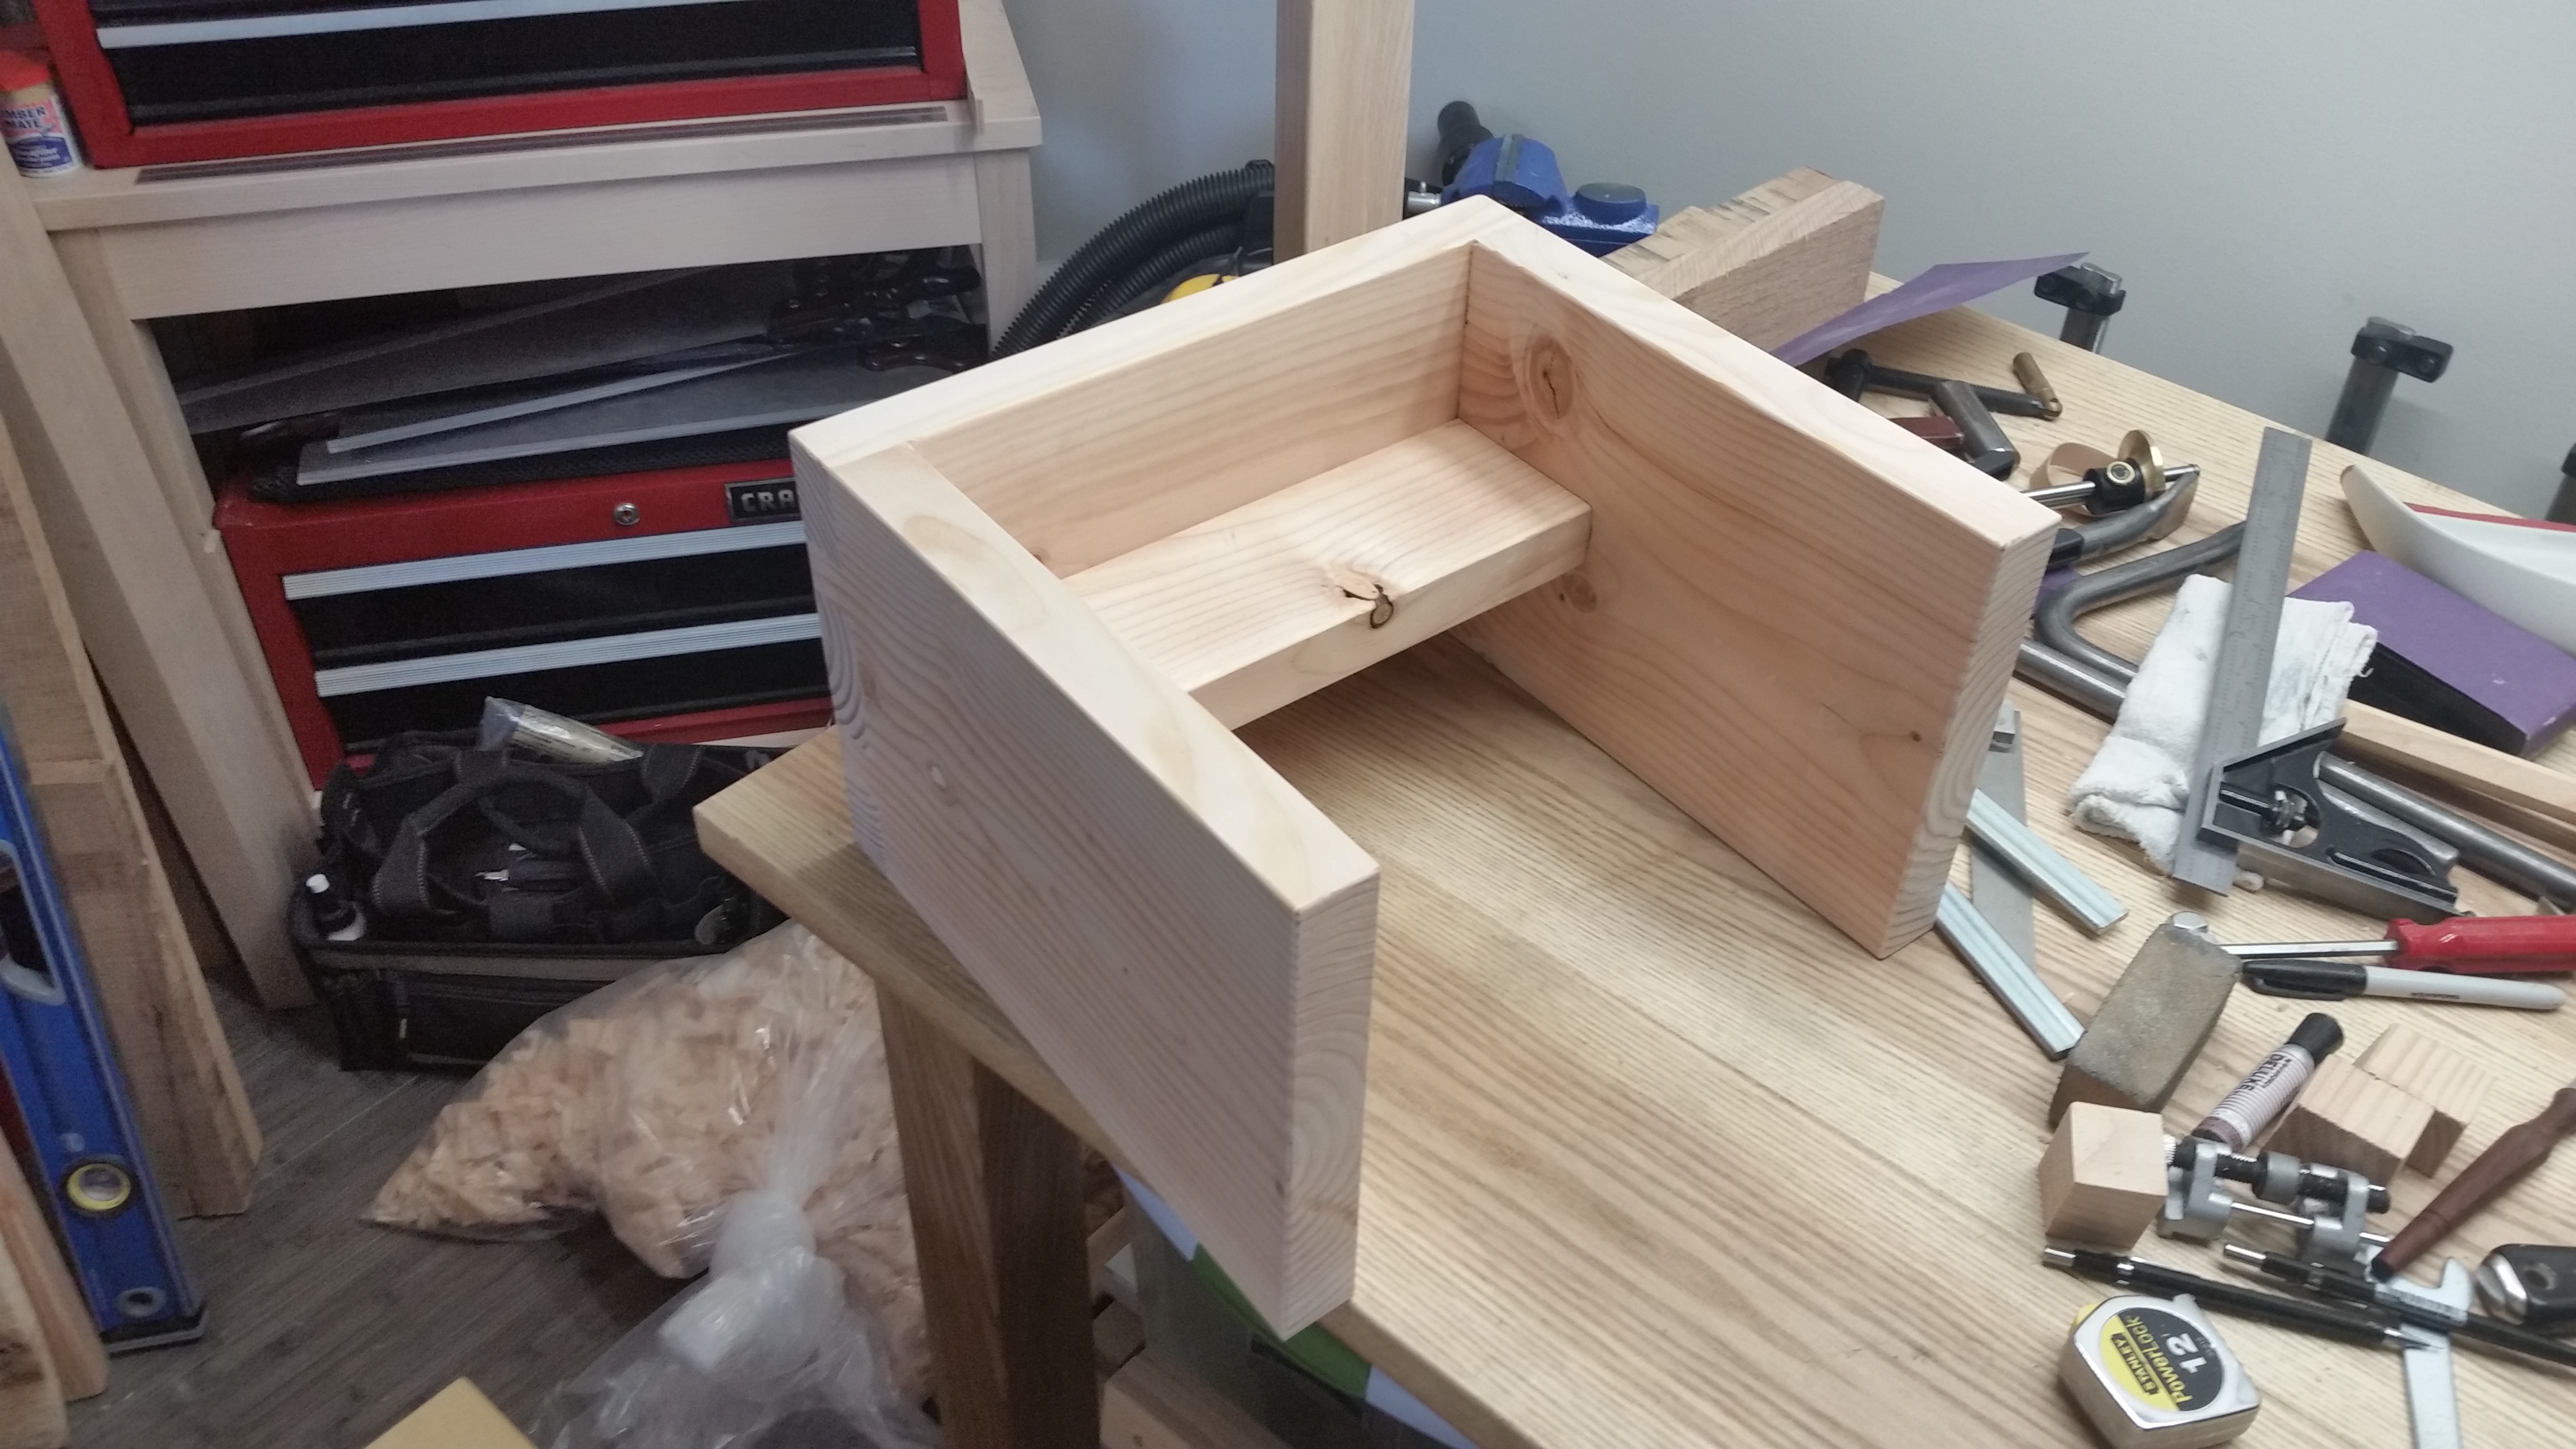
I think that in hardwood, I would have been comfortable with just the two sides and the top.  But in something as soft as Douglas Fir, I opted for an additional cross-support, which connects to the sides via mortise and tenon.  I did not glue or otherwise attach the cross-support to the underside of the top to allow a tiny bit of flex.

Solid as a rock in softwood.

Solid as a rock in softwood.

Speaking of flex, one nice byproduct of using such a soft wood is that the entire piece has a bit of give throughout.  This means that any bit of twist or wobble the piece might have (due to an uneven floor or what have you) vanishes when the weight of a person is applied.

With this done, I am now done with footstools, forever.  Probably not forever, but certainly for a while.

JPG

Safe and Sound

I have been pouring over potential plant stand designs for several weeks and I finally settled on what I think will work. The final height of the pot should end up roughly the same as the temporary fix (see below), which has been a useful guide.  I haven’t nearly finished the build yet, but some of the stock (scrap hard maple) is at least surfaced and ready for final dimensioning and joinery.

In my continued quest to not turn The Apartment Woodworker into a “look at this awesome thing that I made with my awesome tools” kind of website, I would like merely to share the design specs and explain some of the choices.  I am certain the design will be refined further through the build process, but for now, I am satisfied with the aesthetic baseline.

Plant Stand - February 2015

Careful readers will note the ratio of each leg above and below the cross-member is almost exactly that of a lightsaber (or, if you’re boring, a katana).

First, the piece only has three legs. While there has been much going on lately in the world of three-legged furniture, I really just wanted some practice cutting angled tenons and chopping angled mortises. Much of what I design and build is square and true, which can get pretty boring. Plus, the splay and the angle of the legs will keep it stable and the tops of the legs will secure the pot laterally.

Second, the hub design was born from how to get the correct splay angle on the legs. I initially gravitated toward a lapped t-shape (seen top right), which would have reduced the number of individual pieces but required a compound angle on each tenon. Unfortunately, the piece will be weight-bearing, and that compound angle would not place the load on the legs parallel with the mortise and tenon. The hub design, though, allows for the in-line load distribution.  I can drawbore each leg assembly to the hub for an eternal joint, even with the additional complexity.

Finally, although the drawing doesn’t show it, I will probably shape the legs a bit as an excuse to put my new spokeshave (a very old Stanley with a very new blade) through it’s paces.

This is my current, temporary solution.

In case you are wondering, this is my current, temporary solution.  River ate the crown off the left stem, which was the impetus for this particular project.

Now I just have to build the thing. I’ll post pictures when it’s finished.

JPG

Now, About That “Mostly”

Whenever someone asks me what I do in my free time, after the involuntary “free time, that’s funny”, I undoubtedly mention that I like to make things out of wood (and write about it).  I think that may be an understatement.  Sometimes, all that keeps me going day-to-day is the fantasy of one day having the time and the space to have a studio/workshop where I design and build furniture on my own schedule.

But, for now, woodworking doesn't (and doesn't have to) pay the bills.  But it does pay significant emotional and intellectual dividends.

But, for now, woodworking doesn’t (and doesn’t have to) pay the bills. But it does pay significant emotional and intellectual dividends.

The next question is usually about types of furniture I like to make.  “Oh, tables, benches and chairs, mostly” I’ll say, careful to also mention that I don’t particularly enjoy casework (in part, because sheet goods are gross).

Now, about that “mostly”…

I don’t very often talk about my obsession with pet furniture and plant furniture.  In truth, I spend more time perusing the internet for cat perch ideas and plant stand designs than I ever spend scouring human furniture catalogs.  Store-bought pieces are fine (and I’m certainly not taking commissions on cat perches or indoor planters), but anything handmade by me is not going to break down or come loose.  When it comes to my kitty and my dragon trees, that’s the most important thing.  I know lots of pet owners and indoor plant aficionados who would agree.

This is made from 8/4 red oak offcuts.  Call me old fashioned, but I believe a piece of furniture should outweigh the load its bearing.

This is made from 8/4 red oak offcuts.  Call me old fashioned, but I believe a piece of furniture should outweigh the load its bearing.

I’m not saying I’ll ever actually open up a “non-humans only” furniture store.  I’m just saying it would be awesome and hilarious.  I’m sure my parents would be proud.

JPG

Jointer Plane Envy

It’s getting to that point: I think I need a jointer plane. I’ve survived quite well for a while now jointing (and doing almost everything else) with my No. 5 1/2 jack plane.  A jack plane really is more than enough for all normal woodworking tasks (as I’ve said before), but it would be pretty awesome though to have a real try plane. The extra seven inches of length would make all the difference in the world.

wpid-20150218_205822.jpg

That’s what she said?

I will first attempt to clean up an old corrugated Craftsman that was gifted to me last year. But I know myself, and this exercise ends in me splurging for a premium plane. Unlike other size planes where I’m happy to flatten and tune a mid-priced brand, I would rather spend the money for an already true, flat and square sole. I’m leaning toward the Veritas bevel-up model, about which I’ve heard good things.

No matter what, I bet agonizing about it will earn me another few more months to figure out where to keep the thing in my tool chest.  Hollar at me if you have any other suggestions.

JPG

Sharp Enough, From Now On

I use diamond plates for hand-sharpening (with window cleaner as lubricant).  Specifically, I use DMT Dia-Sharp continuous diamond plates and I currently own four: coarse (320 grit), fine (600 grit), extra fine (1200 grit) and extra extra fine (8000 grit).  I am truly happy with only the coarse and fine.

I don’t know if it’s the wheel on my sharpening guide or bad manufacturing luck, but both the extra fine and extra extra fine plates have developed a stripe down the center where the grit has worn almost completely off.  This happened almost immediately with the extra extra fine and took about a month of heavy use with the extra fine.  I try to change up which parts of the plate I use, but for thick plane irons, I have no choice but to run right down the center and the difference in grit leaves a dull hump in the center of the irons.

DMT, if you are listening, I am not particularly happy with these two diamond plates.

DMT: if you are listening, I am not particularly happy with these two diamond plates.

So I am trying something new.  Rather than purchase replacements (new territory for me, I know), I have decided that from now on, my plane irons are only getting sharpened to 600 grit (i.e., on the fine plate).  After re-watching Paul Sellers’ Sharpening to 250 Grit video a couple times over the last few days, I think it will be okay (I sharpen pretty often as is).  I’ll still do my chisels and router plane irons to 1200 grit on the extra fine plate (since I can run them up and down the remaining grit on the sides).

I don’t really even use the 8000 grit plate anymore.  Given how proactive I am with re-sharpening, I haven’t found the extra effort makes much of a difference on edge retention.  And I think I remember hearing somewhere that the edge dulls to a lower grit pretty quickly anyway, so what’s the point?

We’ll see how it goes.  If nothing else, it will cut the weight of my tool chest by a diamond plate’s worth of ounces.

JPG

Saying Goodbye (For Now) to Old Friends

Yesterday, I said farewell to some of my oldest and most trusted tools: my full size router set, cordless jigsaw and cordless circular saw. They now live in storage in my brother’s basement.

These are some of my original tools, from the before times when everything I knew about woodworking came from Norm Abram.  Back before I knew I wanted to do hand tool woodworking almost exclusively.  I consider many of my early tool purchases impulsive wastes of money, but not these.  If (when?) I have the space again, these tools will be back in the shop.

Godspeed, gentlemen.  We shall meet again!

Godspeed, gentlemen. We shall meet again!

My quest to simplify my woodworking existence continues.  I hadn’t touched any of these tools since well before I moved into my apartment over 4 months ago.   My finishing supplies bin takes their place under the worktable.

That brings total power tools remaining in my apartment woodworking shop to: compact router, cordless drill, random orbit sander and Dremel rotary tool.  Not sure there is anything left to cut at this point.  I have thought about giving up my WorkSharp 3000 sharpening station as well, but I never know if I’ll need to grind an edge back to life.

Goodbye for now, old friends!

JPG

The Strong, Silent Type

I recently received an email from a follower (who runs an excellent, albeit way over my head, chronicle of his custom Triumph TR6 called Bowtie6) that made me realize I had completely neglected the second most important piece of furniture in my apartment woodworking shop.  I spent so much time rifling through my tool chests, but I gave nary a mention to the rolling tool cart I built specifically to support those tool chests.

wpid-20140917_093911.jpg

The white part keeps the red parts off the floor.

Constructed entirely of hard maple, the rolling tool cart is custom dimensioned to fit the top chest and intermediate chest.  It’s rock solid, relatively compact and was never intended to be flashy.  There is no finish on the piece (I could never settle on a color and it’s waterproof anyway).  And, just by luck, the whole assembly fits very nicely into a corner in my apartment near the workbench.

I’d like to think much thought went into the design.  For example:

  • the top chest sits (unbolted) on the top, with the handles comfortably at 36″ high (the exact height of my elbows) for ease of lifting
  • there is enough tabletop around the top chest for storing glues and putties (and other odds and ends that have no place on a bench top during a project)
  • the gap between the intermediate chest (also unbolted) and the top rails is almost 10 inches high, giving me ample room to store my machinists granite slab and my panel saws
  • the bottom shelf is slatted and floats free in rabbets in the lower rails for maximum flexibility as the piece settles under the weight of the tool chests
No one will ever know

I think aesthetics are sometimes lost on shop furniture projects.

As always, after a few months of use, there are some things I would change, in retrospect:

  • the casters are not nearly large enough to make the cart mobile, which is fine while the cart sits stationary in my apartment
  • I should have added dowels at the tops of the posts to secure the tabletop, which is currently glued directly to the frame and further secured with glued-in wood blocks (like corner brackets)
  • I measured the intermediate chest wrong and had to cut shallow dadoes in the posts to accommodate the lip of the intermediate chest (which extends out slightly to permit stacking of intermediate and top chests)
  • I haven’t yet been able to bring myself to drive nails into the side for hanging my winding sticks and dovetail markers
wpid-20140916_160713.jpg

You can clearly see the dadoes and the tiny casters in this shot.

I built the rolling tool cart to be furniture quality (like everything I do) and I know I succeeded because my mother has already called dibs on the piece to use as a kitchen island.  If and when she finally confiscates it, I will swap in a set of larger, decorative casters and fit a middle shelf into the dadoes (there is a bright side, I guess).

In the end, like any good piece of shop furniture, the rolling tool cart does its job and fades silently into the background.

JPG