General

Traveling Tool Tote Retrospective

It’s been about a month since I finished the traveling tool tote.  I am very pleased with the result.  Even if I haven’t figured out how or where to attach a transom chain.

wp-1463092251778.jpg

I’m getting better at stuffing it, too.

I may be my own biggest critic, but there also are genuinely some things I don’t like about it.  In no particular order of importance, the good and the bad are as follows:

Size and Shape

  • The Good: the basic dimensions are nearly perfect for the tools it was designed to hold.  My panel saws fit inside lengthwise (in a till) and the well area comfortably holds a bevel-up jointer, a No. 4 smoothing plane, a large router plane, a block plane, a tool roll (chisels) and sharpening gear (diamond plates, saw file roll, etc).  The 4″ deep sliding tray has plenty of capacity for two backsaws (dovetail and carcass), marking and measuring tools and assorted odds and ends.  The simple rack on the back wall rounds out the basic storage setup, giving me everything I need for working away from the shop.  It’s heavy but portable, even fully-loaded (but by “portable”, I mean “I can move it from my apartment to my trunk by myself without herniating a disk”.
  • The Bad: the sliding tray itself is too wide. At just under 7″, it covers more than half of the well, making it difficult to reach tools that sit in the center of the floor.  I find myself removing the tray more often than not as I’m unloading.  A small complaint, but still something to address in the next version.  In addition, the simple rack, with its four spacers, will eventually be replaced with a solid rack of 1/2″ holes bored every 1 1/8″ on center (which I avoided this time around due to lack of drill press).
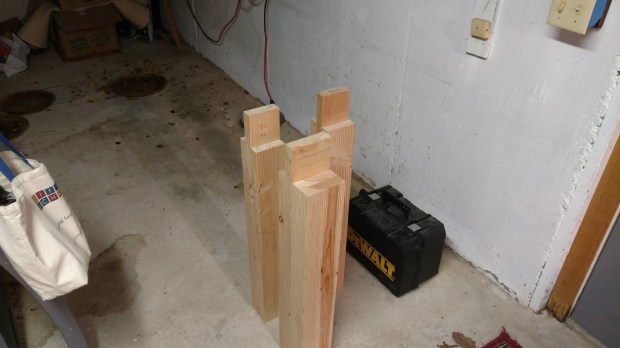
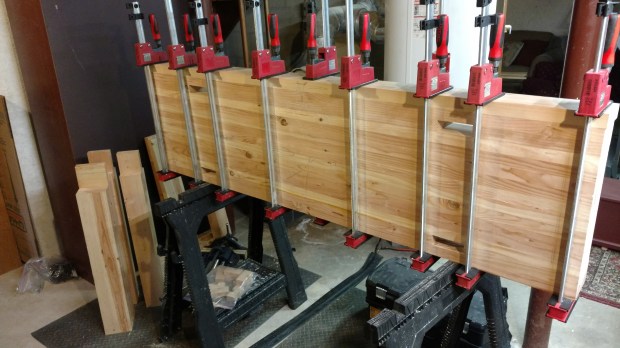
Construction

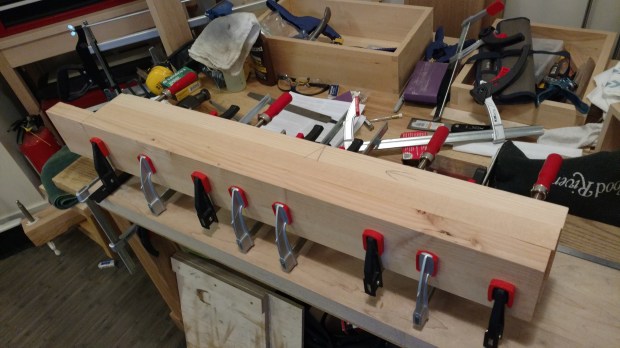
  • The Good: rabbets and nails are definitely easier to get right than dovetails.  Angling the nails a bit adds to the holding power and properly sizing the end grain makes for a strong joint.  Although not strictly necessary, I added a dovetailed lower skirt to keep everything cinched tightly and cover the end-grain on the floorboards.  And the lid, consisting of a pine panel and two oak battens nailed on, came together quickly and easily.
  • The Bad: rabbets and nails will never be as strong as dovetails.  In fact, trauma to the case during construction fractured one of the corner joints and even when re-glued and re-nailed, I felt it necessary to add corner brackets as reinforcement.  I will likely dovetail the next incarnation.  Also, the oak battens only hold the pine lid flat across the width and do not affect the slight bow across the length of the lid.

Hardware

  • The Good: the Lee Valley iron handles are comfortable and stout, being screwed through the pine sides and into the oak tray runners.  Both the Tremont cut nails (used for assembling the case and attaching the tray bottom) and Dictum die-forged nails (used for attaching the lid battens and assembling the tray sides) look nice and hold well.  I am still searching for a reasonably-priced transom chain for the lid.
  • The Bad:  the “no mortise” hinges are a pain to get straight.  Even after attaching all three to the case and transferring marks to the lid, I still put the lid on slightly crooked.  An extreme amount of fussing barely undid the damage, and I switched in regular butterfly hinges .  I also continue to struggle with slotted screws (hand-driven or not) to the point where it was preferable to glue in the panel saw till.

Conclusion

I may have overestimated the tools required for on-site work.  I don’t really need everything this tool chest is meant to hold (e.g., I haven’t once reached for a panel saw or my saw set).  As a result, the fully-loaded tool chest is very heavy; almost too heavy for casual travel.

The next incarnation will be smaller and lighter.  I’m testing out a 24″ x 12″ version (also made from home center 1×12 pine, but thicknessed down to 1/2″) that will be dovetailed at the corners.  In addition to experimenting with french-fitting the well storage, it will also swap out a sliding tray for a full-depth version that should be placed on the benchtop (like a mobile tool well).

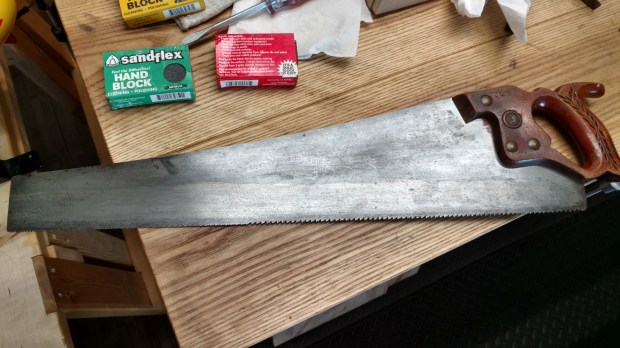
And this might be a good excuse to splurge on that BT&C Hardware Store Saw, which I believe will fit the 23″ inside dimensions.

JPG

I’ve Said it Before

And I’ll say it again: I never know how big something will be until it’s knocked together.

wp-1465746129644.jpg

24″ wide x 12″ deep x 11″ tall, to be exact.

They may be a P.I.T.A. to store, but I’m always glad to have the band-clamps seen above.  The half-pins on the top front corners (i.e., the most visible corners) of the carcase don’t fit tightly to the tail board, so I’m cinching it all together as the glue dries.  Fingers crossed the glue holds long enough for me to drive a headless brad into each tail board to close up the gap permanently.

If that doesn’t work, Plan B is to use wood filler and paint the top rim.  I’m putting a proper dust seal on this chest, so there will be plenty of clearance for a couple coats of milk paint.  If this were a chest with a battened lid (like the traveling tool tote), as a matter of course the top rim would be painted to protect against the constantly slamming.

wp-1465762343142.jpg

Editor’s Note:  Success!

Next up: ripping bards for the lid and the skirts. And maybe making a saw till.  This is another travel-size tool chest, FYI.  Check out tomorrow’s post for more info.

JPG

Short Cuts Make Long Delays

For an upcoming project, I need perfectly flat, perfectly straight stock.  But I only need 1/2″ thickness out of 3/4″ boards.  So I’m taking the laziest possible approach: skip planing.  But because the boards start off too thin for true skip-planing, I am pulling a page from the planing sled handbook and using blue tape to fill the hollows.

wp-1465429089545.jpg

If I had a super power, it would be “cutting corners”.

Each outside edge is planed perfectly straight and without twist, and the blue tape will ensure the board rides to the planer table evenly and without pressing flat.  Thereby, one side of the board will be made perfectly flat.  With the tape then be removed, the board can be flipped end over end and sent back through the planer for perfectly parallel faces.

Speaking of parallel faces, I apparently left my winding sticks at my parents house, hanging off my old workbench.  I needed some for the above skip-planing.  So I made some out of scrap 3/4″.

wp-1465429084046.jpg

About as basic as they can get.

At 1.5″ x 15″, I’m sure they will get re-purposed for actual furniture.

JPG

Easy Desk Conversion Kit

About four years ago, armed with nothing but a double bevel sliding compound miter saw and a medium router kit, I set out to make a desk.  It was my first foray into what I could (at the time) consider non-traditional table joinery (mitered half-laps and bridle joints).  I’ve wanted to revisit the design for a while now; not because I don’t like it, but because I could do it so much better by hand.

Except that sensibilities change and the design now seems heavy to me.  I want something lighter, but that won’t leave me without a desk for an extended period of build time.  The tabletop is still in excellent shape.  Laminated from five boards of ~1″, quarter-sawn, mineral-streaked red oak, it’s straight and rigid over the years.  My solution for a quick retrofit: metal legs.

wp-1465296948802.jpg

Made by Osborne Wood.

Each leg is 29″ high and has a 4×4 base.  No. 10 pan-head screws should be fine for attaching them to oak battens, which will in-turn be (hide)glued and nailed to the underside of the tabletop.

wp-1465299099984.jpg

This is 3/4″ oak.  I think I might need 5/4″ (at least) for the battens.

There is not much weight on the tabletop (two monitors and basic computer input devices), so I don’t see the need for lengthwise support battens.  I may, however, add a third batten, cross-grain at the center point.  The switch from wooden frame to metal legs will raise the work surface the thickness of the battens (~1″), add over 4″ of underside clearance, and reduce the overall length by about 7″.

Assuming I prepare the leg assemblies in advance, the retrofit should be doable in an afternoon (including a quick flattening of the underside where it will mate with the battens).  The salvaged wood from the frame (also red oak) will find some use (after being stripped of wipe-on poly).

JPG

New Sharpening Jig

It was time to make another depth stop jig for use with an off the shelf Eclipse/Record-style sharpening guide.  My current version of the jig, made of 2×3 offcuts, is way too bulky for carrying around in my traveling tool tote.  I don’t freehand sharpen my plane irons, so this is an essential piece of shop equipment for getting consistent edges across multiple sharpening sessions. I did not make one for chisels, though, because I freehand (or machine, if available) sharpen my chisels.

wp-1463935046348.jpg

The sharpening guide in question shown in the middle.

I had considered making this a “Basic Project”, but it’s been done so many times I don’t want to take credit for the plans.  This new version is just a variation of Christopher Schwarz’ design.  Please note that if you don’t use the Eclipse/Record-style of sharpening guide, the depths listed below won’t work for you (but the numbers can be adjusted to fit whatever sharpening guide you use).

wp-1463935036436.jpg

Instructions for the full-size, benchtop style seen top left.

There is no real joinery in this project, which I love. Each stop block is CA glued in place and tacked with brads once the glue is set.  What makes this project a little tricky, however, is the need for perfectly square edges. Once you have a straight reference edge (planed or factory, if using sheet goods), the shooting board really gets a workout squaring the ends of the stop blocks and the base board.

I could not find a link to the instructions pictured above, but the depths are as follows:

  • 25° = 54mm
  • 30° = 40mm
  • 35° = 29.5mm
  • 40° = 21mm
  • 45° = 15mm

One thing I didn’t realize before this build was how quickly CA glue sets on white pine (spoiler alert: VERY quickly).  Even so, CA glue does not have great shear strength, so pre-drilling the brads was important.  Two brads per block seems to be more than enough.

wp-1463935043153.jpg

I put the depths I use the least on the underside of the jig.

I eschewed the 1mm shim on a string for creating 1° microbevels (seen in the full-size instructions pictured above).  Mainly because using the same metal ruler I use for the David Charlesworth Ruler Trick works just fine.

It may only be quartersawn white pine, but this thing should last forever.  And if the CA glue gives way, I’ll just scrape it off and use hide glue (the nails will guide the block into place again).  Or I could preemptively drive a third, larger nail into each block and be done with it.

JPG

Let There Be Light! (Part Deux)

When the electrical failed in the external workroom at my parents’ house where I keep my thickness planer, my choices were clear: learn electrician stuff or build an improvised lighting rig.  No stranger to DIY illumination solutions, I chose the latter.

wp-1464133866470.jpg

Not bad, for using only what was on hand.

I had nearly forgotten about these LED floodlights. Each is 15W and approximately 1.5lbs. They aren’t great for directional lighting (they’re meant for use with a diffuser), but the four together provide enough illumination to thickness plane and rummage around without tripping over myself.

The board holding them together is a scrap of 1/2″ x 3″ red oak, with six 1/4″ holes drilled through it to accept the four lights and two threaded eyes (leftovers from the original arbor rig in my apartment).  I thought about using a scrap 2×4, but that seemed overkill and I didn’t have one available in my apartment, anyway.  If the board does sag over time, I can always replace it with something more rigid.

wp-1464133862307.jpg

The essence of apartment woodworking, all in one camera frame.

The line is 3/8″ marine rope from the boating center.  Whatever line I don’t use for hanging this rig will go back to its original purpose: a stay for the lid on the traveling tool tote.  Lastly, the power cords are bound together with some hook and loop zip ties and run to a one-to-four power cord splitter.

I love these little DIY rigs because they solve real problems with the minimum of materials.  Plus I get to play gaffer and pretend like I know movie stuff.  Best of all, I should be able to see again while I’m thickness planing.

I’ll take a picture on site over the weekend and post it to twitter.

JPG

Holy crap, you guys!

I got so much done over the weekend.  I’m very close to being done with the Stent Panel workbench.

First, I added pine veneer to the cheek of each of the tenons, which is part 1 of the joinery strategy for a stretcher-less workbench. Part 2 is using my new mortise float to square and plumb each mortise (although a rasp would work equally well).  Part 3 is shoulder planing the opposite side of the tenon to perfect, piston-fit.

wp-1463873618825.jpg

It’s face-grain to face-grain, so these are permanent additions.

Speaking of tenons, three out of four legs are completely done, with the fourth in process.  They are stouter than I anticipated and I’m confident in the plan for the workbench.  Overall weight should be close to 200 lbs. once assembled.

wp-1463873624555.jpg

Always label your parts.

The fourth leg is only in process because I finally added the show face to the slab, which took all but one of my parallel jaw clamps.  It was an excellent glue-up, though, and I can’t wait until the show face is glistening from final planing.

wp-1463873629327.jpg

Total depth is expected to be exactly 19.75″ after final squaring.

There is technically only one more board to glue up (the inside board on the front right leg), although I expect the crochet will be laminated.  In addition, I need two new short stretchers.  The old ones no longer fit with the fatter tenons sitting differently in the mortises.

wp-1463874003243.jpg

Also, F-clamps are no substitute for parallel jaw clamps.

That’s it for now.  Looks like I need one more weekend to finish everything.  The very last step will be to rough flush the mortise strips with the rest of the benchtop using a hand-held power planer.  Final flattening will occur once it’s back home and in place.

JPG


Forging New Paths

New to me, at least.  I’m cleaning up a vintage saw.

wp-1463397729478.jpg

And ruining my nice ash table in the process.

This Simonds saw, a 12ppi crosscut panel saw, came to me through a family friend (a godparent, in fact).  The plate was lightly rusted, with little pitting (and none near the teeth).  Sandflex hand blocks and some elbow grease quickly led to a passable shine.  And the Etch even survived the rust removal process.  The plate was slightly breasted along the toothline: unclear to me if the breasting was OEM or a product of uneven filing over time.

wp-1463397737989.jpg

Made from 1901 to 1926, according to teh interwebs.

The handle is also in excellent shape, if slightly paint-caked around the plate.  There is some chipping around one of the saw nuts (probably my doing), but otherwise, the finish is consistent and no work was needed.  I may ease the top tongue on the handle to fit my hand better, but I’d like to see how it works before I do.

wp-1463397733639.jpg

No lamb’s tongue, but whatever.

The only real problem with the saw was the teeth.  One side of the plate, the were filed much smaller than other.  My best guess is the crosscut filing was consistently done out of horizontal and without flipping the saw around between sides.  So my choices were: (i) file the teeth completely away and start all over or (ii) reshape the saw into a 6+ tpi rip saw.  There is a great Paul Sellers tutorial on recutting saw teeth, but a 6+ tpi rip saw will fill a gap in my tool chest.

wp-1463397744561.jpg

Notice the sharp teeth on the left even after heavy jointing with a flat file

I’m not finished with it yet, but I think reshaping was the right choice.  I already own a 10 tpi rip pattern panel raw (which is great for all-around work, including cross-cutting to rough length), but my only other rip pattern panel saw is 4.5 tpi (too coarse in my experience for hardwoods).  This saw will almost split the difference and give me a more aggressive option for hardwoods and softwoods alike.

And worse comes to worst, I’ll file them flat and start all over again.  There is plenty of plate left.  Either way, I’m going to need a new 7″ slim file after this.

JPG


It’s Easier to Remove More

I’m sick of projects.  I want to spend the next month just sharpening and sorting.  Figuring out what I have, giving away what I don’t need, and planning a permanent tool storage solution around that result.  I’d also like to beef up my DIY moxon vise with an extra board on the back jaw for balance.

wp-1463090713357.jpg

The shop is becoming cluttered again.

But all of that depends on actually finishing one project: my Stent Panel workbench.  I’m very close: four more boards to laminate onto the remaining legs, one short stretcher to fit and a show face to attach to the benchtop.  But then comes the final problem: piston-fitting the leg tenons.  Since abandoning long stretchers, friction-fit joinery has become a must.  And for portability, I also won’t be gluing or drawboring the legs in place (at least not at first).

So far, sizing tenons has been a trial and error process.  I flatten a tenon board, square an edge, and then send it through the thicknesser to just over the correct thickness and width.  In at least two cases, the tenons ended up too thin (by 1/64 or so) for the mortises.

My first thought was to CA glue plastic shims to the tenon cheeks.  This worked fine.  But the correct thickness plastic shims are either hot pink or white, neither of which are a great color matches to the rest of the bench.

My second option is wood veneer.  In fact, Rockler makes a 2/83″ pine veneer sold in 3 sq ft batches for under $9.00 (it was $12.98 including shipping).  I figure a film of PVA glue brings the patch up to 1/32; I can shoulder plane down the reverse side to friction fit. And the face grain to face grain glue surface should make the veneer a permanent addition to the tenons.

The leftover veneer can be used to fill any remaining gaps once the bench is assembled and flipped over.  Measure twice and cut once, indeed.

JPG

Fleam On

From time to time, I make woodworking resolutions.  Maybe “resolution” isn’t the correct work; perhaps “aspiration” is more appropriate.  A less pedantic version of me would just say “goal”.

My most recent woodworking resolution is using my crosscut tenon saw more often.  Which is secret code for “learn to sharpen my crosscut tenon saw better”.

wp-1462967979904.jpg

I put these lines on the new saw vise for a reason…

For some time now, I’ve relied almost exclusively on rip-pattern saws for both ripping and crosscutting.  It’s true that crosscutting with a rip-pattern saw leaves a ragged edge, but most cross-grain cuts also get a knife-line (or gauge-line) to establish a clean shoulder.  Any raggedness from the saw sits below the visible shoulder line (or is cleaned up when paring to said line).  And I’ve gotten quite good at rip-pattern sharpening, making it even more efficient.

But crosscut saws exist for a reason.  The different tooth geometry really does matter in some applications (e.g., through dadoes).  So I am retraining myself to sharpen a crosscut-pattern.  I have a feeling there will be some tooth jointing in my future.

JPG