apartment woodworking

Tenon Details

Mortise and Tenon joint is the first woodworking joint I learned to cut.  At first, it was tenons by hand and mortises by plunge router. Closed mortises, roughly half the material deep, and stub tenons, with four shoulders. Everything co-planar and nothing fancy. Words like “reveal” and “haunch” were unknown to me.

Even the picture is poor quality.

One of the first joints I ever cut.  Even the picture is poor quality.

After a few months of voraciously consuming woodworking scholarship (mostly via YouTube) and much trial and error, I knew enough to plan a specific reveal for a joint. A nice roundover leading to a slight reveal can make a world of aesthetic difference and can be accomplished by simply varying tenon shoulder depth.

This is a vanity sink I built for my brother's first house.

The vanity sink I built for my brother’s first house.  That’s the matching footstool on the right.

Later, I learned to always cut mortise and tenon joints to align the long-grain gluing surfaces (and maybe even do a double mortise and tenon) for maximum strength. This allows for different board orientations (and more delicate-looking frames).

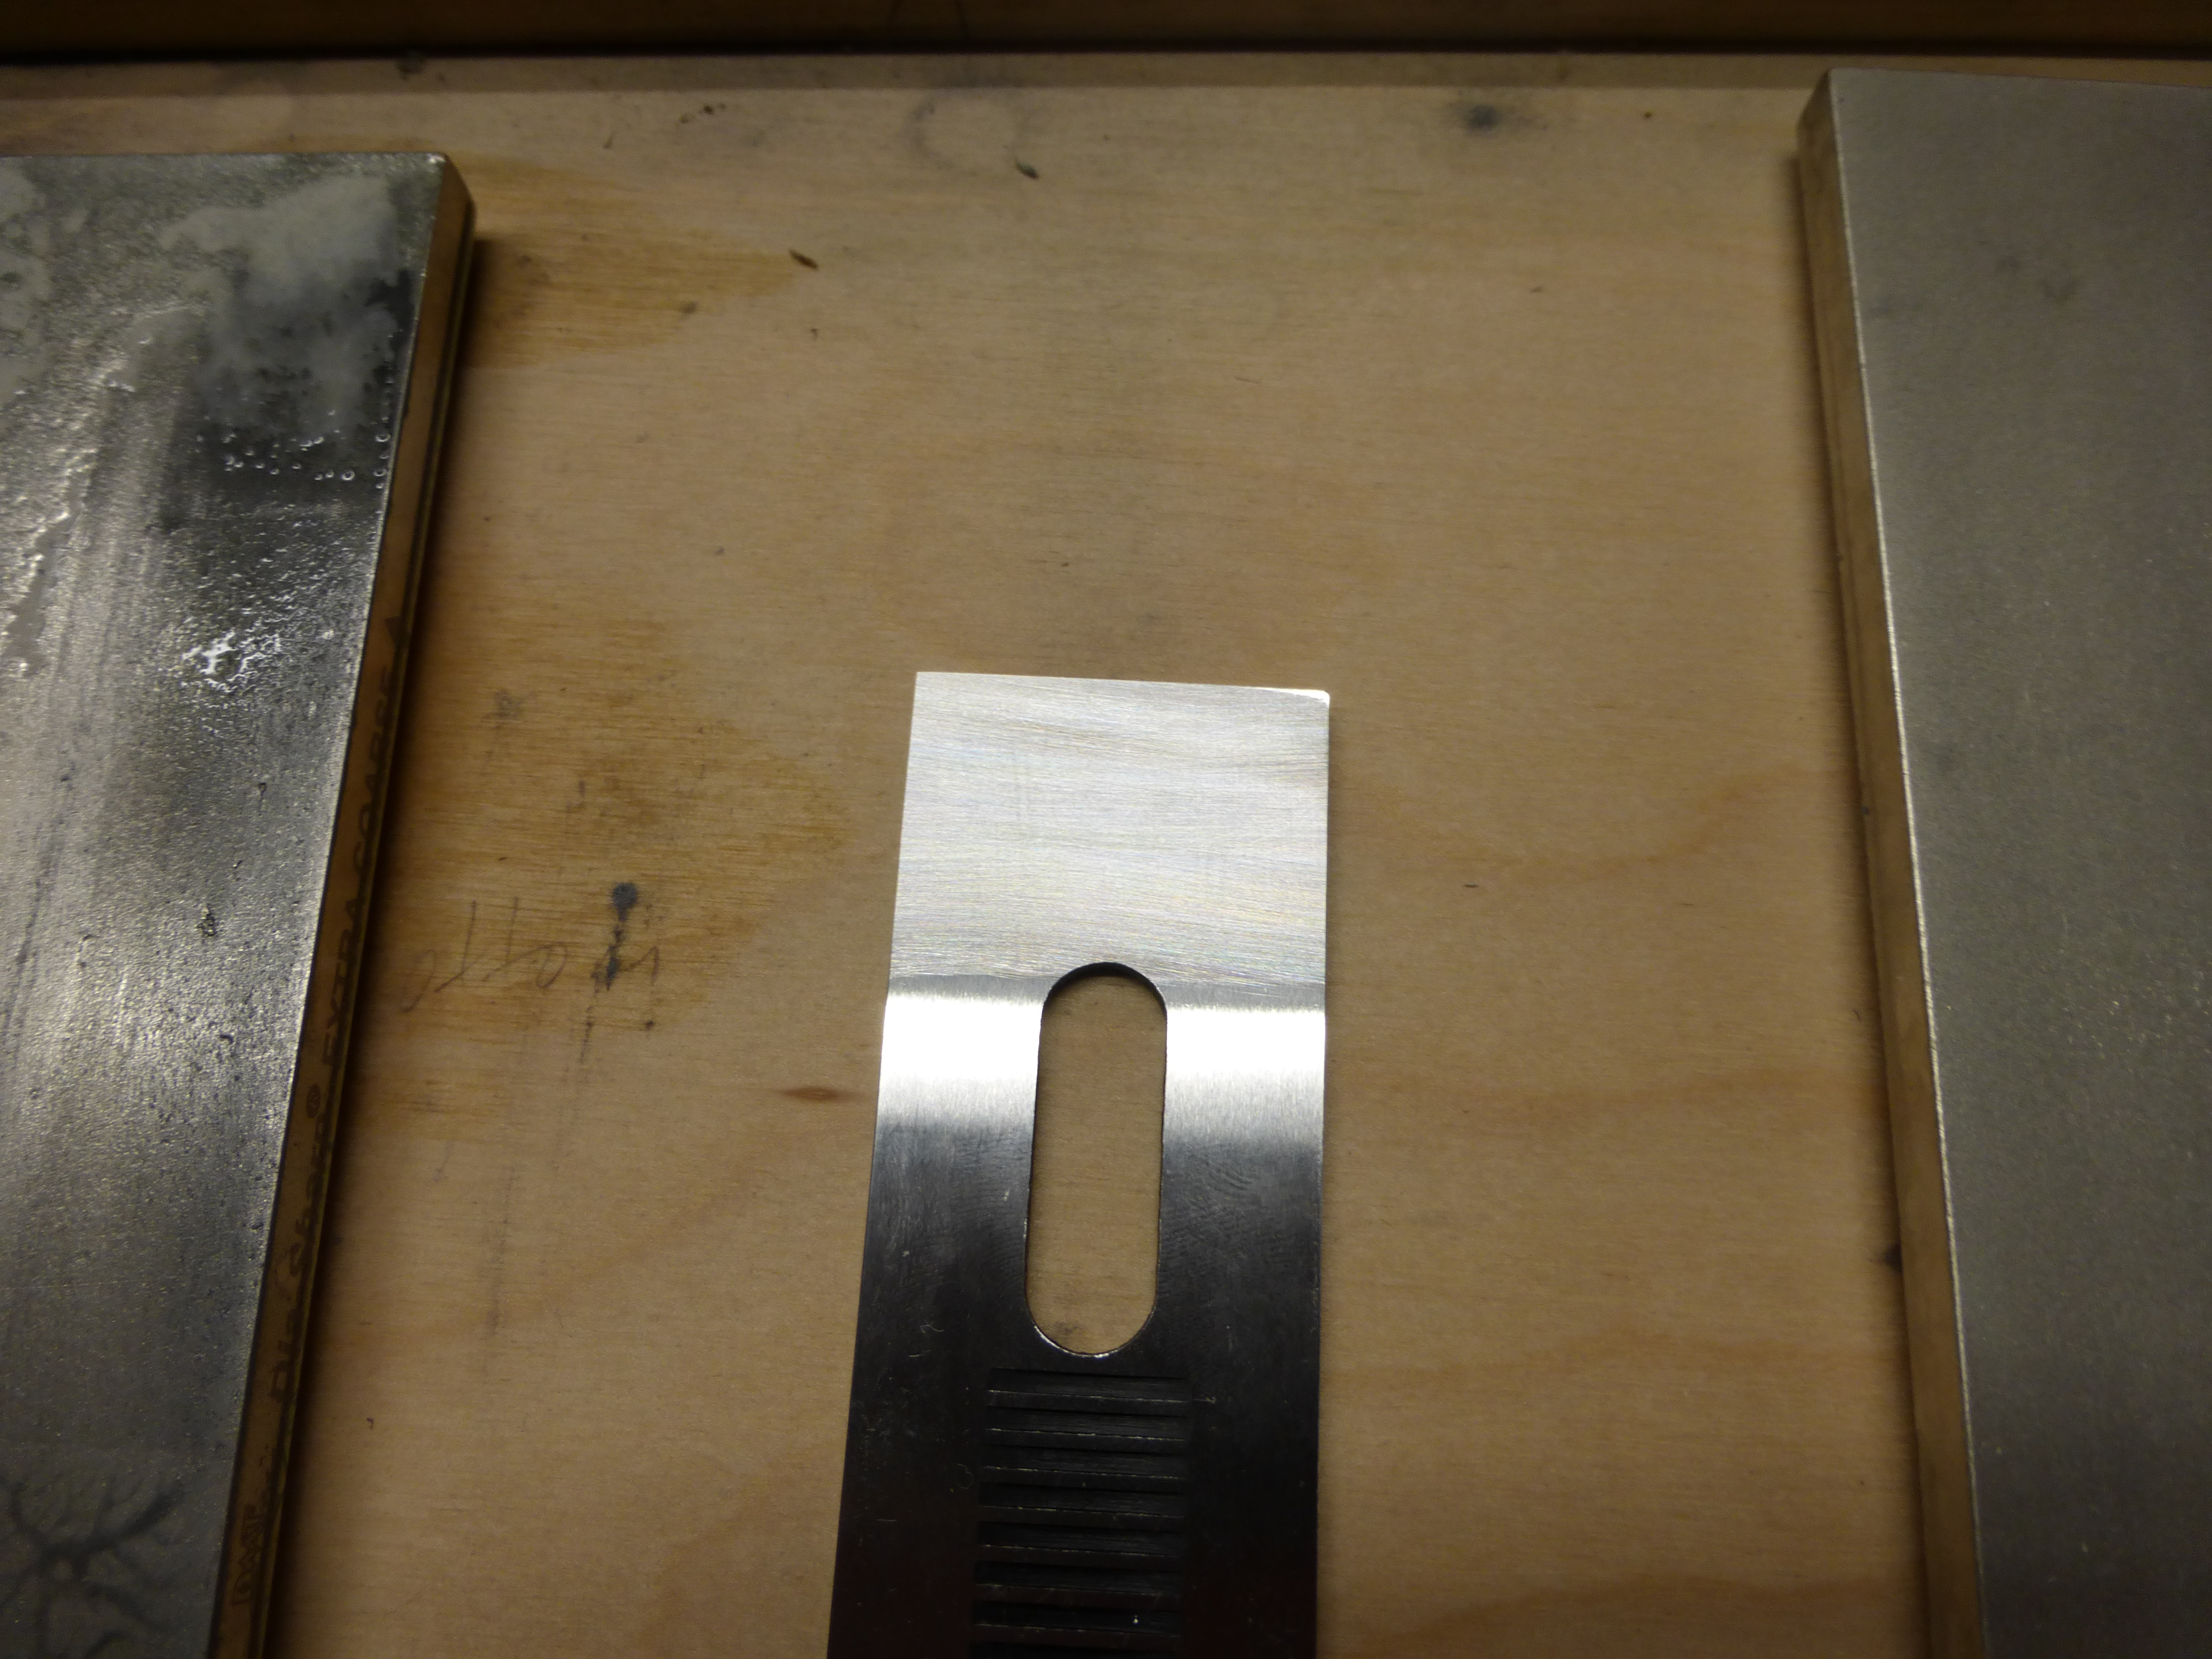
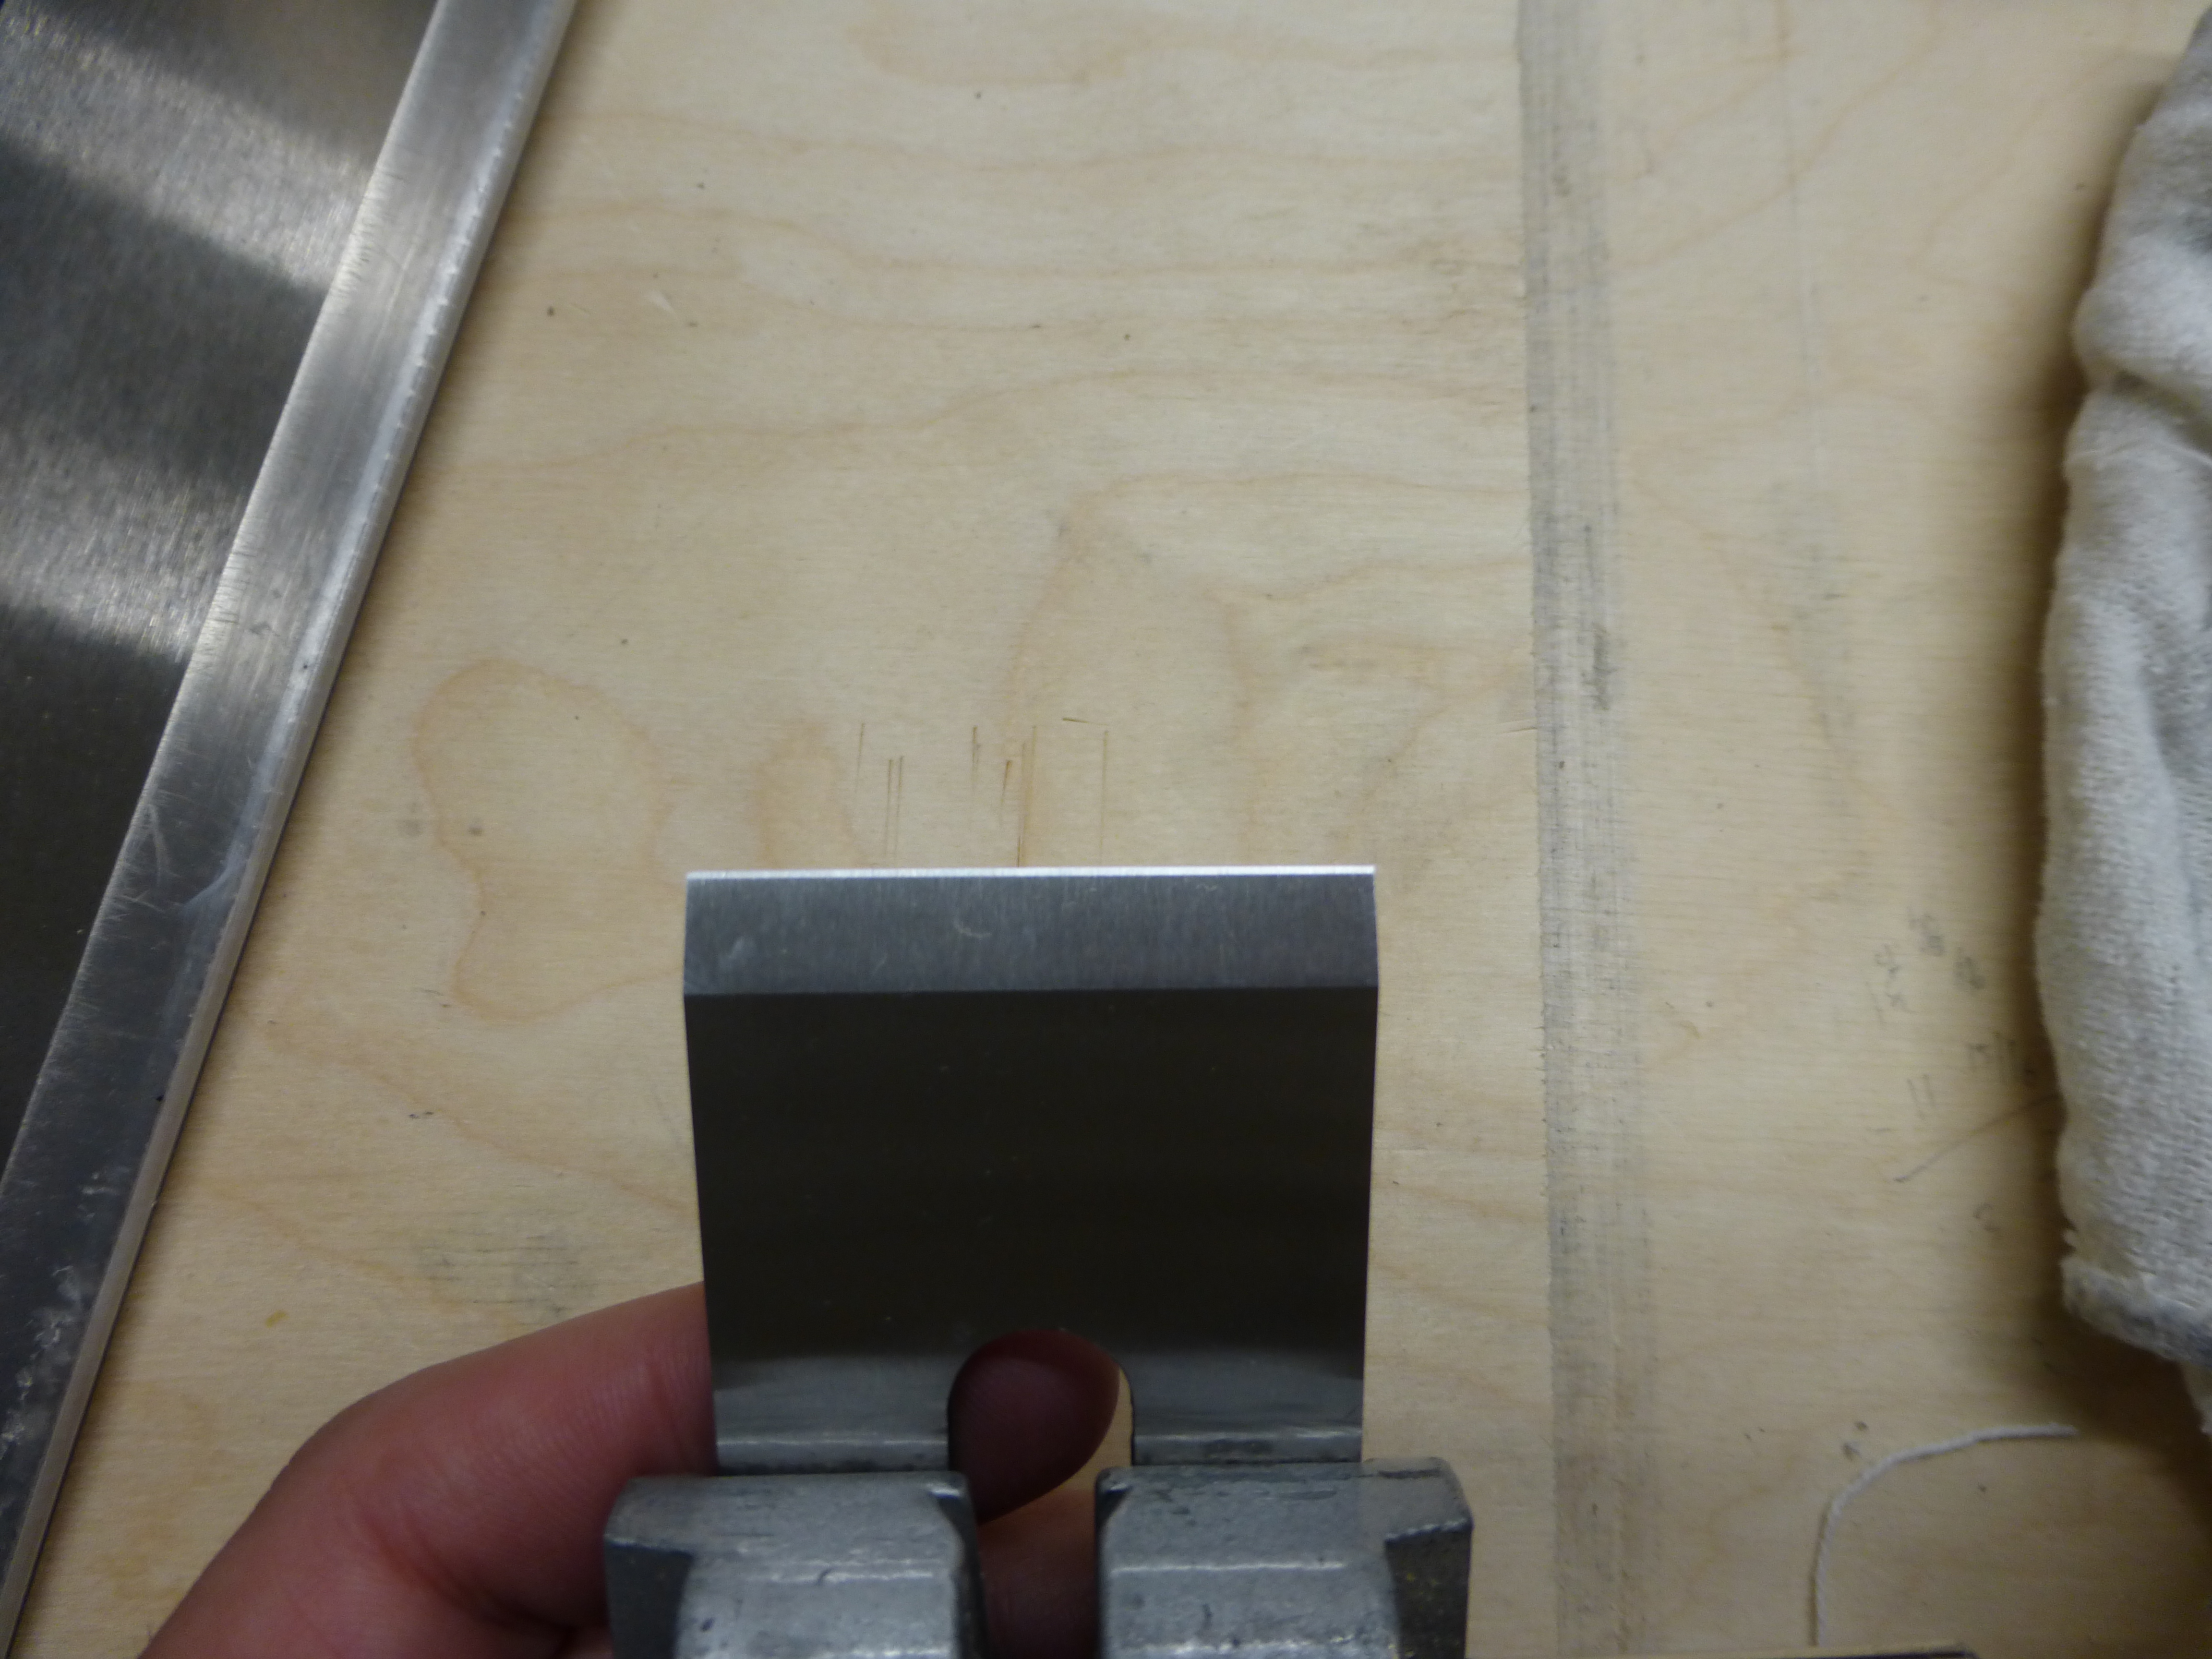
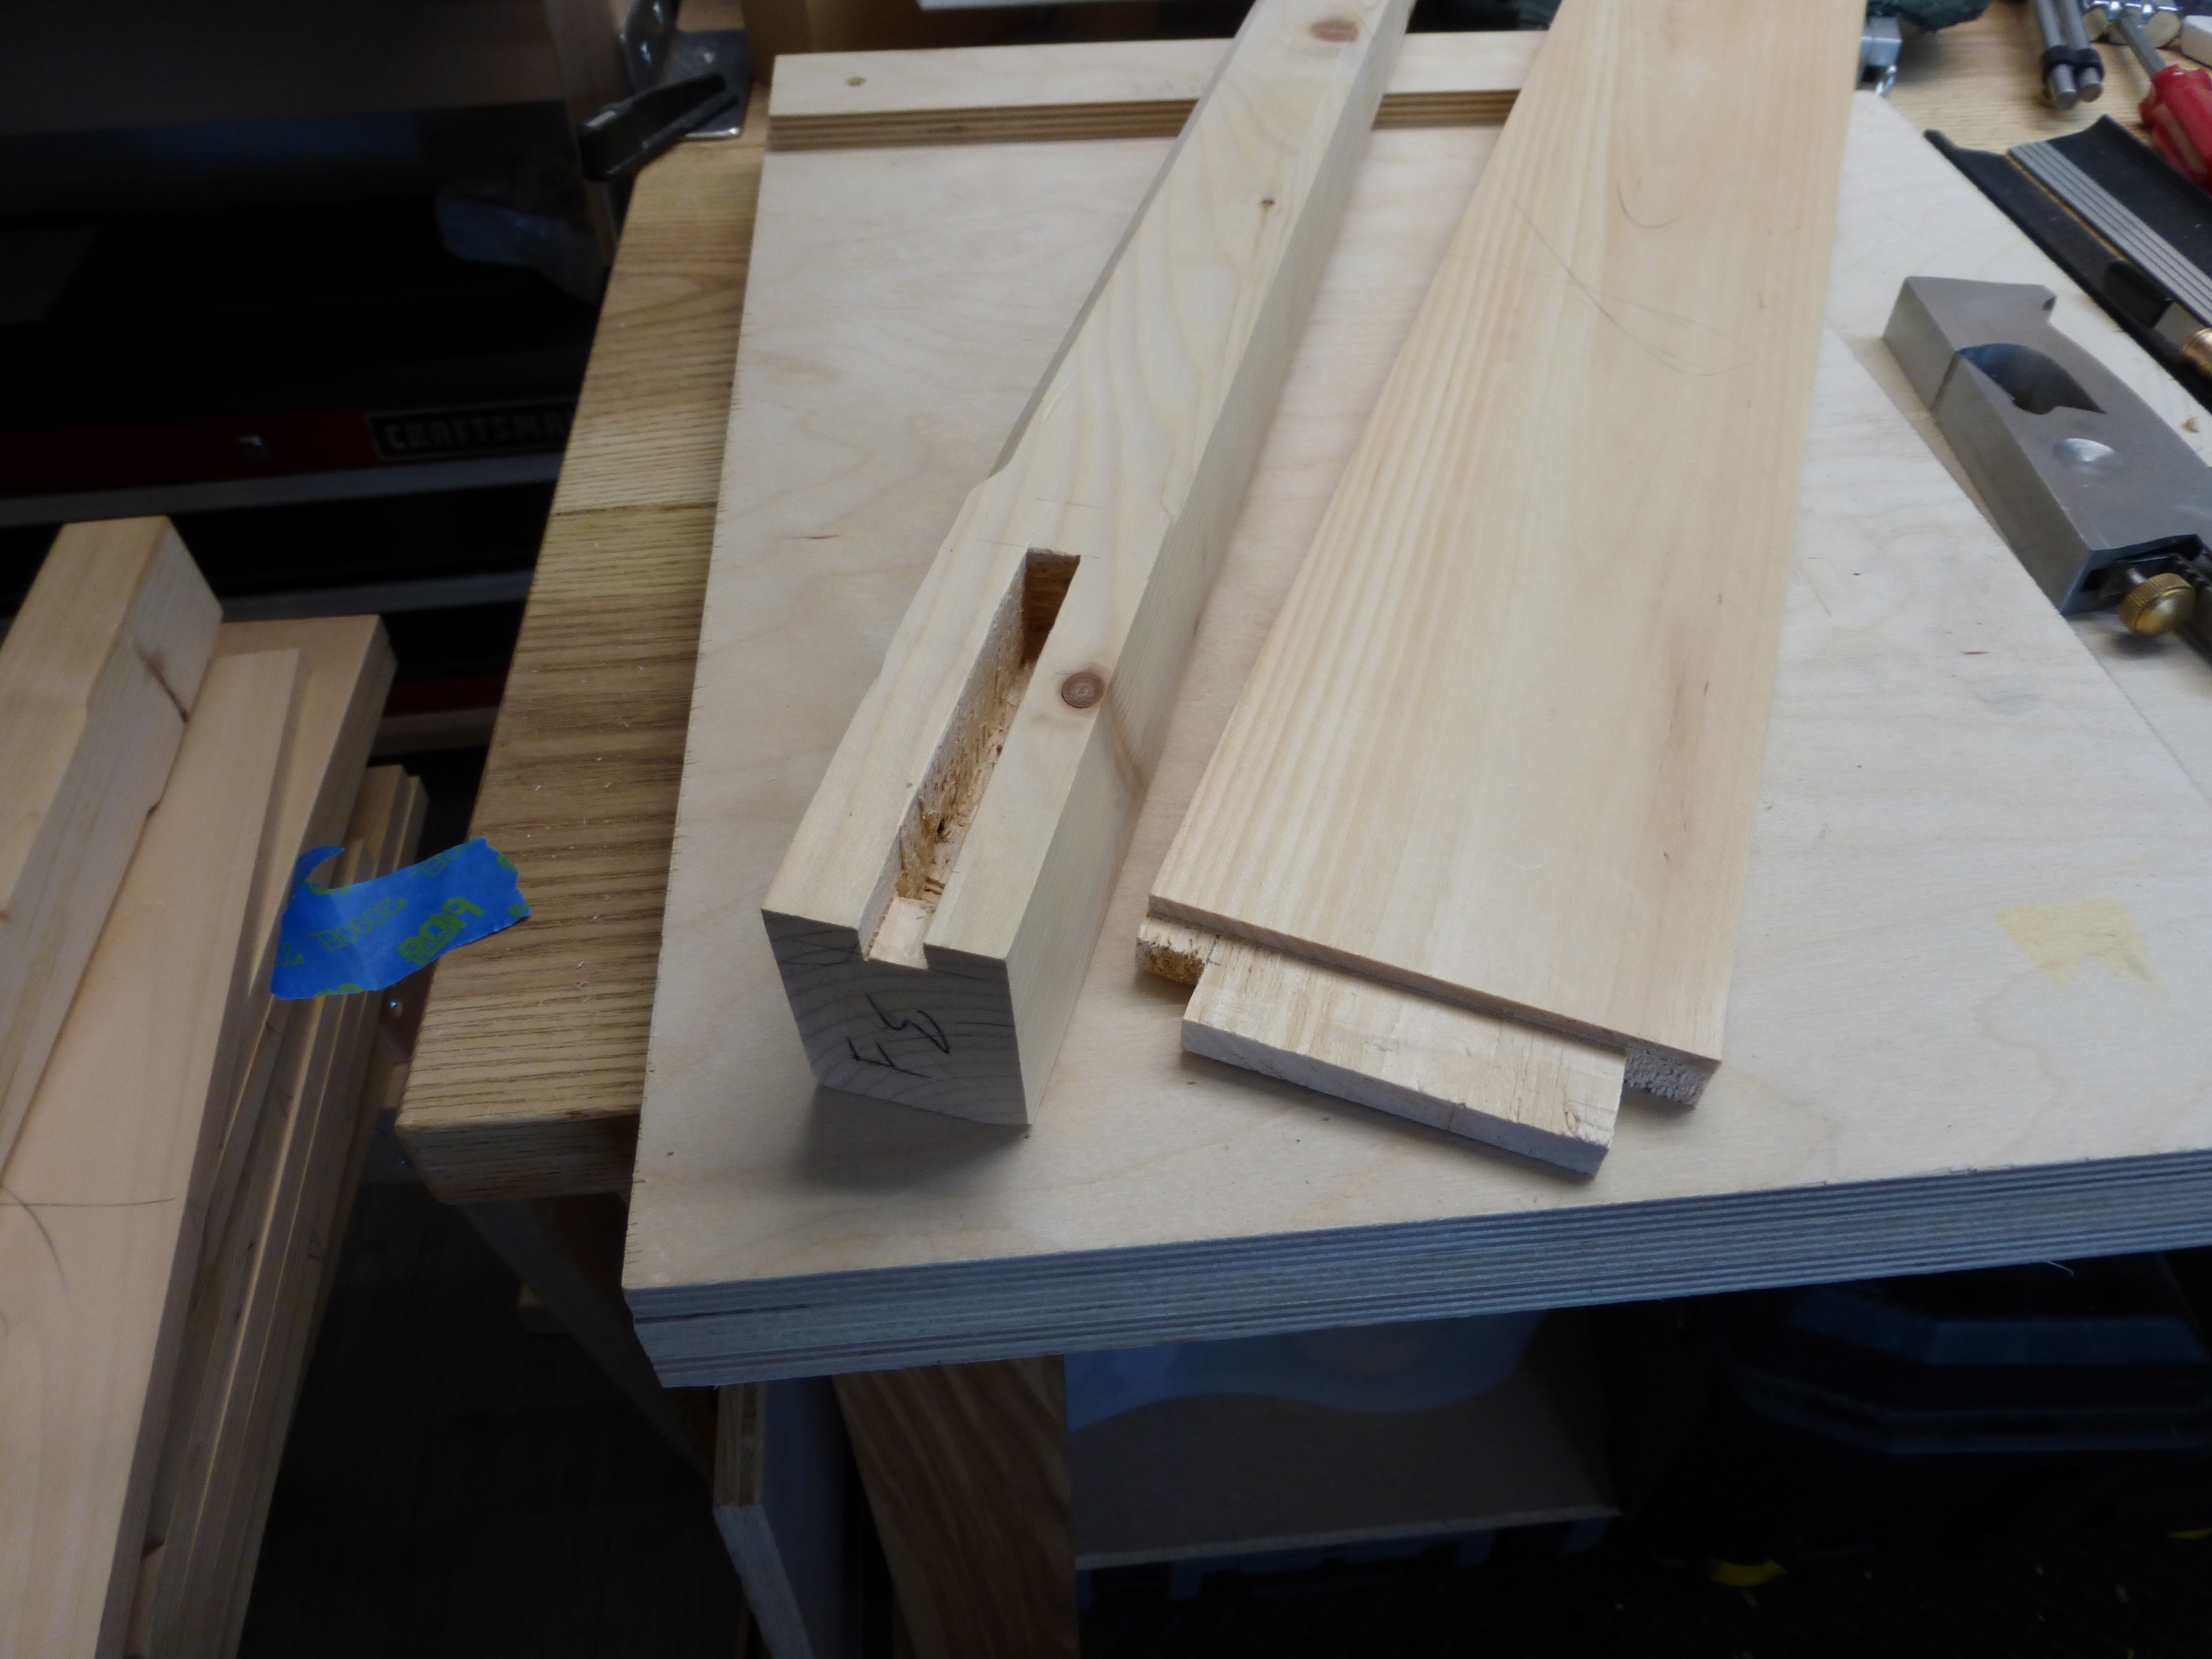
Later still, I discovered the haunched tenon, and I’ve been using it as much as I can ever since.

They all basically look like this.

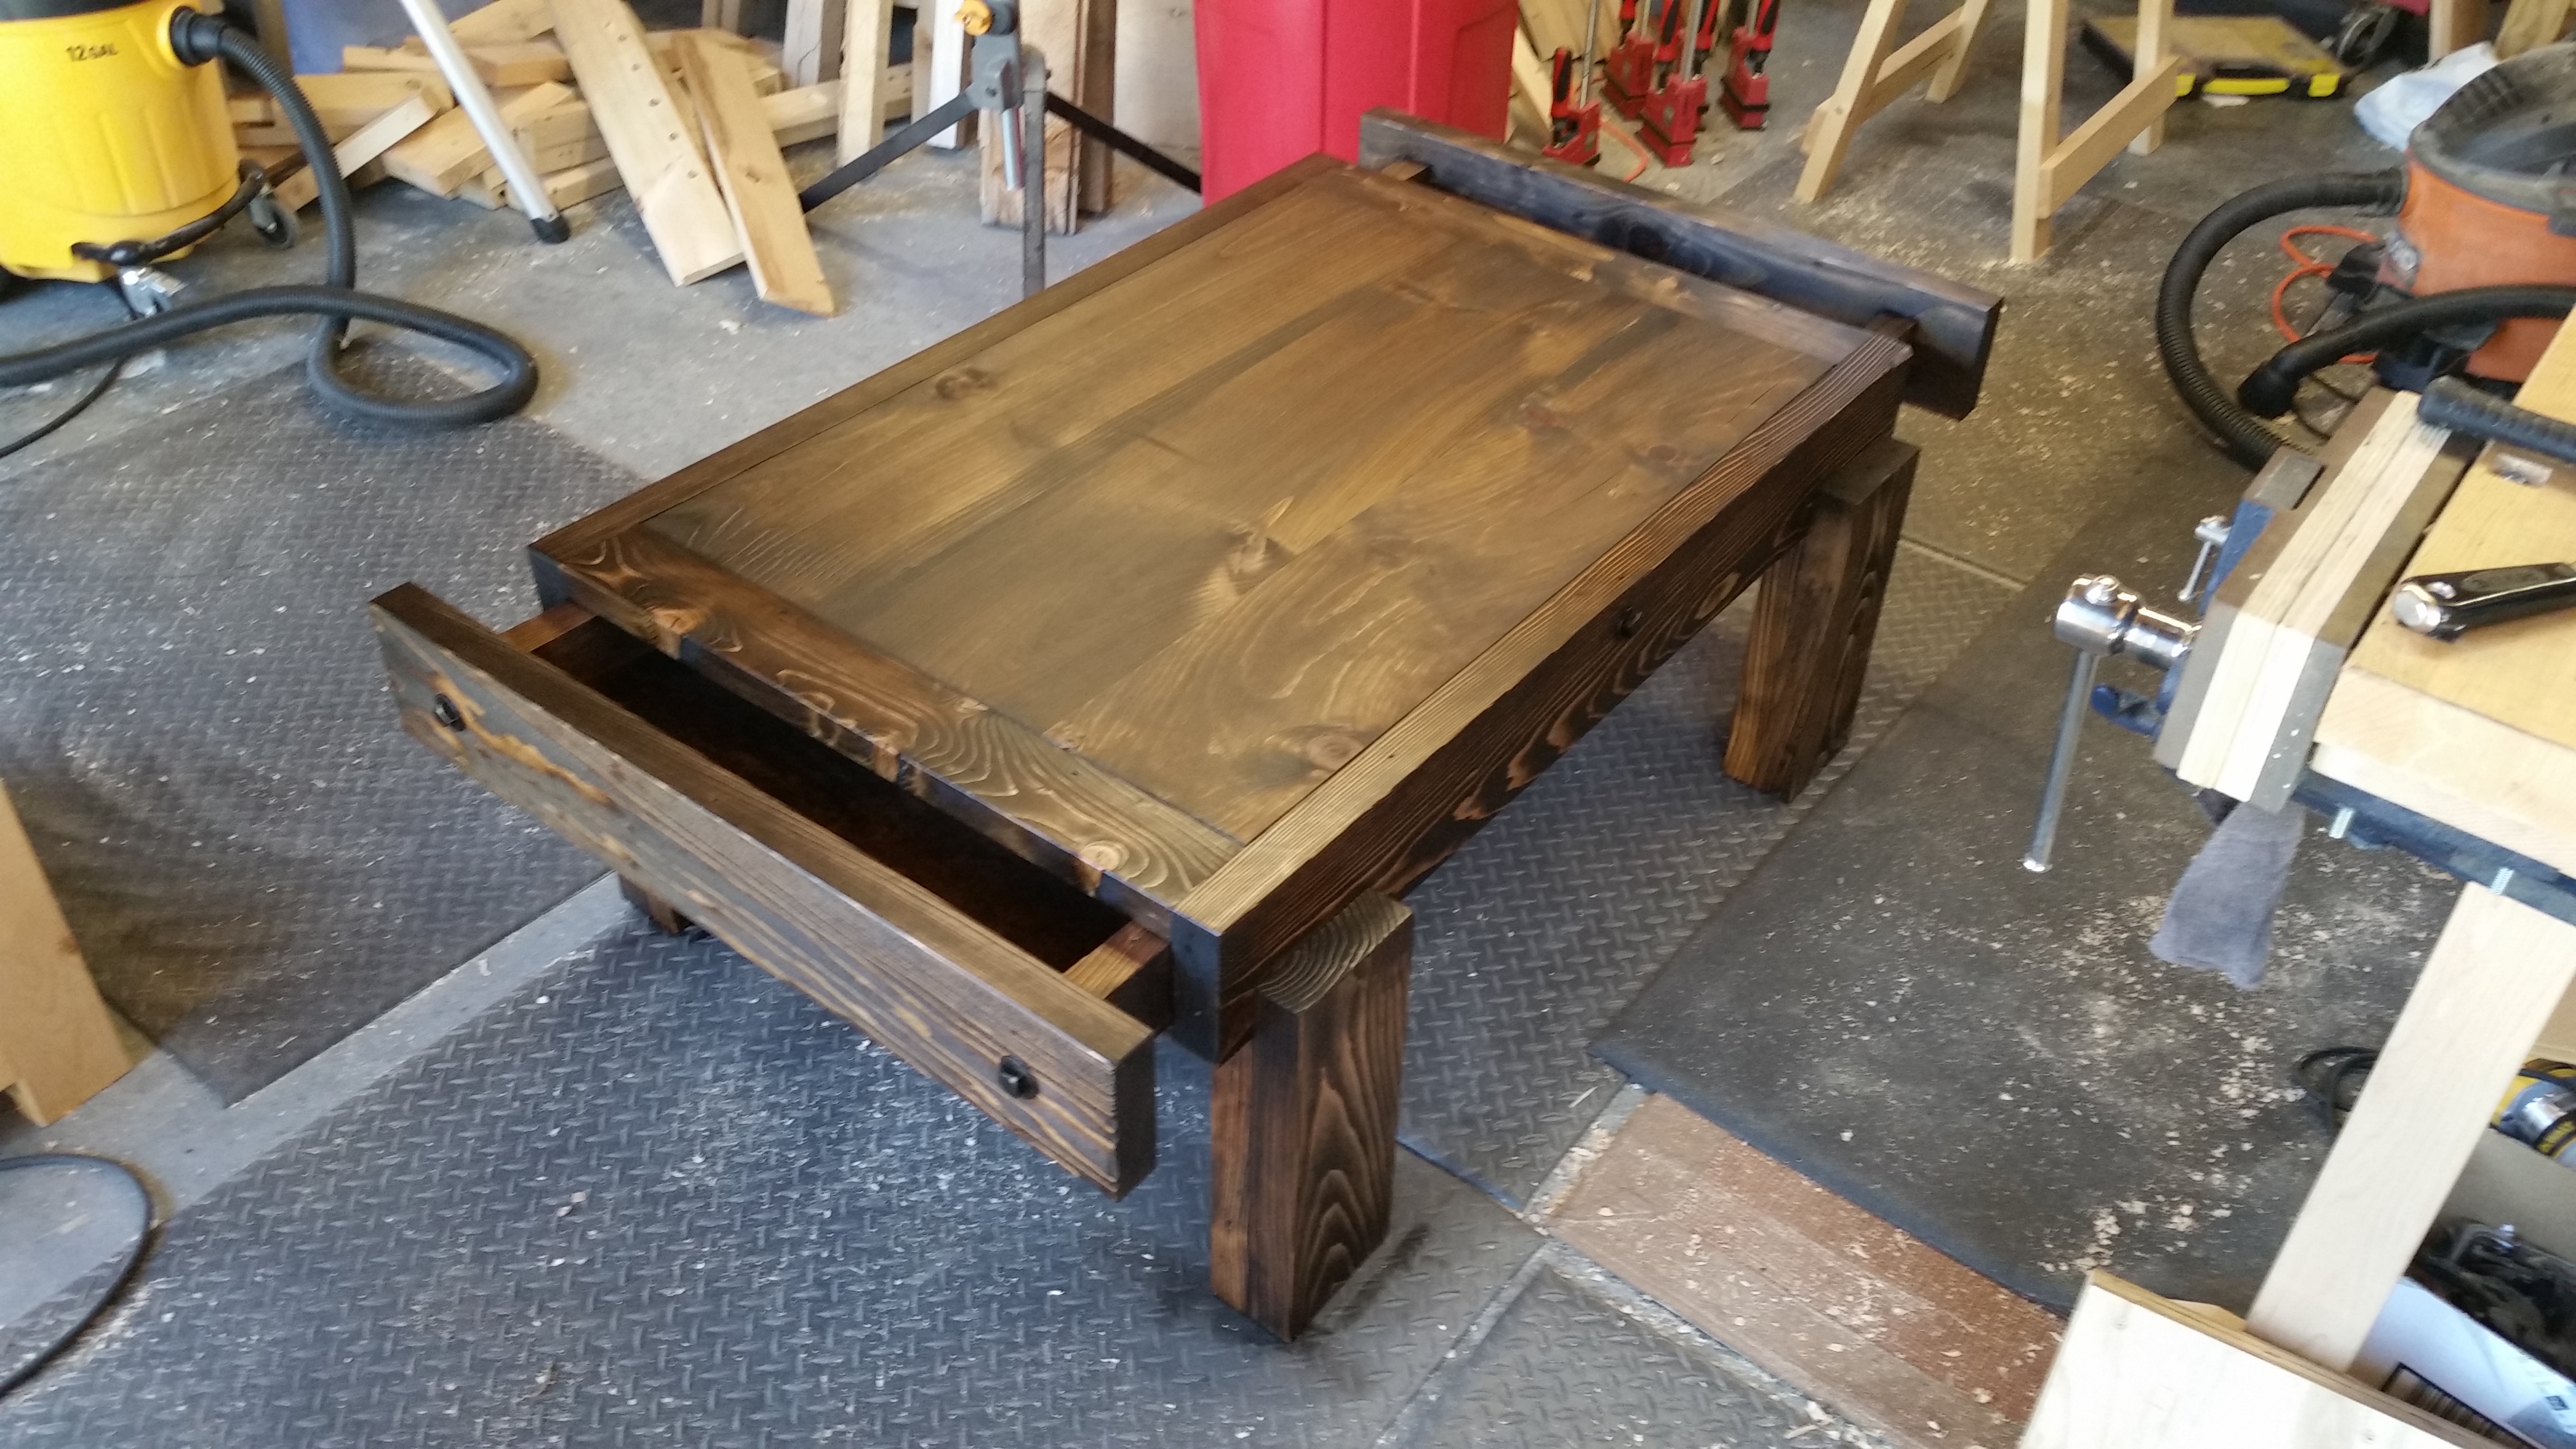
This is the angled-leg bedside table.

I understand the true purpose of the haunch. It permits maximum tenon height (for maximum resistance to twisting force) while still keeping the mortise closed at the top (and thereby stronger than an open mortise, such as a bridal joint). But I also appreciate the economy of the joint. The haunch means I have to chop less mortise overall without compromising joint strength. On a rectangular table with eight mortises (of 4 inches or so each), a half inch haunch saves me a full mortise-worth of chopping.

I also rarely do full length tenons, preferring a bottom shoulder of some depth (usually the width of the mortise, because a chisel is a handy straightedge) to hide any roughness of the mortise hole. Assuming a bottom shoulder of another half inch, that’s a whole extra mortise worth of chopping saved in a single project. And with the haunch on the top of the tenon, I’m only cutting three shoulders – maybe even only two shoulders, if the material is thin enough.

All this time savings means I get more done in the shop with less effort.  And best of all, none of these “shortcuts” ever show in the finished piece.

JPG

New Block Plane

I finally caved and replaced my box-store block plane with a slightly more upscale version.  It’s not an everyday tool in my shop, so I didn’t splurge for an ultra premium block plane.  But I was frustrated enough with the lateral adjustment capabilities of my old block plane that it was time for a change.

P1000082

I have brand loyalty because I don’t mind a little tuning.

From unboxing to finish, total honing time was about half an hour to clean up the plane (most of which was flattening on the 220 diamond plate).

P1000080

Just about done in this picture.

I’m pretty pleased with the machining on this particular tool.  The sole is pretty flat and the iron was ground square (both rarities for this brand, I will admit).  A couple swipes at 30 degrees left a razor-sharp secondary bevel on the freshly-flattened iron.

P1000081

Fastest sharpening job ever.

There is no lateral adjustment lever, but there is plenty of clearance around the knuckle cap for a hammer tap.  The new block plane is also longer and heavier than my old one (it’s about the size of a No. 1), but the knuckle cap gives it a better feel in the hand.  Overall, I’m happy so far, even if I’ve only taken a few end grain shavings to test blade sharpness.

JPG

In the Here and Now

Having finally cleared a couple projects from the queue, I can now get around to that plant stand I designed a few months back. Its lower priority was due to the presence of a suitable placeholder, certainly, but also because of a personal flaw I often struggle with. I find it difficult to focus on a single project from start to finish. I get distracted regularly, sometimes to the detriment of timeliness.

The rough stock for the plant stand was ripped quite a while ago. The design, with some minor tweaks from the original, has been locked off for almost as much time. But things kept coming up (work, life, other projects) and the build was always delayed. But now I’m back on task – for now, anyway. A couple more hours of planing and I’ll be ready to hit the thicknesser and move onto joinery.  As a bonus, I used the planing slab for the first time in a while.  The planing slab is still flat, which is nice. And that Veritas Inset Vise is such a joy to use.

P1000075

I think I need to tweak the orientation of the planing slab to the work table.

Also, I’ve said it before, but hard maple is hard.  Especially the stuff for this project: air-dried, riftsawn, tight-ringed Vermont sugar maple. After only S2S’ing these boards, I sure am grateful for my thickness planer.

wpid-20150519_074128.jpg

A jar of Vermont Maple Syrup died so that this plant stand may live.

JPG

Knot very Clear

The other morning, for 10 mins or so while I was waiting for a pair of pants to dry, I broke out the miter box and cut some boards to rough length for a couple different upcoming projects. The task at hand – digging through the pile of off-cut pine siding to find boards with clear sections of sufficient length – was a success. I now have knot-free boards aplenty, and the knotty off-off-cuts will become firewood for my brother.

wpid-20150515_203113.jpg

Perfectly burnable waste.

It got me thinking, though: what’s wrong with knots? I get it: dead knots and the holes they leave behind are a pain. But with live knots, aside from a bit of extra plane iron wear, what is the real impact, especially on the strength or stability of a board? Not much, and yet I obsess about clear stock. Everyone knows trees have knots, so what am I trying to hide?

Sometimes, though, I actually choose boards at the lumber yard specifically for their knots. A large live knot can have its own beauty, and a few small (stable) dead knots can add a rustic contrast to an otherwise modern piece.

Like everything else in woodworking, it’s a balance. Knotty wood is fine for some pieces and not for others. Knowing the difference is much more art than science.

JPG

The Immediacy of Pencil and Ruler

I commute to work, which means I spend a significant portion of each weekday on the train (up to 2.5 hours in the aggregate). Before I started woodworking, most of my train time was spent reading documents and catching up on emails.  Now, I try to bang out a new blog post (like this one) or put pencil to paper for a new furniture design whenever I can.

A while back, I started keeping a black composition notebook – like the ones for middle school creative writing class – with graph paper (instead of ruled) for my designs.  I’ve tinkered with Sketch-Up and other computer-aided design software before, but I keep coming back to the immediacy of pencil and ruler on graph paper.  That way, I transcribe the idea before the inspiration fades.

wpid-20150512_104012.jpg

The fastest design program of all!

Each design gets dated and in truth few actually get built. But it’s nice to have a tangible record of the varying levels of woodworking inspiration that hit me.  Each page is a snapshot of my small-space woodworking journey, telling the story of how my sensibilities and style have evolved over the past few years.  I may never get around to making most of these pieces, but that’s okay.  Many of my favorite or best (often not the same thing) designs are amalgamations of past ideas, gleaned from old sketches and made fresh.

A few plans are further refined before going into a binder I glibly refer to as my “portfolio”.  These designs I truly intend to revisit and execute one day.  When I free-build a piece of which I am particularly proud, I will reverse engineer a design to also include my portfolio.  In this way, I have for myself a neat repository of my best and favorite pieces.

JPG

Glossary of Terms

There are so many woodworking terms. For joints. For tools. For techniques.  Where does a person begin?

Before I took up woodworking a few years ago, I didn’t know a damned thing about it.  I started on YouTube and worked backward. Wikipedia was helpful, as was my first woodworking book (Working Wood 1&2 by Paul Sellers). Now over three years into my apartment woodworking sojourn, my knowledge has grown along with my vocabulary.

I have recently been made aware that woodworking jargon can create a barrier to entry. Knowledge that I take for granted is not universal.  So going forward, in an effort to make the site more approachable – and because I think it will be fun – every defined term appearing in a post will be included in a new page entitled “Glossary of Terms”.

The page went live yesterday.  Please feel free to critique my definitions, as most are from memory.

JPG

An Obvious Downside

I’ve mentioned a couple times that my main source of cheap pine is off-cuts from tongue-and-groove pine siding.  I’m running a bit low, but I’ve managed to make a three-foot tall stack of 36″ to 48″ long boards last for most of a year.  While the material is fluffy and easy to work, it isn’t exactly stable, and most of the time, is significantly twisted and cupped (thankfully, not often bowed).  This presents an obvious problem: final board thickness.

Before preparation, any given piece is only about 11/16″ thick, and the “raw” board can have almost 1/8″ of cup/twist or more.  This means that after flattening and straightening to S2S, I’m often a barely a shade over 1/2″ on some parts of the board.  Passing the piece goes through the thicknesser takes it down to a hair over 1/2″ all around at S4S.

P1000072

This pile of shavings is from S2S’ing only two 19.5″ x 4″ boards.

This is why I’ve gotten in the habit of only S3S’ing these boards when the project can allow for it.  For example, the bottom shelf of the toy workbench was made of four such boards.  The underside of that shelf will never be visible, so I left the extra mass in the boards by only S3S’ing them.

P1000066

That’s a machinist granite slab adding clamping pressure.

I also use this trick when I need an inside tenon shoulder or when a board is too wide for my thicknesser, in each case where the inside face will otherwise be concealable.

This trick isn’t available in some applications, however.  For instance, I can’t attach drawer runners to the twisted inside face of a side rail (like for the angled leg side table) and the underside of a tabletop should be trued to mate well to the table frame.  I guess you could technically use rabbets to solve each problem, but that seems like even more work than just thicknessing properly.

I haven’t disassembled much antique furniture, but I find it difficult to believe I’m the first person to cut this corner when possible.  I think this shortcut thing is becoming a running theme.

JPG

Blasphemy (Not Really)

With an inspired idea in-hand, I have finished my design for a bedside table that I am hoping will be the first piece of a full bedroom set (or maybe a living room set, depending on my mood). It will heavily employ my favorite joint (the mitered half-lap) and be two-toned, probably in cherry with a lighter wood tabletop and shelf (both of which will float). I might add a drawer at some point, but that is not critical to the design.

The most beautiful joint of all.

The most beautiful joint of all.

While creating a cut list, it occurred to me the table will essentially have a face frame (two, in fact: front and back). Being a hardwood-only woodworker (except for drawer bottoms and the odd storage container), I don’t do much casework. To me, “face frame” might as well be a euphemism for “way to hide the end grain of sheet good carcasses”. Veritably one step up (barely) from stick-on edge banding.  In this piece, though, the face frames are meant to hide the end grain of the hardwood tabletop and shelf.

I usually don’t mind exposed end-grain (there will be, after all, visible end grain in each of the mitered half-lap joints). I certainly remember reading somewhere that masking end-grain was a much more dire endeavor in eons past. But for some reason, it feels correct to hide the end-grain in this project.

wpid-20140909_093210.jpg

Lots of exposed end-grain here.  And here.  And here.  Everywhere, really.

I’m hoping to get some stock preparation done this weekend if I can make it to the lumberyard on Saturday. Maybe I will first mock up a face frame in pine to confirm dimensions. I don’t do prototypes often, but it makes sense in this instance.

JPG

A Toy Workbench

I’ve alluded to it several times, but I finally finished over the weekend the toy workbench for my niece and nephew.  Although it took much longer than expected (due to my sloth, mostly), I am unequivocally pleased with the result.  At 23.5″ long, by 12.5″ deep and 23.5″ high, the piece is not exactly in proportion to a full size workbench (which was the original goal), but nonetheless will serve its purpose.  If anything, it’s a bit tall for my nephew currently, who should grow into it within the next year.

In all its, ahem, unfinished glory.

In all its, ahem, unfinished glory.  I expect my brother and sister-in-law will paint it.

Right away, I knew this project was something special when the laminated benchtop came together so easily. I took great care to S3S each piece for the lamination, so it was a snap to glue up all nine pieces at once and then flatten the slab once the glue dried.

I learned my lesson from the planing slab project.

I learned that lesson the hard way during the planing slab project.

Constructed mostly of leftover home center Douglas Fir, much of the stock that went into the bench is quartersawn or riftsawn (three legs and both stretchers being the exceptions), so it should be a pretty stable piece for a long time.  The joinery throughout is solid and relatively simple:

  • The legs are stub-tenoned and glued into the underside of the benchtop (drawbores felt a little extreme for a toy workbench).
  • The side rails are flush (but not glued) to the underside of the benchtop and stub-tenoned and glued into the legs.
  • The front and back stretchers are half-lapped to the legs and affixed with with glue and a single No. 10 wood screw.

The shelf, which after much agonizing I glued and nailed to the underside of the stretchers (shortcuts do make sense, sometimes), is off-cut pine siding (rather than Douglas Fir), planed S3S.

All in all, the toy workbench weighs about 40 lbs. It would have been heavier, but I lost some thickness on the benchtop slab on account of chopping mortises on the wrong side.

I would be greatly surprised if it’s not still around for my grand-nieces and grand-nephews.  And now I have some practice for when I make the real thing.

Ebbs and Flows

I’ve been stuck in a creative rut. Sure, I’ve completed plenty of woodworking projects over the last few months, but I haven’t designed anything I find intellectually stimulating in a long while.  But today, I broke my drought. And surprisingly, this piece will be for my use.

The design is not quite finalized yet (I freehand sketched the plans on the train and I need to confirm I have the correct lumber available), but I already have enough to build off. I think this one may go in the portfolio. I’m excited. For the first time in far too long.

JPG