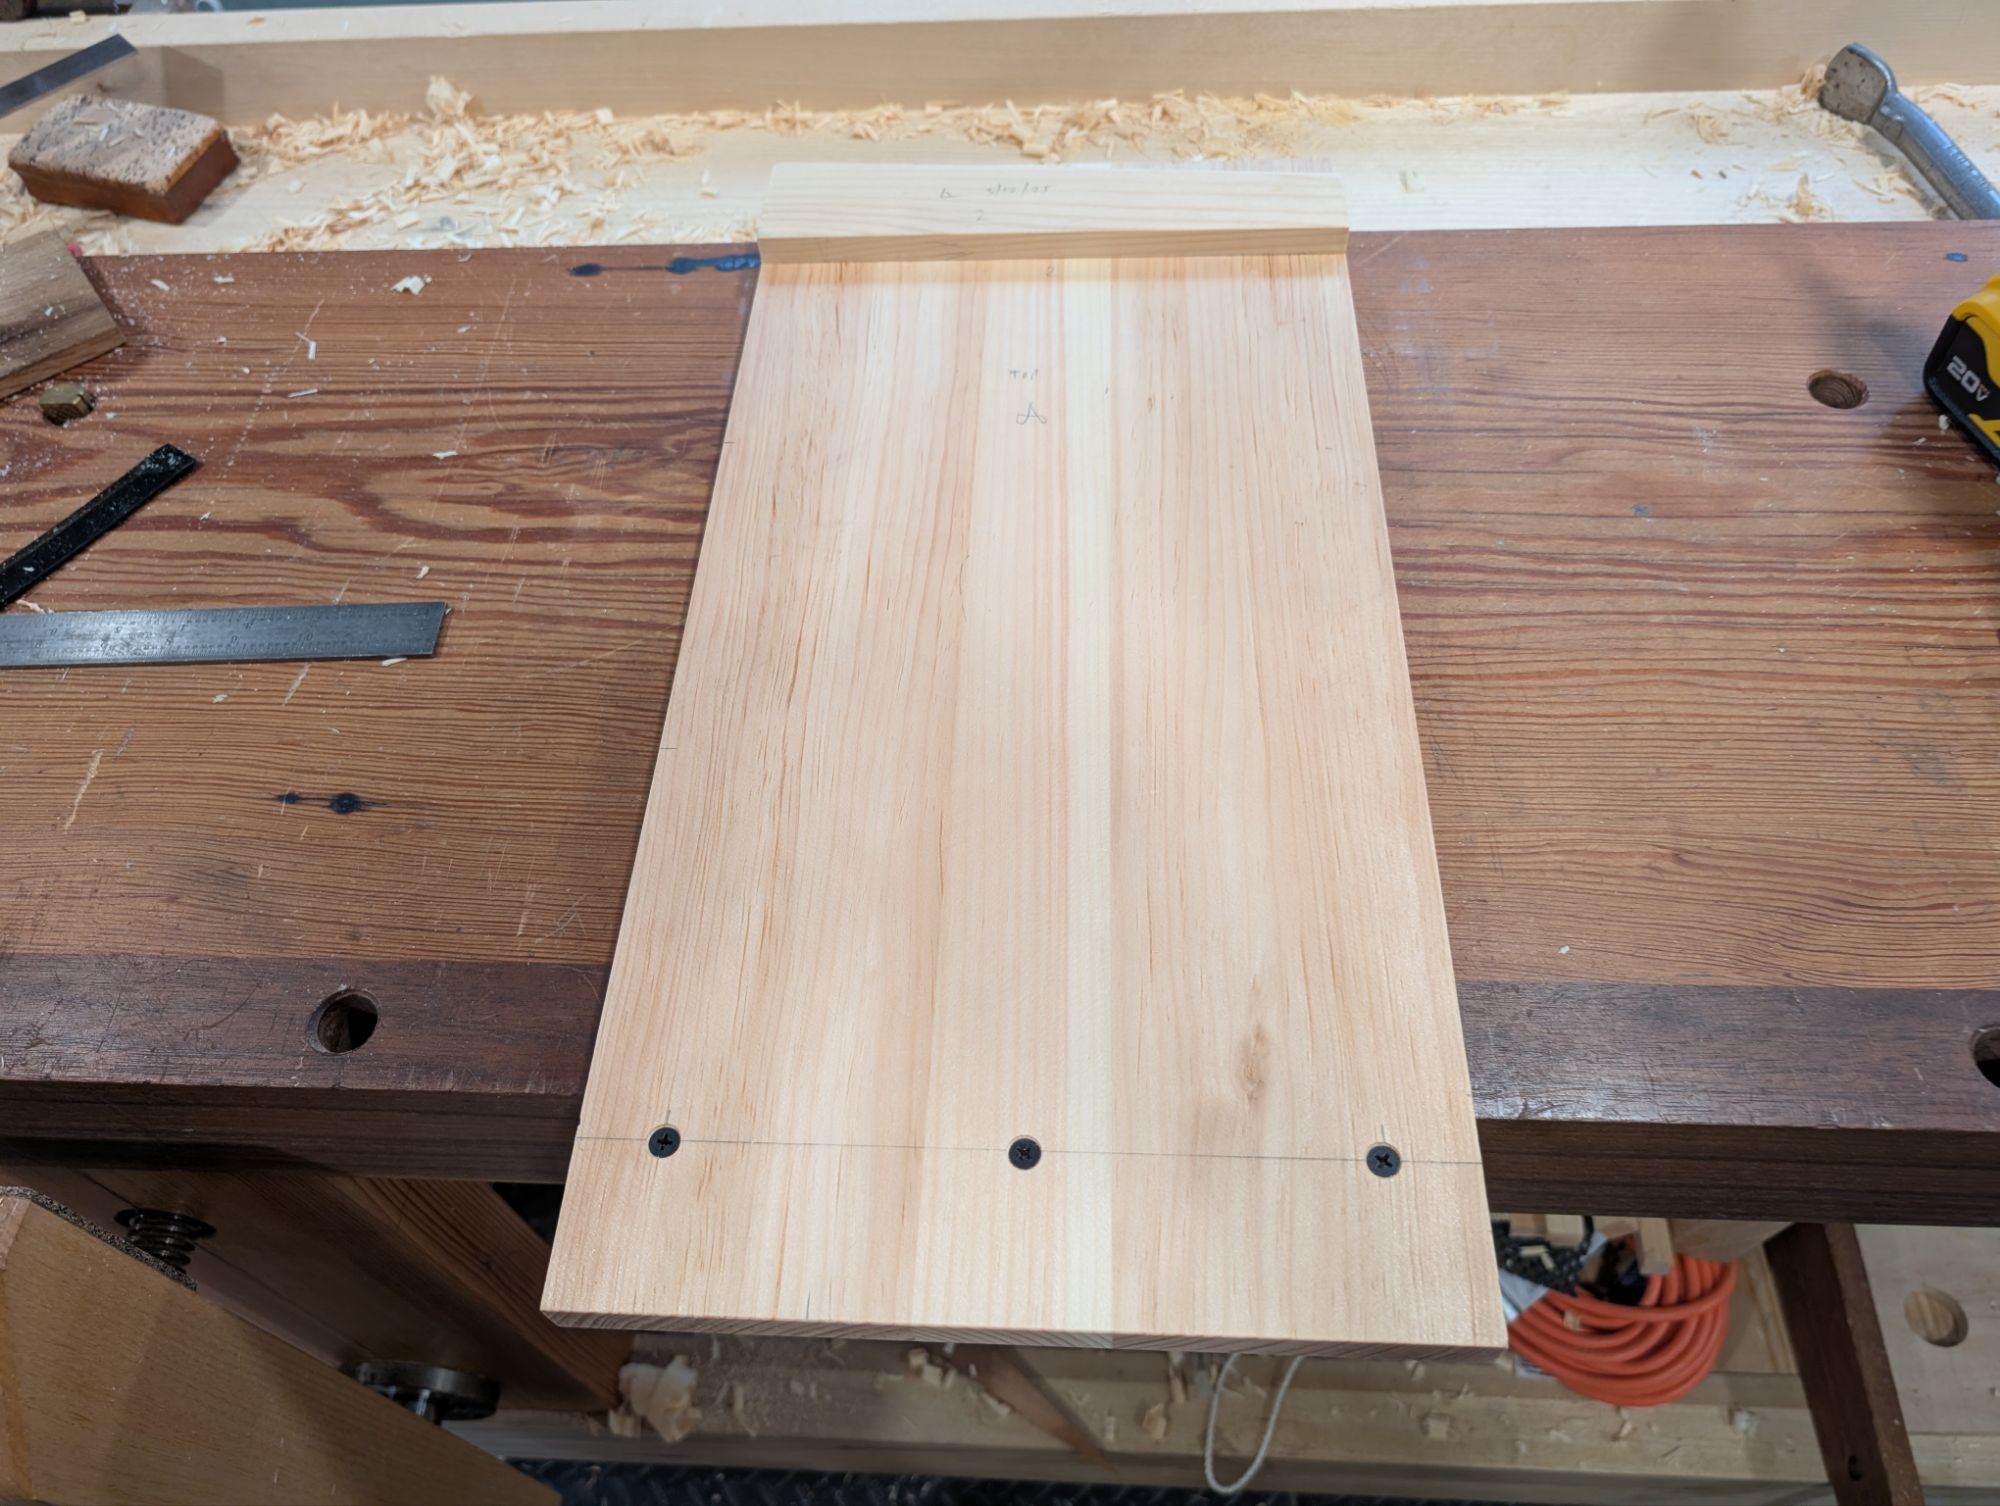
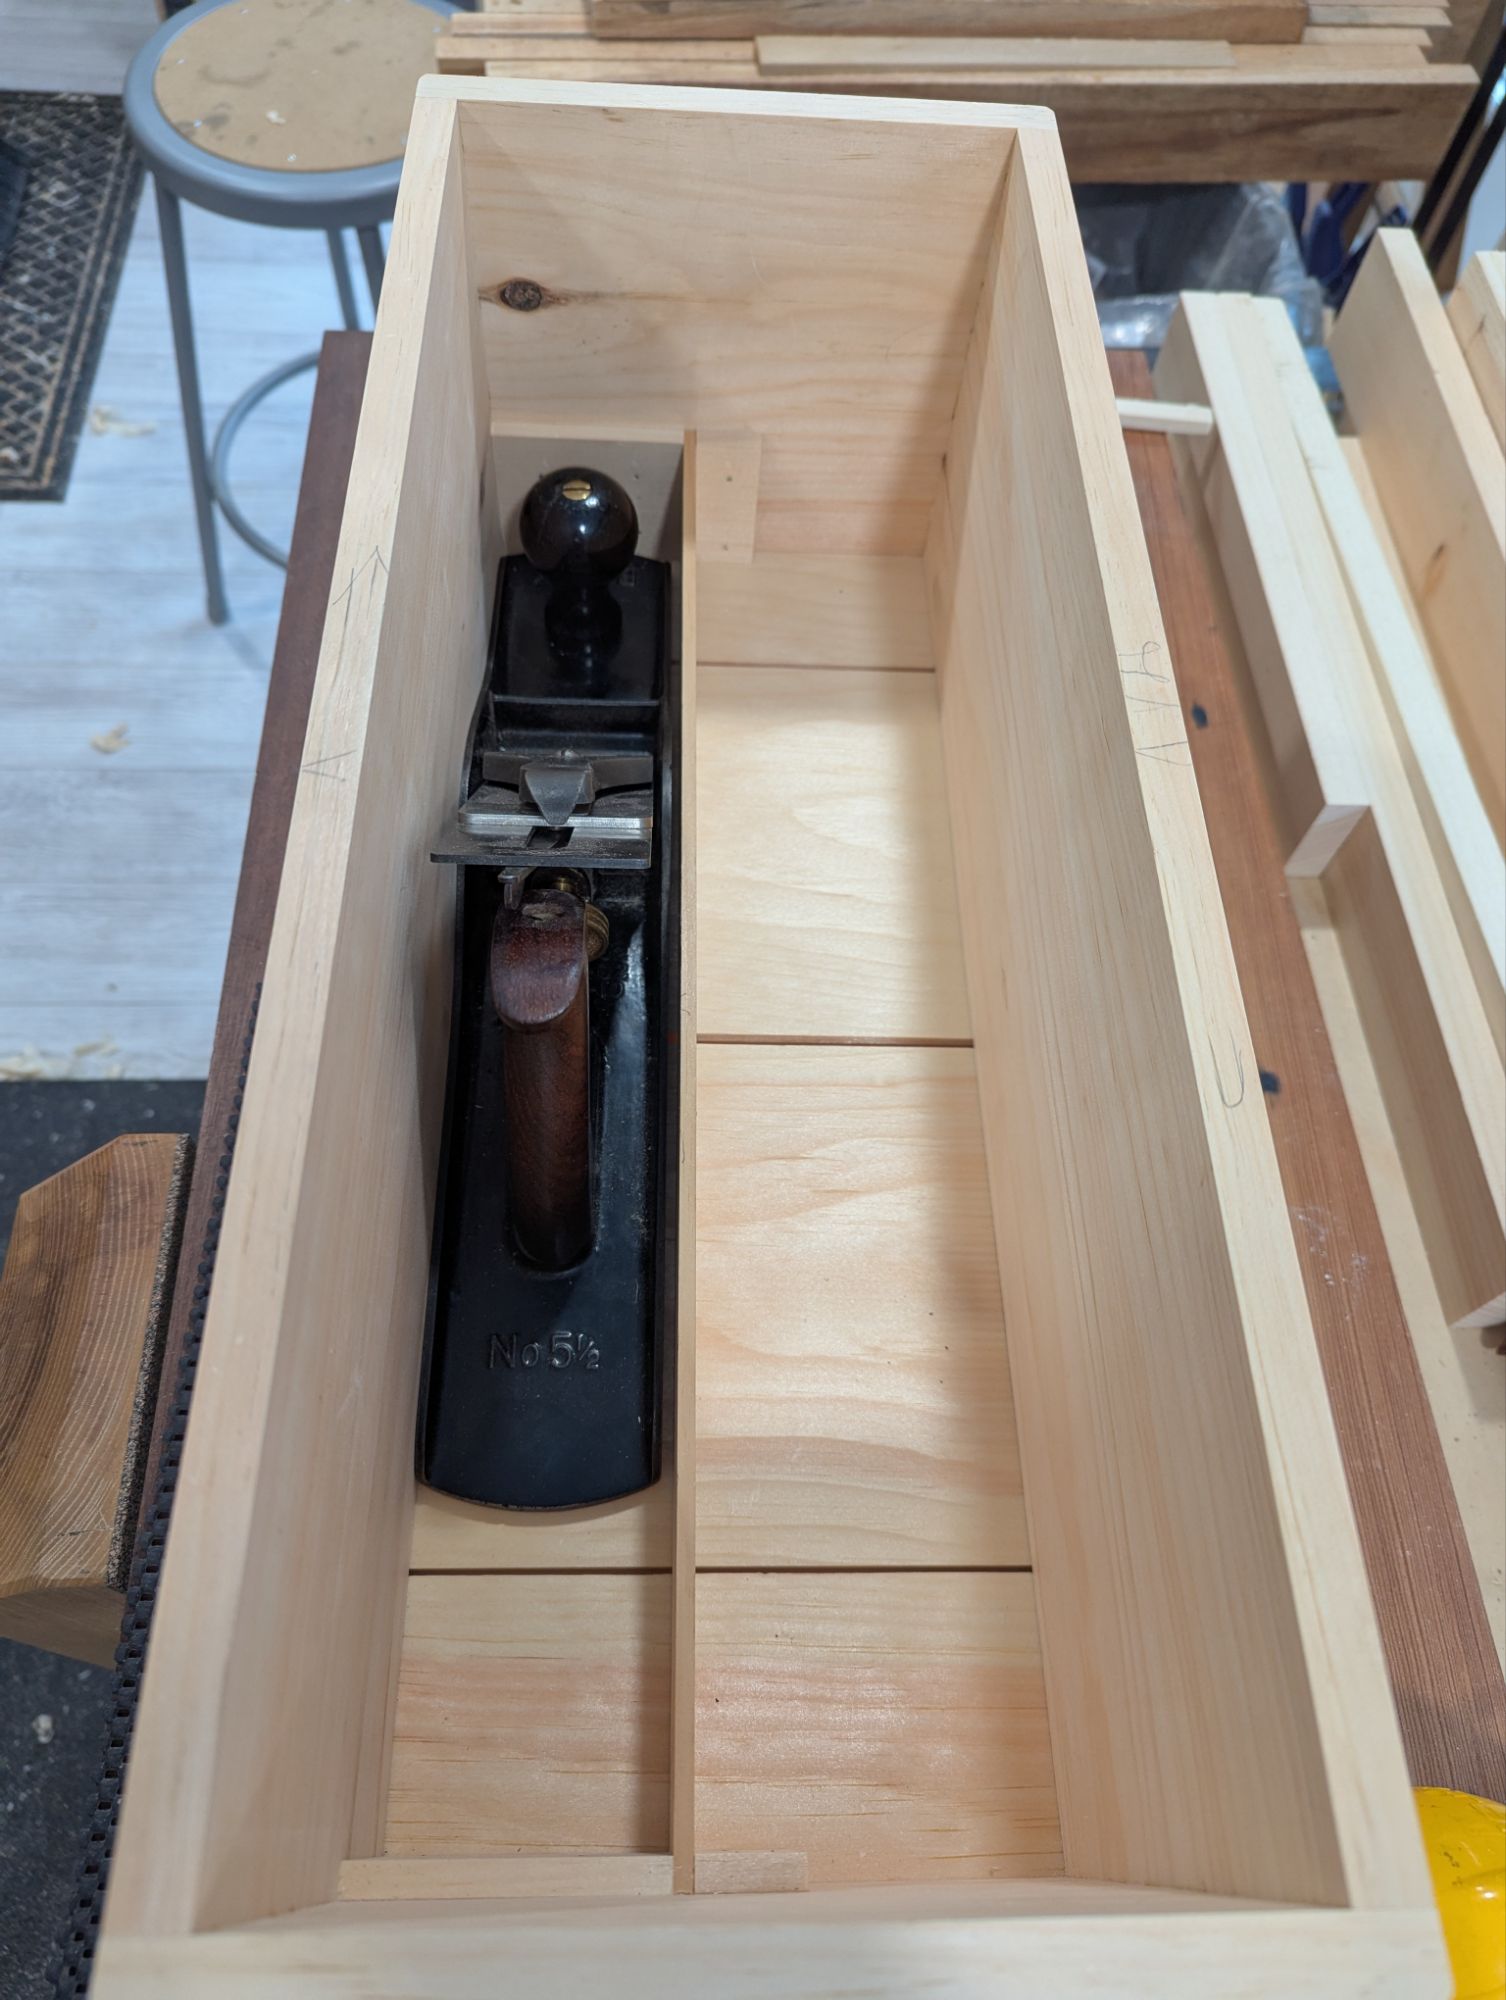
I’ve had the same shooting board for 12 years. It’s a clone of the Lost Art Press plans (made of 1/2″ baltic birch plywood) and has served me very well. But after a dozen years, it’s pretty chewed up (mostly from being too lazy to flip it over when using it as a bench hook for sawing).
So, over the last week or so, I took the time (and some pine scraps) to make a new one. This is in the Richard Maguire style, with no bed (meaning the plane rides on the benchtop) and assembled with a wedged fence and cleat. I didn’t get any pictures during the making, but it’s all 3/4″ white pine throughout. You should click the link to Richard’s youtube video. He’s a great entertainer in addition to being a great craftsman and instructor.
No bed means your benchtop must be relatively flat across its depth to support the plane.
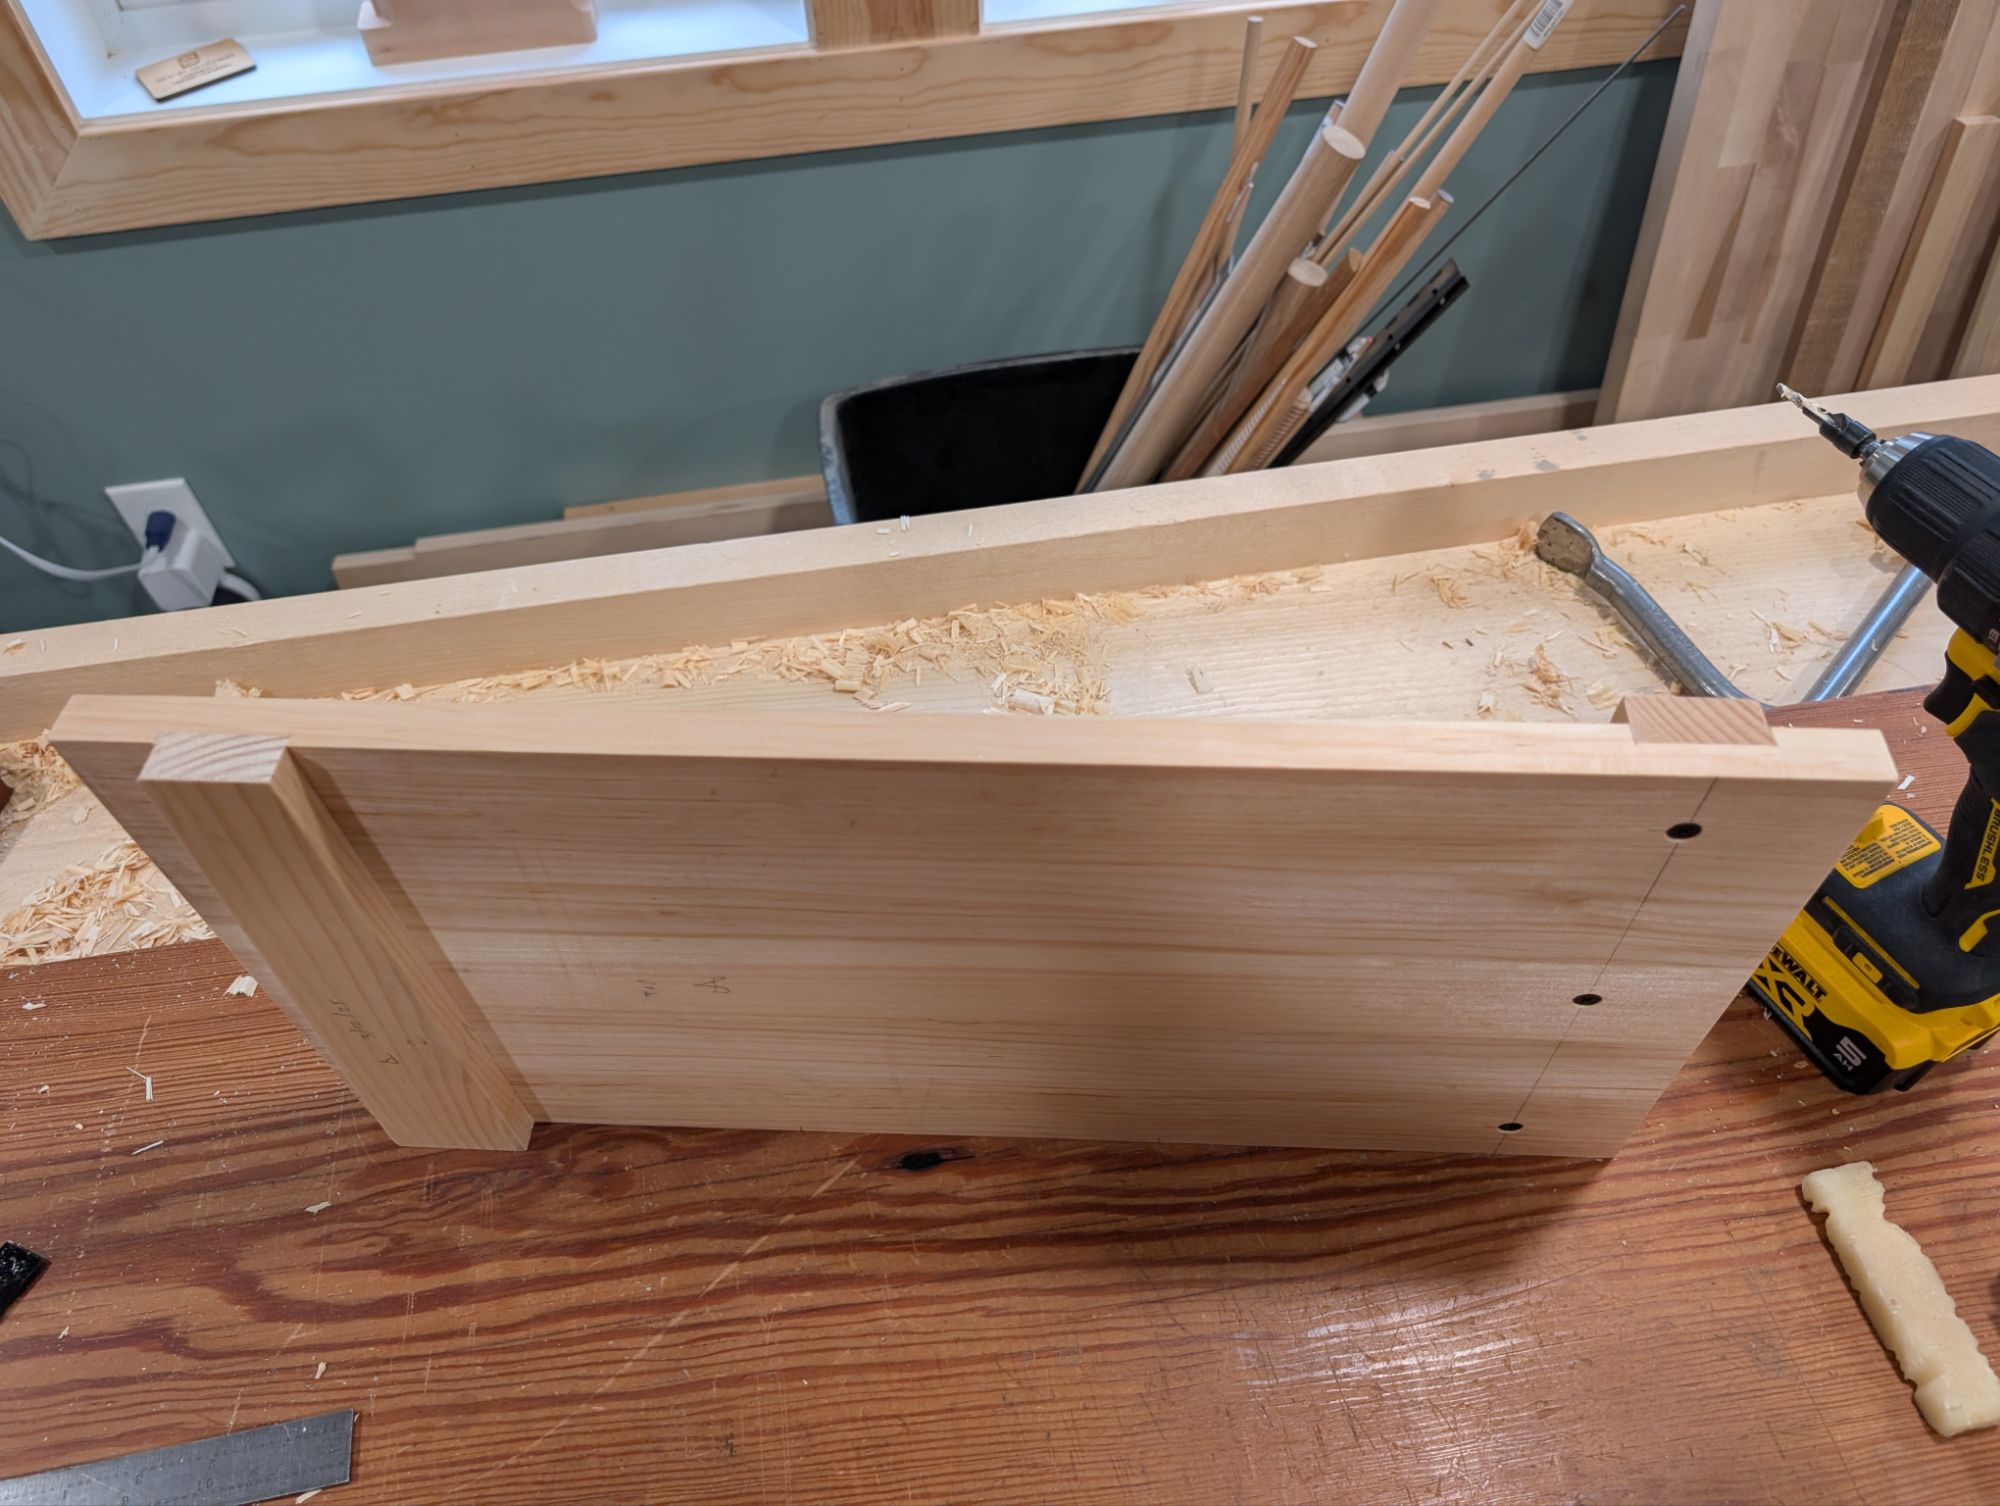
Each of the cleat (which hooks onto the bench in use) and the fence (which establishes the 90 degree reference for shooting things square) is recessed into the board with dado. The cleat dado is a full 1/4″ deep (for strength), while the fence dado is only 1/8″ (to preserve some additional height for the fence to function as an effective backer board. Recessing the fence and cleat cross grain into the board helps keep it flat over time (better explained in Richard in the linked video).
Better shot here showing the wedged fence and cleat.
I have worked on long shooting boards without fences in the past. But they are almost always used for squaring edges to a reference face; not for shooting end grain square. This one is shorter and specifically designed for end grain.
Work has been very busy so it was good just to get a little shop time. Hope you can do the same.
Happy New Year, everyone! Hopefully everyone has fully recovered from their New Year’s Eve partying and is back in the shop. I certainly am.
As with every new year, I try to tackle a few small but important projects (I call them “fixgasms“) around the shop. The term is not exclusive to the workshop. A fixgasm can be anything that’s been on the to-do list for too long and won’t really take a ton of effort to complete, but will have outsized impact when done.
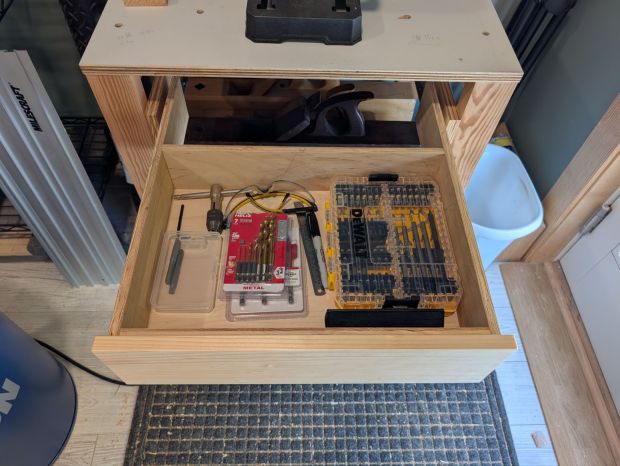
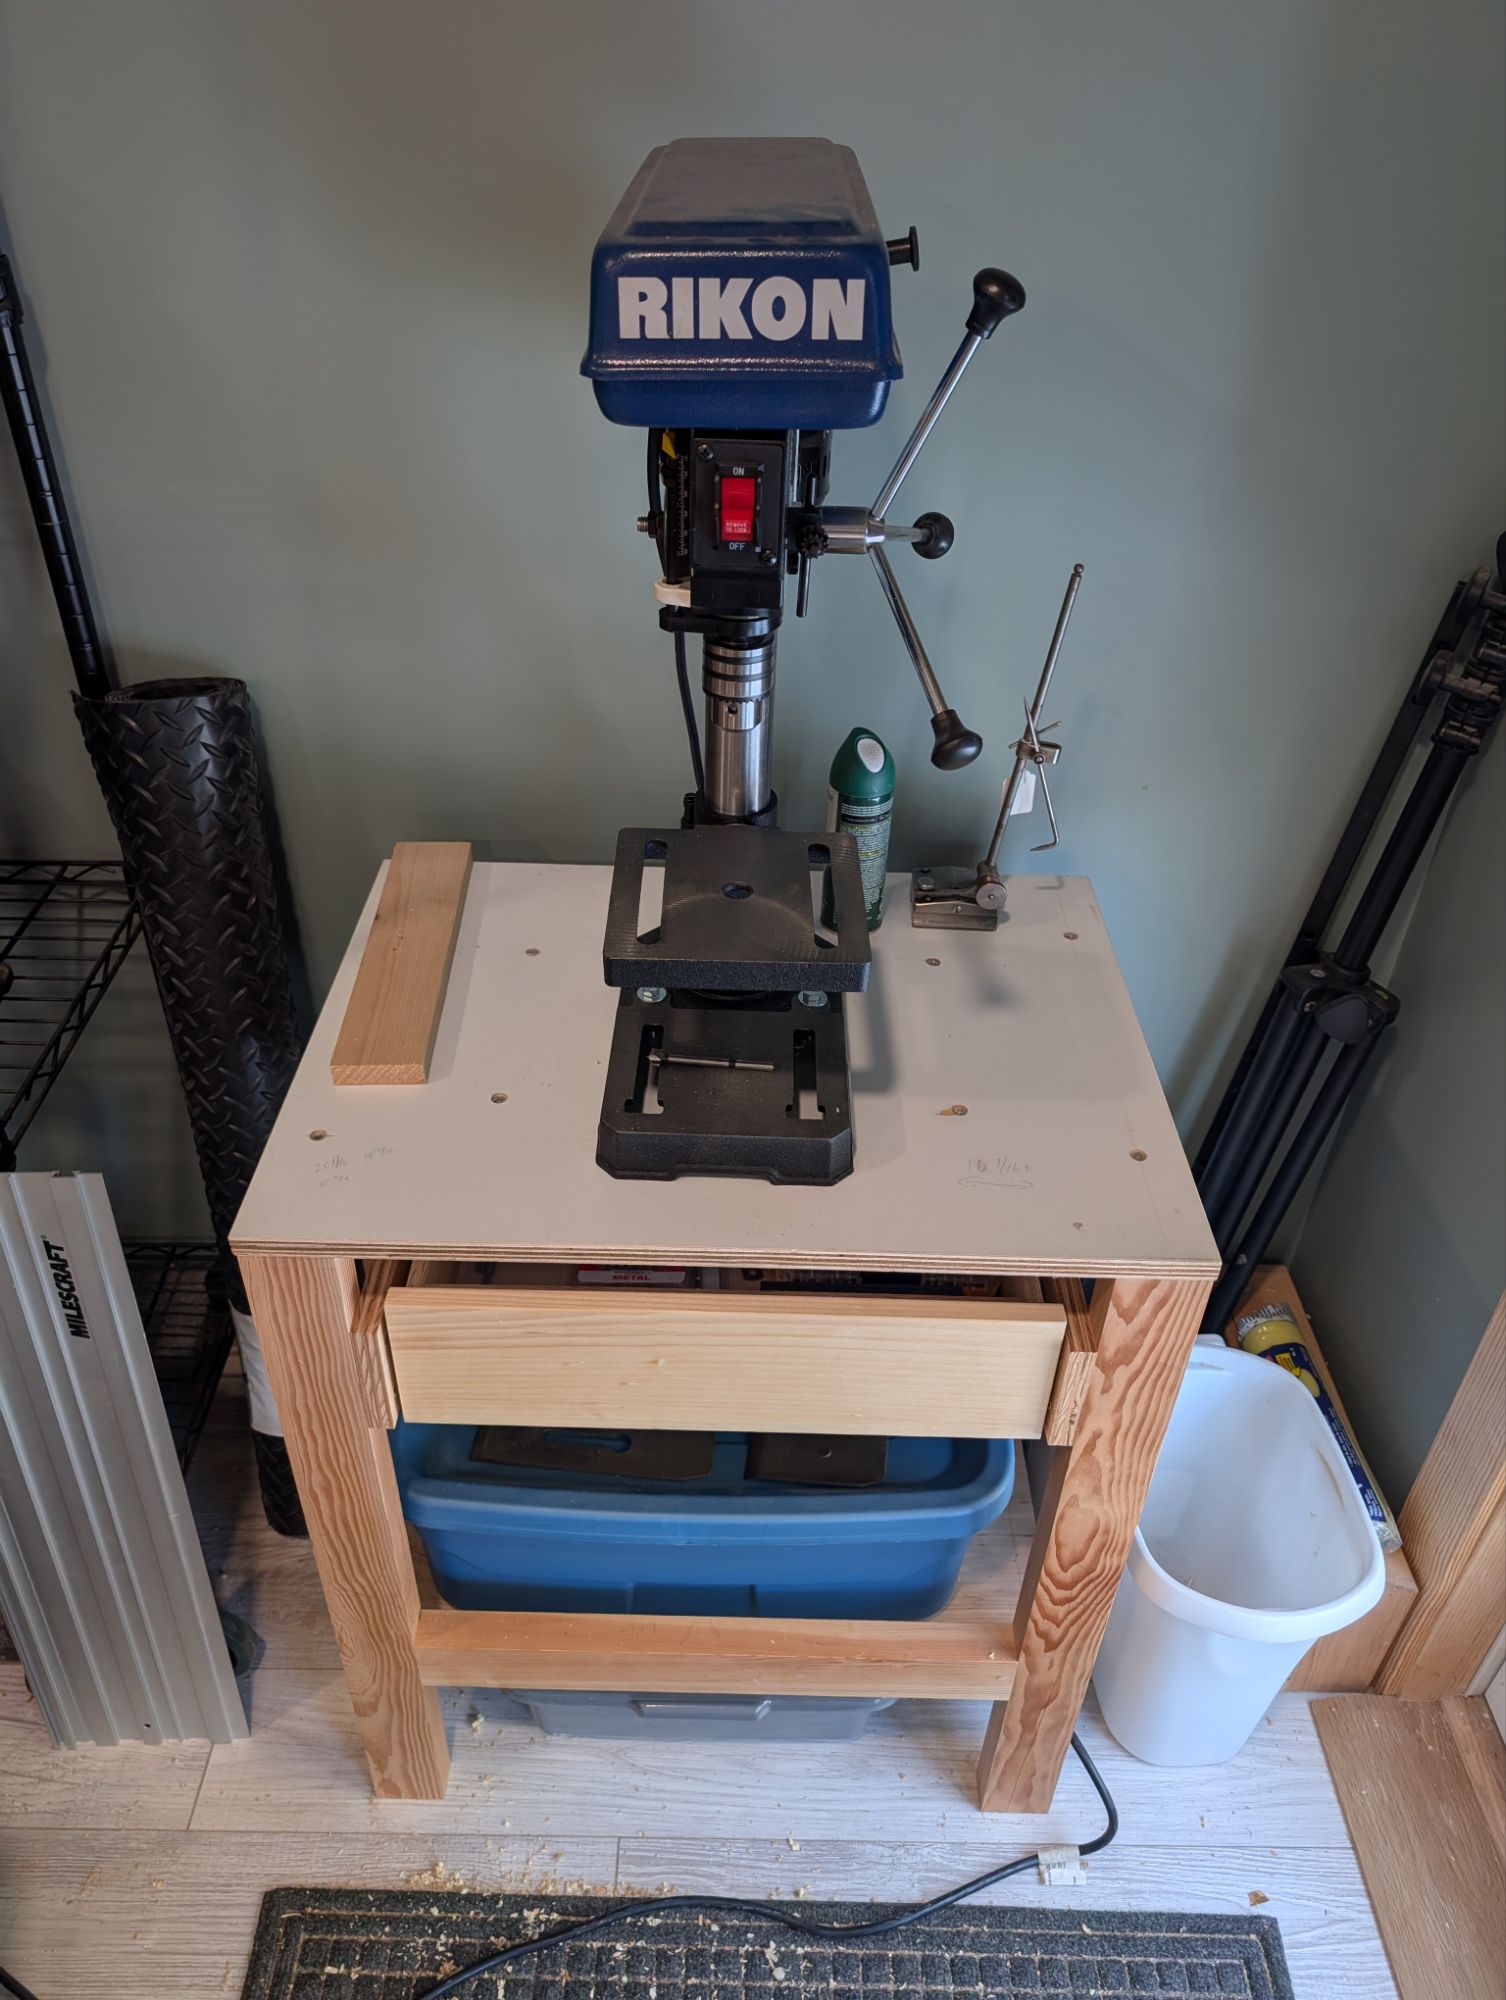
First one up is a drawer for the drill press table. The table frame is Douglas Fir and joined with glue and pocket screws. I’ve come to really appreciate pocket screws for these types of shop furniture. The top is 3/4″ painted plywood reclaimed from some kitchen cabinets. It’s slick but pretty water resistant.
An 8″ drill press is all I ever really need for the hand tool shop.
The drawer is made from scrap 1/2″ plywood, also joined with glue and pocket screws. The drawer bottom is 1/4″ plywood glued and nailed on. The drawer front is white pine and there is a 3/4″ lip underneath to use instead of a separate drawer pull. The drawer inside dimension are about 16×12 and 3.5″ or so deep. More than enough for drill bit sets and accessories.
I used some full extension drawer slides from the home center and they work well enough (they are “soft close” according the packaging). I contemplated making oak drawer runners, but laziness won out in the end.
I still need to migrate my Forstner bits from the garage Craftsman chest.
The next fixgasm on my list (for today or tomorrow) is to hang some wall mounted clamp racks and free up floor space. I never really move my mobile clamp cart around the shop, so it’s pretty much just in the way. It’s also way too big and not a super efficient use of space anyway.
I hope you all find some time in the coming weeks to tackle those little but important projects around the shop.
When I first built my wall-hanging tool chest, I had only a handful of moulding planes. Basically a quarter set of hollows and rounds, plus a wooden fillister (rabbeting) plane. So the little cubbies at the bottom were more than sufficient for both those and my couple of joinery planes.
Being a 3/4 metal tongue and groove plane, large router plane, and combination plane.
But since then, I’ve accumulated more worker moulding planes, including a few beading planes, two more tongue and groove double planes (for 9/16 and 7/8), some rabbet/shoulder planes, and so on. So on a snowy weekend in Southern New England, I made a new moulding plane cubby.
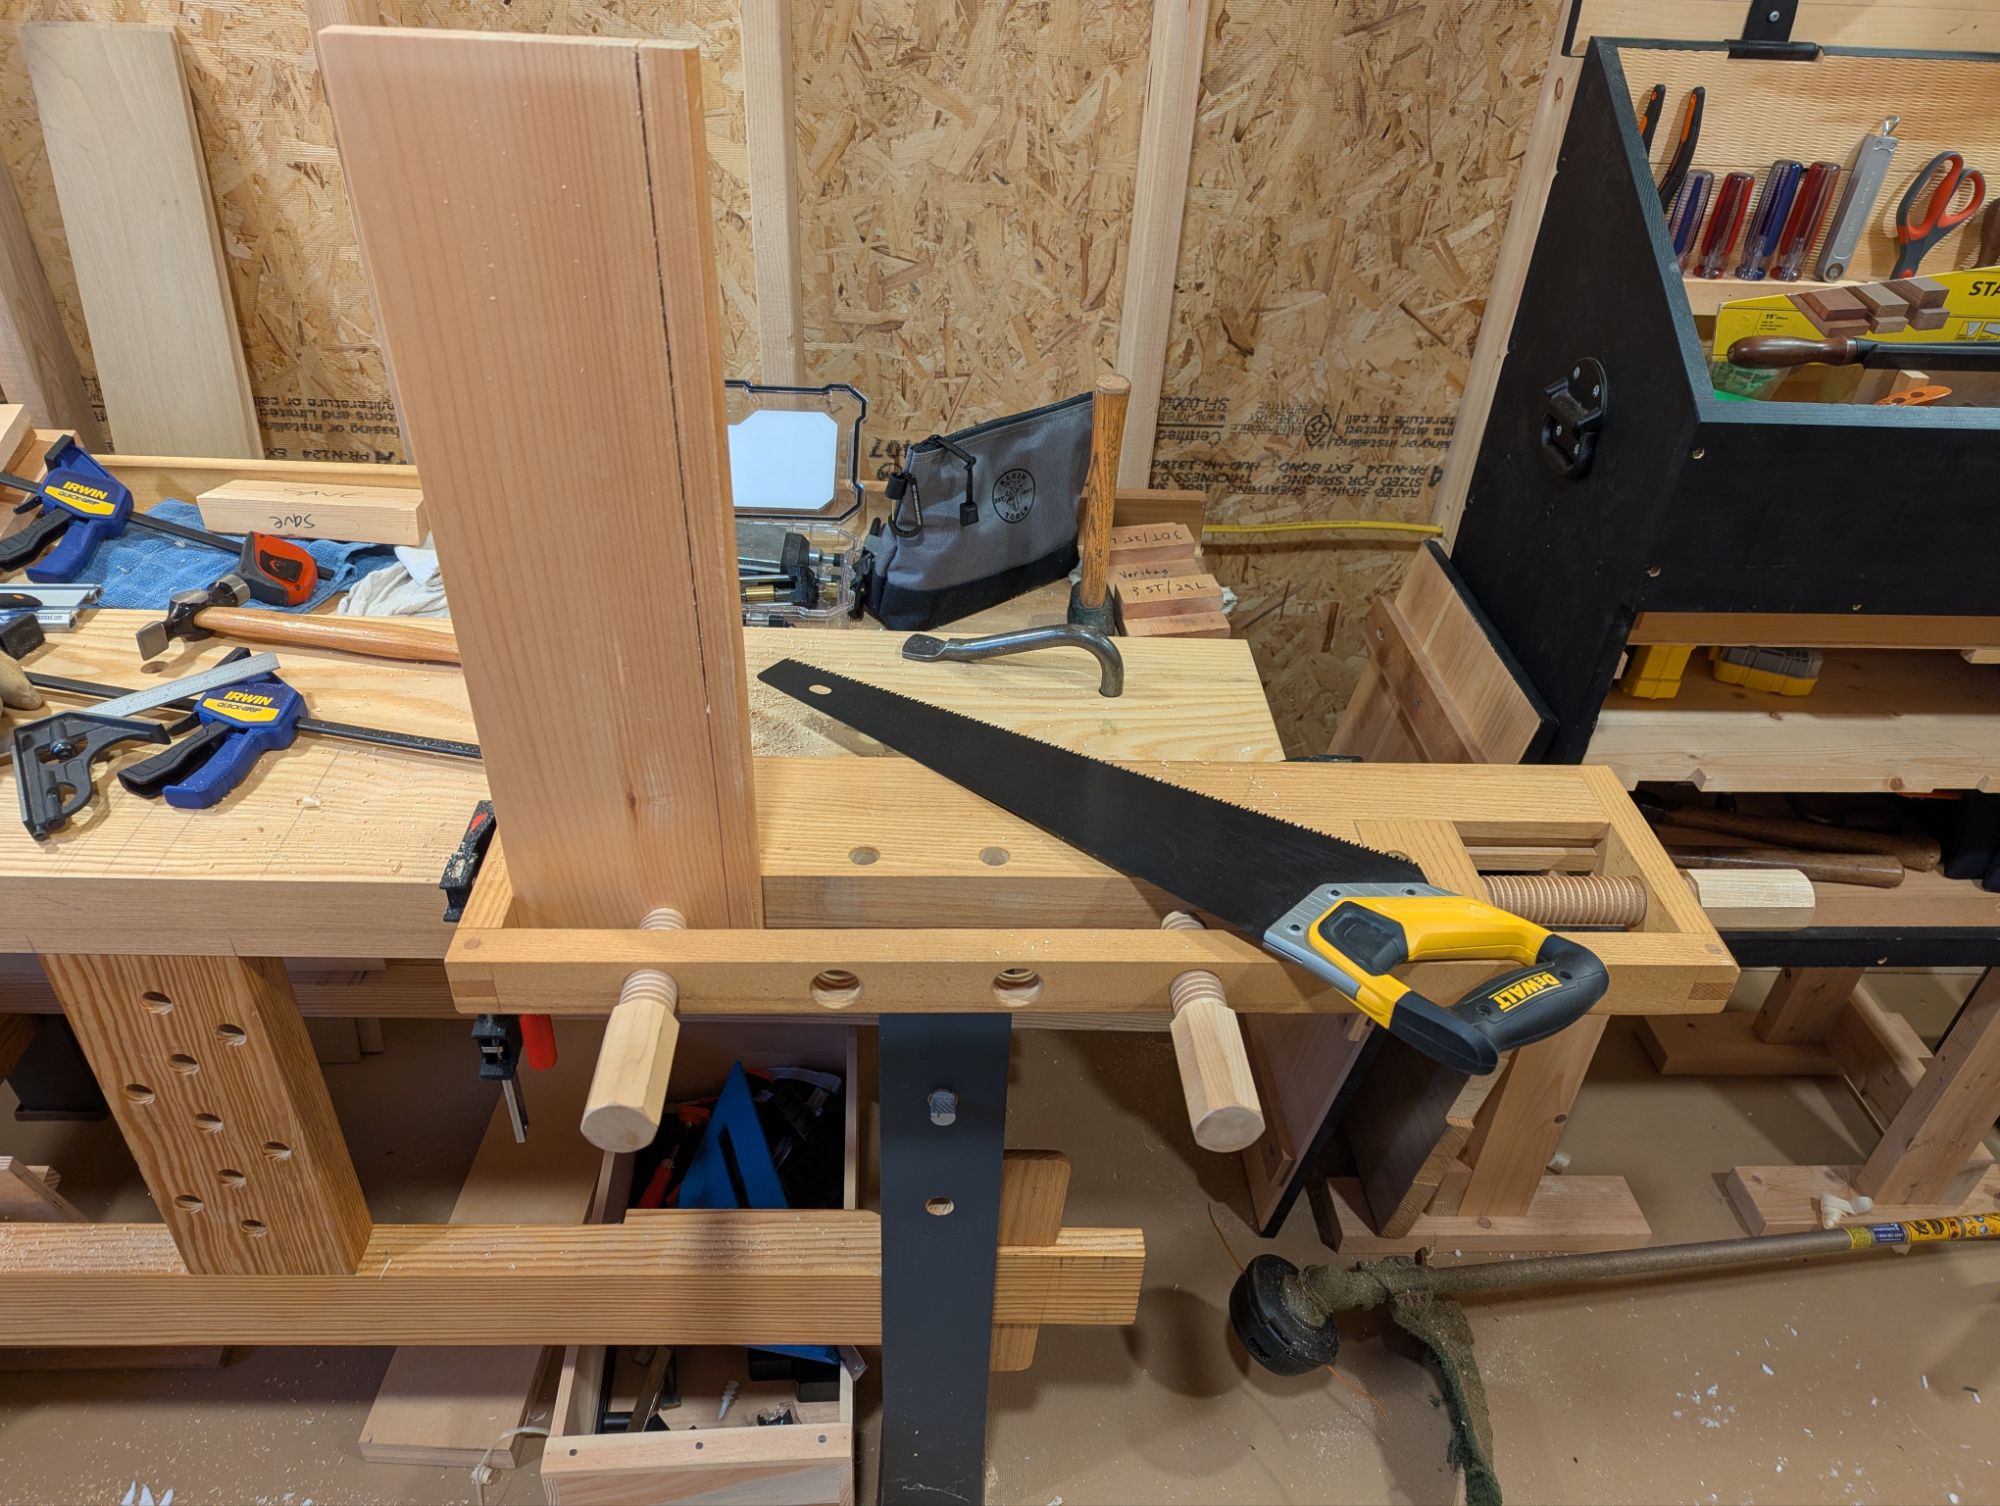
When your dovetails fit nicely, the clamp on the dado is all your need.
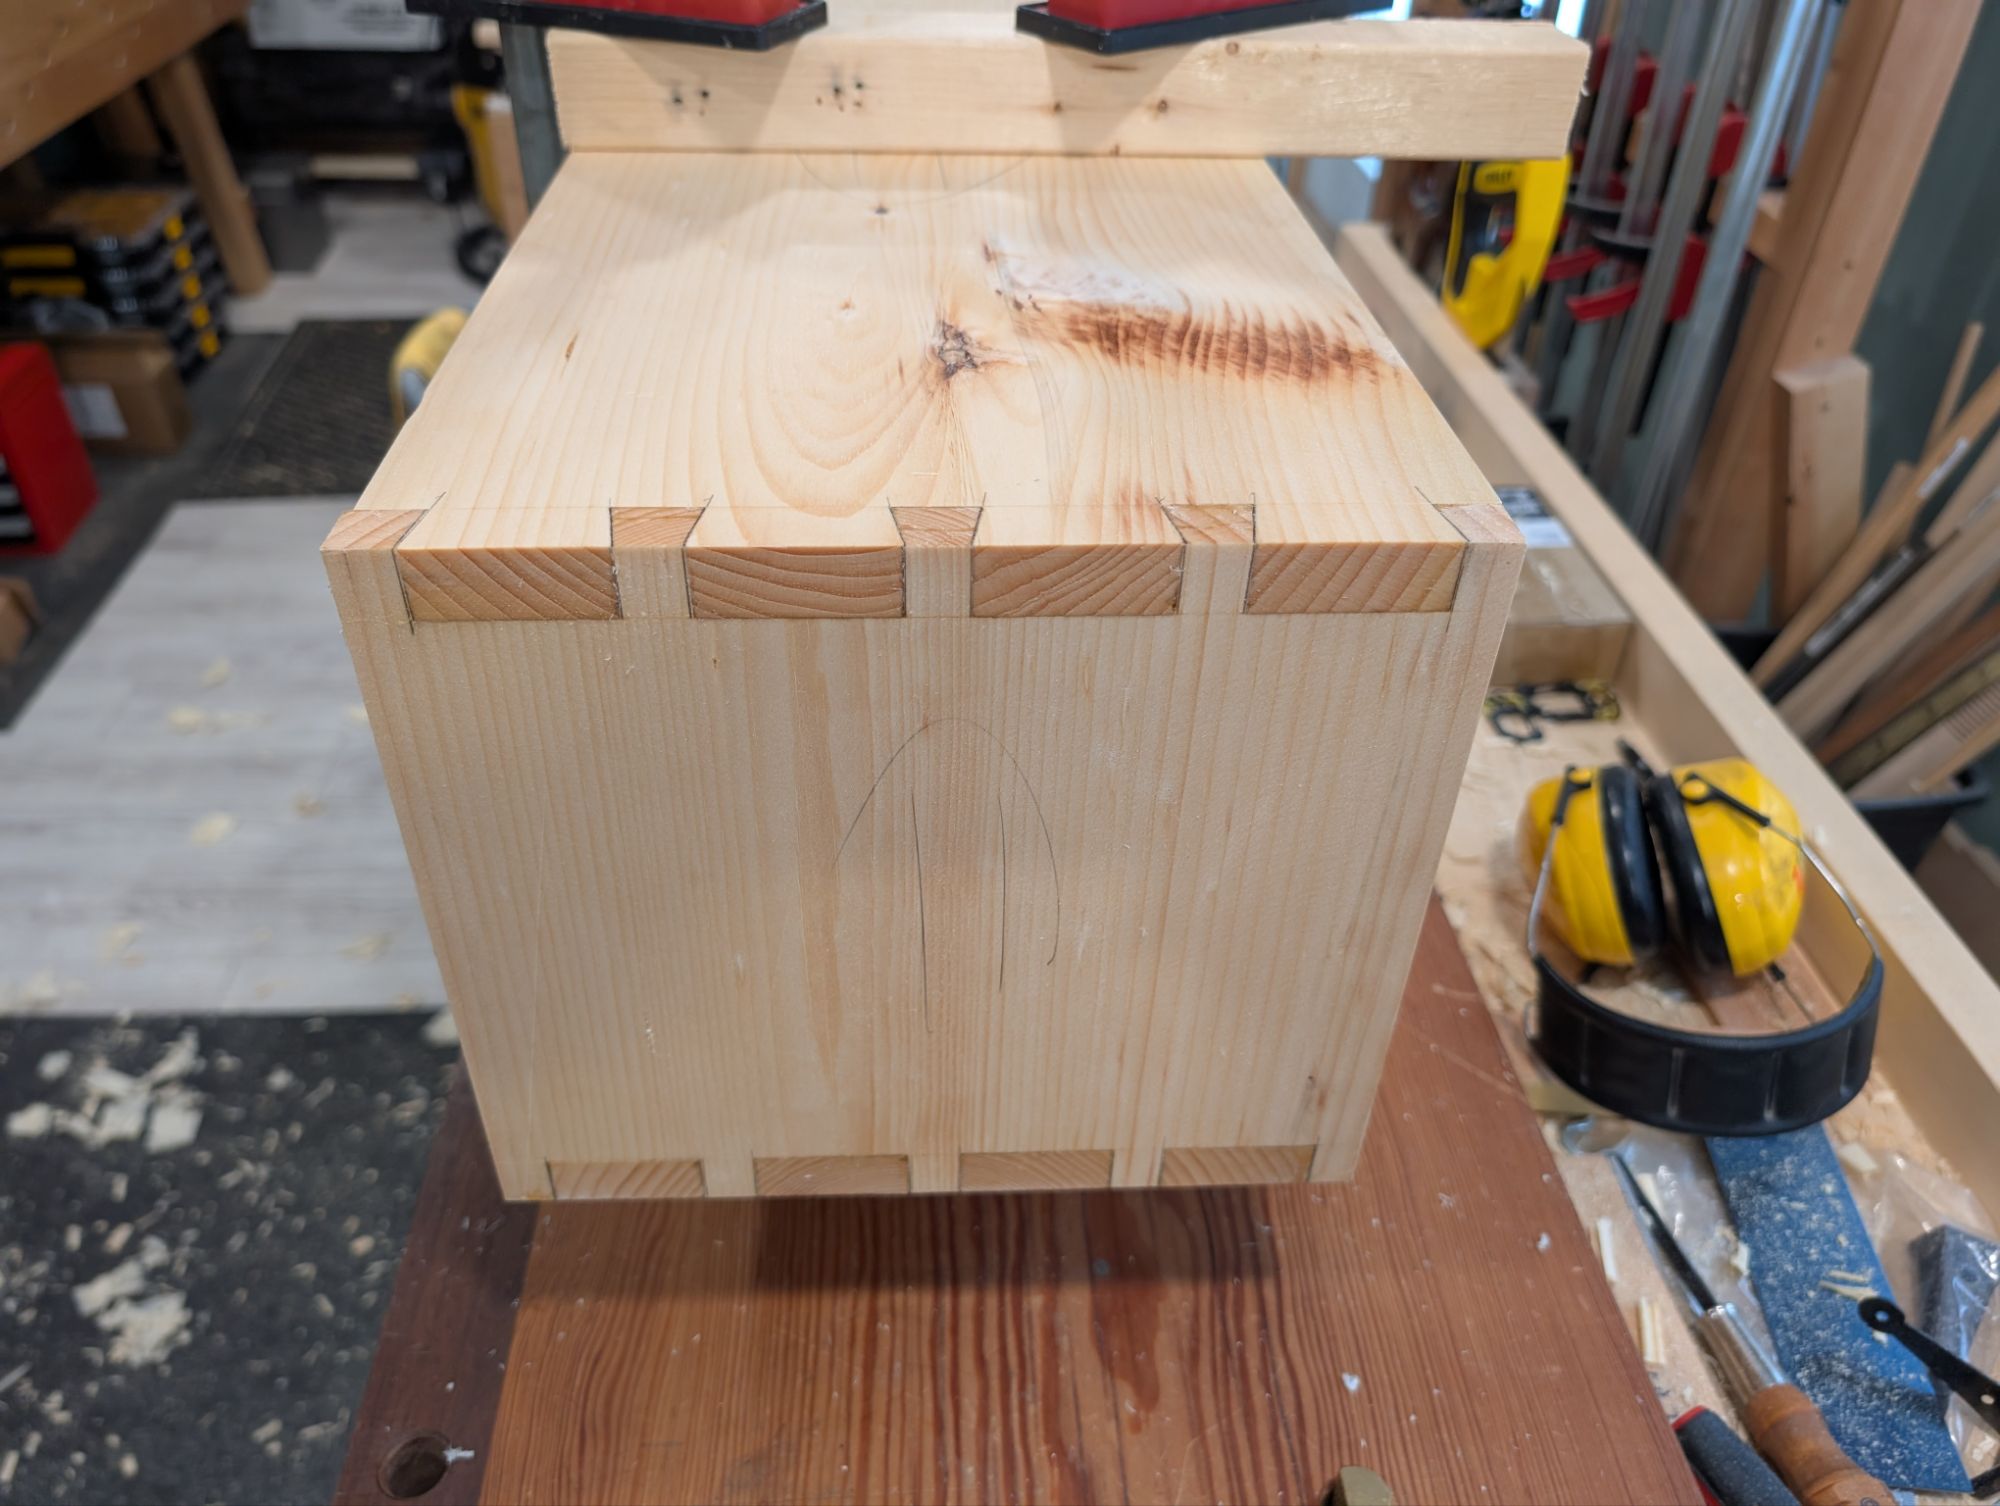
The dimensions are exactly the same as the lower cubbies, other than a little extra depth (since I don’t have to account for the French cleats. Once the glue dries, I’ll run a few screws into the dado board (more for peace of mind than actual fastening) and screw this new cubby down to the top of the current wall cabinet. The joinery is very much overkill (pocket screws or even rabbet and nails would have been more than sufficient for this, as it will experience no significant forces). But I needed the dovetail practice for another project.
I prefer larger pins. Larger than English style, anyway. Not quite Central European.
The wood for this little cubby is pretty scruffy. It’s just a home center white pine 1×12, planed flat and thicknessed to about 11/16. Even home center white pine isn’t usually this brittle and stringy, though. It’s basically the definition of “deal”. And deal is useful for many things, including shop projects.
If I ever get around to remaking my wall mounted tool chest in nicer wood (this was, after all, just a prototype), I will probably add this cubby into the main carcass. I have some old genuine mahogany that I’ve been saving for that in particular. But that’s a long way off.
In any event, I hope everyone is staying warm and dry.
Editor’s Note: Buckle up. This will be a long one and will at times feel like James is just ranting. In an effort to pander to his international audience, James is also adding metric parentheticals. Even if using anything other than Freedom Units is anathema to him.
I’ve a number of small trips on my calendar for Fiscal Year 2025. Between concerts throughout the Northeast of the United States, a beach vacation in the Cape of Cod, and, of course, my spring pilgrimage to the house in Central Vermont, I will be away from my home shop quite a bit over the next 6 months. And I’d like to be able to do some vacation woodworking.
Vermont is not an issue. I have, over time, migrated a full size workbench and entire complement of essential woodworking handtools up to permanently live in the utility shed on the property. As a result, though, I don’t really have a travel tool kit anymore. I’ve never been much of a tool hoarder and I foolishly gave away my travel tool box once it did its job and moved everything up to the aforementioned utility shed.
So I’ve been forced to start at essentially square one in putting a new travel tool kit together.
Over the years of making many, many, many travel tool chests, and in refining my thinking on what specific tools one actually needs for casual, on-site, vacation woodworking, I’ve learned a couple lessons. Many the hard way.
First and foremost, vacation woodworking (for me) is not fine furnituremaking. I know of very talented folks who vacation carve beautiful and intricate panels. And I envy them. But that’s just not me. If I’m making furniture outside the home shop, it’s utilitarian: an extra table or a bench or stool. Or if you can’t sit on it, it’s probably a shelf or a rack or a quick shadow box to display some quirky knick-knack picked up at a local antique shop.
That is the long way of saying that my vacation tool kit can an should be small. And I mean small. One saw that crosscuts well and can rip decently (if not efficiently). One bench plane. Two chisels and a mallet. A knife, a square, a bevel gauge, an awl, and a way to bore small holes. Something to keep all of the above sharp. A small hammer and nail set, some pliers, and a measuring tape (although everyone should have one of these in their car anyway). That’s about it. And I’ll probably be tossing in a bag of nails, a bottle of glue, and other miscellany as well (because I just can’t help myself).
All told, that’s 30 lbs. or so of tools (or 14 kg for you metric cretins), before you add the container to store it all in. About that…
I grew up (and still live) by the coast in Southern New England. Between sailing and swimming and other salt-water related activities, canvas tote bags are second nature to me. I have many, and I love them for a broad range of holding and storage tasks. But you cannot just throw a bench plane into a canvas bag, even in a plane sock. No matter how careful, you’ll eventually break the tote or ding another tool. I have in the past made a plane box to keep the bench plane safe, but even that’s not ideal since it still rattles around and can crash into other tools.
And what about your hand saw? Even if you sheath it in a proper carpenter’s saw bag, you could still bend the plate if it bangs around too much in the bag (for instance, against the heavy bench plane). Folding saws are great, but they tend to cut on the pull stroke and I work in the English style (being a steadfast disciple of Paul Sellers).
You can spend money on a nice tool bag with storage pockets to segregate the edge tools and other small tools into pockets. I especially like CLC bags, and any of the Husky bags from the purse aisle at the Homeless Despot will work. But the big stuff is still rattling around inside, if they will even fit. And don’t get me started on metal toolboxes, which can hold a small arsenal in perfect organization but will undoubtedly snag and tear the upholstery in your back seat if you’re not careful.
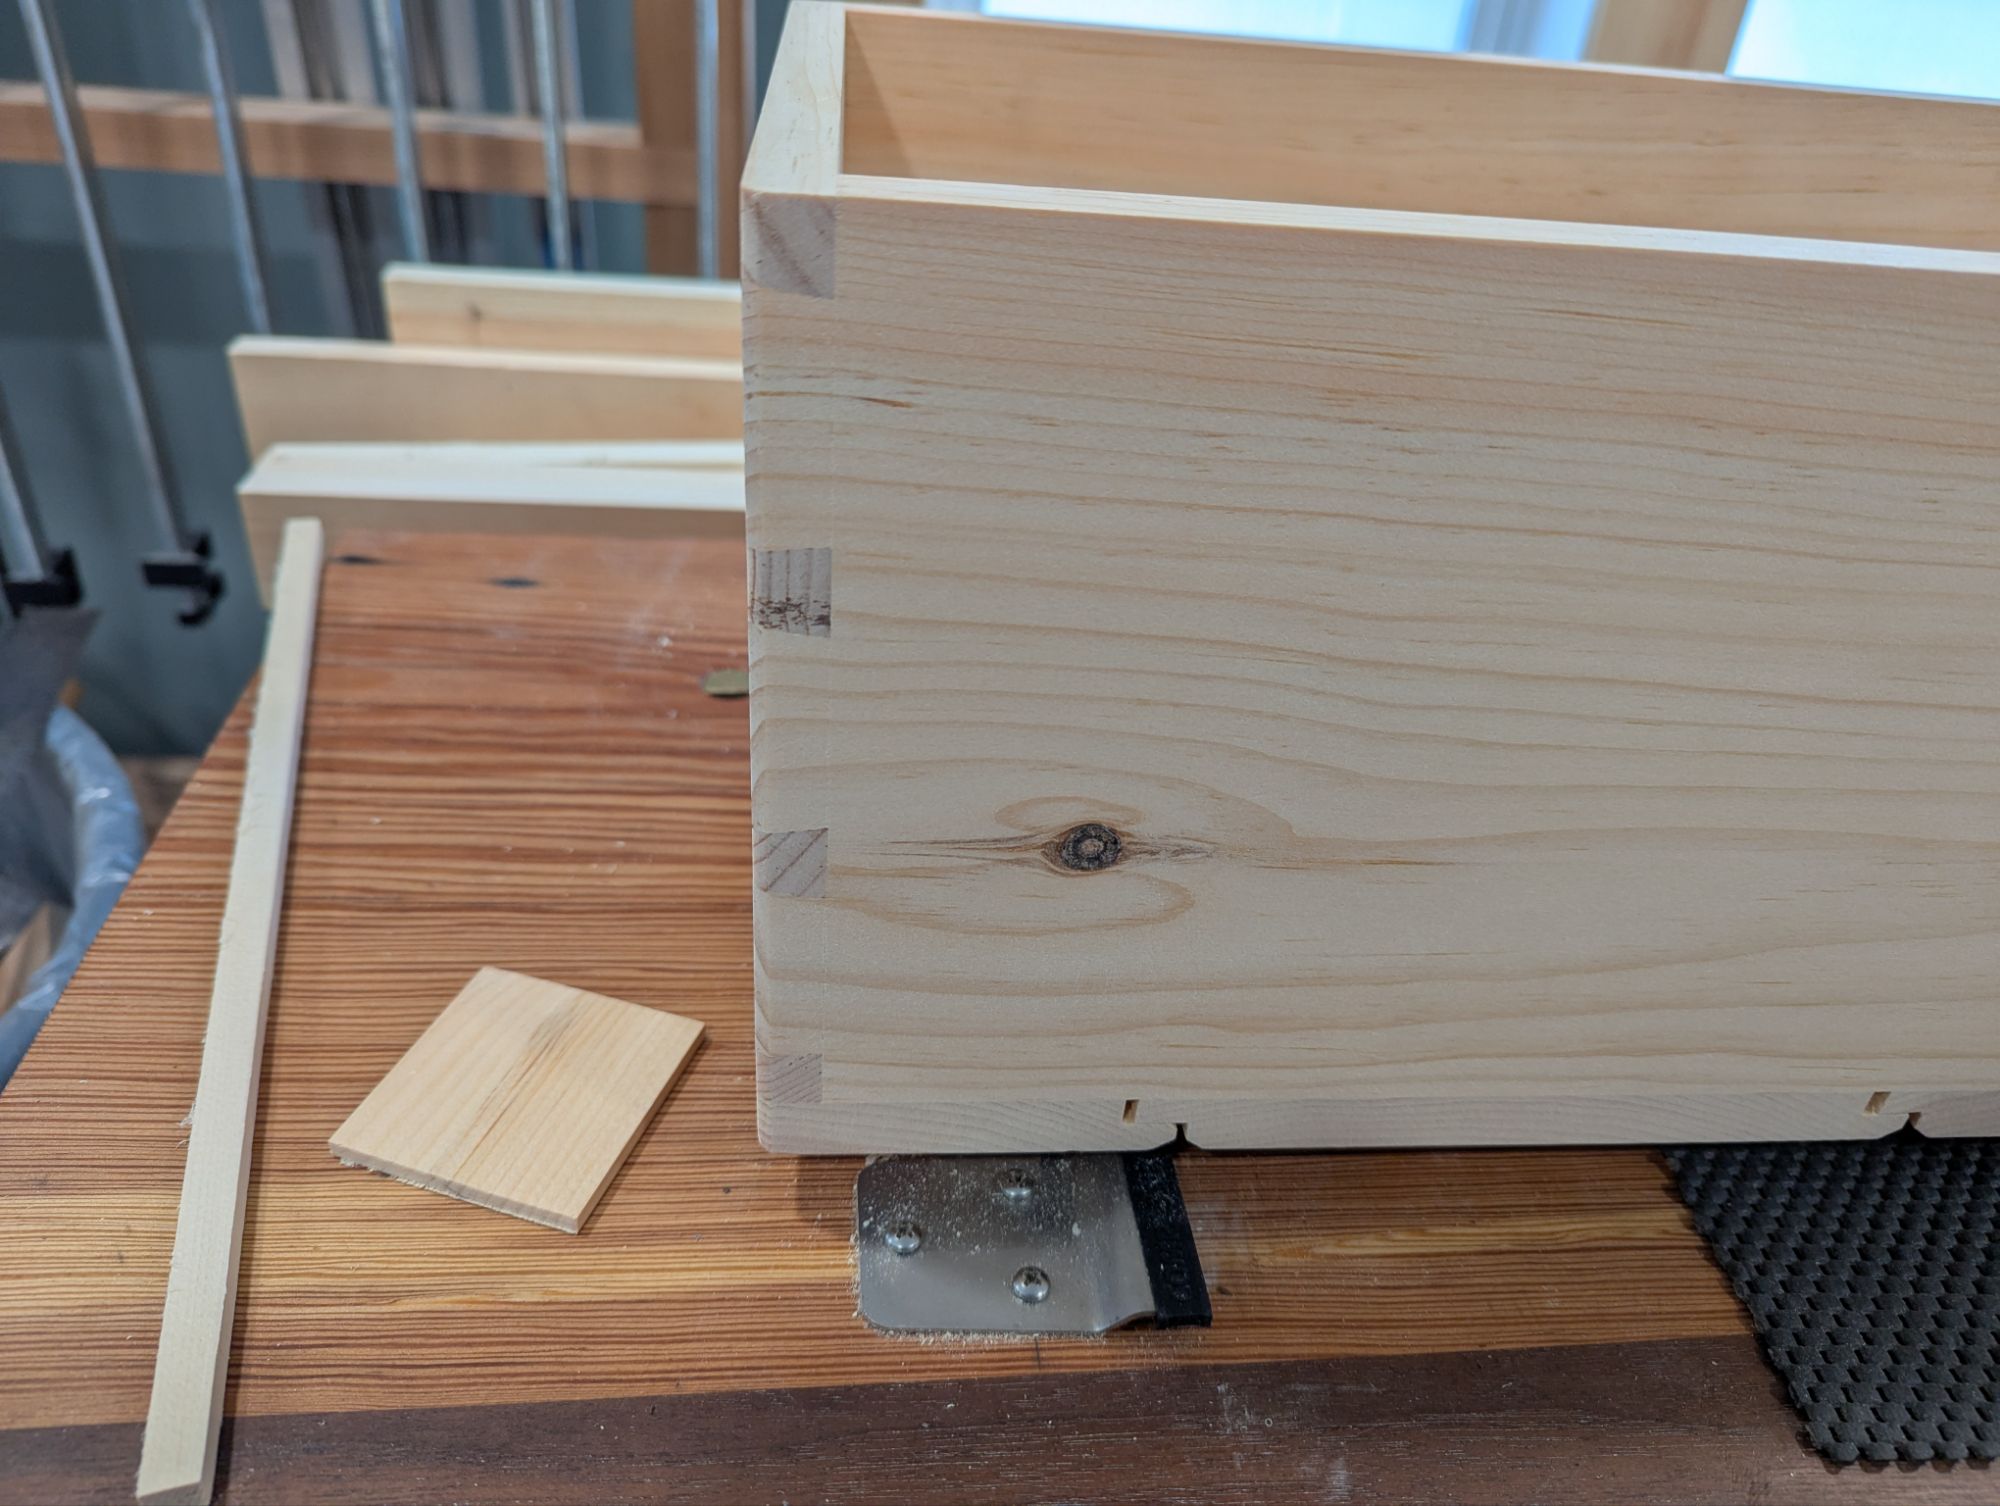
So where does this leave you? Well, we are woodworkers after all. So I would suggest making a pine box that you can french fit to keep your tools safe.
It’s a travel tool chest, though, and will need to haul at most 50 lbs. (again, 23 kg for you metric types), inclusive of the box itself. The 3/4″ or even 7/8″ stock you might see in a proper English floor chest is way overkill here. For a travel tool chest, I typically take the thickness down to 9/16″ or even 1/2″ (13mm or so), with the actual thickness depending on wherever ends up actually flat across the width.
Funny thing is: when working in stock of that thickness and this application (where strength really matters), you really can’t do posh Western European dovetail patterns with super narrow pins. I like wider pins anyway and these travel tool chests are a good excuse to make the pins noticeably beefier. Like so:
Those heavy chamfers on the corners are prep for the iron angle reinforcement.
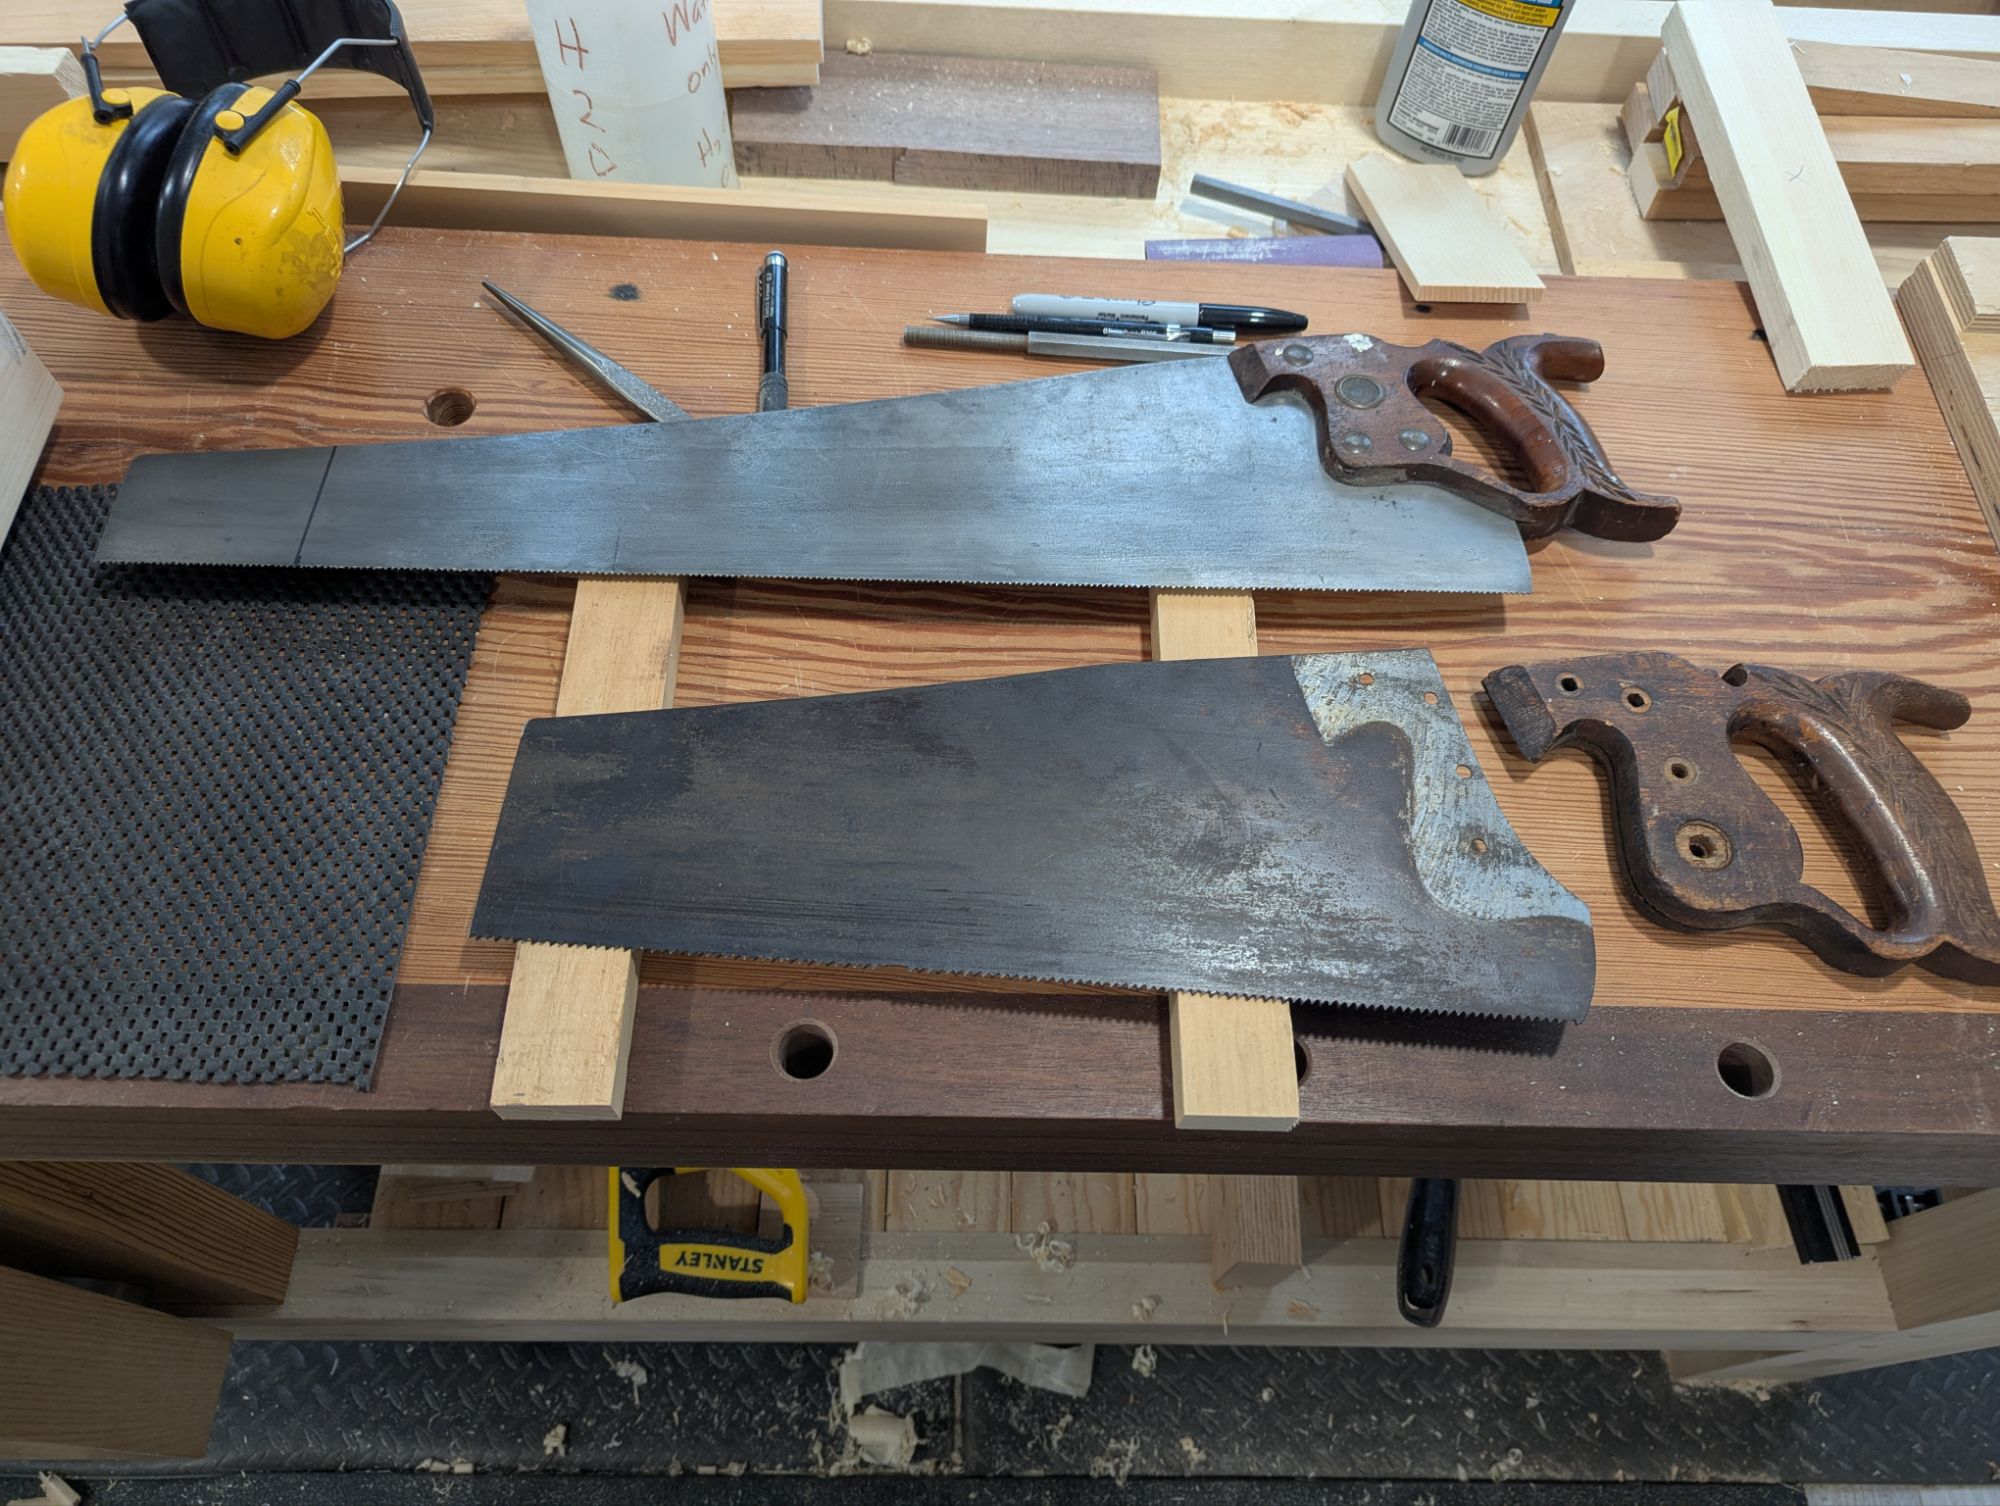
So how big should a travel tool chest be for the type of rustic vacation woodworking I tend to do? Well, your saw is always going to be your longest tool in the kit. Frankly, if you’re intent on hauling around one or more 20″ panel saws, you might as well just make a full size Dutch Tool Chest and bring an entire workshop with you. But I have found you only really need about 15 inches (380mm or so) of tooth line for most woodworking sawing tasks. It’s less efficient than a longer saw because of the shorter stroke, sure. But it still works fine.
A saw like that will fit into a tool box that’s got 19-20 inches (480-510mm) of internal length. You could buy a small home center hard point saw, and they work well. But they sure don’t look very nice and aren’t terribly comfortable to use for long periods, especially when ripping. So what are the other options?
Well, vintage hand saws are abundant and cheap. If the tote is in decent shape, and the plate itself still has some life, odds are it’s got a kink in the tooth line. And that kink is probably around 1/4 or 1/3 of the way back from the toe. You’ll never get that kink out (and even if you do, you probably just work hardened the area around the kink so it will just kink again, or shear). But what if you could just angle grind off everything past the kink and make a shorter saw? Suddenly, that saw would fit into a travel tool box of manageable size.
Something like this, perhaps?
A 20 inch panel saw shown above for length comparison.
I find with shorter saw plates (physics for the win) that they are more rigid and more controllable. After making several travel saws of various tooth pitch this way, I’m starting to think that backsaws (and especially half back saws) are somewhat superfluous. You can do fine joinery tasks with a backless hand saw that’s short enough. The lost stroke length is meaningless when you’re aiming for precision. And 15 inches feels like the sweet spot for rigidity and control.
So when you allow for the saw and other tool kit described above, plus the french fitting, I find a tool chest that is about 20″ long (510mm) x 8″ wide (200mm) x 7″ high in the well (175mm) will hold everything I need, even if it’s a bit cramped. If you can get away with some more width, go for it. But remember to subtract about 1 inch (25mm) to determine the inside dimensions when planning out your tool storage.
The second lesson on travel tool kits, and probably even more important, is that you can’t bring a thickness planer with you to the beach. I mean, you can. But then you’re a psychopath. So you’re probably working with dimensional stock (home center pine or construction lumber) that needs to be flattened and/or trued on site. And unless you are a different type of psychopath, this rules out anything smaller than a No. 5. I typically use a No. 6 fore plane for everything in home shop (other than the absolute final smoothing before finish). However, I prefer a No. 5 1/2 jack plane for travel work. It’s the right combination of length and width (and heft) for being on the go. And this is where a corrugated sole really shines, in fairness.
That extra room is for a little box that will hold a measuring tape and some other bits and bobs.
In a 20 x 8 toolbox, your jack plane will take up less than half of the total width, and not all of the length either. A hand saw till is about 1 1/2″ (38mm) wide and you can cram a few smaller tools around the saw itself. So you have around 4″ of width for everything else, which I typically fit out with a rack (for the edge tools and pokey bits) and another well for sharpening gear). You can make a lid with some depth to it that will add a new dimension (pun intended) to your storage space.
But I’m going to stop there, before this becomes a veritable novella.
In the meantime, that cut off saw plate needs to sit in some Evapo-Rust for a day to get cleaned up. Pretty sure that saw was a Disston, but it could be an Atkins. It’s definitely not a Simmonds (my preferred brand of vintage saw).
We’ll see. In any event, Happy President’s Day, all!
Hope everyone’s 2025 is off to a great start! I am actively ignoring the shitshow that is the United States federal government for the next 2-4 years, so that means more woodworking!
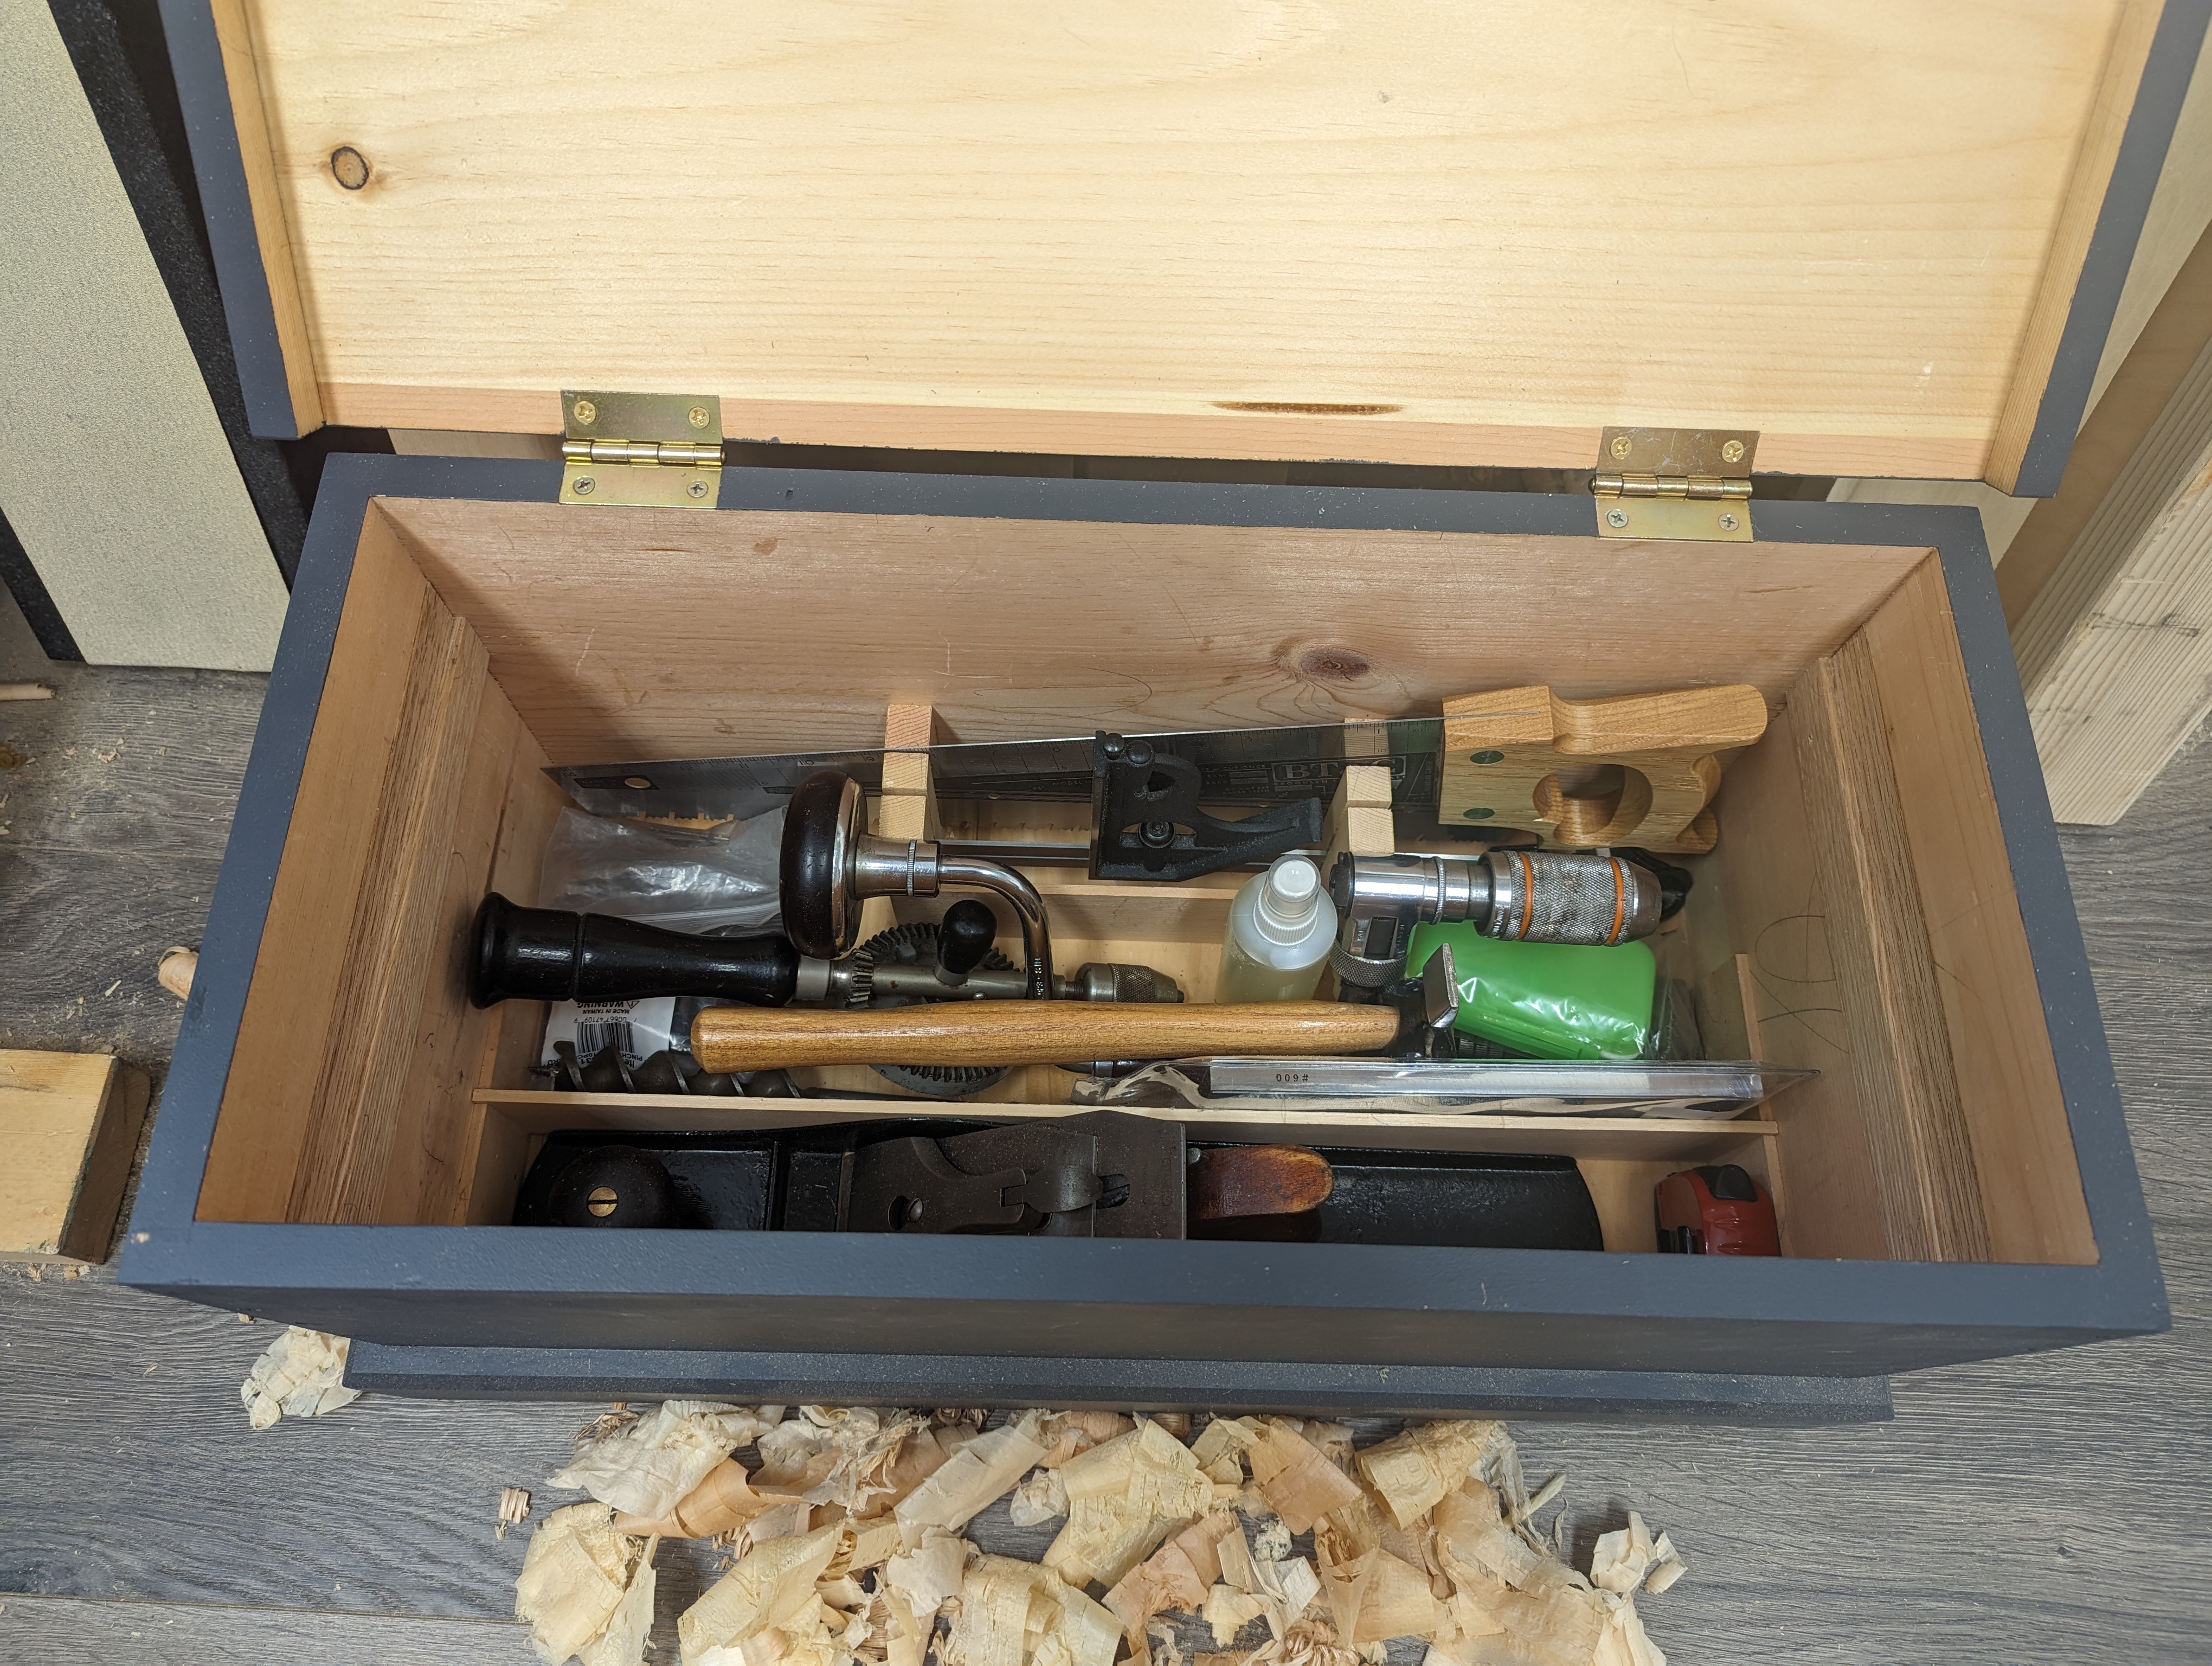
I was recently up north where I have a basic set of hand tools and a pretty good workbench in a shed. My tool kit consists of a few bench planes (No. 5 1/2, No. 4, and scrub plane), saws (a 20 inch hardpoint and a 12″ hardpoint, plus a 12TPI crosscut carcase saw), chisels (1″, 3/4″, and 1/2″), plus a small router plane, a small shoulder plane, a brace and bit, and all the basic marking and measuring tools. This is, in my view, an essential hand tool woodworking kit and I can do most home improvement and general construction tasks that cross the bench. Speaking of which, the workbench is 62″ long and the main benchtop slab is 15″ deep, which is plenty.
I have a dedicated Milkman’s Workbench for when I need vises.
But when I’m up north, when I’m not making spice racks and rebuilding exterior stairs, I like to scour the antique stores for two things: gate leg tables and vintage handtools. Most recently, I found a nice double gateleg table that now sits under a window in my living room. For furniture, I highly recommend The Red Carrot in Rutland, Vermont. Especially when the warehouse down the road is open. They also have a great selection of rustic boxes, most of which seem to have been joiner’s chests at some point. I don’t buy them to use them, but rather to study the techniques.
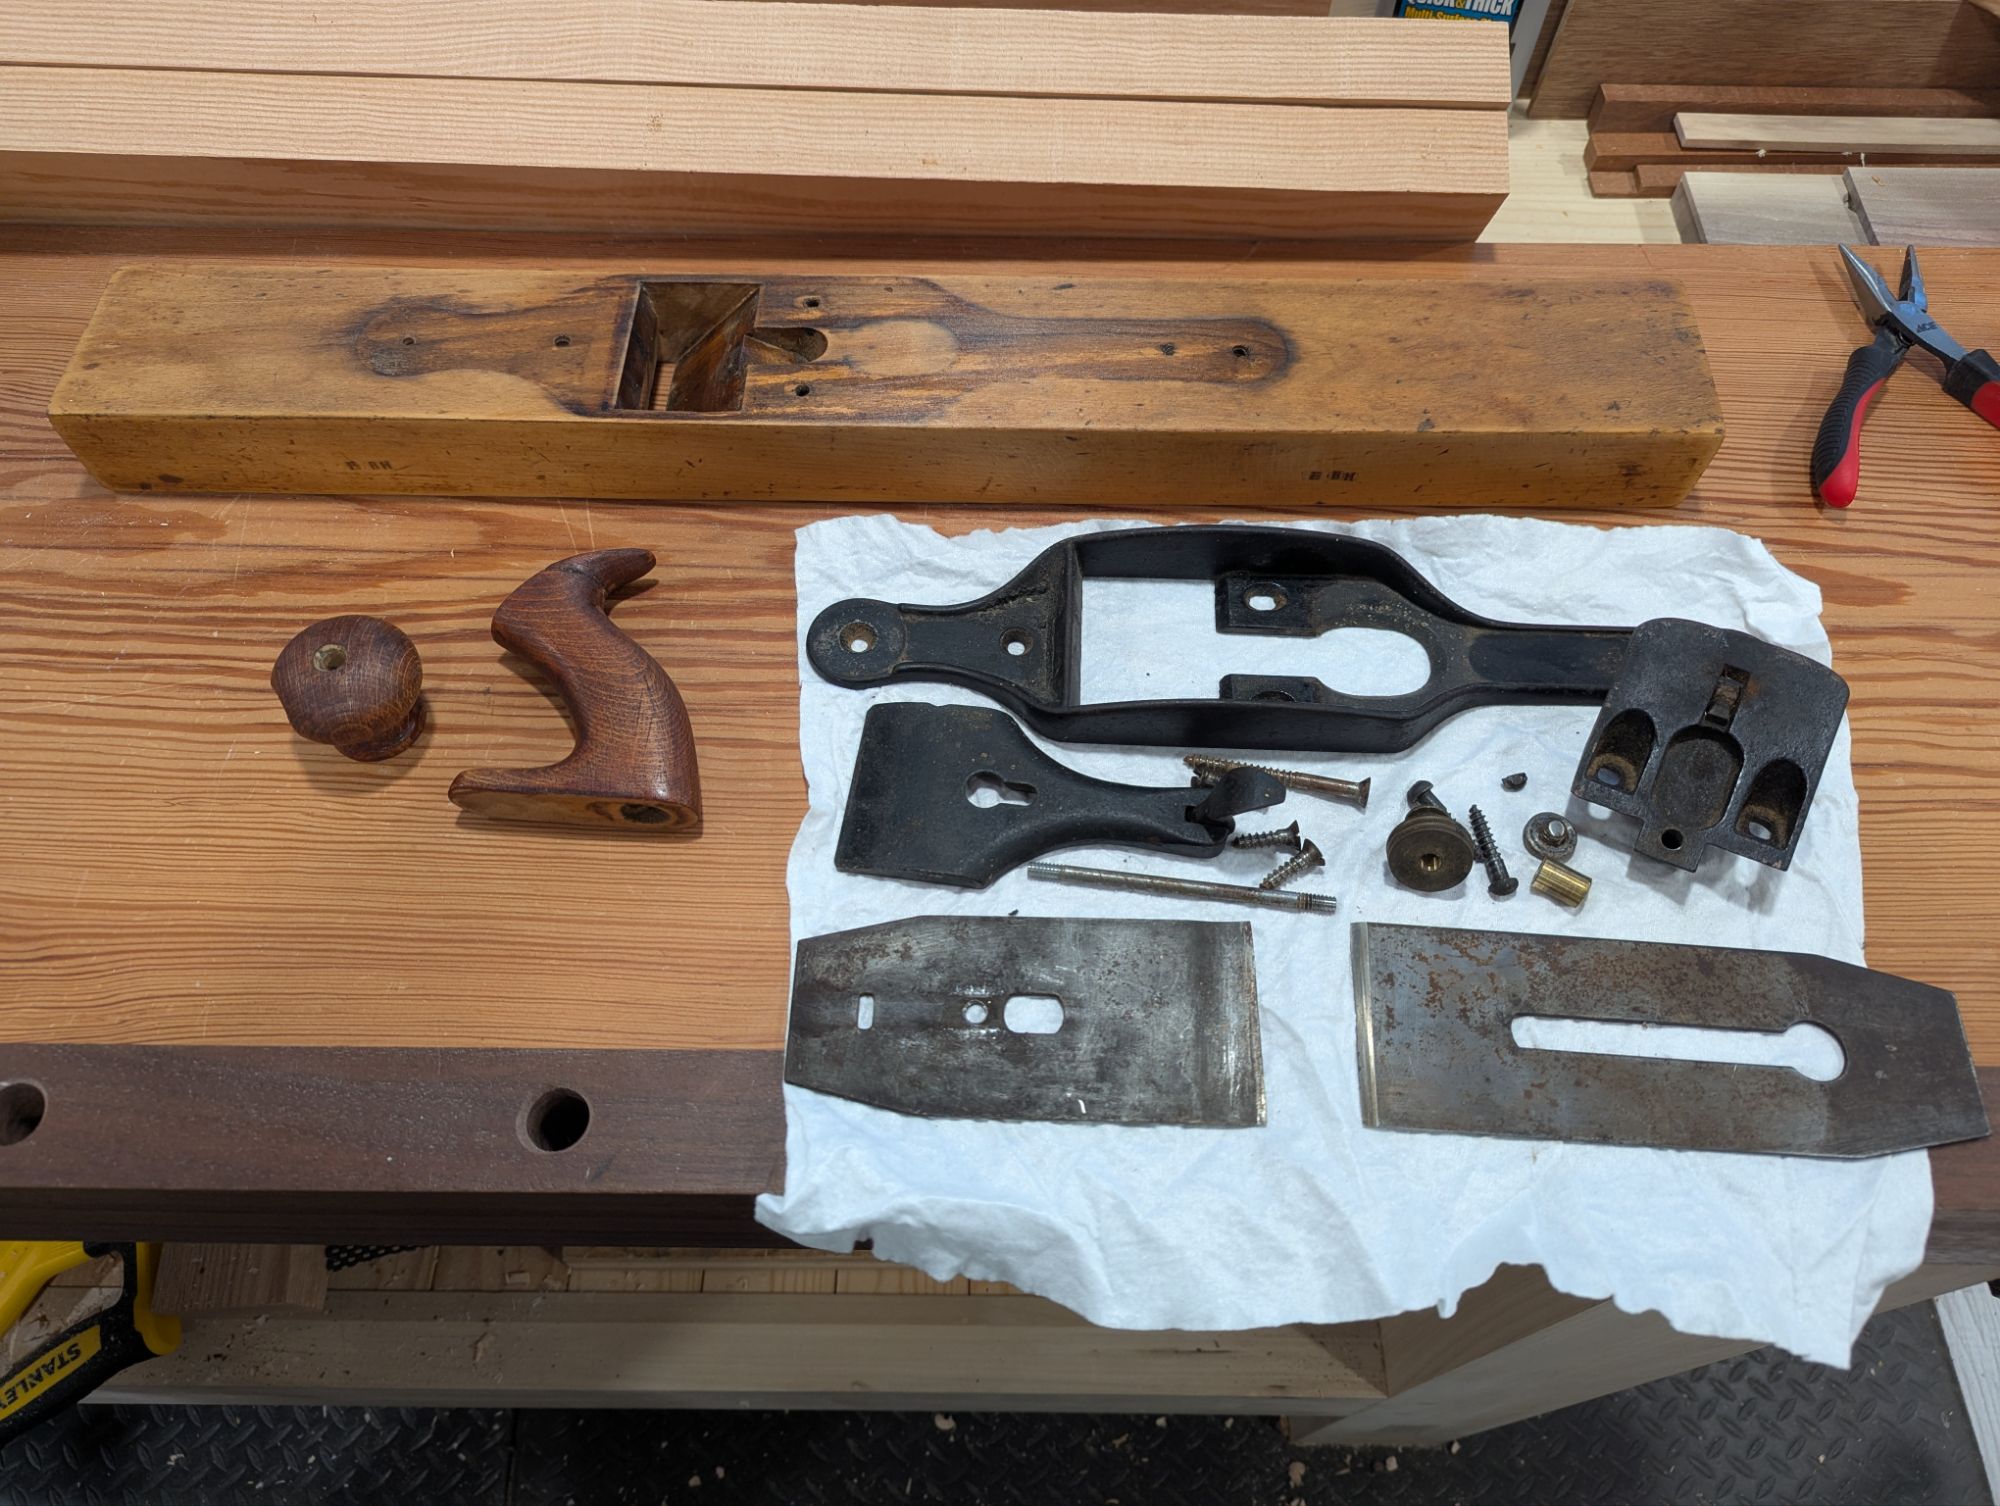
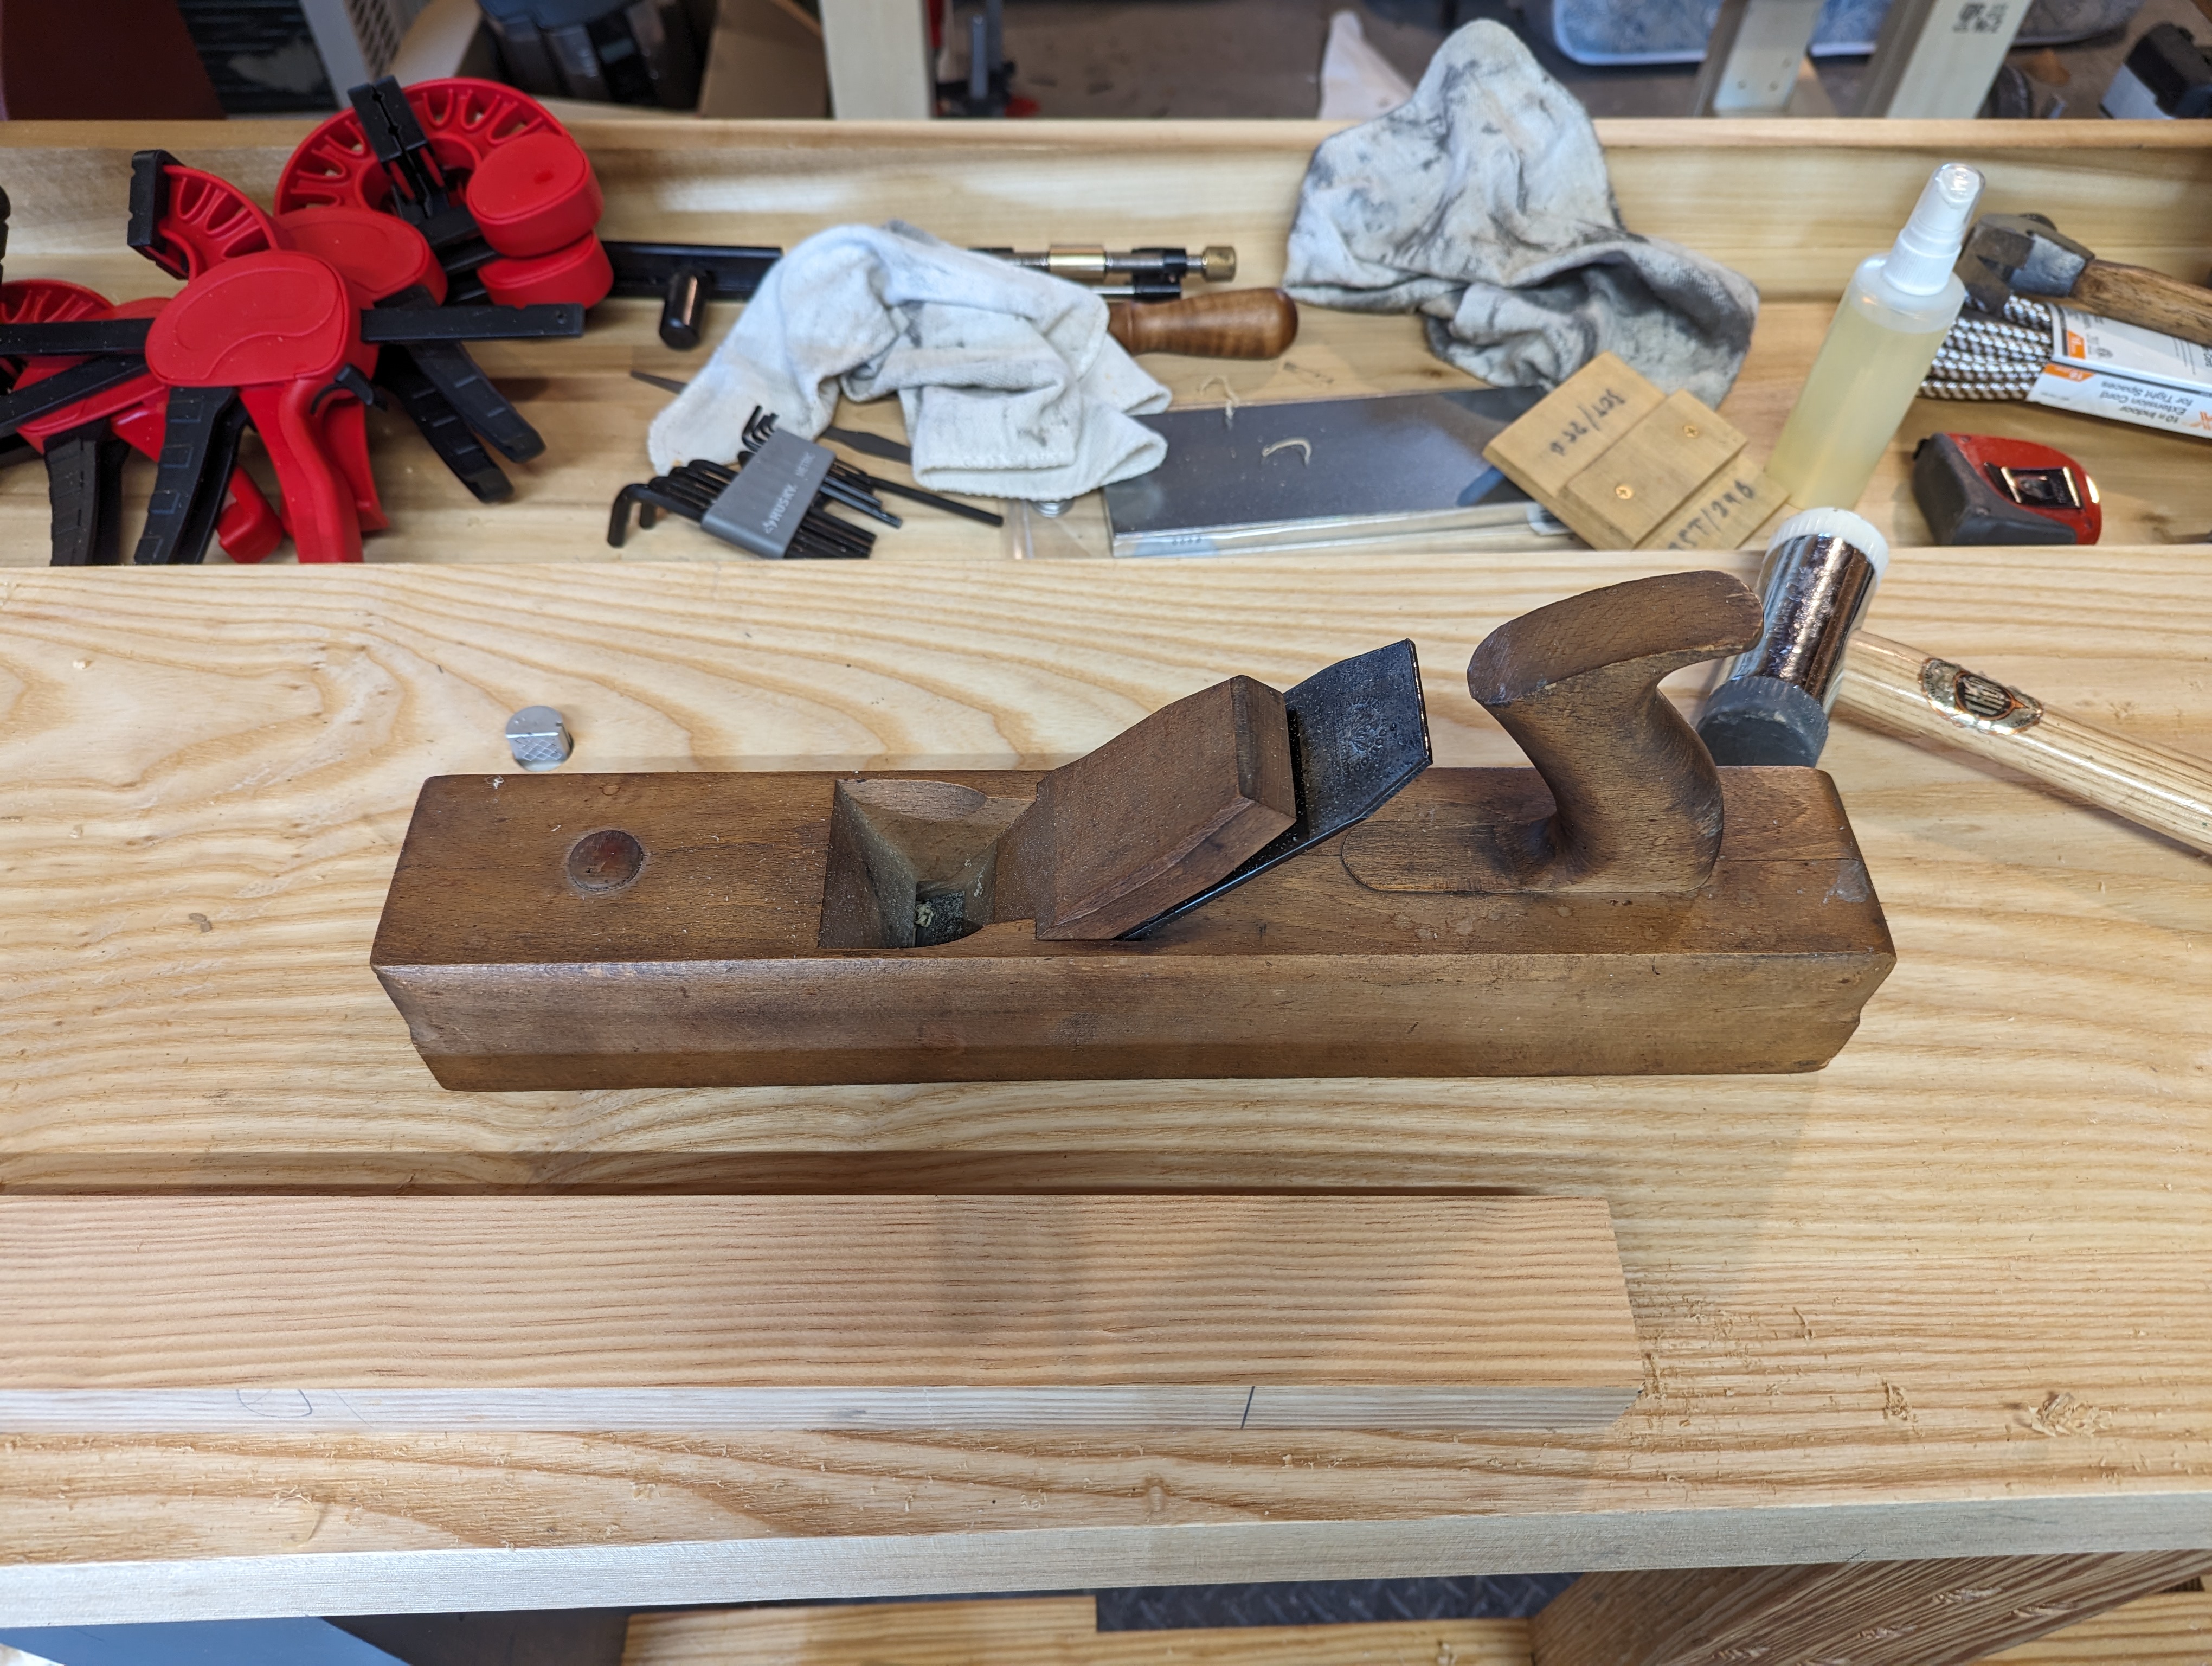
For tools, though, I find the foofier antique stores and thrift shops tend to be goldmines. While everyone else is looking at the jewelry and lamps and sewing machines up front, I’m digging through the back corner to find Disston and Simmonds hand saws and Stanley bench planes. On this trip, in addition to a nice 9 PPI Simmonds crosscut hand saw (26″ plate length) I extricated from a pile of painted kitsch, I finally bought a transitional jointer plane I’d been eyeing for a few years as it migrated around the store.
Not bad for 150 years old.
As far as I can tell, it’s a Stanley No. 31 transitional jointer plane, Type 4 (manufactured between 1871 and 1872). No lateral adjustment, right handed threads on the depth adjustment knob. The japanning on the casing is like 95% intact and aside from the horn of the tote being cracked (I’ll make a new tote), and one of the slotted frog screws having split (you can see the half moon fragment next to the frog, and replacement screws are readily available on electronic bay dot com), it’s in amazing shape. The beech sole, while a bit twisted, seems never to have been seriously flattened. The mouth is still crisp and tight and should remain so after truing the sole. The throat has shrunk a bit (again, 150 year old wood), so I might have to grind 1/16″ off the iron width so it adjusts easier. Or just get a modern replacement blade which is a bit narrower. Even the knob is sound (despite a small flake off the side).
Do I need a transitional jointer plane for my toolkit? Definitively no. I have a Type 1 Stanley Bedrock No. 7, and one of the very last Old Street Tool trying planes ever made. Plus I have a No. 6 fore plane that is just as good as a jointer for most of the work that I do. And is my every day plane, as it were.
But this transitional plane was $45 dollars and a piece of history. So I will clean it up and use it as I see fit.
Suffice to say, it’s been a very long year. I lived through some serious renovations on the house, moved my workshop to another room in the house, and generally just had so much going on professionally and socially I did far less woodworking this year than I would have hoped. But even with all that, I still found some time on Thursday to put down the work mobile and pick up the plane, saw, and chisel.
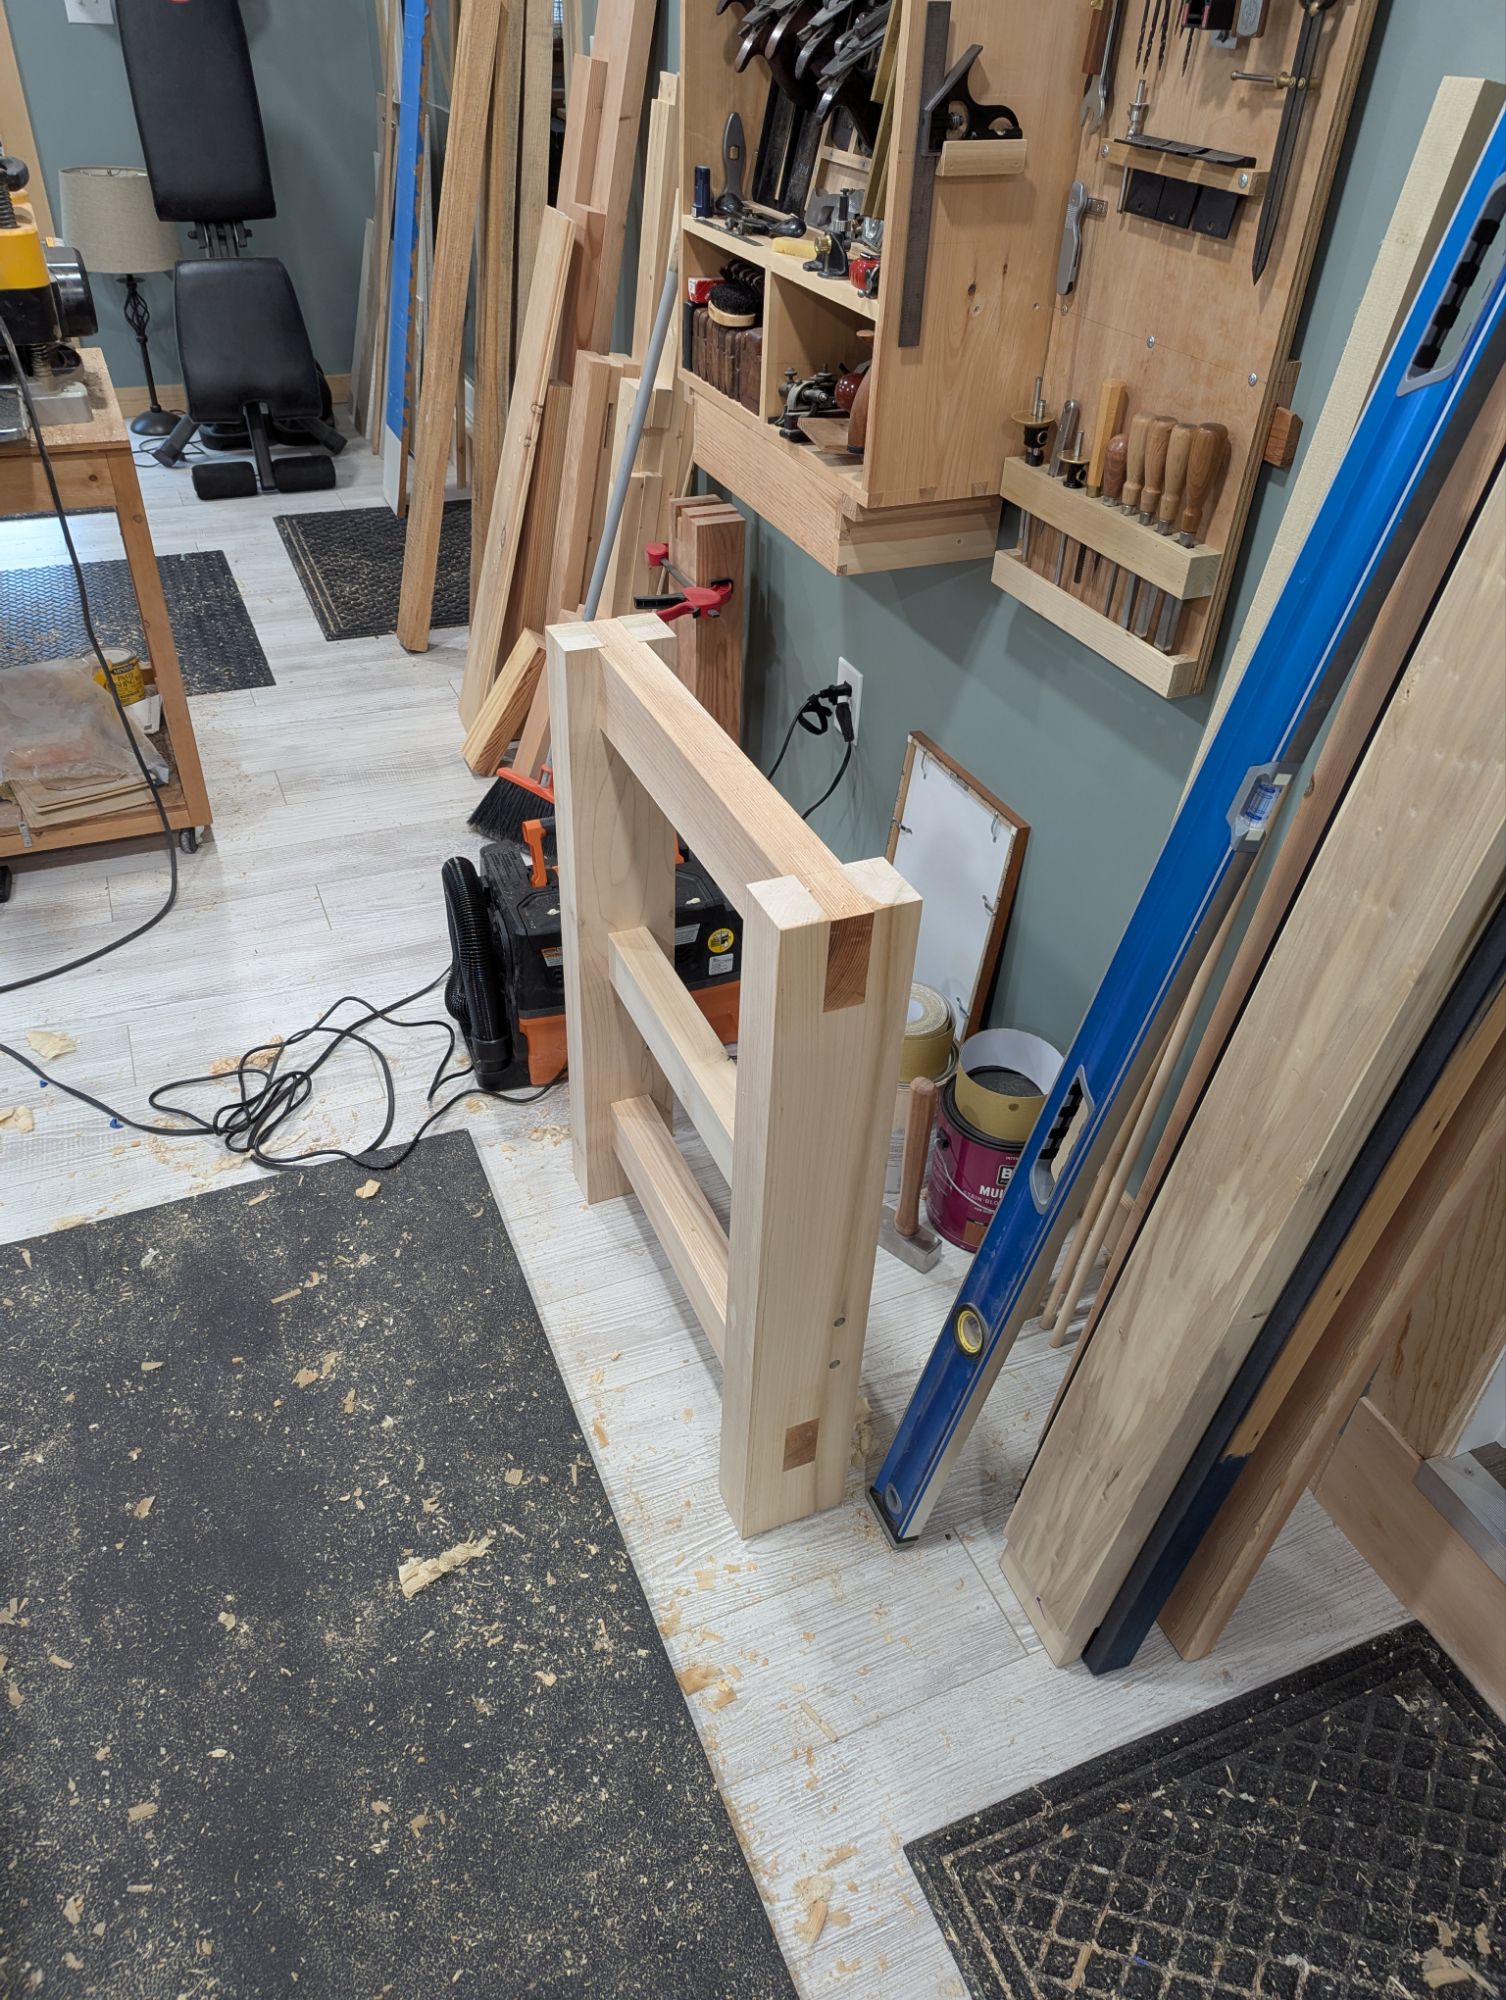
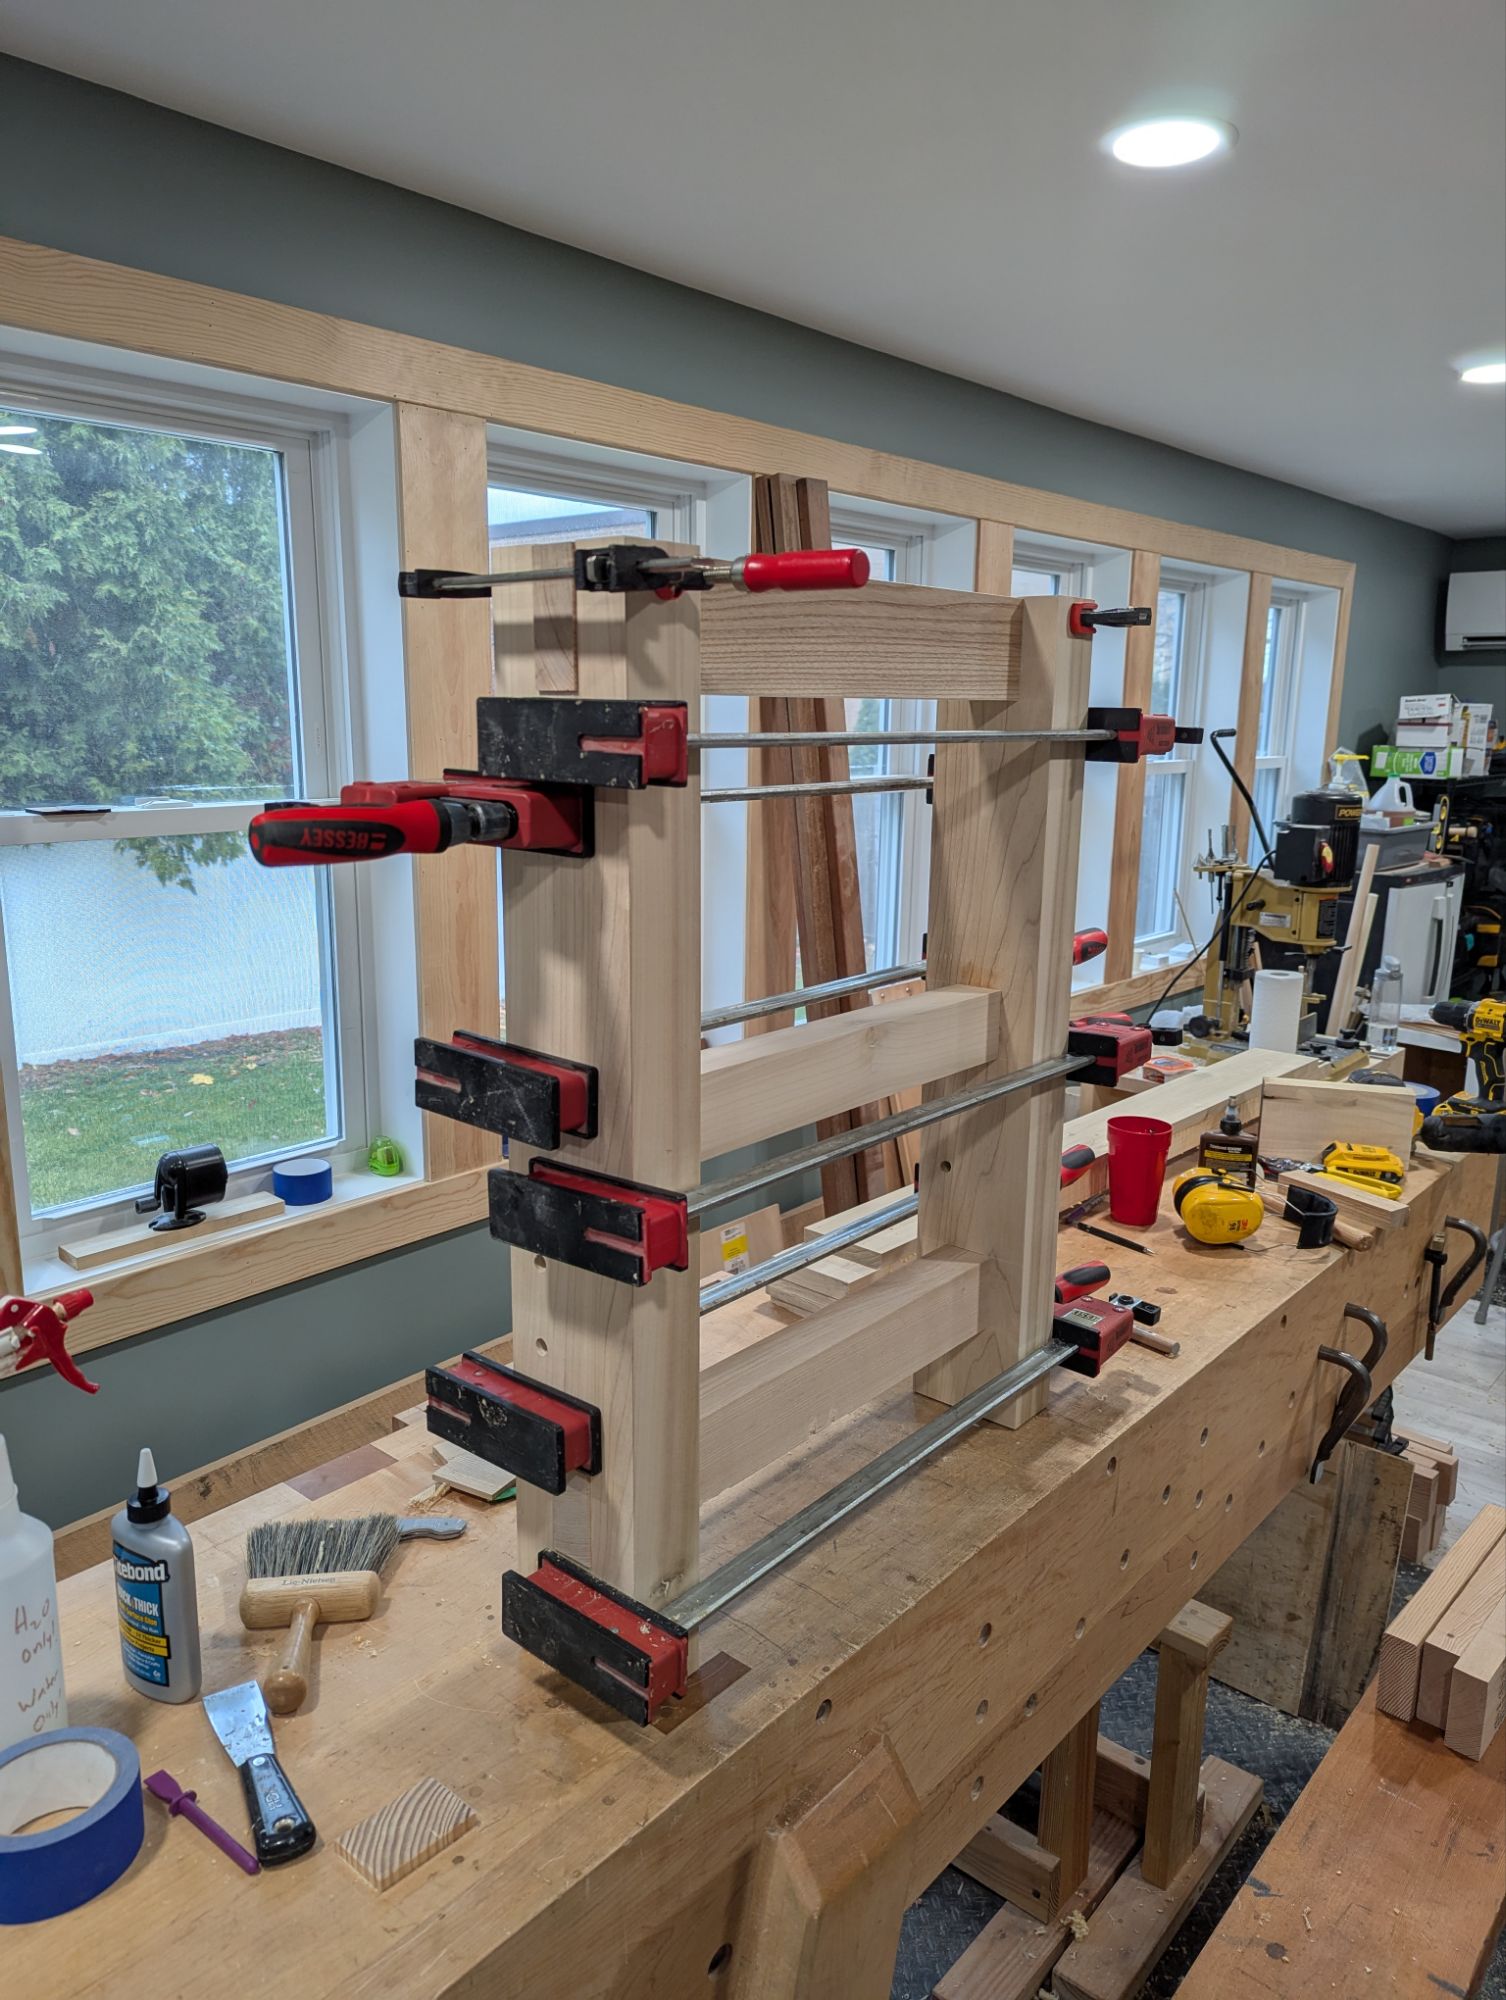
I am in the thick of a new workbench build (it’s been almost four years since I built one for myself, if you can believe it). And I’m at that point where it’s just about to start feeling like an actual workbench, rather than a bunch of beefy sticks.
One of the two leg assemblies.
So even though it’s after the holiday, I hope everyone finds some time in the shop this weekend. Even if it’s just an hour to glue up another leg assemble before your next conference call.
I’ve really learned to love Titebond Thick & Quick for mortise and tenon joinery.
Happy American Thanksgiving from The Apartment Woodworker, to you and yours.
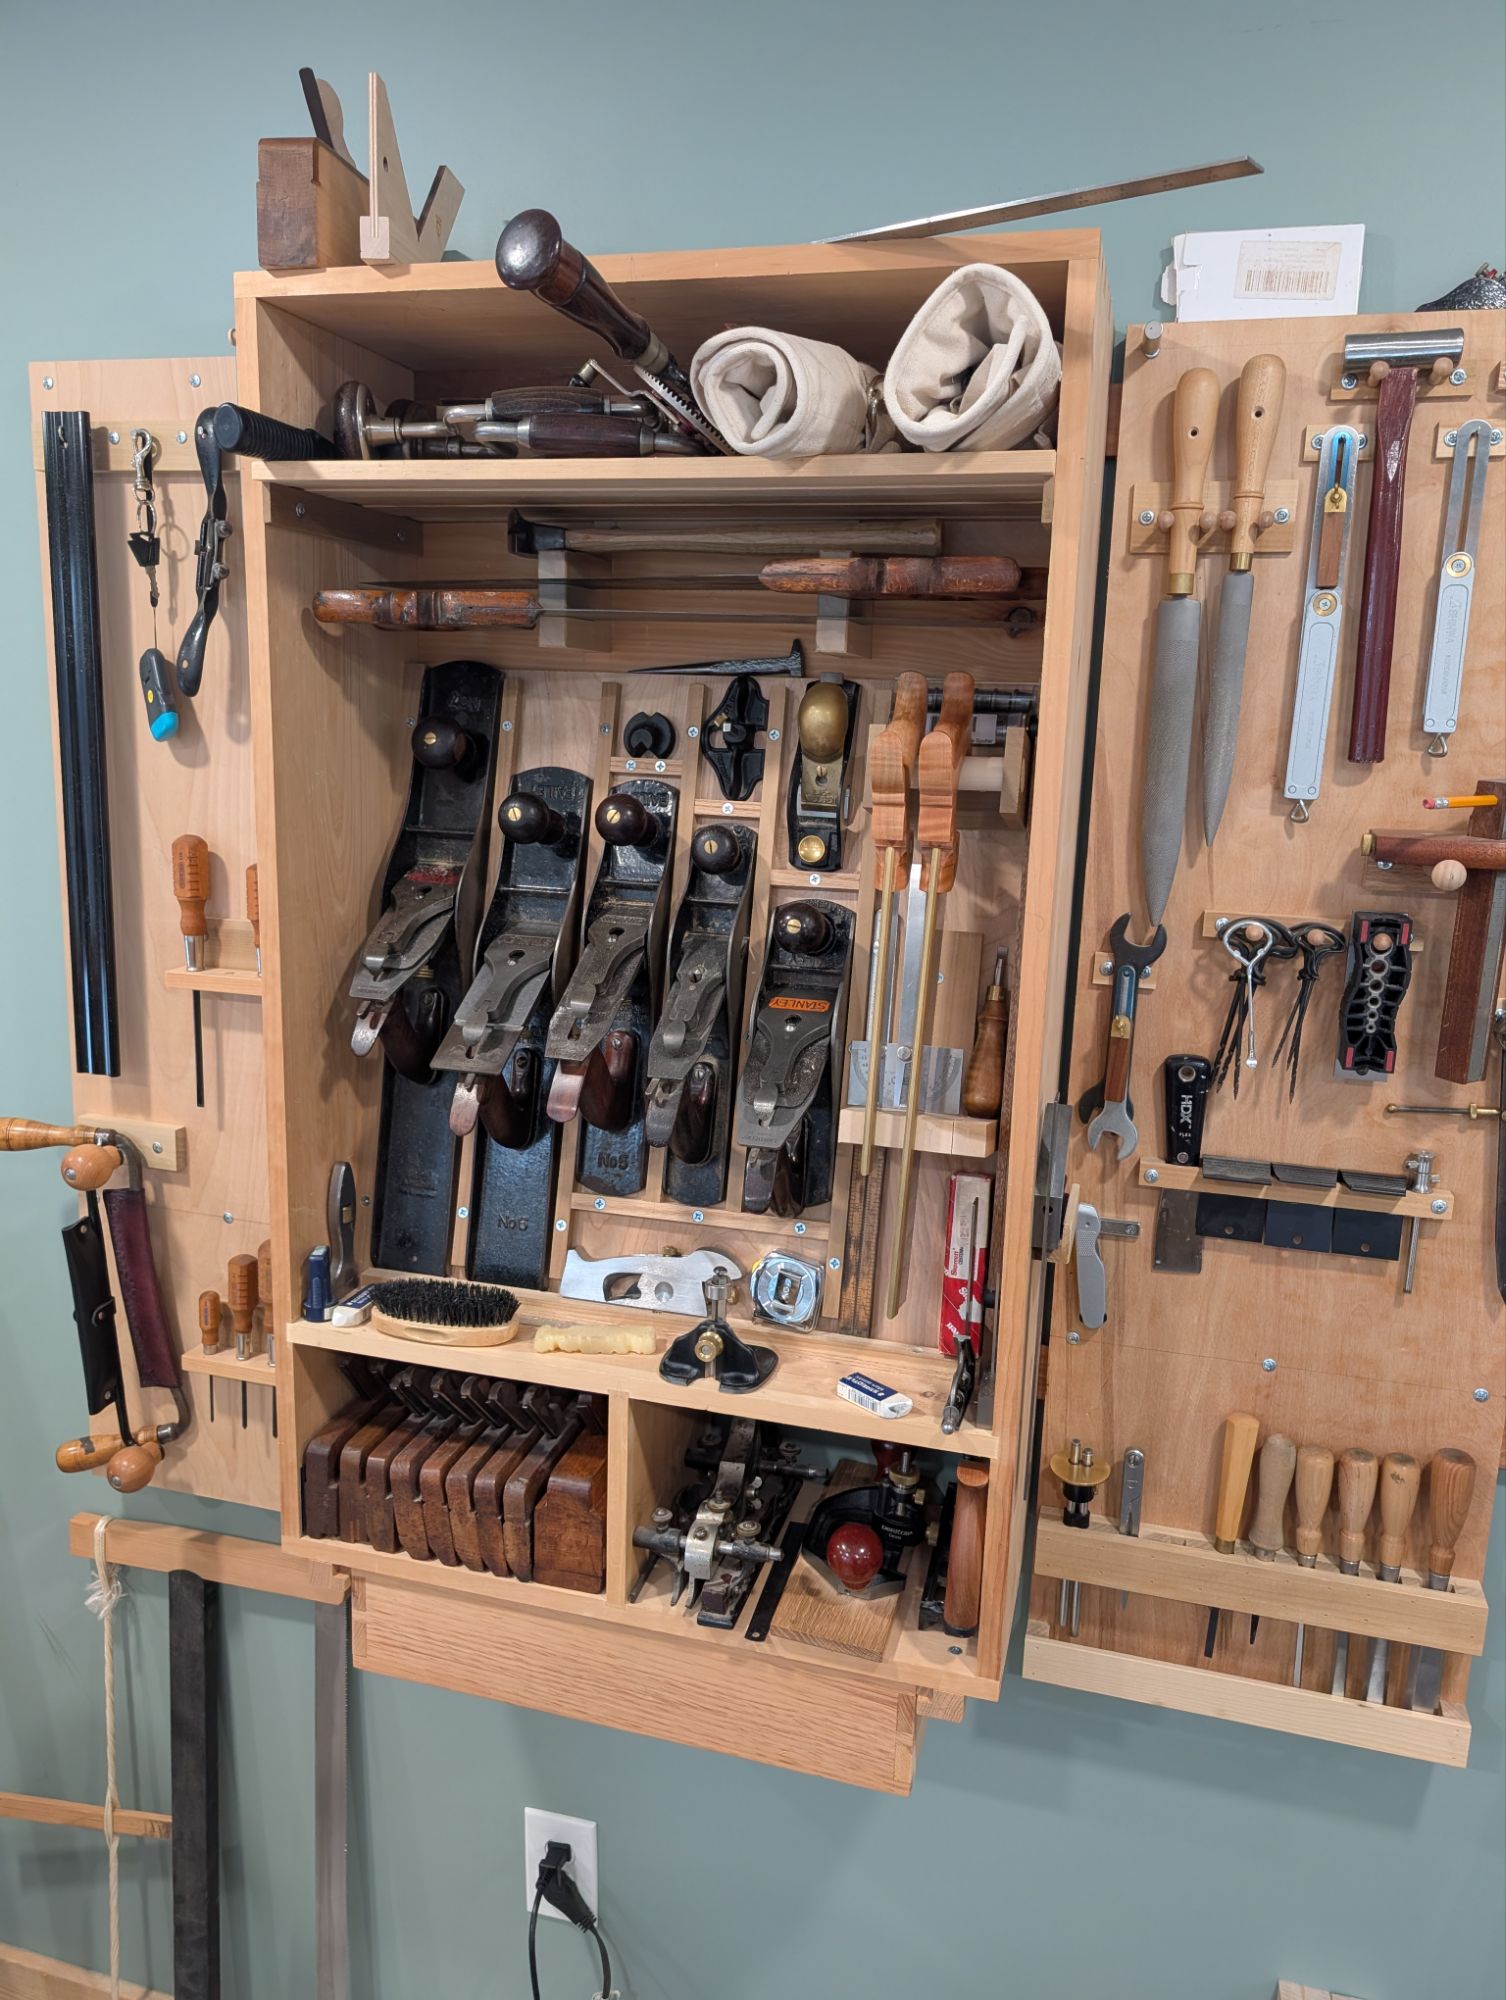
In between my day job as an M&A attorney and my social responsibilities (which are legion), I have been slowly organizing the new workshop. Recently, this has included updating the tool wall that goes with my hanging wall cabinet. The tool wall itself hangs from the same french cleats the main wall cabinet hangs off, and I actually now have enough room for a second tool wall on the other side of the cabinet (that I may or may not ever get around to).
My first goal for the new tool wall was to move a number of tools that used to hang off the sides of the wall cabinet itself (or just lived on or around the workbench) onto the tool wall. I largely kept the previous hangers for the other tools (chisel mallet, rasps, dovetail layout guides, and chisels/marking gauges, etc.), but I did remake the rasp hanger so they would hang a bit more uniformly.
As for new tools on the wall, the plane adjustment hammer (red handle), the sliding bevels, the large dividers, the gimlets and dowel plate, and the wrenches all used to hang on the right side of the main cabinet (above where the combination square is currently). Happily, by moving those to the wall (and shrinking the footprint [wallprint?] of the cabinet itself), I was actually able to widen the tool wall too and fit even more tools on it.
I was even able to fit my discontinued Lee Valley pencil gauge on it. For the record, mine had no “character” to speak of when I unwrapped it. It really does work great, though.
A thinner top shelf also helped fit more boring tools.
The new wall is 14″ wide and 44″ tall (the height matches the cabinet height including the drawer), and is made of 3/4 birch plywood (the 5 ply, veneered home center stuff). There is still some space above the chisels and below the dovetail guides but aside from a bar magnet to hang my marking knifes, I’m not 100% sure what to put there. I really like where the 12″ combination square sits currently. I’m just too used to it to change it (and I’m proud of how well the hanger design works).
There are still a coping saw and my gunsmith pattern screwdrivers on the far side of the wall cabinet, which will go on the opposite tool wall if/when I get to it. I will also hang my Crucible bench square, my drawknives (yes, I have two now!), and a few other things on that opposite wall when the time comes.
It goes without saying, but I buy all my tools with my own money (the ones I didn’t get as a gift from my godfather or inherit from my grandfather).
I’m not sure I could ever go back to a floor chest as my main tool storage. But that’s just a luxury I’ve worked hard to attain.
I went up north for a quick summer weekend and did something I don’t usually do: peruse the antique shops. This was pretty fruitful, honestly. I found a boarded chest made from 12″ x 7/8″ clear pine which will clean up very nicely. It’s about 24x14x14. It was last used as a toy chest (I know from the several Battleship peg pieces inside it) but it has some signs of old tills. More on that another time.
I also found a nice Disston D7 (I think) hand saw, crosscut. The plate is arrow straight with no kinks that I can see. Even the nib is intact. The only defect (aside from a heavy black patina on the blade that comes from being stored in barn-like conditions) is a small chip off the top horn of the tote. Easily fixed (or, honestly, just sanded smooth and left alone). I’ll do a quick restoration post on that one too in the future.
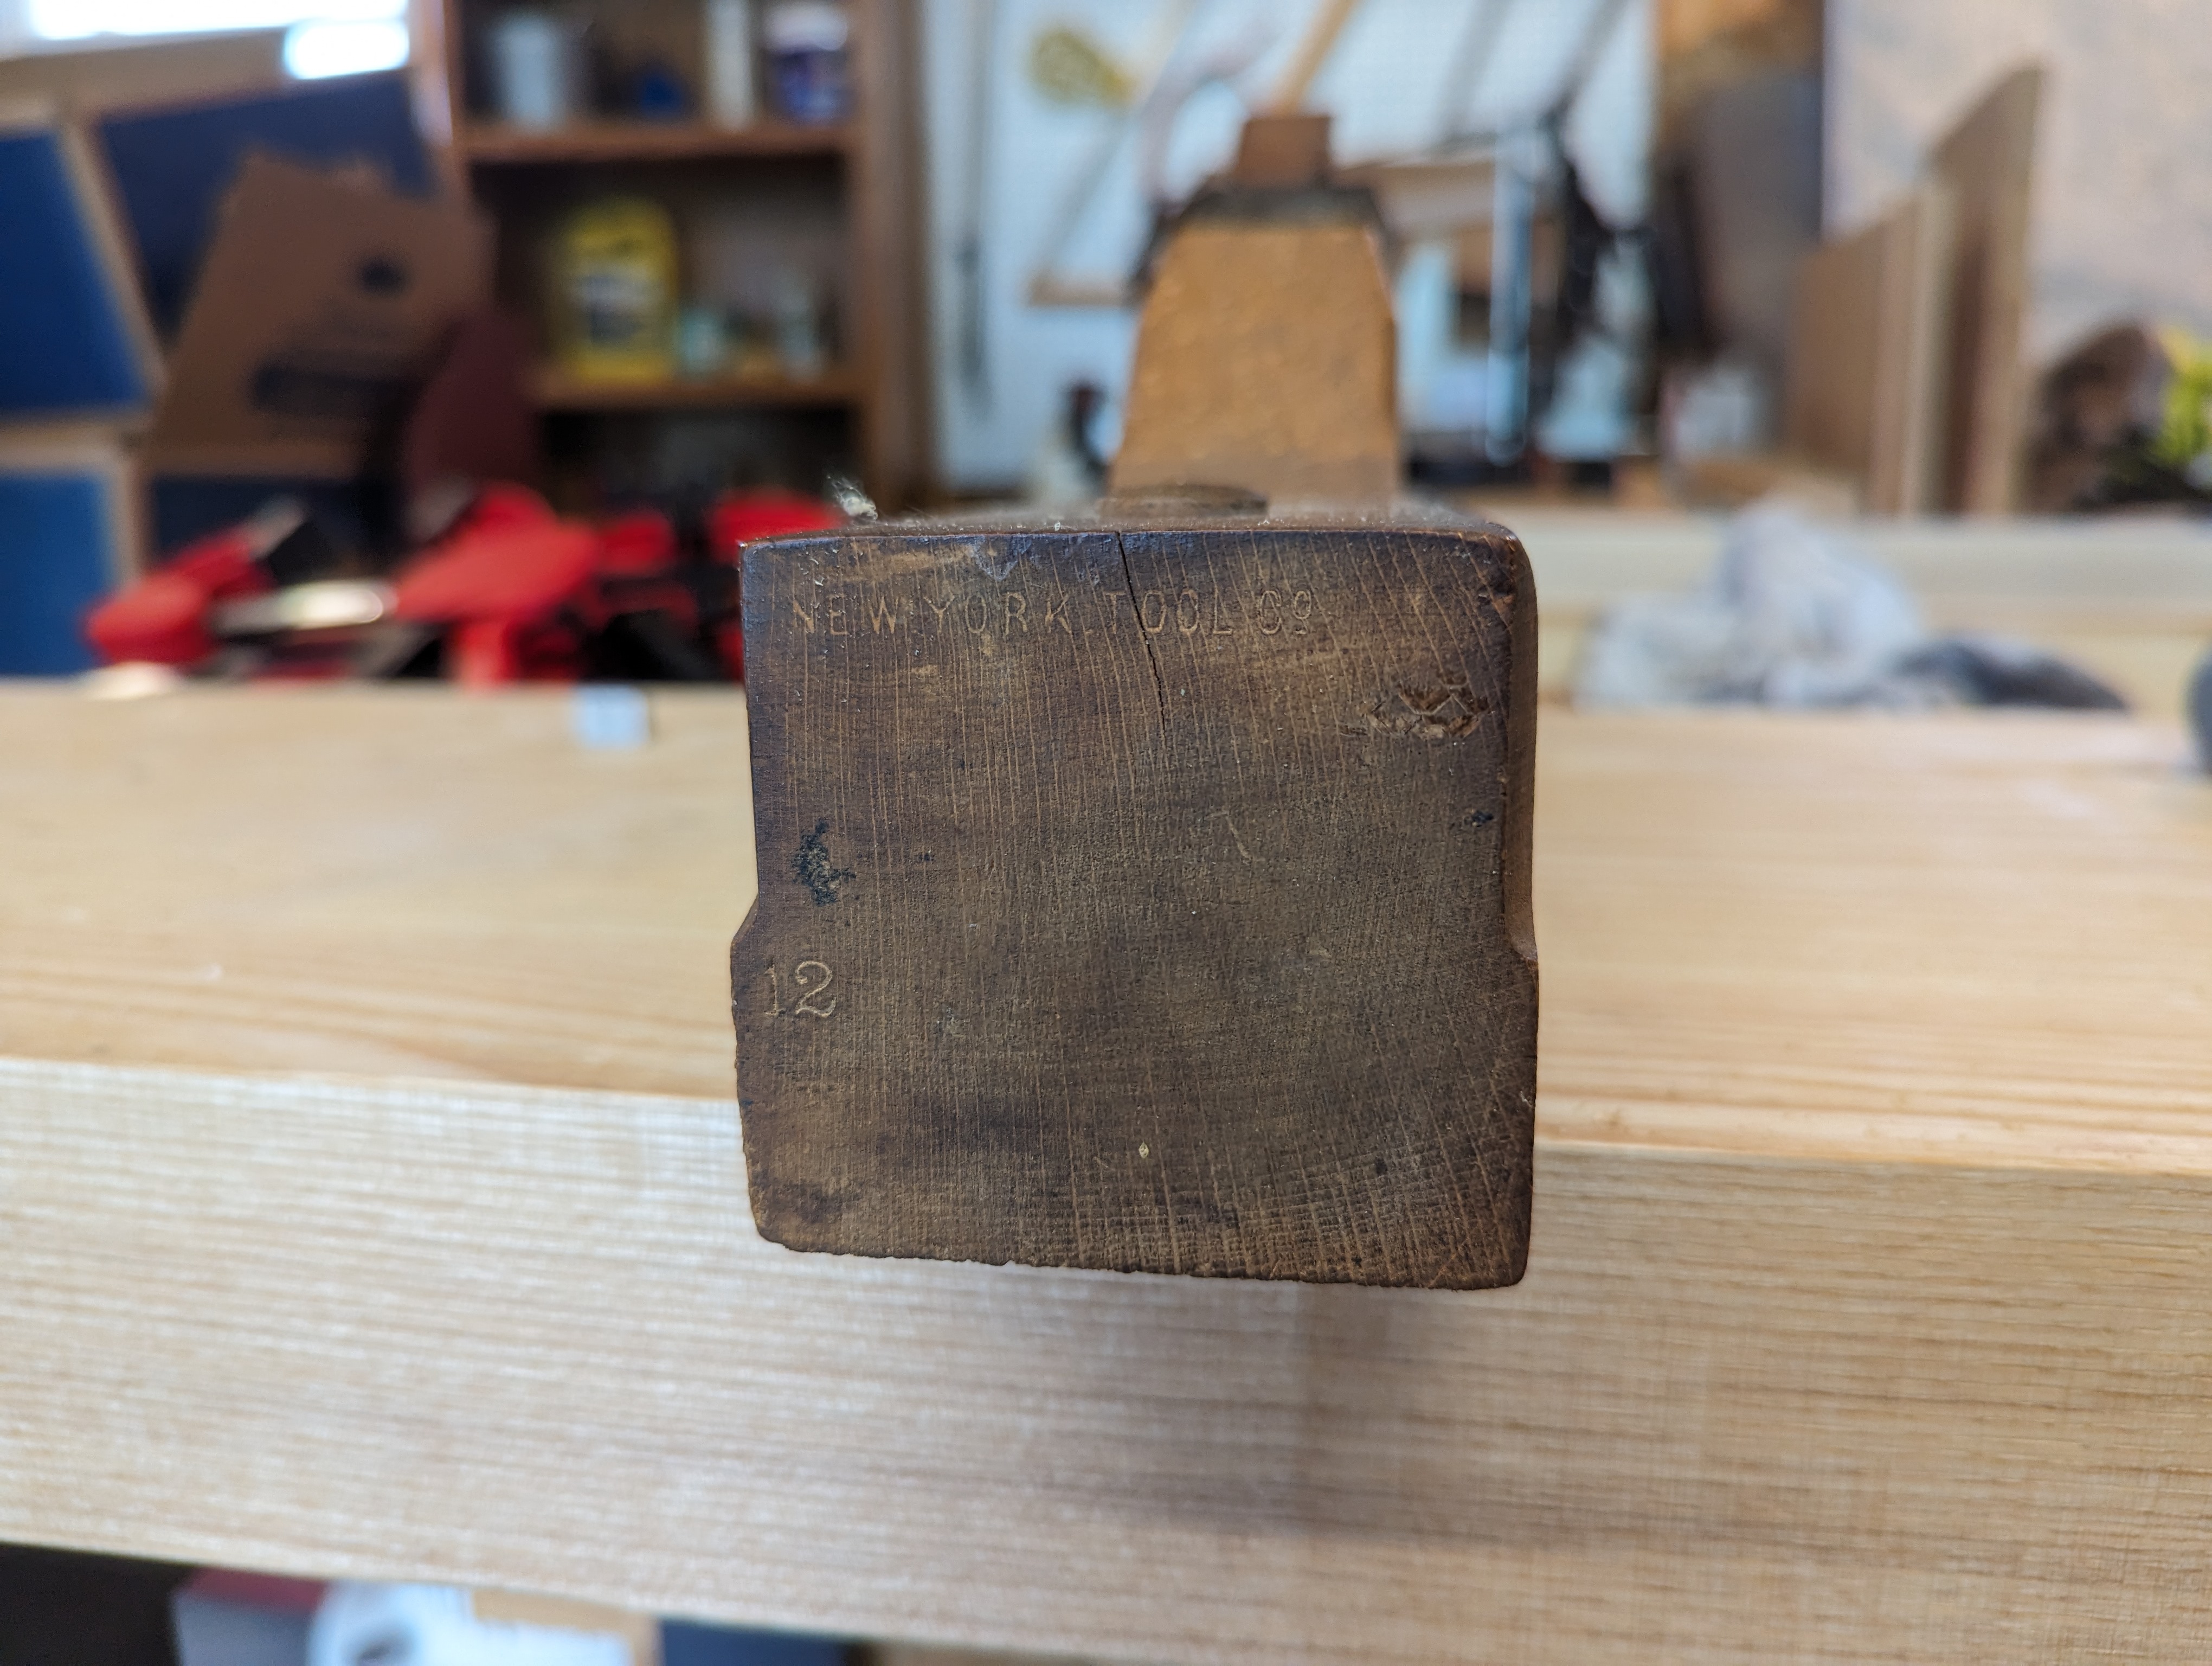
But the best find (in my opinion) was a wooden jack plane in remarkable condition. It’s stamped with “New York Tool Co.” (which my cursory research showed was a brand used by the Auburn Tool Co in the late second half of the 19th century). It’s 16 inches long and seems to be a No. 12. I didn’t even argue with the sticker price at the antique shop (which was $25).
One tiny check on the toe of the plane.
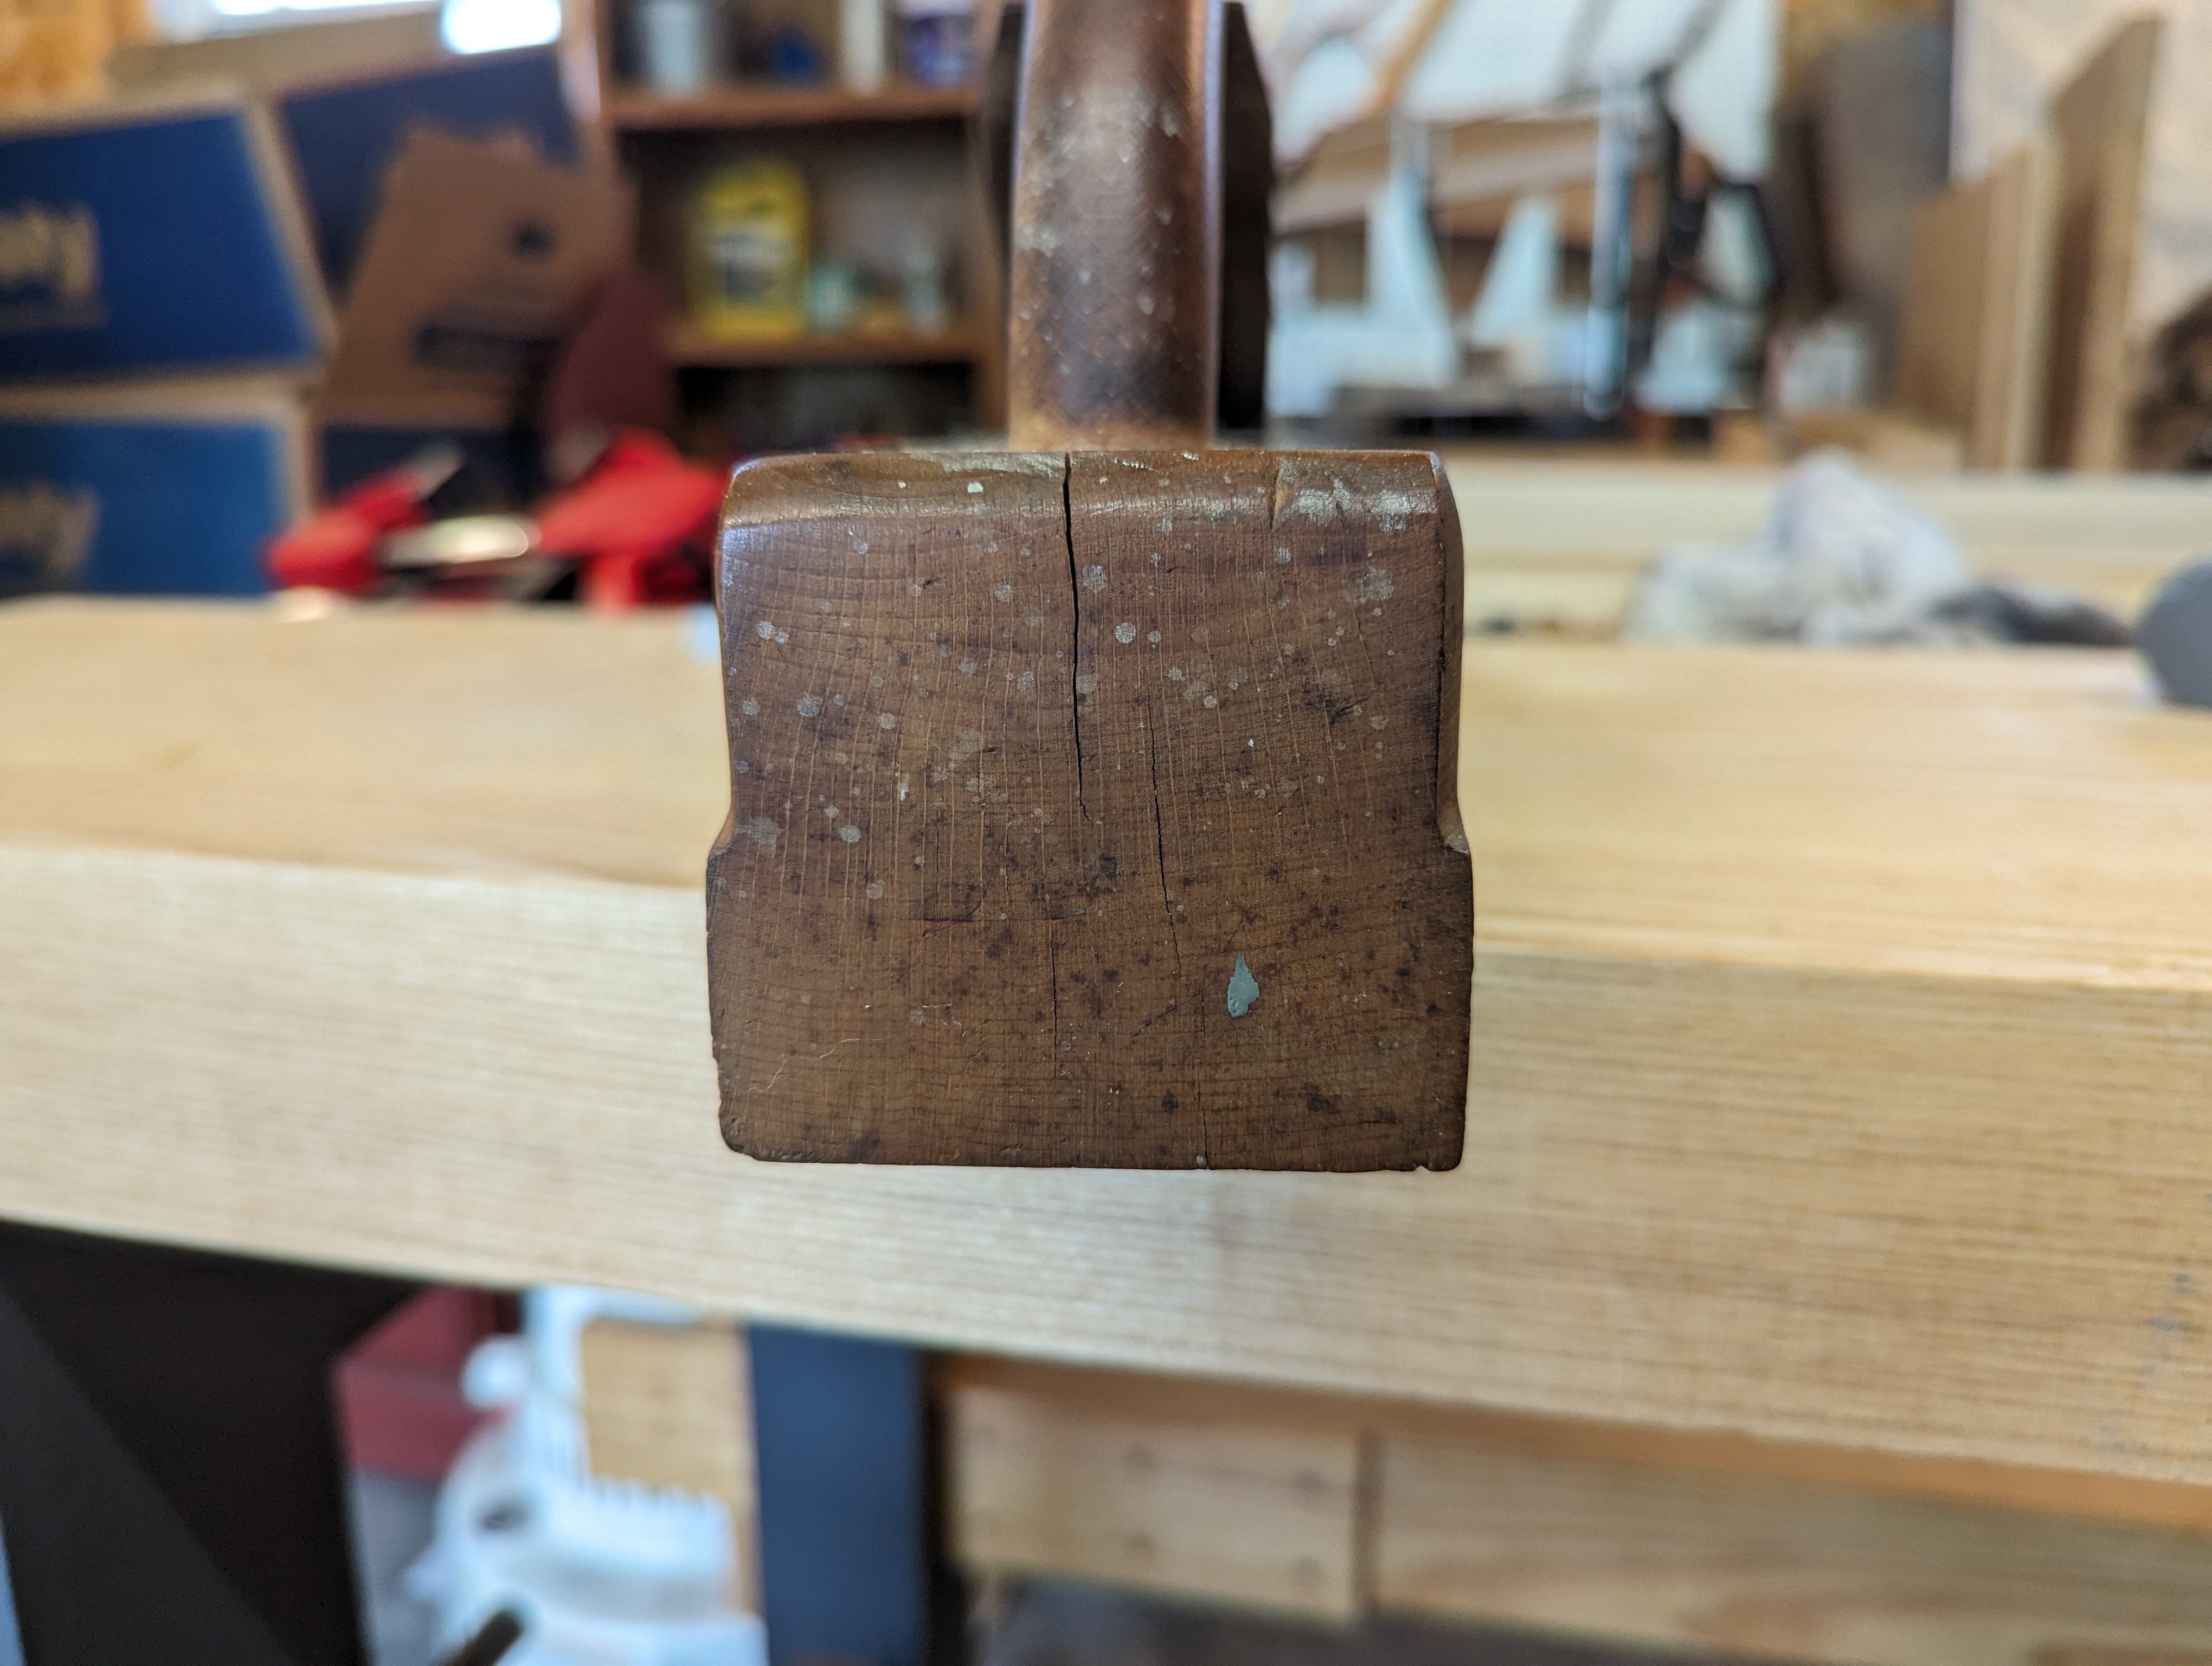
The strike button on the front of the plane is pristine and there is no mushrooming to speak of on the iron (mushrooming happens from consistent use of a metal hammer or mallet to adjust the depth and lateral adjustment of the iron). There are also no mallet dents on the heel of the plane; just a few shallow checks away from the sole.
It’s honestly a bit silly how nice this thing is.
The tote is fully in tact, with just a couple of knicks showing lighter wood below which are probably just from being in a box bumping into other antique store fare (and not from use). The tote itself is a bit wobbly and just need regluing after 130 years. In fact, the only meaningful patina on the entire plane is on the back of the tote (where the palm of the user would be). If I had mineral spirits and denatured alcohol with me on the trip, I probably could have freshened it up to like new.
That could easily just be grime sticking to the exposed end grain and not patina from use.
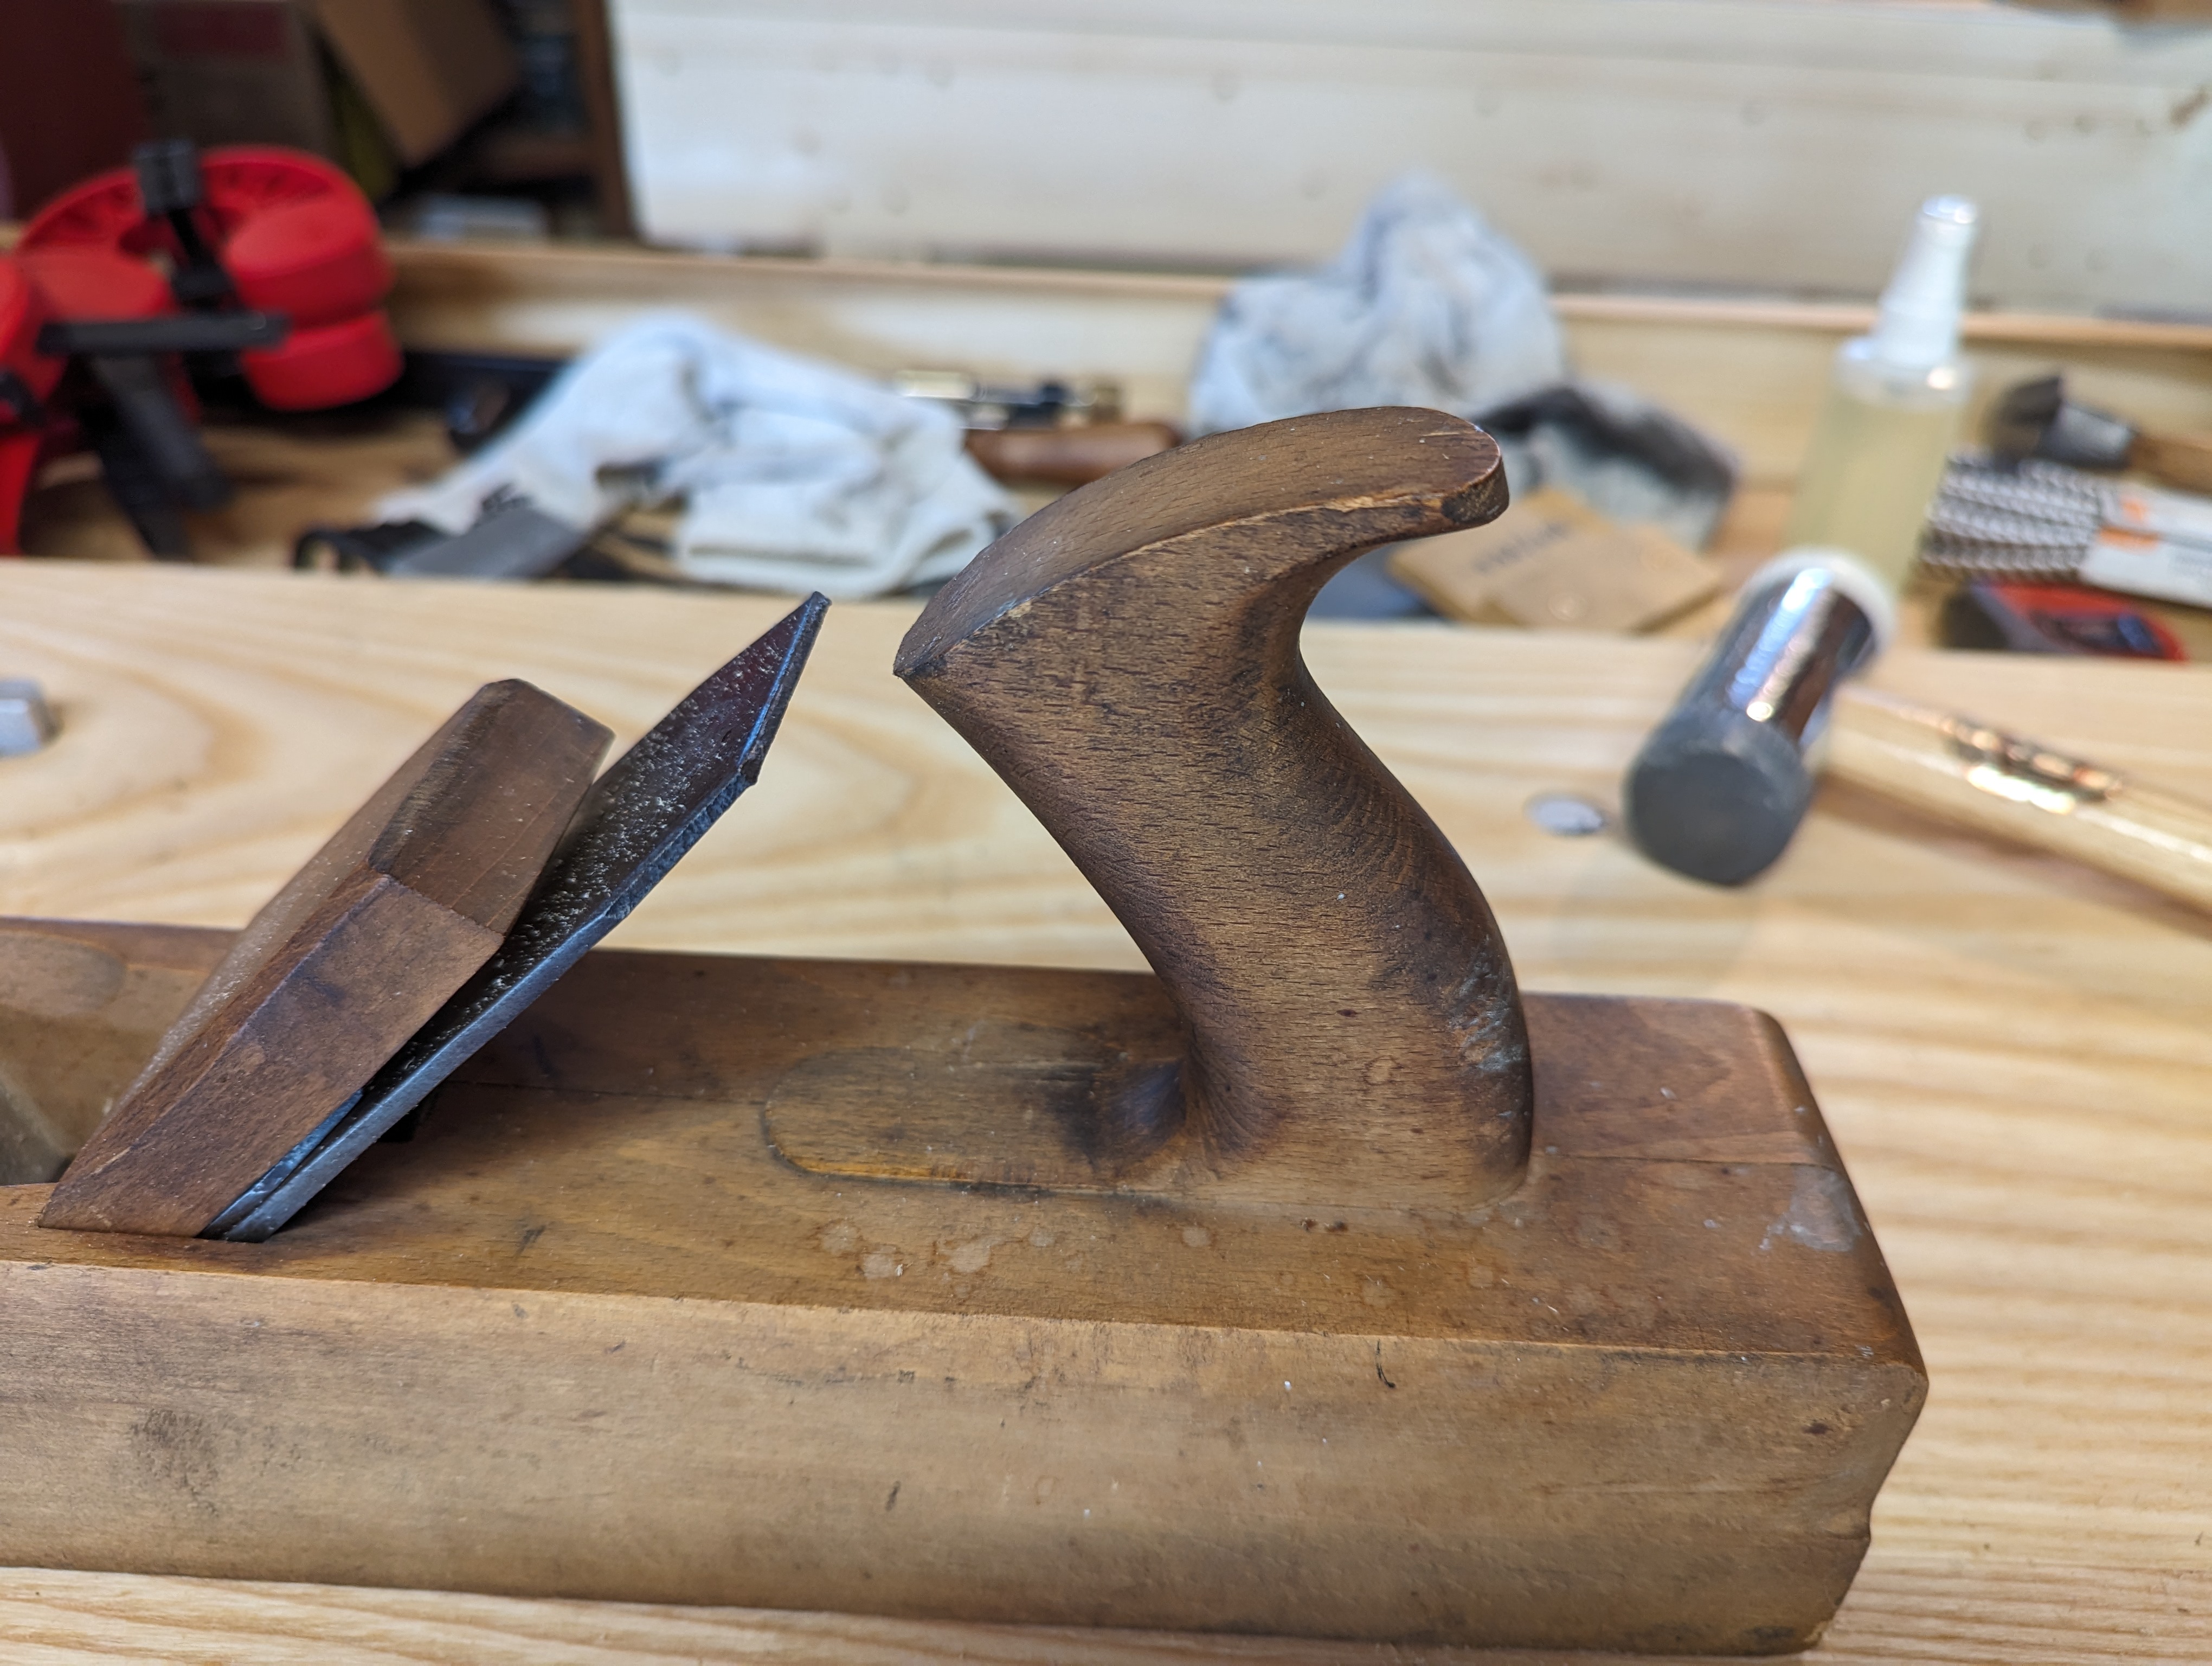
The mouth is still tight. Not tight for a jack plane, mind you; tight for any wooden plane. The front of the mouth is crisp and 90 degrees to the sides of the sole. The back of the mouth (behind the iron) is a little chipped but that seems pretty common on wooden soled planes where the bed comes to such a fragile point. A couple swipes with a fine cut file will clean it right up. I’m not even sure the sole has ever been flattened, but it didn’t take much to true it with a fore plane. And there are no splits on the cheeks around the wedge.
Seriously. Look at that crisp mouth on a 130 year old wooden jack plane.
The iron looks pretty much fresh to me; I don’t think it’s ever been reground. There were no shavings caught between the iron and the chip breaker when I pulled the two apart; just a little flaky orange rust. Other than being sharpened a bit out of square, and some camming on the cap iron screw, you’d be hard pressed to prove this thing ever actually saw any real use. There aren’t even any of the usual paint splatters or other stains from being near a workbench.
Those Victorian era prisoners sure knew how to make ’em!
All in all, I have a hard time believing that someone made even a part time living with this tool. It’s just too pristine. It’s possible there was a hobbyist in the late 19th century, perhaps an attorney or accountant, who took pride in the upkeep of his tools, even though he rarely put them to heavy use. But that seems a bit too romantic and hits a bit too close to home.
In any event, it will have a good home with me. Even with occasional use (I’m not giving up my metal planes any time soon), this beauty will probably see more action with me that it did in its youth.
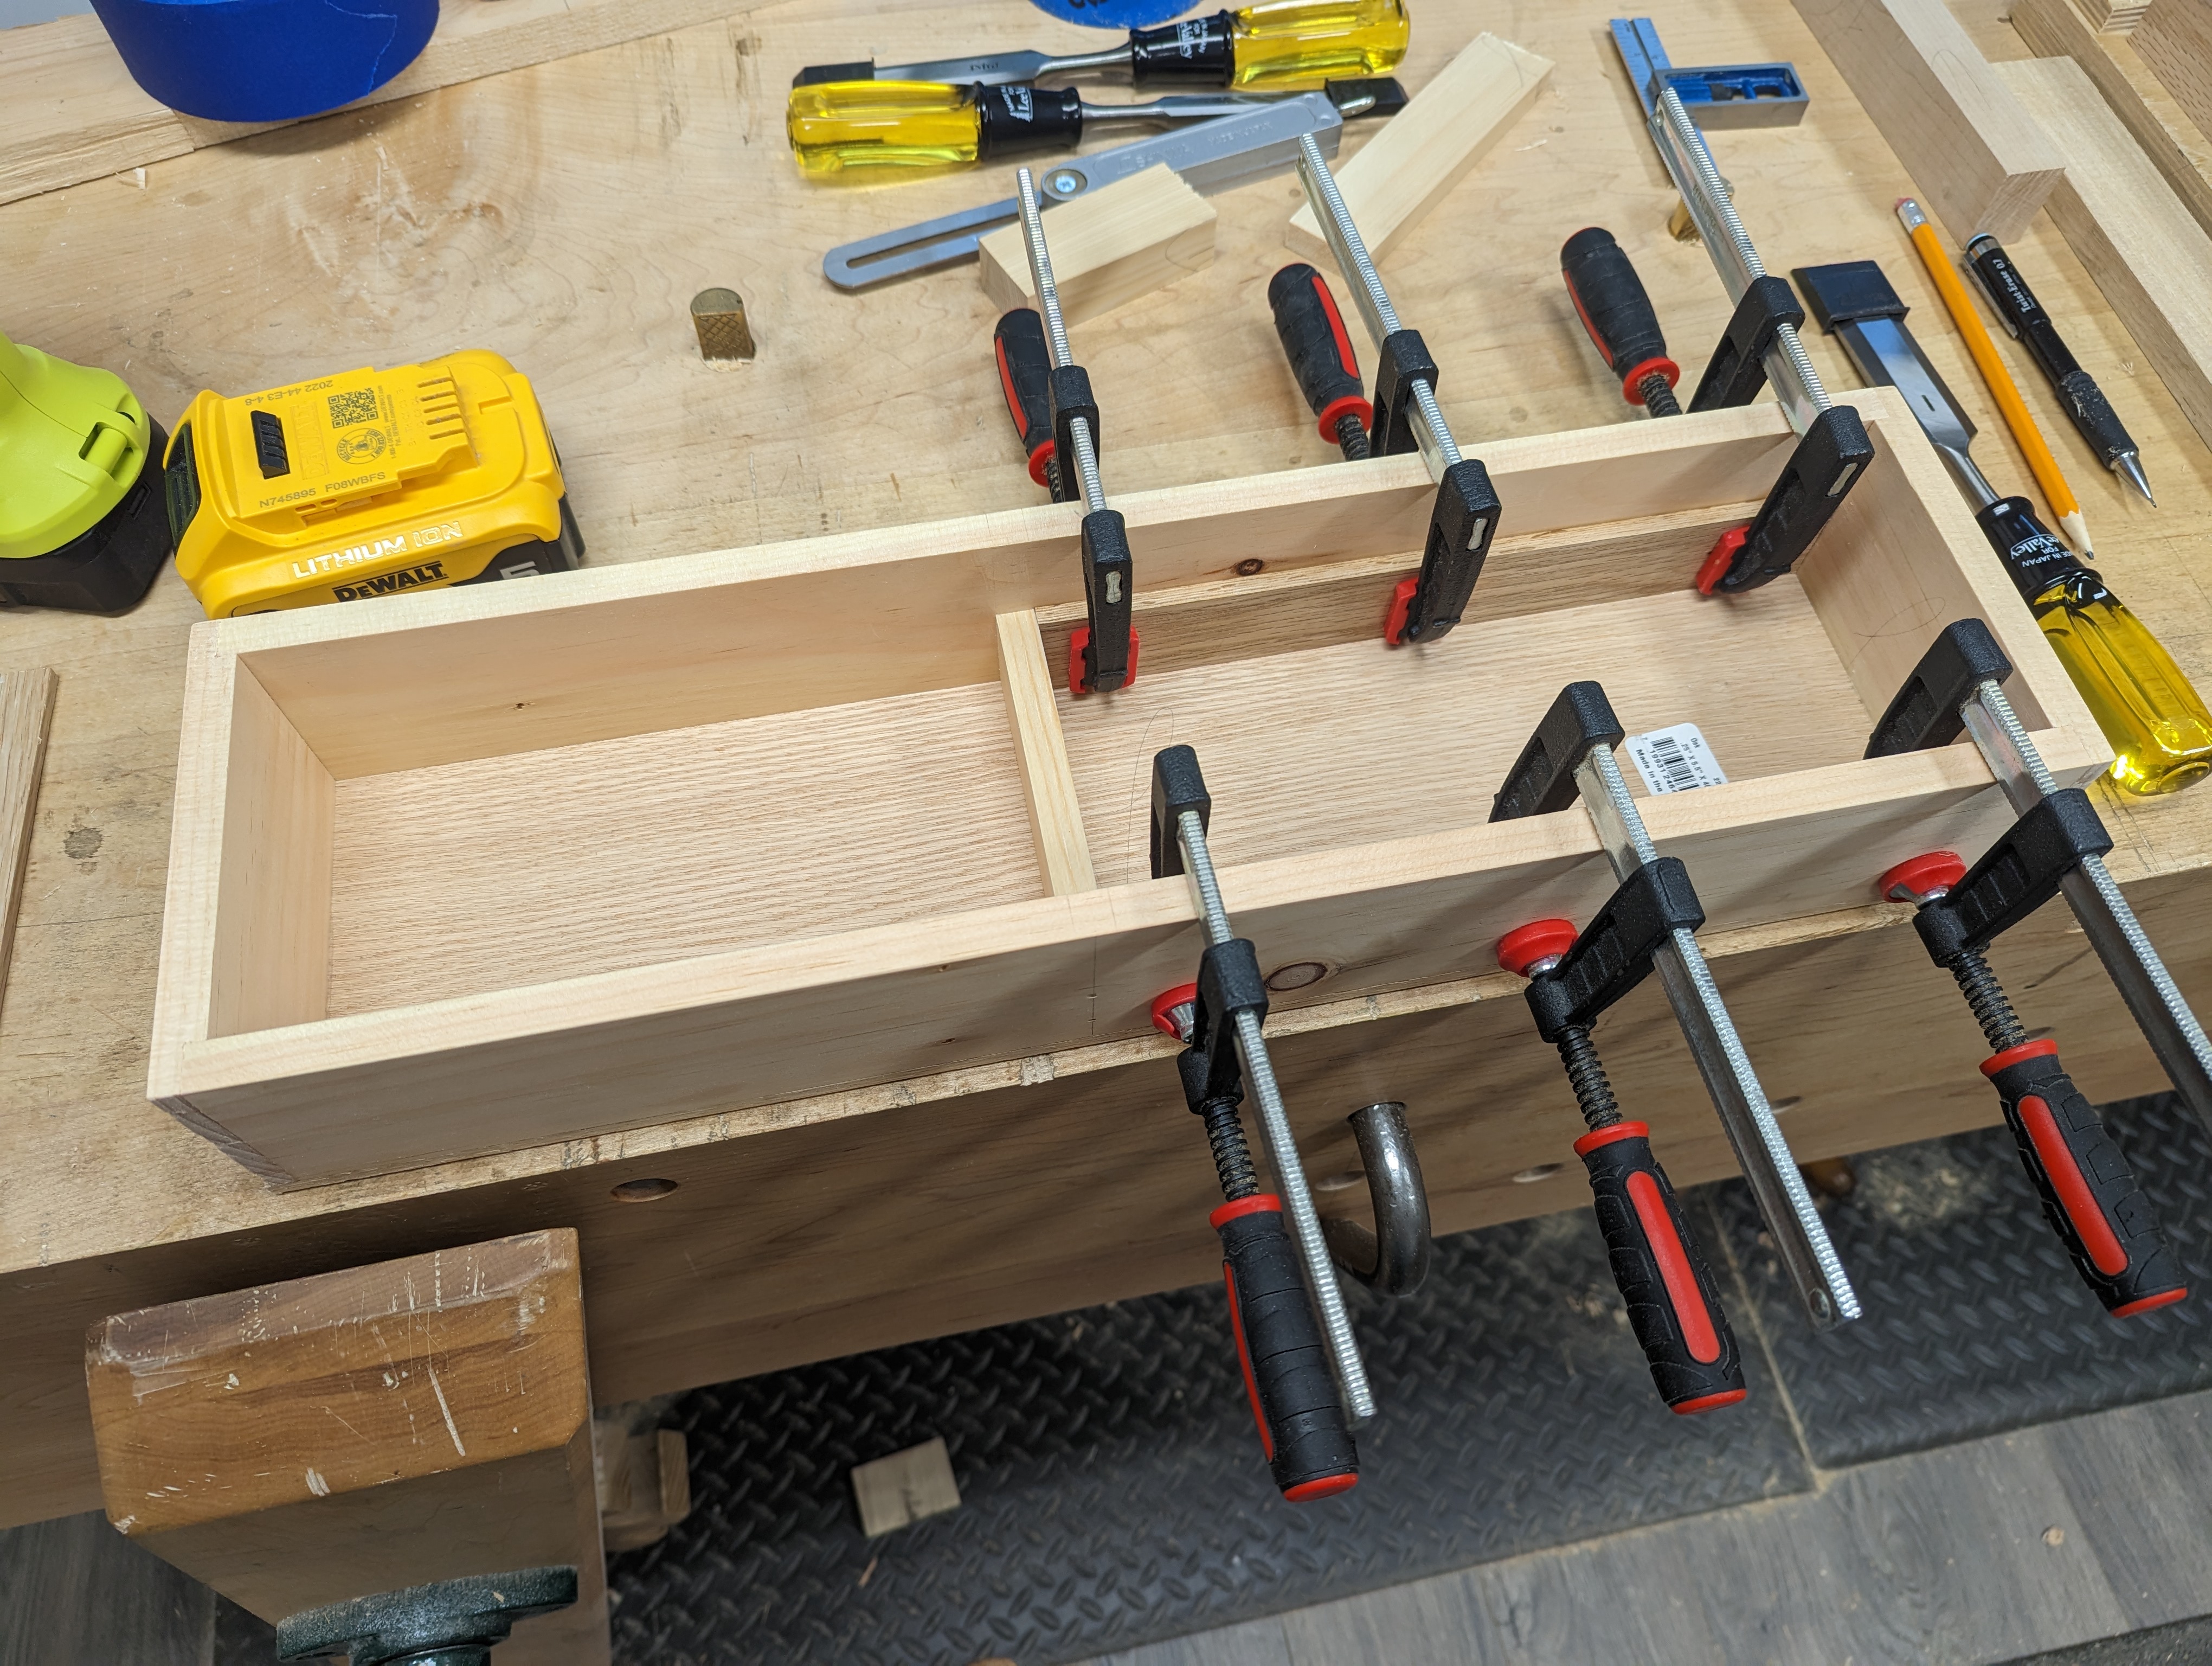
It’s no secret that I like me a sliding tray in a toolbox. See here. Or here. A pull out tray that covers the whole well is well and good if that’s your thing. I have a vintage craftsman metal toolbox that’s built that way. But I find it gets in the way on the bench.
As shown by the links above, I’ve made a few traveling toolboxes in my day. Any tool storage solution should be customized to tools it will hold, of course. Though much trial and error, I’ve settled on the perfect size (using 5/8″ pine for the case) being roughly 22″ long x 11″ wide x 9″ high. This gives plenty of room in the well for a No. 6 Stanley (my preferred “single” plane), a saw till for a small panel saw (the BTC hardware store saw is shown below, but any small hardpoint saw will fit too) and combination square, a short sweep hand brace and bits, and an eggbeater drill, plus a hammer and a sharpening stone. If the chest were taller, I’d probably add a tool rack to the back wall of the well.
And some other odds and ends.
But a No. 6 is only about 5 1/4″ high, and even a panel saw in its till is less than 6″. What do do with the other 3+” of well space? A sliding tray, of course, that slides front to back and holds everything else I’ll need.
3″ is too deep for a single tray of this size. Nothing you’re carrying You’d waste a ton of space. And 3″ of height is probably enough for two tiers of sliding trays (bottom probably being 1 1/2″ deep (so 1 3/4″ with the bottom)). I’ve certainly done that before in the blue toolbox.
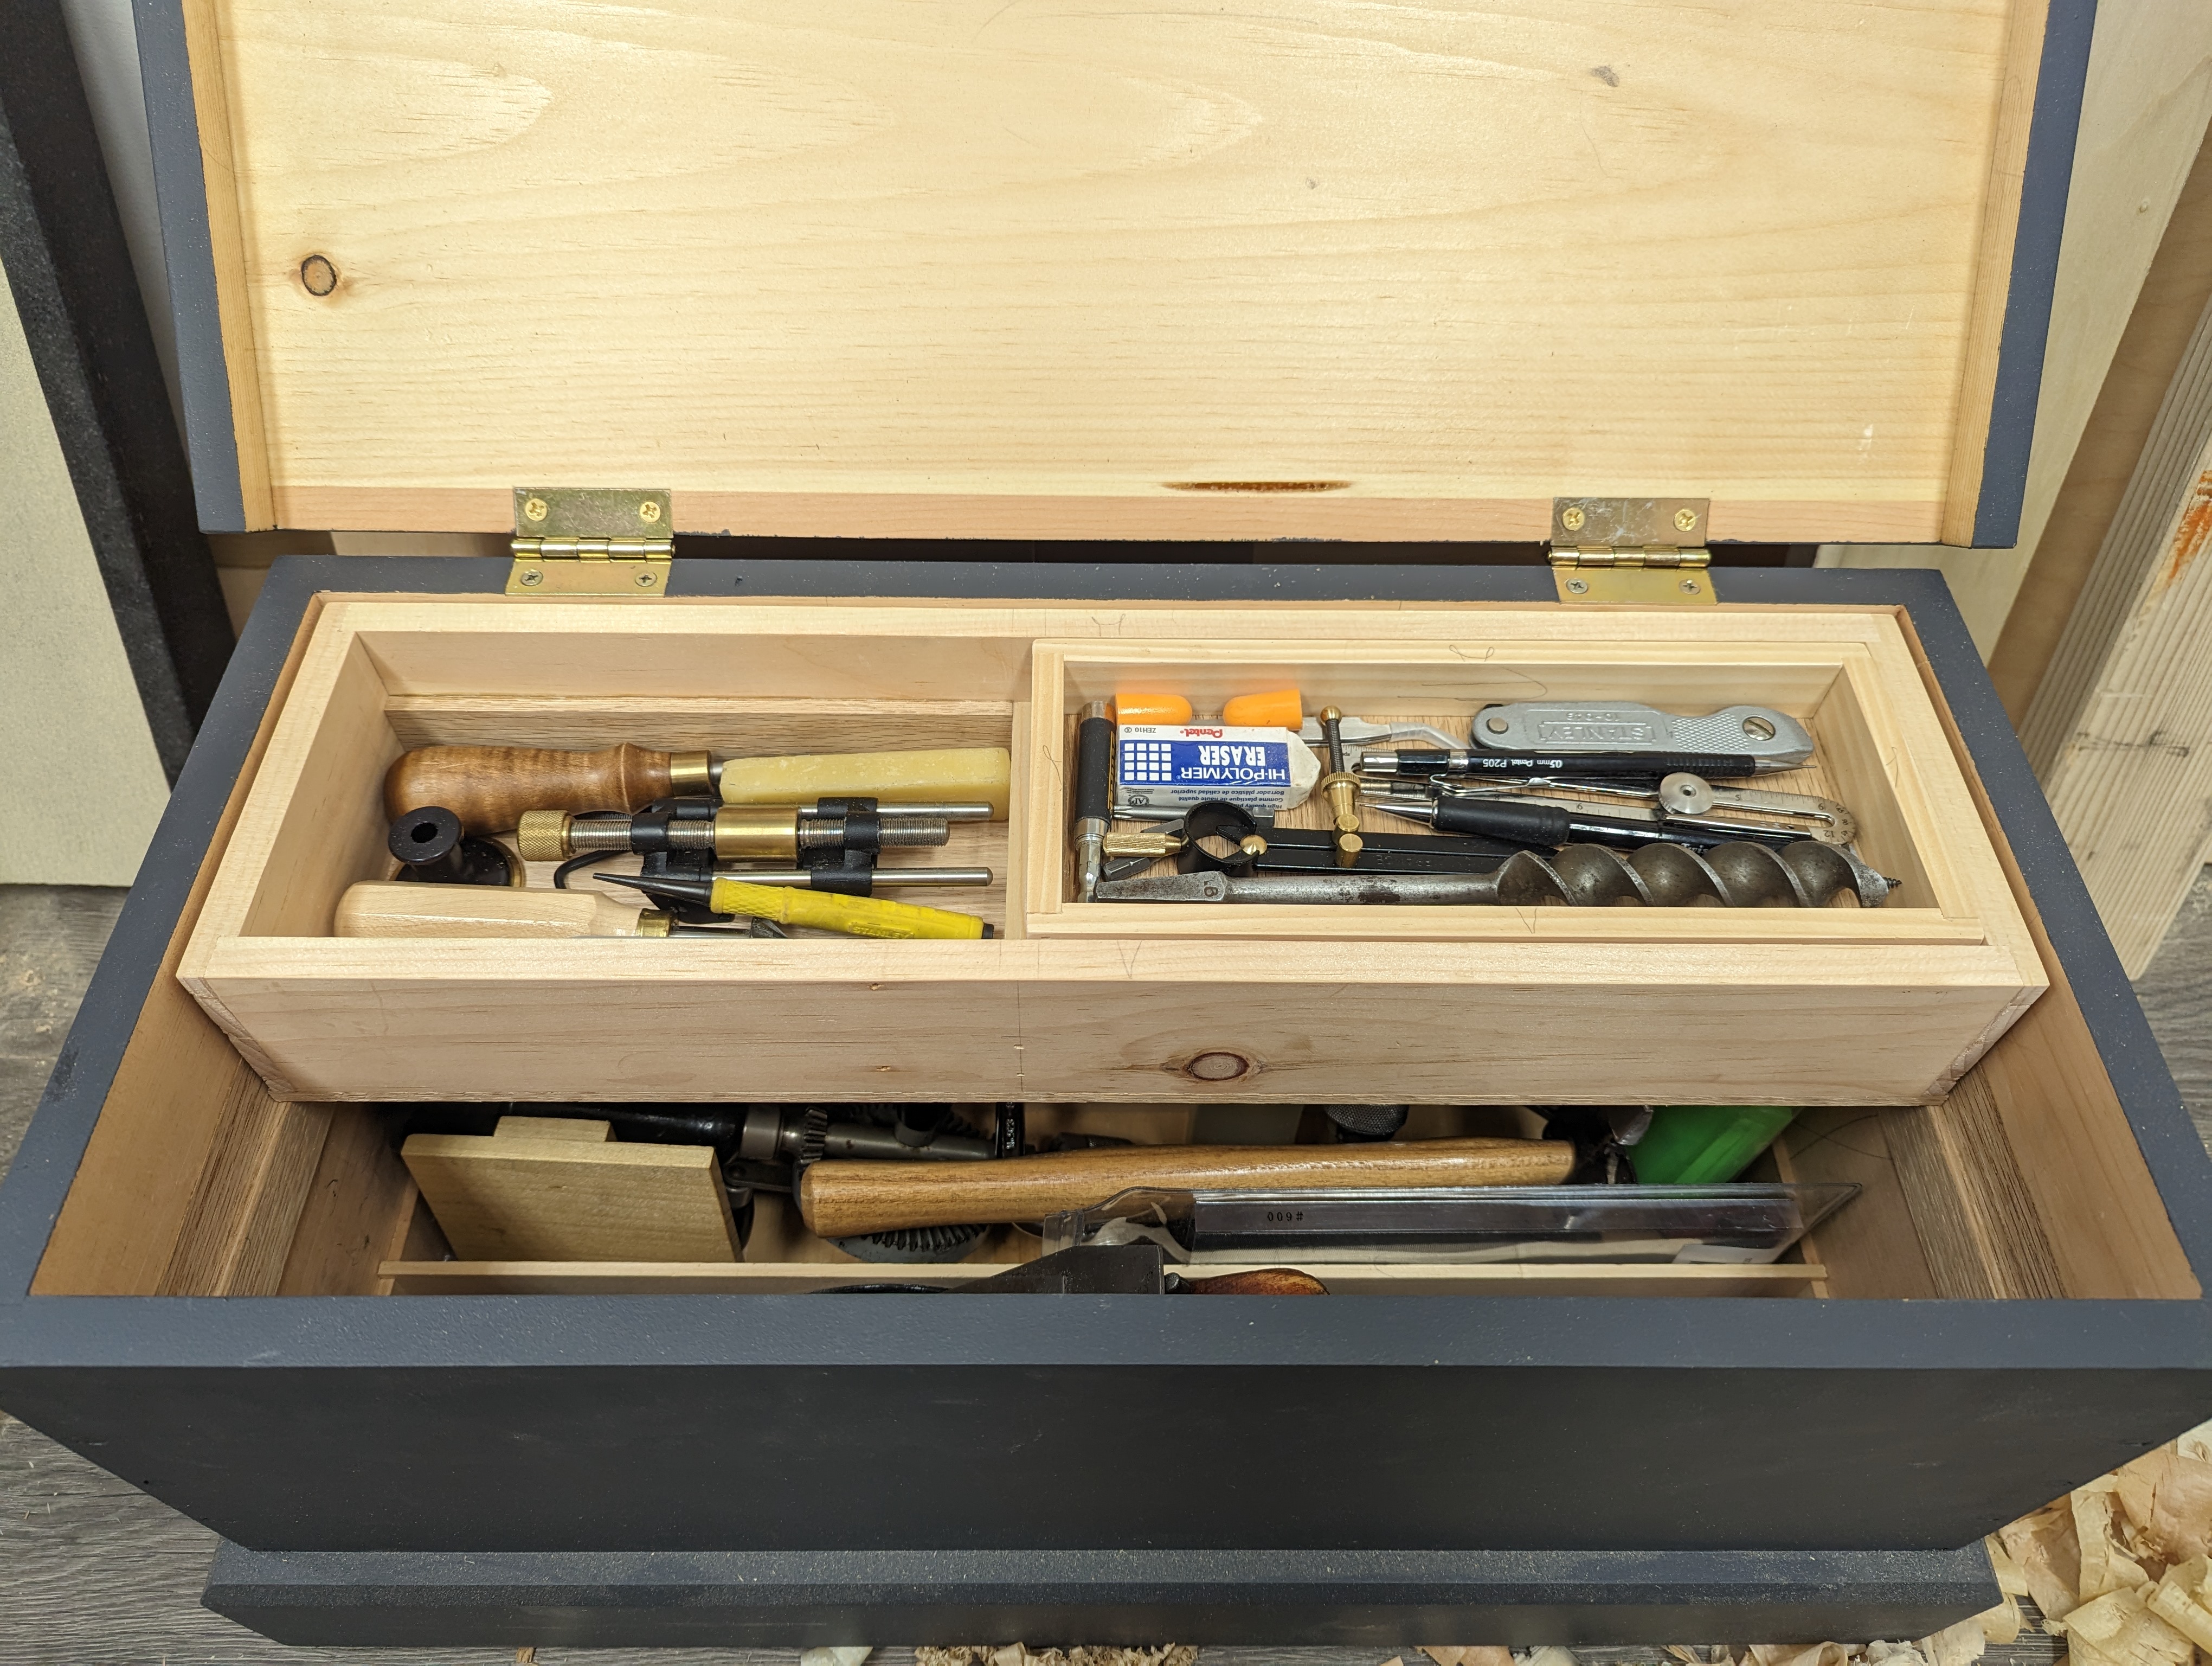
But I thought it would be fun this time to add the second tray inside the first. So I first whipped up a single deep tray with 1/2″ pine in the usual style (1/4″ oak bottom with grain running parallel to the length of the tray, nailed onto the tray) that was about 5″ wide. I also divided off a dedicated chisel compartment, since there will be lots of piling into the rest of the tray.
The divider also let me use up some shorter oak scraps for the inner runners.
To size the inside tray, I found the tallest items that would sit in the bottom of the tray tray (which was either the stock of my marking gauge or my sharpening guide) and sized some thin oak runners to that height, plus 1/8″ (see picture above). Those got glued in to the long sides of the tray. I then knocked together another tray in 3/8″ pine that was pretty much exactly half the length tray and tall enough to fill the remaining depth of the large tray (taking into account the 1/4″ oak tray bottom). The grain of the tray bottom runs perpendicular to the length of the tray this time.
It overlaps the chisel compartment a bit but doesn’t get in the way.
I’ve found the inside tray acts as a bit of a gyroscope when this thing is on the move. The toolbox easily fits in the back seat of the car and I’ve noticed the tray whips around less than if it were a single tray. Perhaps the inner tray shifts a bit on the x axis and takes away some of the y axis momentum (inertia?) of the larger tray. Who knows?
The auger bit seems to have migrated out of the well.
If you need a how-to on making and fitting sliding trays in a tool chest, I highly recommend the Christopher Schwarz 2015 Popular Woodworking article on a Traveling Toolchest (a medium chest that is still big enough for a hobbyist woodworker’s set of tools). Go to the “Interior” section of the article.
This setup works so well, I also added a sliding inner tray to the drawer on my hanging tool cabinet in the shop. More on that later, but a sneak preview below.
No gyroscopic action needed here.
I hope everyone gets some workshop time on the holiday weekend.
I had in my mind a singular vision. A mini workbench, surrounded by a tray, that sat upon an office desk. Like those perpetual motion clacking ball desk toys. But where one could plane small sticks of wood with a block plane in meditative rhythm. The small curls falling gently into a rimmed collection tray to keep things neat.
I could have sworn such a thing existed. Maybe it was advertised in an old Popular Woodworking issue. It might have been Fine Woodworking or WOOD. But it eluded me.
So I made a prototype. And it turned out great!
As I saw it in my mind.
The bench itself is roughly 1:8 scale. The slab is 12 inches long and 3 inches wide. 1/2 inch thickness would have been to scale, but I bumped it up to 7/8 for stiffness. The wing, which functions as both a tool shelf and a shooting board, is about 1 inch wide and 1/4 inch thick. The planing stop is 1/2 inch square. For those who care, the entire setup is 19 x 7 x 3.
About the footprint of a large gaming keyboard.
Let’s talk materials for a moment. This is just a prototype, so I used some tight grain Spruce framing lumber from up north. In Vermont, where my parents have a house, you can get stuff that has birdseye pattern and blue streaks but still arrow straight grain. It’s beautiful and a joy to work with.
This stock was a bit more plain, but I think still looks good. The only non-Spruce materials in the piece are the planing stop (red oak) and the base of the tray (1/2 inch birch plywood).
Spruce is rather rigid and dimensionally stable, so a good choice for this.
The workbench legs are 1 1/2 inch x 4 inch x 1 inch posts that are rabbeted (cross grain) into the slab top. The oak planing stop is also rabbeted in. The planing stop actually hides some nails reinforcing the joint between the slab and the front legs. The tool shelf is just brad nailed down to the legs.
To attach the bench to the collection tray, the legs are glued and screwed from the underside of the plywood. The tray itself is banded in 1/2 inch spruce just butt jointed around and glued and nailed on. I stuck on some nonskid furniture pads to the underside so it won’t slide around.
Top view with some blanks.
There is admittedly a practical purpose to this piece. There is a step down on the window sill in my office at work. The larger pots overhang the stepdown and it’s unstable without a spacer that’s level with the main sill and fully support the pot. Each spacer needs to be somewhere between 1/2 and 11/16 but the height varies. This will allow me to fine tune some pine 1 x 3/4 spacers on site.
A full size, modern block plane is probably a bit much for this setup. Perhaps I’ll clean up a slightly smaller vintage block plane from the user pile. We’ll see.
When I make a nicer version in mahogany or walnut, I may do a Basic Projects writeup. But for now, the prototype is rather serviceable.